This article is forwarded from: blog.csdn.net/KH_FC
JumpServer is an open source fortress machine owned by FIT2CLOUD. It is also the world's first open source fortress machine, using GNU GPL v2 0 open source protocol is an operation and maintenance security audit system conforming to 4A specification. It is developed in Python, complies with Web 2.0 specification, and is equipped with an industry-leading Web Terminal scheme. It has beautiful interactive interface and good user experience. At the same time, it adopts a distributed architecture, supports multi machine room cross regional deployment and horizontal expansion, and has no restrictions on the number of assets and concurrency. This open source fortress machine not only provides the community open source version, but also provides the enterprise version used by enterprises. The enterprise version has more powerful functions.
Feizhiyuan official website address: https://www.fit2cloud.com/
Its open source software:
- MeterSphere: it is a one-stop open source continuous testing platform, covering test tracking, interface testing, performance testing, teamwork and other functions. It is fully compatible with JMeter, Postman, Swagger and other open source and mainstream standards, effectively helping the development and testing team make full use of cloud elasticity to conduct highly scalable automated testing and accelerate high-quality software delivery, Promote the improvement of the overall efficiency of China's testing industry.
- KubeOperator: is an open source lightweight Kubernetes distribution that focuses on helping enterprises plan, deploy and operate production level Kubernetes clusters.
- DataEase: it is an open-source data visualization analysis tool to help users quickly analyze data and gain insight into business trends, so as to achieve business improvement and optimization. DataEase supports rich data source connections, can quickly make charts by dragging, and can be easily shared with others.
- RackShift: it is an open source bare metal server management platform with functions covering bare metal server discovery, out of band management, RAID configuration, firmware update, operating system installation, etc.
- RiskScanner: it is an open source bare metal server management platform with functions covering bare metal server discovery, out of band management, RAID configuration, firmware update, operating system installation, etc.
- HaLo: a modern open source blog / CMS system is worth trying
- RackShift: it is an open source bare metal server management platform with functions covering bare metal server discovery, out of band management, RAID configuration, firmware update, operating system installation, etc.
- RiskScanner: it is an open source multi Cloud Security compliance scanning platform. Based on Cloud Custodian and nucleus engine, it realizes security compliance scanning and vulnerability scanning of mainstream public (private) cloud resources.
Before the start, I would like to thank feizhiyuan for bringing us so many open-source and easy-to-use platforms
preparation
- For a Linux host, of course, if you have enough conditions, you can use the host. If you do not use it in a formal environment, you are not recommended to use a real host, but a virtual host. The host specification is recommended to be no less than a 2-core 4G configuration. Of course, you can use a lower specification for testing.
- Networking. It is recommended to release the whole network. You need to download some update files and the main file on github
- It is recommended to prepare a dual network card. Everyone knows that the fortress machine can be on the internal network or the external network. Of course, most fortress machines have an internal network card and an external network card. In order to truly simulate, it is recommended to use a dual network card.
- CentOs or RedHat is recommended for the operating system, and Ubuntu or other open source linux operating systems are not recommended. I won't tell you the reason here. If you are interested, you can try it
External environment requirements:
The external environment requirements mentioned here actually mean that when your fortress machine uses a virtual machine or host alone, you need to have another database and redis, and you need to configure and specify them after the fortress machine is installed. They are required for the fortress machine to run.
- MySQL: version no less than 5.7
- MariaDB: version no less than 10.2
- Redis: version no less than 5.0
With these ready, you can try to start the installation
install
There are many deployment methods available on the official website. I think the most used are load balancing deployment and single machine deployment, because the number of virtual hosts is not enough. Here, the single machine deployment method is adopted, and there are many installation methods available on the official website:
- One click deployment: this method is my favorite one. It is simple, rough and fast, but there will be many limitations.
- Manual deployment: the degree of difficulty is average. It is difficult to deploy. You need to have a certain understanding of the deployment.
- Offline deployment (amd64): the degree of difficulty is average, and it is difficult. You need to have a certain understanding of deployment.
- Offline deployment (arm64): the degree of difficulty is general, and it is difficult. You need to have a certain understanding of the deployment.
- Source code deployment: deployment is relatively difficult. You should have a good understanding of the architecture and try to install and deploy again.
- Container deployment: this container deployment requires you to be familiar with K8s.
You can choose your own appropriate way to install it. If you are interested, you can try all ways. It will be very helpful for your study
1, One click deployment
One click deployment is the simplest way to install jumpserver. In this way, you only need to copy the command to your host on the official website, wait for the execution to succeed, and then find the installation directory and start it. Let's see the specific operations below
Main operating instructions
# It will be installed to / opt / jumpserver-installer-v2.0 by default 17.2 contents
curl -sSL https://github.com/jumpserver/jumpserver/releases/download/v2.17.2/quick_start.sh | bash
cd /opt/jumpserver-installer-v2.17.2
# After installation, the configuration file is / opt / jumpserver / config / config txt
# If you have external MySQL/MariaDB and Redis, you must modify this file and specify your address and password
cd /opt/jumpserver-installer-v2.17.2

# start-up
./jmsctl.sh start

# stop it
./jmsctl.sh down

# uninstall
./jmsctl.sh uninstall

# help
./jmsctl.sh -h
Detailed steps
- Host check
First, you need to check whether both of your network cards are effective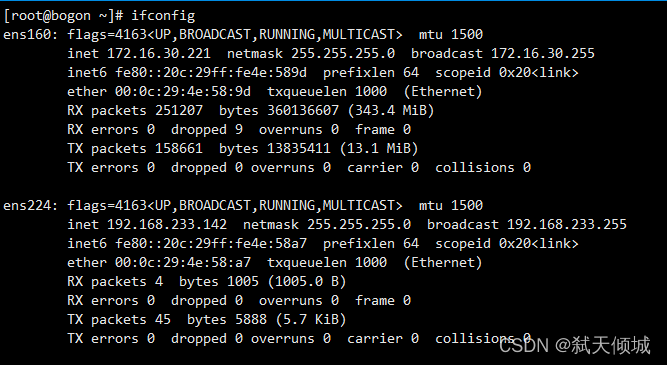
The connectivity is forgotten in the test. One click deployment requires networking to download installation packages and resources
Check whether there are some installed conflict packages. Here, you must pay attention to ensure that these services are useless before uninstalling. I don't care if this is a virtual machine, so you can directly use * to uninstall some useless installation packages
- Download installer
We can copy the first command above and paste it into our command line for execution
Because you need to download the main installation file on github, you all know that downloading things on github is very slow, and you even haven't downloaded successfully after waiting for a long time. Here's a little acceleration skill.
Let's look at the different addresses below
https://github.com/jumpserver/jumpserver/releases/download/v2.17.2/quick_start.sh
contrast
https://github.com.cnpmjs.org/jumpserver/jumpserver/releases/download/v2.17.2/quick_start.sh
A comparison shows that the difference between the two addresses is in GitHub Cnpmjs. Com has been added Org, the principle is to use the image server to download these services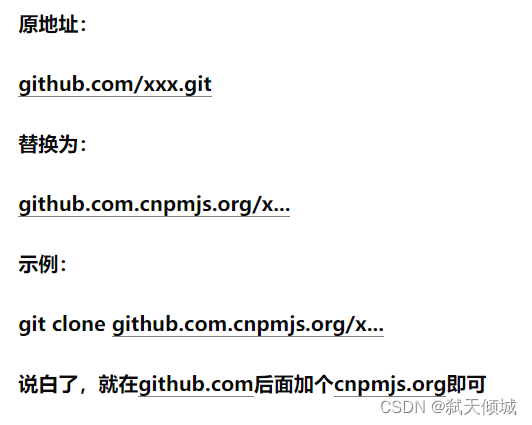
Now let's try to download it again, but at this time, we should pay attention to removing | bash from the above address, otherwise you will be prompted that the download fails. Let's update the download link address
wget https://github.com.cnpmjs.org/jumpserver/jumpserver/releases/download/v2.17.2/quick_start.sh
So there's no problem downloading.
After downloading, you need to open this file and modify the download address of github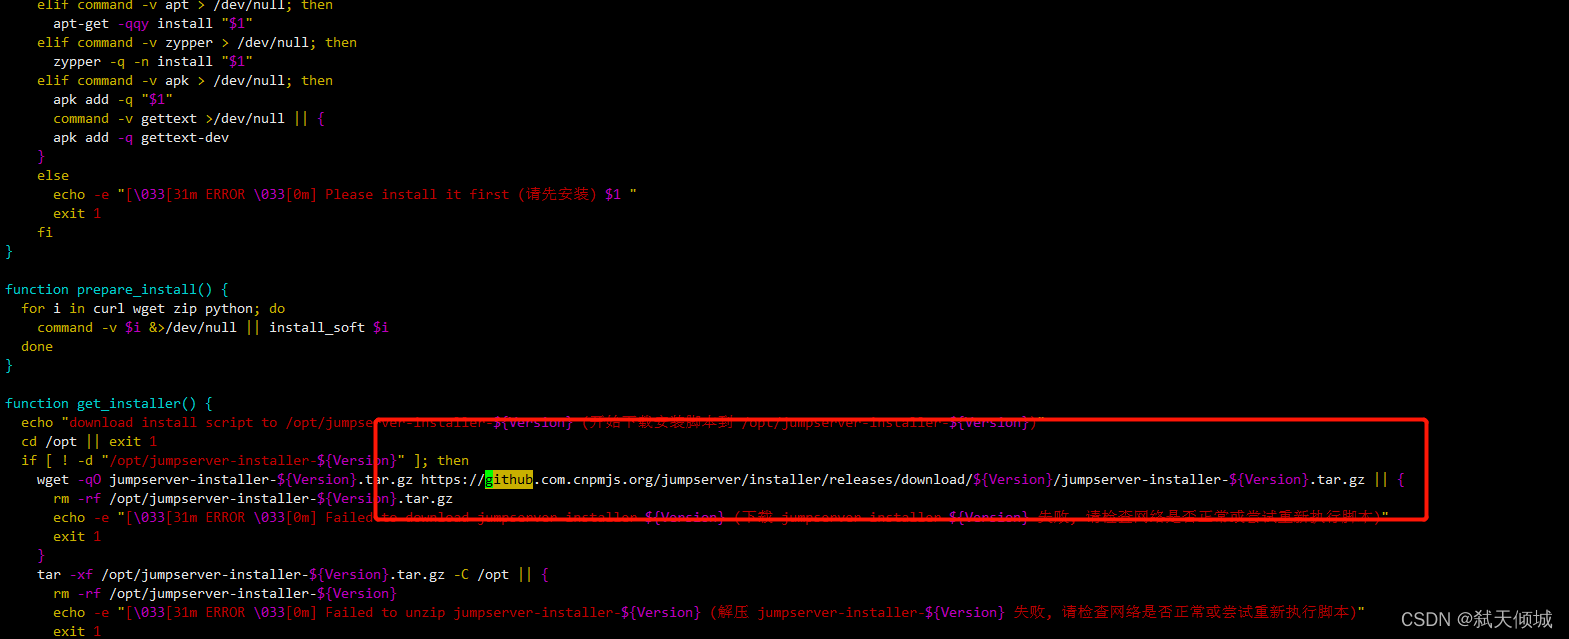
After the modification is completed, save it, and then use bash to execute it. The execution command is as follows:
bash quick_start.sh
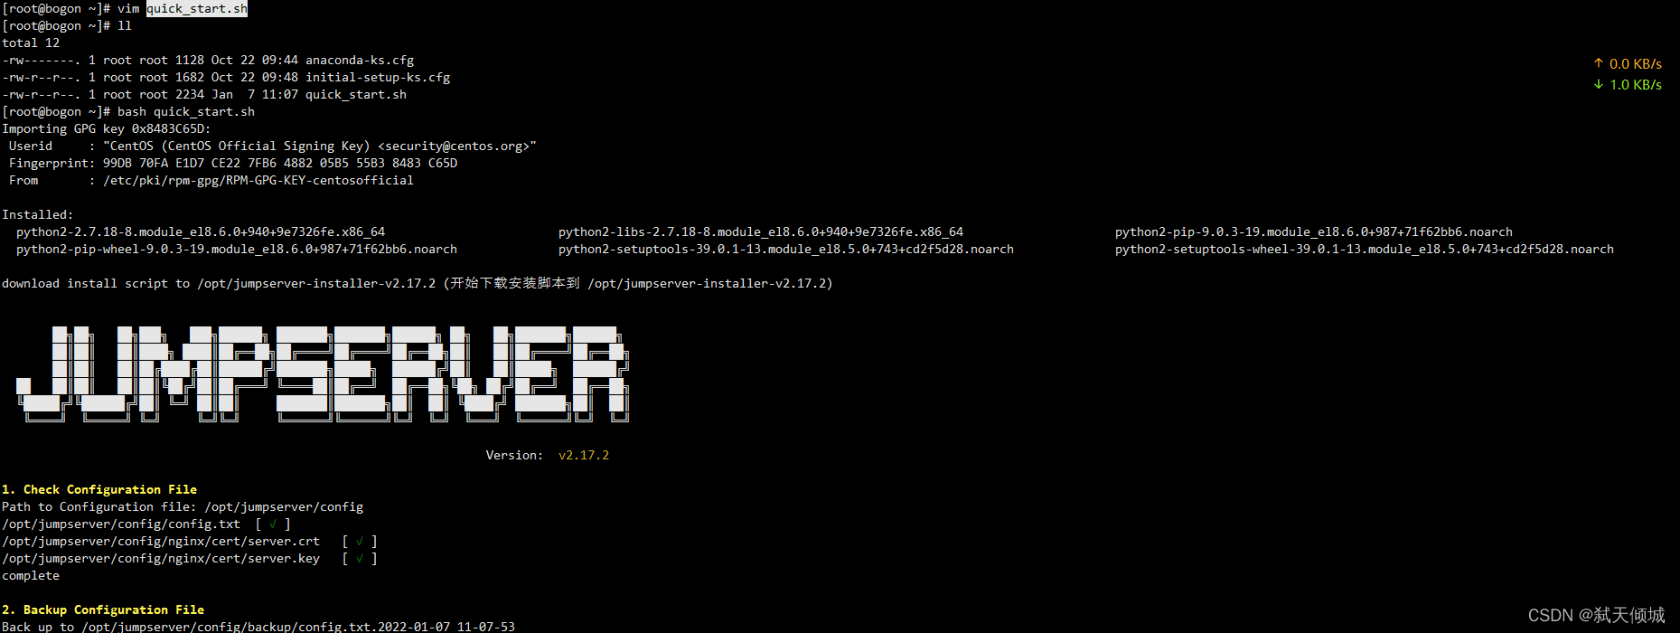
Questions may appear in the middle. You can choose y


The following are whether you need to set the external ports of excel, redis and jumpserver. I will keep the default here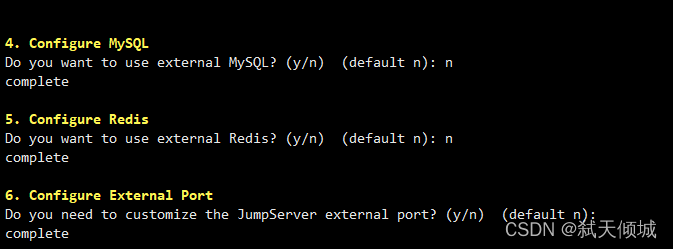
The next step is to wait for the execution to complete. Many images need to be downloaded, and the waiting time will be long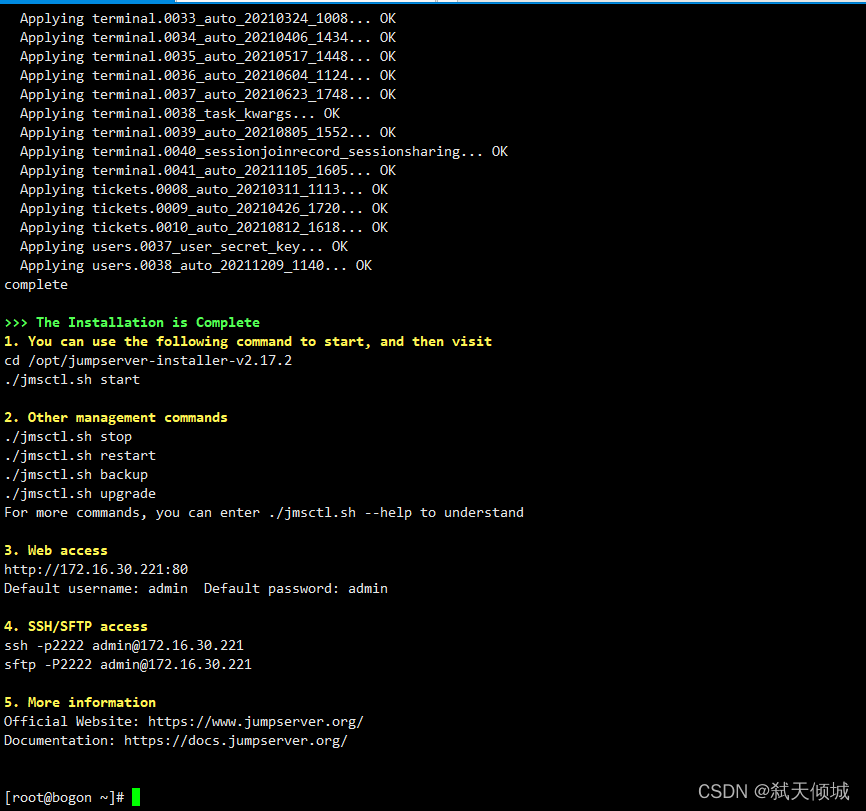
After a long wait, it's finally done. Next, let's start jumpserver and start it according to the prompt of installation completion
After successful startup, use the browser to access the address of the external network. I use the internal network to access here
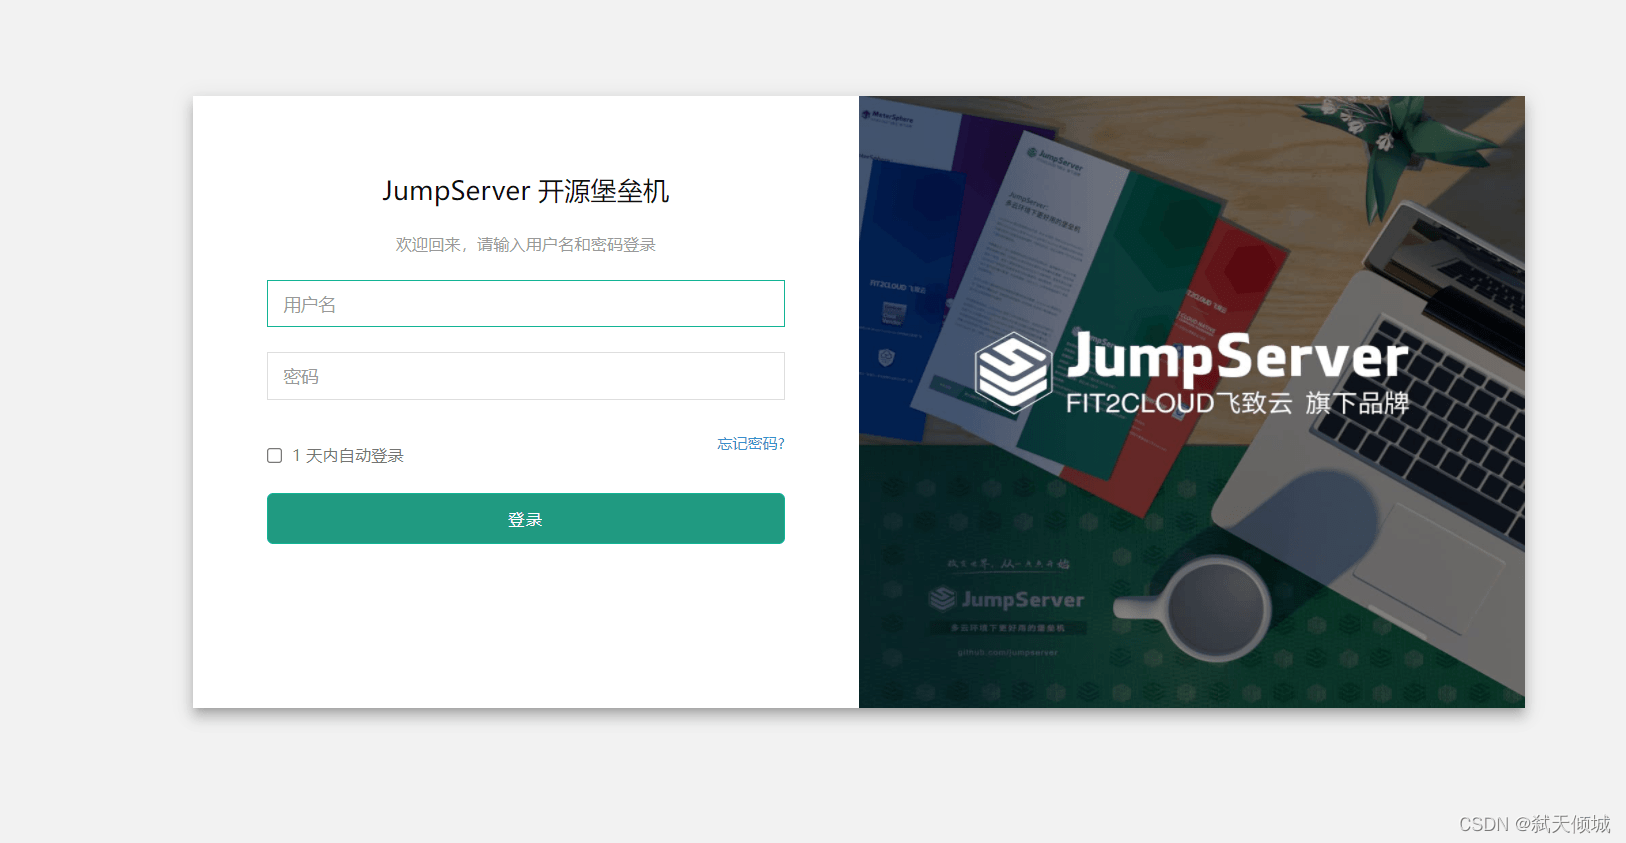
The default account password is admin. You need to reset the password for the first login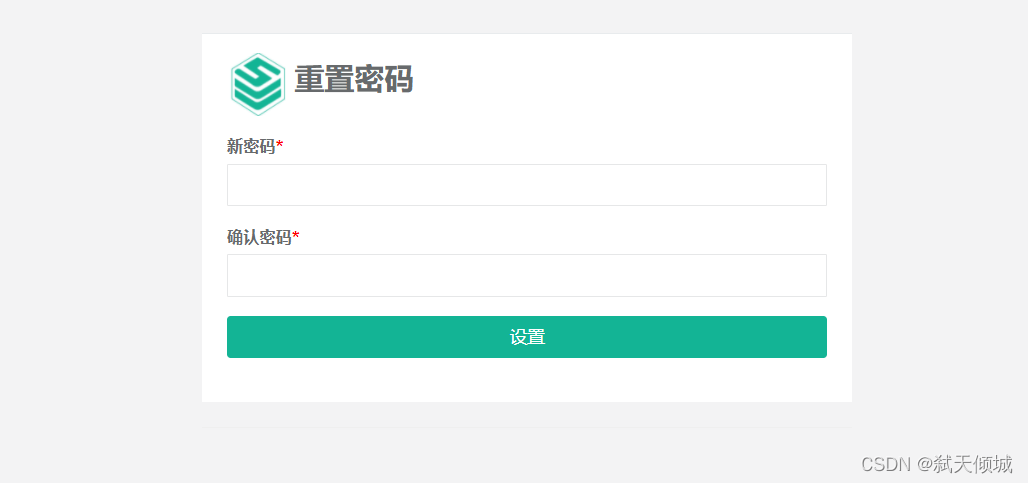
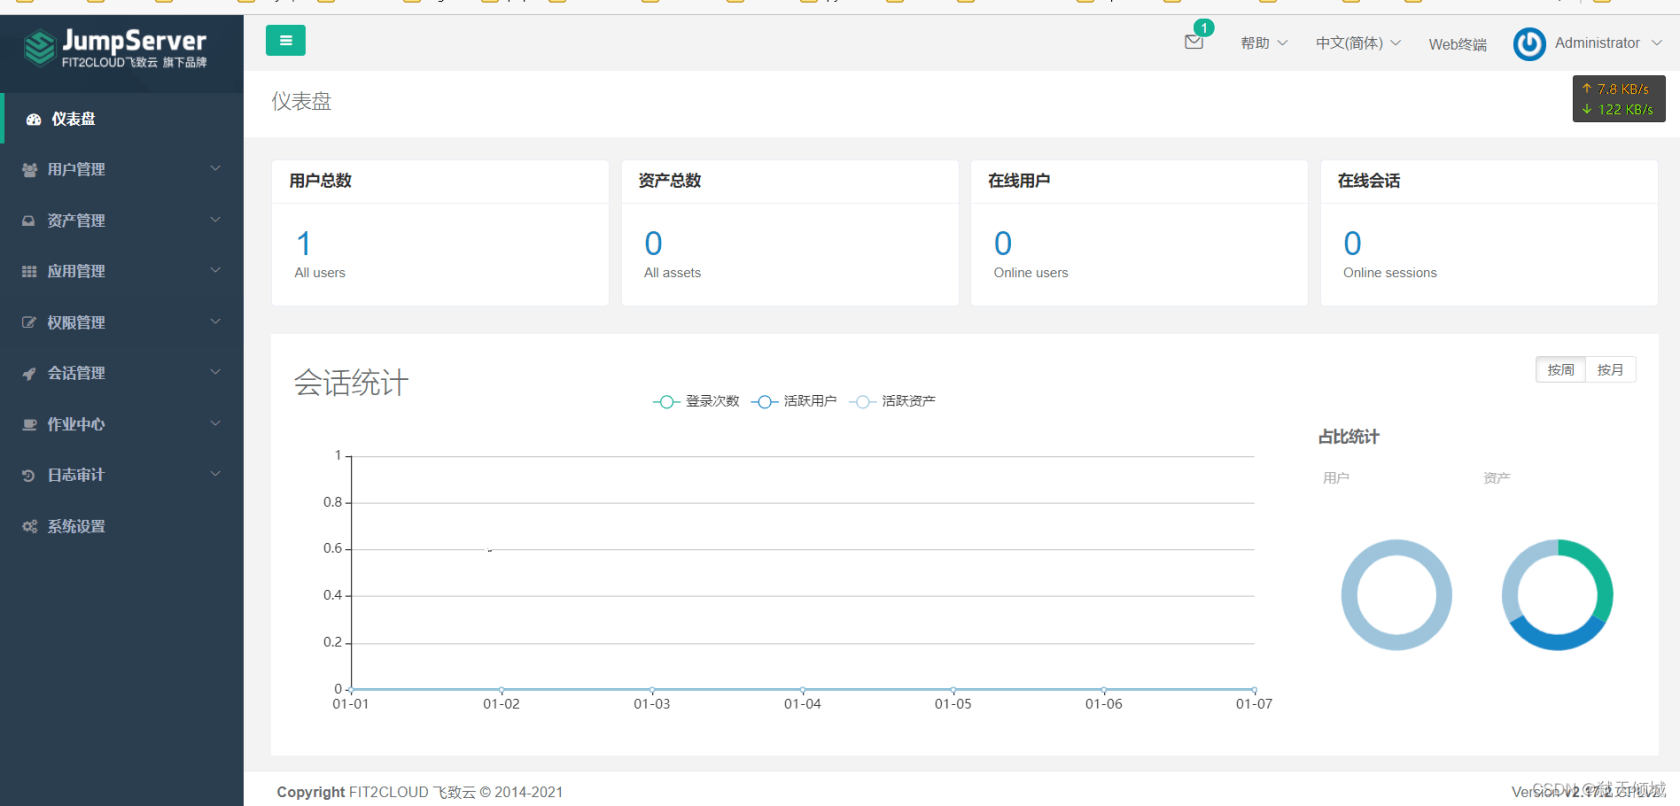
The installation is completed here. I'll write a brief installation below
2, Manual deployment
cd /opt
wget https://github.com/jumpserver/installer/releases/download/v2.17.2/jumpserver-installer-v2.17.2.tar.gz
tar -xf jumpserver-installer-v2.17.2.tar.gz
cd jumpserver-installer-v2.17.2
# Modify the profile template as needed. If you don't know the purpose, you can skip the modification
cat config-example.txt
# If the following settings are empty, the system will automatically generate a random string
## Please modify secret for migration_ Key and BOOTSTRAP_TOKEN is the original setting
## Complete parameter documentation https://docs.jumpserver.org/zh/master/admin-guide/env/

## For the installation configuration, amd64 uses Huawei cloud to accelerate the download by default. For arm64, please comment out DOCKER_IMAGE_PREFIX=swr.cn-south-1.myhuaweicloud.com
# DOCKER_IMAGE_PREFIX=swr.cn-south-1.myhuaweicloud.com
VOLUME_DIR=/opt/jumpserver
DOCKER_DIR=/var/lib/docker
SECRET_KEY=
BOOTSTRAP_TOKEN=
LOG_LEVEL=ERROR

##  MySQL configuration, USE_EXTERNAL_MYSQL=1 means using an external database. Please enter the correct MySQL information
USE_EXTERNAL_MYSQL=0
DB_HOST=mysql
DB_PORT=3306
DB_USER=root
DB_PASSWORD=
DB_NAME=jumpserver

##  Redis configuration, USE_EXTERNAL_REDIS=1 indicates that the external database is used. Please enter the correct redis information
USE_EXTERNAL_REDIS=0
REDIS_HOST=redis
REDIS_PORT=6379
REDIS_PASSWORD=

## Compose project settings. If the 192.168.250.0/24 network segment conflicts with your existing network segment, please modify it and restart JumpServer
COMPOSE_PROJECT_NAME=jms
COMPOSE_HTTP_TIMEOUT=3600
DOCKER_CLIENT_TIMEOUT=3600
DOCKER_SUBNET=192.168.250.0/24

## IPV6 settings, whether the container opens ipv6 nat, USE_IPV6=1 means on, and when it is 0, DOCKER_SUBNET_IPV6 definition does not take effect
USE_IPV6=0
DOCKER_SUBNET_IPV6=2001:db8:10::/64

## Nginx configuration, USE_LB=1 means on, and HTTPS is enabled when LB = 0_ The port definition does not take effect
HTTP_PORT=80
SSH_PORT=2222
RDP_PORT=3389

USE_LB=0
HTTPS_PORT=443

## Task configuration, whether to start JMS_ Cell container. A single node must be opened
USE_TASK=1

## XPack, USE_XPACK=1 means open, and the open source version setting is invalid
USE_XPACK=0

# Core configuration, session definition, SESSION_COOKIE_AGE indicates the number of seconds after idle, and the session expires_ EXPIRE_ AT_ BROWSER_ Close = true means that the session expires when the browser is closed
# SESSION_COOKIE_AGE=86400
SESSION_EXPIRE_AT_BROWSER_CLOSE=true

# Koko Lion XRDP component configuration
CORE_HOST=http://core:8080

# Additional configuration
CURRENT_VERSION=
# install
./jmsctl.sh install

# start-up
./jmsctl.sh start
# After installation, the configuration file is / opt / jumpserver / config / config txt
cd /opt/jumpserver-installer-v2.17.2

# start-up
./jmsctl.sh start

# stop it
./jmsctl.sh down

# uninstall
./jmsctl.sh uninstall

# help
./jmsctl.sh -h
3, Offline deployment (amd64)
cd /opt
tar -xf jumpserver-offline-installer-v2.17.2-amd64-84.tar.gz
cd jumpserver-offline-installer-v2.17.2-amd64-84
# Modify the profile template as needed. If you don't know the purpose, you can skip the modification
cat config-example.txt
# If the following settings are empty, the system will automatically generate a random string
## Please modify secret for migration_ Key and BOOTSTRAP_TOKEN is the original setting
## Complete parameter documentation https://docs.jumpserver.org/zh/master/admin-guide/env/

## For the installation configuration, amd64 uses Huawei cloud to accelerate the download by default. For arm64, please comment out DOCKER_IMAGE_PREFIX=swr.cn-south-1.myhuaweicloud.com
# DOCKER_IMAGE_PREFIX=swr.cn-south-1.myhuaweicloud.com
VOLUME_DIR=/opt/jumpserver
DOCKER_DIR=/var/lib/docker
SECRET_KEY=
BOOTSTRAP_TOKEN=
LOG_LEVEL=ERROR

##  MySQL configuration, USE_EXTERNAL_MYSQL=1 means using an external database. Please enter the correct MySQL information
USE_EXTERNAL_MYSQL=0
DB_HOST=mysql
DB_PORT=3306
DB_USER=root
DB_PASSWORD=
DB_NAME=jumpserver

##  Redis configuration, USE_EXTERNAL_REDIS=1 indicates that the external database is used. Please enter the correct redis information
USE_EXTERNAL_REDIS=0
REDIS_HOST=redis
REDIS_PORT=6379
REDIS_PASSWORD=

## Compose project settings. If the 192.168.250.0/24 network segment conflicts with your existing network segment, please modify it and restart JumpServer
COMPOSE_PROJECT_NAME=jms
COMPOSE_HTTP_TIMEOUT=3600
DOCKER_CLIENT_TIMEOUT=3600
DOCKER_SUBNET=192.168.250.0/24

## IPV6 settings, whether the container opens ipv6 nat, USE_IPV6=1 means on, and when it is 0, DOCKER_SUBNET_IPV6 definition does not take effect
USE_IPV6=0
DOCKER_SUBNET_IPV6=2001:db8:10::/64

## Nginx configuration, USE_LB=1 means on, and HTTPS is enabled when LB = 0_ The port definition does not take effect
HTTP_PORT=80
SSH_PORT=2222
RDP_PORT=3389

USE_LB=0
HTTPS_PORT=443

## Task configuration, whether to start JMS_ Cell container. A single node must be opened
USE_TASK=1

## XPack, USE_XPACK=1 means open, and the open source version setting is invalid
USE_XPACK=0

# Core configuration, session definition, SESSION_COOKIE_AGE indicates the number of seconds after idle, and the session expires_ EXPIRE_ AT_ BROWSER_ Close = true means that the session expires when the browser is closed
# SESSION_COOKIE_AGE=86400
SESSION_EXPIRE_AT_BROWSER_CLOSE=true

# Koko Lion XRDP component configuration
CORE_HOST=http://core:8080

# Additional configuration
CURRENT_VERSION=
# install
./jmsctl.sh install

# start-up
./jmsctl.sh start
# After installation, the configuration file is / opt / jumpserver / config / config txt
cd /opt/jumpserver-installer-v2.17.2

# start-up
./jmsctl.sh start

# stop it
./jmsctl.sh down

# uninstall
./jmsctl.sh uninstall

# help
./jmsctl.sh -h
4, Offline deployment (arm64)
cd /opt
tar -xf jumpserver-offline-installer-v2.17.2-amd64-84.tar.gz
cd jumpserver-offline-installer-v2.17.2-amd64-84
# Modify the profile template as needed. If you don't know the purpose, you can skip the modification
cat config-example.txt
# If the following settings are empty, the system will automatically generate a random string
## Please modify secret for migration_ Key and BOOTSTRAP_TOKEN is the original setting
## Complete parameter documentation https://docs.jumpserver.org/zh/master/admin-guide/env/

## For the installation configuration, amd64 uses Huawei cloud to accelerate the download by default. For arm64, please comment out DOCKER_IMAGE_PREFIX=swr.cn-south-1.myhuaweicloud.com
# DOCKER_IMAGE_PREFIX=swr.cn-south-1.myhuaweicloud.com
VOLUME_DIR=/opt/jumpserver
DOCKER_DIR=/var/lib/docker
SECRET_KEY=
BOOTSTRAP_TOKEN=
LOG_LEVEL=ERROR

##  MySQL configuration, USE_EXTERNAL_MYSQL=1 means using an external database. Please enter the correct MySQL information
USE_EXTERNAL_MYSQL=0
DB_HOST=mysql
DB_PORT=3306
DB_USER=root
DB_PASSWORD=
DB_NAME=jumpserver

##  Redis configuration, USE_EXTERNAL_REDIS=1 indicates that the external database is used. Please enter the correct redis information
USE_EXTERNAL_REDIS=0
REDIS_HOST=redis
REDIS_PORT=6379
REDIS_PASSWORD=

## Compose project settings. If the 192.168.250.0/24 network segment conflicts with your existing network segment, please modify it and restart JumpServer
COMPOSE_PROJECT_NAME=jms
COMPOSE_HTTP_TIMEOUT=3600
DOCKER_CLIENT_TIMEOUT=3600
DOCKER_SUBNET=192.168.250.0/24

## IPV6 settings, whether the container opens ipv6 nat, USE_IPV6=1 means on, and when it is 0, DOCKER_SUBNET_IPV6 definition does not take effect
USE_IPV6=0
DOCKER_SUBNET_IPV6=2001:db8:10::/64

## Nginx configuration, USE_LB=1 means on, and HTTPS is enabled when LB = 0_ The port definition does not take effect
HTTP_PORT=80
SSH_PORT=2222
RDP_PORT=3389

USE_LB=0
HTTPS_PORT=443

## Task configuration, whether to start JMS_ Cell container. A single node must be opened
USE_TASK=1

## XPack, USE_XPACK=1 means open, and the open source version setting is invalid
USE_XPACK=0

# Core configuration, session definition, SESSION_COOKIE_AGE indicates the number of seconds after idle, and the session expires_ EXPIRE_ AT_ BROWSER_ Close = true means that the session expires when the browser is closed
# SESSION_COOKIE_AGE=86400
SESSION_EXPIRE_AT_BROWSER_CLOSE=true

# Koko Lion XRDP component configuration
CORE_HOST=http://core:8080

# Additional configuration
CURRENT_VERSION=
# install
./jmsctl.sh install

# start-up
./jmsctl.sh start
# After installation, the configuration file is / opt / jumpserver / config / config Txt * * bold style**
cd /opt/jumpserver-installer-v2.17.2

# start-up
./jmsctl.sh start

# stop it
./jmsctl.sh down

# uninstall
./jmsctl.sh uninstall

# help
./jmsctl.sh -h
5, Kubernetes
helm repo add jumpserver https://jumpserver.github.io/helm-charts
helm repo list
vi values.yaml
# Template https://github.com/jumpserver/helm-charts/blob/main/charts/jumpserver/values.yaml
# Default values for jumpserver.
# This is a YAML-formatted file.
# Declare variables to be passed into your templates.

nameOverride: ""
fullnameOverride: ""

## @param global.imageRegistry Global Docker image registry
## @param global.imagePullSecrets Global Docker registry secret names as an array
## @param global.storageClass Global StorageClass for Persistent Volume(s)
## @param global.redis.password Global Redis™ password (overrides `auth.password`)
##
global:
  imageRegistry: "docker.io"    # Huawei cloud can be used to accelerate SWR in China cn-south-1. myhuaweicloud. com
  imageTag: v2.16.3             # Version number
  ## E.g.
  #  imagePullSecrets:
  #  - myRegistryKeySecretName
  ##
  imagePullSecrets: []
      # - name: yourSecretKey
  storageClass: ""              # NFS SC

## If the Redis database included in the chart is disabled, JumpServer will
## use below parameters to connect to an external Redis server.
##
externalDatabase:               # Database related settings
  engine: mysql
  host: localhost
  port: 3306
  user: root
  password: ""
  database: jumpserver

## If the MySQL database included in the chart is disabled, JumpServer will
## use below parameters to connect to an external MySQL server.
##
externalRedis:                  # Redis settings
  host: localhost
  port: 6379
  password: ""

serviceAccount:
  # Specifies whether a service account should be created
  create: false
  # The name of the service account to use.
  # If not set and create is true, a name is generated using the fullname template
  name:

ingress:
  enabled: true
  annotations:
    # kubernetes.io/tls-acme: "true"
    compute-full-forwarded-for: "true"
    use-forwarded-headers: "true"
    kubernetes.io/ingress.class: nginx
    nginx.ingress.kubernetes.io/configuration-snippet: |
       proxy_set_header Upgrade "websocket";
       proxy_set_header Connection "Upgrade";
  hosts:
    - "test.jumpserver.org"                 # External domain name
  tls: []
  #  - secretName: chart-example-tls
  #    hosts:
  #      - chart-example.local

core:
  enabled: true

  labels:
    app.jumpserver.org/name: jms-core

  config:
    # Generate a new random secret key by execute `cat /dev/urandom | tr -dc A-Za-z0-9 | head -c 50`
    secretKey: ""                            # Secret to encrypt sensitive information_ Key, the length is recommended to be greater than 50 bits
    # Generate a new random bootstrap token by execute `cat /dev/urandom | tr -dc A-Za-z0-9 | head -c 16`
    bootstrapToken: ""                       # The token used for component authentication is recommended to be longer than 24 bits
    # Enabled it for debug
    debug: false
    log:
      level: ERROR

  replicaCount: 1

  image:
    registry: docker.io
    repository: jumpserver/core
    tag: v2.13.2
    pullPolicy: IfNotPresent

  command: []

  env: []

  livenessProbe:
    failureThreshold: 30
    httpGet:
      path: /api/health/
      port: web

  readinessProbe:
    failureThreshold: 30
    httpGet:
      path: /api/health/
      port: web

  podSecurityContext: {}
    # fsGroup: 2000

  securityContext: {}
    # capabilities:
    #   drop:
    #   - ALL
    # readOnlyRootFilesystem: true
    # runAsNonRoot: true
    # runAsUser: 1000

  service:
    type: ClusterIP
    web:
      port: 8080
    ws:
      port: 8070

  resources: {}
    # We usually recommend not to specify default resources and to leave this as a conscious
    # choice for the user. This also increases chances charts run on environments with little
    # resources, such as Minikube. If you do want to specify resources, uncomment the following
    # lines, adjust them as necessary, and remove the curly braces after 'resources:'.
    # limits:
    #   cpu: 1000m
    #   memory: 2048Mi
    # requests:
    #   cpu: 500m
    #   memory: 1024Mi

  persistence:
    storageClassName: jumpserver-data
    accessModes:
      - ReadWriteMany
    size: 10Gi
    # annotations: {}
    finalizers:
      - kubernetes.io/pvc-protection
    # subPath: ""
    # existingClaim:

  volumeMounts: []

  volumes: []

  nodeSelector: {}

  tolerations: []

  affinity: {}

koko:
  enabled: true

  labels:
    app.jumpserver.org/name: jms-koko

  config:
    log:
      level: ERROR

  replicaCount: 1

  image:
    registry: docker.io
    repository: jumpserver/koko
    tag: v2.13.2
    pullPolicy: IfNotPresent

  command: []

  env: []

  livenessProbe:
    failureThreshold: 30
    httpGet:
      path: /koko/health/
      port: web

  readinessProbe:
    failureThreshold: 30
    httpGet:
      path: /koko/health/
      port: web

  podSecurityContext: {}
    # fsGroup: 2000

  securityContext:
    privileged: true
    # capabilities:
    #   drop:
    #   - ALL
    # readOnlyRootFilesystem: true
    # runAsNonRoot: true
    # runAsUser: 1000

  service:
    type: ClusterIP
    web:
      port: 5000
    ssh:
      port: 2222

  resources: {}
    # We usually recommend not to specify default resources and to leave this as a conscious
    # choice for the user. This also increases chances charts run on environments with little
    # resources, such as Minikube. If you do want to specify resources, uncomment the following
    # lines, adjust them as necessary, and remove the curly braces after 'resources:'.
    # limits:
    #   cpu: 100m
    #   memory: 128Mi
    # requests:
    #   cpu: 100m
    #   memory: 128Mi

  persistence:
    storageClassName: jumpserver-data
    accessModes:
      - ReadWriteMany
    size: 10Gi
    # annotations: {}
    finalizers:
      - kubernetes.io/pvc-protection

  volumeMounts: []

  volumes: []

  nodeSelector: {}

  tolerations: []

  affinity: {}

lion:
  enabled: true

  labels:
    app.jumpserver.org/name: jms-lion

  config:
    log:
      level: ERROR

  replicaCount: 1

  image:
    registry: docker.io
    repository: jumpserver/lion
    tag: v2.13.2
    pullPolicy: IfNotPresent

  command: []

  env: []

  livenessProbe:
    failureThreshold: 30
    httpGet:
      path: /lion/health/
      port: web

  readinessProbe:
    failureThreshold: 30
    httpGet:
      path: /lion/health/
      port: web

  podSecurityContext: {}
    # fsGroup: 2000

  securityContext: {}
    # capabilities:
    #   drop:
    #   - ALL
    # readOnlyRootFilesystem: true
    # runAsNonRoot: true
    # runAsUser: 1000

  service:
    type: ClusterIP
    web:
      port: 8081

  resources: {}
    # We usually recommend not to specify default resources and to leave this as a conscious
    # choice for the user. This also increases chances charts run on environments with little
    # resources, such as Minikube. If you do want to specify resources, uncomment the following
    # lines, adjust them as necessary, and remove the curly braces after 'resources:'.
    # limits:
    #   cpu: 100m
    #   memory: 512Mi
    # requests:
    #   cpu: 100m
    #   memory: 512Mi

  persistence:
    storageClassName: jumpserver-data
    accessModes:
      - ReadWriteMany
    size: 10Gi
    # annotations: {}
    finalizers:
      - kubernetes.io/pvc-protection

  volumeMounts: []

  volumes: []

  nodeSelector: {}

  tolerations: []

  affinity: {}

xpack:
  enabled: false      # Enterprise version turn this option on

omnidb:
  labels:
    app.jumpserver.org/name: jms-omnidb

  config:
    log:
      level: ERROR

  replicaCount: 1

  image:
    registry: registry.fit2cloud.com
    repository: jumpserver/omnidb
    tag: v2.13.2
    pullPolicy: IfNotPresent

  command: []

  env: []

  livenessProbe:
    failureThreshold: 30
    tcpSocket:
      port: web

  readinessProbe:
    failureThreshold: 30
    tcpSocket:
      port: web

  podSecurityContext: {}
    # fsGroup: 2000

  securityContext: {}
    # capabilities:
    #   drop:
    #   - ALL
    # readOnlyRootFilesystem: true
    # runAsNonRoot: true
    # runAsUser: 1000

  service:
    type: ClusterIP
    web:
      port: 8082
    ws:
      port: 8071

  resources: {}
    # We usually recommend not to specify default resources and to leave this as a conscious
    # choice for the user. This also increases chances charts run on environments with little
    # resources, such as Minikube. If you do want to specify resources, uncomment the following
    # lines, adjust them as necessary, and remove the curly braces after 'resources:'.
    # limits:
    #   cpu: 100m
    #   memory: 128Mi
    # requests:
    #   cpu: 100m
    #   memory: 128Mi

  persistence:
    storageClassName: jumpserver-data
    accessModes:
      - ReadWriteMany
    size: 10Gi
    # annotations: {}
    finalizers:
      - kubernetes.io/pvc-protection

  volumeMounts: []

  volumes: []

  nodeSelector: {}

  tolerations: []

  affinity: {}

xrdp:
  labels:
    app.jumpserver.org/name: jms-xrdp

  config:
    log:
      level: ERROR

  replicaCount: 1

  image:
    registry: registry.fit2cloud.com
    repository: jumpserver/xrdp
    tag: v2.13.2
    pullPolicy: IfNotPresent

  command: []

  env: []

  livenessProbe:
    failureThreshold: 30
    tcpSocket:
      port: rdp

  readinessProbe:
    failureThreshold: 30
    tcpSocket:
      port: rdp

  podSecurityContext: {}
    # fsGroup: 2000

  securityContext: {}
    # capabilities:
    #   drop:
    #   - ALL
    # readOnlyRootFilesystem: true
    # runAsNonRoot: true
    # runAsUser: 1000

  service:
    type: ClusterIP
    rdp:
      port: 3389

  resources: {}
    # We usually recommend not to specify default resources and to leave this as a conscious
    # choice for the user. This also increases chances charts run on environments with little
    # resources, such as Minikube. If you do want to specify resources, uncomment the following
    # lines, adjust them as necessary, and remove the curly braces after 'resources:'.
    # limits:
    #   cpu: 100m
    #   memory: 128Mi
    # requests:
    #   cpu: 100m
    #   memory: 128Mi

  persistence:
    storageClassName: jumpserver-data
    accessModes:
      - ReadWriteMany
    size: 10Gi
    # annotations: {}
    finalizers:
      - kubernetes.io/pvc-protection

  volumeMounts: []

  volumes: []

  nodeSelector: {}

  tolerations: []

  affinity: {}

web:
  enabled: true

  labels:
    app.jumpserver.org/name: jms-web

  replicaCount: 1

  image:
    registry: docker.io
    repository: jumpserver/web
    tag: v2.13.2
    pullPolicy: IfNotPresent

  command: []

  env: []

  livenessProbe:
    failureThreshold: 30
    httpGet:
      path: /api/health/
      port: web

  readinessProbe:
    failureThreshold: 30
    httpGet:
      path: /api/health/
      port: web

  podSecurityContext: {}
    # fsGroup: 2000

  securityContext: {}
    # capabilities:
    #   drop:
    #   - ALL
    # readOnlyRootFilesystem: true
    # runAsNonRoot: true
    # runAsUser: 1000

  service:
    type: ClusterIP
    web:
      port: 80

  resources: {}
    # We usually recommend not to specify default resources and to leave this as a conscious
    # choice for the user. This also increases chances charts run on environments with little
    # resources, such as Minikube. If you do want to specify resources, uncomment the following
    # lines, adjust them as necessary, and remove the curly braces after 'resources:'.
    # limits:
    #   cpu: 100m
    #   memory: 128Mi
    # requests:
    #   cpu: 100m
    #   memory: 128Mi

  persistence:
    storageClassName: jumpserver-data
    accessModes:
      - ReadWriteMany
    size: 1Gi
    # annotations: {}
    finalizers:
      - kubernetes.io/pvc-protection

  volumeMounts: []

  volumes: []

  nodeSelector: {}

  tolerations: []

  affinity: {}
# install helm install jms-k8s jumpserver/jumpserver -n default -f values.yaml # uninstall helm uninstall jms-k8s -n default
6, Source installation
For this suggestion, please refer to the compilation documents on the official website: docs.jumpserver.org/zh/master/dev/...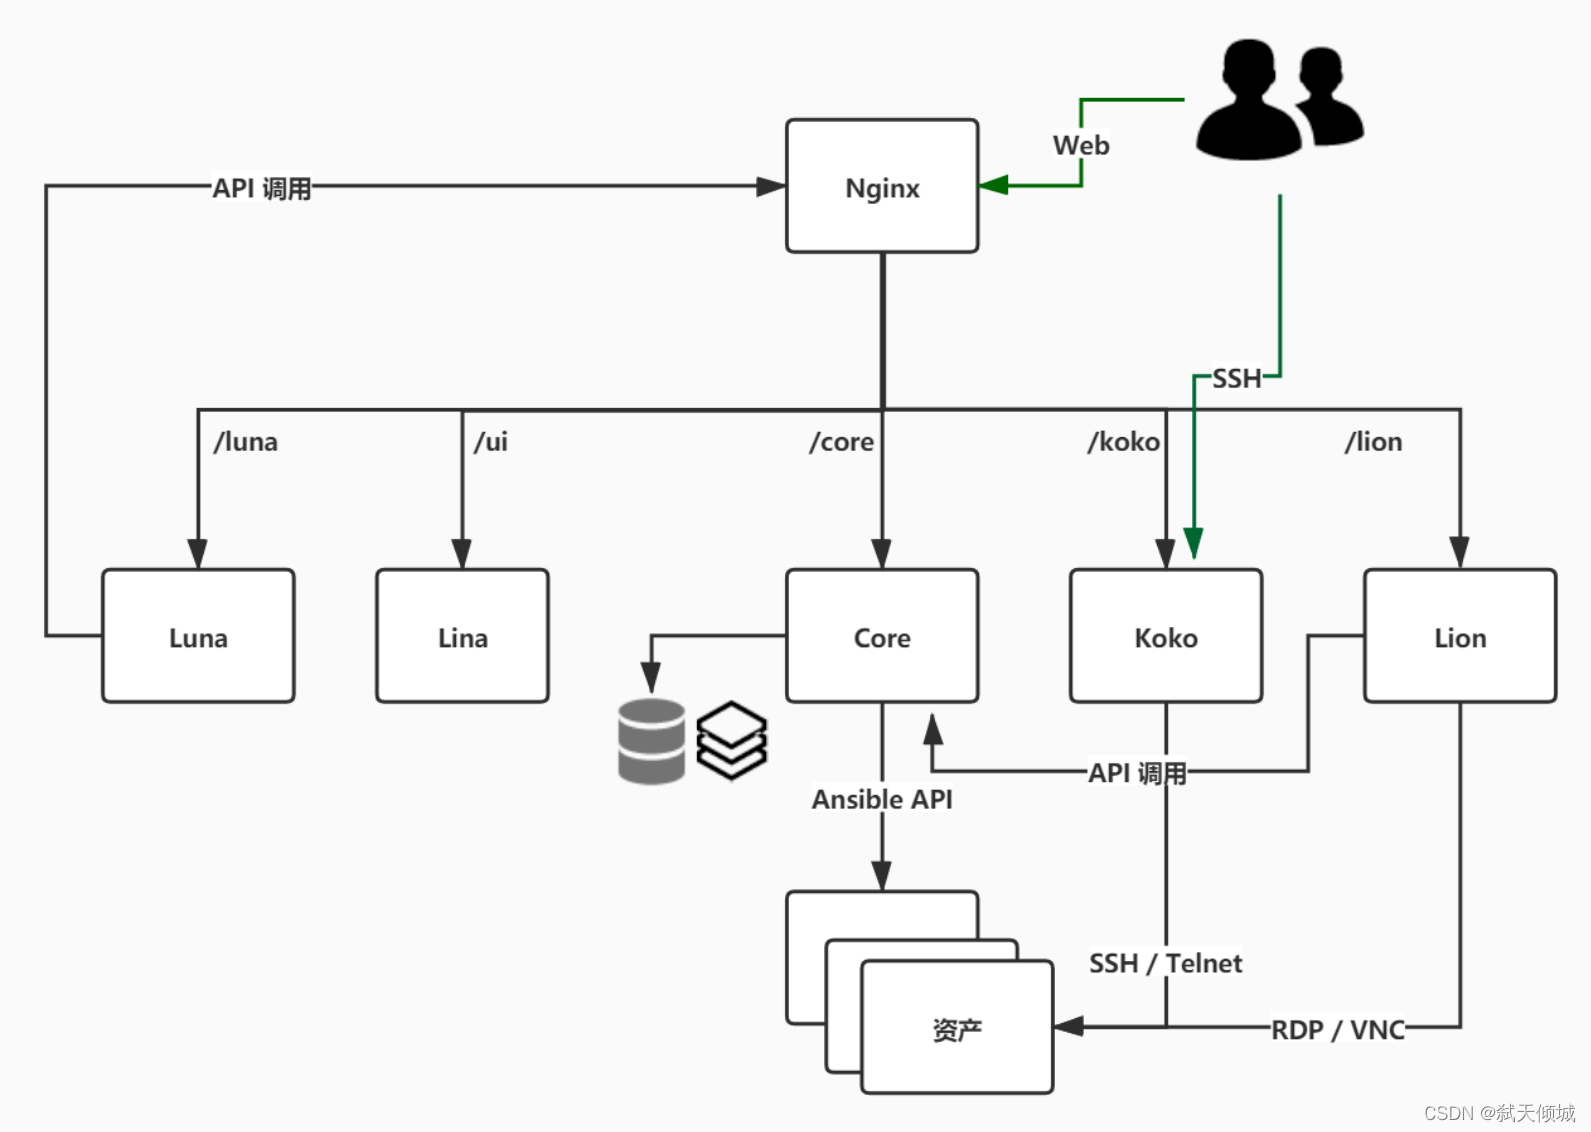
use
The use of all graphical interfaces is quite simple, especially easy to use. It's OK to simply grope. It's not described here. This is the official document address: docs.jumpserver.org/zh/master/user...
You can use it as a reference