springboot2. Use Shiro under 0 framework
introduce
Shiro is an open source project under Apache. It is an easy-to-use security framework that provides many functions, including authentication, authorization, encryption, session management and so on. Shiro uses a relatively simple and easy-to-use authorization method. Shiro is a lightweight framework with simple configuration and wide application. It is used in many excellent open source projects.
Build springboot, web page
Create project
Build a springboot development environment
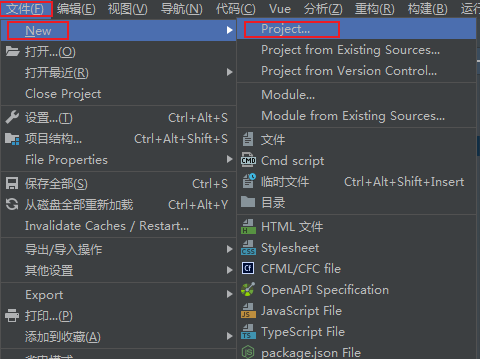
Open idea and click file - > new - > Project
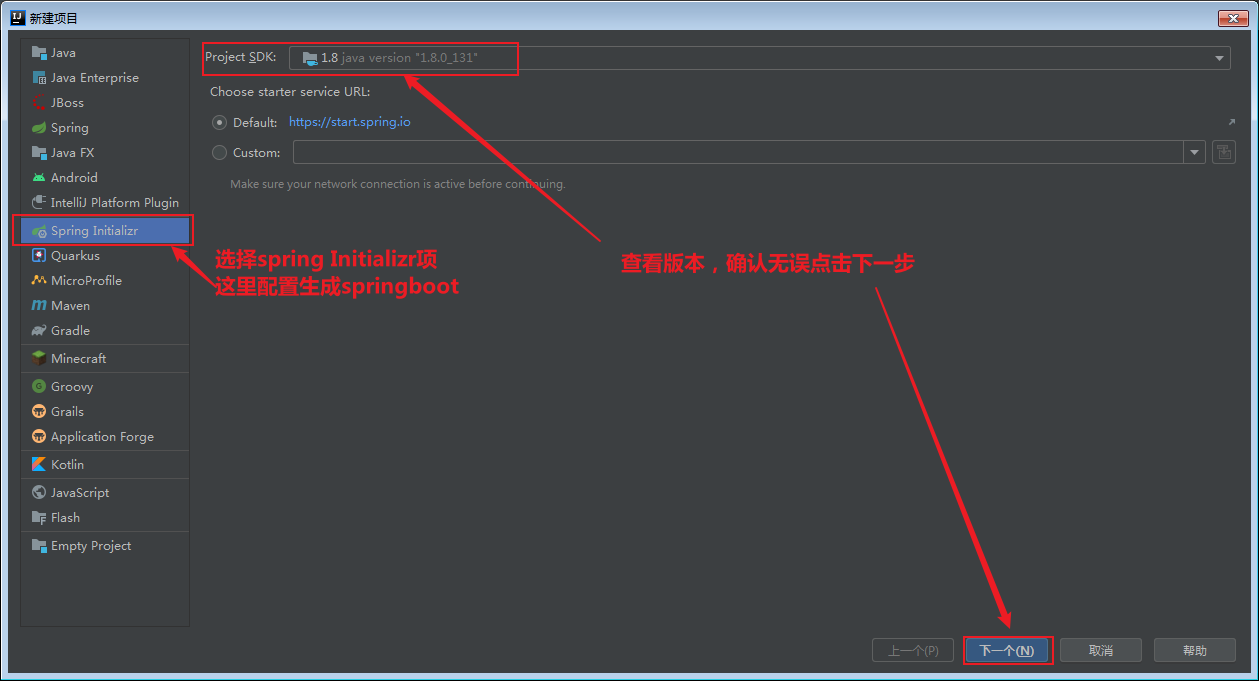
After that, you will enter the new project of idea. Click the flag of the leaf and a switch button here, and then click next
Then, this is the real configuration interface. After filling in the information, you can click next. The more important thing is the Java version. Here, the default is version 11. You need to select the version according to the actual situation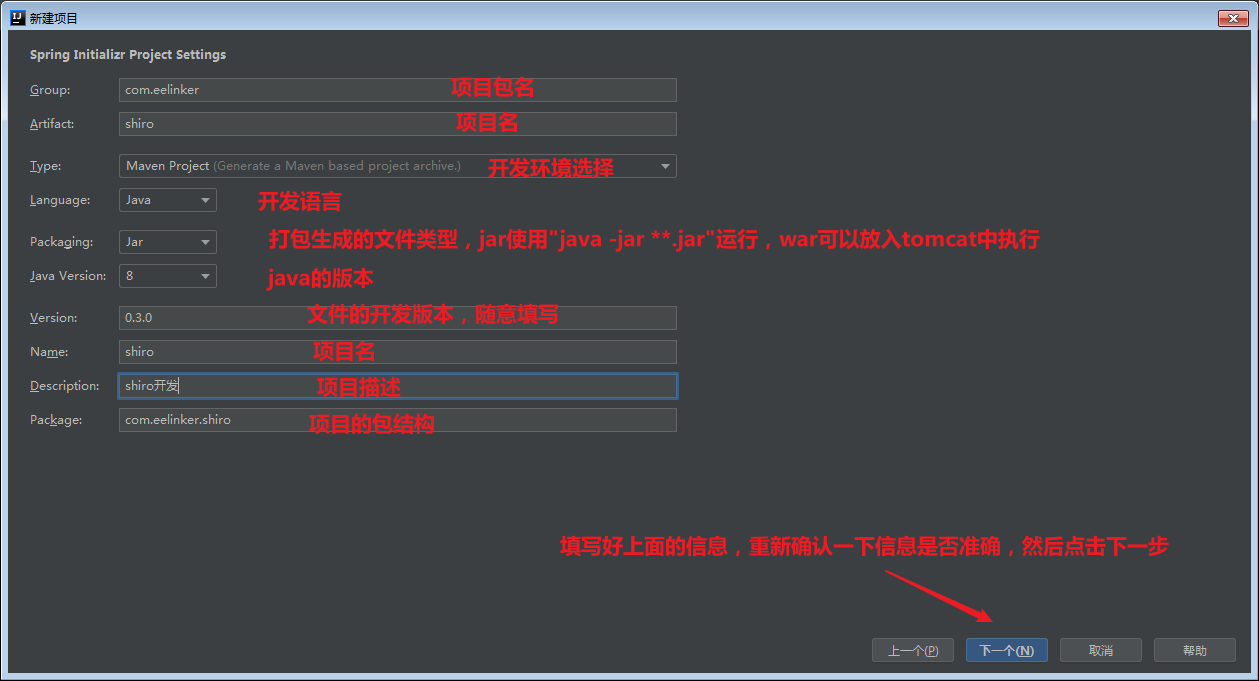
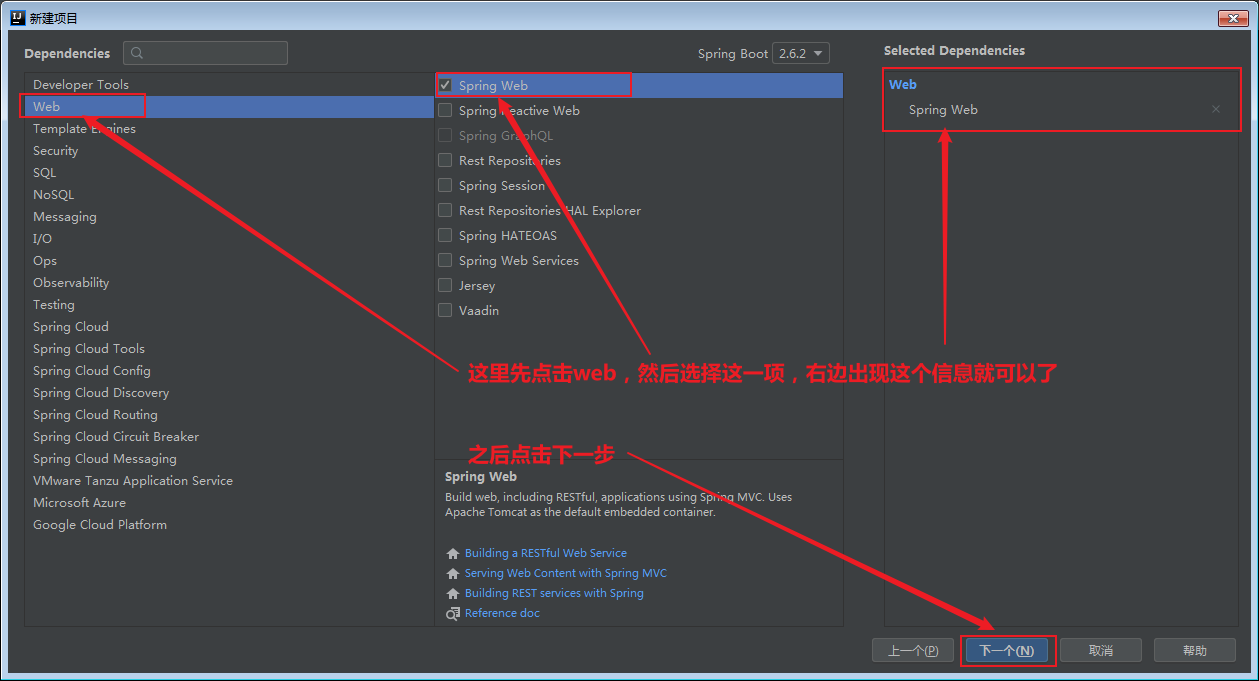
In dependency selection, just select the spring web option in Web. Then click next.
Generally, just look at the above. The project name and the last name of the project location can be inconsistent, which will not affect the operation of the program
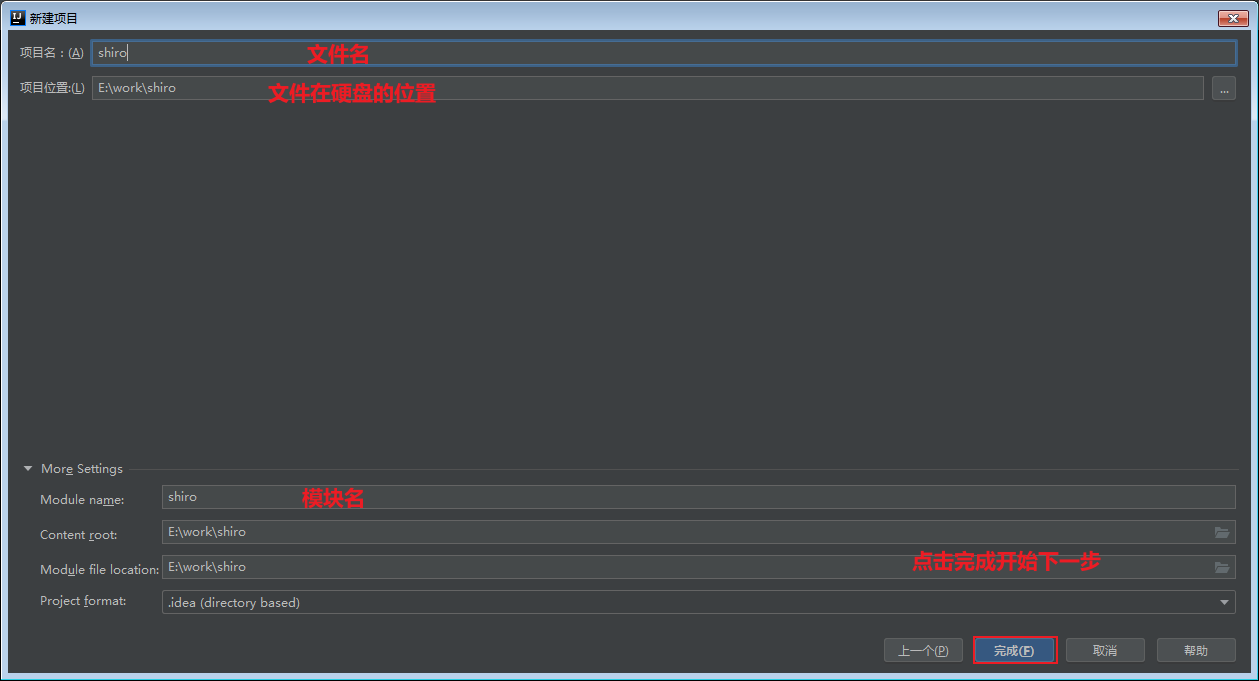
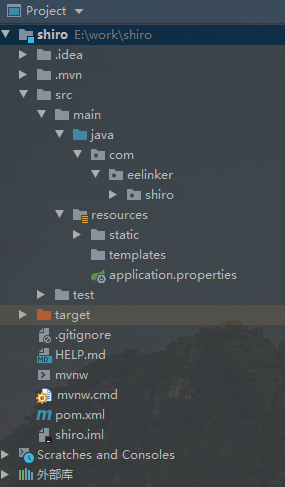
Click finish, and then wait for the maven project to download the required dependencies. Depending on the download, the project structure is as follows. (target will be generated when the project is running)
Add dependency
Open POM XML file to add dependency in tag
org. apache. shiro. Shiro all is a dependency that needs to be used in this article
com.alibaba.fastjson is a json format file processing tool, which may be used
<dependency>
    <groupId>org.apache.shiro</groupId>
    <artifactId>shiro-all</artifactId>
    <version>1.6.0</version>
</dependency>
<dependency>
    <groupId>com.alibaba</groupId>
    <artifactId>fastjson</artifactId>
    <version>1.2.74</version>
</dependency>
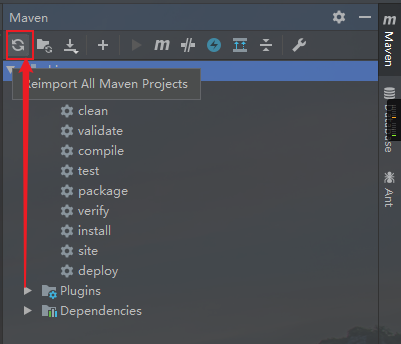
Open maven on the right side of idea and click refresh as shown in the figure to download the dependent package
Build web front-end content
Use several front-end web pages to connect back-end data for debugging.
The first is the homepage (you need to log in to enter)
The second is the user's login page
The third is to remind the user of the unauthorized page, and he will automatically jump to the home page or login page.
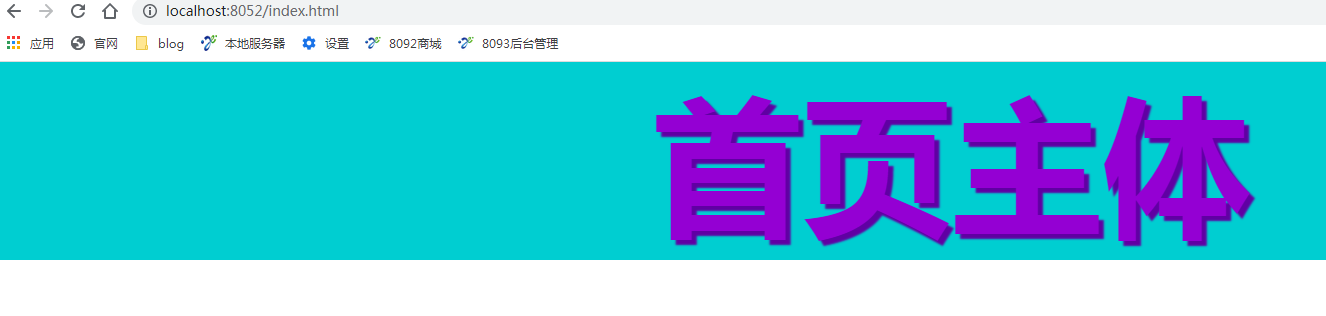
The first is the first page. Simply write a big home page using html web pages, and simply beautify it. It's very clear
<!DOCTYPE html>
<html lang="en">
<head>
    <meta charset="UTF-8">
    <title>home page</title>
</head>
<body style="margin: 0;padding: 0;border-style: none">
<h1 style="margin:0;padding: 0;text-align: center;background-color: #00ced1;color: #9400d3;font-size: 150px;text-shadow: 5px 5px 2px #6000a3;">
    Home page subject
</h1>
</body>
</html>
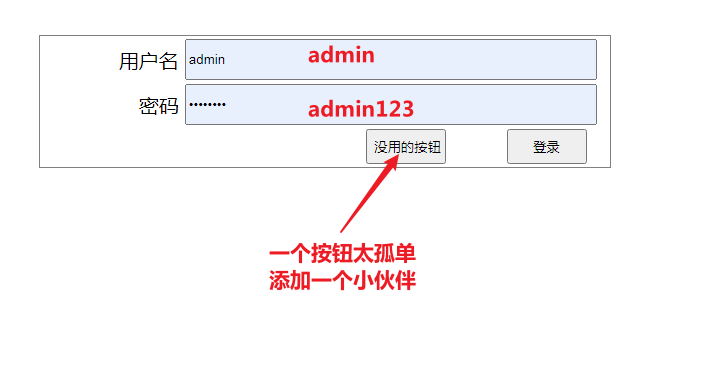
Then there is the second page, the login page. Use the form. Never use the domain name (ip) + port followed by the path for the action content. This method will lead to inconsistent session s every time the form is submitted. Just write the path directly. It's still like death. Just beautify it
<!DOCTYPE html>
<html lang="en">
<head>
    <meta charset="UTF-8">
    <title>System login</title>
    <style>
        input[type="text"], input[type="password"] {
            margin: 0 2px;
            height: 35px;
            width: 100%;
        }

        input[type="submit"], input[type="button"] {
            height: 35px;
            width: 80px;
        }

        td {
            font-size: 20px;
            text-align: right;
        }
        tr{

        }
        table {
            padding: 0 20px 0 0 ;
            width: 30%;
            border-style: solid;
            border-width: 1px;
        }

    </style>
</head>
<body>
<center>
    <form action="/user/login" method="get" style="margin-top: 10%;" target="_self">
        <table>
            <tr>
                <td>user name</td>
                <td><input type="text" name="username"/></td>
            </tr>
            <tr>
                <td>password</td>
                <td><input type="password" name="password"/></td>
            </tr>
            <tr>
                <td colspan="2"><input type="button" value="Useless button"style="margin-left:30%; ">
                    <input type="submit" value="Sign in" style="margin-left:10%; "></td>
            </tr>
        </table>
    </form>
</center>
</body>
</html>
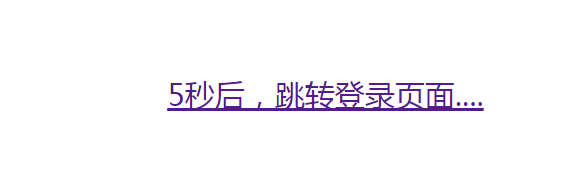
Then there is the page to jump when the user does not have permission. Here, it is set to automatically jump to the home page or login page after opening the page for 5 seconds.
<!DOCTYPE html>
<html lang="en">
<head>
    <meta charset="UTF-8">
    <title>You don't have this access</title>
</head>
<body>
<div style="margin: 100px 0 0 40%;font-size: 30px">
    <a id="aa123" href="/login.html">5 Seconds later, jump to the login page....</a>
</div>
</body>
<script>
    let time = 5;
    let interval = setInterval(setText, 1000)
    setTimeout(toLogin, 5000);

    function toLogin() {
        window.open("/login.html","_self")
    }

    function setText() {
        time--;
        document.getElementById("aa123").innerText = time + "Seconds later, jump to the login page...."
        if (time===0){
            clearInterval(interval)
        }
    }
</script>
</html>
java part
introduce
Considering that sql and MySQL configurations are too complicated, static data is used instead of sql in the project. Then simulate and write a part of the service layer.
Startup item
Set a new annotation in the Application class of the startup item of the project. Here, use the @ ComponentScan annotation to scan the annotation class. In order to save trouble, directly scan with * *
import org.springframework.boot.SpringApplication;
import org.springframework.boot.autoconfigure.SpringBootApplication;
import org.springframework.context.annotation.ComponentScan;

@SpringBootApplication
@ComponentScan(basePackages = {
        //Scan package, load annotation
        "com.eelinker.shiro.**",
        "com.eelinker.shiro.**.**",
        "com.eelinker.shiro.**.**.**"
})
public class ShiroApplication {
    public static void main(String[] args) {
        SpringApplication.run(ShiroApplication.class, args);
    }
}
Service layer
User
First, you need to create an entity class, User, User data information encapsulation, get, set and toString methods. There is a Role class that is undefined and represents the User's access rights.
public class User {
    //User id
    private int id;
    //user name
    private String username;
    //User password
    private String password;
    //User rights
    private Role role;
}
Role
There are three types of boss permission, employee permission, inspector permission and customer permission. The detailed permissions are also divided into administration, make and check
Customers can only access the most basic access rights. Other people have the customer access rights by default. These access rights need to log in. If they don't log in, they will jump to the login interface by default. In order to distinguish these permissions, an enumeration class is specially made (it is OK not to enumerate, but to replace it with string data)
package com.eelinker.shiro.entity;

import java.util.HashSet;
import java.util.Set;

/**
 *Role type
 *
 * @author Administrator
 */
public enum Role {

    //Boss all rights
    boss(permissionType.administration, permissionType.make, permissionType.check),

    //Employee production permission
    staff(permissionType.make),

    //Check personnel query permission
    checker(permissionType.check),

    //Customer access
    customer;

    private final permissionType[] types;

    Role(permissionType... types) {
        this.types = types;
    }
	/**
	 * Permission type
	 */
    public enum permissionType {
        administration,
        make,
        check;

        @Override
        public String toString() {
            return name();
        }
    }
	/**
	 * Get the user's permission name
	 */
    public Set<String> toSetValue() {
        Set<String> permsSet = new HashSet<>();
        for (permissionType type : types) {
            System.out.println(type.name());
            permsSet.add(type.name());
        }
        return permsSet;
    }
}
UserService
After encapsulating the user's information, the next step is to write the Service code. Because this is only a demonstration, you only need to show the user's access rights. The static List collection replaces the contents in the database, and select replaces the query statement encapsulation of mybatis. Query the user's specific data according to the user name.
import com.eelinker.shiro.entity.Role;
import com.eelinker.shiro.entity.User;
import org.springframework.stereotype.Service;

import java.util.ArrayList;
import java.util.List;

/**
 * Created System: Windows7
 * Created Code by  Administrator
 * Created Date: 2022/1/13 16:05
 *
 * @author Administrator
 */
@Service
public class UserService {
    private static List<User> userList = new ArrayList<User>() {
        {
            add(new User(1, "admin", "admin123", Role.boss));
            add(new User(2, "checker", "checker123", Role.checker));
            add(new User(3, "staff_zhang", "staff003", Role.staff));
            add(new User(4, "staff_li", "staff004", Role.staff));
            add(new User(5, "staff_wang", "staff005", Role.staff));
            add(new User(6, "staff_zhao", "staff006", Role.staff));
            add(new User(7, "customer7", "customer", Role.customer));
            add(new User(8, "customer8", "customer", Role.customer));
            add(new User(9, "customer9", "customer", Role.customer));
            add(new User(10, "customer10", "customer", Role.customer));
            add(new User(11, "customer11", "customer", Role.customer));
        }
    };

    private static User select(String username) {
        for (User user : userList) {
            if (user.getUsername().equals(username)) {
                return user;
            }
        }
        return null;
    }

}
shiro configuration section
Read yml configuration file data content
In spring boot, you can set the key value pairs in yml by yourself. This is convenient for developers to modify and debug. Here is my custom shiro configuration. Use shiro as a prefix. In shiro's next-level sub parameters, it is also possible to write the key value of login URL as loginUrl.
The name of the configuration file locates application Shiro YML (it is also possible to change the suffix to yaml)
shiro:
  #Login address url
  login-url: /login.html
  #Unauthorized jump
  unauthorized-url: /unauthor.html
  #url of successful login
  success-url: /index.html
  filter-class:
    - anon,org.apache.shiro.web.filter.authc.AnonymousFilter
    - logout,org.apache.shiro.web.filter.authc.LogoutFilter
  #Path filtering rules
  filter-rule:
    - /**.html,anon
    - /index/**,anon
    - /user/**,anon
    #Log out of the login address. The developer does not need to write relevant code or business, but can also log out of the login
    - /logout,logout
    #You need permission with this name to access this path (login is not mentioned here, and it will be triggered if you don't log in, and then jump to unauthorized URL)
    - /select/**,perms["check"]
    - /**,authc
After the configuration is written, the developer cannot read it directly. It needs to be configured in the main configuration phase, that is, application YML this file.
Here is the server Port this is the location where the project port is modified
spring.profiles.active here is to configure springboot. Read the application Shiro configured above YML file.
server:
  port: 8052
spring:
  profiles:
    active: shiro
  messages:
    encoding: UTF-8
  main:
    allow-bean-definition-overriding: true
After configuring the above information, you can create an entity class to encapsulate the data. The code is as follows. Because the configuration requires a set of key value pairs rather than a list set, you can use "," to separate two data. The path and face in front of the two data are the specific contents
filterClass is the class loading of the interceptor. This class will be created in the getFilterClassValue method and returned.
filterRule this is the interception path. The path in front of it is the path, and the access conditions behind it are allowed
@Component
@ConfigurationProperties(prefix = "shiro")
public class ShiroConfigReader {
    private String loginUrl;
    private String unauthorizedUrl;
    private String successUrl;
    private List<String> filterClass;
    private List<String> filterRule;
    // get set toString is omitted. In idea, you can use the alt+insert key to create
	public Map<String, Filter> getFilterClassValue() throws Exception {
        Map<String, Filter> map = new HashMap<>();
        if (filterClass != null) {
            for (String string : filterClass) {
                String[] keyAndValue = string.split(",");
                if (keyAndValue.length == 2) {
                    Class aClass = ClassLoader.getSystemClassLoader().loadClass(keyAndValue[1]);
                    Object object = aClass.newInstance();
                    if (object instanceof Filter) {
                        map.put(keyAndValue[0], (Filter) object);
                    }
                }
            }
            if (map.size() != 0) {
                return map;
            }
        }
        throw new IllegalAccessException("The parameter is empty or the value is incorrect");
    }

    public Map<String, String> getFilterRuleMap() {
        Map<String, String> map = new HashMap<>();
        if (filterRule != null) {
            for (String string : filterRule) {

                String[] keyAndValue = new String[2];
                int index = string.indexOf(",");
                if (index != -1) {
                    keyAndValue[0] = string.substring(0, index);
                    keyAndValue[1] = string.substring(index + 1);
                    map.put(keyAndValue[0], keyAndValue[1]);
                } else {
                    throw new IllegalArgumentException("The yml file parameter is incorrect");
                }
            }
            return map;
        }
        throw new IllegalArgumentException("The yml file parameter is incorrect");
    }
}
After getting these configuration information, you can read the data information according to the content, and subsequent modifications and additions can be made in yml. The annotation @ Component was found in the previous java file, so @ Autowired can be used to read it in shiro below. Read and load this information in shiroFilterFactoryBean
import com.eelinker.shiro.config.reader.ShiroConfigReader;
import org.apache.shiro.mgt.DefaultSessionStorageEvaluator;
import org.apache.shiro.mgt.DefaultSubjectDAO;
import org.apache.shiro.realm.Realm;
import org.apache.shiro.spring.web.ShiroFilterFactoryBean;
import org.apache.shiro.web.mgt.DefaultWebSecurityManager;
import org.springframework.beans.factory.annotation.Autowired;
import org.springframework.context.annotation.Bean;
import org.springframework.context.annotation.Configuration;

/**
 * springBoot There are three different aspects of integrated jwt authentication, corresponding to the following abc
 *
 * @author Administrator
 */
@Configuration
public class ShiroConfig {
    @Autowired
    private ShiroConfigReader reader;

    @Bean
    public Realm realm() {
        return new MyRealm();
    }

    @Bean
    public DefaultWebSecurityManager securityManager() {
        DefaultWebSecurityManager securityManager = new DefaultWebSecurityManager();
        securityManager.setRealm(realm());
        // Turn off ShiroDAO function
        DefaultSubjectDAO subjectDAO = new DefaultSubjectDAO();
        DefaultSessionStorageEvaluator defaultSessionStorageEvaluator = new DefaultSessionStorageEvaluator();
        // There is no need to save things in Shiro Session anywhere (including Http Session)
        defaultSessionStorageEvaluator.setSessionStorageEnabled(false);
        subjectDAO.setSessionStorageEvaluator(defaultSessionStorageEvaluator);
        securityManager.setSubjectDAO(subjectDAO);
        //Disable getSession method of Subject
//        securityManager.setSubjectFactory(subjectFactory());
        return securityManager;
    }

    @Bean
    public ShiroFilterFactoryBean shiroFilterFactoryBean() throws Exception {
        ShiroFilterFactoryBean shiroFilter = new ShiroFilterFactoryBean();
        shiroFilter.setSecurityManager(securityManager());
        shiroFilter.setLoginUrl(reader.getLoginUrl());
        shiroFilter.setUnauthorizedUrl(reader.getUnauthorizedUrl());
        shiroFilter.setFilters(reader.getFilterClassValue());
        shiroFilter.setFilterChainDefinitionMap(reader.getFilterRuleMap());
        return shiroFilter;
    }
}
In the first @ Bean, an object of MyRealm class is created. Here is the content required for user authorization and authentication.
doGetAuthorizationInfo method to judge whether the currently accessed user has access permission, such as checking and managing production permission. Here, you will query the user's data information, use the database for authentication, and read the user information for authentication.
doGetAuthenticationInfo this method is used when the user calls subject Login (token), you will enter here to configure permissions.
import com.eelinker.shiro.entity.User;
import com.eelinker.shiro.service.UserService;
import org.apache.shiro.authc.*;
import org.apache.shiro.authz.AuthorizationInfo;
import org.apache.shiro.authz.SimpleAuthorizationInfo;
import org.apache.shiro.realm.AuthorizingRealm;
import org.apache.shiro.subject.PrincipalCollection;
import org.springframework.beans.factory.annotation.Autowired;

import java.util.Set;

public class MyRealm extends AuthorizingRealm {

    @Autowired
    private UserService service;

    /**
     * User authentication
     */
    @Override
    protected AuthorizationInfo doGetAuthorizationInfo(PrincipalCollection principalCollection) {

        String username = (String) principalCollection.getPrimaryPrincipal();
        User user = service.selectByUsername(username);
        // Permission Set collection
        Set<String> permsSet = user.getRole().toSetValue();
        // Return permission
        SimpleAuthorizationInfo info = new SimpleAuthorizationInfo();
        info.setStringPermissions(permsSet);
        return info;
    }

    /**
     * User authority authentication (login)
     * This token is the jwtToken passed in from the filter
     */
    @Override
    protected AuthenticationInfo doGetAuthenticationInfo(AuthenticationToken token) throws AuthenticationException {
        //What is returned here is something similar to the account password, but jwtToken is a jwt string. You also need a class name for this Realm
        return new SimpleAuthenticationInfo(token.getPrincipal(), token.getCredentials(), "MyRealm");
    }

}
However, there is no userService to query the permissions of users Selectbyusername method, so add this method to userService
public User selectByUsername(String username) {
    for (User user : userList) {
        if (user.getUsername().equals(username)) {
            return user;
        }
    }
    return null;
}
Controller simple creation
There is a login page in the previously created page, so login now. The creation of class is omitted, and a UserService is automatically injected here. It can be verified in mapping
@Autowired
private UserService userService;

/**
 * User login
 *
 * @param username
 * @param password
 * @return
 */
@RequestMapping("/user/login")
public String login(@RequestParam String username, @RequestParam String password) {
    User user = userService.login(username, password);
    if (user != null) {
        Subject subject = SecurityUtils.getSubject();
        UsernamePasswordToken token = new UsernamePasswordToken(username, password);
        subject.login(token);
        return "redirect:/index.html";
    }
    return "redirect:/login.html";
}
However, there is no service code for verification. Go back to UserService and add the following code to verify whether the user name and password are correct.
public User login(String username, String password) {
    User user = select(username);
    if (user == null) {
        throw new NullPointerException("User does not exist !");
    }
    if (user.getPassword().equals(password)) {
        return user;
    } else {
        System.out.println("Password error");
    }
    return null;
}
As can be seen from the figure below, first enter the pure domain name, and then jump to login HTML has an effect on the interception page of the table name shiro
OK, look at the login page, enter the following data to check whether the login is successful, and the success will enter the index HTML page
Go back to the code and write a page that needs permission to access. The select in this page has been configured in the previous yml file. Query permission is required to access. After the code is written, restart and visit the web page
@ResponseBody
public Map<String, Object> getInfo() throws Exception {
    Map<String, Object> map = new HashMap<>();
    map.put("filterRule", reader.getFilterRuleMap());
    map.put("filterClass", reader.getFilterClassValue());
    map.put("loginUrl", reader.getLoginUrl());
    map.put("unauthorizedUrl", reader.getUnauthorizedUrl());
    map.put("successUrl", reader.getSuccessUrl());
    return map;
}
Enter localhost:8052/select/info on the web page to access. Since it has been restarted, it will jump to the login page. At this time, you need to log in again. (if it's still on the home page, it's the problem of web page cache. Just clear it.)
If there is a state of, there is no problem

What if the user doesn't log in, or logs in but doesn't have the right to check? What about users?
Enter localhost:8052/logout to log out and try again by entering localhost:8052/select/info.
If a user who is not logged in cannot access it, he will jump to the login page. If a logged in user does not have this permission, he will jump to the following page, and then jump to the login page