> View sliding is the basis for Android to implement custom controls. There are many ways to realize View sliding. Here we mainly explain six sliding methods, namely layout(), offsetLeft AndRight (), offsetTop AndBottom (), Layout Params, animation, scollTo and scollBy, and Scroller.
View sliding is the basis for Android to implement custom controls, and we will inevitably encounter View sliding in development. In fact, no matter what kind of sliding mode, the basic idea is similar: when the click event passes to View, the system records the coordinates of the touching point, when the finger moves, the system records the coordinates of the touching point after the movement and calculates the offset, and modifies the coordinates of the View through the offset. There are many ways to realize View sliding. Here we mainly explain six sliding methods, namely layout(), offsetLeft AndRight (), offsetTopAndBottom(), Layout Params, animation, scollTo and scollBy, and Scroller.
1 layout() method
The onLayout() method is called to set the display position when the View is drawn, so we can also control the coordinates of the View by modifying the left, top, right and bottom attributes of the View. First, we need to customize a View to get the coordinates of the touch points in the onTouchEvent() method. The code is as follows:
public boolean onTouchEvent(MotionEvent event) {
  //Acquiring abscissa and ordinate coordinates of finger touch points
  int x = (int) event.getX();
  int y = (int) event.getY();

  switch (event.getAction()) {
    case MotionEvent.ACTION_DOWN:
      lastX = x;
      lastY = y;
      break;
Next, we calculate the offset in the ACTION_MOVE event and call the layout() method to reposition the custom View.
case MotionEvent.ACTION_MOVE:
  //Calculate the distance of movement
  int offsetX = x - lastX;
  int offsetY = y - lastY;
  //Call the layout method to reposition it
  layout(getLeft()+offsetX, getTop()+offsetY,getRight()+offsetX , getBottom()+offsetY);
  break;
The layout() method is called to rearrange the screen every time you move to achieve the effect of moving View. Custom View. The entire code of CustomView is as follows:
public class CustomView extends View {
  private int lastX;
  private int lastY;
  public CustomView(Context context, AttributeSet attrs, int defStyleAttr) {
    super(context, attrs, defStyleAttr);
  }
  public CustomView(Context context, AttributeSet attrs) {
    super(context, attrs);
  }

  public CustomView(Context context) {
    super(context);
  }

  public boolean onTouchEvent(MotionEvent event) {
    //Acquiring abscissa and ordinate coordinates of finger touch points
    int x = (int) event.getX();
    int y = (int) event.getY();

    switch (event.getAction()) {
      case MotionEvent.ACTION_DOWN:
        lastX = x;
        lastY = y;
        break;
      case MotionEvent.ACTION_MOVE:
        //Calculate the distance of movement
        int offsetX = x - lastX;
        int offsetY = y - lastY;
        //Call the layout method to reposition it
        layout(getLeft()+offsetX, getTop()+offsetY,getRight()+offsetX , getBottom()+offsetY);
        break;
    }
  return true;
  }
}
Subsequently, we can refer to the custom View in the layout.
<?xml version="1.0" encoding="utf-8"?>
<LinearLayout xmlns:android="http://schemas.android.com/apk/res/android"
  xmlns:tools="http://schemas.android.com/tools"
  android:layout_width="match_parent"
  android:layout_height="match_parent"
  android:orientation="vertical">
  <com.example.liuwangshu.moonviewslide.CustomView
    android:id="@+id/customview"
    android:layout_width="80dp"
    android:layout_height="80dp"
    android:layout_margin="50dp"
    android:background="@android:color/holo_red_light" />
</LinearLayout>
Run the program as shown in Figure 1. The box in Figure 1 is our custom CustomView, which changes its position as our fingers slide.
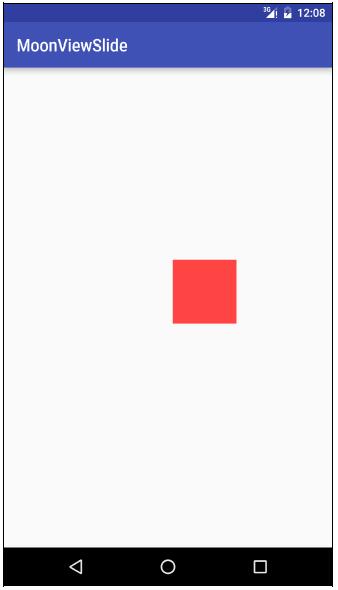
Sliding of View in Figure 1
2 offsetLeftAndRight() and offsetTopAndBottom()
These two methods have the same effect as layout() method and the same way of using them. We replace the code in ACTION_MOVE with the following code:
case MotionEvent.ACTION_MOVE:
  //Calculate the distance of movement
  int offsetX = x - lastX;
  int offsetY = y - lastY;
  //Migration of left and right
  offsetLeftAndRight(offsetX);
  //Migration of top and bottom
  offsetTopAndBottom(offsetY);
  break;
3 Layout Params (changing layout parameters)
LayoutParams mainly saves the layout parameters of a View, so we can change the layout parameters of the View through LayoutParams to achieve the effect of changing the position of the View. Similarly, we replace the code in ACTION_MOVE with the following code:
LinearLayout.LayoutParams layoutParams= (LinearLayout.LayoutParams)getLayoutParams();
    layoutParams.leftMargin = getLeft() + offsetX;
    layoutParams.topMargin = getTop() + offsetY;
    setLayoutParams(layoutParams);
Because the parent control is LinearLayout, we used LinearLayout.LayoutParams. If the parent control is RelativeLayout, use RelativeLayout.LayoutParams. In addition to Layout Params using layout, we can also use ViewGroup. Margin Layout Params to implement:
ViewGroup.MarginLayoutParams layoutParams = (ViewGroup.MarginLayoutParams)
getLayoutParams();
    layoutParams.leftMargin = getLeft() + offsetX;
    layoutParams.topMargin = getTop() + offsetY;
    setLayoutParams(layoutParams);
4 Animation
View animation can be used to move, create anim folder in res directory and translate.xml:
<?xml version="1.0" encoding="utf-8"?>
<set xmlns:android="http://schemas.android.com/apk/res/android">
  <translate
    android:duration="1000"
    android:fromXDelta="0"
    android:toXDelta="300" />
</set>
Next, call it in Java code, which is as follows:
mCustomView.setAnimation(AnimationUtils.loadAnimation(this, R.anim.translate));
Running the program, the small box we set will move 300 pixels to the right, and then return to its original position. To solve this problem, we need to add fillAfter="true" in translate.xml, as shown below. When you run the code, you will find that the box stays in its current position after moving 300 pixels to the right.
<?xml version="1.0" encoding="utf-8"?>
<set xmlns:android="http://schemas.android.com/apk/res/android" android:fillAfter="true">
  <translate
    android:duration="1000"
    android:fromXDelta="0"
    android:toXDelta="300" />
</set>
It should be noted that View animation does not change the position parameters of View. If a Button is rendered as above, clicking on the Button does not trigger the click event when the 300 pixels of the Button translation remain in the current position, but it triggers the click event when we click on the original position of the Button. For the system, the Button does not change its original location, so clicking on other locations certainly does not trigger the Button click event. Attribute animation in Android 3.0 solves this problem, because it can not only execute animation, but also change the position parameters of View. Of course, it's simpler to use attribute animation to move here. Let's have CustomView move 300 pixels to the right along the X axis in 1000ms. The code is as follows.
ObjectAnimator.ofFloat(mCustomView,"translationX",0,300).setDuration(100
0).start();
5 scrollTo and scollBy
scrollTo(x,y) means to move to a specific coordinate point, while scrollBy(dx,dy) means that the increment of movement is dx, dy. Among them, scollBy ultimately calls scollTo. View.java's scollBy and scollTo source code is as follows:
public void scrollTo(int x, int y) {
  if (mScrollX != x || mScrollY != y) {
    int oldX = mScrollX;
    int oldY = mScrollY;
    mScrollX = x;
    mScrollY = y;
    invalidateParentCaches();
    onScrollChanged(mScrollX, mScrollY, oldX, oldY);
    if (!awakenScrollBars()) {
      postInvalidateOnAnimation();
    }
  }
}

public void scrollBy(int x, int y) {
  scrollTo(mScrollX + x, mScrollY + y);
}
ScllTo and scollBy move the contents of View, and if used in ViewGroup, they move all their sub-Views. We replace the code in ACTION_MOVE with the following code:
((View)getParent()).scrollBy(-offsetX,-offsetY);
To achieve the effect of CustomView moving with your fingers, you need to set the offset to a negative value. Why set it to negative? Here is a detailed explanation. Suppose we are looking at the newspaper with a magnifying glass, which is used to display the contents of the words. Likewise, we can think of magnifiers as our cell phone screens, which are responsible for displaying content; newspapers as canvas under the screen, which are used to provide content. The content outside the magnifying glass, that is, the content of the newspaper will not disappear with the movement of the magnifying glass, it has always existed. Similarly, the view we can't see on our mobile screen doesn't mean it doesn't exist, as shown in Figure 2.

Figure 2 Initial Situation
There are three controls on the canvas, namely Button, EditText and SwichButton. Only Button is displayed on the screen of the phone, and its Android coordinates are (60,60). Now we call scrollBy(50,50), which literally means that the Button should be on the lower right side of the screen, but that's not the case. If we call scrollBy(50,50), the parameters are positive. Our mobile screen moves 50 to the X axis, that is, to the right, and then the mobile screen moves 50 to the Y axis, that is to say, 50 to the bottom. The effect of the translation is shown in Figure 3.

Figure 3 calls scrollBy(50,50)
Although the values we set are positive and move in the positive direction of the X and Y axes, Button moves in the opposite direction, which is the difference caused by different reference objects. So when we use scrollBy method, we need to set negative numbers to achieve the desired effect.
6 Scroller
When we use the scollTo/scollBy method to slide, the process is instantaneous, so the user experience is not good. Here we can use Scroller to achieve the transition effect of sliding, this process is not completed in an instant, but in a certain time interval. Scroller itself cannot slide View. It needs to work with View's computeScroll()
The effect of elastic sliding can only be achieved by means of cooperation of methods. Here we implement the CustomView to move smoothly to the right. First, we initialize the Scroller. The code is as follows:
public CustomView(Context context, AttributeSet attrs) {
  super(context, attrs);
  mScroller = new Scroller(context);
}
Next, rewrite the computeScroll() method, which the system calls in the draw() method when drawing the View. In this method, we call the scrollTo() method of the parent class and obtain the current scroll value continuously through Scroller. We call invalidate() method for continuous redrawing every small sliding distance, and computeScroll() method is called for redrawing, so we can achieve smooth moving effect by moving a small distance continuously and coherently.
@Override
  public void computeScroll() {
    super.computeScroll();
    if(mScroller.computeScrollOffset()){
      ((View) getParent()).scrollTo(mScroller.getCurrX(),mScroller.getCurrY());
      invalidate();
    }
  }
We write a smoothScrollTo method in CustomView, call Scroller's startScroll() method, and move delta pixels along the X axis in 2000 Ms. The code is as follows:
public void smoothScrollTo(int destX,int destY){
  int scrollX=getScrollX();
  int delta=destX-scrollX;
  mScroller.startScroll(scrollX,0,delta,0,2000);
  invalidate();
}
Finally, we call the smoothScrollTo() method of CustomView in ViewSlideActivity.java. Here we set CustomView to move 400 pixels to the right along the X axis.
mCustomView.smoothScrollTo(-400,0);
This article is selected from Android Advanced Light Click on this link to view the book on the blog view website.
If you want to get more wonderful articles in time, you can search for "blog point of view" or scan the two-dimensional code below and pay attention to it.