preface
SMOKE is a real-time monocular 3D object detector for automatic driving. Why pay attention to this article? This is because the obstacle perception of Baidu Apollo 7.0 camera released these two days is also improved based on this model; So it made me interested.
Paper name: smoke: single stage monolithic 3D object detection via keynote estimation
Thesis address: https://arxiv.org/pdf/2002.10111.pdf
Open source address: https://github.com/lzccccc/SMOKE

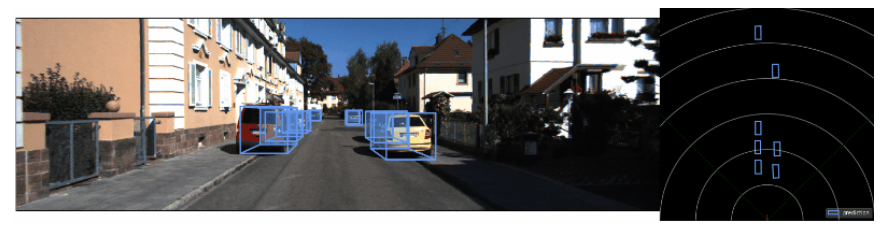
This paper creates an SME development environment based on docker; The effect of SME model is as follows.
catalogue
2, Download and enter the Ubuntu 18 image
6, Establish} SME code environment
1, Environmental requirements
- Ubuntu 16.04 / Ubuntu 18.04
- Python 3.7
- Pytorch 1.3.1
- CUDA 10.0
2, Download and enter the Ubuntu 18 image
Official website: https://hub.docker.com/_/ubuntu?tab=tags
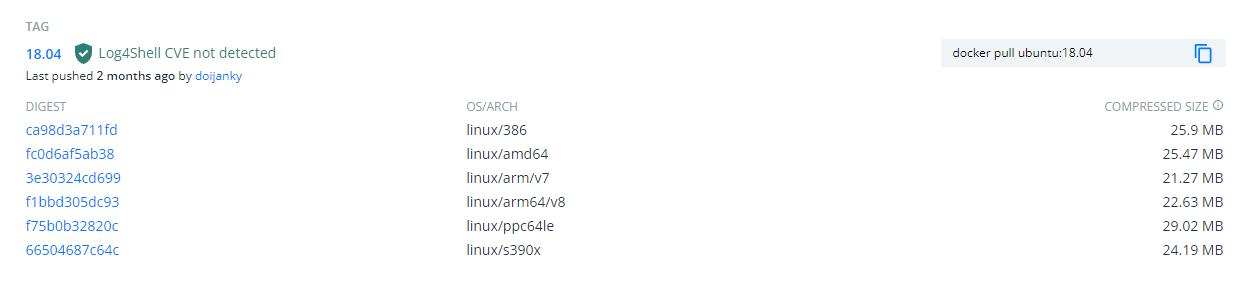
docker has been installed in the computer, and its version is greater than 19.0; Pull the Ubuntu 18 image:
docker pull ubuntu:18.04
Enter Ubuntu 18 image (support GPU acceleration)
docker run -i -t --gpus all -e NVIDIA_DRIVER_CAPABILITIES=compute,utility -e NVIDIA_VISIBLE_DEVICES=all ubuntu:18.04 bash
If you want to train the model normally, you need memory, and you also need to map directories;
docker run -i -t -v /home/disk1/guopu/:/home/guopu:rw --gpus all --shm-size 18G -e NVIDIA_DRIVER_CAPABILITIES=compute,utility -e NVIDIA_VISIBLE_DEVICES=all ubuntu:18.04 bash
Explain: -- SHM size 18G refers to the maximum 18G memory used in docker; If you need a larger, you can set it freely;
-v /home/disk1/guopu/:/home/guopu:rw refers to the mapping directory, which maps the real local directory / home/disk1/guopu / to / home/guopu in docker. In this way, modifying the contents of the mapped directory in docker will really affect the local directory files.
PS: enter the Ubuntu 18 image (common method, but this method cannot normally use the GPU)
docker run -i -t ubuntu:18.04 /bin/bash
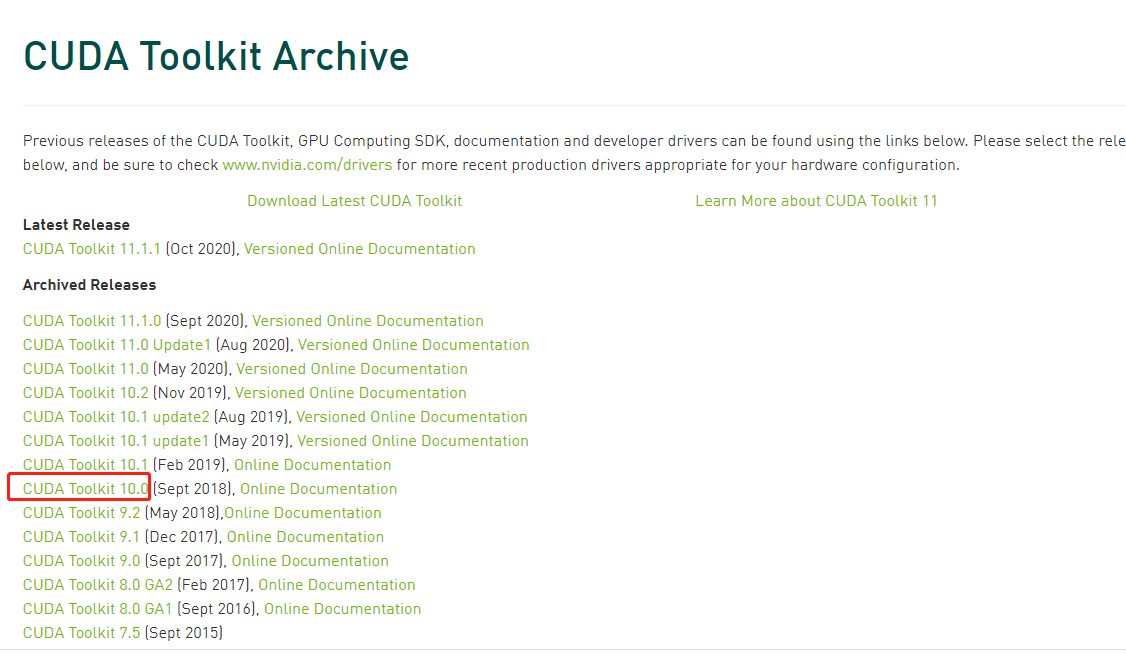
3, Installing CUDA 10.0
First in CUDA Toolkit Archive Find CUDA Toolkit 10.0 on the web page. Address: https://developer.nvidia.com/CUDA-TOOLKIT-ARCHIVE
Select the corresponding system parameters and download the CUDA Toolkit 10.0 file:
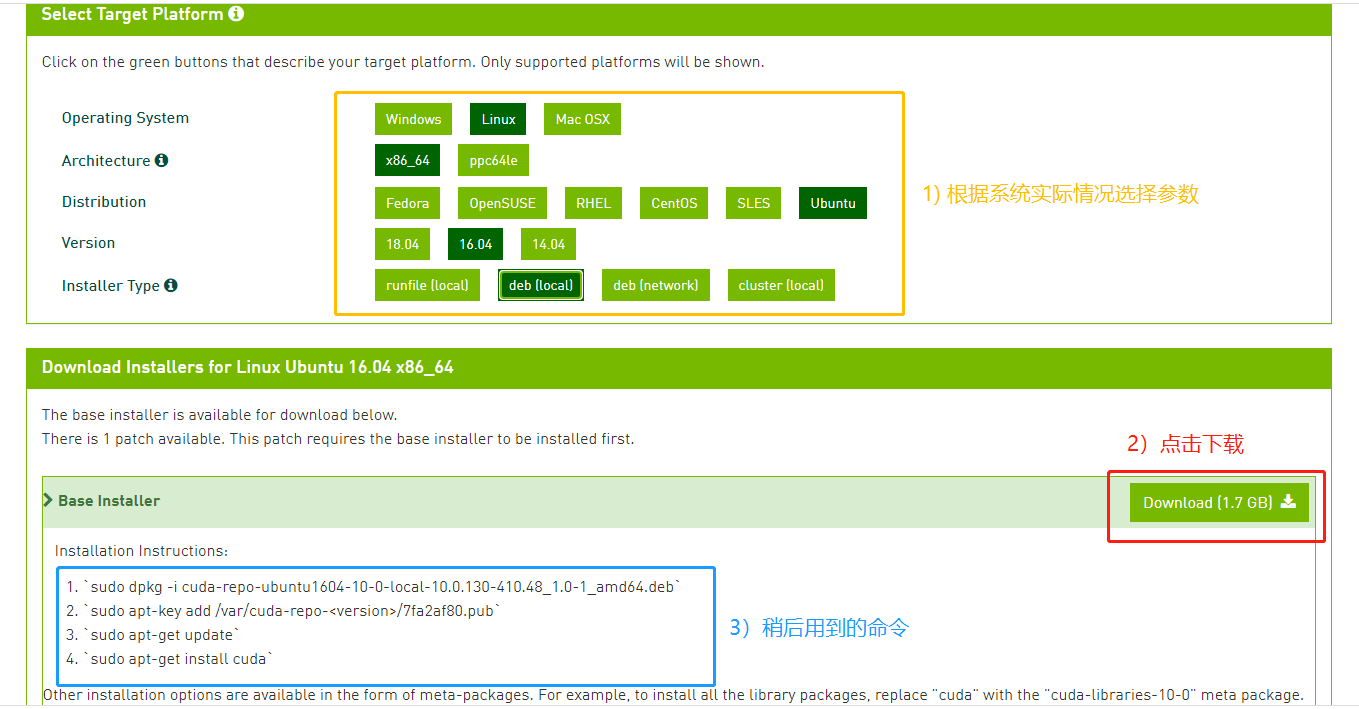
First of all Download the deb installation package locally. Then use ctrl+alt+F1 to enter the terminal and close the graphical user interface with the following command:
service lightdm stop
Execute the first dpkg command in the blue box above
dpkg -i cuda-repo-ubuntu1604-10-0-local-10.0.130-410.48_1.0-1_amd64.deb
After execution, in the path / etc / apt / sources list. D will generate a cuda-10-0-local-10.0 130-410.48. List file. Use the cat command to view the file:
$ cat cuda-10-0-local-10.0.130-410.48.list
deb file:///var/cuda-repo-10-0-local-10.0.130-410.48 /
sources.list.d / folder is said to be used to store third-party installation sources. For example, when we execute the dpkg command just now, we actually create a new local installation source, which is stored in the generated.
As you can see, the local CUDA warehouse is placed in / var / cuda-repo-10-0-local-10.0 130-410.48 /
Now execute the second dpkg command
Official: apt key add / var / CUDA repo - < version > / 7fa2af80 pub
Actual execution:
apt-key add /var/cuda-repo-10-0-local-10.0.130-410.48/7fa2af80.pub
Then execute the third and fourth dpkg commands
apt-get update
apt-get install cuda
After the installation is successful, execute NVIDIA SMI to see the NVIDIA driver;
After installation, add environment variables and open bashrc file,
Command line input: VIM ~ / Bashrc, then add the following three lines at the end of the file, save and exit
export CUDA_HOME=/usr/local/cuda

export PATH=$PATH:$CUDA_HOME/bin

export LD_LIBRARY_PATH=/usr/local/cuda-10.0/lib64${LD_LIBRARY_PATH:+:${LD_LIBRARY_PATH}}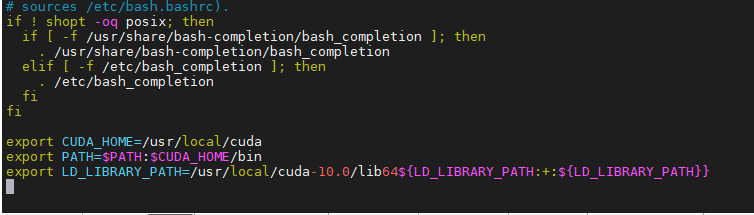
Then refresh the environment variable and enter: source ~ / bashrc
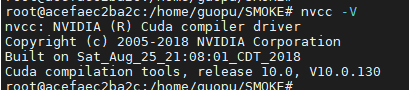
Test whether CUDA is installed successfully. Enter {nvcc - V and the display is as follows. The description is OK
4, Installing Python 3.7
4.1 upgrade package index and software
apt update
4.2 installing and compiling the required packages
apt install build-essential zlib1g-dev libbz2-dev libncurses5-dev libgdbm-dev libnss3-dev libssl-dev libreadline-dev libffi-dev wget
4.3 download Python 3 seven
Download python-3.7.0 from the official website 4. Tgz documents
wget https://www.python.org/ftp/python/3.7.4/Python-3.7.4.tgz
4.4. Unzip the Python installation package
tar -xzvf Python-3.7.4.tgz
4.5. Compilation and installation
cd Python-3.7.4
./configure --prefix=/usr/local/src/python37
make
make install
4.6. Establish soft connection
ln -s /usr/local/src/python37/bin/python3.7 /usr/bin/python3.7
ln -s /usr/local/src/python37/bin/pip3.7 /usr/bin/pip3.7
The default setting is Python 3 7 and PIP3 seven
ln -s /usr/local/src/python37/bin/python3.7 /usr/bin/python
ln -s /usr/local/src/python37/bin/pip3.7 /usr/bin/pip
After installation, check the python version: python -V} pip version: pip -V

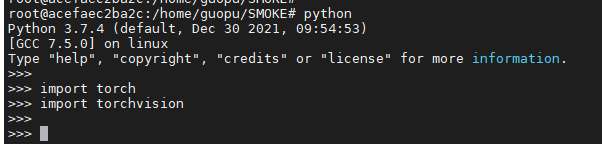
5, Install pytorch 1.3 one
Execute the following command:
pip install torch==1.3.1 torchvision==0.4.2
But I found it too slow, so I used Tsinghua soft acceleration to install it
pip install torch==1.3.1 torchvision==0.4.2 -i https://pypi.tuna.tsinghua.edu.cn/simple/
It's installed. Check it
6, Establish} SME code environment
First download the code, and then establish the;
git clone https://github.com/lzccccc/SMOKE
python setup.py build develop
After creation, you can see:
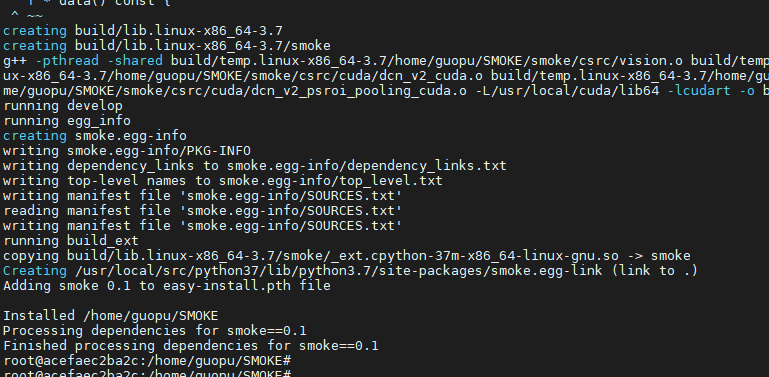
It's done~~