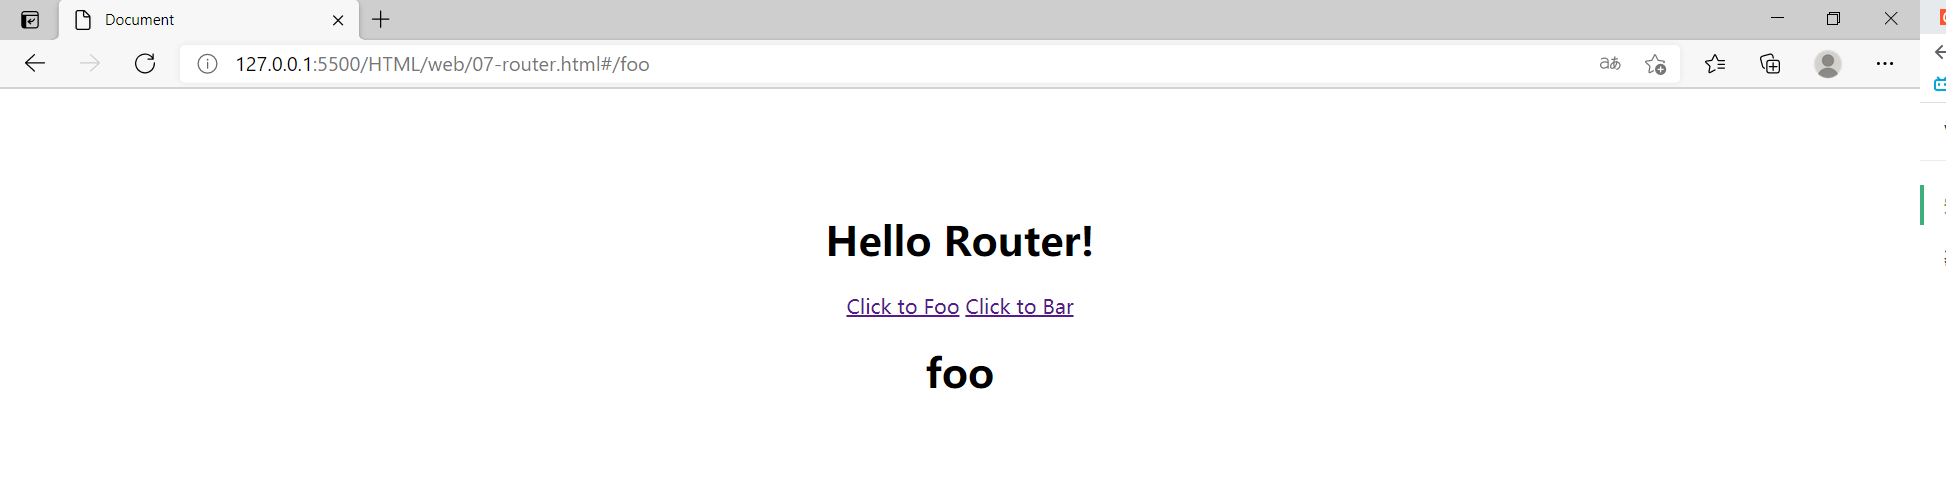
1, Reference CDN to build a simple route
Official website address: https://router.vuejs.org/zh/installation.html
<!DOCTYPE html>
<html lang="en">
<head>
  <meta charset="UTF-8">
  <meta http-equiv="X-UA-Compatible" content="IE=edge">
  <meta name="viewport" content="width=device-width, initial-scale=1.0">
  <title>Document</title>
</head>
<style>
  #app{
    text-align: center;
    margin-top: 100px;
  }
</style>
<body>
  <script src="https://unpkg.com/vue/dist/vue.js"></script>
  <script src="https://unpkg.com/vue-router/dist/vue-router.js"></script>
  <div id="app">
    <h1>Hello Router!</h1>
    <p>
      <!-- use router-link Components to navigate. -->
      <!-- Pass in `to` Property specifies the link. -->
      <!-- <router-link> By default, it will be rendered as a `<a>` label -->
      <router-link to="/foo">Click to Foo</router-link>
      <router-link to="/bar">Click to Bar</router-link>
    </p>
    <!-- Route exit -->
    <!-- The components to which the route matches will be rendered here -->
    <router-view></router-view>
  </div>
  <script>
    // 0. If you use modularization mechanism to program and import Vue and vuerouter, you need to call Vue use(VueRouter)
    // 1. Define (route) components.
    // You can import from other files
    const Foo = { template: '<h1>foo</h1>' }
    const Bar = { template: '<h1>bar</h1>' }
    // 2. Define route
    // Each route should map a component. Where "component" can be
    // Via Vue The component constructor created by extend(),
    // Or, just a component configuration object.
    // We'll talk about nested routing later.
    const routes = [
      { path: '/foo', component: Foo },
      { path: '/bar', component: Bar }
    ]
    // 3. Create a router instance and then transfer it to 'routes' configuration
    // You can also transfer other configuration parameters, but let's do it first.
    const router = new VueRouter({
      routes // Abbreviation: routes
    })
    // 4. Create and mount root instances.
    // Remember to inject routes through router configuration parameters,
    // So that the whole application has routing function
    const app = new Vue({
      router
    }).$mount('#app')
    // Now, the application has started!
  </script>
</body>
</html>
1,router-link
Instead of using the commonly used a tag, the page URL jump uses a custom component router link to create links. This allows Vue Router to change the URL and process the URL without reloading the page.
<router-link to="/foo">Click to Foo</router-link>
<router-link to="/bar">Click to Bar</router-link>
2,router-view
Router view will display the components corresponding to the url. Is to display the page or component after clicking.
The clicked navigation links will be added with the style class = "router link exact active router link active". It can be used to set the distinction between clicked and non clicked styles.
3. Properties of router link
to
A link that represents the destination route. When clicked, the internal will immediately transfer the value of to to the router Push (), so this value can be a string or an object describing the target location.
<router-link to="/foo">Click to Foo</router-link>
replace
If the replace attribute is set, router will be called when clicking Replace() instead of router No history will be left after the navigation.
append
After the append property is set, its path is added before the current (relative) path. For example, we navigate from / A to a relative path B. If append is not configured, the path is / B; if it is configured, it is / a/b.
tag
Sometimes you want to render to some kind of label, such as
- . So we use the tag prop class to specify what kind of tag. Similarly, it will still listen for clicks and trigger navigation.
-
<router-link to="/foo" tag="li">foo</router-link>
<!-- Render results -->
<li>foo</li>
active-class
Set the CSS class name used when the link is activated. It can be replaced by the following code.
<style>
   .active{
      background-color : red;
   }
</style>
<p>
   <router-link v-bind:to = "{ path: '/a'}" active-class = "active">Router Link 1</router-link>
   <router-link v-bind:to = "{ path: '/b'}" tag = "span">Router Link 2</router-link>
</p>
Note that active class = "active" is used here.
exact-active-class
Configure the class that should be activated when links are accurately matched. It can be replaced by the following code.
<p>
   <router-link v-bind:to = "{ path: '/a'}" exact-active-class = "active">Router Link 1</router-link>
   <router-link v-bind:to = "{ path: '/b'}" tag = "span">Router Link 2</router-link>
</p>
event
Declare events that can be used to trigger navigation. It can be a string or an array containing strings.
<router-link v-bind:to = "{ path: '/route1'}" event = "mouseover">Router Link 1</router-link>event = "mouseover"
The above code sets event as mouseover, and the HTML content of navigation will change when the mouse moves to Router Link 1. Move the mouse to the top to switch.
2, Dynamic routing
We often need to map all routes to which a pattern matches to the same component. For example, we have a User component, which should be used to render all users with different ID s. Then, we can use "dynamic segment" in the routing path of Vue router to achieve this effect:
const User = {
  template: '<div>User</div>'
}

const router = new VueRouter({
  routes: [
    // Dynamic path parameters start with a colon
    { path: '/user/:id', component: User }
  ]
})
Now, things like / user/foo and / user/bar will map to the same route.
A path parameter is marked with a colon:. When a route is matched, the parameter value will be set to this$ route. Params, which can be used within each component. Therefore, we can update the User's template and output the current User's ID:const User = { template: '<div>User {{ $route.params.id }}</div>' }You can set multiple "path parameters" in a route, and the corresponding values will be set to $route Params.
Respond to changes in routing parameters
Remind me that when using routing parameters, such as navigating from / user/foo to / user/bar, the original component instances will be reused. Because both routes render the same component, reuse is more efficient than destroying and re creating. However, this also means that the component's lifecycle hook will no longer be called.
When reusing components, if you want to respond to changes in routing parameters, you can simply watch (monitor changes) $route Object:const User = { template: '...', watch: { $route(to, from) { // Respond to routing changes } } }Or use the beforeRouteUpdate navigation guard introduced in 2.2:
const User = {
  template: '...',
  beforeRouteUpdate (to, from, next) {
    // react to route changes...
    // don't forget to call next()
  }
}
Capture all routes or 404 Not found routes
General parameters will only match the characters in the URL fragment separated by /. If you want to match any path, we can use wildcard (*):
{
  // Will match all paths
  path: '*'
}
{ // Will match any path starting with ` / user - ' path: '/user-*' }When using wildcard routing, please ensure that the routing order is correct, that is, the routing with wildcard should be placed last. Route {path: '*'} is usually used for client 404 errors. If you use History mode, make sure your server is configured correctly.
When using a wildcard, $route A parameter named pathMatch will be automatically added in params. It contains the part of the URL that is matched by wildcards:
// Give a route {path: '/user - *'}
this.$router.push('/user-admin')
this.$route.params.pathMatch // 'admin'
// Give a route {path: '*'}
this.$router.push('/non-existing')
this.$route.params.pathMatch // '/non-existing'
Advanced matching mode
Vue router uses path to regexp as the path matching engine, so it supports many advanced matching patterns, such as optional dynamic path parameters, matching zero or more, one or more, and even custom regular matching. Check its documentation to learn high-order path matching, and this example shows how Vue router uses this kind of matching.
Match priority
Sometimes, the same path can match multiple routes. At this time, the matching priority is in the order of route definition: whoever defines it first will have the highest priority.
3, Nested routing
With the help of Vue router and nested routing configuration, this relationship can be simply expressed.
<div id="app">
  <router-view></router-view>
</div>
const User = {
  template: '<div>User {{ $route.params.id }}</div>'
}

const router = new VueRouter({
  routes: [
    { path: '/user/:id', component: User }
  ]
})
The < router View > here is the top-level exit, rendering the components matched by the highest-level route. Similarly, a rendered component can also contain its own nested < router View >. For example, add a < router View > in the template of the User component:
const User = {
  template: `
    <div class="user">
      <h2>User {{ $route.params.id }}</h2>
      <router-view></router-view>
    </div>
  `
}
To render components in nested exits, you need to use the children configuration in the parameters of vueroter:
const router = new VueRouter({
  routes: [
    { path: '/user/:id', component: User,
      children: [
        {
          // When / user/:id/profile matches successfully,
          // The UserProfile will be rendered in the User's < router View >
          path: 'profile',
          component: UserProfile
        },
        {
          // When / user/:id/posts match successfully
          // UserPosts will be rendered in User's < router View >
          path: 'posts',
          component: UserPosts
        }
      ]
    }
  ]
})
Note that nested paths starting with / are treated as root paths. This allows you to make full use of nested components without setting nested paths.
You will find that children configuration is an array of routing configurations like routes configuration, so you can nest multiple routes.
At this time, based on the above configuration, when you access / user/foo, the User exit will not render anything, because there is no matching sub route. If you want to render something, you can provide an empty sub route:const router = new VueRouter({ routes: [ { path: '/user/:id', component: User, children: [ // When / user/:id matches successfully, // UserHome will be rendered in User's < router View > { path: '', component: UserHome }, // ... Other sub routes ] } ] })4, HTML5 History mode
The default hash mode of Vue router uses the hash of the URL to simulate a complete URL, so when the URL changes, the page will not be reloaded.
If we don't want ugly hash, we can use the history mode of routing, which makes full use of history Pushstate API to complete URL jump without reloading the page.const router = new VueRouter({ mode: 'history', routes: [...] })When you use history mode, the url is like a normal url, for example http://yoursite.com/user/id , also good-looking!
However, to play this mode well, it also needs background configuration support. Because our application is a single page client application, if the background is not configured correctly, when users directly access it in the browser http://oursite.com/user/id It will return 404, which is not good-looking.
Therefore, you should add a candidate resource covering all situations on the server: if the URL does not match any static resources, the same index should be returned HTML page, which is the page your app depends on.5, Global front guard
You can use router Before each registers a global front guard:
const router = new VueRouter({ ... })

router.beforeEach((to, from, next) => {
  // ...
})
Document address: https://router.vuejs.org/zh/