Spark Learning: using idea to develop spark applications
This article is based on jdk1 8. The idea development tool and maven are all configured.
background
Because saprk service has been deployed on the remote centos server, but the code of spark based application is developed in the local idea, how to make the locally developed spark code run and debug on the remote spark service has become an urgent problem to be solved.
Installation of scala plug-in under idea
For the idea development tool, file - > setting - > plugins - > Browse repositories, search scala and download the plug-ins corresponding to your idea version.
New maven project under idea
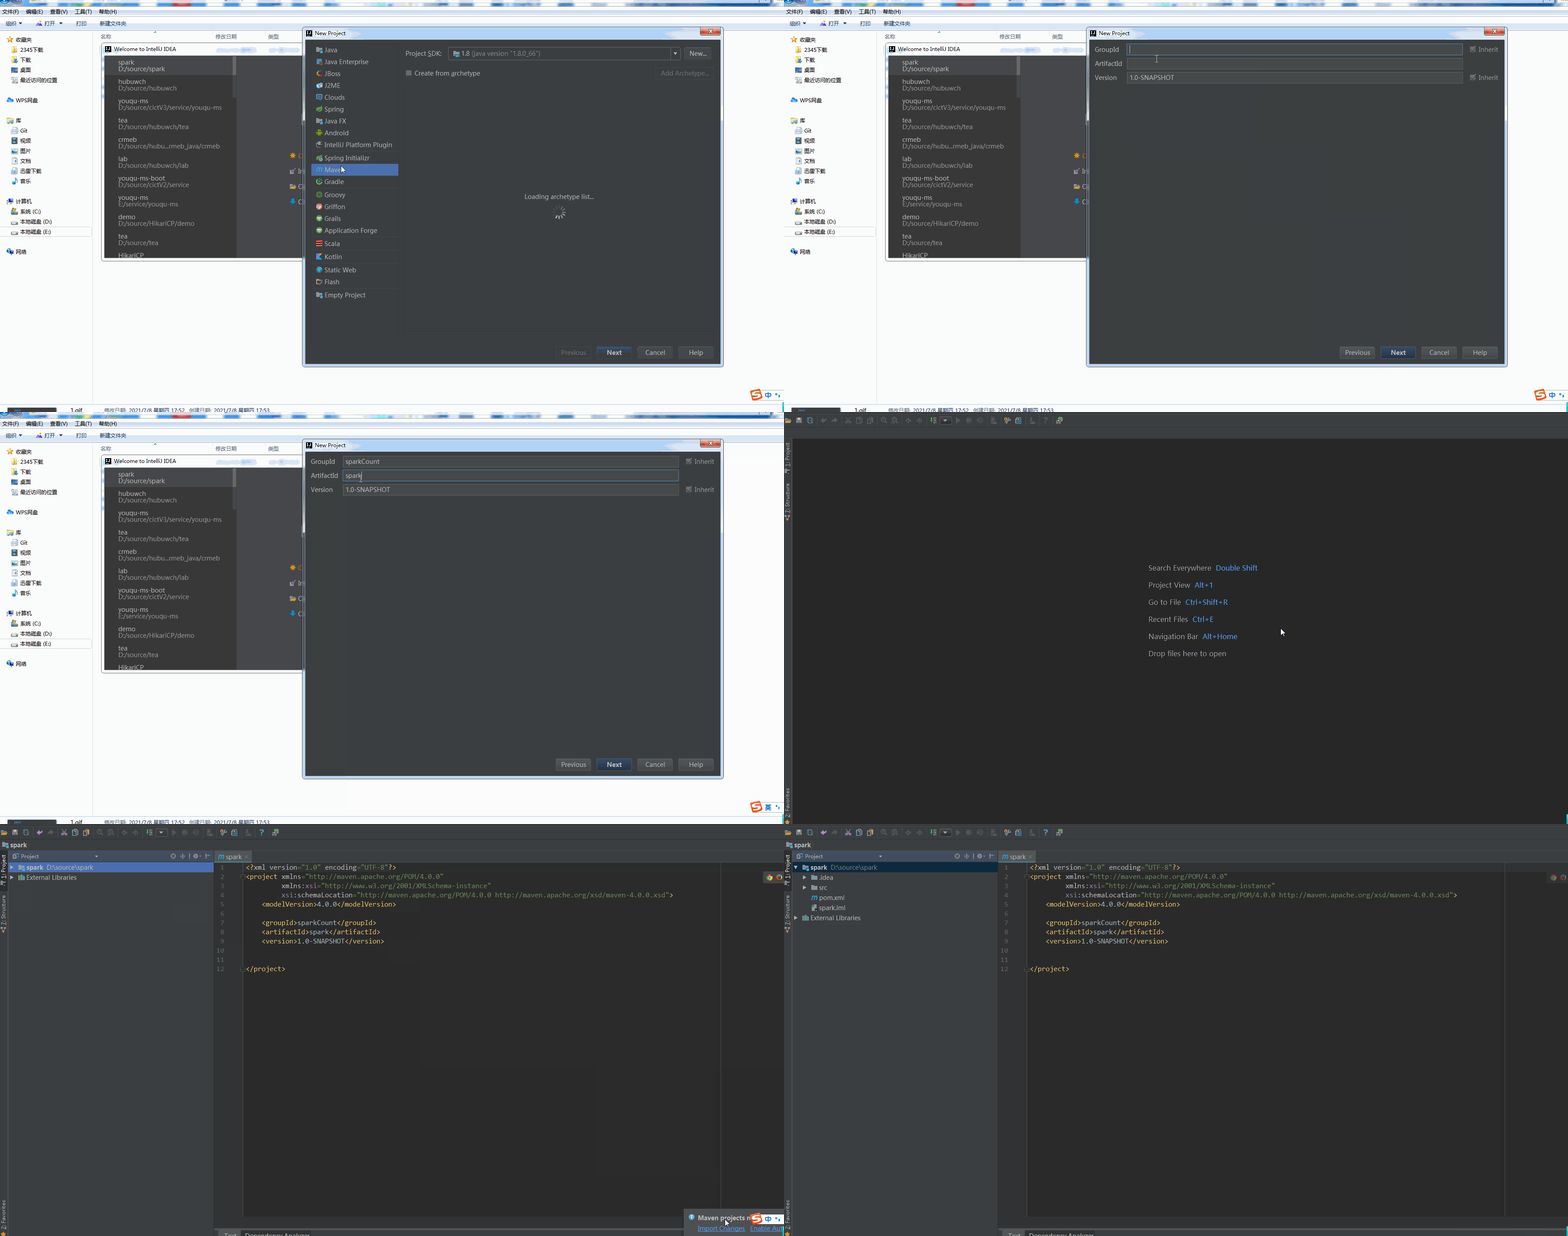
Configuring Scala for projects
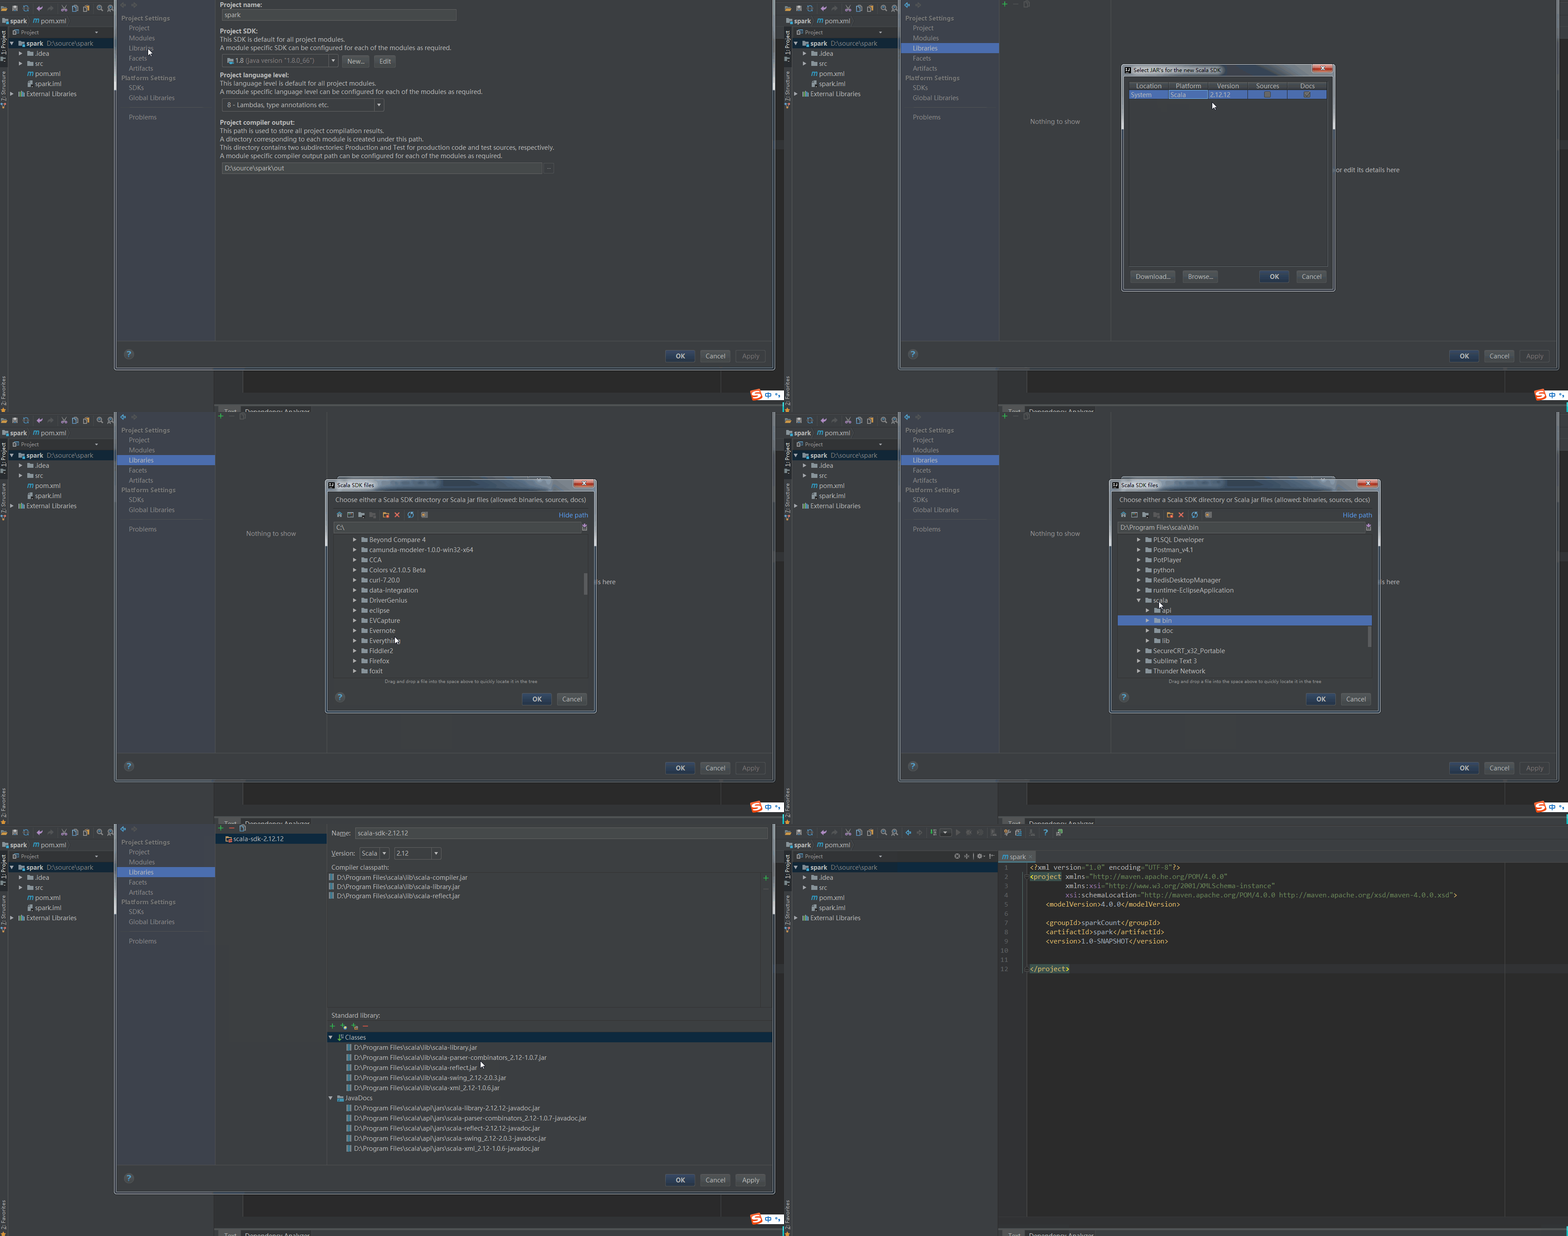
Configure maven dependencies
Modify POM XML file, add the following content:
 <dependencies>
    <dependency>
        <groupId>org.apache.spark</groupId>
        <artifactId>spark-core_2.12</artifactId>
        <version>3.1.2</version>
    </dependency>
    <dependency>
        <groupId>org.apache.hadoop</groupId>
        <artifactId>hadoop-client</artifactId>
        <version>2.6.5</version>
    </dependency>
</dependencies>

<build>
    <plugins>
        <plugin>
            <groupId>org.scala-tools</groupId>
            <artifactId>maven-scala-plugin</artifactId>
            <version>2.15.2</version>
            <executions>
                <execution>
                    <goals>
                        <goal>compile</goal>
                        <goal>testCompile</goal>
                    </goals>
                </execution>
            </executions>
        </plugin>

    </plugins>
</build>
The spark core version should be the same as Spark 3.1.2 stand alone installation and deployment The spark version deployed in the article is consistent because in the article Spark development practice: building a Scala environment The version of the local scala configuration in is 2.12, otherwise the program will report an error.
After configuration, wait for the dependent package to load.
Create a new Scala object with the following code:
object WordCount {

    def main(args: Array[String]): Unit = {
    val conf = new SparkConf()
               .setAppName("WordCount")
               .setMaster("spark://localhost:7078")
    val sc = new SparkContext(conf)

    val file = sc.textFile("/home/bigData/softnew/spark/README.md")
	//    val rdd = file.flatMap(line => line.split("")).map(word => (word,1)).reduceByKey(_+_)
	//    rdd.collect()
	//    rdd.foreach(println)
	//    rdd.collectAsMap().foreach(println)
	    println("#####################"+file.count()+"#####################")
	    println("#####################"+file.first()+"#####################")


	  }

}
Configure remote deployment path
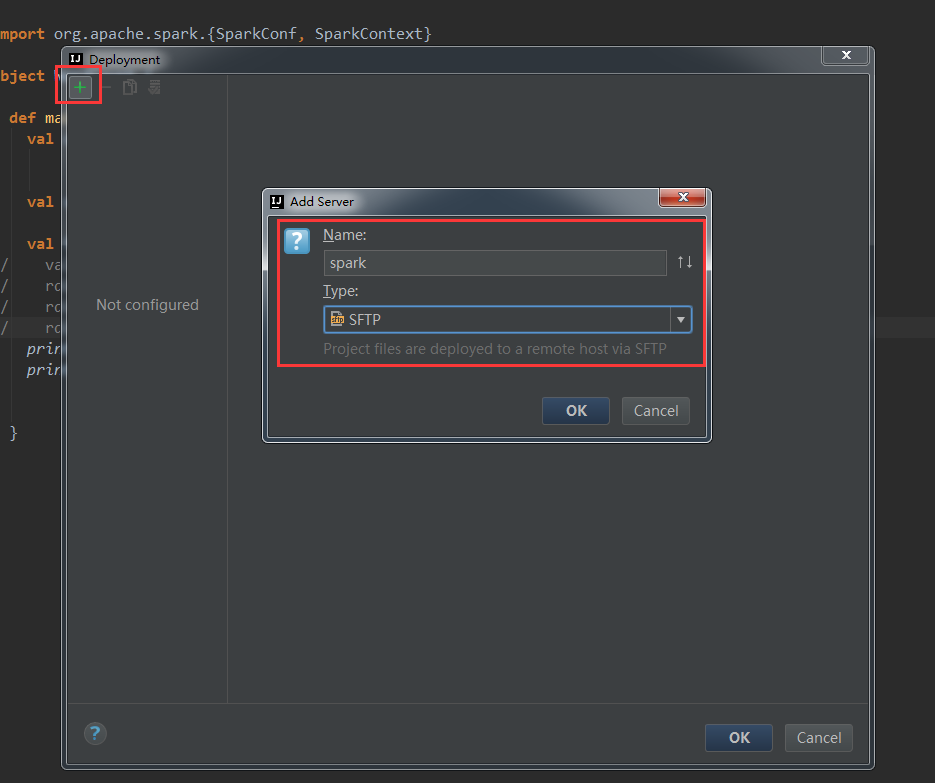
Scala files will eventually be packaged into jar files, and then submitted to the spark master node to perform tasks using the spark submit tool. Since the spark submit tool is on the remote server, you need to configure the deployment of jar packages to the remote server, as follows:
Idea tools - > deployment - > configuration, the deployment window will pop up, click the + sign, and select type and name according to the following figure:
Configure connection:
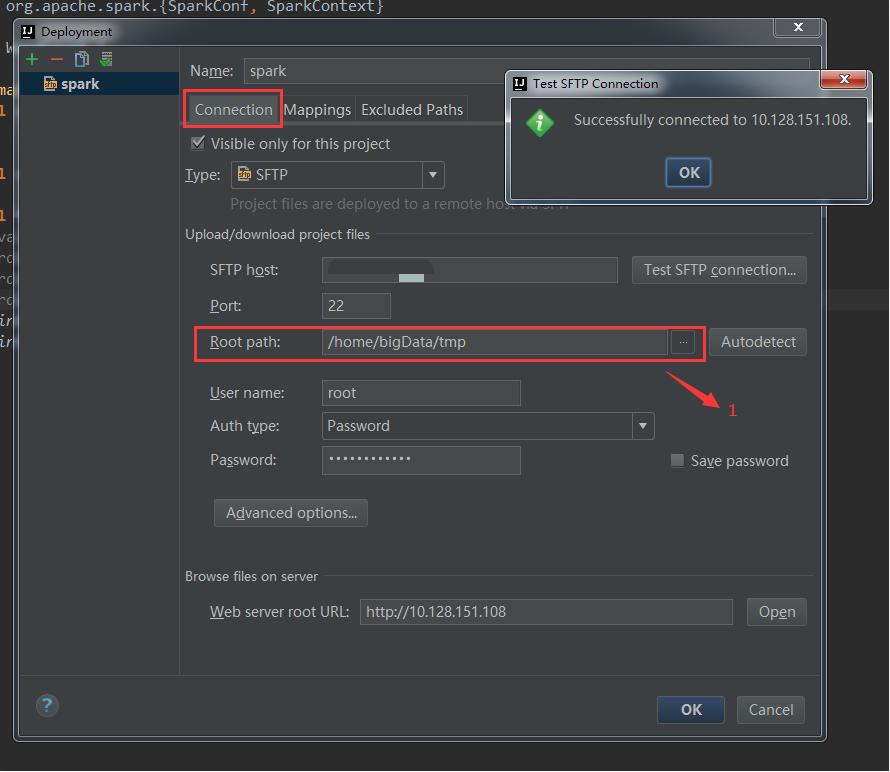
Among them, SFTP host, user name and Password are the ip, account and Password of the remote server. After configuration, you can click the test SFTP connection button behind SFTP host to test whether it can be connected. Root path is the directory where the remote server deploys the jar package.
Configure Mappings:
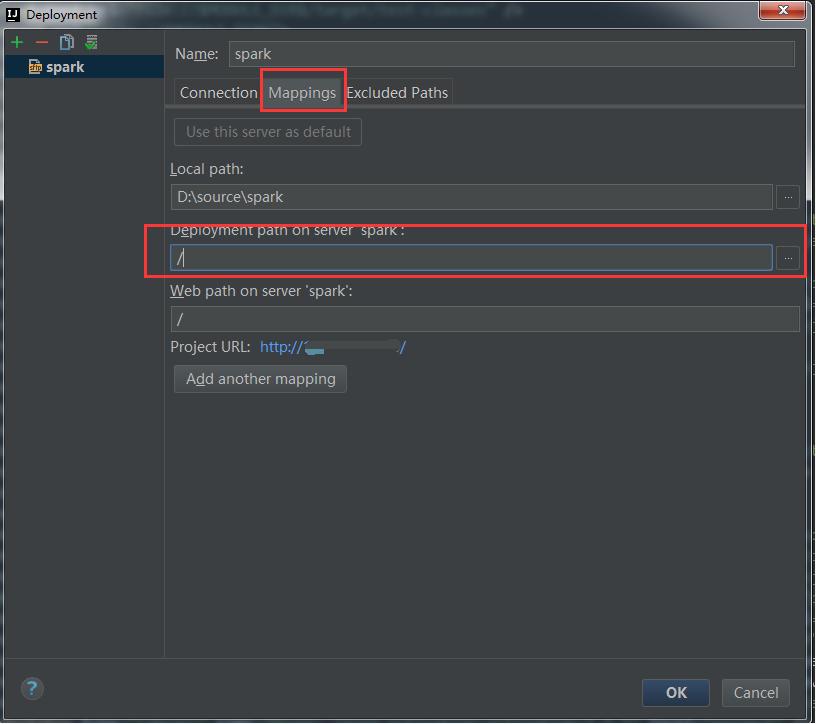
Where, the deployment path on server spark path is relative to the Root path in the configuration connection.
Idea tools - > deployment - > option. The configuration is as follows:
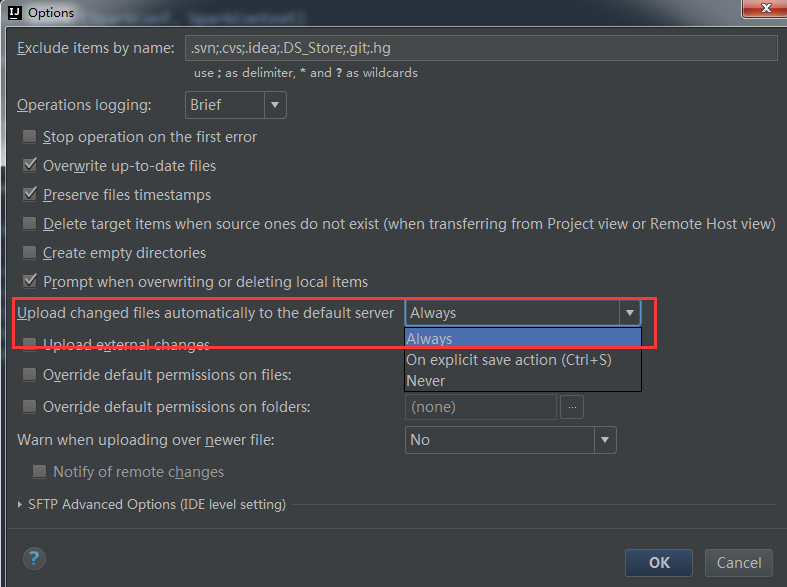
Call mvn package to package and upload to the remote server:
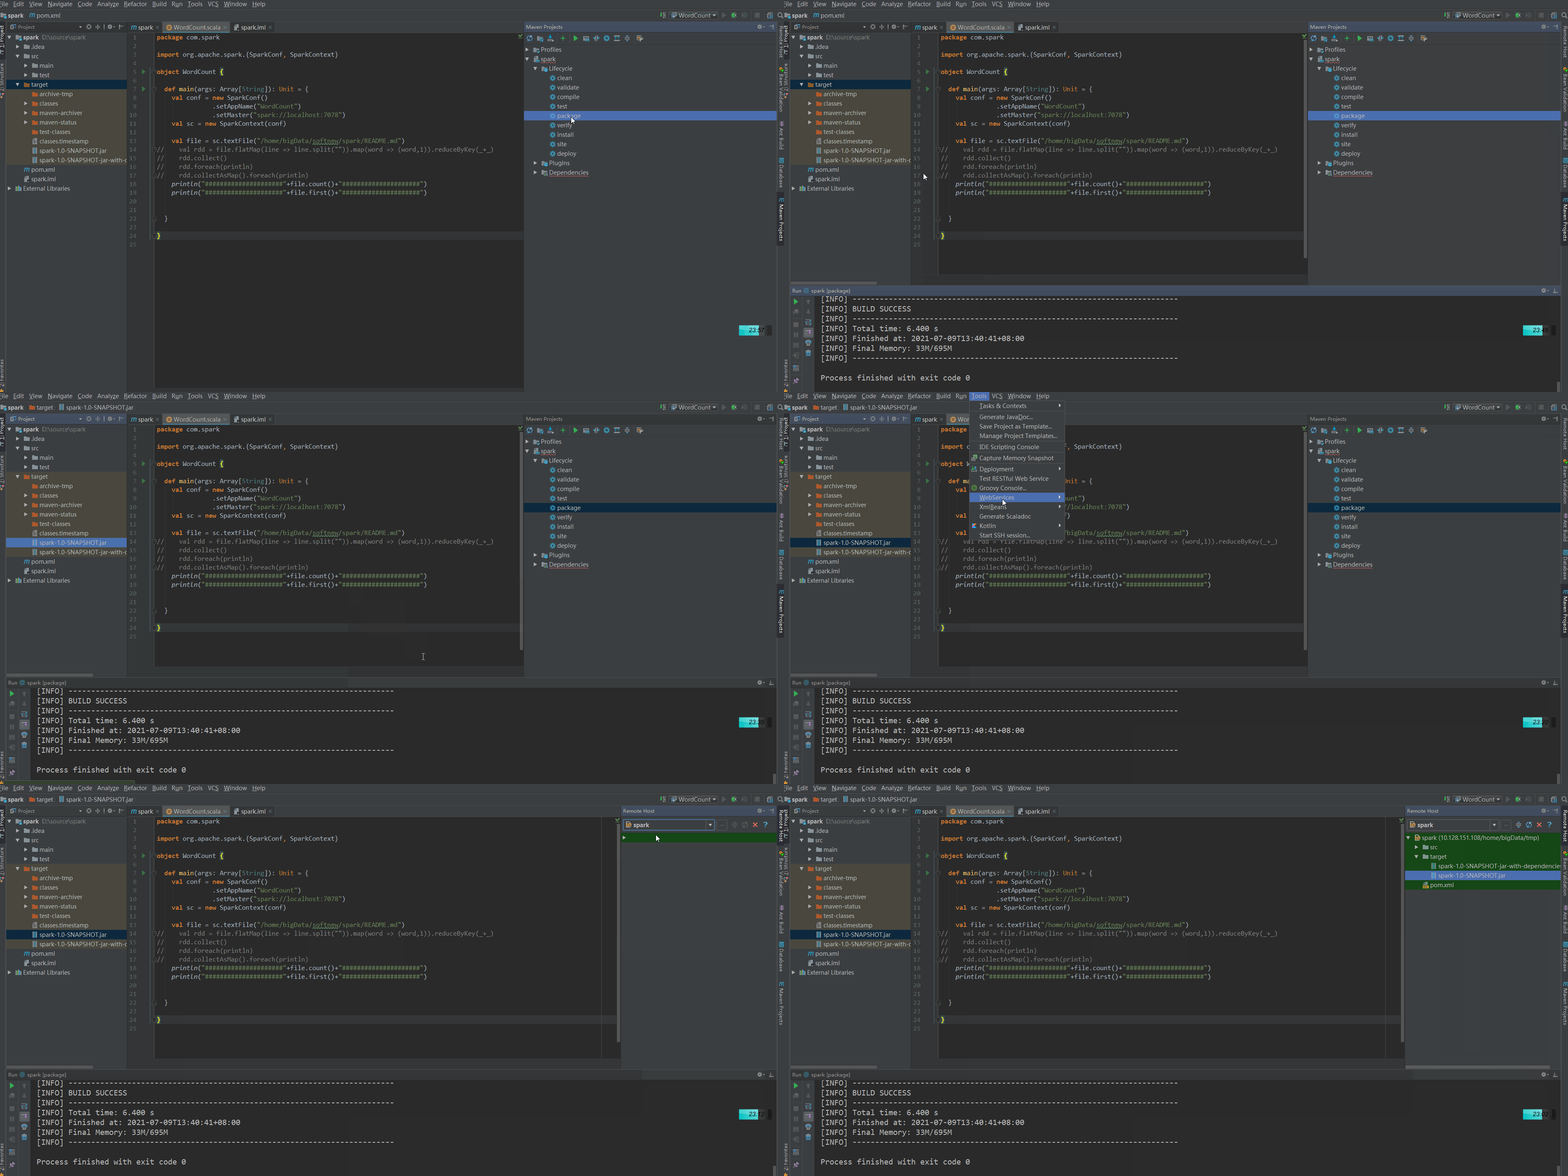
Find the uploaded jar package under the Root path of the remote server, then execute the following command to upload the jar to the spark server, and start the jvm to listen on port 8336:
spark-submit --class com.spark.WordCount --master spark://localhost:7078 --driver-java-options "-Xdebug -Xrunjdwp:transport=dt_socket,server=y,suspend=y,address=8336" spark-1.0-SNAPSHOT.jar
Where, – master spark master node address
address=8336 jvm listening port
Server = y indicates that the started JVM is the debugger. If n, it indicates that the JVM started is a debugger
Suspend = y means that the started JVM will pause and wait until the debugger is connected. If n, the JVM will not pause and wait
As shown in the figure below, start listening successfully.
[root@localhost target]# spark-submit --class com.spark.WordCount --master spark://localhost:7078  --driver-java-options "-Xdebug  -Xrunjdwp:transport=dt_socket,server=y,suspend=y,address=8336" spark-1.0-SNAPSHOT.jar
Listening for transport dt_socket at address: 8336
Configure remote debugging
As follows:
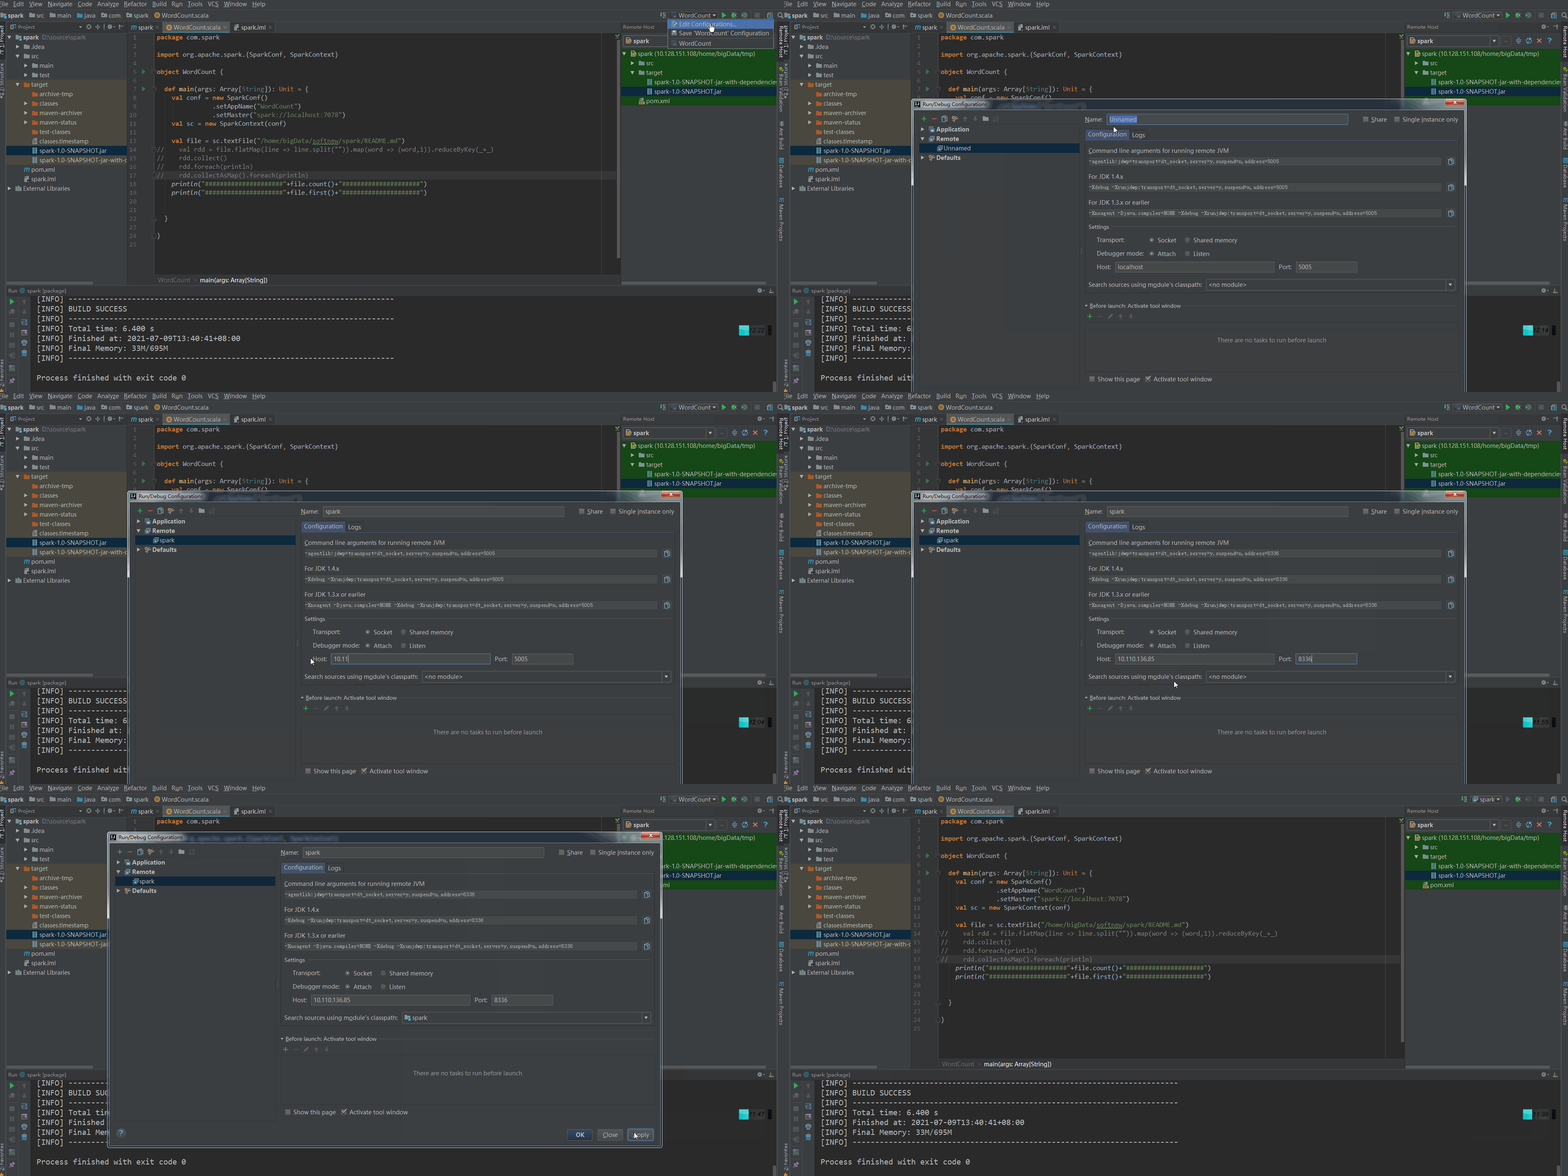
Select the remote debugging project just created in the debug in the upper right corner and click Run.
You can see that the listening interface just started spark submit generates a debugging log, as follows:
21/07/09 13:58:57 INFO TaskSchedulerImpl: Killing all running tasks in stage 0: Stage finished
21/07/09 13:58:57 INFO DAGScheduler: Job 0 finished: count at WordCount.scala:18, took 3.201509 s
#####################108#####################
21/07/09 13:58:57 INFO SparkContext: Starting job: first at WordCount.scala:19
...
21/07/09 13:58:57 INFO TaskSchedulerImpl: Killing all running tasks in stage 1: Stage finished
21/07/09 13:58:57 INFO DAGScheduler: Job 1 finished: first at WordCount.scala:19, took 0.088650 s
###################### Apache Spark#####################
21/07/09 13:58:57 INFO SparkUI: Stopped Spark web UI at http://192.168.136.53:4040
21/07/09 13:58:57 INFO StandaloneSchedulerBackend: Shutting down all executors
conclusion
The debugging method described in this article is only suitable for the scenario of single person learning and development, not for multi person development, because we have to observe the debugging log of the remote server, which will be confused. If it is in the actual company development scenario, it is recommended to configure saprk environment locally for development and debugging.
Reference articles
Setting up remote debugging spark environment with window+idea