The first two articles talked to readers about JdbcTemplate, the simplest data persistence scheme in Spring Boot. JdbcTemplate is simple but not very useful because it is not as convenient as MyBatis. The steps to integrate MyBatis in Spring+Spring MVC are still a bit complex. To configure multiple beans, Spring Boot further simplifies this so that MyBatis is basically availableTo get out of the box, this article looks at how MyBatis works in Spring Boot.
Project Creation
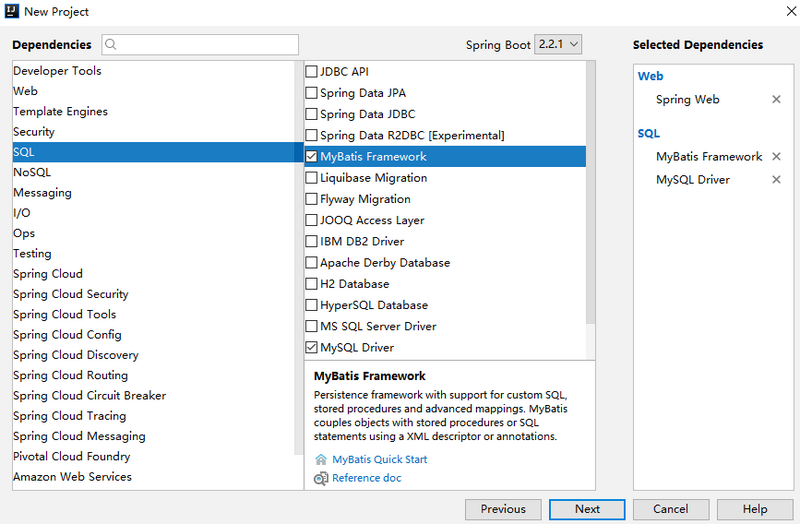
Start by creating a basic Spring Boot project, adding Web dependencies, MyBatis dependencies, and MySQL-driven dependencies, as follows:
After successful creation, add Druid dependencies and lock the MySQL driver version, complete dependencies as follows:
<dependency>
    <groupId>org.springframework.boot</groupId>
    <artifactId>spring-boot-starter-web</artifactId>
</dependency>
<dependency>
    <groupId>org.mybatis.spring.boot</groupId>
    <artifactId>mybatis-spring-boot-starter</artifactId>
    <version>2.0.0</version>
</dependency>
<dependency>
    <groupId>com.alibaba</groupId>
    <artifactId>druid-spring-boot-starter</artifactId>
    <version>1.1.10</version>
</dependency>
<dependency>
    <groupId>mysql</groupId>
    <artifactId>mysql-connector-java</artifactId>
    <version>5.1.28</version>
    <scope>runtime</scope>
</dependency>
In this way, the project is created successfully.Partners note that MyBatis and Druid depend on different naming than other libraries and belong to the xxx-spring-boot-stater mode, which means that the starter was provided by a third party.
Basic Usage
The use of MyBatis is essentially the same as JdbcTemplate, starting with the basic information for configuring the database in application.properties:
spring.datasource.url=jdbc:mysql:///test01?useUnicode=true&characterEncoding=utf-8
spring.datasource.username=root
spring.datasource.password=root
spring.datasource.type=com.alibaba.druid.pool.DruidDataSource
Once the configuration is complete, MyBatis can create a Mapper to use, for example, I create a UserMapper2 directly here, as follows:
public interface UserMapper2 {
    @Select("select * from user")
    List<User> getAllUsers();

    @Results({
            @Result(property = "id", column = "id"),
            @Result(property = "username", column = "u"),
            @Result(property = "address", column = "a")
    })
    @Select("select username as u,address as a,id as id from user where id=#{id}")
    User getUserById(Long id);

    @Select("select * from user where username like concat('%',#{name},'%')")
    List<User> getUsersByName(String name);

    @Insert({"insert into user(username,address) values(#{username},#{address})"})
    @SelectKey(statement = "select last_insert_id()", keyProperty = "id", before = false, resultType = Integer.class)
    Integer addUser(User user);

    @Update("update user set username=#{username},address=#{address} where id=#{id}")
    Integer updateUserById(User user);

    @Delete("delete from user where id=#{id}")
    Integer deleteUserById(Integer id);
}
This is a fully annotated way to write SQL, not an XML file.
The @Select, @Insert, @Update, and @Delete annotations correspond to the select, insert, update, and delete tags in the XML respectively, and the @Results annotation is similar to the ResultMap mapping file in XML (the getUserById method aliases the field of the query result mainly to demonstrate the use of the @Results annotation to small partners).
In addition, the @SelectKey annotation can be used to implement the primary key backfill function, that is, when the data is successfully inserted, the successfully inserted data id is assigned to the user object's id property.
Once UserMapper2 has been created, there are two ways to configure a mapper scan. One is to add the @Mapper annotation directly to UserMapper2. One drawback is that all Mappers are added manually. If one falls, it will make a mistake. Another way to do this once and for all is to add a Mapper scan directly to the startup class, as follows:
@SpringBootApplication
@MapperScan(basePackages = "org.javaboy.mybatis.mapper")
public class MybatisApplication {
    public static void main(String[] args) {
        SpringApplication.run(MybatisApplication.class, args);
    }
}
Okay, after that, you can test the use of Mapper.
mapper map
Of course, developers can also write SQL in XML, such as creating a UserMapper, as follows:
public interface UserMapper {
    List<User> getAllUser();

    Integer addUser(User user);

    Integer updateUserById(User user);

    Integer deleteUserById(Integer id);
}
Then create the UserMapper.xml file as follows:
<?xml version="1.0" encoding="UTF-8" ?>
<!DOCTYPE mapper
        PUBLIC "-//mybatis.org//DTD Mapper 3.0//EN"
        "http://mybatis.org/dtd/mybatis-21-mapper.dtd">
<mapper namespace="org.javaboy.mybatis.mapper.UserMapper">
    <select id="getAllUser" resultType="org.javaboy.mybatis.model.User">
        select * from t_user;
    </select>
    <insert id="addUser" parameterType="org.javaboy.mybatis.model.User">
        insert into user (username,address) values (#{username},#{address});
    </insert>
    <update id="updateUserById" parameterType="org.javaboy.mybatis.model.User">
        update user set username=#{username},address=#{address} where id=#{id}
    </update>
    <delete id="deleteUserById">
        delete from user where id=#{id}
    </delete>
</mapper>
Write the corresponding SQL of the method in the interface directly in the XML file.
So where exactly is this UserMapper.xml?There are two places to put it, the first is directly under the package where UserMapper is located:

UserMapper.xml placed here is automatically scanned, but there is another Maven problem that causes XML resources in the java directory to be ignored when packaging projects. Therefore, if UserMapper.xml is placed under the package, you need to add the following configuration to the pom.xml file to avoid automatically ignoring the XML files in the java directory when packaging:
<build>
    <resources>
        <resource>
            <directory>src/main/java</directory>
            <includes>
                <include>**/*.xml</include>
            </includes>
        </resource>
        <resource>
            <directory>src/main/resources</directory>
        </resource>
    </resources>
</build>
Of course, UserMapper.xml can also be placed directly in the resources directory, so that you don't have to worry about being ignored when packaging, but in the resources directory, you must create the same directory level as the Mapper interface package directory to ensure that the XML and Mapper interfaces are together again after packaging, otherwise the XML files will not be scanned automatically and you will need to add them at that timeAdditional configuration.For example, I created a mapper directory in the resources directory to place the mapper files as follows:

Now tell mybatis where to scan mapper in application.properties:
mybatis.mapper-locations=classpath:mapper/*.xml
With this configuration, the mapper can be used normally.Note that this does not require profile filtering in the pom.xml file.
Principle analysis
In the SM integration, developers need to provide themselves with two beans, one SqlSessionFactory Bean, the other MapperScannerConfigurer, which in Spring Boot do not need to be provided by the developers themselves, but does not mean that the two beans are not needed. In the org.mybatis.spring.boot.autoconfigure.MybatisAutoConfiguration class, we canYou can see that Spring Boot provides both beans, with some of the source code as follows:
@org.springframework.context.annotation.Configuration
@ConditionalOnClass({ SqlSessionFactory.class, SqlSessionFactoryBean.class })
@ConditionalOnSingleCandidate(DataSource.class)
@EnableConfigurationProperties(MybatisProperties.class)
@AutoConfigureAfter(DataSourceAutoConfiguration.class)
public class MybatisAutoConfiguration implements InitializingBean {

  @Bean
  @ConditionalOnMissingBean
  public SqlSessionFactory sqlSessionFactory(DataSource dataSource) throws Exception {
    SqlSessionFactoryBean factory = new SqlSessionFactoryBean();
    factory.setDataSource(dataSource);
    return factory.getObject();
  }
  @Bean
  @ConditionalOnMissingBean
  public SqlSessionTemplate sqlSessionTemplate(SqlSessionFactory sqlSessionFactory) {
    ExecutorType executorType = this.properties.getExecutorType();
    if (executorType != null) {
      return new SqlSessionTemplate(sqlSessionFactory, executorType);
    } else {
      return new SqlSessionTemplate(sqlSessionFactory);
    }
  }
  @org.springframework.context.annotation.Configuration
  @Import({ AutoConfiguredMapperScannerRegistrar.class })
  @ConditionalOnMissingBean(MapperFactoryBean.class)
  public static class MapperScannerRegistrarNotFoundConfiguration implements InitializingBean {

    @Override
    public void afterPropertiesSet() {
      logger.debug("No {} found.", MapperFactoryBean.class.getName());
    }
  }
}
The annotations on the class show that the configuration here takes effect when SqlSessionFactory, SqlSessionFactoryBean, and DataSource are present in the current class path, and both SqlSessionFactory and SqlTemplate are provided.Why look at this code?This will be an important reference for the next article when Songo shares the configuration of MyBatis's multiple data sources in Spring Boot.
Okay, let's start with this, and you can download the related cases from GitHub: https://github.com/lenve/javaboy-code-samples
Focus on Public Number, focus on Spring Boot+ micro-services and front-end and back-end separation, share regular video tutorials, reply to Java after attention, and pick up the Java dry goods that Songgo prepared for you!