6, Spring Boot and data access
1. Introduction
For the data access layer, whether SQL (relational) or NOSQL (non relational), Spring Boot adopts the method of integrating Spring Data for unified processing by default. Add a large number of automatic configurations and mask many settings. Introduce various xxxTemplate and xxxRepository to simplify our operation on the data access layer. For us, we only need to make simple settings.
2. Spring Boot integrates JDBC
Add the following dependencies:
<!--        JDBC rely on-->
        <dependency>
            <groupId>org.springframework.boot</groupId>
            <artifactId>spring-boot-starter-jdbc</artifactId>
        </dependency>

        <!--        MySQL Drive dependency-->
        <dependency>
            <groupId>mysql</groupId>
            <artifactId>mysql-connector-java</artifactId>
            <scope>runtime</scope>
        </dependency>
Configuration in configuration file:
spring:
  datasource:
    username: root
    password: root
    url: jdbc:mysql://192.168.1.106:3306/jdbc
    driver-class-name: com.mysql.cj.jdbc.Driver
Test connection
//Get data source
@Autowired
DataSource dataSource;

/**
 * Test whether the connection is obtained successfully
 * @throws SQLException
 */
@Test
void contextLoads() throws SQLException {
    System.out.println(dataSource.getClass());
    Connection connection = dataSource.getConnection();
    System.out.println();
    System.out.println(connection);
    connection.close();
}
Automatic configuration principle:
Relevant configurations of data sources are explored in DataSourceProperties
Directory of dependent packages:
jetbrains://idea/navigate/reference?project=spring-boot-06-jdbc&fqn=org.springframework.boot.autoconfigure.jdbc
Refer to DataSourceAutoConfiguration to create a data source according to the configuration. By default, Hikari connection pool is used.
You can use:
spring.datasource.type
Specify a custom data source type
You can also customize the data source type
DataSourceInitializer: ApplicationListener;
Function:
1),runSchemaScripts(); Run the table creation statement;
2),runDataScripts(); Run sql statements that insert data;
By default, you only need to name the file:
schema-*.sql(Table creation) data-*.sql((data)
Default rule: schema.sql,schema-all.sql;
have access to
	schema:
      - classpath:department.sql
      Specify location
Operation database: the JdbcTemplate operation database is automatically configured
Using IDEA to execute sql script to create database table
Mode 1:
-
Create sql script under resources
-
Use naming conventions: schema - SQL (create table), data - SQL (data)
-
Configuration in configuration file:
spring: datasource: username: root password: root url: jdbc:mysql://192.168.1.106:3306/jdbc driver-class-name: com.mysql.cj.jdbc.Driver initialization-mode: always -
The running program will automatically create tables or add data
Mode 2:
-
Create a new sql folder under the resources folder and put in the sql script file
-
Profile configuration
spring: datasource: username: root password: root url: jdbc:mysql://192.168.1.106:3306/jdbc driver-class-name: com.mysql.cj.jdbc.Driver initialization-mode: always schema: - classpath:sql/department.sql -
The running program created the table successfully
Examples of manipulating database data
package com.why.springboot.controller;

import org.springframework.beans.factory.annotation.Autowired;
import org.springframework.jdbc.core.JdbcTemplate;
import org.springframework.stereotype.Controller;
import org.springframework.web.bind.annotation.GetMapping;
import org.springframework.web.bind.annotation.ResponseBody;

import java.util.List;
import java.util.Map;

/**
 * @Description TODO Operation database
 * @Author why
 * @Date 2020/12/25 14:48
 * Version 1.0
 **/
@Controller
public class HelloController {

    @Autowired
    JdbcTemplate jdbcTemplate;

    @ResponseBody
    @GetMapping("/query")
    public Map<String,Object> map(){
        List<Map<String, Object>> list = jdbcTemplate.queryForList("SELECT * FROM `department`");
        return list.get(0);
    }
}
3. Spring Boot integrates Druid data sources
Introducing Druid dependency
<!-- https://mvnrepository. com/artifact/com. Alibaba / Druid Druid dependency -- >
<dependency>
    <groupId>com.alibaba</groupId>
    <artifactId>druid</artifactId>
    <version>1.2.4</version>
</dependency>
**Druid version dependent address:** https://mvnrepository.com/artifact/com.alibaba/druid
Profile configuration:
spring:
  datasource:
#   Basic configuration of data source
    username: root
    password: 123456
    driver-class-name: com.mysql.jdbc.Driver
    url: jdbc:mysql://localhost:3306/ssm_crud
    type: com.alibaba.druid.pool.DruidDataSource
#   Other configurations of data source
    initialSize: 5
    minIdle: 5
    maxActive: 20
    maxWait: 60000
    timeBetweenEvictionRunsMillis: 60000
    minEvictableIdleTimeMillis: 300000
    validationQuery: SELECT 1 FROM DUAL
    testWhileIdle: true
    testOnBorrow: false
    testOnReturn: false
    poolPreparedStatements: true
#   Configure the filters for monitoring statistics interception. After removing the filters, the sql in the monitoring interface cannot be counted, and 'wall' is used for firewall
    filters: stat,wall,log4j
    maxPoolPreparedStatementPerConnectionSize: 20
    useGlobalDataSourceStat: true
    connectionProperties: druid.stat.mergeSql=true;druid.stat.slowSqlMillis=500
At this time, although the property is configured, it does not take effect and needs to be configured by yourself
Configuration makes properties effective
package com.why.springboot.config;

import com.alibaba.druid.pool.DruidDataSource;
import com.alibaba.druid.support.http.StatViewServlet;
import com.alibaba.druid.support.http.WebStatFilter;
import org.springframework.boot.context.properties.ConfigurationProperties;
import org.springframework.boot.web.servlet.FilterRegistrationBean;
import org.springframework.boot.web.servlet.ServletRegistrationBean;
import org.springframework.context.annotation.Bean;
import org.springframework.context.annotation.Configuration;

import javax.sql.DataSource;
import java.util.Arrays;
import java.util.HashMap;
import java.util.Map;

/**
 * @Description TODO Druid Configure to make other druid attributes effective
 * @Author why
 * @Date 2020/12/25 15:19
 * Version 1.0
 **/
@Configuration
public class DruidConfig {

    @ConfigurationProperties(prefix = "spring.datasource")//Will be in spring The attribute prefixed with datasource is bound to the container
    @Bean
    public DataSource druid(){
        return new DruidDataSource();
    }

    /**
     * Configure druid monitoring
     */
    //1. Configure the Servlet in the management background
    @Bean
    public ServletRegistrationBean statViewServlet(){
        ServletRegistrationBean bean = new ServletRegistrationBean(new StatViewServlet(), "/druid/*");
        //Configure initialization parameters
        //The configured parameters can be viewed in the ResourceServlet parent class of StatViewServlet() and StatViewServlet()
        Map<String,String> initParams = new HashMap<>();
        //Login background system user name
        initParams.put("loginUsername","admin");
        //Login background system password
        initParams.put("loginPassword","123456");
        //Who is allowed to access
        initParams.put("allow","");//When the second parameter is not written or null, all accesses are allowed by default
        //Configure who is denied access
        initParams.put("deny","192.168.1.106");
        bean.setInitParameters(initParams);
        return bean;
    }

    //2. Configure a monitored filter
    @Bean
    public FilterRegistrationBean webStatFilter(){
        FilterRegistrationBean bean = new FilterRegistrationBean();
        bean.setFilter(new WebStatFilter());
        //Set initialization parameters
        //The configured parameters can be viewed in WebStatFilter()
        Map<String,String> initParams = new HashMap<>();
        //Exclude blocked requests
        initParams.put("exclusions","*.js,*.css,/druid/*");
        bean.setInitParameters(initParams);
        //Set blocked requests
        bean.setUrlPatterns(Arrays.asList("/*"));
        return bean;
    }
}
4. Spring Boot integrates MyBatis
4.1 create MyBatis basic environment
Create project
Select the required module
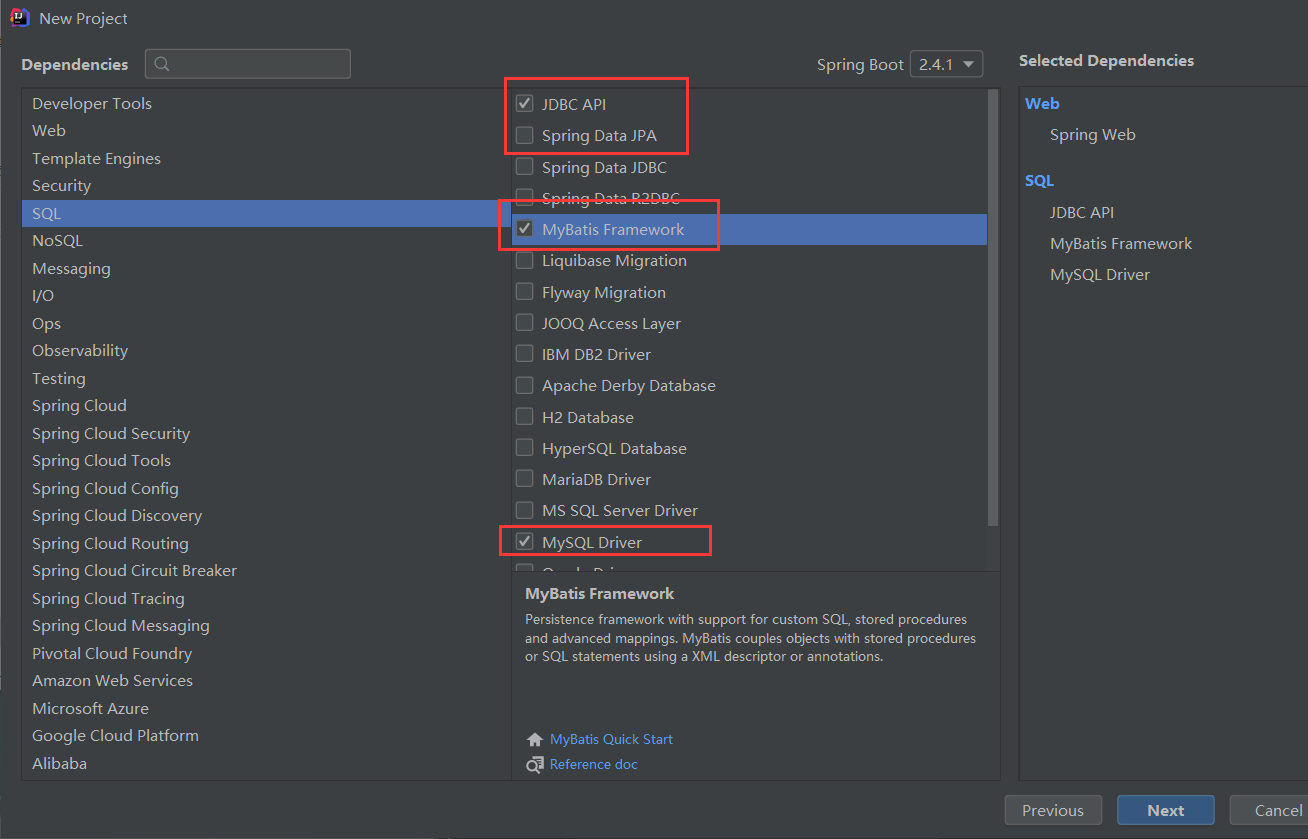
Introduced dependencies
<dependencies>
        <dependency>
            <groupId>org.springframework.boot</groupId>
            <artifactId>spring-boot-starter-jdbc</artifactId>
        </dependency>

        <dependency>
            <groupId>org.springframework</groupId>
            <artifactId>spring-jdbc</artifactId>
        </dependency>
        <dependency>
            <groupId>org.springframework.boot</groupId>
            <artifactId>spring-boot-starter-web</artifactId>
        </dependency>
        <dependency>
            <groupId>org.mybatis.spring.boot</groupId>
            <artifactId>mybatis-spring-boot-starter</artifactId>
            <version>2.1.4</version>
        </dependency>

        <dependency>
            <groupId>mysql</groupId>
            <artifactId>mysql-connector-java</artifactId>
            <scope>runtime</scope>
        </dependency>
        <dependency>
            <groupId>org.springframework.boot</groupId>
            <artifactId>spring-boot-starter-test</artifactId>
            <scope>test</scope>
        </dependency>
        <dependency>
            <groupId>org.springframework.boot</groupId>
            <artifactId>spring-boot</artifactId>
            <version>2.4.1</version>
        </dependency>
        <!-- https://mvnrepository. com/artifact/com. Alibaba / Druid Druid dependency -- >
        <dependency>
            <groupId>com.alibaba</groupId>
            <artifactId>druid</artifactId>
            <version>1.2.4</version>
        </dependency>
    </dependencies>
Introduce Druid data source, configure property file and configure DruidConfig configuration class. Refer to Spring Boot to integrate Druid data source
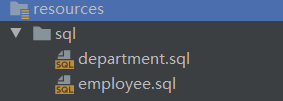
Create database table
Create an sql script in the resources/sql folder
Configuration properties file
initialization-mode: always
schema:
  - classpath:sql/department.sql
  - classpath:sql/employee.sql
Create Java Bean
Employee.java
package com.why.springboot.entity;

/**
 * @Description TODO Employee table
 * @Author why
 * @Date 2020/12/25 17:10
 * Version 1.0
 **/
public class Employee {
    private Integer id;
    private String lastName;
    private Integer gender;
    private String email;
    private Integer d_id;

    public Integer getId() {
        return id;
    }

    public void setId(Integer id) {
        this.id = id;
    }

    public String getLastName() {
        return lastName;
    }

    public void setLastName(String lastName) {
        this.lastName = lastName;
    }

    public Integer getGender() {
        return gender;
    }

    public void setGender(Integer gender) {
        this.gender = gender;
    }

    public String getEmail() {
        return email;
    }

    public void setEmail(String email) {
        this.email = email;
    }

    public Integer getD_id() {
        return d_id;
    }

    public void setD_id(Integer d_id) {
        this.d_id = d_id;
    }

    @Override
    public String toString() {
        return "Employee{" +
                "id=" + id +
                ", lastName='" + lastName + '\'' +
                ", gender=" + gender +
                ", email='" + email + '\'' +
                ", d_id=" + d_id +
                '}';
    }
}
Department.java
package com.why.springboot.entity;

/**
 * @Description TODO Department table
 * @Author why
 * @Date 2020/12/25 17:13
 * Version 1.0
 **/
public class Department {
    private Integer id;
    private String departmentName;

    public Integer getId() {
        return id;
    }

    public void setId(Integer id) {
        this.id = id;
    }

    public String getDepartmentName() {
        return departmentName;
    }

    public void setDepartmentName(String departmentName) {
        this.departmentName = departmentName;
    }

    @Override
    public String toString() {
        return "Department{" +
                "id=" + id +
                ", departmentName='" + departmentName + '\'' +
                '}';
    }
}
4.2 using MyBatis to manipulate the database
4.2.1 Mybatis annotated version
Create mapper to realize operation database
package com.why.springboot.mapper;

import com.why.springboot.entity.Department;
import org.apache.ibatis.annotations.*;

/**
 * @Description TODO Operation Department table
 * @Author why
 * @Date 2020/12/25 17:18
 * Version 1.0
 **/
@Mapper//Specifies the mapper that operates the database
public interface DepartmentMapper {

    /**
     * insert data
     *
     * @Options(useGeneratedKeys = true,keyProperty = "id") Get self incrementing id
     *
     * @param department
     * @return
     */
    @Options(useGeneratedKeys = true,keyProperty = "id")
    @Insert("INSERT INTO department(departmentName) VALUES(#{departmentName})")
    public int insertDept(Department department);

    /**
     * Delete a piece of data
     * @param id
     * @return
     */
    @Delete("DELETE FROM department WHERE id=#{id}")
    public int deleteDeptById(Integer id);

    /**
     * Update data
     * @param department
     * @return
     */
    @Update("UPDATE department SET departmentName=#{departName} WHERE id = #{id}")
    public int updateDept(Department department);

    /**
     * Query data
     * @param id
     * @return
     */
    @Select("SELECT * FROM department WHERE id=#{id}")
    public Department getDeptById(Integer id);
}
test
@RestController
public class DeptController {

    @Autowired
    DepartmentMapper departmentMapper;

    /**
     * Find by id
     * @param id
     * @return
     */
    @GetMapping("/dept/{id}")
    public Department getDepartment(@PathVariable("id") Integer id){
        return departmentMapper.getDeptById(id);
    }

    /**
     * Insert department according to the incoming department name
     * @param department
     * @return
     */
    @GetMapping("/dept")
    public Department insertDept(Department department){
        departmentMapper.insertDept(department);
        return department;
    }
}
be careful:
-
Get the self incremented primary key for returning data
@Options(useGeneratedKeys = true,keyProperty = "id")
-
When the name of the Java Bean table is inconsistent with that of the Java Bean database
For example, Java Bean: departmentName
Database tables: department_name
Customize Mybatis rules using the following rules
@Configuration public class MyBatisConfig { /** * Configuration when the names of Java beans and database tables are different, you can still inject and customize the Mybatis configuration rules * @return */ @Bean public ConfigurationCustomizer configurationCustomizer(){ return new ConfigurationCustomizer(){ @Override public void customize(org.apache.ibatis.session.Configuration configuration) { configuration.setMapUnderscoreToCamelCase(true); } }; } } -
When there are a lot of mapper packages, you can use the configuration to add the following annotations for batch scanning
@MapperScan(value = "com.why.springboot.mapper")//Automatically scan all mapper s under this package
4.2.2 Mybatiss use profile version
Create mapper file
package com.why.springboot.mapper;

import com.why.springboot.entity.Employee;
import org.apache.ibatis.annotations.Mapper;

/**
 * @Description TODO Employee Database operations for tables
 * @Author why
 * @Date 2020/12/29 12:05
 * Version 1.0
 **/
@Mapper//Assemble the interface scan into the container
public interface EmployeeMapper {

    /**
     * query
     * @param id
     * @return
     */
    public Employee getEmpById(Integer id);

    /**
     * add to
     * @param employee
     */
    public void insertEmp(Employee employee);
}
Create the following directory
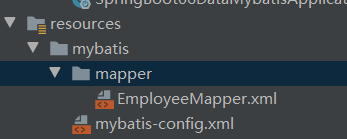
mybatis-config.xml, Mybatis global configuration
<?xml version="1.0" encoding="UTF-8" ?>
<!DOCTYPE configuration
        PUBLIC "-//mybatis.org//DTD Config 3.0//EN"
        "http://mybatis.org/dtd/mybatis-3-config.dtd">
<configuration>
<!--    Set up data tables and Java-bean Different naming methods-->
    <settings>
        <setting name="mapUnderscoreToCamelCase" value="true"/>
    </settings>
</configuration>
EmployeeMapper.xml, mapper mapping file
<?xml version="1.0" encoding="UTF-8" ?>
<!DOCTYPE mapper
        PUBLIC "-//mybatis.org//DTD Mapper 3.0//EN"
        "http://mybatis.org/dtd/mybatis-3-mapper.dtd">
<!-- namespace binding mapper Full class name of the file-->
<mapper namespace="com.why.springboot.mapper.EmployeeMapper">
<!--    public Employee getEmpById(Integer id);-->
    <select id="getEmpById" resultType="com.why.springboot.entity.Employee">
        select * from employee where id = #{id}
    </select>
<!--    public void insertEmp(Employee employee);-->
    <insert id="insertEmp">
        insert into employee(lastName,email,gender,d_id) values (#{lastNmae},#{email},#{gender},#{d_id})
    </insert>
</mapper>
Set the relevant configuration of Mybatis in the yml file
#Configure Mybatis
mybatis:
  #Location of the Mybatis global configuration file
  config-location: classpath:mybatis/mybatis-config.xml
  mapper-locations: classpath:mybatis/mapper/*.xml
JPA boot spring integration
1. Introduction to JPA
JPA: Based on ORM (Object Relation Mapping) idea
2. Use basic steps
-
Write entity classes (Java beans) and data tables for mapping, and configure the mapping relationship
package com.why.springboot.entity; import javax.persistence.*; /** * @Description TODO User entity class * * Use JPA annotation to configure mapping relationship: * @Author why * @Date 2020/12/29 14:27 * Version 1.0 **/ @Entity//Tell JPA that this is an entity class @Table(name = "user")//Specify which data table corresponds to it. If omitted, the default table name is the lowercase user of the class name public class User { @Id//Annotation this is a primary key @GeneratedValue(strategy = GenerationType.IDENTITY)//Self increasing gradually private Integer id; @Column(name = "last_name",length = 50)//Represents the corresponding column private String lastName; @Column(name = "email")//If the column name is omitted, it is the property name private String email; public Integer getId() { return id; } public void setId(Integer id) { this.id = id; } public String getLastName() { return lastName; } public void setLastName(String lastName) { this.lastName = lastName; } public String getEmail() { return email; } public void setEmail(String email) { this.email = email; } } -
Write the data table corresponding to Dao interface operation entity class
package com.why.springboot.repository; import com.why.springboot.entity.User; import org.springframework.data.jpa.repository.JpaRepository; /** * @Description TODO Operate the JAP database * * Inherit jparepository < User, Integer >, entity class corresponding to User data table and type corresponding to Integer primary key * * @Author why * @Date 2020/12/29 14:42 * Version 1.0 **/ public interface UserRepository extends JpaRepository<User,Integer> { } -
yaml profile basic configuration
spring:
  datasource:
    url: jdbc:mysql://localhost:3306/data?useUnicode=true&characterEncoding=UTF-8&serverTimezone=UTC
    username: root
    password: root
    driver-class-name: com.mysql.cj.jdbc.Driver
    initialization-mode: always
  jpa:
    hibernate:
      #Update or create data table
      ddl-auto: update
    #Show SQL on console
    show-sql: true
be careful:
Configure initialization mode: always, otherwise the table creation will not succeed
-
Using JPA to manipulate database data
/**
 * @Description TODO Use addition, deletion, modification and query
 * @Author why
 * @Date 2020/12/29 14:56
 * Version 1.0
 **/
@RestController
public class UserController {

    @Autowired
    UserRepository userRepository;

    @GetMapping("/user/{id}")
    public User getUser(@PathVariable("id") Integer id){
        User user = userRepository.findById(id).get();
        return user;
    }

    @GetMapping("/user")
    public User insertUser(User user){
        User save = userRepository.save(user);
        return save;
    }
}