At first, I don't know how to start. I can learn from demo provided by the government. Such as:
https://spring.io/guides/gs/rest-service/ Can download the source code to see, have a rough understanding.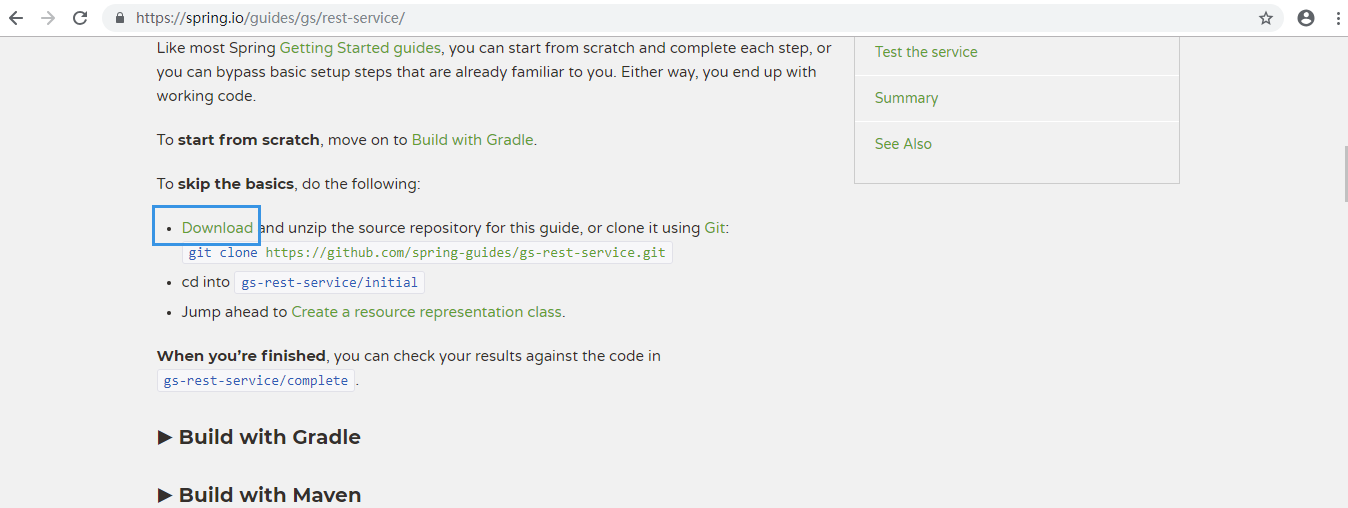
Environmental preparation:
JDK 1.8 and above, Maven 3.2+
For editors, it is recommended to use IntelliJ IDEA to create projects with boots. It is convenient to select spring components, including spring web, spring cloud XXXX and so on, to directly generate corresponding pom.xml files. Of course, eclipse is also very good, used eclipse for many years, using IDEA is really not used to. However, the IDEA project creation guide is really great, as shown below, the project can be created and run directly.
Because it is learning, we still operate step by step.
1. Create a maven project, pom.xml as follows:
<?xml version="1.0" encoding="UTF-8"?>
<project xmlns="http://maven.apache.org/POM/4.0.0" xmlns:xsi="http://www.w3.org/2001/XMLSchema-instance"
         xsi:schemaLocation="http://maven.apache.org/POM/4.0.0 http://maven.apache.org/xsd/maven-4.0.0.xsd">
    <modelVersion>4.0.0</modelVersion>

    <groupId>com.kevin</groupId>
    <artifactId>spring-boot-study</artifactId>
    <version>0.0.1-SNAPSHOT</version>
    <name>spring-boot-study</name>
    <description>Demo project for Spring Boot</description>

    <parent>
        <groupId>org.springframework.boot</groupId>
        <artifactId>spring-boot-starter-parent</artifactId>
        <version>2.1.6.RELEASE</version>
        <relativePath/>
    </parent>

    <properties>
        <java.version>1.8</java.version>
    </properties>

    <dependencies>
        <dependency>
            <groupId>org.springframework.boot</groupId>
            <artifactId>spring-boot-starter-web</artifactId>
        </dependency>

        <dependency>
            <groupId>org.springframework.boot</groupId>
            <artifactId>spring-boot-starter-test</artifactId>
            <scope>test</scope>
        </dependency>
    </dependencies>

    <build>
        <plugins>
            <plugin>
                <groupId>org.springframework.boot</groupId>
                <artifactId>spring-boot-maven-plugin</artifactId>
            </plugin>
        </plugins>
    </build>
</project>
You can see that dependency is much simpler than previous spring projects. Let's see what spring-boot-starter-web is.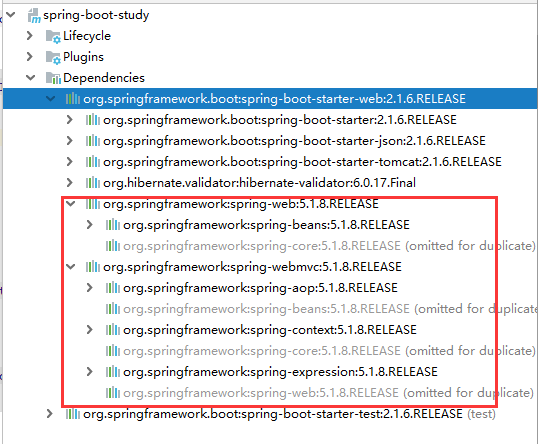
Seen from the above figure are spring-web, spring-mvc, spring-beans... Is it familiar and intimate? Is it the dependency package of our traditional spring web project? This shows that spring-boot-starter-xxx will encapsulate the required dependency packages. Introducing it will automatically introduce the required dependency packages without considering version conflicts, jar package loss or duplication, which is one of the essence of spring-boot.
In addition, we can send a spring-boot-starter-tomcat from the above figure, which is the built-in Tomcat of spring-boot. It does not need us to download and configure tomcat, which is also one of the essence of spring-boot.
2. Write the startup class SpringBootStudyApplication.java. The class name is customized, but it must be placed in the root directory.
package com.kevin.springbootstudy;

import org.springframework.boot.SpringApplication;
import org.springframework.boot.autoconfigure.SpringBootApplication;

@SpringBootApplication
public class SpringBootStudyApplication {

    public static void main(String[] args) {
        SpringApplication.run(SpringBootStudyApplication.class, args);
    }

}
It's a main method that uses Spring Application. run () to start the application (starting spring components and tomcat in turn). The key is to annotate @SpringBootApplication and see what @SpringBootApplication does:
@ SpringBootConfiguration defines the current class as the configuration class.
@ Enable AutoConfiguration automatically loads the configuration.
@ ComonentScan scans all the classes that need to be managed under the package in which the class is located, which is equivalent to the previous <context: component-scan>, which is why the startup class needs to be placed in the root directory.
You can also specify properties for @SpringBootApplication, such as exclude (which packages do not need to be scanned), scanBasePackages (which packages do not need to be scanned)
3. Run the Startup Class directly (SpringBootStudyApplication.java), you can see that a tomcat is started directly, the port defaults to 8080, and there is a banner information at the front (how to customize later)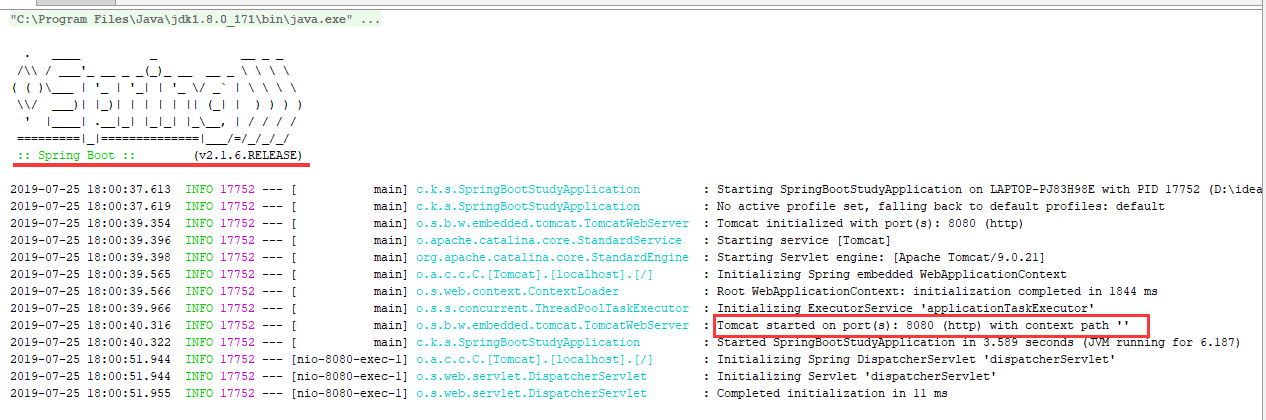
4. Create Greeting, define basic attributes and construct methods. Note that final is used here, and cannot be modified after assignment.
package com.kevin.springbootstudy.model;

public class Greeting {

    private final long id;

    private final String content;

    public Greeting(long id, String content) {
        this.id = id;
        this.content = content;
    }

    public long getId() {
        return id;
    }

    public String getContent() {
        return content;
    }
}
5. Create HelloController.java to provide api
The number of concurrent packages used by counter increases and there is no concurrency problem
The annotation @RestController is a combination of @Controller@ResponseBody (returning the result as a string)
package com.kevin.springbootstudy.controller;

import com.kevin.springbootstudy.model.Greeting;
import org.springframework.stereotype.Controller;
import org.springframework.web.bind.annotation.RequestMapping;
import org.springframework.web.bind.annotation.RequestParam;

import java.util.concurrent.atomic.AtomicInteger;
import java.util.concurrent.atomic.AtomicLong;

@Controller
public class HelloController {

    private final static String template = "Hello, %s!";

    private final AtomicLong counter = new AtomicLong();

    @RequestMapping("/hello")
    public Greeting hello(@RequestParam(value = "name", defaultValue = "World") String name){
        return new Greeting(counter.incrementAndGet(), String.format(template, name));
    }

}
6. Start the service (SpringBootStudyApplication.java) for testing
Visit http://127.0.0.1:8080/hello and return: {"id":1,"content":"Hello, World!"}
Visit http://127.0.0.1:8080/hello?name=Kevin and return: {"id":2,"content":"Hello, Kevin!"
7. Write test classes
MockMvc is used to simulate network requests. Two test methods are written, one without parameters and the other with parameters. Whether the results of matching and returning are up to expectations is achieved.
jsonPath(expression) matches the returned results by expression
The result returned by jsonPath("$.content") starts from scratch and retrieves the data with the attribute content.
Some static methods of MockMvcRequest Builders are needed for testing, but the code is simpler to introduce directly.
import static org.springframework.test.web.servlet.request.MockMvcRequestBuilders.get;
import static org.springframework.test.web.servlet.result.MockMvcResultHandlers.print;
import static org.springframework.test.web.servlet.result.MockMvcResultMatchers.jsonPath;
import static org.springframework.test.web.servlet.result.MockMvcResultMatchers.status;
package com.kevin.springbootstudy;

import org.junit.Test;
import org.junit.runner.RunWith;
import org.springframework.beans.factory.annotation.Autowired;
import org.springframework.boot.test.autoconfigure.web.servlet.AutoConfigureMockMvc;
import org.springframework.boot.test.context.SpringBootTest;
import org.springframework.test.context.junit4.SpringRunner;
import org.springframework.test.web.servlet.MockMvc;

import static org.springframework.test.web.servlet.request.MockMvcRequestBuilders.get;
import static org.springframework.test.web.servlet.result.MockMvcResultHandlers.print;
import static org.springframework.test.web.servlet.result.MockMvcResultMatchers.jsonPath;
import static org.springframework.test.web.servlet.result.MockMvcResultMatchers.status;

@RunWith(SpringRunner.class)
@SpringBootTest
@AutoConfigureMockMvc
public class HelloControllerTests {

    @Autowired
    private MockMvc mockMvc;

    @Test
    public void noParamTest() throws Exception{
        this.mockMvc.perform(get("/hello")).andDo(print()).andExpect(status().isOk()).andExpect(jsonPath("$.content").value("Hello, World!"));
    }

    @Test
    public void paramTest() throws Exception{
        this.mockMvc.perform(get("/hello").param("name", "Kevin")).andDo(print()).andExpect(status().isOk()).andExpect(jsonPath("$.content").value("Hello, Kevin!"));
    }
}
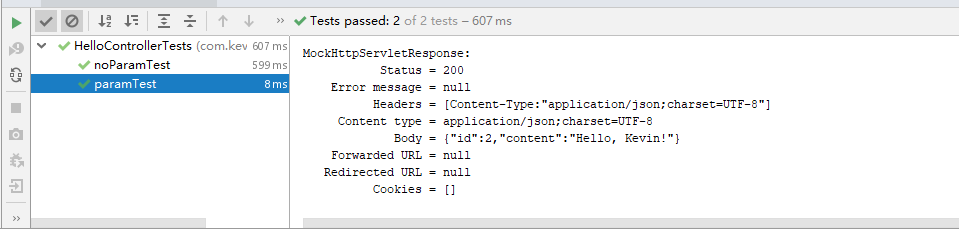
Tests are normal, you can find that building a simple project to provide access to the api, using spring boot is obviously fast and easy, the real is out of the box.