upload
The code of the Controller is very simple. Because the spring MVC framework is used, you can directly connect it with MultipartFile. Because it is a multi picture upload, it is connected with an array. Note here that the parameter name should be the same as the name in < input > Values correspond to:
@RequestMapping("/pic")
@ResponseBody
public ResponseEntity<String> pic(MultipartFile [] pictures) throws Exception {
    ResponseEntity<String> responseEntity = new ResponseEntity<>();
    long count = Arrays.asList(pictures).stream().
            map(MultipartFile::getOriginalFilename).
            filter(String::isEmpty).count();
    if (count == pictures.length){
        responseEntity.setCode(ResponseEntity.ERROR);
throw new NullOrEmptyException("pictures cannot be empty at the same time");
    }
    responseEntity.setCode(ResponseEntity.OK);
    responseEntity.setMessage("upload succeeded");
    return responseEntity;
}
Code of front page , name value and Controller here The parameter name of is corresponding to:
<div class="container">
    <div class="avatar-upload">
        <div class="avatar-edit">
            <input type='file' name="pictures" id="imageOne" accept=".png, .jpg, .jpeg"/>
            <label for="imageOne"></label>
        </div>
        <div class="avatar-preview">
            <div id="imageOnePreview"
                 style="background-image: url(http://ww3.sinaimg.cn/large/006tNc79ly1g556ca7ovqj30ak09mta2.jpg);">
            </div>
        </div>
    </div>
</div>
function readURLOne(input) {
    if (input.files && input.files[0]) {
        var reader = new FileReader();
        reader.onload = function(e) {
            $('#imageOnePreview').css('background-image', 'url('+e.target.result +')');
            $('#imageOnePreview').hide();
            $('#imageOnePreview').fadeIn(650);
        }
        reader.readAsDataURL(input.files[0]);
    }
}
$("#imageOne").change(function() {
    readURLOne(this);
});
function getUpload(){
    //Get the name value of all attribute key s in the form
    var formData = new FormData($("#picForm")[0]);
    $.ajax({
        url: '/pic',
        type: 'POST',
        dataType:"json",
        data: formData,
        processData: false,
        contentType: false,
        success:(function(data) {
            window.confirm(data.message);
            window.location.reload();
        }),
        error:(function(res) {
            alert("fail");
        })
    });
}
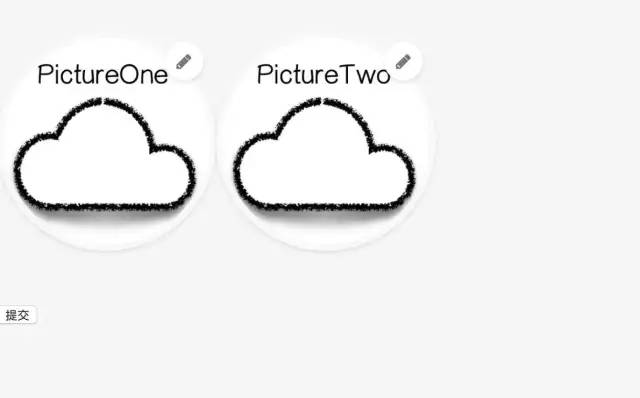
Effect display
The initial page is as follows
Echo as after uploading the picture
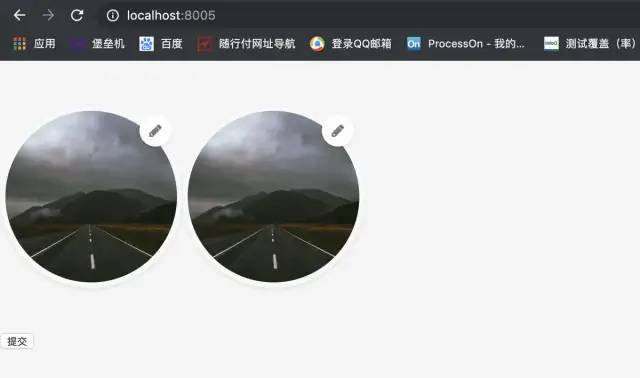
Click submit to upload the picture to the background. In addition, all the interview questions and answers of Spring Boot series have been sorted out. Wechat searches the Java technology stack and sends them in the background: the interview can be read online.
Configure the properties of uploaded pictures
By default, only images below 1MB can be uploaded. If you want to set the upload image size. You need to configure the following in the configuration file:
spring:
  servlet:
    multipart:
      enabled: true
      max-file-size: 20MB
      max-request-size: 20MB
Spring Boot basic tutorial and sample source code: https://github.com/javastacks/spring-boot-best-practice
The following are the file configurations
spring.servlet.multipart.enabled=true #Support multi file upload
spring.servlet.multipart.file-size-threshold=0B #Threshold for writing files to disk
spring.servlet.multipart.location= #Save address of uploaded file
spring.servlet.multipart.max-file-size=1MB #Maximum number of uploaded files
spring.servlet.multipart.max-request-size=10MB #Maximum value requested
spring.servlet.multipart.resolve-lazily=false #Whether to delay parsing multipart requests when files or parameters are accessed
exception handling
Exception handling uses the global exception handling mechanism provided by Springboot. Just add the @ ControllerAdvice annotation to the class. Add @ exceptionhandler (the exception class you want to intercept) to the method to intercept all Controller exceptions.
If you want to intercept a specific Controller, you only need to specify it in @ controlleradvice (basepackageclass = Controller you want to intercept)
@ControllerAdvice
@Slf4j
public class CommonExceptionHandler extends ResponseEntityExceptionHandler {

    @ExceptionHandler(NullOrEmptyException.class)
    @ResponseBody
    public ResponseEntity<String> nullOrEmptyExceptionHandler(HttpServletRequest request, NullOrEmptyException exception){
        log.info("nullOrEmptyExceptionHandler");
        return handleErrorInfo(request, exception.getMessage());
    }

    @ExceptionHandler(value = Exception.class)
    @ResponseBody
    public ResponseEntity<String> defaultErrorHandler(HttpServletRequest request, Exception exception){
        log.info("defaultErrorHandler");
        return handleErrorInfo(request, exception.getMessage());
    }

    private ResponseEntity<String> handleErrorInfo(HttpServletRequest request, String message) {
        ResponseEntity<String> responseEntity = new ResponseEntity<>();
        responseEntity.setMessage(message);
        responseEntity.setCode(ResponseEntity.ERROR);
        responseEntity.setData(message);
        responseEntity.setUrl(request.getRequestURL().toString());
        return responseEntity;
    }
}
Pit encountered
1. If the return value is the file name of the template file, the @ ResponseBody annotation cannot be added to either the class or the method, because if it is added, it will be parsed into a Json string and returned.
2. Note that the parameter name transmitted by the front end corresponds to the parameter name received by the back end one by one. Otherwise, 405 error will be reported
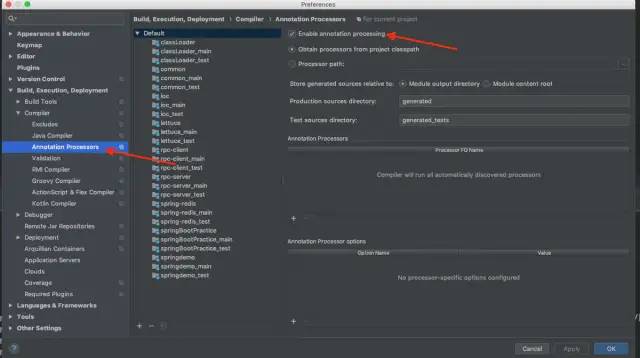
3. Develop using IDEA. If lombok is used, you need to check Enable annotation processing in Annotation Processors