Druid is the best database connection pool in the Java language and provides powerful monitoring and extension capabilities.
After comparing Druid with HikariCP, although HikariCP has a higher performance than Druid, Druid includes many dimensions of statistical and analytical functions, which is why everyone chooses to use it.
Here's how to configure using Druid in SpringBoot
1: Modify the pom file to add dependencies:
<dependencies>
        <!--Exclude Default Log Framework-->
        <dependency>
            <groupId>org.springframework.boot</groupId>
            <artifactId>spring-boot-starter-web</artifactId>
            <exclusions>
                <exclusion>
                    <groupId>org.springframework.boot</groupId>
                    <artifactId>spring-boot-starter-logging</artifactId>
                </exclusion>
            </exclusions>
        </dependency>

        <dependency>
            <groupId>org.springframework.boot</groupId>
            <artifactId>spring-boot-starter-test</artifactId>
            <scope>test</scope>
        </dependency>

        <!--log4j-->
        <dependency>
            <groupId>org.springframework.boot</groupId>
            <artifactId>spring-boot-starter-log4j</artifactId>
            <version>1.3.8.RELEASE</version>
        </dependency>

        <dependency>
            <groupId>com.alibaba</groupId>
            <artifactId>druid</artifactId>
            <version>1.0.18</version>
        </dependency>
<!-- Database Driver -->
        <dependency>
            <groupId>mysql</groupId>
            <artifactId>mysql-connector-java</artifactId>
            <version>5.0.5</version>
        </dependency>
    </dependencies>
2: Add the corresponding data source configuration in the configuration file:
# Server settings (ServerProperties)
#port
server.port=8082
server.address=127.0.0.1
#server.sessionTimeout=30
#Access Path Name
server.contextPath=/boot

# Database Access Configuration
# Master data source, default
spring.datasource.type=com.alibaba.druid.pool.DruidDataSource
spring.datasource.driverClassName=com.mysql.jdbc.Driver
spring.datasource.url=jdbc:mysql://localhost:3306/test
spring.datasource.username=root
spring.datasource.password=123456

# The following are additional settings for connection pooling that apply to all of the above data sources
# Initialization size, minimum, maximum
spring.datasource.initialSize=5
spring.datasource.minIdle=5
spring.datasource.maxActive=20
# Configure how long to wait for a connection to timeout
spring.datasource.maxWait=60000
# Configure how often to do a check to detect idle connections that need to be closed in milliseconds
spring.datasource.timeBetweenEvictionRunsMillis=60000
# Configure a connection's minimum lifetime in milliseconds in the pool
spring.datasource.minEvictableIdleTimeMillis=300000
spring.datasource.validationQuery=SELECT 1 FROMDUAL
spring.datasource.testWhileIdle=true
spring.datasource.testOnBorrow=false
spring.datasource.testOnReturn=false
# Open the PSCache and specify the size of the PSCache on each connection
spring.datasource.poolPreparedStatements=true
spring.datasource.maxPoolPreparedStatementPerConnectionSize=20
# Configure filters intercepted by monitoring statistics, sql cannot be counted after removal,'wall'for firewall
spring.datasource.filters=stat,wall,log4j
# Turn on mergeSql functionality through the connectProperties property; slow SQL records
spring.datasource.connectionProperties=druid.stat.mergeSql=true;druid.stat.slowSqlMillis=5000
# Merge monitoring data from multiple DruidDataSource s
#spring.datasource.useGlobalDataSourceStat=true
There are two ways to configure the monitoring capabilities, one is to configure the servlet,filter, and finally add the @ServletComponentScan annotation in the entry class (spring can scan into our own servlets and filters)
The code is as follows:
@WebServlet(urlPatterns="/druid/*",
                     initParams={
                                    @WebInitParam(name="allow",value="192.168.1.72,127.0.0.1"),// IP Whitelist (all access is allowed if not configured or empty)
                             @WebInitParam(name="deny",value="192.168.1.73"),// IP Blacklist (deny takes precedence over allow when common)
                             @WebInitParam(name="loginUsername",value="admin"),//User name
                             @WebInitParam(name="loginPassword",value="123456"),//Password
                             @WebInitParam(name="resetEnable",value="false")//Disable "Reset All" functionality on HTML pages
                     }
)
publicclass DruidStatViewServlet extendsStatViewServlet{
       privatestatic finallong serialVersionUID = 1L;

}

/**
 *druid Filter.
 *@author Administrator
 *
 */
@WebFilter(filterName="druidWebStatFilter",urlPatterns="/*",
       initParams={
                            @WebInitParam(name="exclusions",value="*.js,*.gif,*.jpg,*.bmp,*.png,*.css,*.ico,/druid/*")//Ignore resources
        }
)
publicclass DruidStatFilter extends WebStatFilter{

}
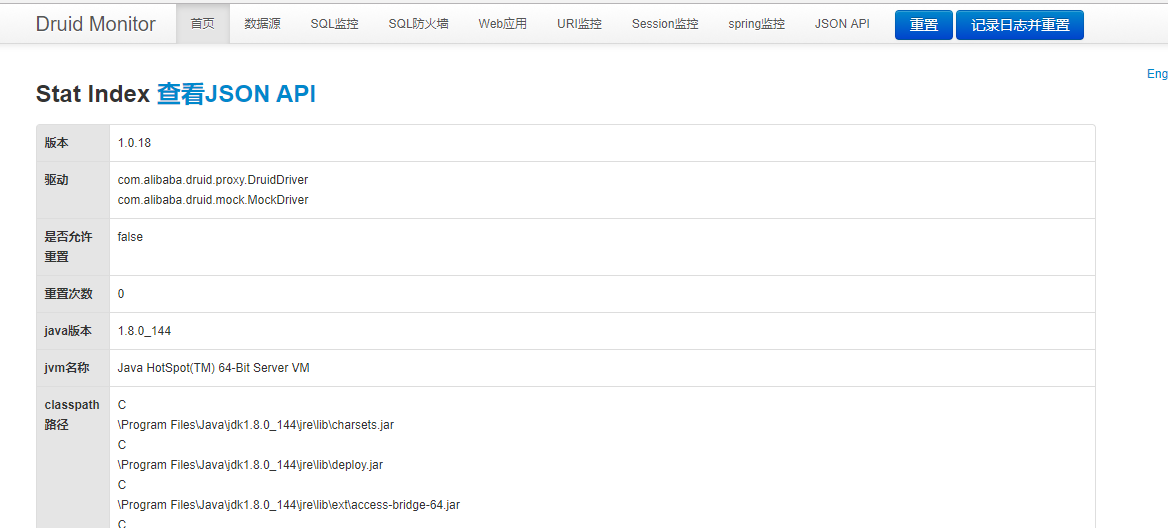
Then access after starting the project http://127.0.0.1:8082/boot/druid/login.html,
Mode two is relatively simple:
/**
 * @author shuyu.wang
 * @version V1.0
 * @ClassName: DruidConfiguration
 * @Description: *druid Configuration. There is no need to add notes in this way:@ServletComponentScan
 * @date 2017 November 23, 2001 2:35:55 p.m.
 */
@Configuration
public class DruidConfig {

    private Logger logger = Logger.getLogger(DruidConfig.class);
    /**
     * Register a StatViewServlet
     *
     * @return
     */
    @Bean
    public ServletRegistrationBean DruidStatViewServle2() {
        // Org.springframework.boot.Context.embedded.ServletRegistrationBeanProvides a class for registration.
        ServletRegistrationBean servletRegistrationBean = new ServletRegistrationBean(new StatViewServlet(),
                "/druid2/*");

        // Add initialization parameters: initParams

        // Whitelist:
        servletRegistrationBean.addInitParameter("allow", "127.0.0.1");
        // IP Blacklist (deny takes precedence over allow when common): Tip if deny is satisfied: Sorry, you are not allowed to
        // view this page.
        servletRegistrationBean.addInitParameter("deny", "192.168.1.73");
        // Login to view the information of the account password.
        servletRegistrationBean.addInitParameter("loginUsername", "admin2");
        servletRegistrationBean.addInitParameter("loginPassword", "123456");
        // Whether the data can be reset.
        servletRegistrationBean.addInitParameter("resetEnable", "false");
        return servletRegistrationBean;
    }

    /**
     * Register one: filterRegistrationBean
     *
     * @return
     */
    @Bean
    public FilterRegistrationBean druidStatFilter2() {
        FilterRegistrationBean filterRegistrationBean = new FilterRegistrationBean(new WebStatFilter());
        // Add a filter rule.
        filterRegistrationBean.addUrlPatterns("/*");
        // Add formatting information that you don't need to ignore.
        filterRegistrationBean.addInitParameter("exclusions", "*.js,*.gif,*.jpg,*.png,*.css,*.ico,/druid2/*");
        return filterRegistrationBean;
    }

    /**
     * Register dataSouce, this is just a simple example, only some parameters are injected, others inject themselves.
     *
     * @param driver
     * @param url
     * @param username
     * @param password
     * @param maxActive
     * @return
     */
    @Bean
    public DataSource druidDataSource(@Value("${spring.datasource.driverClassName}") String driver,
                                      @Value("${spring.datasource.url}") String url, @Value("${spring.datasource.username}") String username,
                                      @Value("${spring.datasource.password}") String password,
                                      @Value("${spring.datasource.maxActive}") int maxActive) {
        DruidDataSource druidDataSource = new DruidDataSource();
        druidDataSource.setDriverClassName(driver);
        druidDataSource.setUrl(url);
        druidDataSource.setUsername(username);
        druidDataSource.setPassword(password);
        druidDataSource.setMaxActive(maxActive);
        logger.info( "DruidConfiguration.druidDataSource(),url=" + url + ",username=" + username + ",password=" + password);
        try {
            druidDataSource.setFilters("stat, wall");
        } catch (SQLException e) {
            e.printStackTrace();
        }
        return druidDataSource;
    }
}
Start the application to access: http://127.0.0.1:8082/boot/druid2/login.html Enter your account number and password: admin2/123456 is accessible. 