Simply record the use of Nacos as the service configuration center, which is based on the previous NAcos service registration. If you don't know about Nacos service registration, you can go to the previous one first. Attach the project structure of this module first
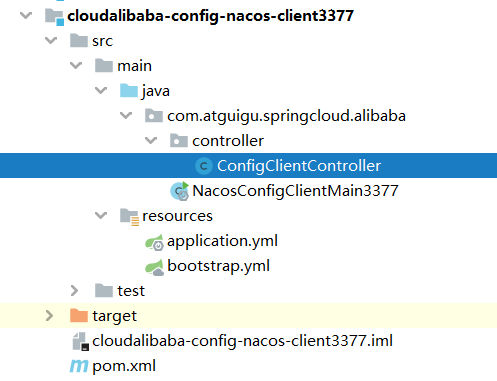
Build Module
Distributed development, first need to establish a Module, the specific process is omitted...
Change Pom
Popular point is to import the dependencies we need. Look at the screenshots and the code for the underlying dependencies. Note that since we are using the Nacos environment, we need to import the dependencies of Nacos. (This module has a parent project and is not detailed, you can also go to the last service registration if you want to use it alone)
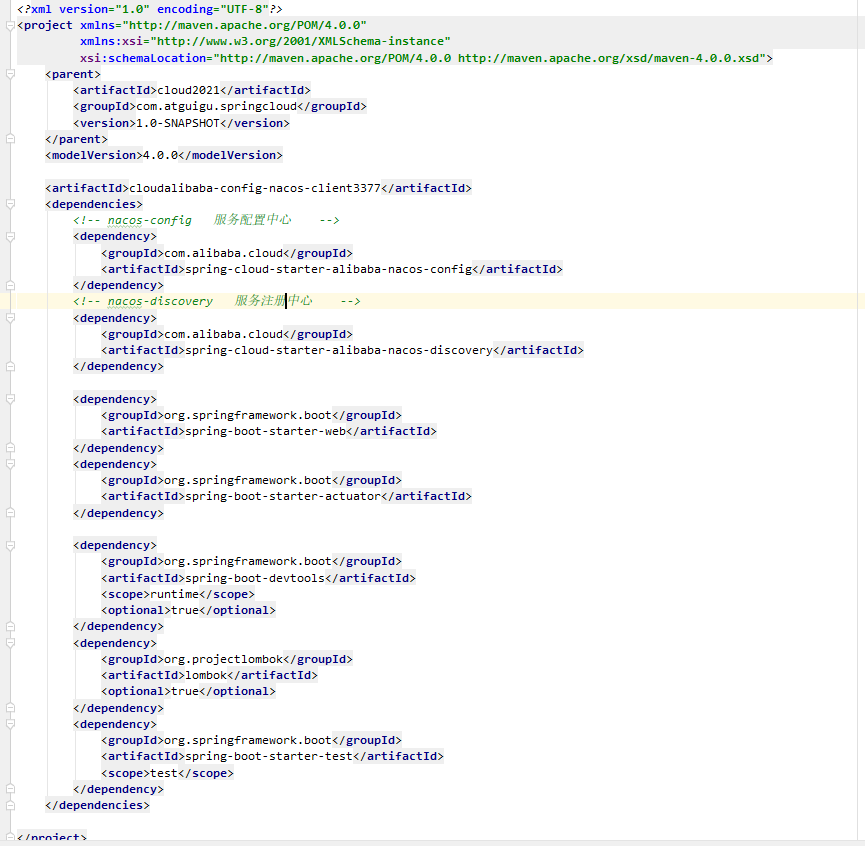
 <dependencies>
        <!-- nacos-config   Service Configuration Center    -->
        <dependency>
            <groupId>com.alibaba.cloud</groupId>
            <artifactId>spring-cloud-starter-alibaba-nacos-config</artifactId>
        </dependency>
        <!-- nacos-discovery   Service Registration Center    -->
        <dependency>
            <groupId>com.alibaba.cloud</groupId>
            <artifactId>spring-cloud-starter-alibaba-nacos-discovery</artifactId>
        </dependency>

        <dependency>
            <groupId>org.springframework.boot</groupId>
            <artifactId>spring-boot-starter-web</artifactId>
        </dependency>
        <dependency>
            <groupId>org.springframework.boot</groupId>
            <artifactId>spring-boot-starter-actuator</artifactId>
        </dependency>

        <dependency>
            <groupId>org.springframework.boot</groupId>
            <artifactId>spring-boot-devtools</artifactId>
            <scope>runtime</scope>
            <optional>true</optional>
        </dependency>
        <dependency>
            <groupId>org.projectlombok</groupId>
            <artifactId>lombok</artifactId>
            <optional>true</optional>
        </dependency>
        <dependency>
            <groupId>org.springframework.boot</groupId>
            <artifactId>spring-boot-starter-test</artifactId>
            <scope>test</scope>
        </dependency>
    </dependencies>
Change yml
After the pom is changed, of course, we will write our yml configuration file. The more important we pay attention to contract > configuration > code, what we need to do now is go to Naocs and pull out the information of our configuration. Like previous configs, bootstrap is also needed. yml and application.yml.
Note that we are using the default Nacos namespace public and the default grouping DEFAULT_GROUP
The configuration is as follows:
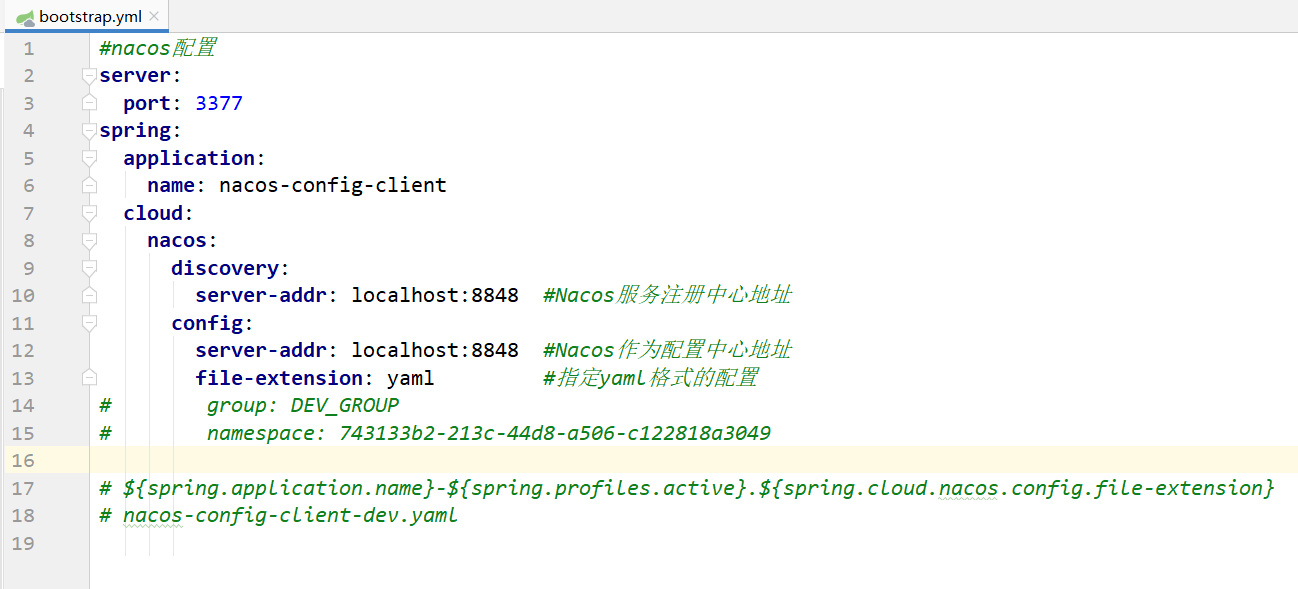
server:
  port: 3377
spring:
  application:
    name: nacos-config-client
  cloud:
    nacos:
      discovery:
        server-addr: localhost:8848  #Nacos Service Registry Address
      config:
        server-addr: localhost:8848  #Nacos as Configuration Center Address
        file-extension: yaml         #Specify configuration of yaml format
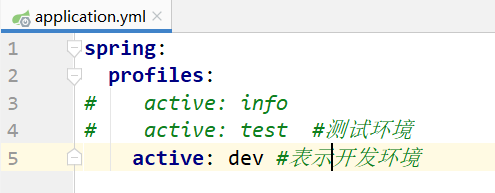
spring:
  profiles:
#    active: info
#    active: test  #testing environment
    active: dev #Represent development environment
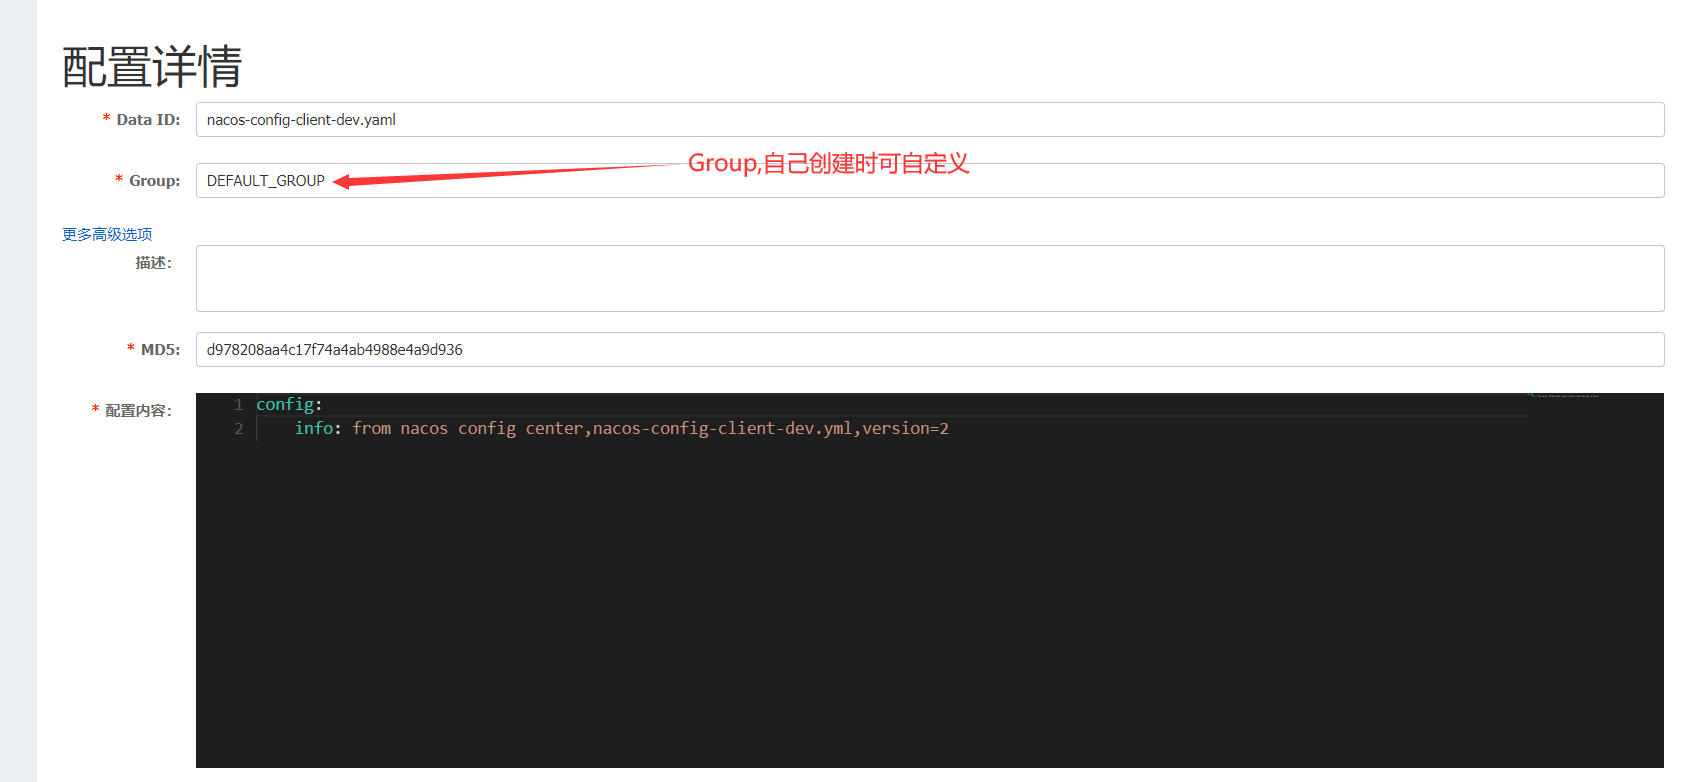
Nacos End Operation
Since you want to configure the information on Nacos, of course Nacos needs our configuration information. Are you right? So here comes the action - --->
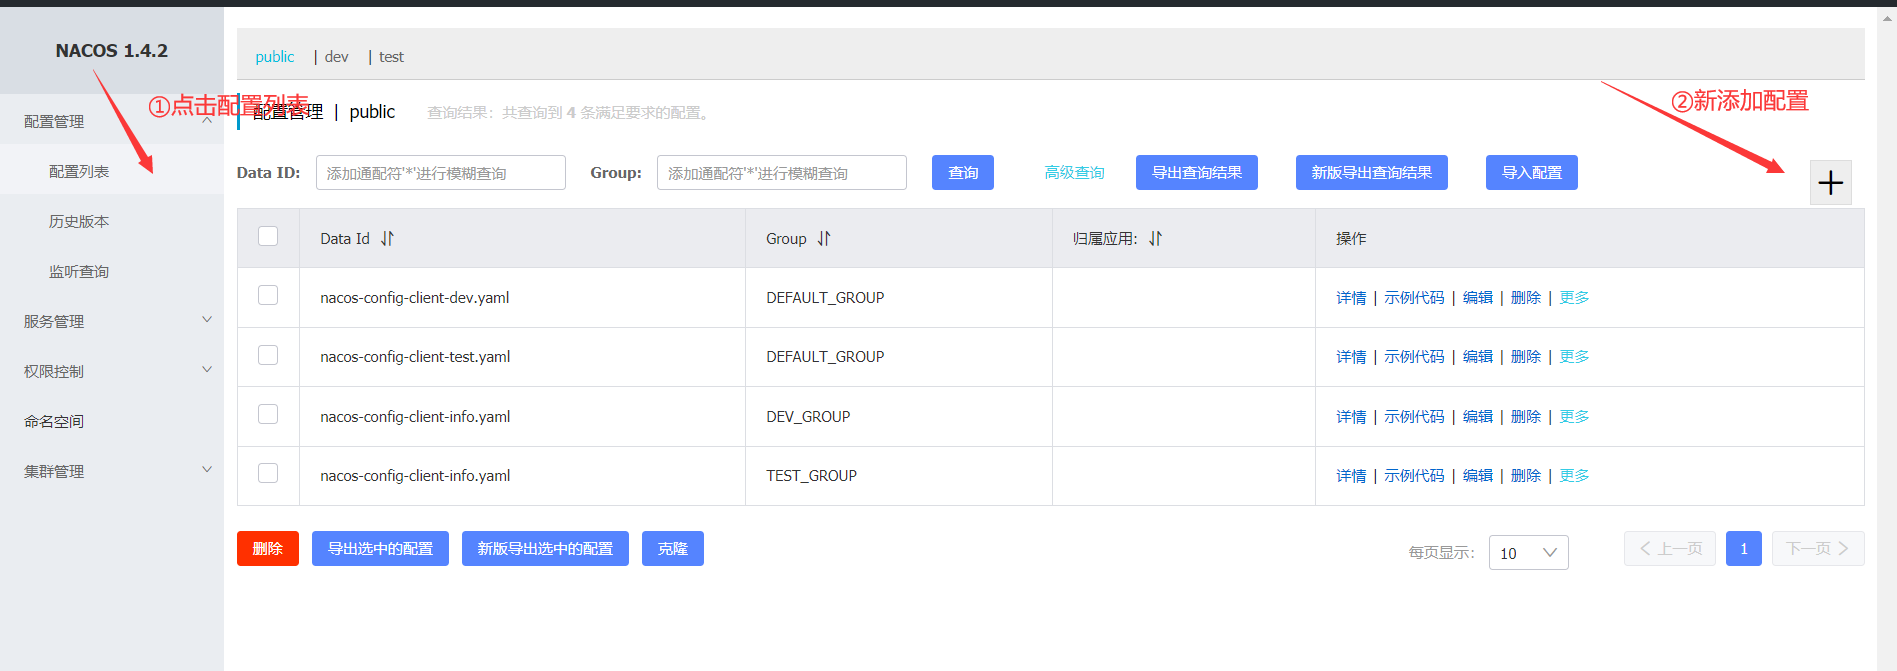
----->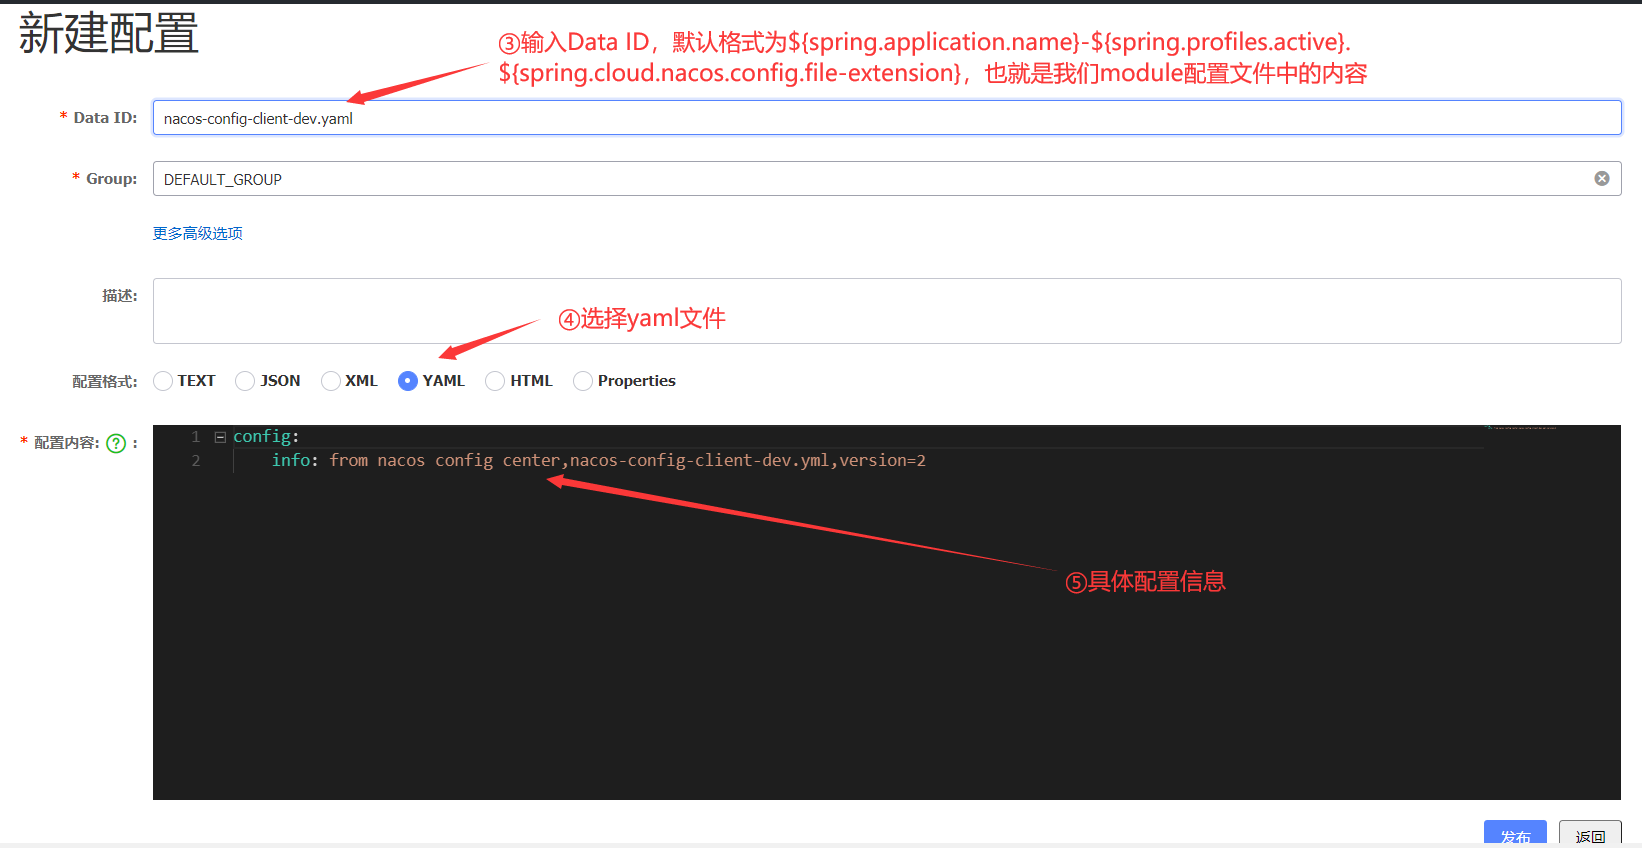
----->Finally of course, click Publish!!!

Then you can see it...
Write Start Class

Write controller Layer
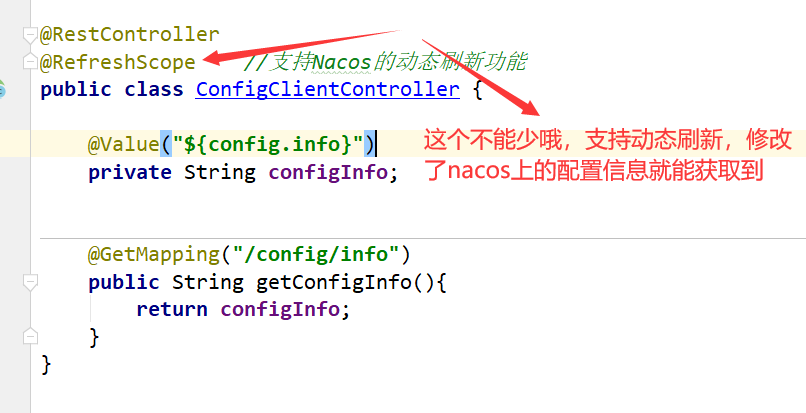
test
Enter the corresponding ip address and port number and access path

Seeing this will be a success!!!
Tips
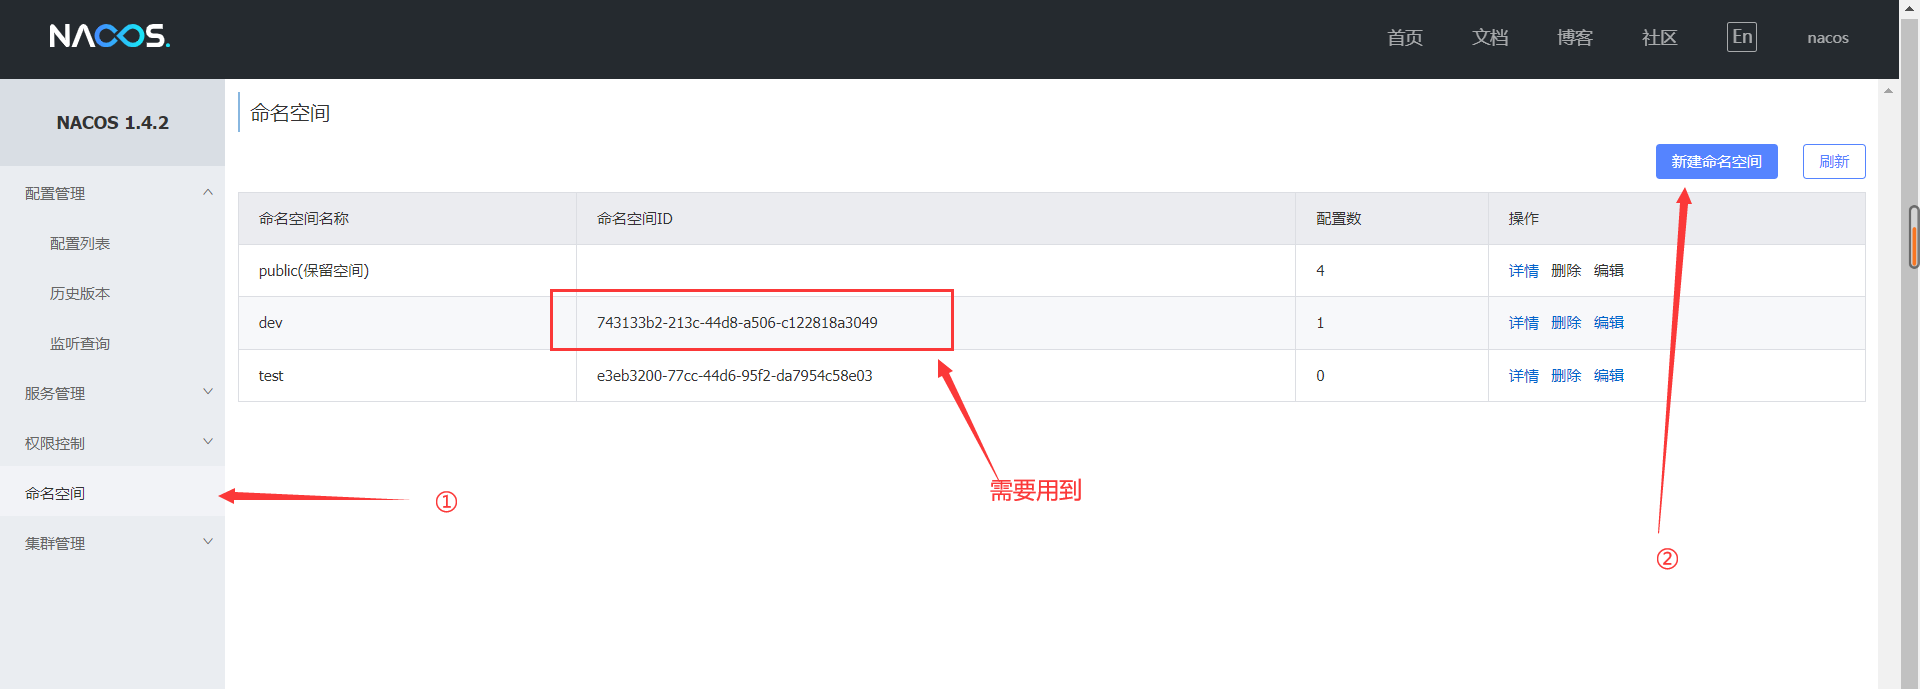
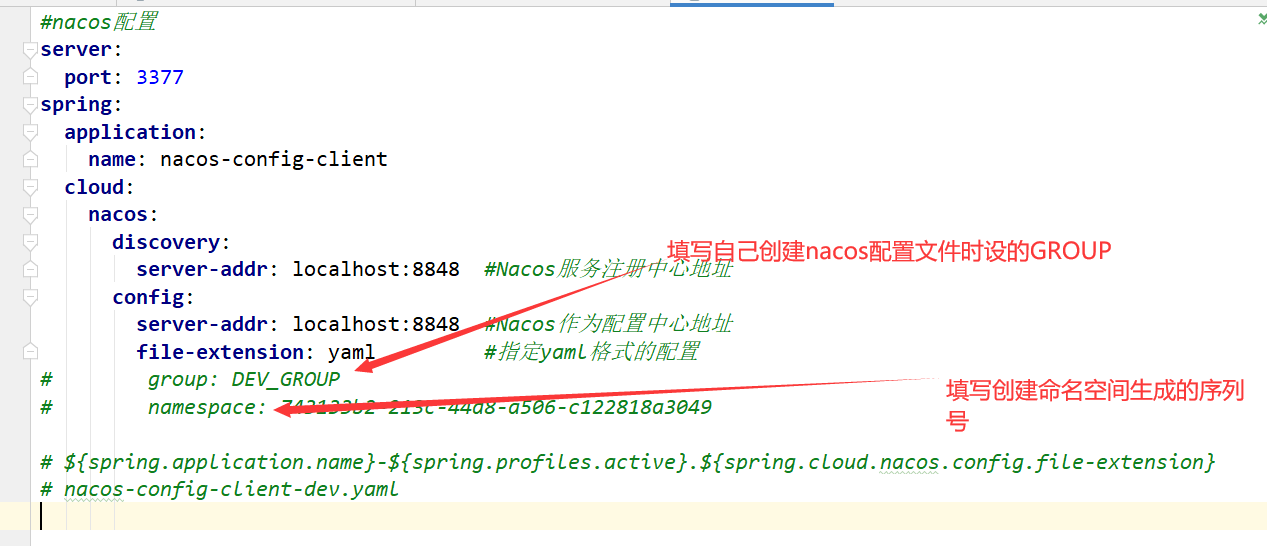
Now that you know the basics, you can try creating namespaces and groups yourself. Simply understand that they work like packages (namespaces) + class names + method names (Data ID s) in java, or file paths, so you can easily distinguish and manage them.
Put some pictures for you, if you need, you can refer to the official website for your own research
If you have any questions, please remind us!!!