Spring MVC project construction
IDEA version: 2021.1 (the operation steps of each version are roughly the same)
1. Create an empty project and create a web module under the project
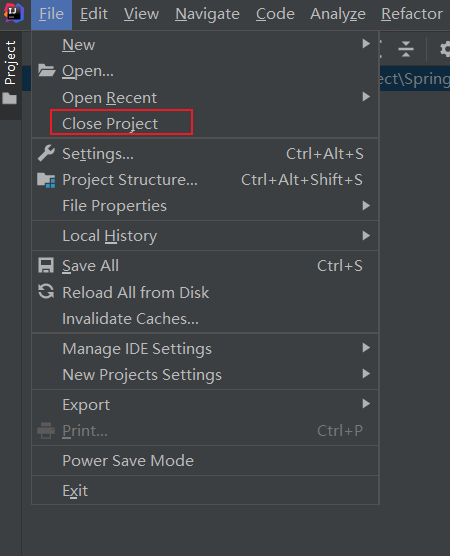
Exit the current project:
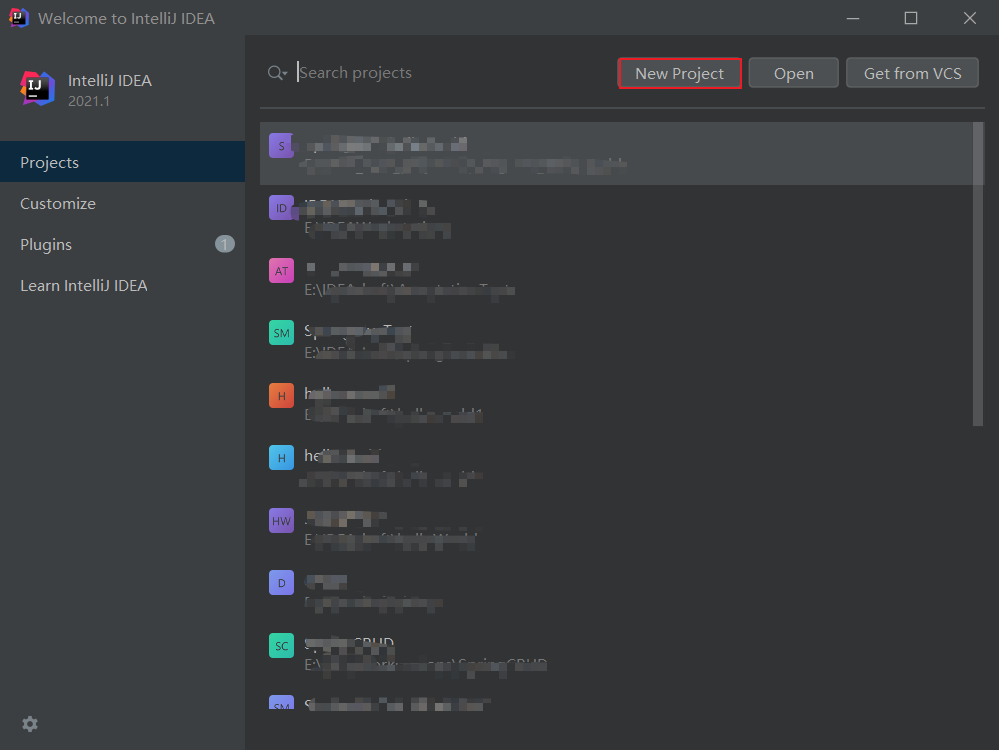
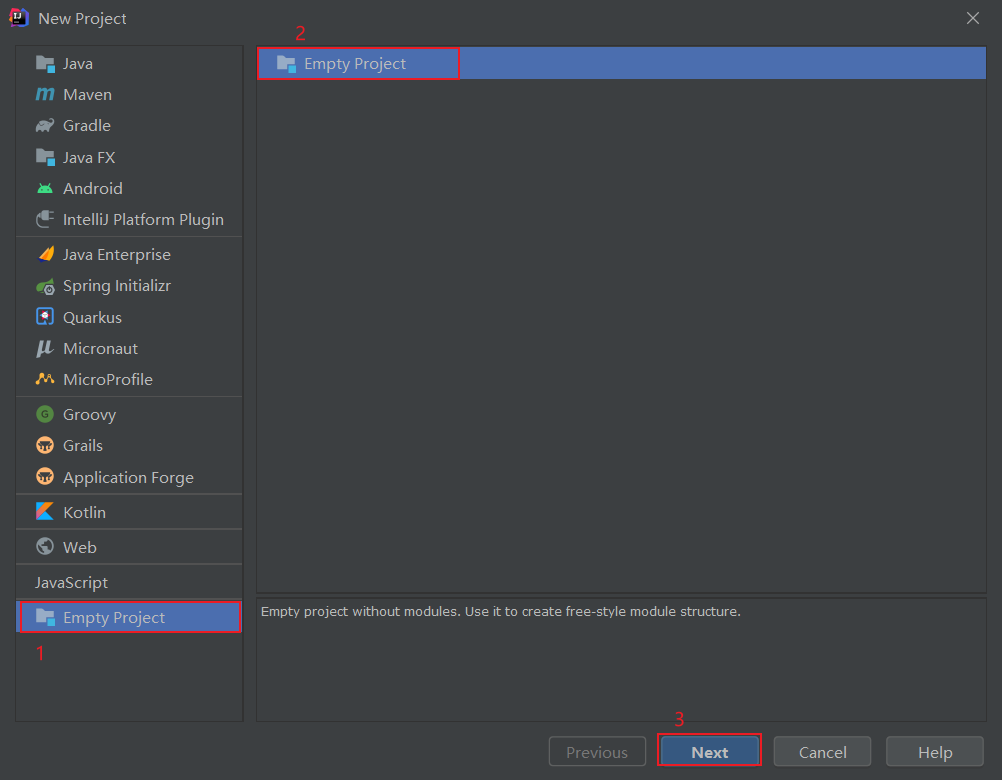
Choose to create an empty project:
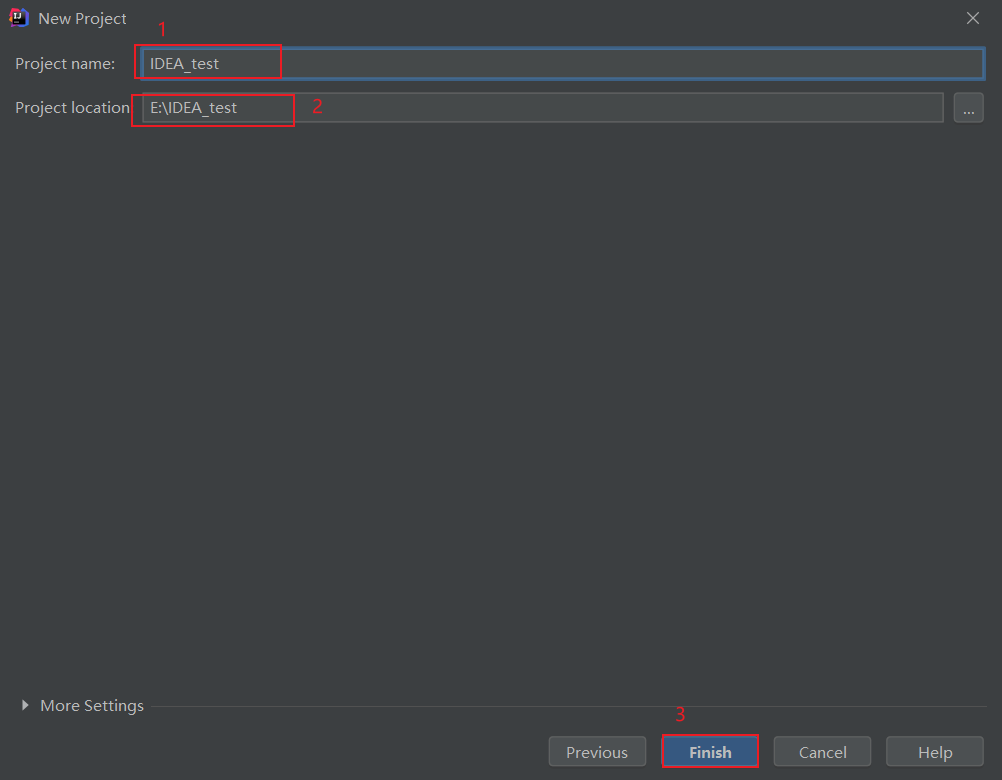
Select project name and location:
After the empty project is completed, we choose to create a module from the template:
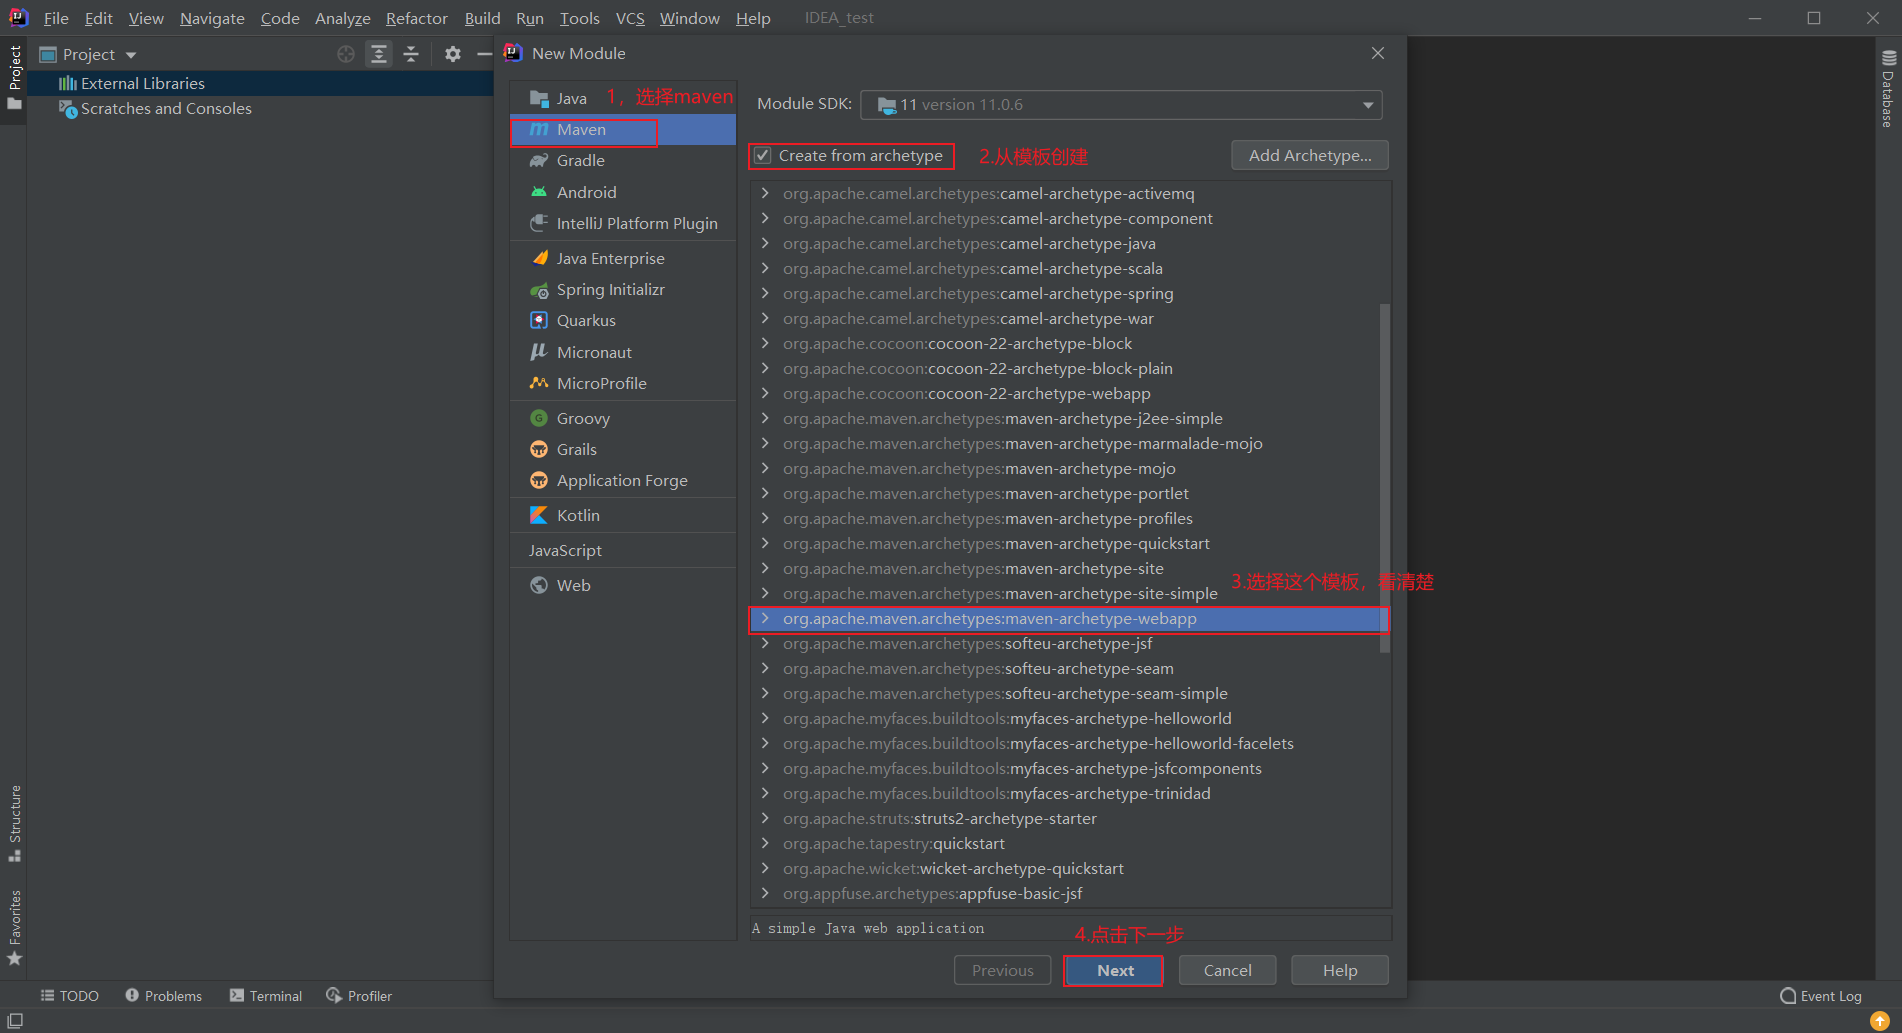
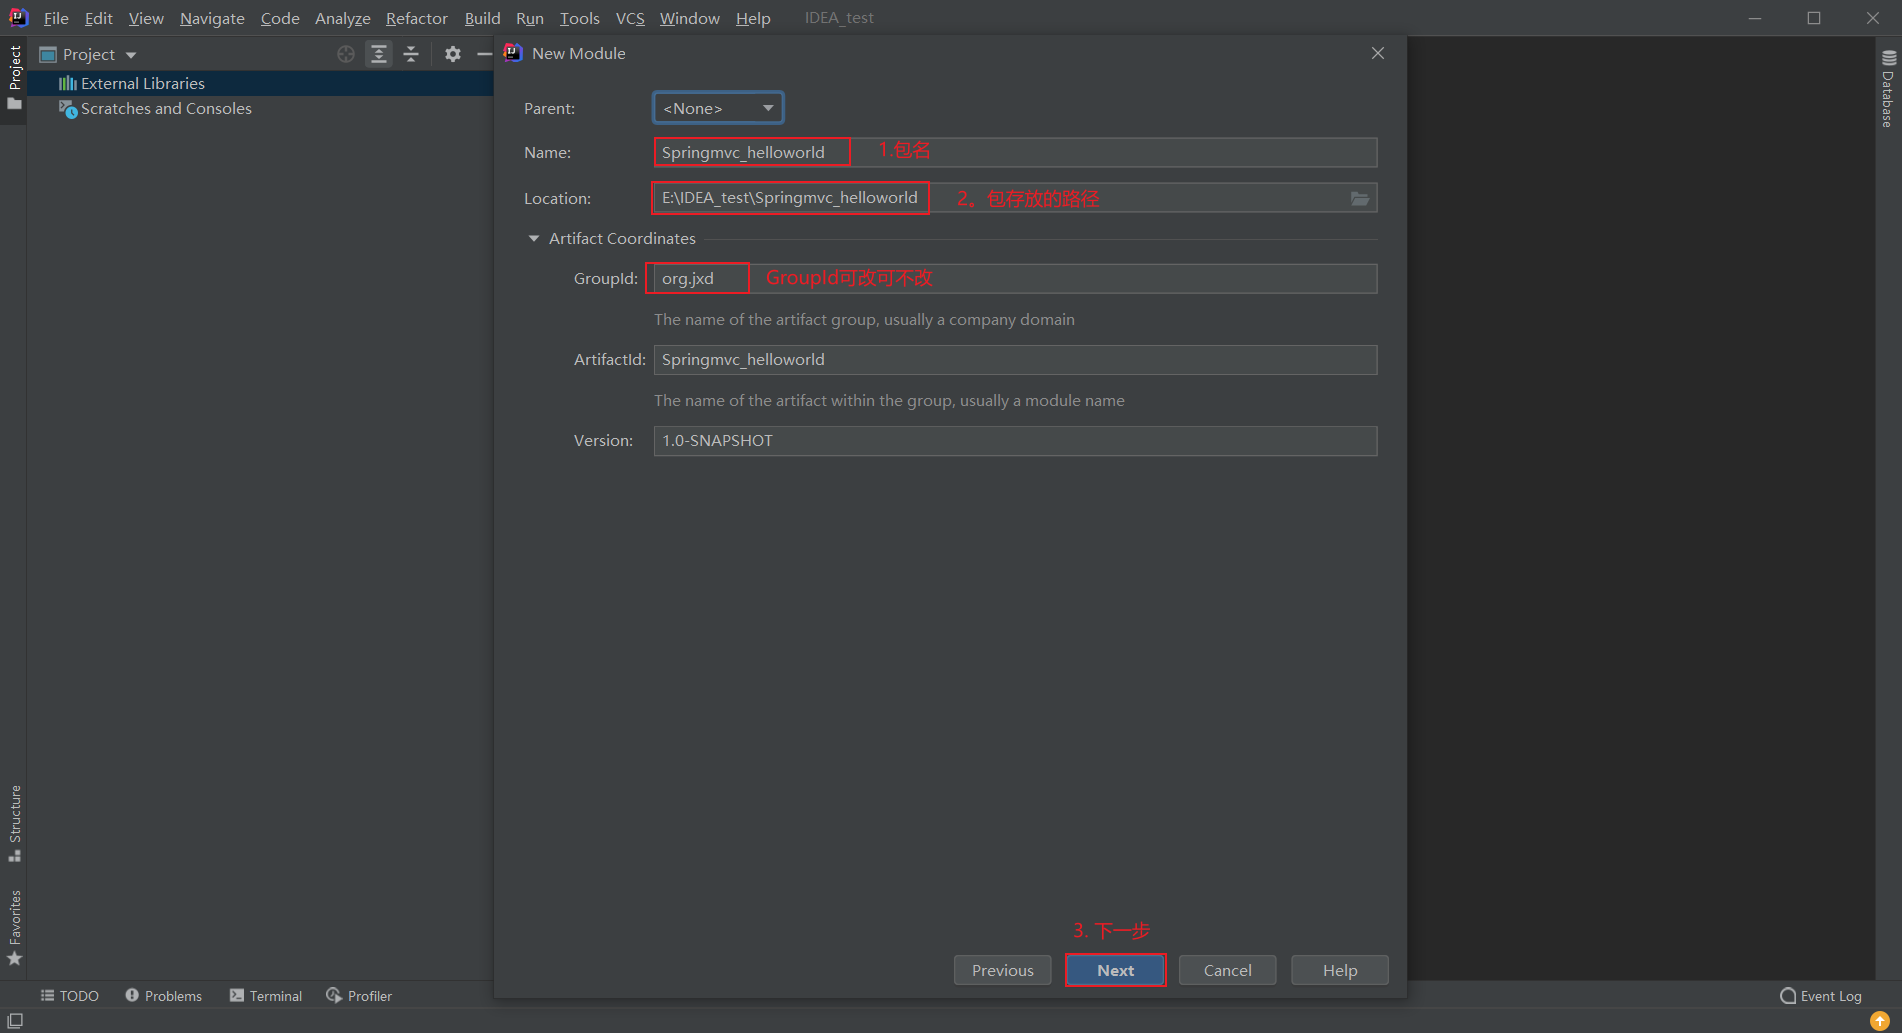
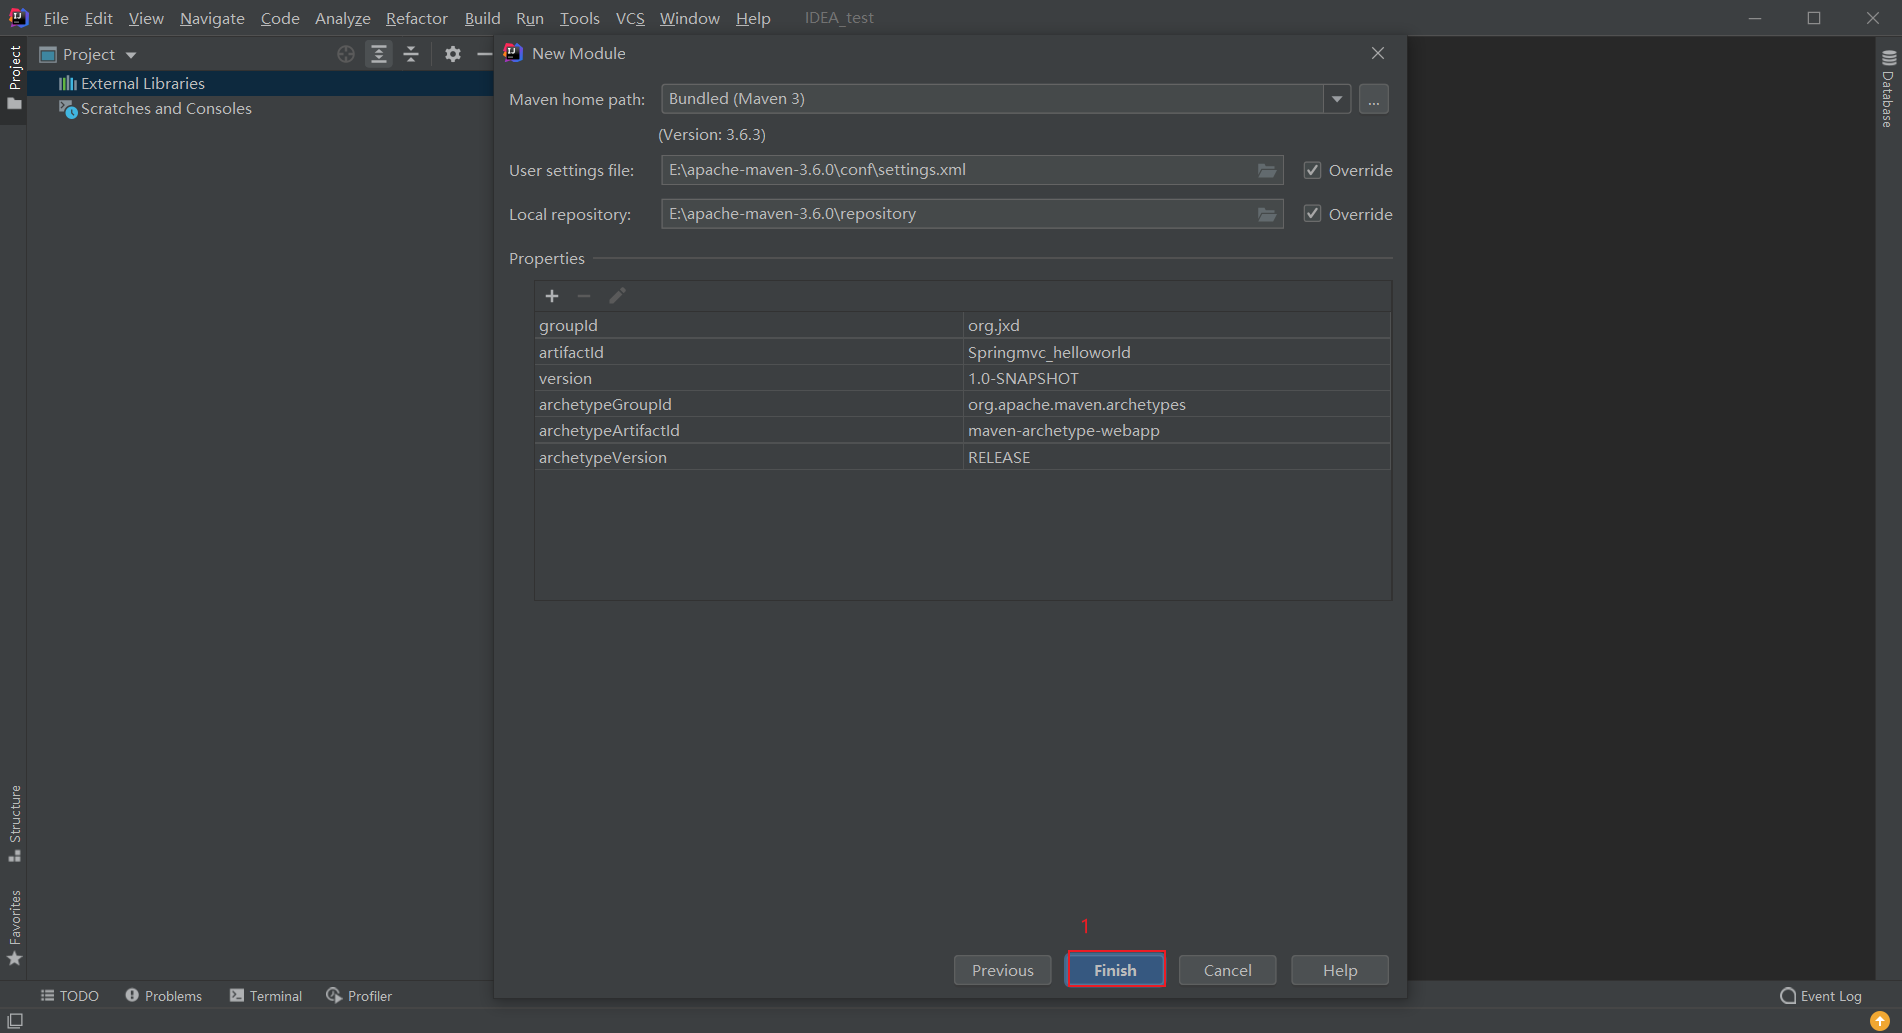
Some information about the configuration module:
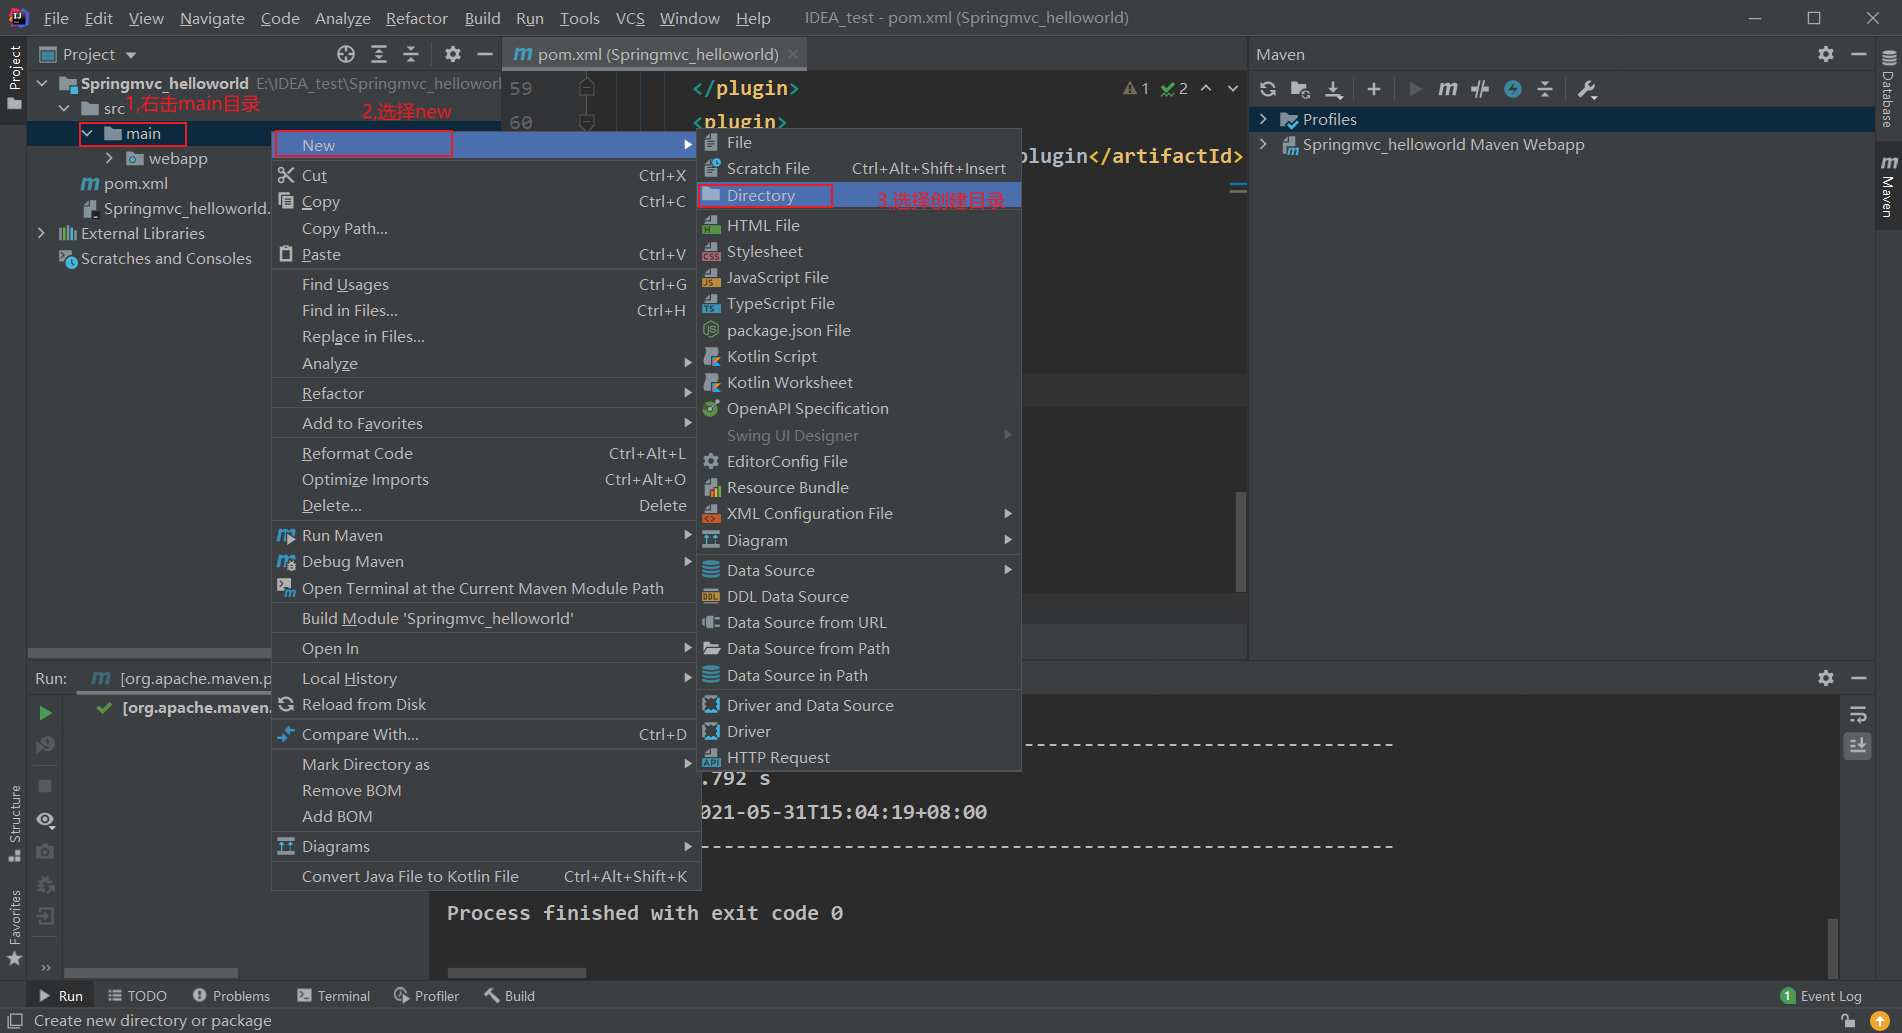
Make up the missing java and resources directories in the module:
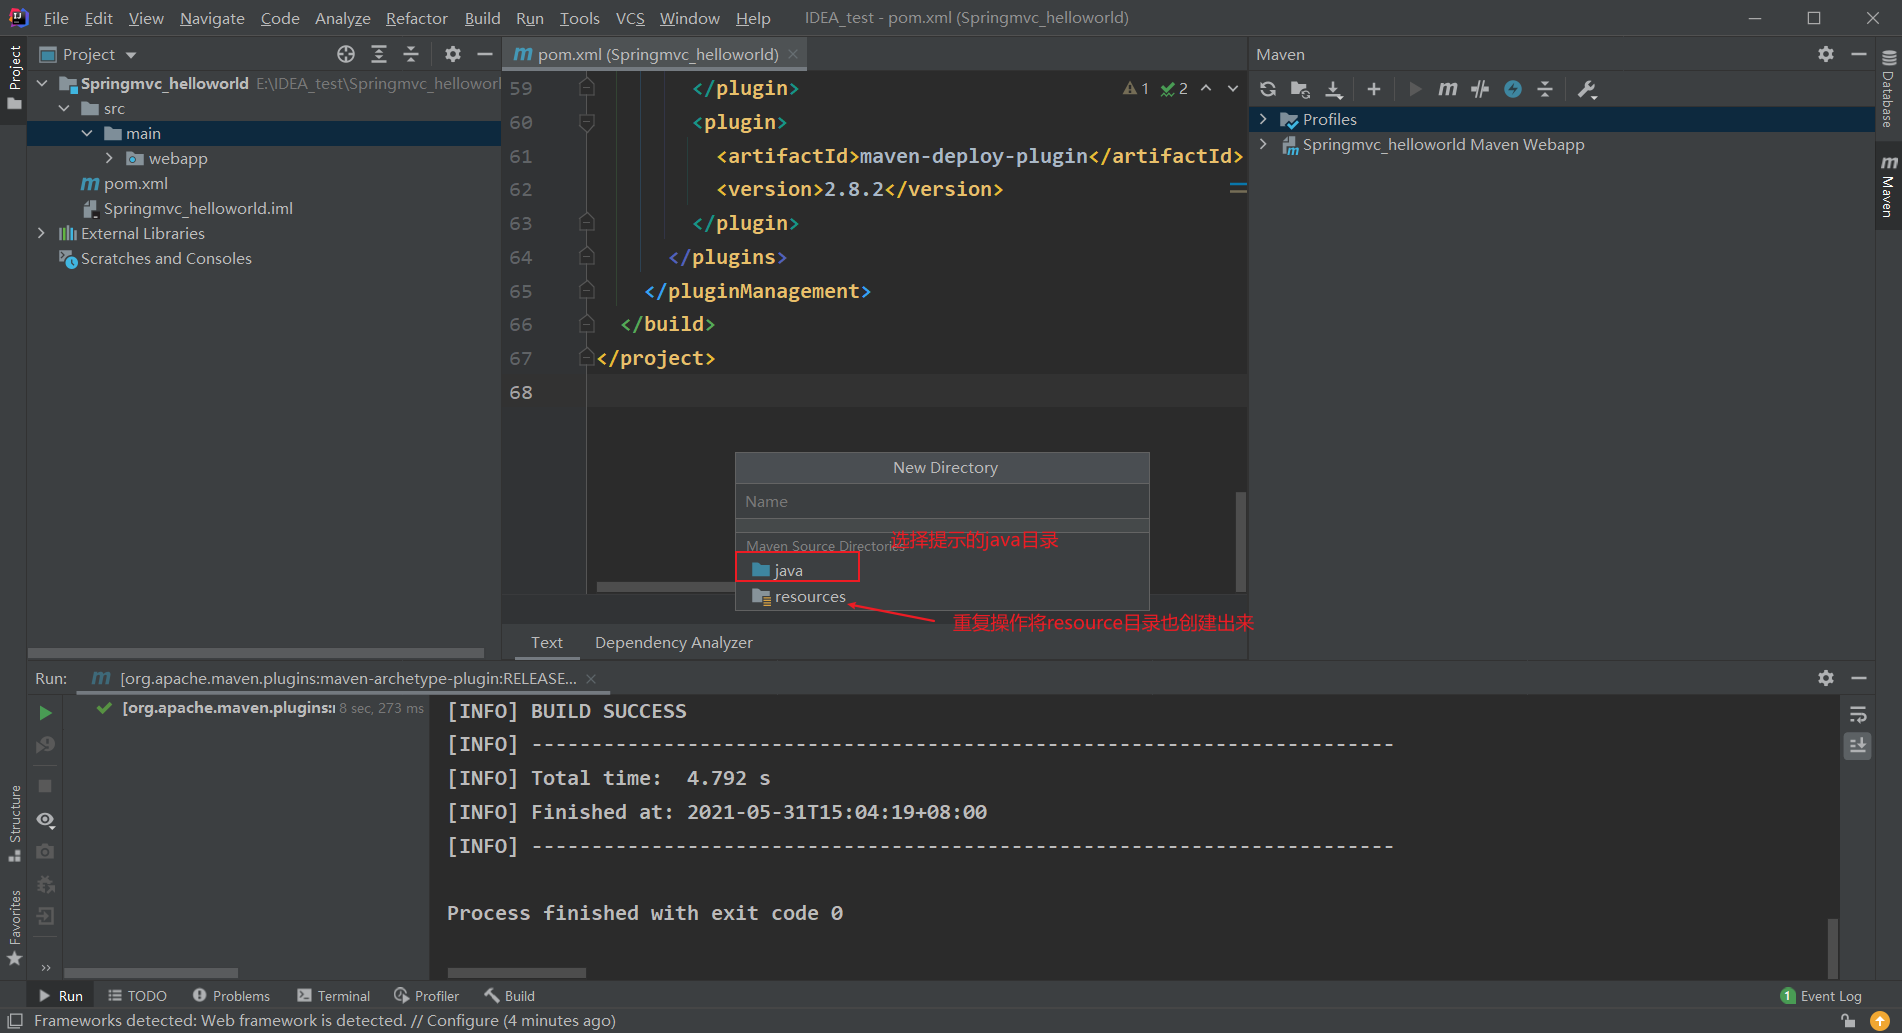
2. Configuration dependency
Put POM The XML file is changed as follows:
<?xml version="1.0" encoding="UTF-8"?>

<project xmlns="http://maven.apache.org/POM/4.0.0" xmlns:xsi="http://www.w3.org/2001/XMLSchema-instance"
  xsi:schemaLocation="http://maven.apache.org/POM/4.0.0 http://maven.apache.org/xsd/maven-4.0.0.xsd">
  <modelVersion>4.0.0</modelVersion>

  <groupId>org.jxd</groupId>
  <artifactId>Springmvc_helloworld</artifactId>
  <version>1.0-SNAPSHOT</version>
  <packaging>war</packaging>

  <properties>
    <project.build.sourceEncoding>UTF-8</project.build.sourceEncoding>
    <maven.compiler.source>1.8</maven.compiler.source>
    <maven.compiler.target>1.8</maven.compiler.target>
  </properties>

  <dependencies>
    <dependency>
      <groupId>junit</groupId>
      <artifactId>junit</artifactId>
      <version>4.11</version>
      <scope>test</scope>
    </dependency>
    <dependency>
      <groupId>org.springframework</groupId>
      <artifactId>spring-context</artifactId>
      <version>5.2.0.RELEASE</version>
    </dependency>
    <dependency>
      <groupId>org.springframework</groupId>
      <artifactId>spring-web</artifactId>
      <version>5.2.0.RELEASE</version>
    </dependency>
    <dependency>
      <groupId>org.springframework</groupId>
      <artifactId>spring-webmvc</artifactId>
      <version>5.2.0.RELEASE</version>
    </dependency>
    <dependency>
      <groupId>javax.servlet</groupId>
      <artifactId>servlet-api</artifactId>
      <version>2.5</version>
      <scope>provided</scope>
    </dependency>
    <dependency>
      <groupId>javax.servlet.jsp</groupId>
      <artifactId>jsp-api</artifactId>
      <version>2.2.1-b03</version>
      <scope>provided</scope>
    </dependency>
  </dependencies>

</project>
3. Change web Version used by XML
Due to the default web The version of XML is relatively low. We need to create one ourselves.
Select "Project Structure":
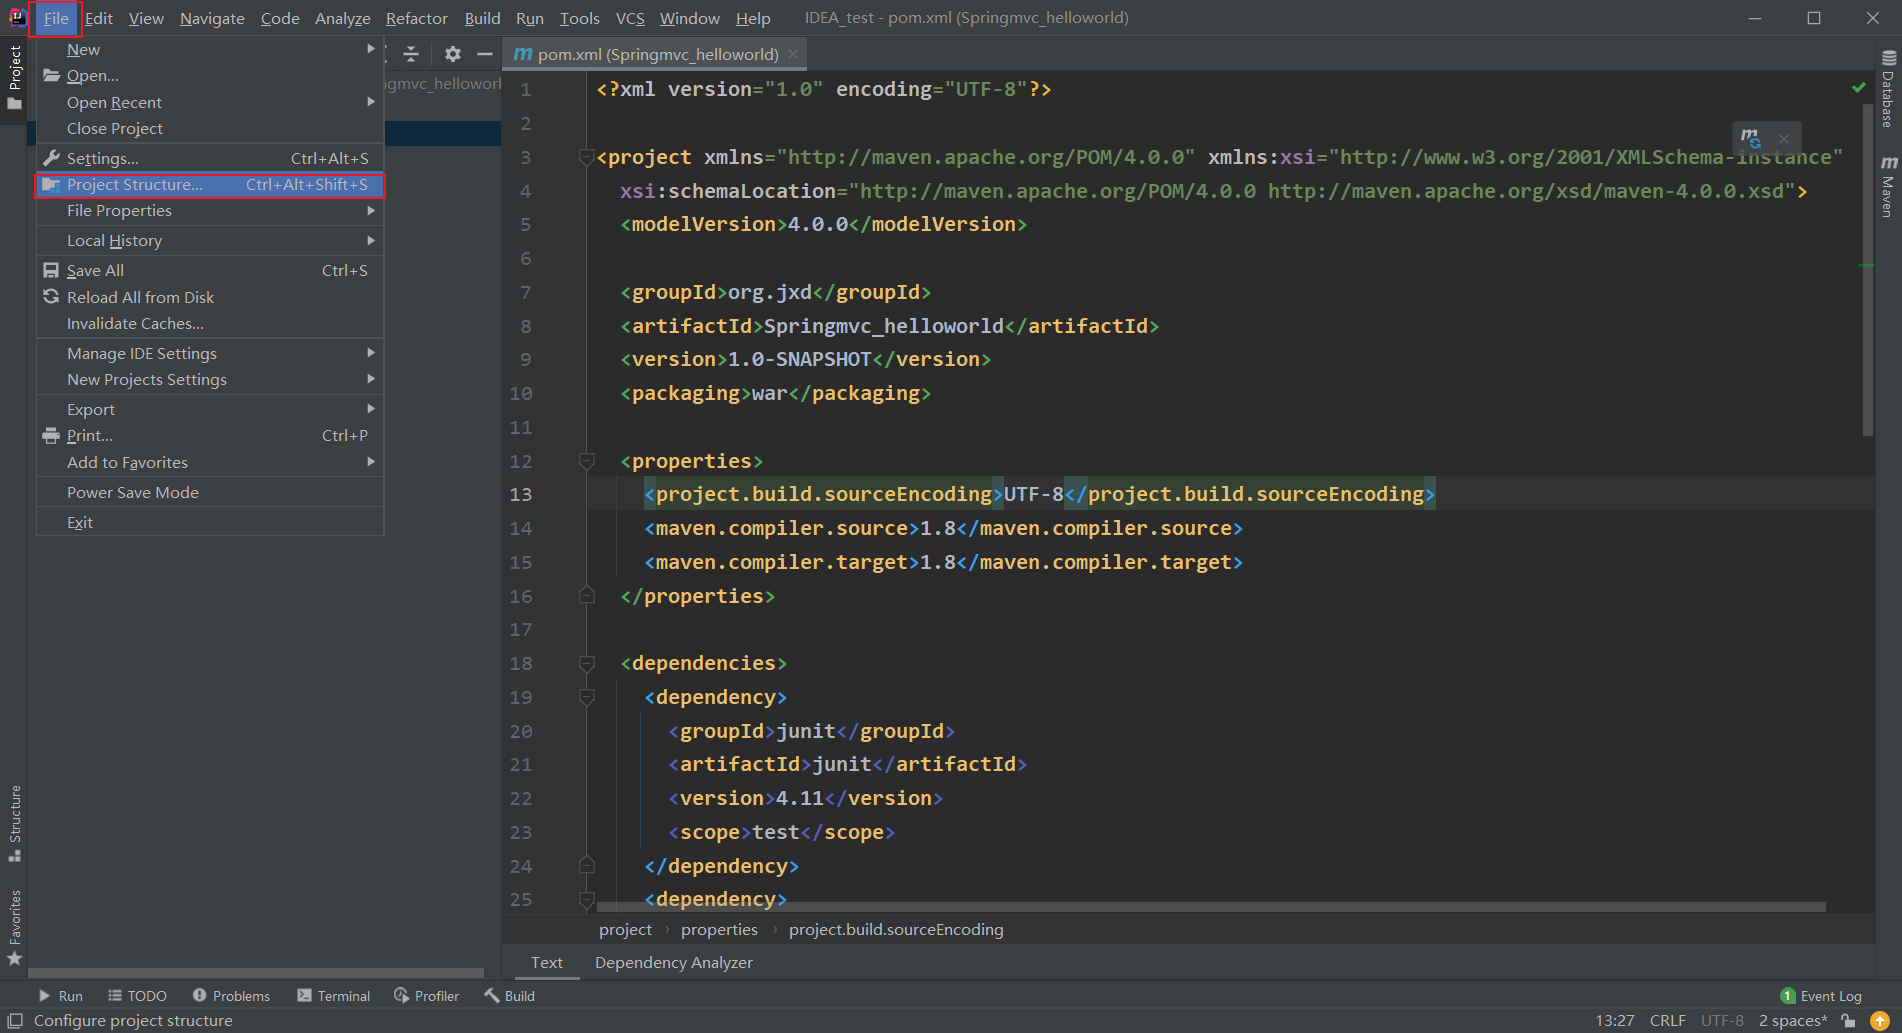
The original web XML delete:
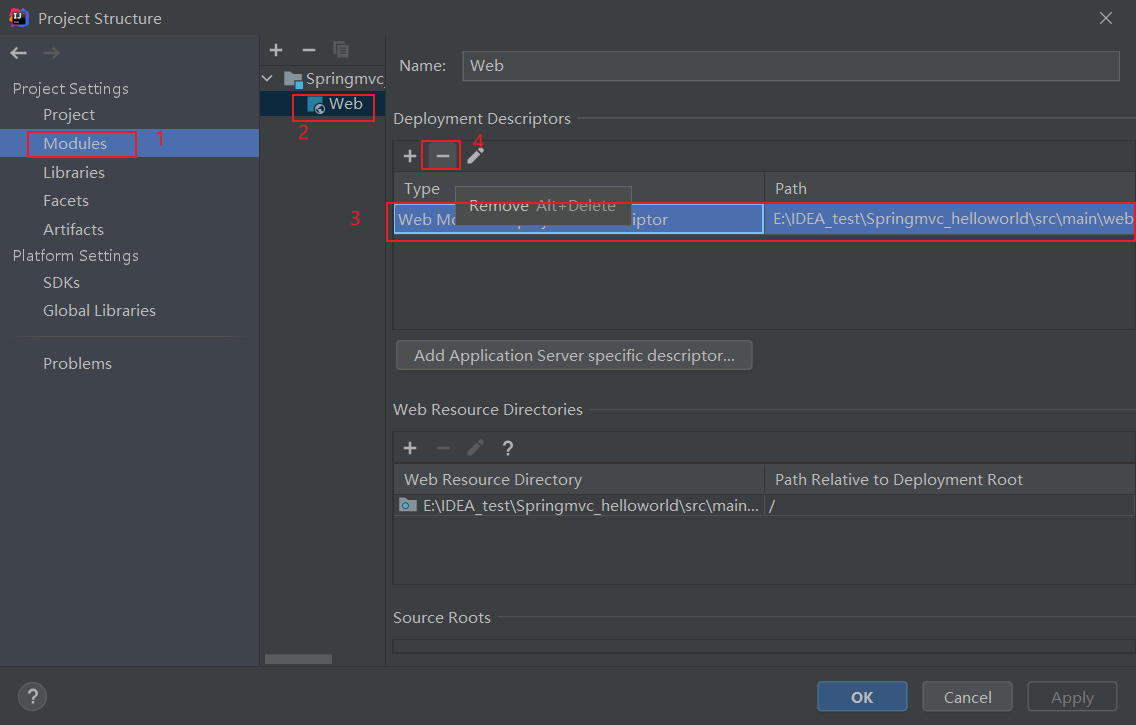
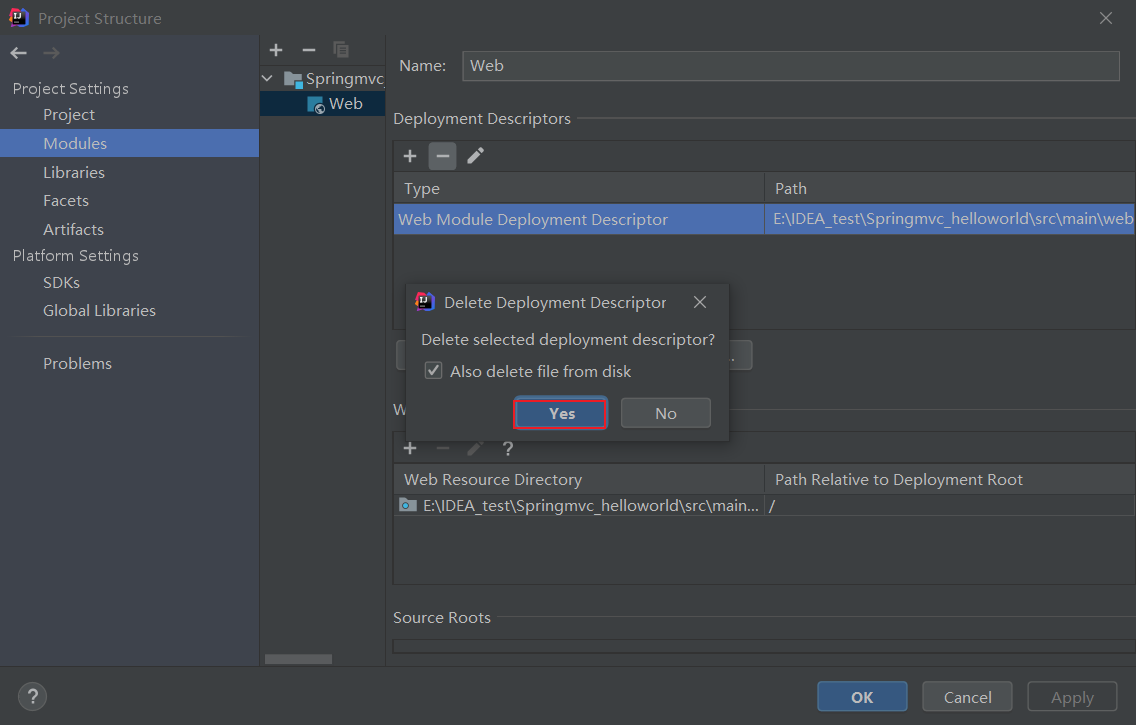
Create a new web XML alternative file, the name should not be the same as web Like XML:
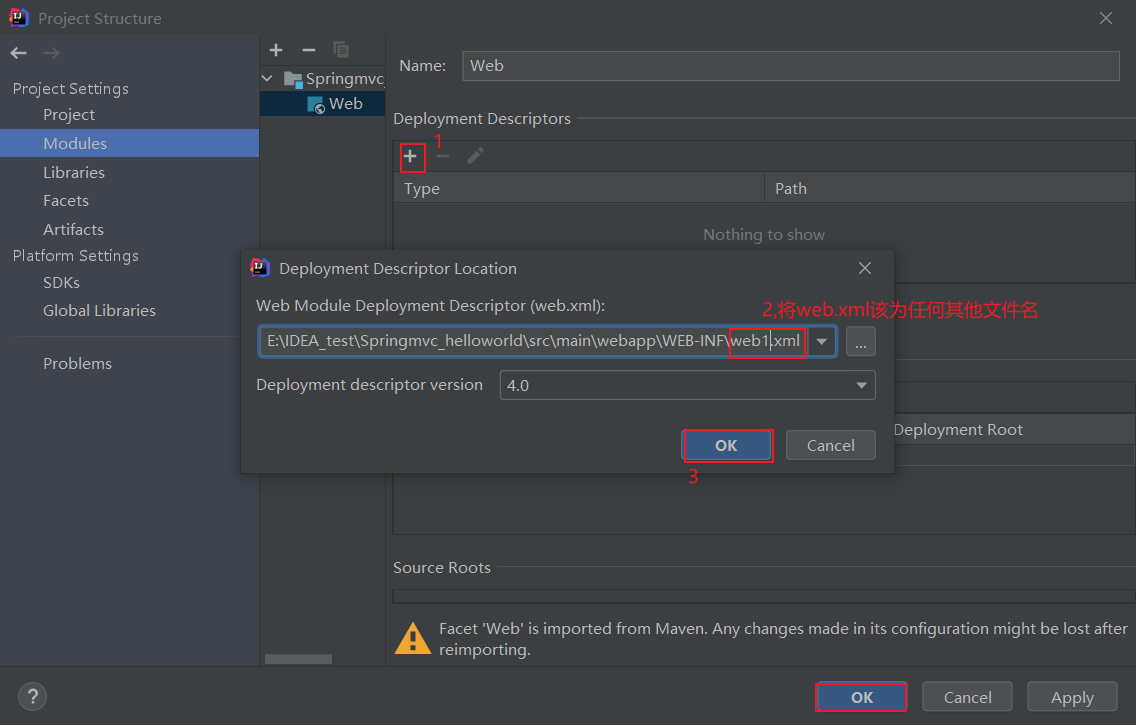
Use the one we just created to replace the web The file name of the XML file is changed to web xml
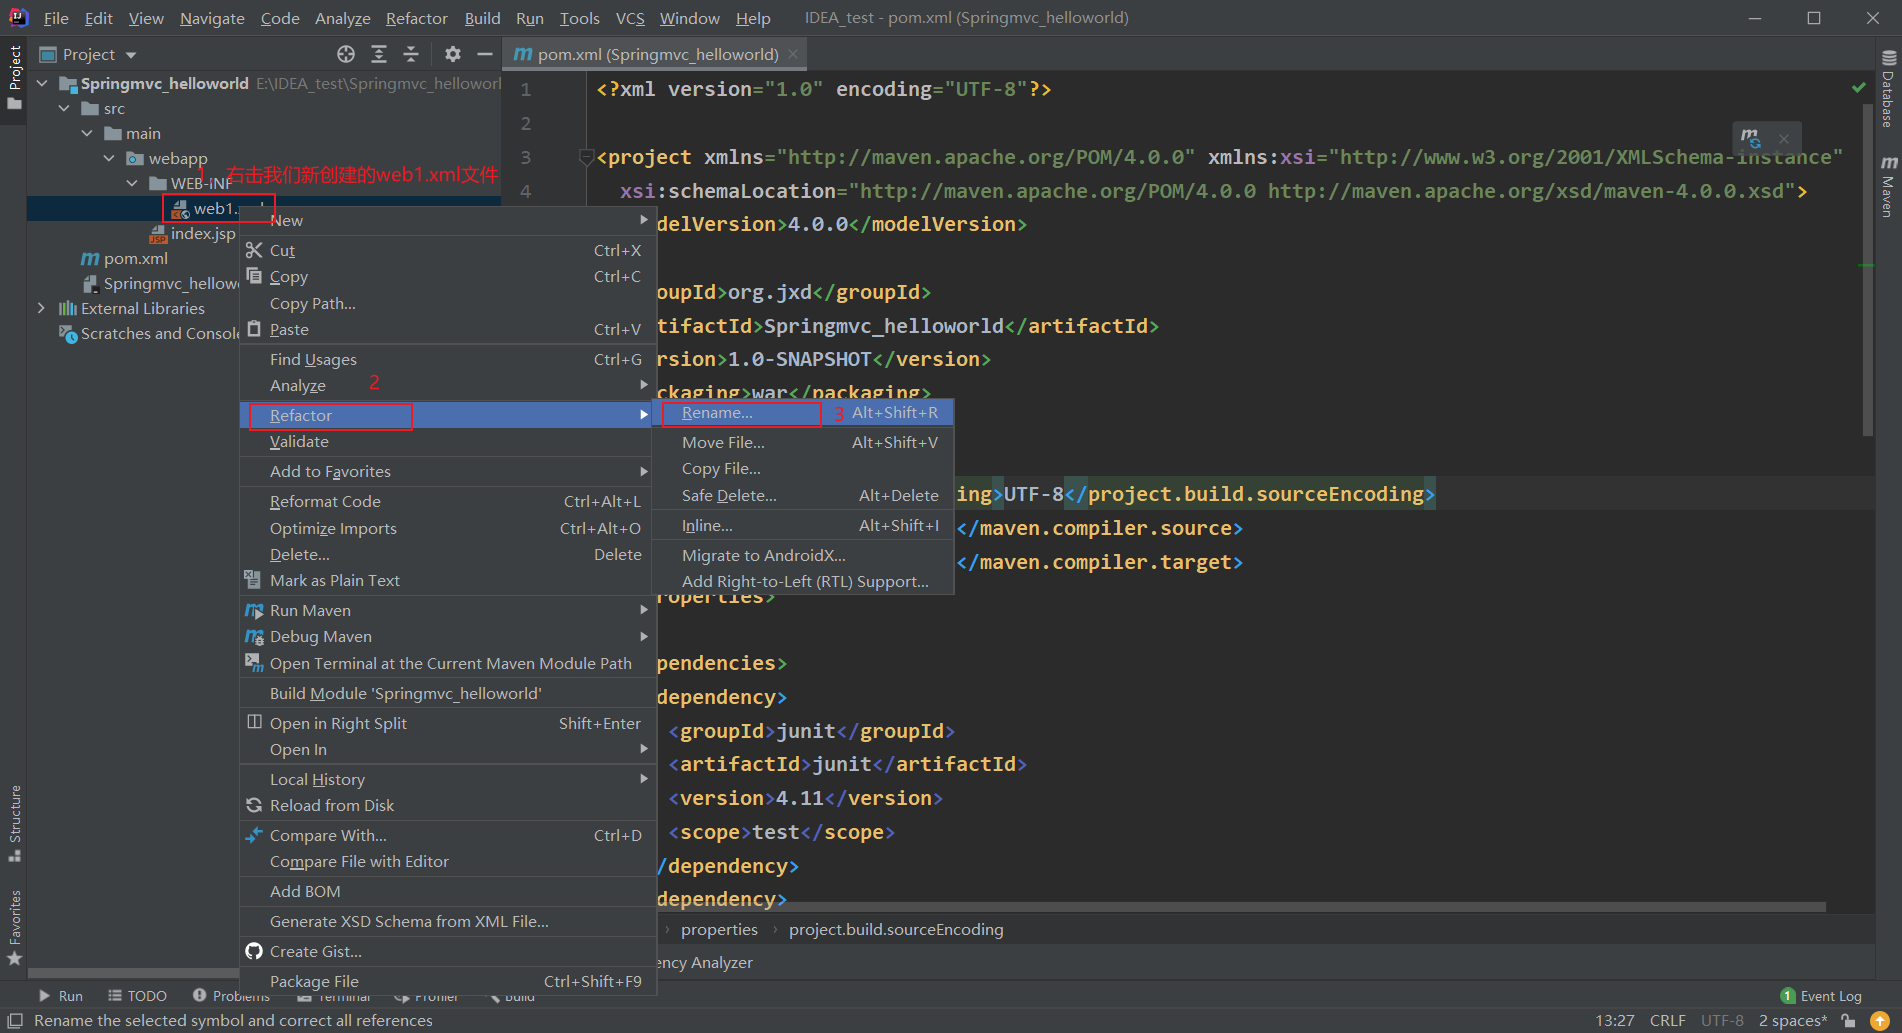
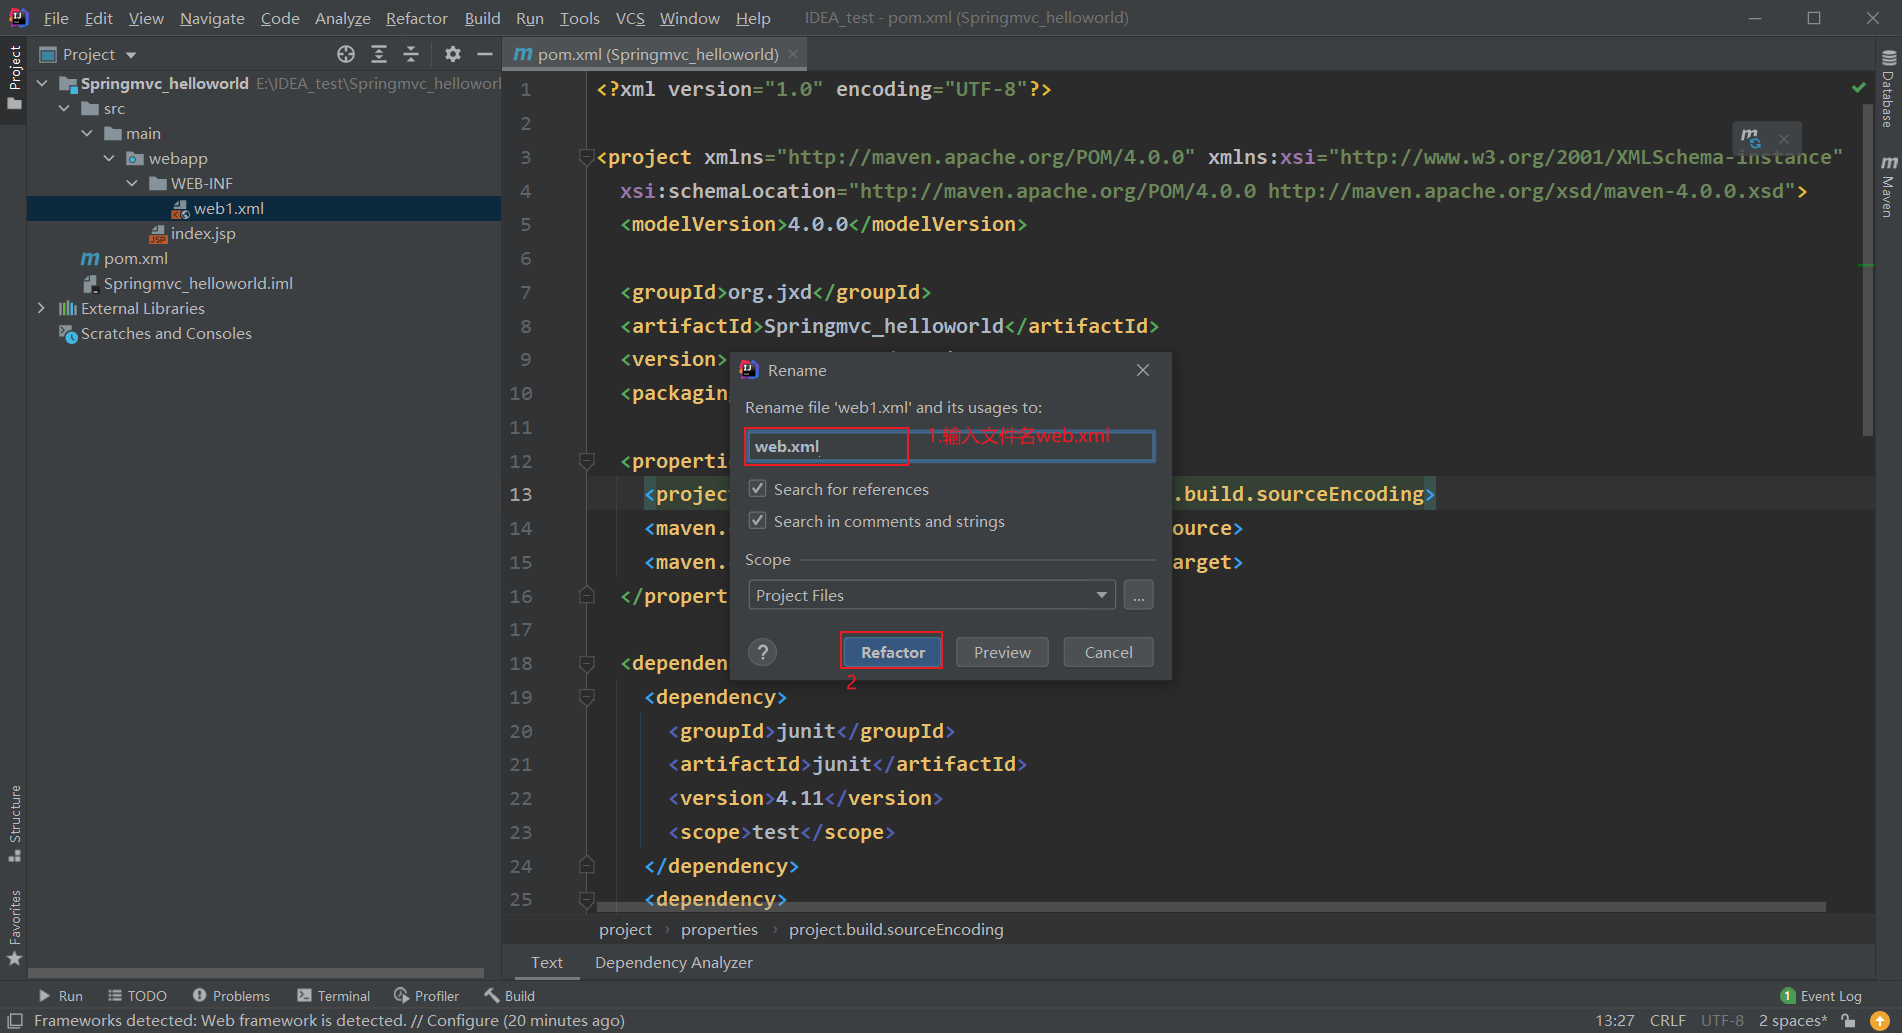
4. Configure web XML file
On the web The XML file is configured as follows:
<?xml version="1.0" encoding="UTF-8"?>
<web-app xmlns="http://xmlns.jcp.org/xml/ns/javaee"
         xmlns:xsi="http://www.w3.org/2001/XMLSchema-instance"
         xsi:schemaLocation="http://xmlns.jcp.org/xml/ns/javaee http://xmlns.jcp.org/xml/ns/javaee/web-app_4_0.xsd"
         version="4.0">

    <!-- Front end interception controller -->
    <servlet>
        <servlet-name>springDispatcherServlet</servlet-name>
        <servlet-class>org.springframework.web.servlet.DispatcherServlet</servlet-class>
        <init-param>
            <param-name>contextConfigLocation</param-name>
            <param-value>classpath:springmvc.xml</param-value>
        </init-param>
        <load-on-startup>1</load-on-startup>
    </servlet>

    <servlet-mapping>
        <servlet-name>springDispatcherServlet</servlet-name>
        <url-pattern>/</url-pattern>
        <!-- /and/*To intercept all requests,/*The range is larger and will be intercepted jsp file -->
    </servlet-mapping>


</web-app>
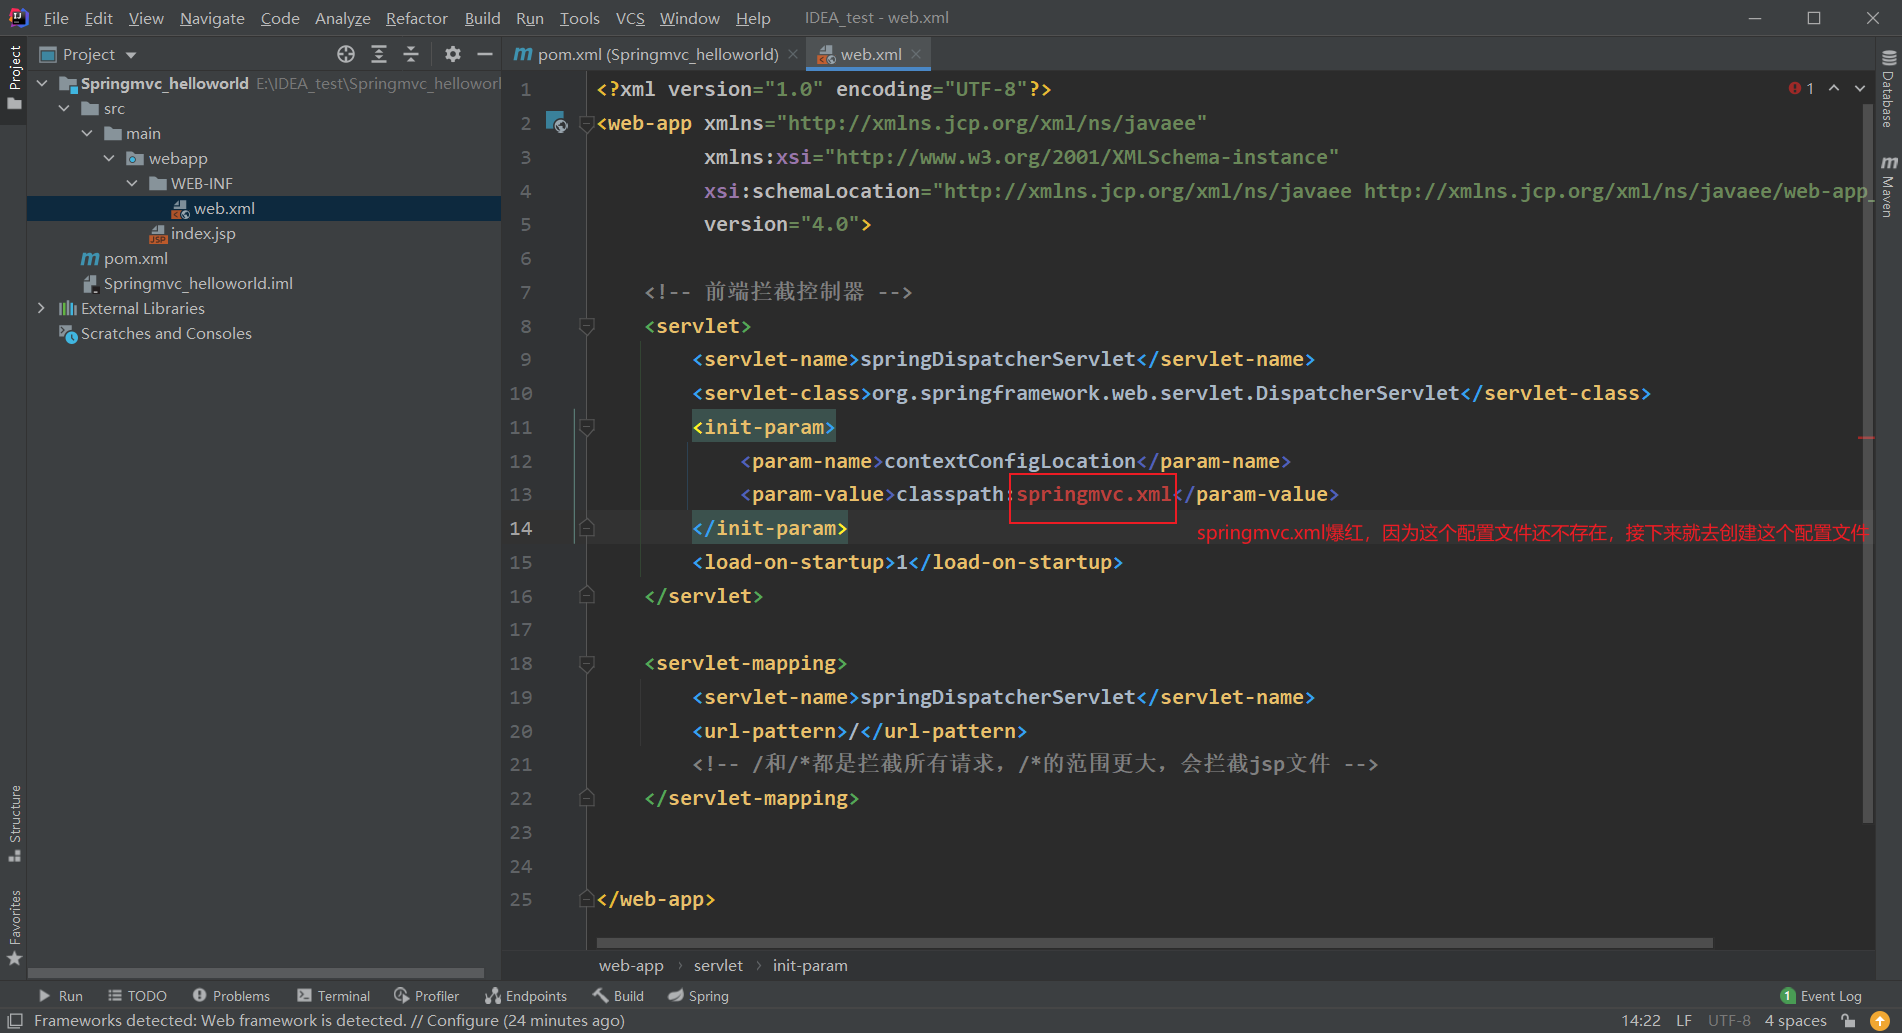
5. Create spring MVC configuration file
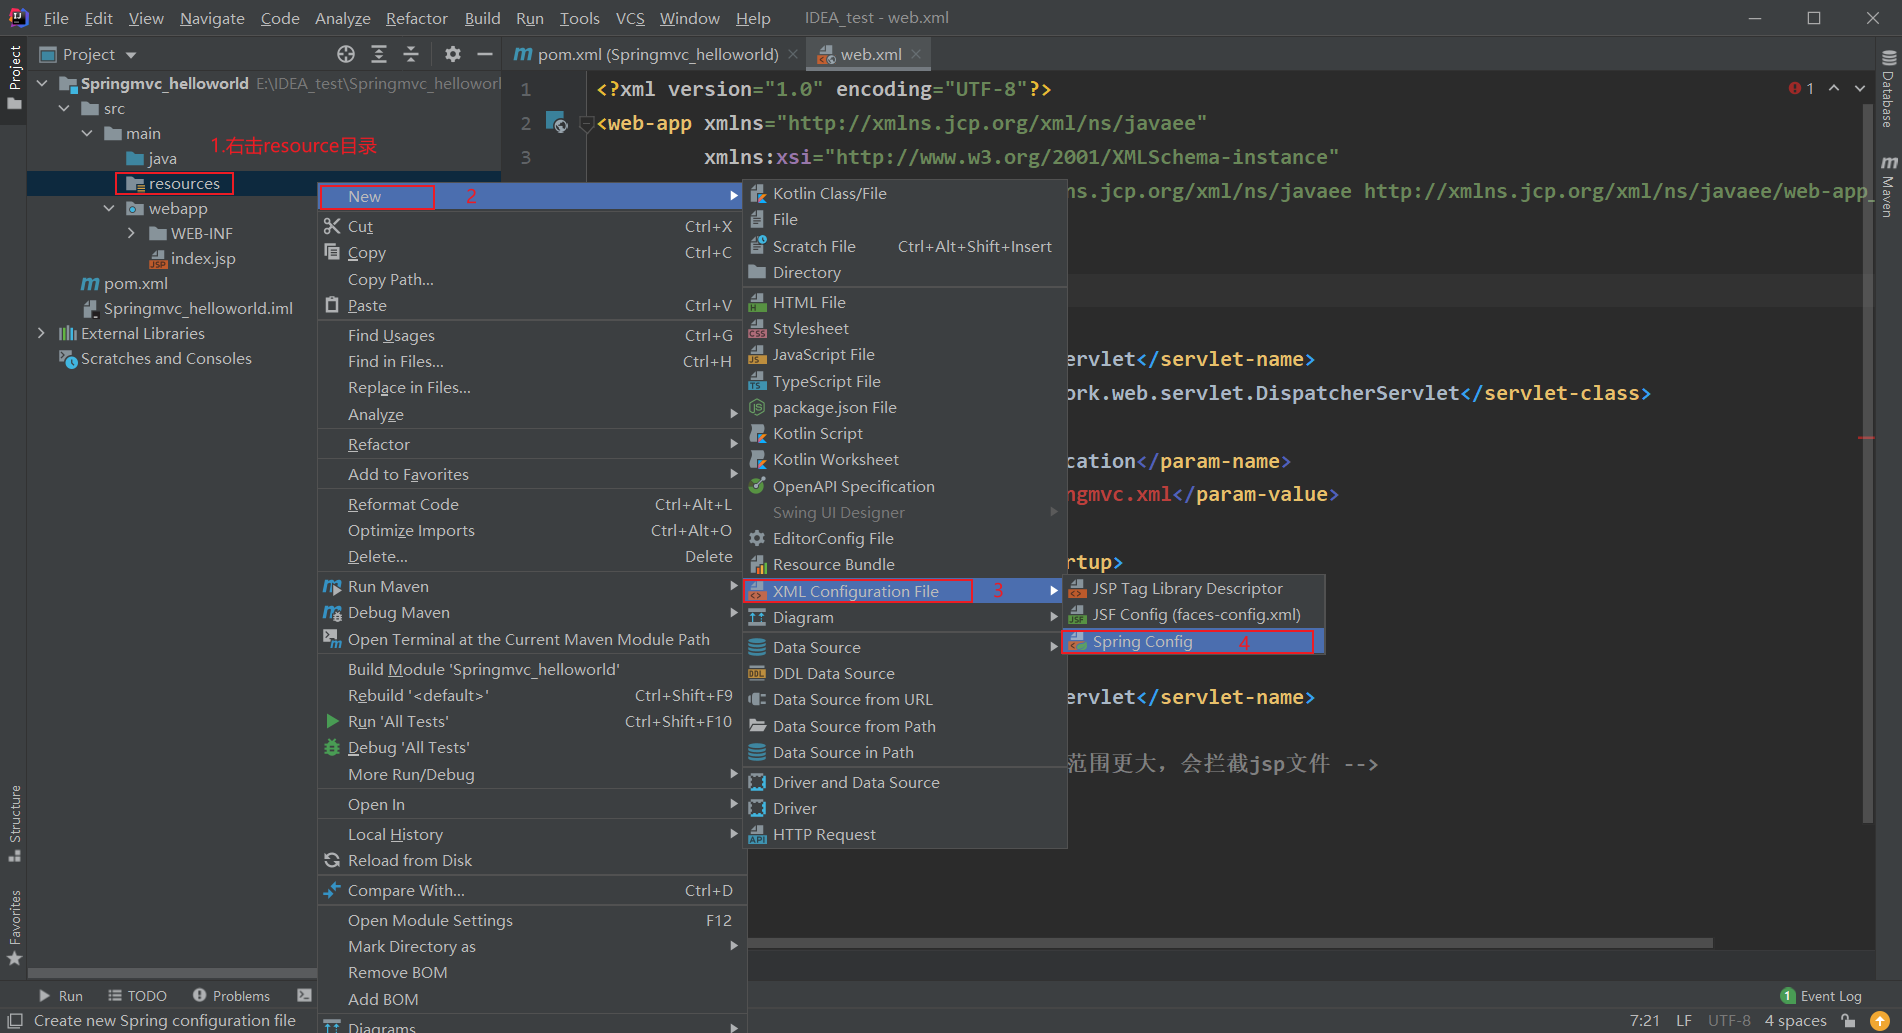
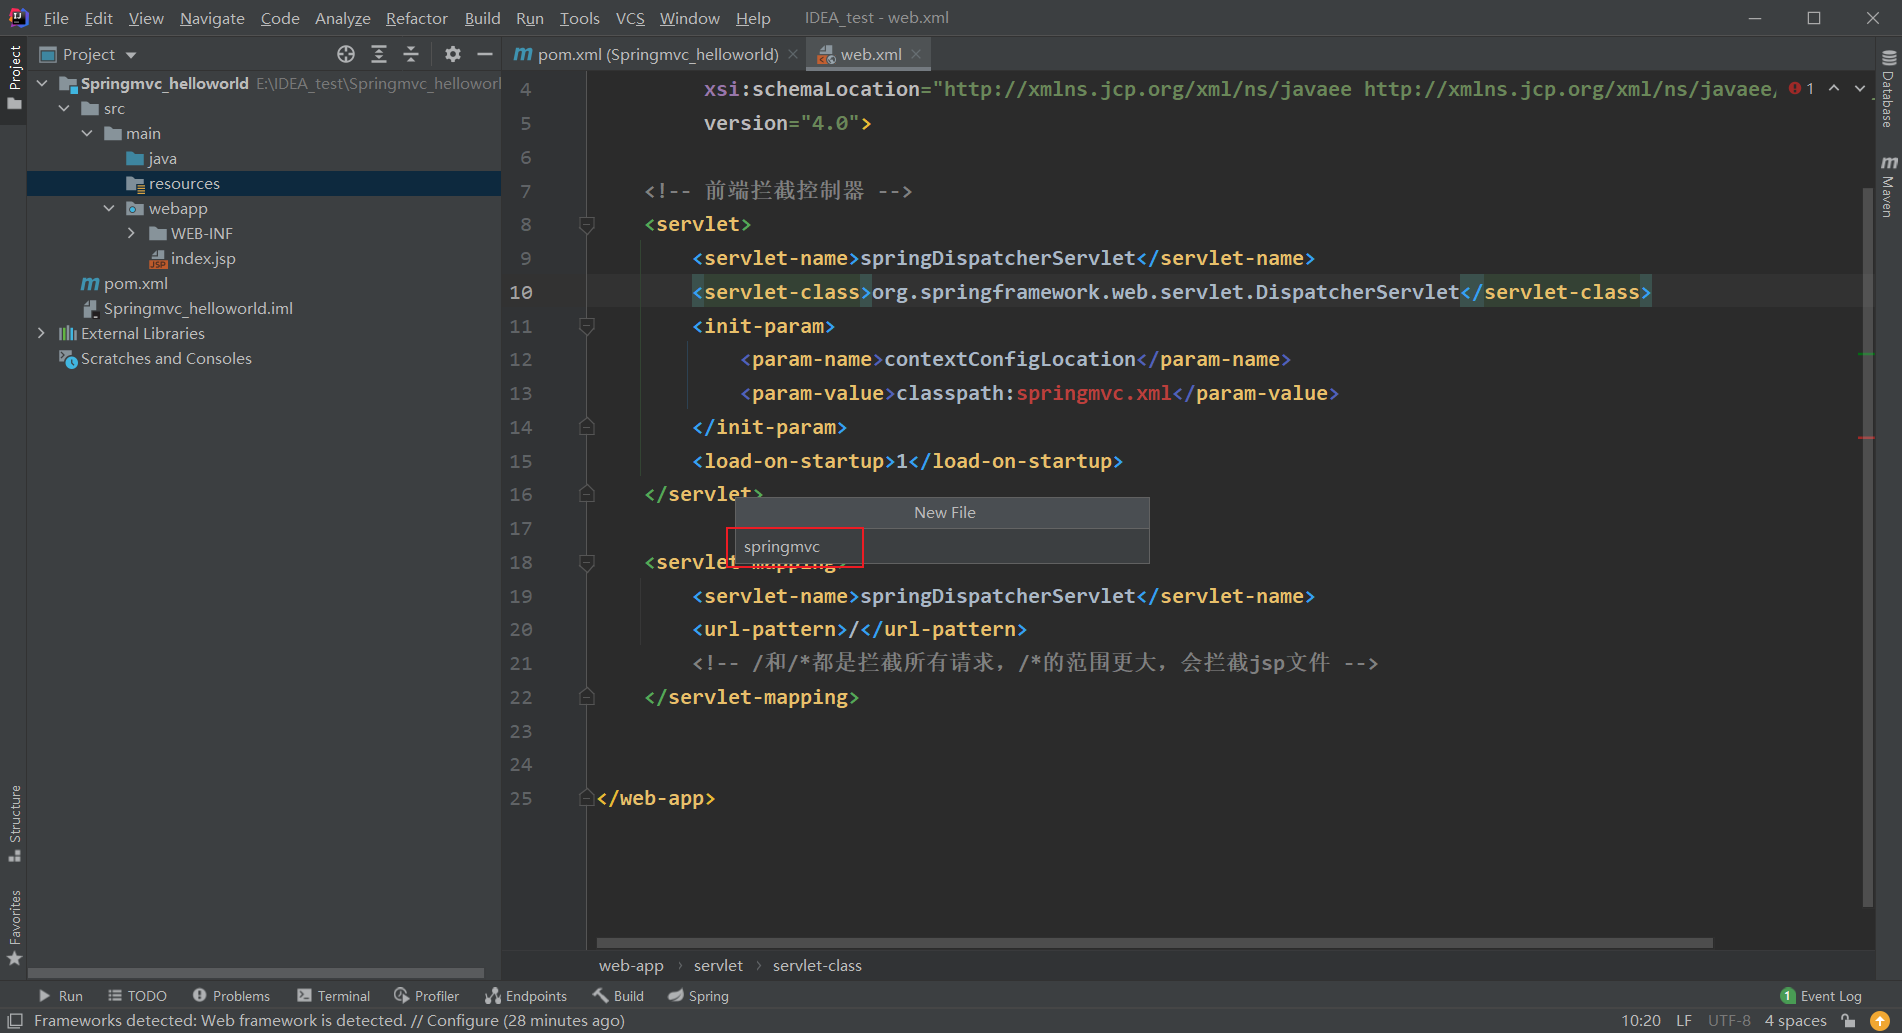
6. Write the target page to jump to
Create a new pages directory under WEB-INF and a new directory named success JSP file, which is the target page we want to jump to:
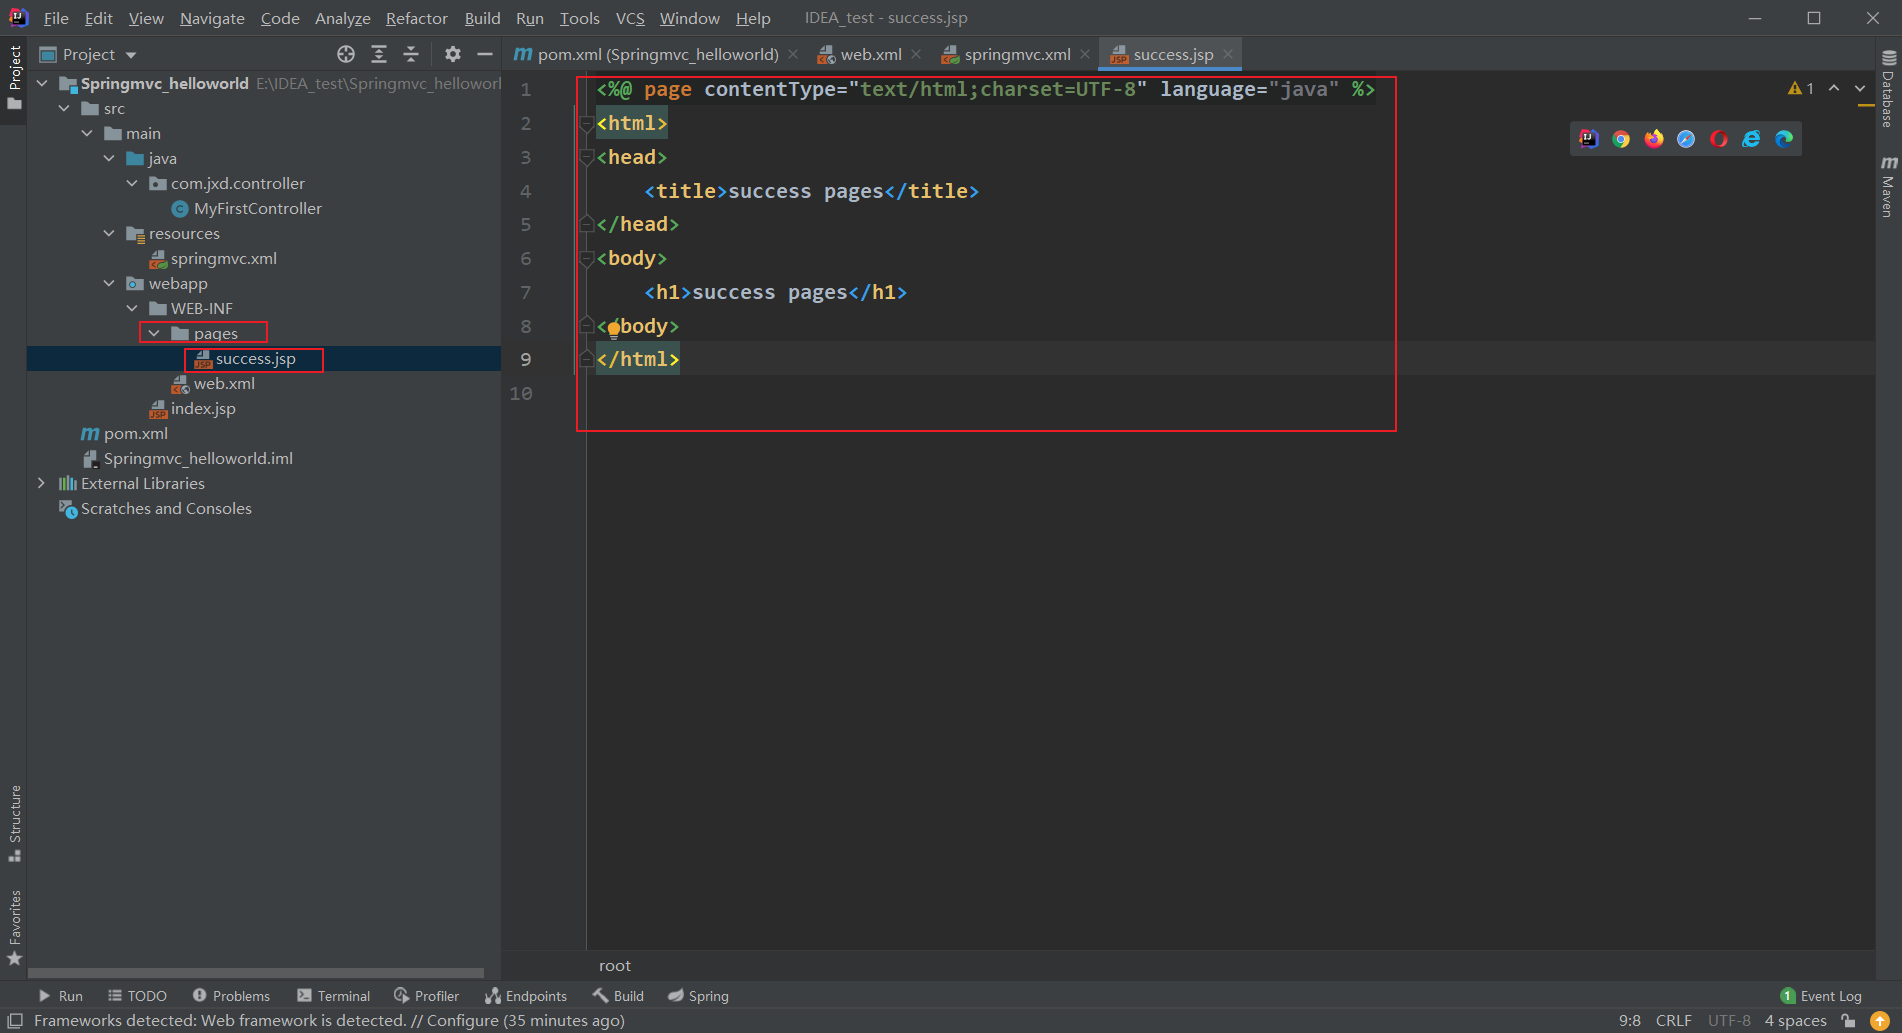
7. Write the control layer of spring MVC
First, create a package com. Com in the java directory to store the java code of all control layers of spring MVC jxd. controller:
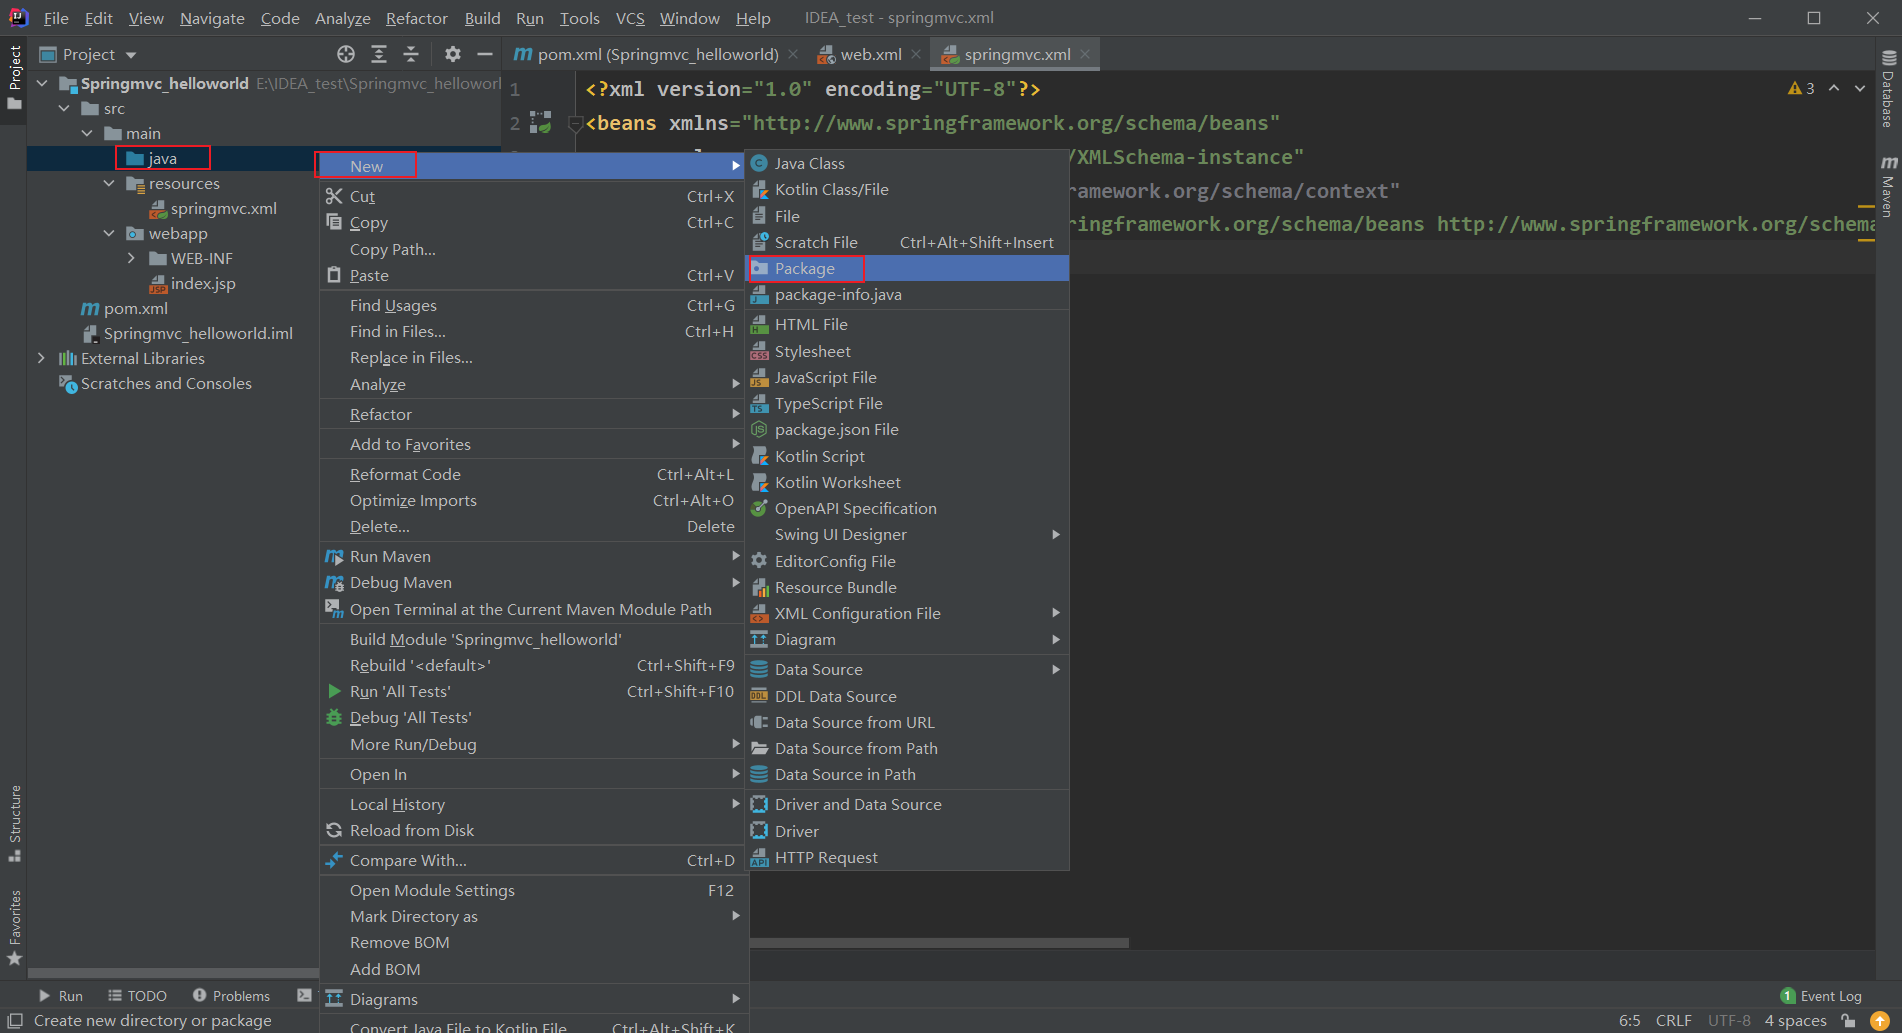
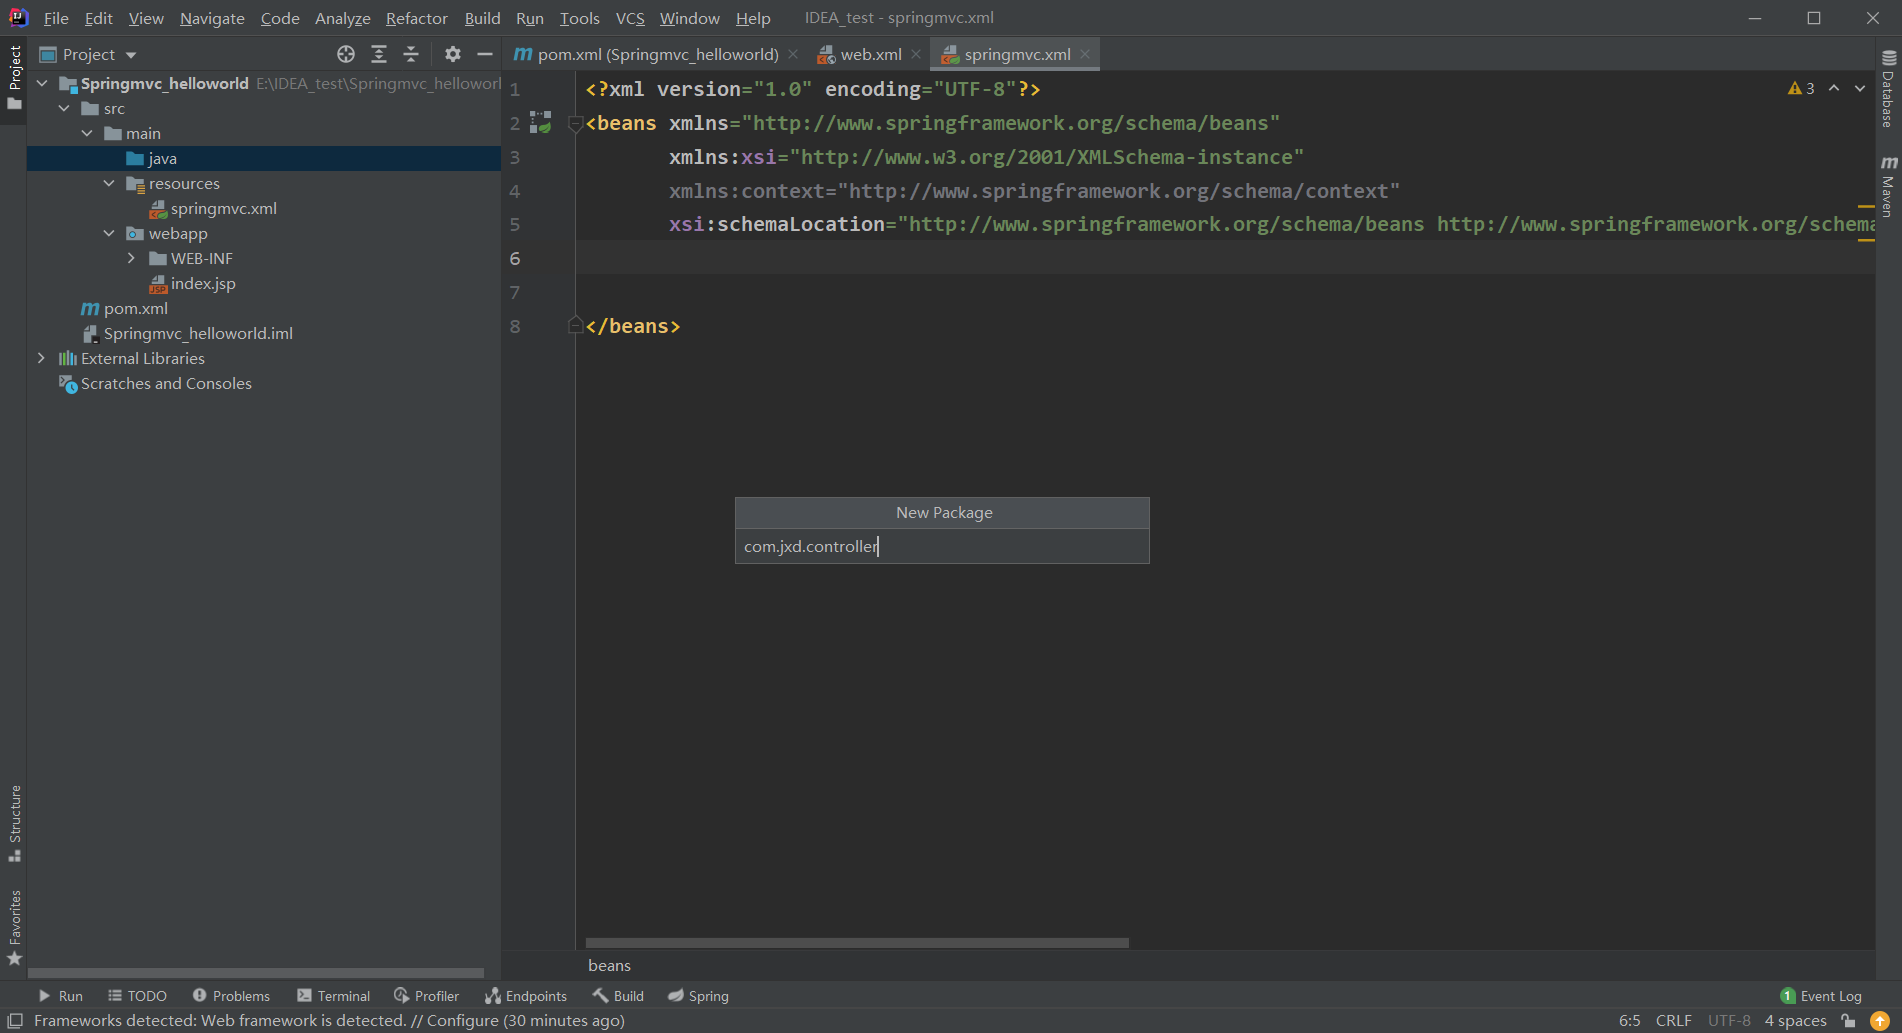
On our created com jxd. Create a MyFirstController class under the controller package:
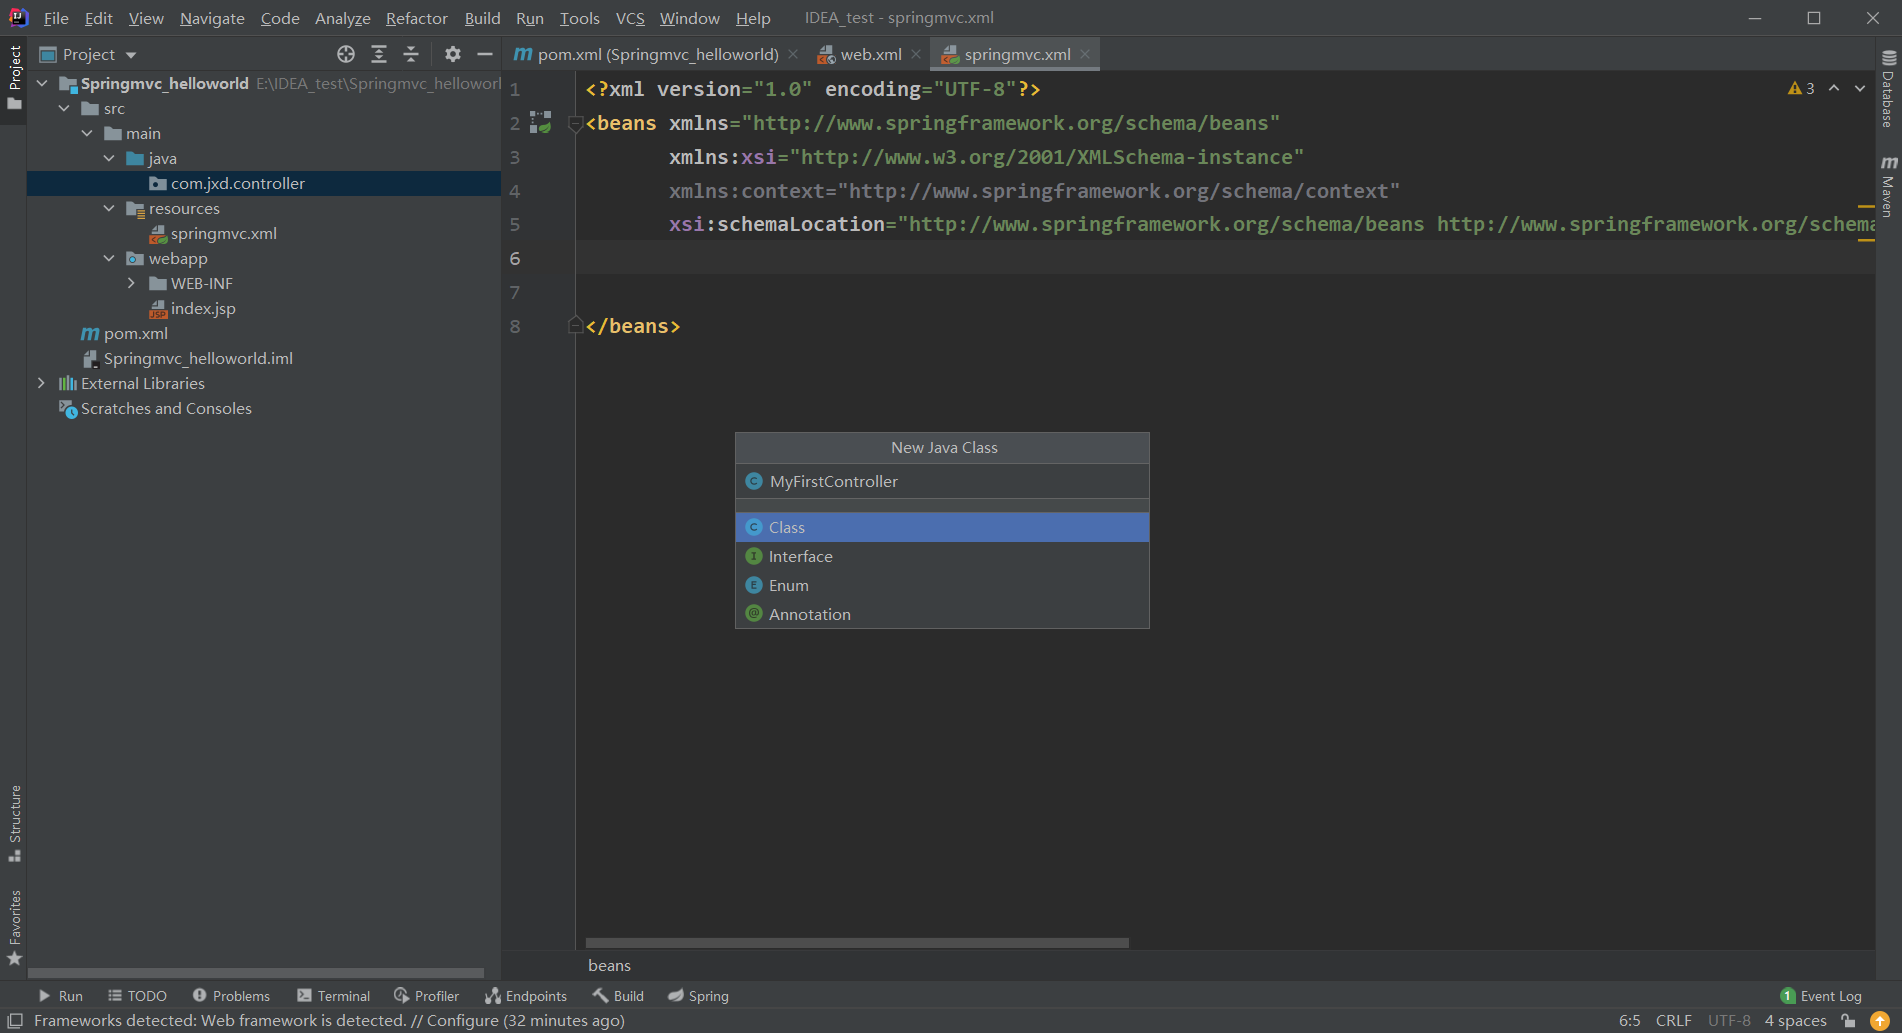
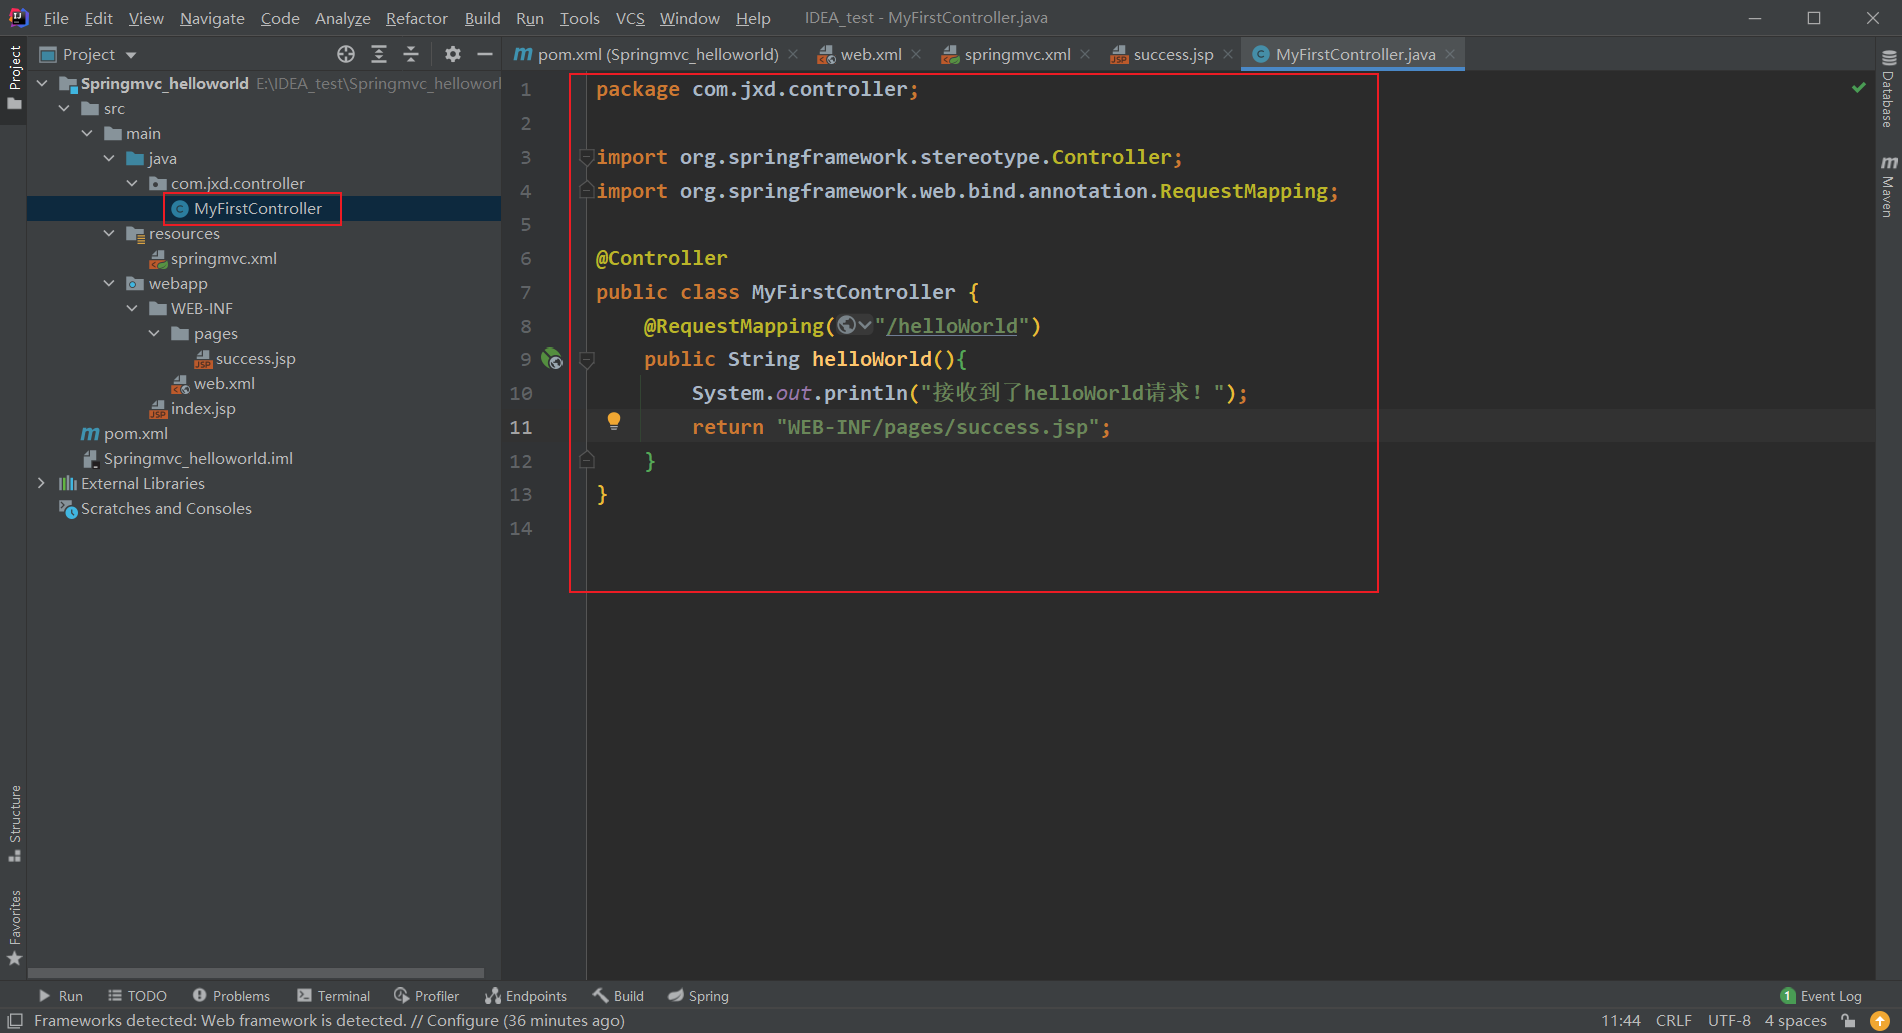
Create a method named helloWorld in this class, which is used to process the helloWorld request. After receiving the helloWorld request, print the information on the console and jump to success jsp:
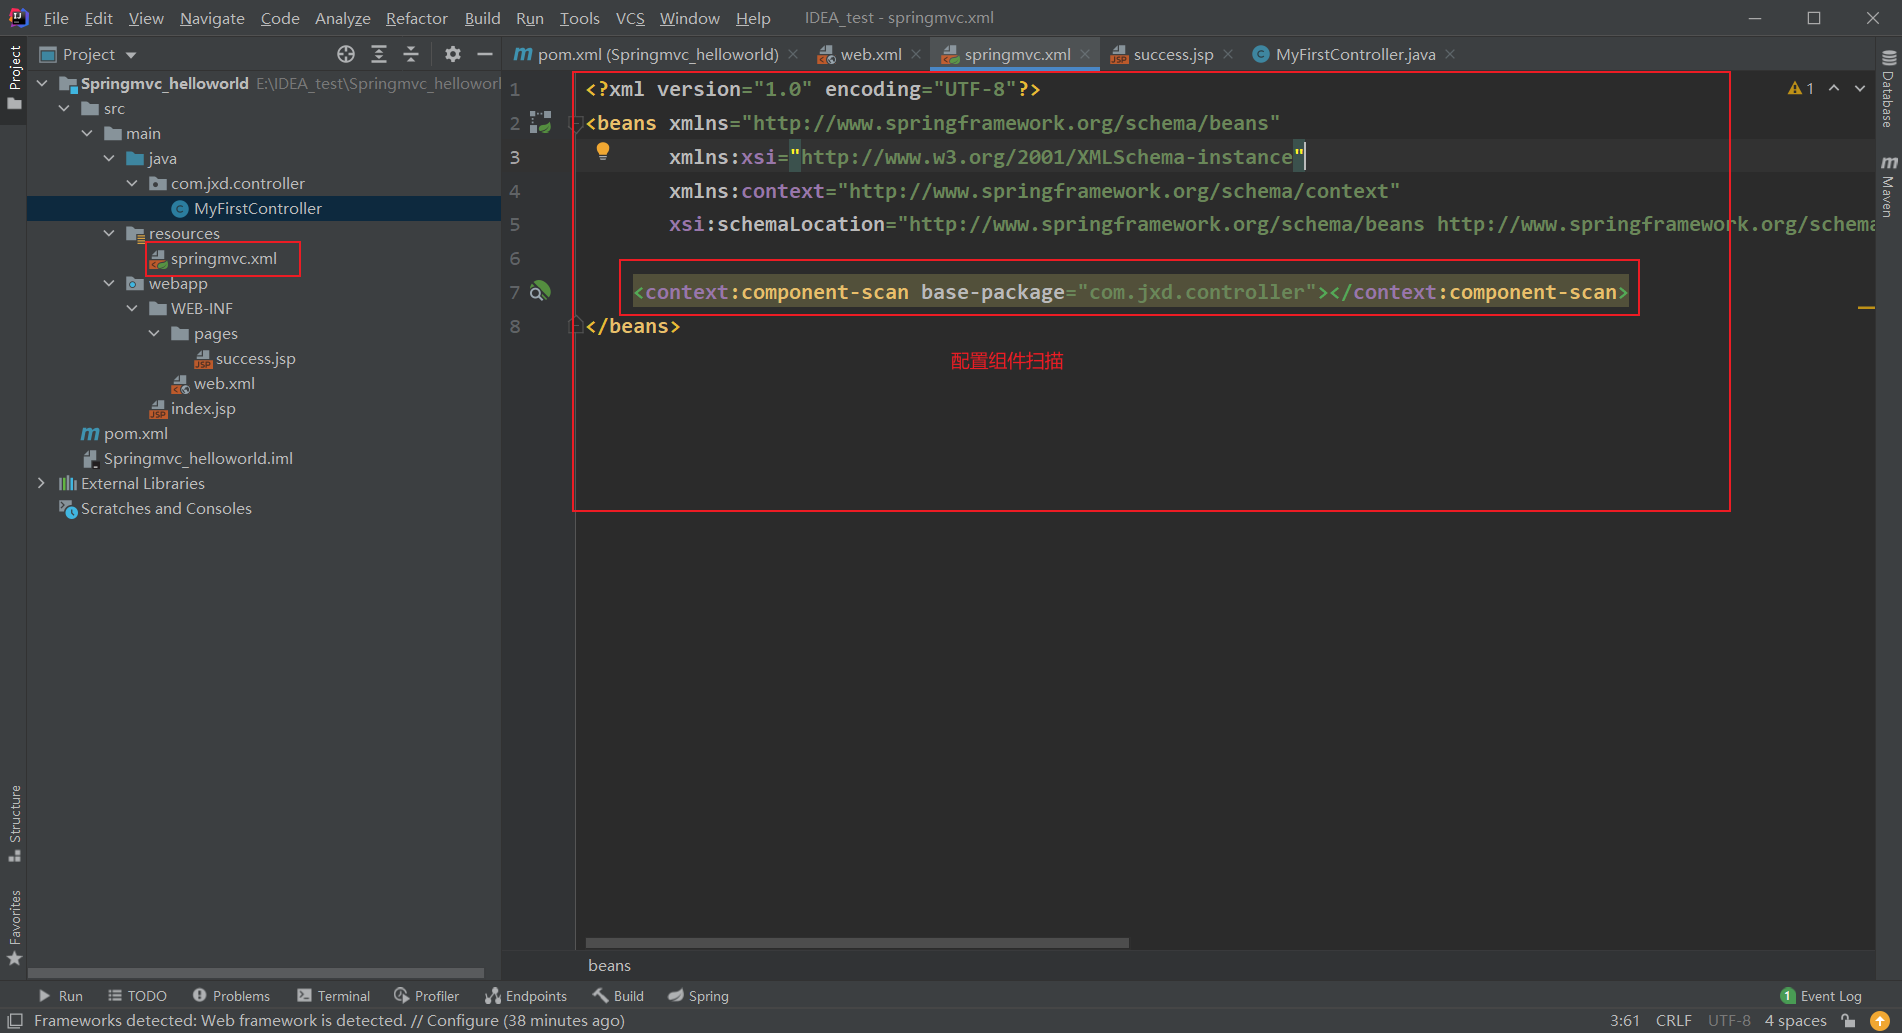
8. Configure component scanning
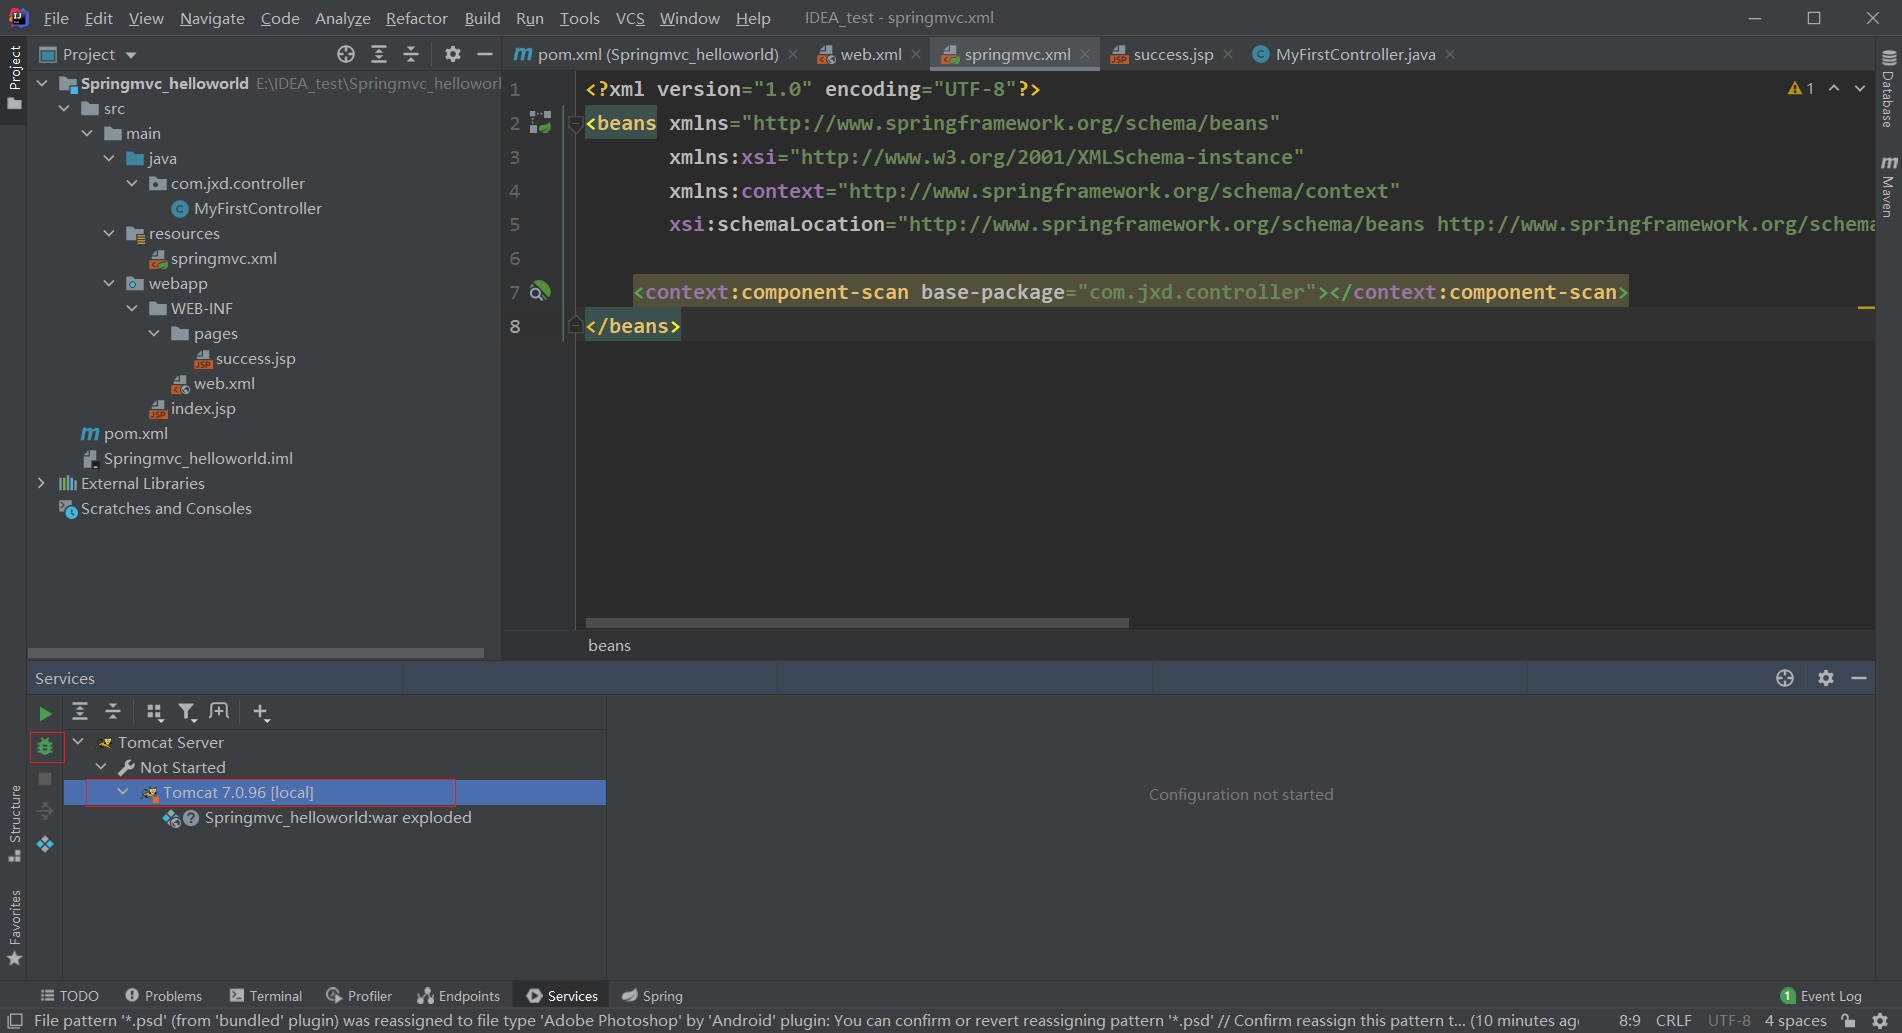
In spring MVC Configure component scanning path in XML file:
9. Add Tomcat service
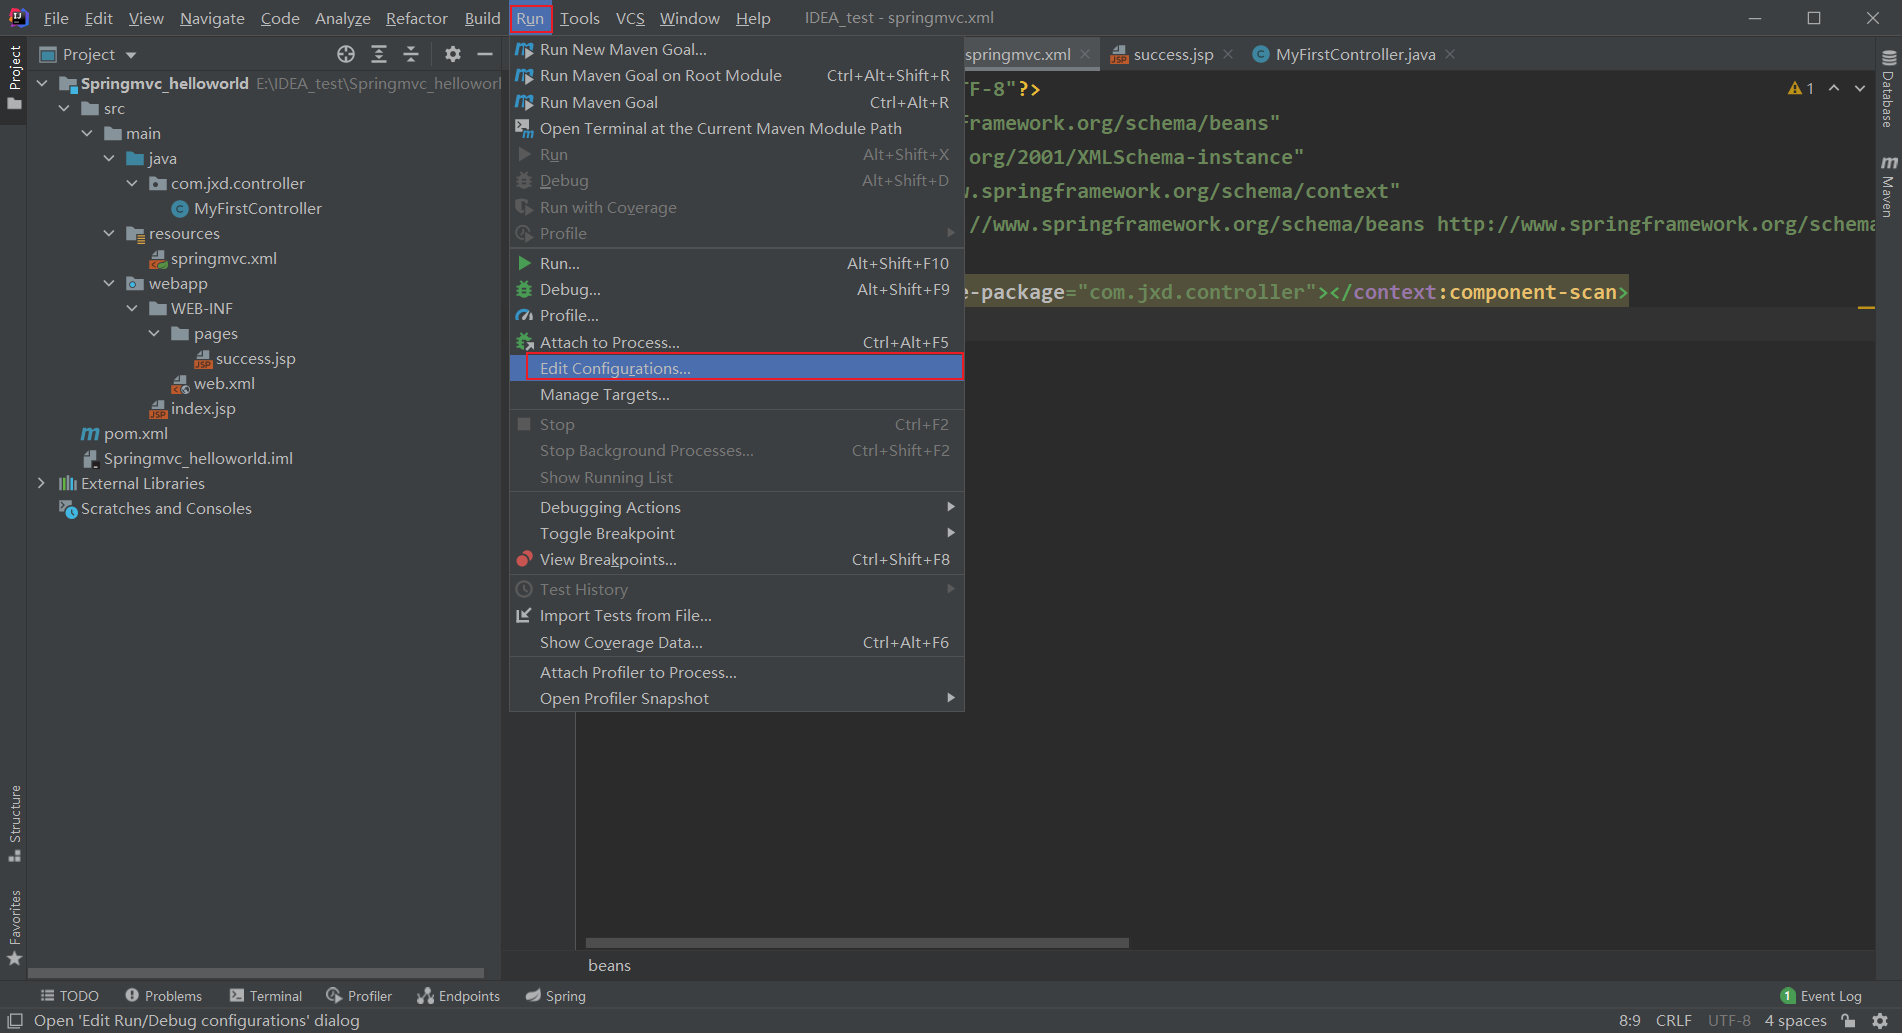
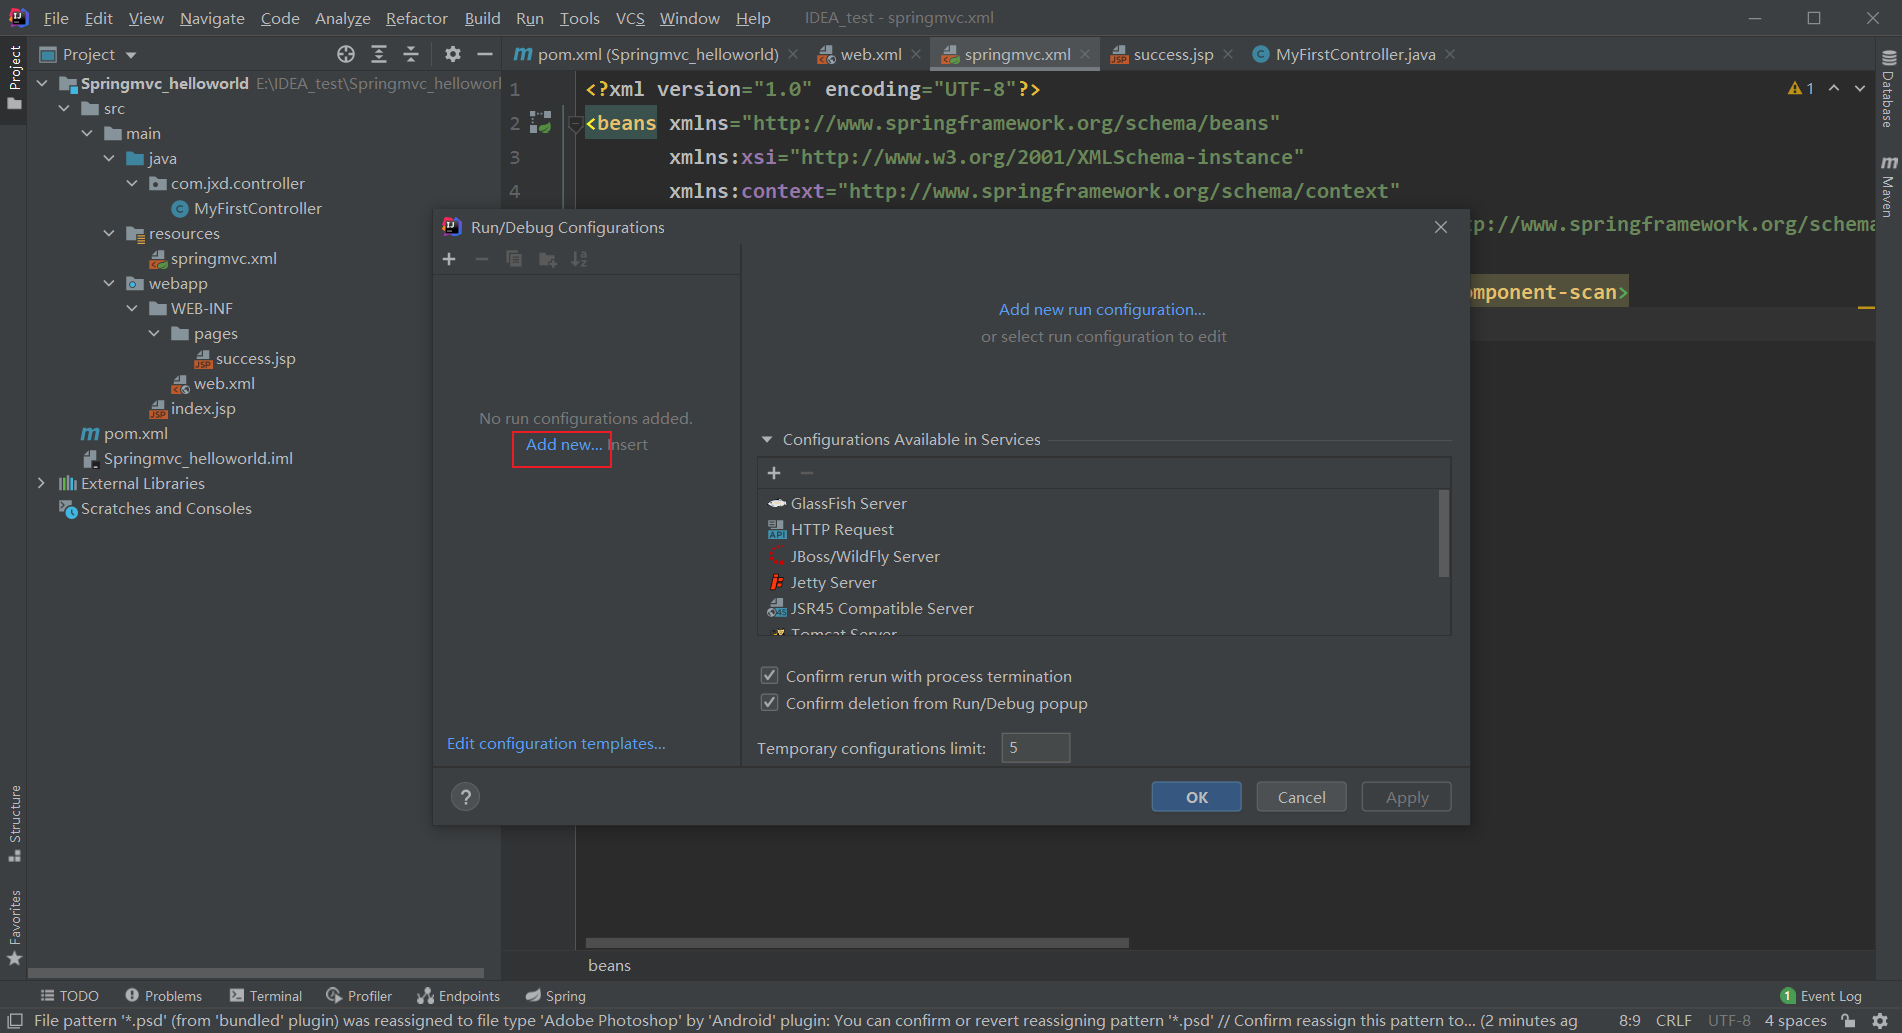
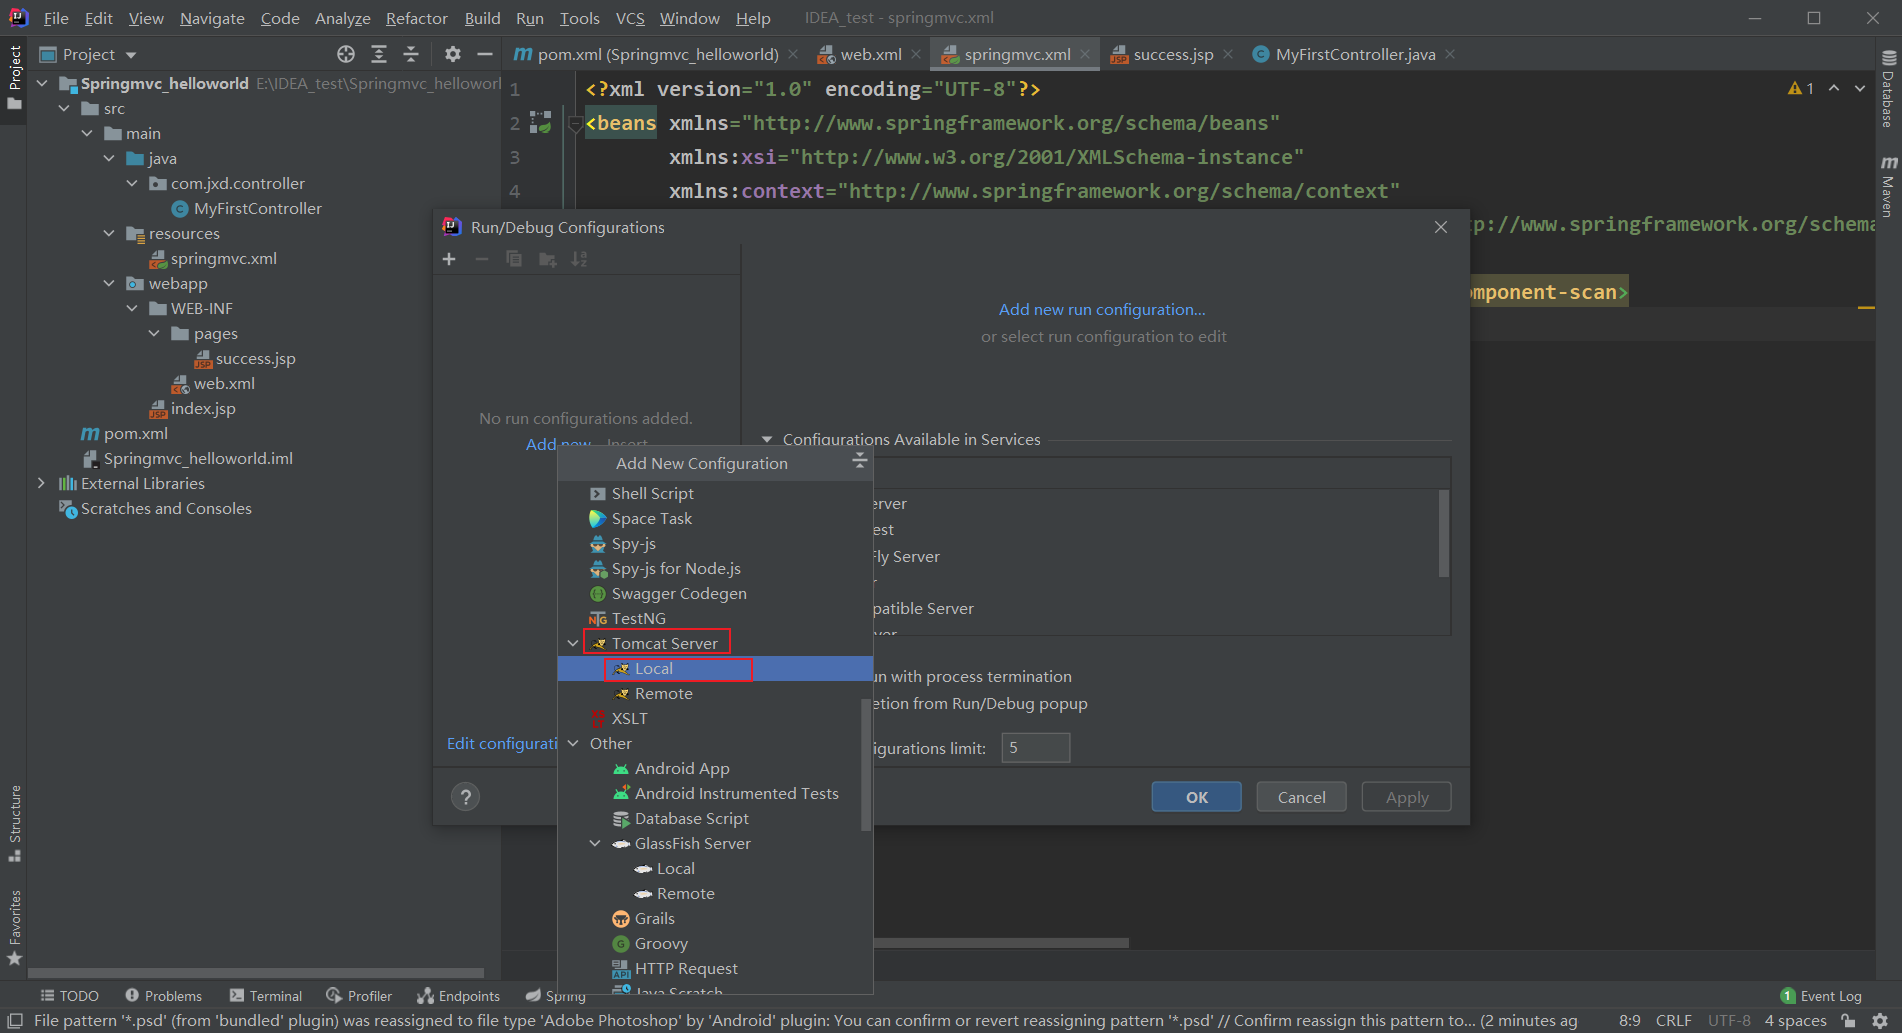
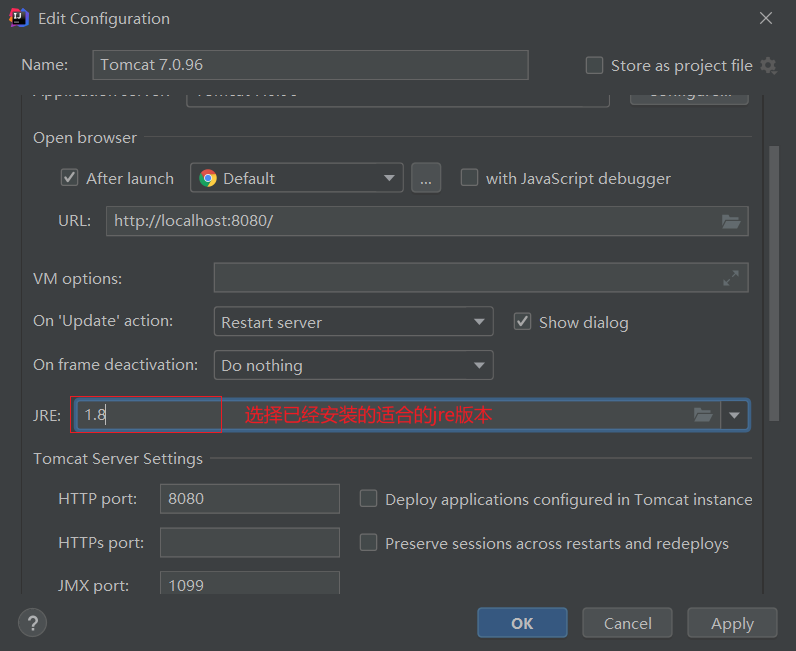
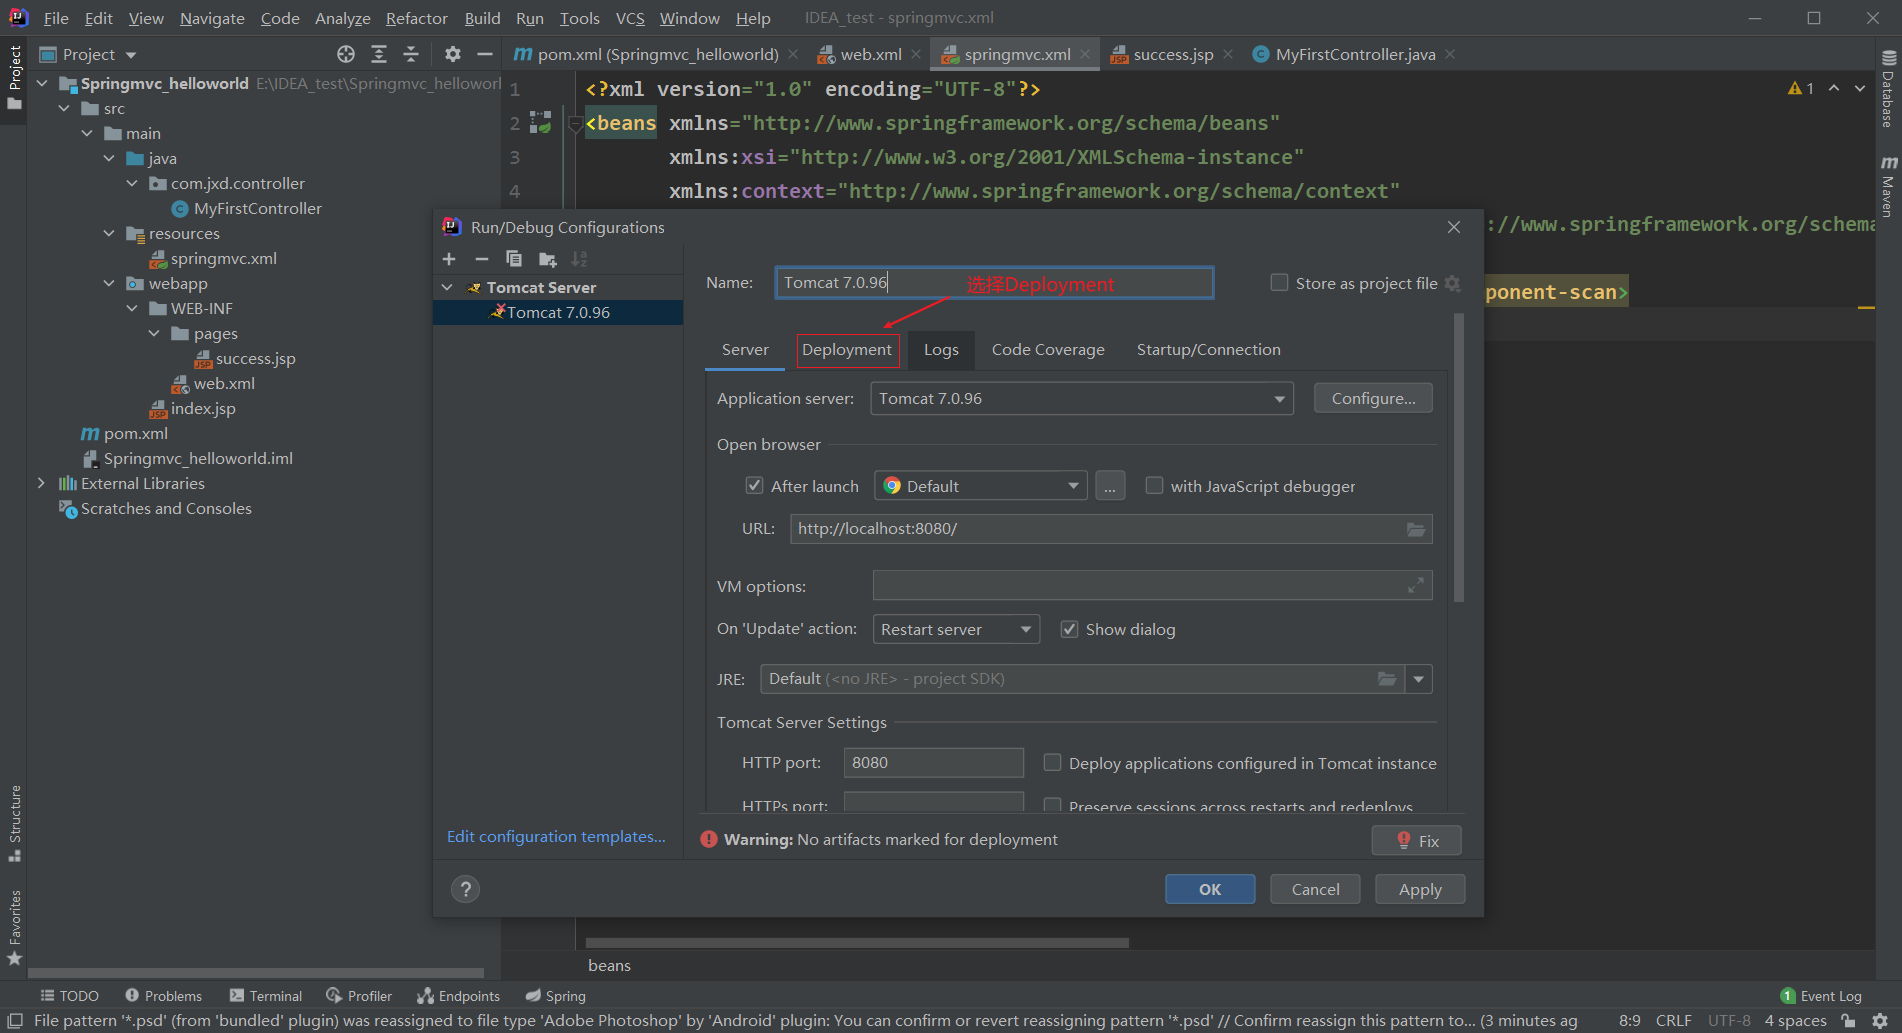
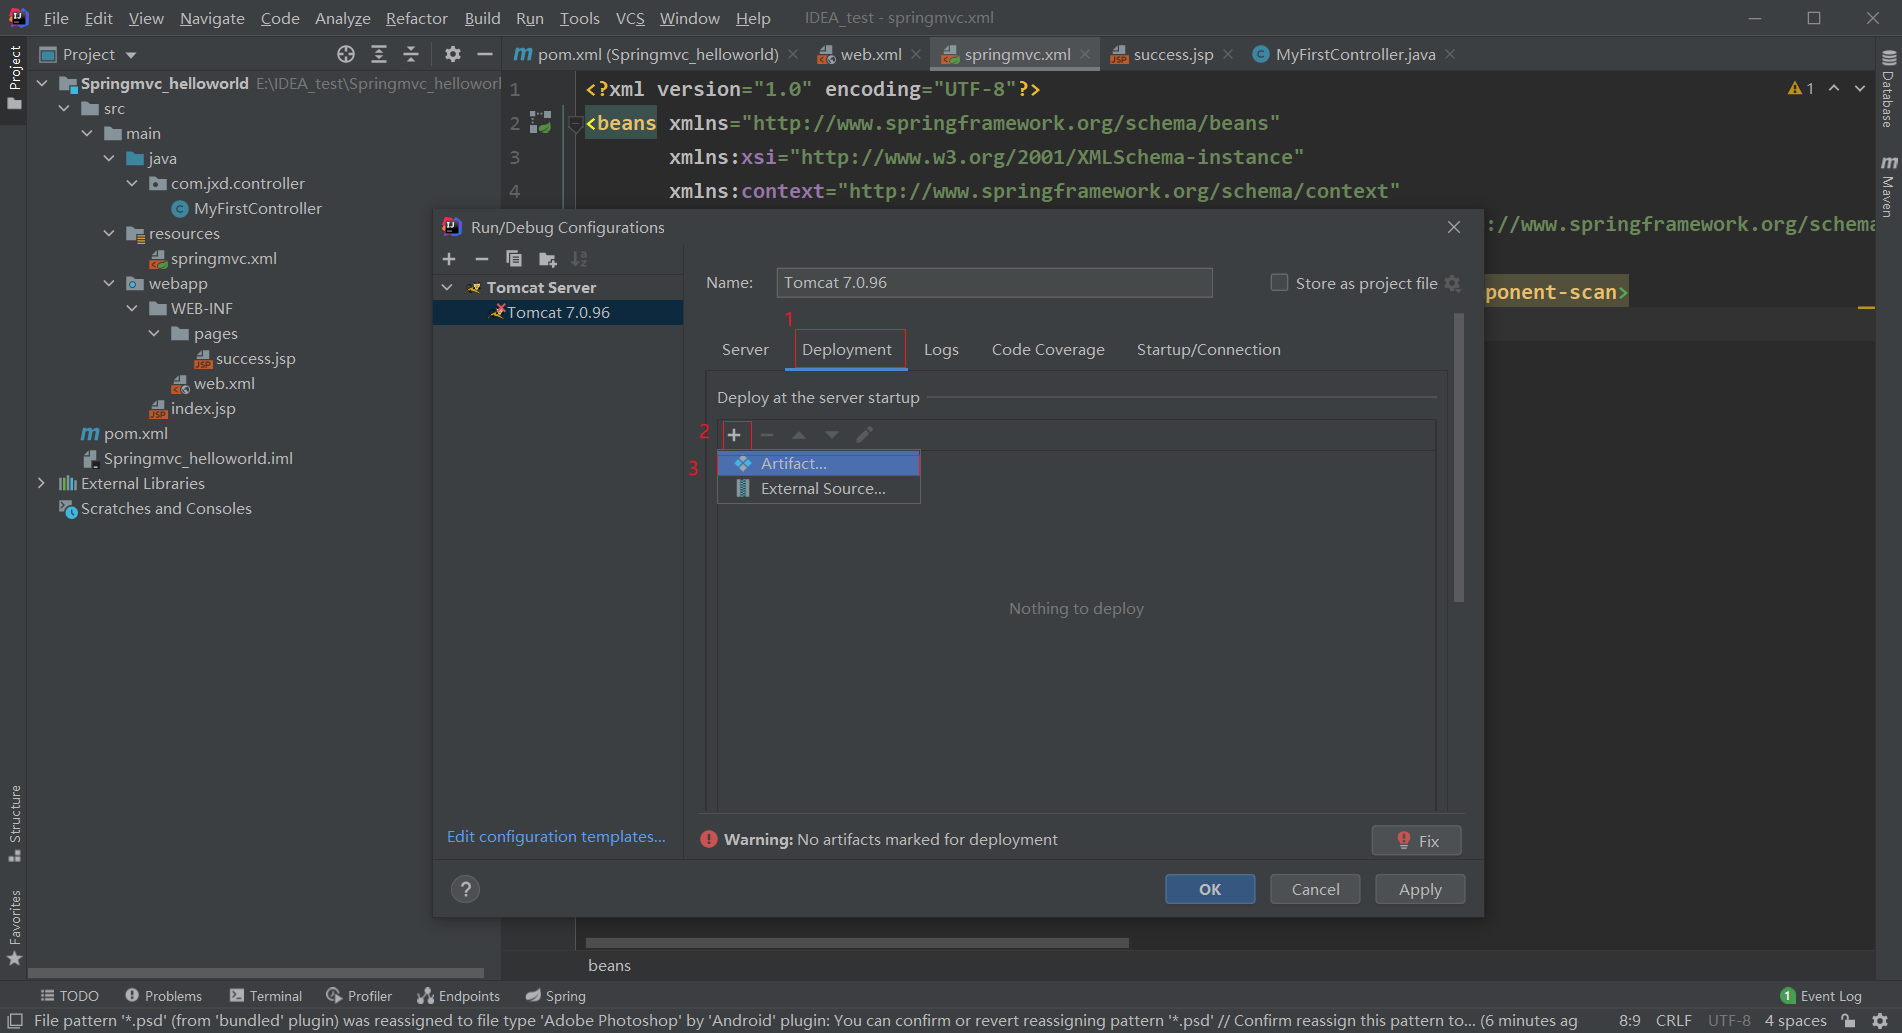
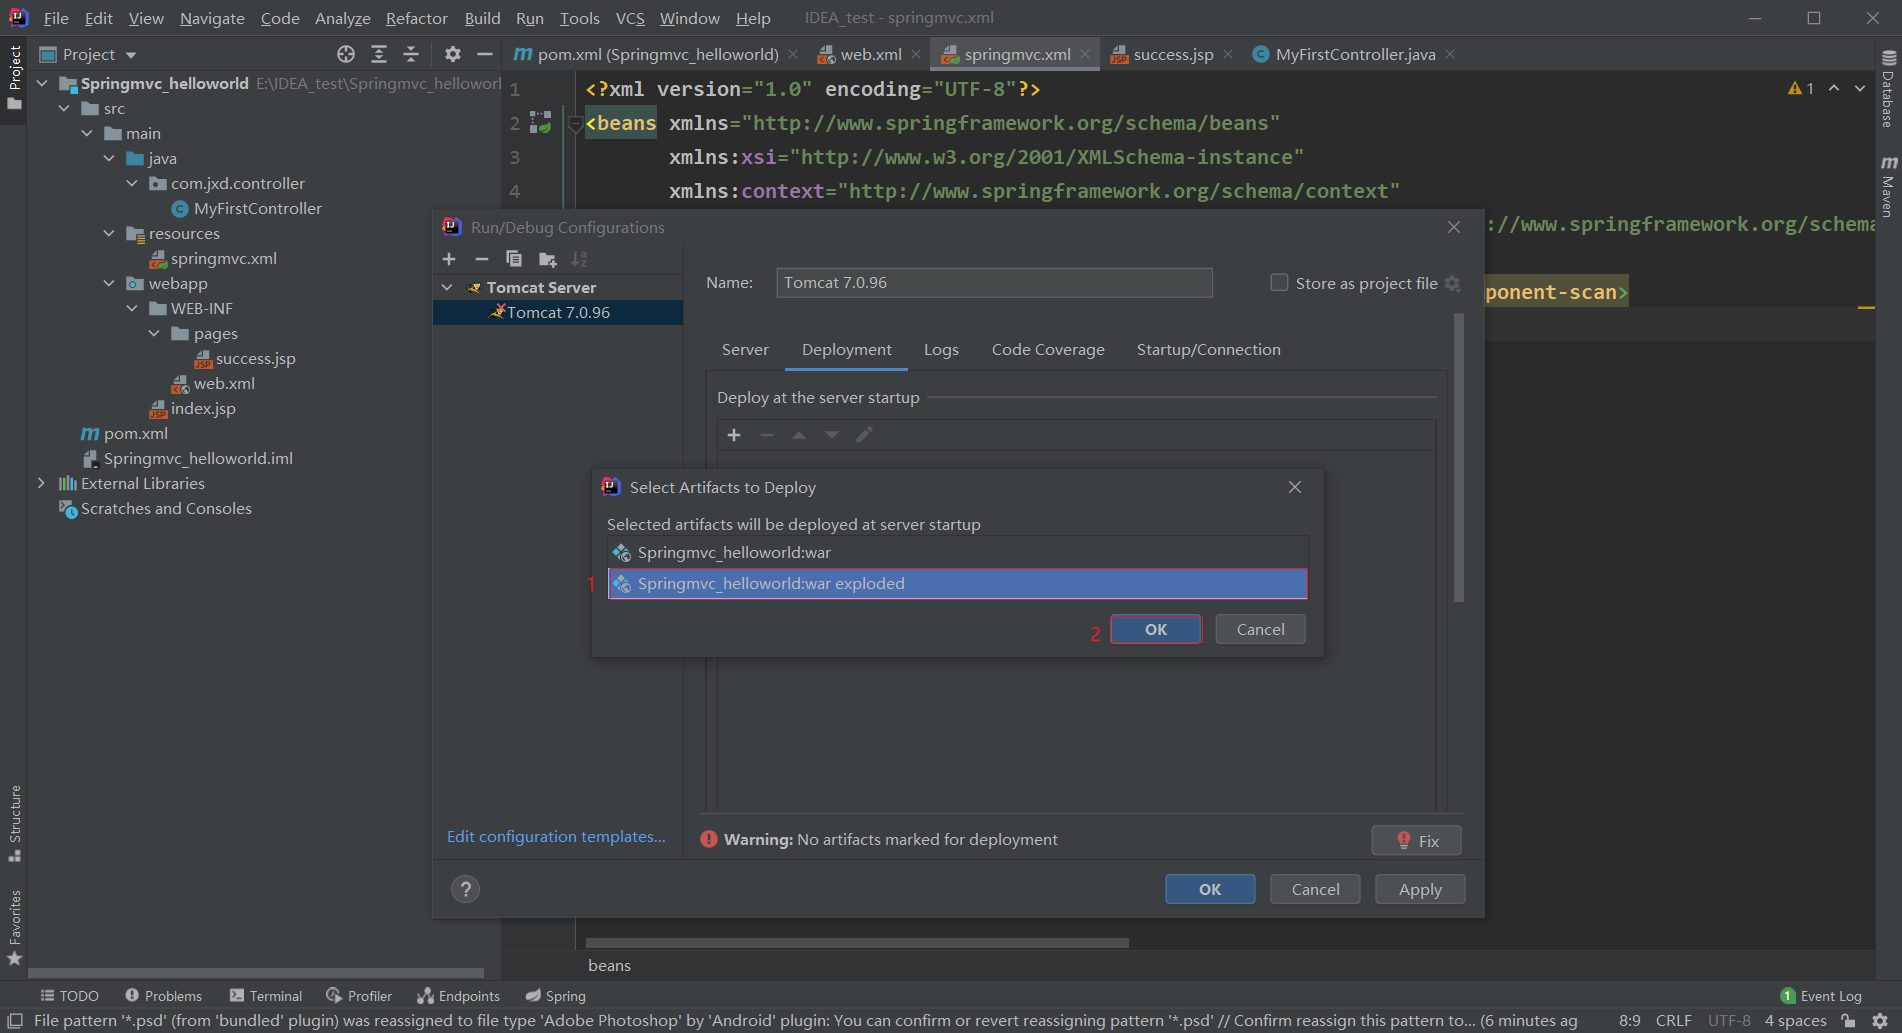
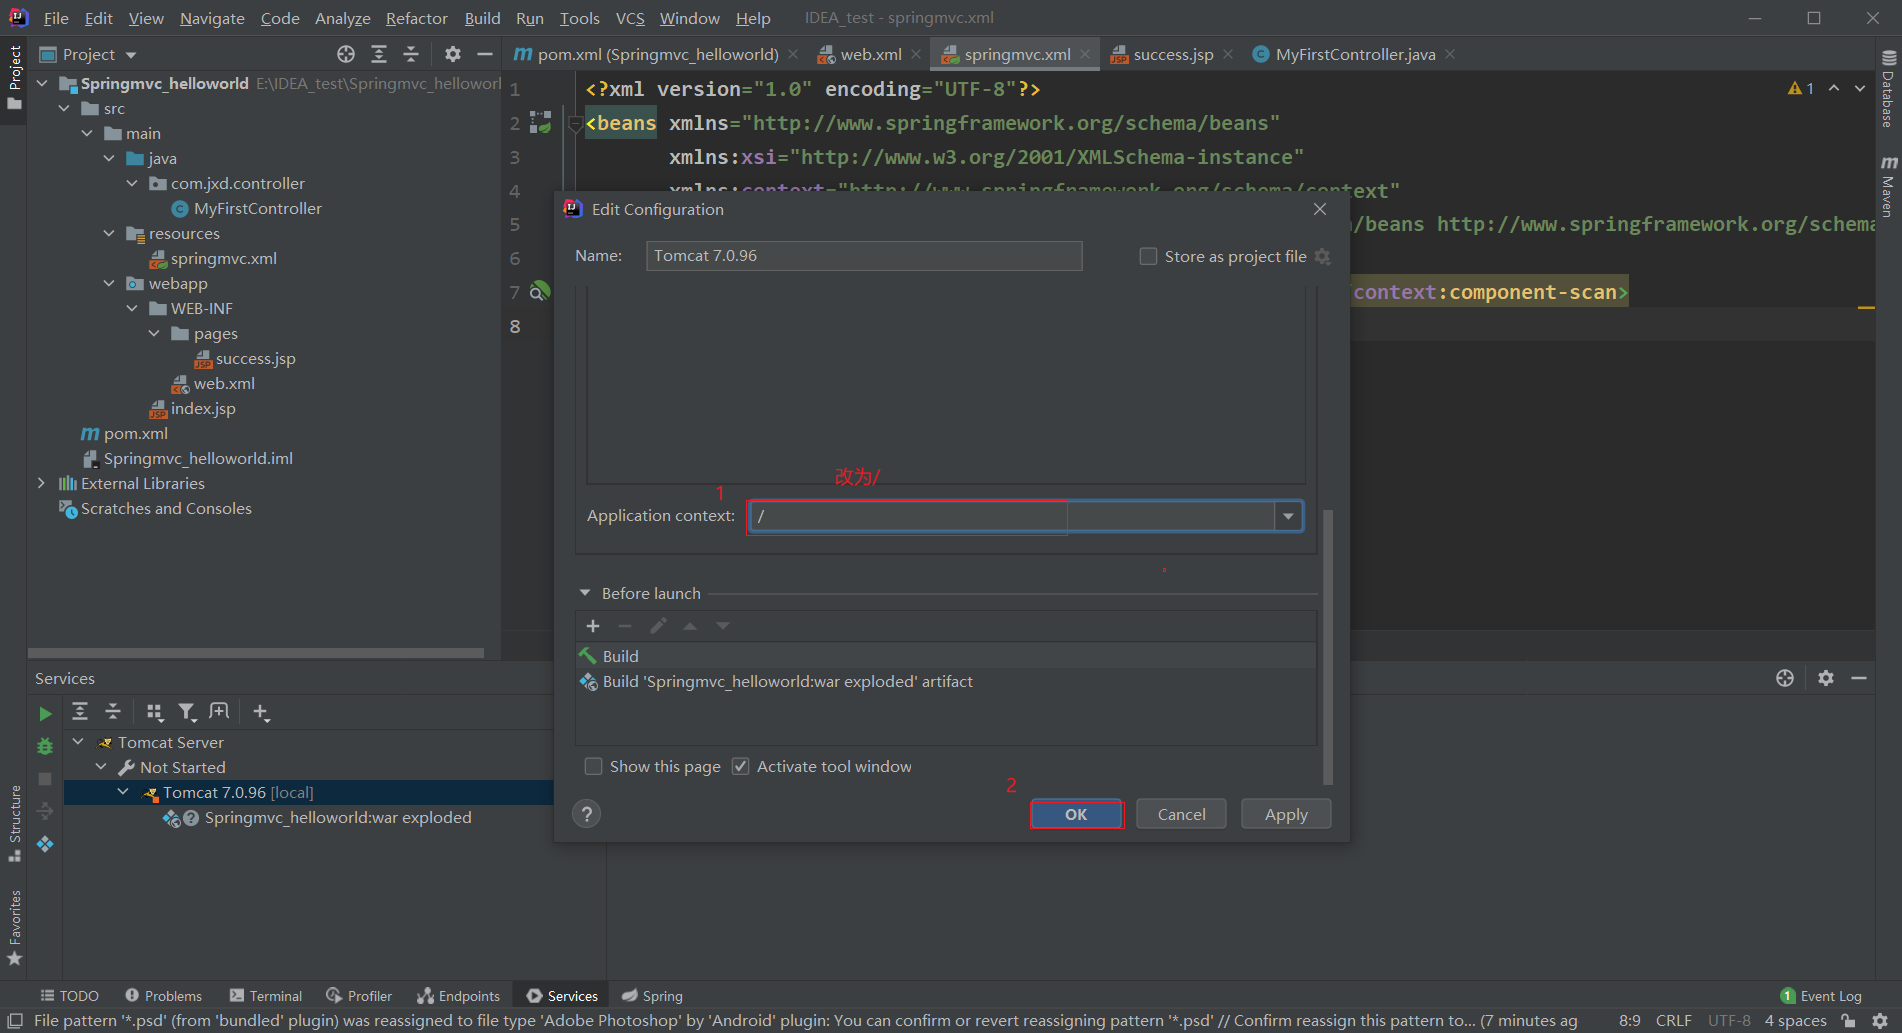
10. Start Tomcat service
After adding Tomcat service, you can start the service to test:
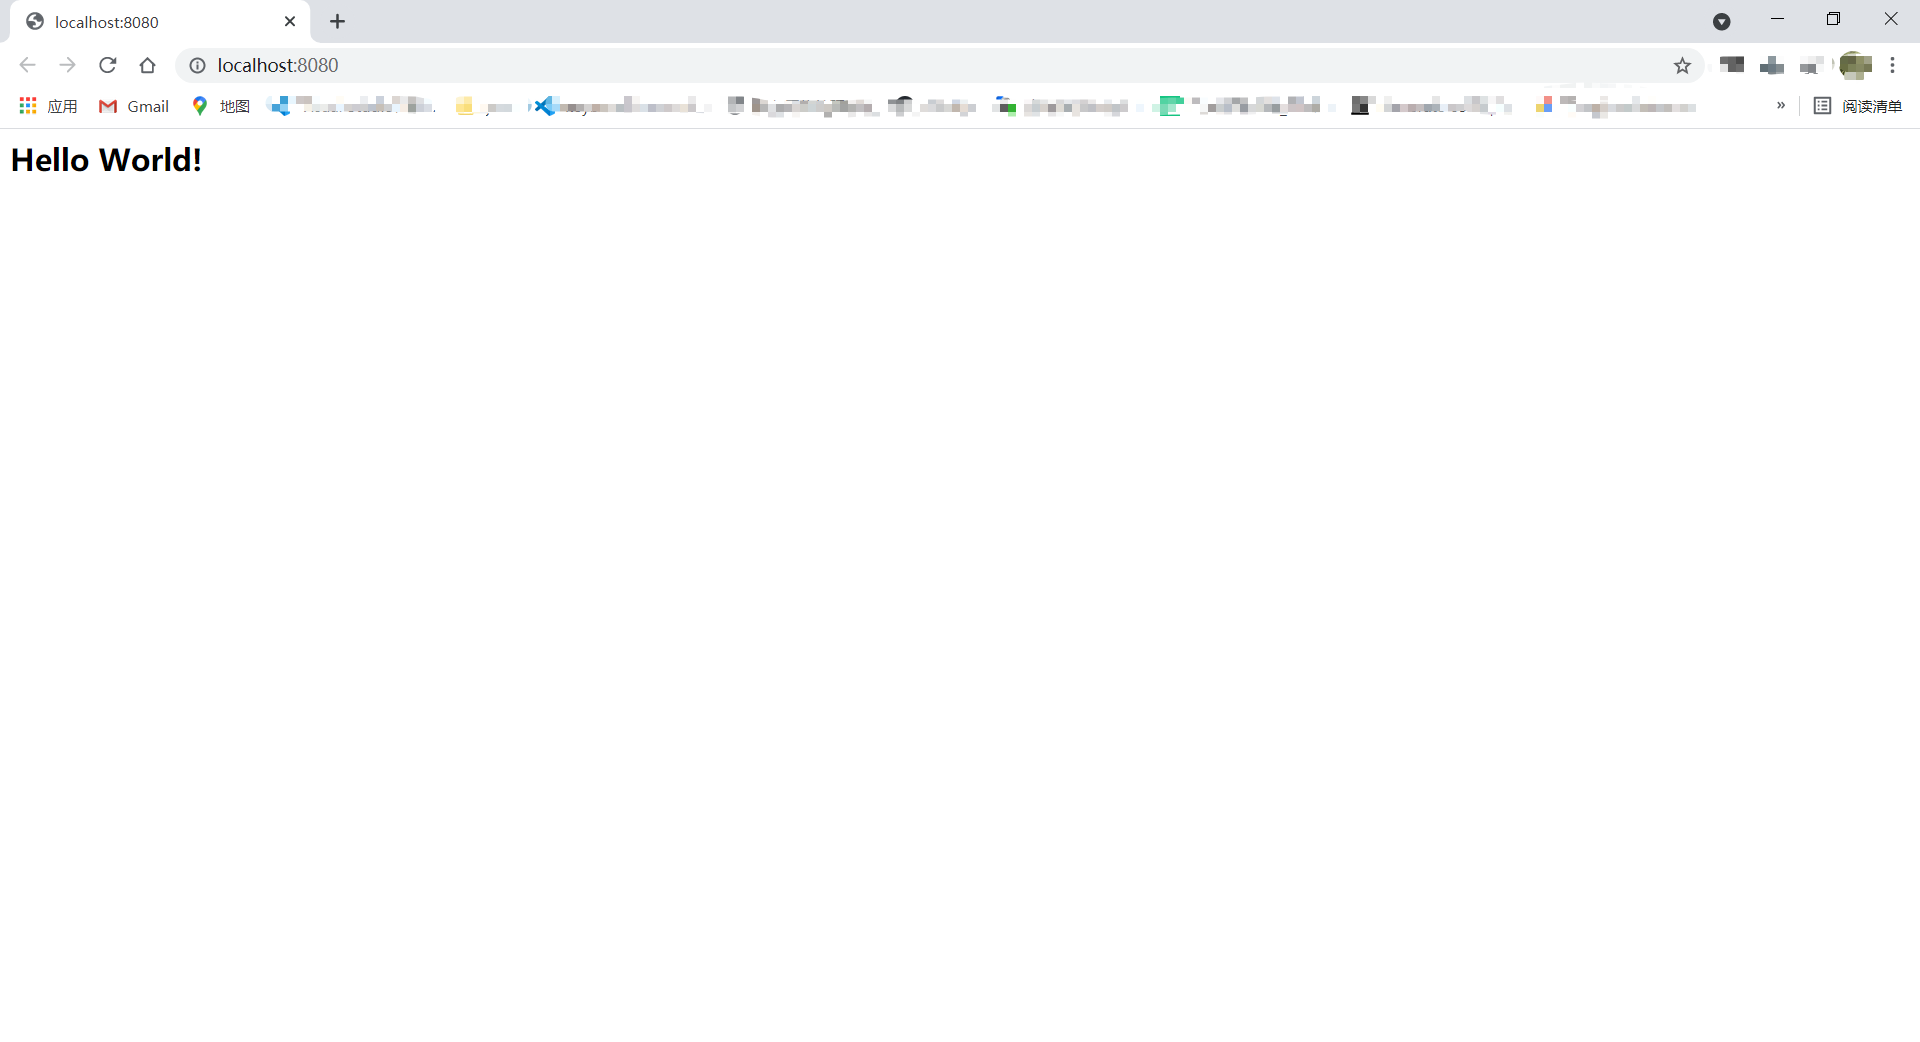
After the service is started, it automatically comes to index JSP page, if there is "Hello World!" Words, indicating that the item is normal, and the page content is as follows:
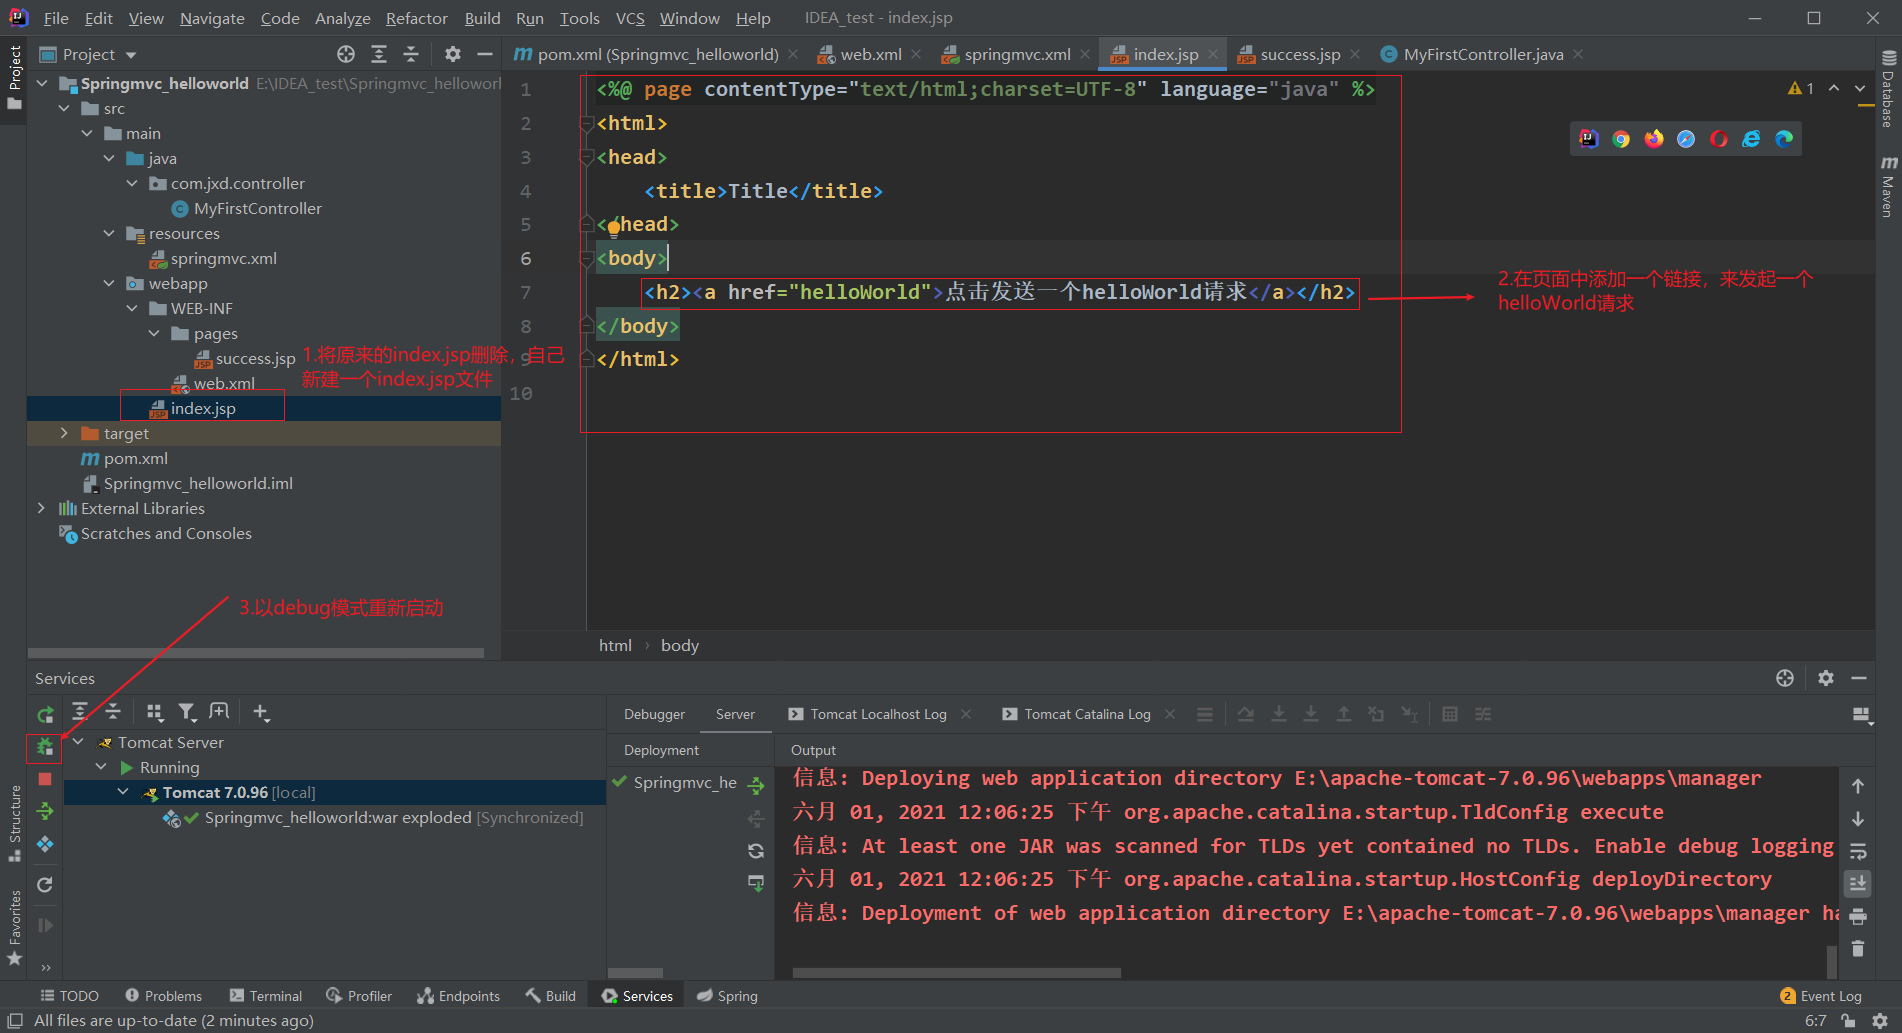
11. Add link request to process
Put the original index Delete the JSP file and create a new index JSP file:
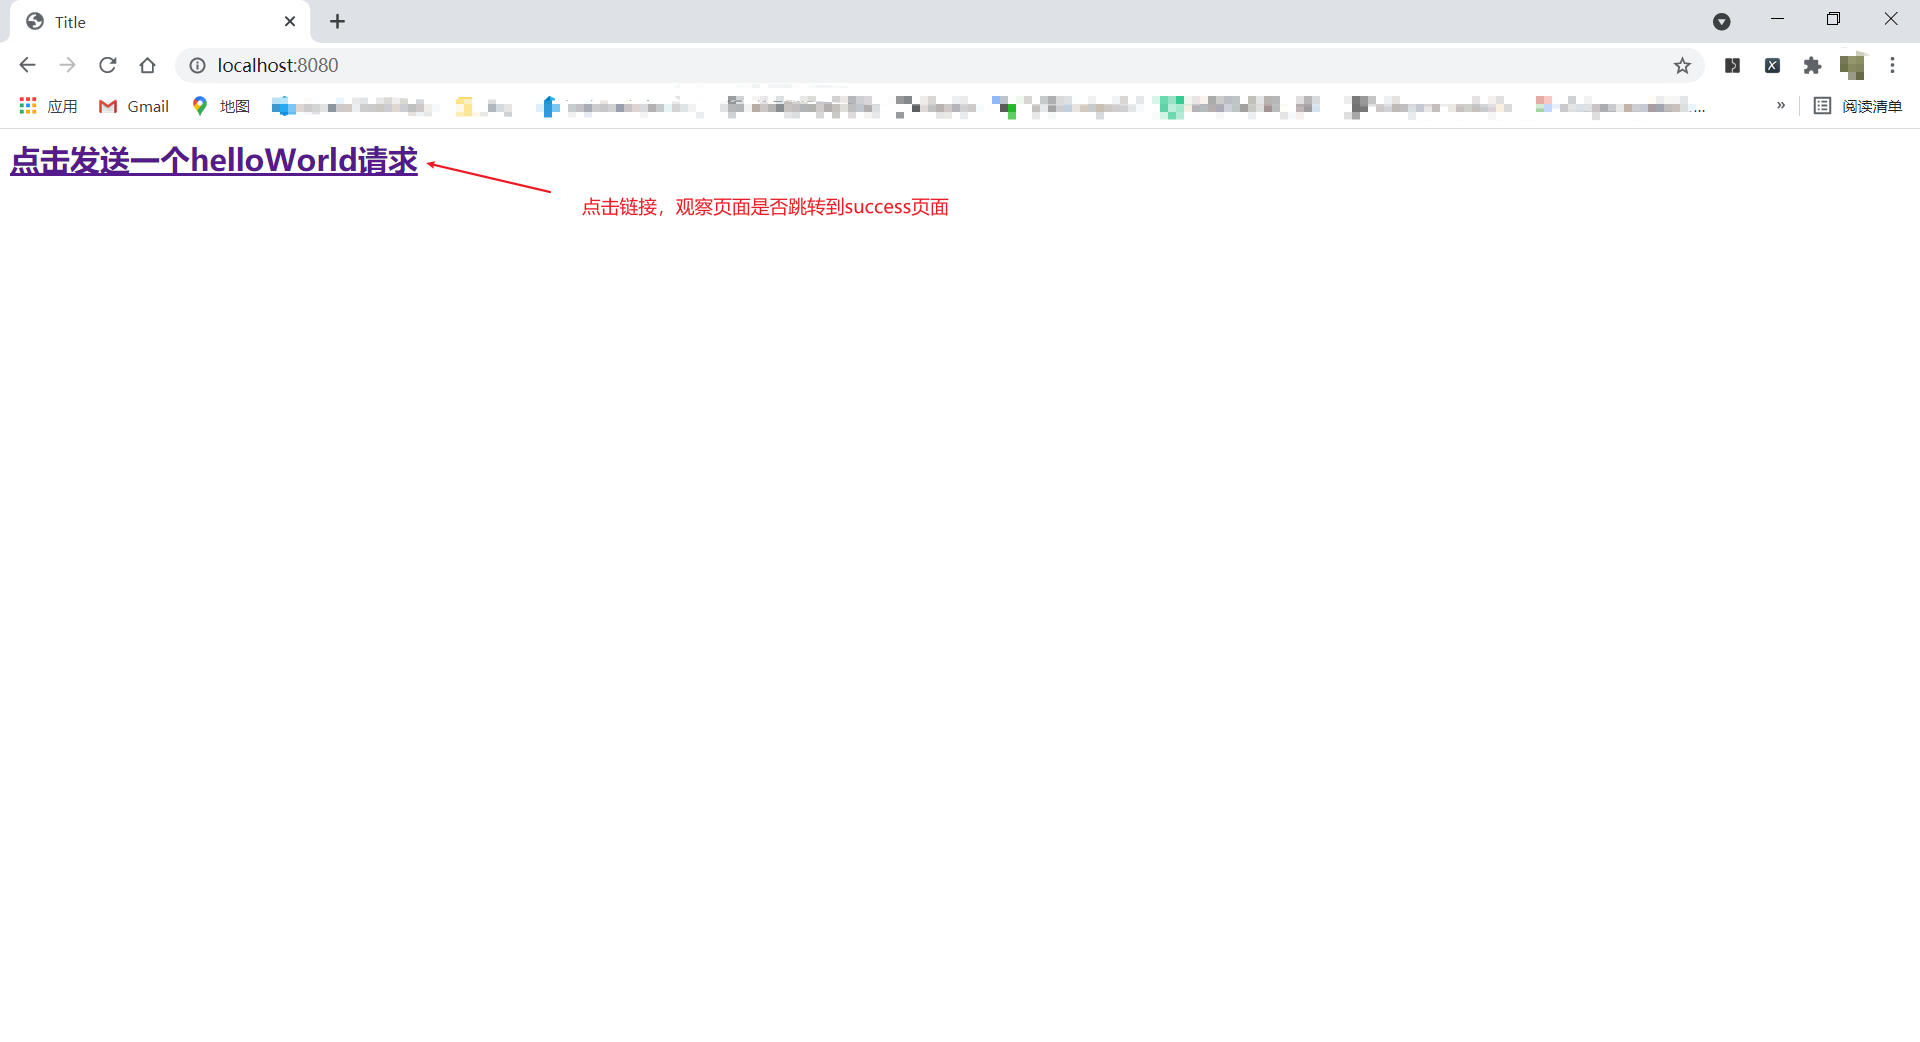
After startup, it defaults to index JSP, click the link to test whether the helloWorld request can be handled correctly:
Click the link and jump to the success page:
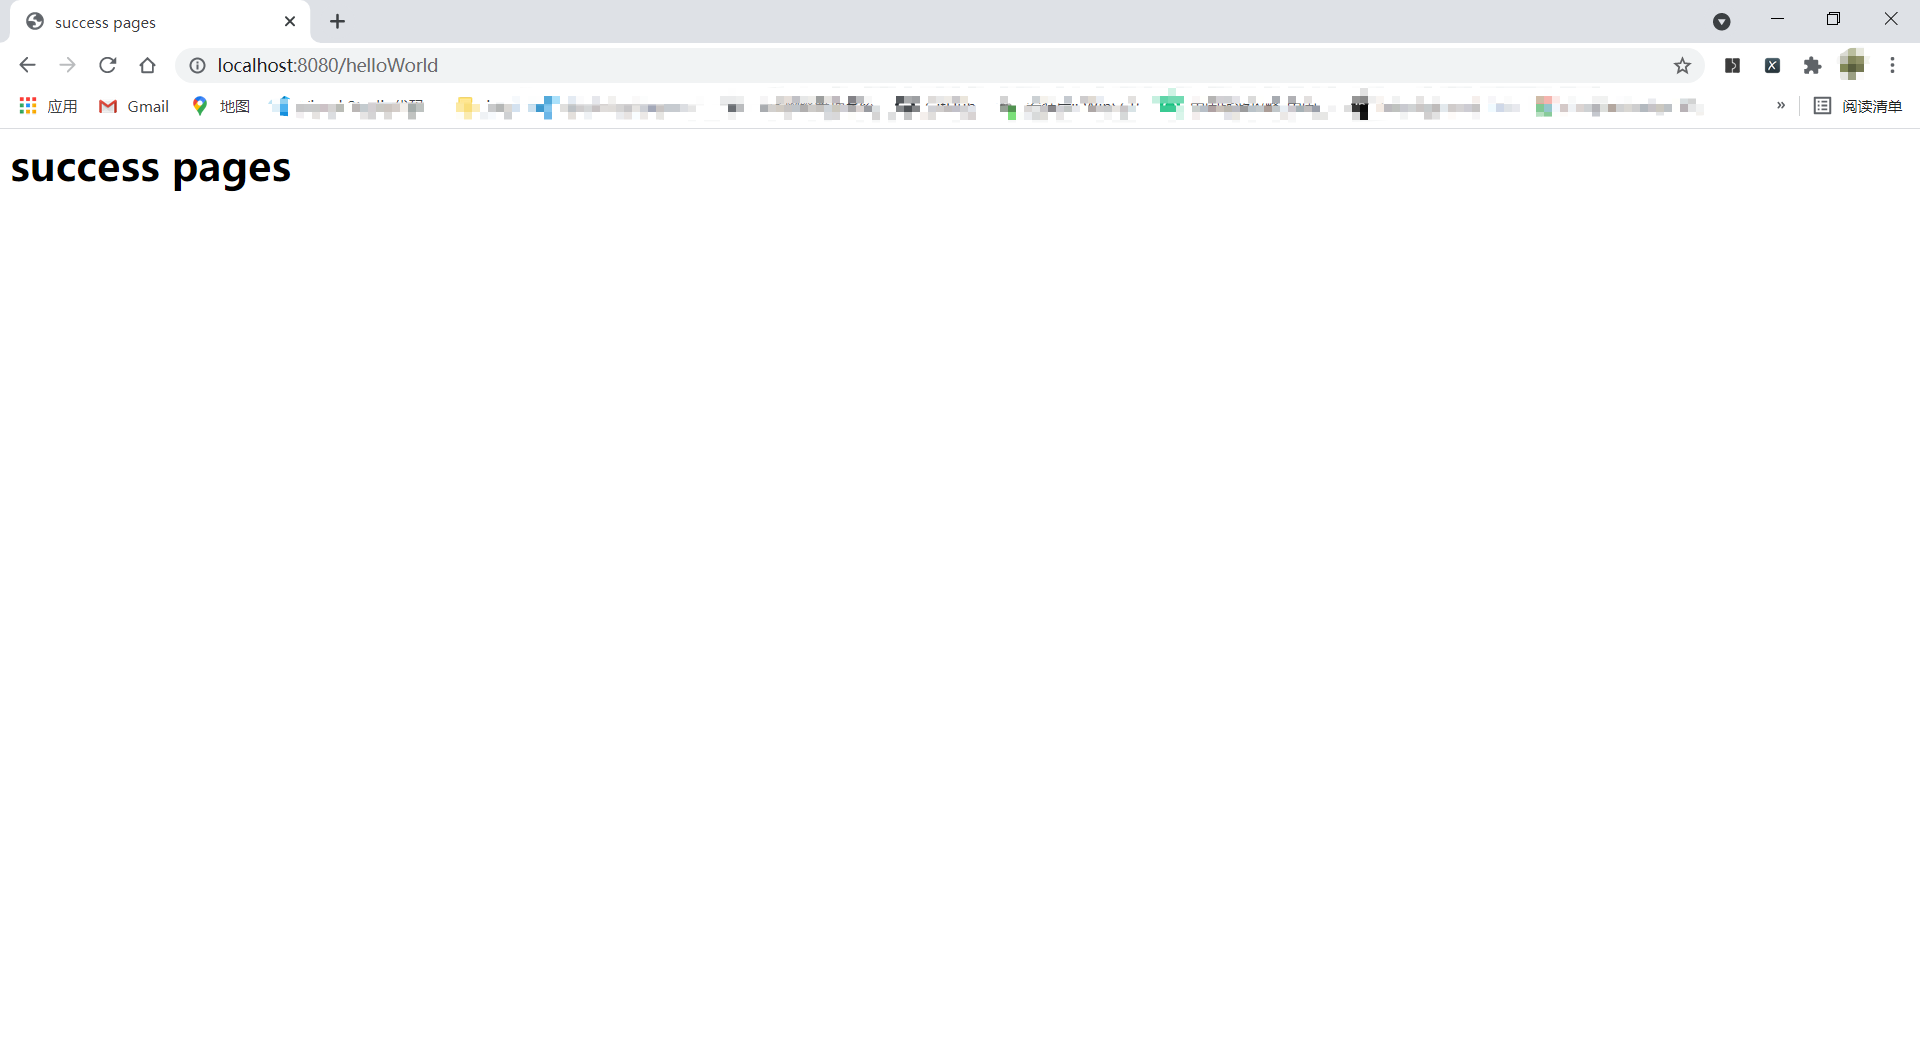
And the console also prints a prompt message:

Well, the above is a simple hello world tutorial of spring MVC project. Thank you for reading!