Preface
In the previous article, the simplest authentication is configured, and the login page accessed is provided by Spring Security by default. In this article, we will create a user login page of our own.
Custom login page
First of all, we need to prepare the custom page. Let's use Thymeleaf to do this.
Reference Thymeleaf
<dependency>
    <groupId>org.springframework.boot</groupId>
    <artifactId>spring-boot-starter-thymeleaf</artifactId>
</dependency>
Create Controller
@RestController
@RequestMapping("/")
public class HomeController {
    @GetMapping(value = {"/", "/home"})
    public ModelAndView home() {
        return new ModelAndView("home");
    }

    @GetMapping(value = "/hello")
    public ModelAndView hello() {
        return new ModelAndView("hello");
    }

    @GetMapping(value = "/login")
    public ModelAndView login() {
        return new ModelAndView("login");
    }

    @RequestMapping({ "/user", "/me" })
    public Map<String, String> user(Principal principal) {
        Map<String, String> map = new LinkedHashMap<>();
        map.put("name", principal.getName());
        return map;
    }
}
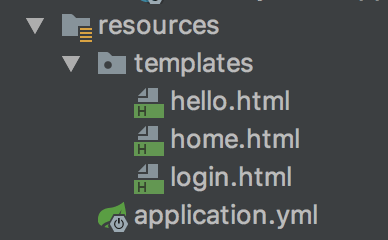
Create three corresponding pages

login page
<!DOCTYPE html>
<html lang="en" xmlns:th="http://www.w3.org/1999/xhtml">
<head>
    <meta charset="UTF-8">
    <title>spring security</title>
</head>
<body>
<div th:if="${param.error}">
    Wrong user name or password!
</div>
<div th:if="${param.logout}">
    You have signed out!
</div>
<form th:action="@{/login}" method="post">
    <div><label> User name:<input type="text" name="username"/> </label></div>
    <div><label> Password:<input type="password" name="password"/> </label></div>
    <div><input type="submit" value="Sign in"/></div>
</form>
</body>
</html>
home page
<!DOCTYPE html>
<html lang="en" xmlns:th="http://www.w3.org/1999/xhtml">
<head>
    <meta charset="UTF-8">
    <title>spring security</title>
</head>
<body>
<h1>home page</h1>

<p>click <a th:href="@{/hello}">Here</a> Jump to [ Hello]page</p>
</body>
</html>
hello page
<!DOCTYPE html>
<html lang="en" xmlns:th="http://www.w3.org/1999/xhtml">
<head>
    <meta charset="UTF-8">
    <title>spring security</title>
</head>
<body>
<h1 th:inline="text">Hello![[${#httpServletRequest.remoteUser}]]!</h1>
<form th:action="@{/logout}" method="post">
    <input type="submit" value="Sign out"/>
</form>
</body>
</html>
Add related configuration
In the previous article, we used application.yml to configure the user name and password. This time, we add a WebSecurityConfig class to configure the custom page.
@EnableWebSecurity
public class WebSecurityConfig extends WebSecurityConfigurerAdapter {
    @Override
    protected void configure(HttpSecurity http) throws Exception {
        http.authorizeRequests()
                // Specify that the home page can be accessed anonymously
                .antMatchers("/", "/home").permitAll()
                // All other pages require authentication
                .anyRequest().authenticated()
                .and()
                // Log in by httpBasic, that is to say, pop up a dialog box of user name and password
                //.httpBasic()
                // Login by form submission
                .formLogin()
                .loginPage("/login")
                .permitAll()
                .and()
                .logout()
                .permitAll();
    }
}
By overriding the config method, we can customize the permissions of the login page. The above notes clearly explain that here is just httpBasic and formLogin. httpBasic doesn't need to write the login page, and formLogin needs us to prepare the login page. In addition to the above two login modes, Spring Security also provides OAuth2, OpenID, CAS and LDAP modes, but additional jar packages need to be referenced, which are not detailed in this article.
In addition, in addition to the above configuration options, you can also configure login URL, logouurl, login submit url, URL of successful or failed jump
test
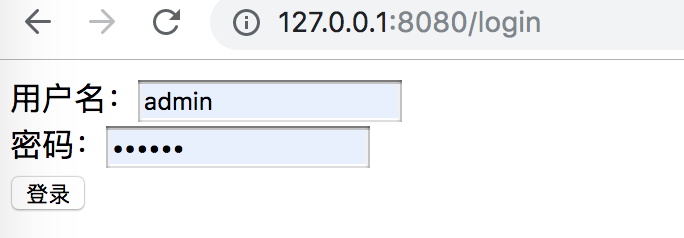
Visit http://127.0.0.1:8080/login
Here comes our custom login page