preface
This article records the process of learning the SpringBoot framework.
Official website: Spring | Home
edition:
- Maven: 3.6.1
- JDK: 1.8
- SpringBoot: 2.3.4
brief introduction
"Spring Boot makes it easy to create stand-alone, production-grade Spring based Applications that you can 'just run'."
advantage
- Create stand-alone Spring applications Create a stand-alone Spring application
- Embed Tomcat, Jetty or Undertow directly (no need to deploy WAR files) Embedded web server
- Provide opinionated 'starter' dependencies to simplify your build configuration Automatic starter dependency to simplify build configuration
- Automatically configure Spring and 3rd party libraries whenever possible Automatically configure Spring and third-party functions
- Provide production-ready features such as metrics, health checks, and externalized configuration Provide production level monitoring, health inspection and external configuration
- Absolutely no code generation and no requirement for XML configuration No code generation, no need to write XML
quick get start
Take building a simple HelloWorld web application as an example.
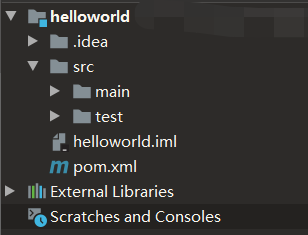
Project creation
Create a maven project
Configure POM XML file, introducing two dependencies:
<?xml version="1.0" encoding="UTF-8"?>
<project xmlns="http://maven.apache.org/POM/4.0.0"
         xmlns:xsi="http://www.w3.org/2001/XMLSchema-instance"
         xsi:schemaLocation="http://maven.apache.org/POM/4.0.0 http://maven.apache.org/xsd/maven-4.0.0.xsd">
    <modelVersion>4.0.0</modelVersion>

    <groupId>org.example</groupId>
    <artifactId>helloworld</artifactId>
    <version>1.0-SNAPSHOT</version>

    <parent>
        <groupId>org.springframework.boot</groupId>
        <artifactId>spring-boot-starter-parent</artifactId>
        <version>2.3.4.RELEASE</version>
    </parent>

    <dependencies>
        <dependency>
            <groupId>org.springframework.boot</groupId>
            <artifactId>spring-boot-starter-web</artifactId>
        </dependency>
    </dependencies>

</project>
Create the directory src/main/java/boot and create the main program MainApplication in it
import org.springframework.boot.SpringApplication;
import org.springframework.boot.autoconfigure.SpringBootApplication;
/**
* Main program class
* @SpringBootApplication: This is a SpringBoot application
*/
@SpringBootApplication
public class MainApplication {
public static void main(String[] args) {
SpringApplication.run(MainApplication.class,args);
}
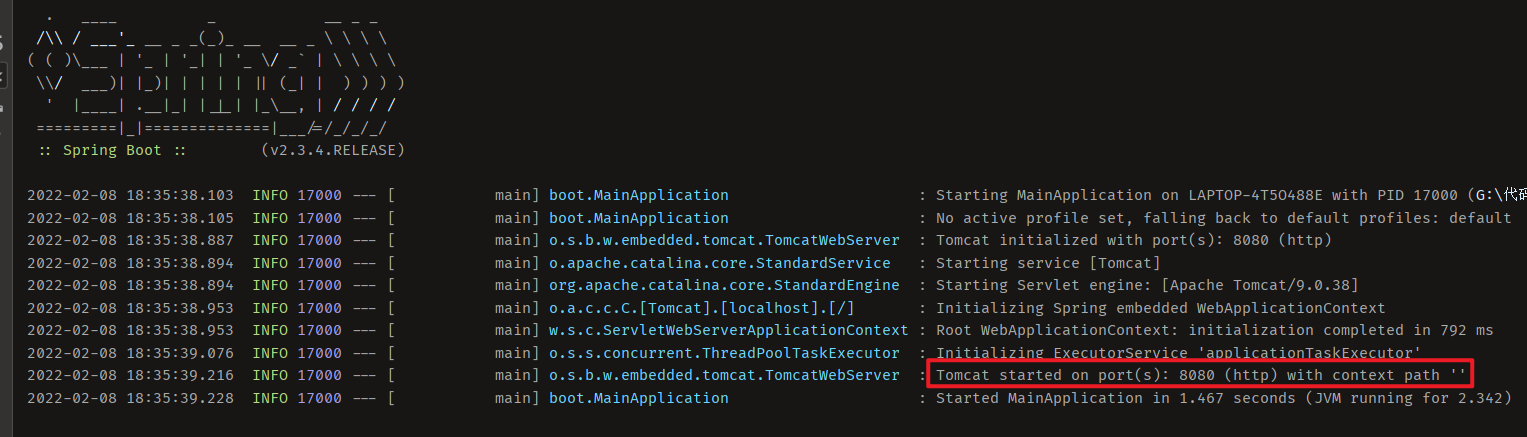
}Without configuring tomcat, run the main program directly to start the web service
Create the directory src/main/java/boot/controller, and write the business class HelloController in it:
import org.springframework.web.bind.annotation.RequestMapping;
import org.springframework.web.bind.annotation.RestController;
@RestController
public class HelloController {
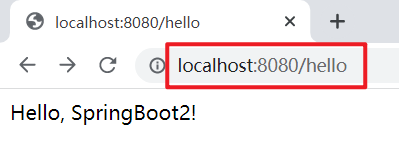
@RequestMapping("/hello")
public String handle01() {
return "Hello, SpringBoot2!";
}
}explain: The annotation @ Controller source code contains @ Controller and @ ResponseBody
Run the main program and access the default port (8080) to see the display information:
to configure
Create the configuration file application. In the directory src/main/resources properties:
server.port=8888
explain: Here is the modified running port of the web service More configuration information can be found on the official website: Common Application Properties (spring.io)
deploy
In POM Import the following dependencies in the XML configuration file:
<build>
<plugins>
<plugin>
<groupId>org.springframework.boot</groupId>
<artifactId>spring-boot-maven-plugin</artifactId>
</plugin>
</plugins>
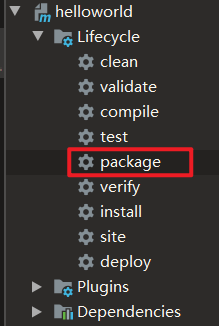
</build>You can directly type the project into a jar package
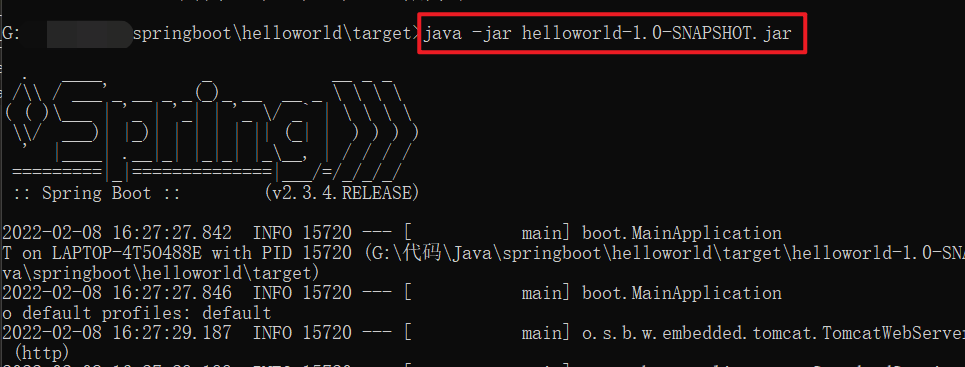
In the directory where the jar package exists, start cmd and run it directly:
Dependency management description
Parent project dependency management
In the above case, you can see that POM is configured When using XML configuration file, parent dependency management is introduced:
<parent>
    <groupId>org.springframework.boot</groupId>
    <artifactId>spring-boot-starter-parent</artifactId>
    <version>2.3.4.RELEASE</version>
</parent>
Viewing the source code, you can see its parent project as follows:
<parent>
    <groupId>org.springframework.boot</groupId>
    <artifactId>spring-boot-dependencies</artifactId>
    <version>2.3.4.RELEASE</version>
</parent>
Click the source code again to view various dependencies:
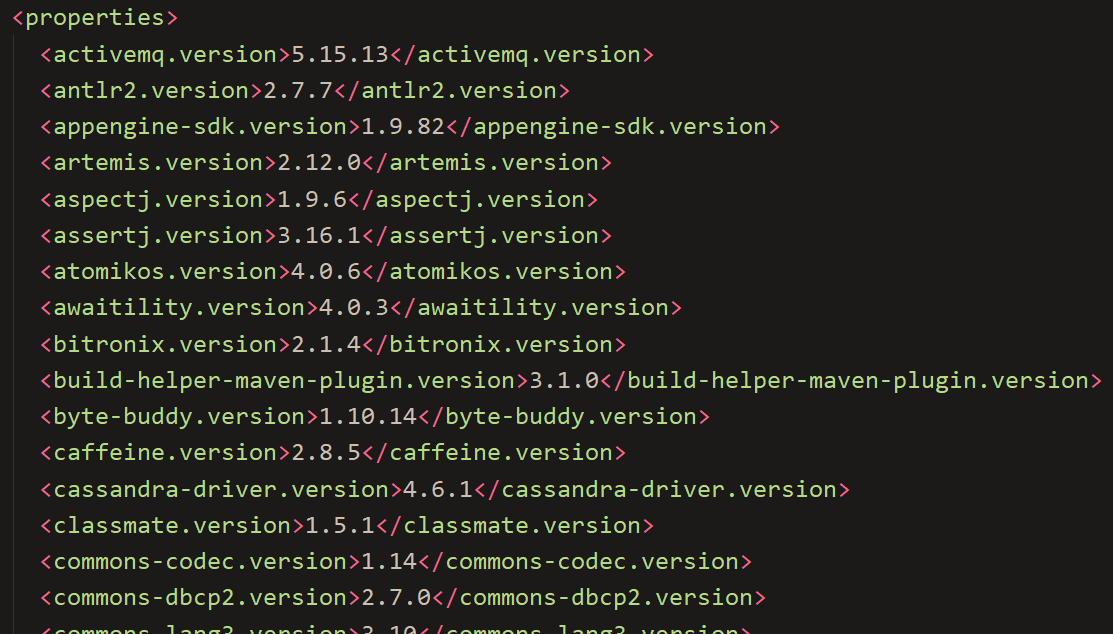
It declares the dependent version number commonly used in almost all development -- automatic version arbitration mechanism. This makes POM Add the required dependency in the XML configuration file without the configuration version number (there will be a default).
If the required dependent version conflicts with the default version, you can manually change the version number (take mysql as an example):
<dependency>
    <groupId>mysql</groupId>
    <artifactId>mysql-connector-java</artifactId>
</dependency>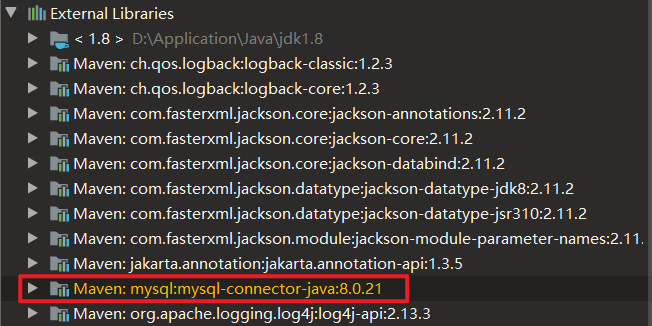
You can see that the default version is 8.0.21
There are two ways to change the version number:
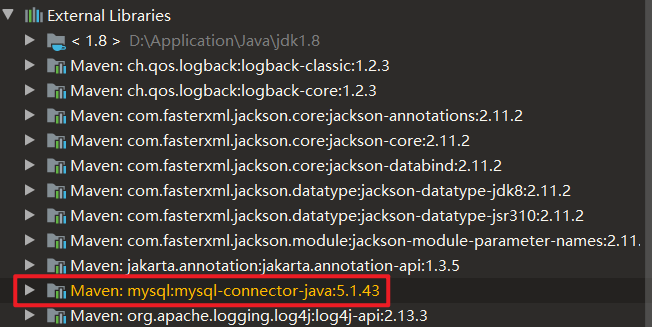
explain: If there are few configurations, you can choose to add the version number directly; If there are many, it is recommended to use < Properties > configuration to facilitate management.
starter scenario launcher
Taking spring boot starter web as an example, many spring boot starter - * (* is a certain scenario) are officially given. As long as starter is introduced, all conventional dependencies of this scenario will be automatically introduced.
Scenario launcher (naming convention) for simplified development provided by a third party: * - spring boot starter
The lowest level dependencies of all scenario initiators are as follows:
<dependency>
  <groupId>org.springframework.boot</groupId>
  <artifactId>spring-boot-starter</artifactId>
  <version>2.3.4.RELEASE</version>
  <scope>compile</scope>
</dependency>
Auto configuration
Configuration components
Click to view the spring boot starter web source code. You can see that the Tomcat dependency and spring MVC components have been automatically configured:
<dependencies>
    <dependency>
        <groupId>org.springframework.boot</groupId>
        <artifactId>spring-boot-starter</artifactId>
        <version>2.3.4.RELEASE</version>
        <scope>compile</scope>
    </dependency>
    <dependency>
        <groupId>org.springframework.boot</groupId>
        <artifactId>spring-boot-starter-json</artifactId>
        <version>2.3.4.RELEASE</version>
        <scope>compile</scope>
    </dependency>
    <dependency>
        <groupId>org.springframework.boot</groupId>
        <artifactId>spring-boot-starter-tomcat</artifactId>
        <version>2.3.4.RELEASE</version>
        <scope>compile</scope>
    </dependency>
    <dependency>
        <groupId>org.springframework</groupId>
        <artifactId>spring-web</artifactId>
        <version>5.2.9.RELEASE</version>
        <scope>compile</scope>
    </dependency>
    <dependency>
        <groupId>org.springframework</groupId>
        <artifactId>spring-webmvc</artifactId>
        <version>5.2.9.RELEASE</version>
        <scope>compile</scope>
    </dependency>
</dependencies>
Component scan
The components in the package where the main program is located and all its sub packages will be scanned by default, so there is no need to configure package scanning.
If you want to change the package scanning directory, there are two ways:
- Configure the annotation @ SpringBootApplication(scanBasePackages="xxx") before the main program class
- Add the annotation @ ComponentScan("xxx") before the main program class
Postscript
A necessary lesson in the Spring family.