1. Scenario Display
File upload is often used in the development process;
This article will take the spring boot as an example, how to receive the file request from the front end;
It is more convenient to upload files using plug-ins. Here I use webuploader
2. Front end code
Step 1: prepare the web loader plug-in and put it into the project;

Because, when the project starts, springboot will automatically load the static resources (front-end code) in the static directory into the project;
Therefore, in order to save trouble, I don't create a web directory here;
Moreover, springboot will automatically index. In the resources/static directory Html is used as the welcome page of the project (I don't configure the mapping relationship between the request and the page for ease).
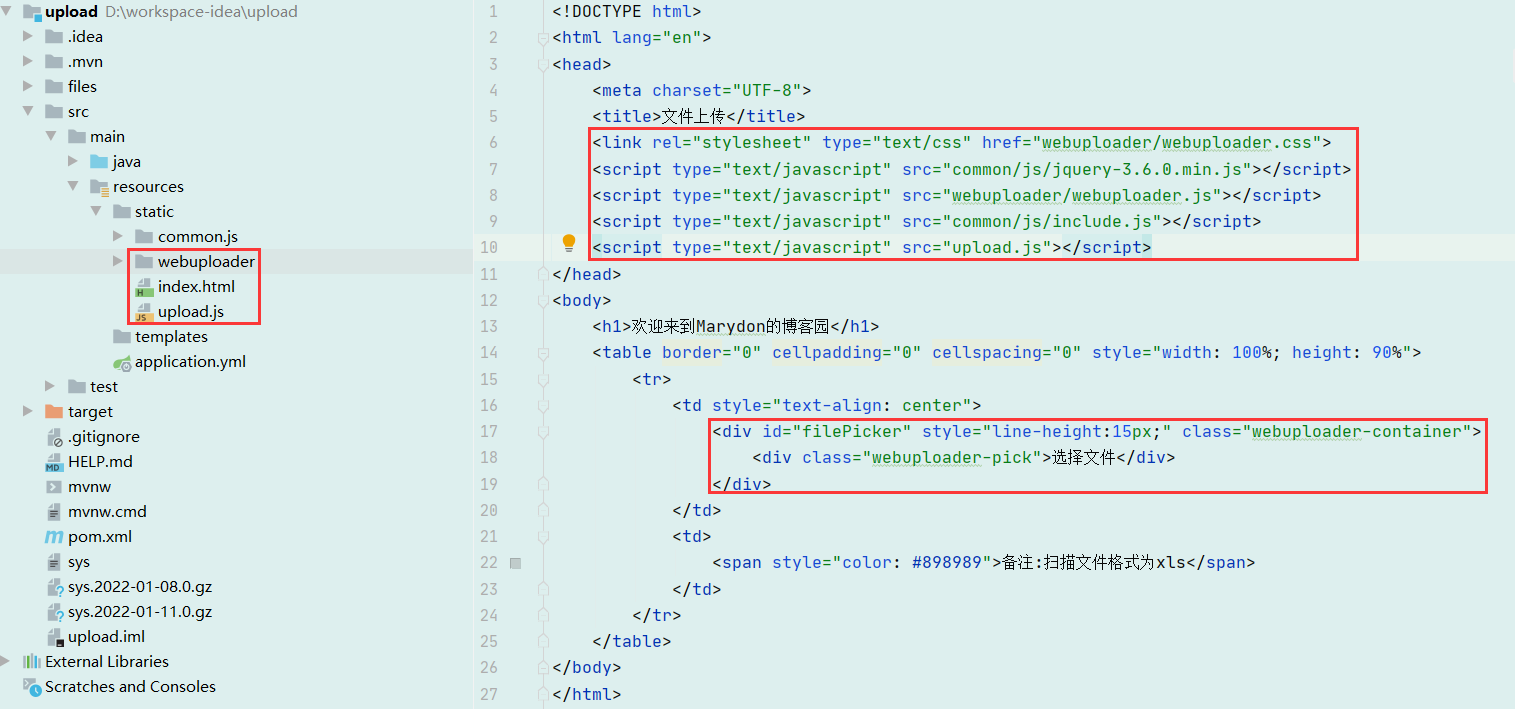
Now, let's have an overall understanding of the front-end code;
A location to store plug-ins: webuploader;
A page to display the plug-in: index html;
A JS to handle file upload: upload js;
index.html needs to be imported:
webuploader.css and webuploader js;
Must be in webuploader jQuery.js JS (because it relies on jQuery);
include.js contains the following contents:
// Get request path
var pathName = window.document.location.pathname;
// Get the project name by intercepting
var baseUrl = pathName.substring(0, pathName.substr(1).indexOf('/') + 1);
Purpose: get the name of the project.
The core code of html is:
<div id="filePicker" style="line-height:15px;" class="webuploader-container">
    <div class="webuploader-pick">Select file</div>
</div>
The webuploader plug-in will add content to the div filePicker through the init() method, for example:

js core code:
view code/**
* The essence of batch upload of the plug-in:
* Each file sends an upload request separately, so its essence is single file upload, not the real meaning: a request contains multiple files.
*/
this.init = function () {
var state = 'pending';
var upUrl = baseUrl + '/file/upload.do';
var uploader = WebUploader.create({
auto: true, // After selecting a file, it is automatically uploaded. By default, it is not automatically uploaded and needs to be triggered
swf: baseUrl + '/webuploader/Uploader.swf', // swf file path
server: upUrl, // Interface for uploading files (replace with the interface path given by your backend)
// Select the button for the file. Optional.
// The internal is created according to the current operation, which may be an input element or flash
pick: '#filePicker',
accept: {
extensions: 'xls,xlsx', // The allowed file suffixes, without dots, are separated by commas. The old version of Excel and the new version are supported here
mimeTypes: 'application/vnd.ms-excel,application/vnd.openxmlformats-officedocument.spreadsheetml.sheet'
},
resize: false, // Do not compress the image. If it is jpeg by default, the file will be compressed before uploading!
/* duplicate :true */ //Repeatable upload
});
/**
* Triggered before the file is added to the queue
* @explain It is mainly used to transfer other parameters
*/
uploader.on('beforeFileQueued', function (file) {
var obj = new Object();
obj.THEMEID = $('#THEMEID').val();
uploader.options.formData = obj;
});
/**
* Upload succeeded
*/
uploader.on('uploadSuccess', function( file, result) {
alert(JSON.stringify(result));
});
/**
* Upload failed
*/
uploader.on('uploadError', function( file, result) {
// alert('File upload failed! ');
alert(JSON.stringify(result));
});
/**
* Upload complete
*/
uploader.on( 'uploadComplete', function( file ) {
});
uploader.on( 'all', function( type ) {
if ( type === 'startUpload' ) {
state = 'uploading';
} else if ( type === 'stopUpload' ) {
state = 'paused';
} else if ( type === 'uploadFinished' ) {
state = 'done';
}
});
}HTML full code:
view code<!DOCTYPE html>
<html lang="en">
<head>
<meta charset="UTF-8">
<title>File upload</title>
<link rel="stylesheet" type="text/css" href="webuploader/webuploader.css">
<script type="text/javascript" src="common/js/jquery-3.6.0.min.js"></script>
<script type="text/javascript" src="webuploader/webuploader.js"></script>
<script type="text/javascript" src="common/js/include.js"></script>
<script type="text/javascript" src="upload.js"></script>
</head>
<body>
<h1>Welcome to Marydon Blog Garden</h1>
<table border="0" cellpadding="0" cellspacing="0" style="width: 100%; height: 90%">
<tr>
<td style="text-align: center">
<div id="filePicker" style="line-height:15px;" class="webuploader-container">
<div class="webuploader-pick">Select file</div>
</div>
</td>
<td>
<span style="color: #898989 "> note: the format of the scanned file is XLS</span>
</td>
</tr>
</table>
</body>
</html>Note: the key point is to introduce the path of the file. Don't make a mistake.
JAVASCRIPT complete code:
view codevar upload = new Upload();
window.onload = function(){
// Don't forget to call the initialization function of WebUploader
upload.init();
}
function Upload() {
var object = this;
/**
* The essence of batch upload of the plug-in:
* Each file sends an upload request separately, so its essence is single file upload, not the real meaning: a request contains multiple files.
*/
this.init = function () {
var uploadUrl = baseUrl + '/file/upload.do';
var uploader = WebUploader.create({
auto: true, // After selecting a file, it is automatically uploaded. By default, it is not automatically uploaded and needs to be triggered
swf: baseUrl + '/webuploader/Uploader.swf', // swf file path
server: uploadUrl, // Interface for uploading files (replace with the interface path given by your backend)
// Select the button for the file. Optional.
// The internal is created according to the current operation, which may be an input element or flash
pick: '#filePicker',
accept: {
extensions: 'xls,xlsx', // The allowed file suffixes, without dots, are separated by commas. The old version of Excel and the new version are supported here
mimeTypes: 'application/vnd.ms-excel,application/vnd.openxmlformats-officedocument.spreadsheetml.sheet'
},
resize: false, // Do not compress the image. If it is jpeg by default, the file will be compressed before uploading!
/* duplicate :true */ //Repeatable upload
});
/**
* Triggered before the file is added to the queue
* @description It is mainly used to transfer other parameters
* @explain I didn't demonstrate here and didn't pass other parameters
*/
uploader.on('beforeFileQueued', function (file) {
var obj = new Object();
obj.THEMEID = $('#THEMEID').val();
uploader.options.formData = obj;
});
/**
* Upload succeeded
*/
uploader.on('uploadSuccess', function( file, result) {
alert(JSON.stringify(result));
});
/**
* Upload failed
*/
uploader.on('uploadError', function( file, result) {
// alert('File upload failed! ');
alert(JSON.stringify(result));
});
};
}Note: the key point is that the plug-in WebUploader needs to be initialized.
3. Back end code
The difficulty is: how to receive requests from the front end?
In fact, it is very simple: the value of the parameter file is a file of MultipartFile type.
For file upload, the uploaded parameters will have at least the following 6 parameters:

In order to facilitate the use of parameters, I use entity classes to receive these parameters, which will be very convenient for subsequent use.
view codeimport lombok.Getter;
import lombok.Setter;
import org.springframework.web.multipart.MultipartFile;
import javax.validation.constraints.NotBlank;
import javax.validation.constraints.NotNull;
/**
* File upload request parameters
* @description:
* @author: Marydon
* @date: 2022-01-10 15:38
* @version: 1.0
* @email: marydon20170307@163.com
*/
@Getter
@Setter
public class UploadParamsDto {
@NotBlank(message = "id:Cannot be empty")
private String id;
@NotBlank(message = "name:Cannot be empty")
private String name;
@NotBlank(message = "type:Cannot be empty")
private String type;
@NotBlank(message = "lastModifiedDate:Cannot be empty")
private String lastModifiedDate;
@NotBlank(message = "size:Cannot be empty")
private String size;
@NotNull(message = "file:Cannot be empty")
private MultipartFile file;
}If you do not need to perform non null verification on parameters, delete the annotation corresponding to these attributes.
JAVA control layer completion code:
view codeimport com.example.upload.web.dto.UploadParamsDto;
import lombok.extern.slf4j.Slf4j;
import org.springframework.validation.annotation.Validated;
import org.springframework.web.bind.annotation.PostMapping;
import org.springframework.web.bind.annotation.RequestMapping;
import org.springframework.web.bind.annotation.RestController;
import org.springframework.web.multipart.MultipartFile;
import java.io.File;
import java.io.IOException;
import java.util.HashMap;
import java.util.Map;
/**
* File upload control layer
* @description:
* @author: Marydon
* @date: 2022-01-10 10:16
* @version: 1.0
* @email: marydon20170307@163.com
*/
@Slf4j
@RestController
@RequestMapping("/file")
public class UploadController {
// File storage path: Project path / files
private static final String UPLOADED_FOLDER = System.getProperty("user.dir") + File.separator + "files";
/*
* File upload
* @attention: Batch upload is not supported
* @description: Request type - multipart / form data
* @date: 2022/1/11 10:23
* @param: paramsDto
* @return: java.util.Map
*/
@PostMapping("/upload.do")
public Map<String, Object> upload(@Validated UploadParamsDto paramsDto) {
// Data to be returned
Map<String, Object> resultMap = new HashMap<>(2);
resultMap.put("isSuccess", true);
resultMap.put("error", "");
Map<String, String> errorMap = new HashMap<>();
// Get uploaded files
MultipartFile file = paramsDto.getFile();
// The file name of the new file
String fileName = System.currentTimeMillis() + "_" + paramsDto.getName();
// Generation of new files
File copyFile = new File(UPLOADED_FOLDER + File.separator + fileName);
// The directory is created automatically if it does not exist
copyFile.mkdirs();
try {
// Transfer the multipart file to the file represented by the file object
// This method can change a folder directly into a file
// When copyFile represents a directory, normally the file cannot be input, and the transferTo() method will directly change the directory into a file and input data
file.transferTo(copyFile);
} catch (IOException e) {
e.printStackTrace();
log.error(e.getMessage());
// If an error is reported, it means that the file upload fails, and the original file name and error information are returned
errorMap.put(paramsDto.getName(), e.getMessage());
}
if (!errorMap.isEmpty()) {
resultMap.put("error", errorMap);
}
return resultMap;
}
}Difficulties also include: how to obtain the directory where files are saved;
Naming rules for new file names;
Quick copy of files.
Of course, if you only parse the uploaded files without saving them, you won't encounter the above three problems.
explain:
Request format: multipart / form data;
Return format: application/json.
In addition, if you need to verify the parameters of the entity class UploadParamsDto, in addition to adding the annotation @ Validated in front of it, you should also introduce the corresponding annotation jar dependency.
<!--spring Check the parameters: hibernate validator-->
<dependency>
    <groupId>org.hibernate</groupId>
    <artifactId>hibernate-validator</artifactId>
    <version>6.0.18.Final</version>
</dependency>
For more details, I talked about it in my previous article.
4. Effect display
Go straight to the welcome page
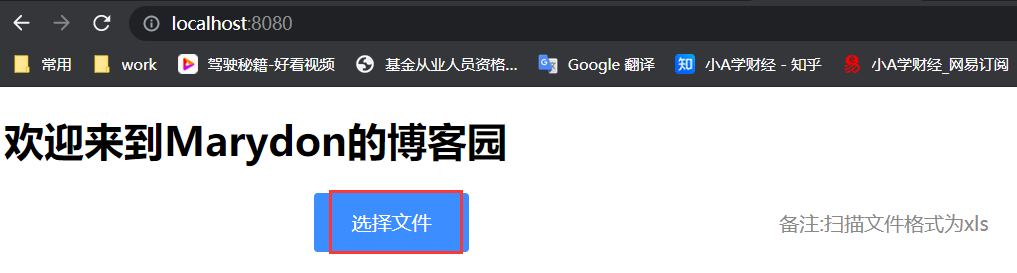
Click "select file" to select the file to upload. Multiple selections are supported.

Storage location of final uploaded files

Write at the end
If you find any mistakes in the article or need to add more content, please leave a message!!!