Druid
Spring boot integrated Druid scheme: one is to directly configure Druid spring boot starter in POM without writing any code; One is to configure druid and write a few lines of code, which can be added; On the basis of scheme 1, add stat and wall to verify login.
First present the github code address: https://github.com/yudiandemingzi/spring-boot-many-data-source
The code can be run directly by pulling down and changing its own mysql database address. Druid has obvious advantages. Its visual interface can monitor the execution of Sql statements and URI s, which is really needed in development.
Let's start with the advantages:
1) replace DBCP and C3P0. Druid It provides an efficient, powerful and scalable database connection pool.
2) Database password encryption. Writing the database password directly in the configuration file is a bad behavior, which is easy to lead to security problems.
3) It can monitor database access performance and make detailed statistics SQL Execution performance, which is helpful for online analysis of database access performance.
4) SQL Execution log, Druid Provides different LogFilter,Monitor your application's database access.
5)extend JDBC,If you want to be right JDBC Layer has programming requirements, which can be realized through Druid Provided Filter-Chain Mechanism, easy to write JDBC Layer extension.
com.alibaba.druid.pool.DruidDataSource basic configuration parameters:
| to configure | Default value | explain |
|---|---|---|
| name | The significance of configuring this attribute is that if there are multiple data sources, they can be distinguished by name during monitoring. If there is no configuration, a name will be generated in the format of "datasource -" + system identityHashCode(this) | |
| jdbcUrl | The url to connect to the database is different from database to database | |
| username | User name to connect to the database | |
| password | Password to connect to the database. If you don't want the password written directly in the configuration file | |
| driverClassName | Automatic identification according to url | This item can be configured or not. If druid is not configured, it will automatically identify the dbType according to the url, and then select the corresponding driverclassname (under recommended configuration) |
| initialSize | 0 | The number of physical connections established during initialization. Initialization occurs when the display calls the init method or the first getConnection |
| maxActive | 8 | Maximum number of connection pools |
| maxIdle | 8 | It is no longer used, and the configuration has no effect |
| minIdle | Minimum number of connection pools | |
| maxWait | The maximum waiting time for obtaining a connection, in milliseconds. After maxWait is configured, the fair lock is enabled by default, and the concurrency efficiency will be reduced. If necessary, you can use a non fair lock by configuring the useUnfairLock property to true | |
| poolPreparedStatements | false | Whether to cache preparedStatement, that is, pscache. Pscache greatly improves the performance of databases that support cursors, such as oracle. It is recommended to close under mysql |
| maxOpenPreparedStatements | -1 | To enable PSCache, it must be configured to be greater than 0. When greater than 0, poolPreparedStatements is automatically triggered and modified to true. In Druid, there will be no problem that PSCache in Oracle occupies too much memory. You can type this value configuration, for example, 100 |
| validationQuery | The sql used to check whether the connection is valid requires a query statement. If validationQuery is null, testonmirror, testOnReturn and testwhiteidle will not work | |
| testOnBorrow | true | When applying for a connection, execute validationQuery to check whether the connection is valid. This configuration will reduce performance |
| testOnReturn | false | When returning a connection, execute its validationQuery to check whether the connection is valid. This configuration will reduce performance |
| testWhileIdle | false | It is recommended to configure to true, which will not affect performance and ensure security. Check when applying for connection. If the idle time is greater than timebetween evictionrunmills, run validationQuery to check whether the connection is valid |
| timeBetweenEvictionRunMillis | 1 minute (1.0.14) | It has two meanings: the Destory thread will detect the connection interval, and the judgment basis of testwhiteidle. See the description of testwhiteidle attribute for details |
| numTestsPerEvictionRun | It is no longer used. A DruidDataSource only supports one evaluationrun | |
| minEvictableIdleTimeMillis | 30 minutes (1.0.14) | The maximum time a connection remains idle without being evicted |
| connectionInitSqls | Execute sql during physical connection initialization | |
| exceptionSorter | Automatic identification according to dbType | When the database throws some unrecoverable exceptions, the connection is discarded |
| filters | The attribute type is string. The extension plug-ins are configured by alias. The commonly used plug-ins are: filter for monitoring statistics: filter for stat log; Log4j defense injected filter:wall | |
| proxyFilters | The type is list < com alibaba. druid,filter. Filter >, if filter and proxyFilters are configured at the same time, it is a combination relationship, not a combination relationship | |
Configure data sources
1. Add Druid data source dependency on.
 <!-- https://mvnrepository.com/artifact/com.alibaba/druid -->
        <dependency>
            <groupId>com.alibaba</groupId>
            <artifactId>druid</artifactId>
            <version>1.2.6</version>
        </dependency>
2. Switch data sources; As mentioned earlier, com.com is used by default for Spring Boot 2.0 and above zaxxer. hikari. Hikaridatasource data source, but it can be accessed through spring datasource. Type specifies the data source.
spring:
  datasource:
    username: root
    password: 123456
    url: jdbc:mysql://localhost:3306/mybatis?serverTimezone=UTC&useUnicode=true&characterEncoding=utf-8
    driver-class-name: com.mysql.cj.jdbc.Driver
    type: com.alibaba.druid.pool.DruidDataSource
3. After data source switching, inject DataSource into the test class, obtain it, and output it to see whether the switching is successful;
@SpringBootTest
class SpringbootDataJdbcApplicationTests {

    @Autowired
    DataSource dataSource;

    @Test
    void contextLoads() throws SQLException {

        //View default data sources
        System.out.println(dataSource.getClass());

    }

}
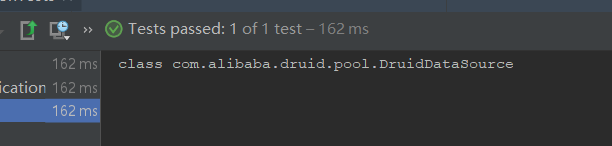
4. Switching succeeded! Now that the switch is successful, you can set the initialization size, maximum number of connections, waiting time, minimum number of connections and other settings of the data source connection; You can view the source code
spring:
  datasource:
    username: root
    password: 123456
    #? serverTimezone=UTC resolves the error in the time zone
    url: jdbc:mysql://localhost:3306/springboot?serverTimezone=UTC&useUnicode=true&characterEncoding=utf-8
    driver-class-name: com.mysql.cj.jdbc.Driver
    type: com.alibaba.druid.pool.DruidDataSource

    #Spring Boot does not inject these attribute values by default and needs to bind itself
    #druid data source proprietary configuration
    initialSize: 5
    minIdle: 5
    maxActive: 20
    maxWait: 60000
    timeBetweenEvictionRunsMillis: 60000
    minEvictableIdleTimeMillis: 300000
    validationQuery: SELECT 1 FROM DUAL
    testWhileIdle: true
    testOnBorrow: false
    testOnReturn: false
    poolPreparedStatements: true

    #Configure filters for monitoring statistics interception, stat: monitoring statistics, log4j: logging, wall: defending sql injection
    #If allowed, an error occurs in Java lang.ClassNotFoundException: org. apache. log4j. Priority
    #Then import the log4j dependency. Maven address: https://mvnrepository.com/artifact/log4j/log4j
    filters: stat,wall,log4j
    maxPoolPreparedStatementPerConnectionSize: 20
    useGlobalDataSourceStat: true
    connectionProperties: druid.stat.mergeSql=true;druid.stat.slowSqlMillis=500
5. Import Log4j dependencies
 <!-- https://mvnrepository.com/artifact/log4j/log4j -->
        <dependency>
            <groupId>log4j</groupId>
            <artifactId>log4j</artifactId>
            <version>1.2.17</version>
        </dependency>
6. Now programmers need to bind the parameters in the global configuration file for DruidDataSource and add them to the container instead of using the automatic generation of Spring Boot; We need to add the DruidDataSource component to the container and bind the properties;
@Configuration
public class DruidConfig {

    /*
       Add the custom Druid data source to the container and no longer let Spring Boot create it automatically
       Bind the Druid data source attribute in the global configuration file to com alibaba. druid. pool. Druiddatasource to make them effective
       @ConfigurationProperties(prefix = "spring.datasource"): The function is to add the global configuration file
       The prefix is spring The attribute value of datasource is injected into com alibaba. druid. pool. Druiddatasource is in a parameter with the same name
     */
    @ConfigurationProperties(prefix = "spring.datasource")
    @Bean
    public DataSource druidDataSource() {
        return new DruidDataSource();
    }

}
7. Test in the test class; See if it succeeds!
@SpringBootTest
class SpringbootDataJdbcApplicationTests {

    @Autowired
    DataSource dataSource;

    @Test
    void contextLoads() throws SQLException {

        //View default data sources
        System.out.println(dataSource.getClass());

        //Get connection
        Connection connection = dataSource.getConnection();
        System.out.println(connection);

        DruidDataSource druidDataSource = (DruidDataSource) dataSource;
        System.out.println("druidDataSource Maximum connections to data source:" + druidDataSource.getMaxActive());
        System.out.println("druidDataSource Number of data source initialization connections:" + druidDataSource.getInitialSize());

        //xxxx Template: SpringBoot has configured the template bean, which can be used immediately
        //For example, jdbc,
        //Close connection
        connection.close();
    }

}

Configure Druid data source monitoring
Druid data source has the function of monitoring and provides a web interface for users to view. Similarly, when installing a router, people also provide a default web page.
Therefore, the first step is to set Druid's background management page, such as login account, password, etc; Configure background management;
//Configure the Servlet of Druid monitoring management background;
//There is no web when the Servlet container is built in XML file, so the Servlet registration method of Spring Boot is used
@Configuration
public class DruidConfig {


    /*
       Add the custom Druid data source to the container and no longer let Spring Boot create it automatically
       Bind the Druid data source attribute in the global configuration file to com alibaba. druid. pool. Druiddatasource to make them effective
       @ConfigurationProperties(prefix = "spring.datasource"): The function is to add the global configuration file
       The prefix is spring The attribute value of datasource is injected into com alibaba. druid. pool. Druiddatasource is in a parameter with the same name
     */
    @ConfigurationProperties(prefix = "spring.datasource")
    @Bean
    public DataSource druidDataSource(){
        return new DruidDataSource();
    }


    //Background monitoring function, fixed method
    @Bean
    public ServletRegistrationBean statViewServlet(){
        ServletRegistrationBean bean =  new ServletRegistrationBean<>(new StatViewServlet(),"/druid/*");

        //Someone needs to log in at the background and configure the account and password
        HashMap<String,String> initParameters =  new HashMap<>();

        //Add configuration,
        //loginUsername and loginPassword are fixed
        initParameters.put("loginUsername","admin");
        initParameters.put("loginPassword","123456");

        //Who is allowed to access in the background
        //initParams.put("allow", "localhost"): indicates that only the local machine can access it
        //initParams.put("allow", ""): when it is empty or null, it means that all access is allowed
        initParameters.put("allow", "");
        //deny: Druid, who is denied access in the background
        //initParams.put("kuangshen", "192.168.1.20"); Indicates that this ip access is prohibited


        bean.setInitParameters(initParameters);//Set initialization parameters

        return bean;
    }

    //Configure the filter of web monitoring for Druid monitoring
    //WebStatFilter: used to configure management association monitoring statistics between Web and Druid data sources
    @Bean
    public FilterRegistrationBean webStatFilter() {
        FilterRegistrationBean bean = new FilterRegistrationBean();
        bean.setFilter(new WebStatFilter());

        //exclusions: sets which requests are filtered and excluded so that statistics are not performed
        Map<String, String> initParams = new HashMap<>();
        initParams.put("exclusions", "*.js,*.css,/druid/*,/jdbc/*");
        bean.setInitParameters(initParams);

        //"/ *" means to filter all requests
        bean.setUrlPatterns(Arrays.asList("/*"));
        return bean;
    }
}
Run access: http://localhost:8080/druid/login.html
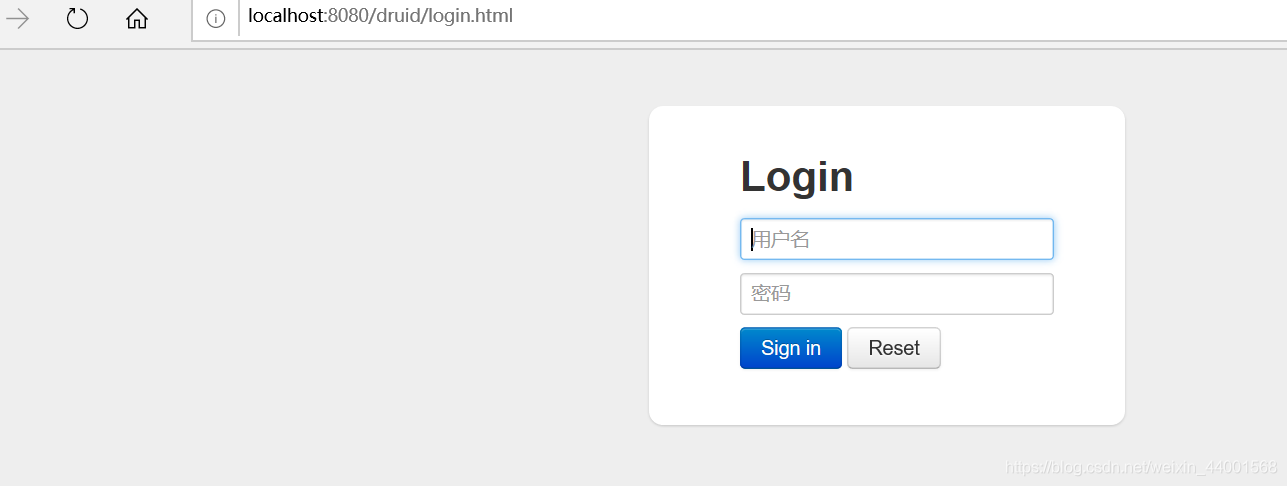
Enter the set account and password to enter the page:
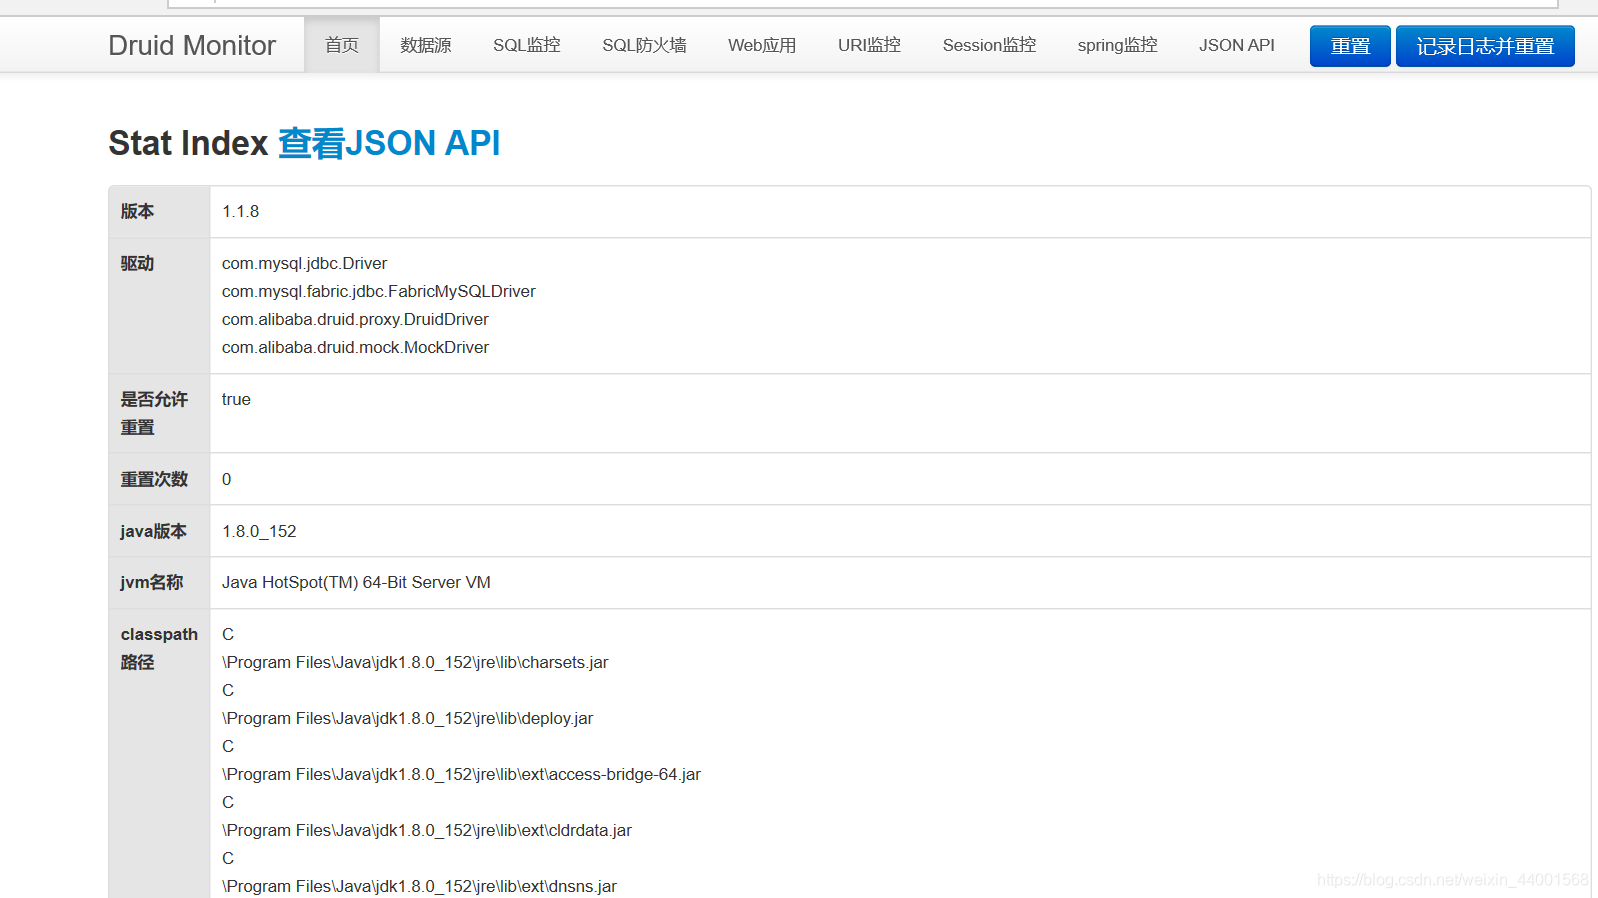
You can also execute a command to view SQL monitoring:
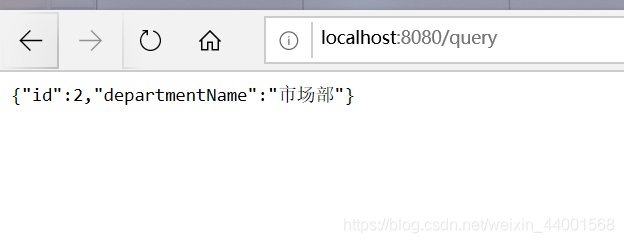
Query execution department:
MyBatis
Official documents: http://mybatis.org/spring-boot-starter/mybatis-spring-boot-autoconfigure/
Maven warehouse address: https://mvnrepository.com/artifact/org.mybatis.spring.boot/mybatis-spring-boot-starter/2.1.1
Integration test
1. Dependencies required to import MyBatis
<!-- https://mvnrepository.com/artifact/org.mybatis.spring.boot/mybatis-spring-boot-starter -->
        <dependency>
            <groupId>org.mybatis.spring.boot</groupId>
            <artifactId>mybatis-spring-boot-starter</artifactId>
            <version>2.2.0</version>
        </dependency>
2. Configure database connection information (unchanged)
spring:
  datasource:
    username: root
    password: 123456
    #? serverTimezone=UTC resolves the error in the time zone
    url: jdbc:mysql://localhost:3306/springboot?serverTimezone=UTC&useUnicode=true&characterEncoding=utf-8
    driver-class-name: com.mysql.cj.jdbc.Driver
    type: com.alibaba.druid.pool.DruidDataSource
3. Test whether the database connection is successful!
@SpringBootTest
class SpringbootMtbatis02ApplicationTests {

    @Autowired
    DataSource dataSource;

    @Test
    void contextLoads() throws SQLException {

        System.out.println(dataSource.getClass());
        System.out.println(dataSource.getConnection());
    }

}

4. Create an entity class and import Lombok!
 <!-- https://mvnrepository.com/artifact/org.projectlombok/lombok -->
        <dependency>
            <groupId>org.projectlombok</groupId>
            <artifactId>lombok</artifactId>
            <version>1.18.20</version>
            <scope>provided</scope>
        </dependency>
Create User entity class:
@Data
@NoArgsConstructor
@AllArgsConstructor
public class User {

    private int id;
    private String name;
    private String pwd;
}
5. Create the Mapper directory and the corresponding Mapper interface
//@Mapper: indicates that this class is a mapper of MyBatis
@Mapper
@Repository
public interface UserMapper {

    List<User> queryUserList();

    User queryUserById(int id);

    int addUser(User user);

    int updateUser(User user);

    int deleteUser(int id);

}
6. Create the mybatis/mapper package under resources to store the corresponding Mapper mapping file
<?xml version="1.0" encoding="UTF-8" ?>
<!DOCTYPE mapper
        PUBLIC "-//mybatis.org//DTD Mapper 3.0//EN"
        "http://mybatis.org/dtd/mybatis-3-mapper.dtd">

<mapper namespace="com.bing.mapper.UserMapper">

    <select id="queryUserList" resultType="User">
       select * from user ;
    </select>

    <select id="queryUserById" resultType="User" parameterType="int">
       select * from user where id = #{id}
    </select>

    <select id="addUser" parameterType="User">
        insert into user (id,name,pwd) values (#{id},#{name},#{pwd})
    </select>

    <update id="updateUser" parameterType="User">
        update user set name = #{name},pwd={pwd} where id = #{id}
    </update>

    <delete id="deleteUser" parameterType="int">
        delete from user where id = #{id}
    </delete>

</mapper>
8. Write Controller to test!
@RestController
public class UserController {

    @Autowired
    private UserMapper userMapper;

    @GetMapping("/queryUserList")
    public List<User> queryUserList(){
        List<User> userList = userMapper.queryUserList();

        for(User user : userList){
            System.out.println(user);
        }
        return userList;
    }
}
9. Run test:
