1. Microservices
(Microservices)—Martin Flower
1.1 microservices
-
Microservice Architecture
- The term has been widely used in the past few years to describe a special way to design applications as a set of independently deployable services.
- At present, this architecture has not been accurately defined, but it has some common characteristics in the organization of business capabilities, automatic deployment, intelligence in the endpoints, and decentralized control of language and data.
-
Microservices
- In the past few years, we found that more and more projects began to use this style, so that our colleagues took it for granted as a default development form when building enterprise applications.
- However, unfortunately, it is difficult to find such a theoretical description of what the microservice style is and how it should be developed.
-
Microservice architecture style
- It is like developing a separate application into a set of small services. Each small service runs in its own process and uses lightweight mechanisms to communicate, usually HTTP API s.
- These services are built around business capabilities and deployed independently through a fully automated deployment mechanism. These services are written in different programming languages, as well as different data storage technologies, and maintain a minimum of centralized management.
-
Before introducing the microservice style, it is helpful to compare the * * overall style) * * that a complete application is built into a single unit.
- Enterprise applications are usually built into three main parts: client-side user interface (composed of HTML pages and Javascript of browsers running on client machines), database (a general and interrelated data management system composed of many tables) and server-side applications.
- The server application processes the HTTP request, executes domain logic, retrieves and updates the data in the database, and sends it to the browser using the appropriate HTML view.
- The server application is complete and is a separate logical execution. Any change to the system involves rebuilding and deploying a new version of the server-side application.
Springboot 2: getting started
2.1 what is Spring
Spring is an open source framework. It is a lightweight Java development framework developed in 2003 by Rod Johnson.
Spring is created to solve the complexity of enterprise application development and simplify development.
2.2 how spring simplifies Java development
In order to reduce the complexity of Java development, Spring adopts the following four key strategies:
1. Lightweight and minimally invasive programming based on POJO;
2. Loose coupling is realized through IOC, dependency injection (DI) and interface oriented;
3. Declarative programming based on AOP and conventions;
4. Reduce style codes through cut planes and templates;
2.3 what is SpringBoot
-
Students who have studied javaweb know that developing a web application, starting from the initial contact with Servlet combined with Tomcat and running a Hello Wolrld program, requires a lot of steps; Later, I used the framework Struts, and then spring MVC. Now, with spring boot, other web frameworks will appear in a year or two; I don't know if you have ever experienced the continuous evolution of the framework, and then all the technologies of your own development projects will continue to change and transform. Anyway, I have experienced it, ha ha. To get back to business, what is SpringBoot? It is a java web development framework, which is similar to spring MVC. Compared with the benefits of other Java Web frameworks, it is officially said that it simplifies development, conventions are greater than configuration, and you can "just run", which can quickly develop web applications and develop an http interface with a few lines of code.
-
The development of all technical frameworks seems to follow a main law:
- A specification framework is derived from a complex application scenario. People only need to make various configurations without implementing it by themselves. At this time, the powerful configuration function becomes an advantage;
- After a certain degree of development, people have chosen some practical functions and design essence to reconstruct some lightweight frameworks based on actual production and application.
- Later, in order to improve development efficiency, they disliked that the original configurations were too troublesome, so they began to advocate "agreement is greater than configuration", and then derived some one-stop solutions.
-
Yes, this is the process of Java enterprise application - > J2EE - > spring - > springboot.
-
With the continuous development of spring, more and more fields are involved. The project integration development needs to cooperate with a variety of files, which gradually becomes less easy to use and simple, contrary to the original concept, and even called configuration hell. Spring Boot is a development framework abstracted under such a background. The purpose is to make it easier for everyone to use spring and integrate various common middleware and open source software;
-
Spring Boot is developed based on spring. Spring Boot itself does not provide the core features and extension functions of the spring framework, but is only used to quickly and quickly develop a new generation of applications based on the spring framework.
- In other words, it is not a solution to replace Spring, but a tool closely combined with the Spring framework to improve the Spring developer experience.
- Spring Boot takes the core idea that convention is greater than configuration. By default, it helps us make a lot of settings. Most Spring Boot applications only need a few spring configurations.
- At the same time, it integrates a large number of common third-party library configurations (such as Redis, MongoDB, Jpa, RabbitMQ, Quartz, etc.). These third-party libraries in Spring Boot applications can be used out of the box with almost zero configuration,
-
Simply put, spring boot is not a new framework. It configures the use of many frameworks by default, just as maven integrates all jar packages and spring boot integrates all frameworks.
-
Spring Boot was born in a famous family. From the beginning, it stood at a relatively high starting point. After several years of development, the ecology is perfect enough. Spring Boot has become the hottest technology in the Java field.
Main advantages of Spring Boot:
- Get started faster for all Spring developers
- Out of the box, various default configurations are provided to simplify project configuration
- Inline containers simplify Web projects
- There are no requirements for redundant code generation and XML configuration
2.4 microservices
What is micro service?
Microservice is an architectural style, which requires that when we develop an application, the application must be built into a combination of a series of small services; It can communicate through http. To talk about microservice architecture, we must first talk about our single application architecture in the past.
Single application architecture
The so-called all in one application architecture means that we encapsulate all application services in an application in one application.
No matter ERP, CRM or other systems, you put database access, web access and other functions into a war package.
- The advantage of this is that it is easy to develop and test; It is also very convenient to deploy; When you need to expand, you only need to copy multiple copies of war, then put it on multiple servers, and then do load balancing.
- The disadvantage of single application architecture is that even if I want to modify a very small place, I need to stop the whole service and repackage and deploy the application war package. Especially for a large application, it is impossible for us to put all the contents in one application. How we maintain and how we divide our work and cooperate is a problem.
Microservice architecture
all in one architecture, we put all functional units in one application. Then we deploy the whole application to the server. If the load capacity is not good, we will replicate the whole application horizontally, expand it, and then balance the load.
The so-called microservice architecture is to break the previous all in one architecture and separate each functional element. The dynamic combination of independent functional elements can only be used to combine the required functional elements. When more functional elements are needed, multiple functional elements can be integrated. Therefore, the microservice architecture replicates the functional elements rather than the entire application.
The benefits are:
- Save call resources.
- The service of each functional element is a replaceable and independently upgradeable software code.
Microservices written by Martin Flower on March 25, 2014 describes in detail what microservices are.
- Original address: http://martinfowler.com/articles/microservices.html
- Translation: https://www.cnblogs.com/liuning8023/p/4493156.html
How to build microservices
The microservice architecture of a large system is like a complex intertwined neural network. Each neuron is a functional element. They complete their own functions, and then request and call each other through http. For example, in an e-commerce system, caching, database, page browsing, checkout, payment and other services are independent functional services, which have been miniaturized. They build a huge system together as micro services. If you modify one of the functions, you only need to update and upgrade one of the function service units.
However, this huge system architecture brings great difficulties to deployment and operation and maintenance. Therefore, spring has brought us a complete set of products for building large-scale distributed micro services:
- Build a microservice application unit with independent functions. You can use springboot to help us quickly build an application;
- The call of large-scale distributed network services is completed by spring cloud to realize distributed;
- In the distributed middle, we perform streaming data calculation and batch processing. We have spring cloud data flow.
- spring figured out the whole process from building applications to large-scale distributed applications.
2.5 HelloWorld
preparation
We will learn how to quickly create a Spring Boot application and implement a simple Http request processing. Through this example, I have a preliminary understanding of Spring Boot and experience its features of simple structure and rapid development.
My environmental preparation:
- java version "1.8.0_181"
- Maven-3.6.1
- SpringBoot 2.x latest edition
Development tools:
- IDEA
Create base project
Spring officially provides very convenient tools
Spring Initializr: https://start.spring.io/ To help us create a Spring Boot application.
[goal 1: create a project using the Spring Initializr page]
Steps:
- Open https://start.spring.io/
- Fill in project information
- Click the "Generate Project" button to generate the project; download the project
- Unzip the project package and import it into Maven project with compiler. Take IntelliJ IDEA as an example:
- Import the Maven project and go to the next step until the project is imported. If it is used for the first time, the speed may be slow. You need to wait patiently for everything to be ready
Project structure analysis
Through the above steps, the basic project is created. The following files will be automatically generated.
- Main program class of program
- An application Properties configuration file
- A test class
The generated DemoApplication and DemoApplicationTests class under the test package can be run directly to start the currently created project. Because the project does not cooperate with any data access or Web module, the program will end after loading Spring.
pom.xml analysis
Open POM XML, take a look at the dependencies of the Spring Boot project:
<!-- Parent dependency -->
<parent>
    <groupId>org.springframework.boot</groupId>
    <artifactId>spring-boot-starter-parent</artifactId>
    <version>2.2.5.RELEASE</version>
    <relativePath/>
</parent>

<dependencies>
    <!-- web Scene launcher -->
    <dependency>
        <groupId>org.springframework.boot</groupId>
        <artifactId>spring-boot-starter-web</artifactId>
    </dependency>
    <!-- springboot unit testing  -->
    <dependency>
        <groupId>org.springframework.boot</groupId>
        <artifactId>spring-boot-starter-test</artifactId>
        <scope>test</scope>
        <!-- Eliminate dependency -->
        <exclusions>
            <exclusion>
                <groupId>org.junit.vintage</groupId>
                <artifactId>junit-vintage-engine</artifactId>
            </exclusion>
        </exclusions>
    </dependency>
</dependencies>

<build>
    <plugins>
        <!-- Package plug-ins -->
        <plugin>
            <groupId>org.springframework.boot</groupId>
            <artifactId>spring-boot-maven-plugin</artifactId>
        </plugin>
    </plugins>
</build>
As shown above, there are four main parts:
- Project Metadata information: the Project Metadata entered during creation, that is, the basic elements of Maven project, including groupId, artifactId, version, name, description, etc
- Parent: inherits the dependency management of spring boot starter parent, version control and packaging
- Dependencies: project specific dependencies, Spring boot starter Web is used to implement the HTTP interface (Spring MVC is included in the dependency). The official website describes it as: building the Web using Spring MVC (including RESTful) application entrants use Tomcat as the default embedded container. Spring boot starter test is used to write dependency packages for unit tests. We will gradually expand the use of more functional modules later.
- Build: build the configuration section. Spring Boot Maven plugin is used by default. In combination with Spring Boot starter parent, Spring Boot applications can be packaged into jars to run directly.
Write HTTP interface
- Create a new controller package in the same level directory of the main program [be sure to be in the same level directory, otherwise it will not be recognized]
- Create a new Controller class in the package
package com.kuang.springboot.controller;

import org.springframework.web.bind.annotation.RequestMapping;
import org.springframework.web.bind.annotation.RestController;

@RestController
public class HelloController {

    @RequestMapping("/hello")
    public String hello() {
        return "Hello World";
    }

}
-
After writing, start the project from the main program, launch the request from the browser, and see the page return;
-
The console outputs the banner of SpringBoot
-
The control bar outputs the port number accessed by Tomcat!
-
#Change the port number of the project
server.port=8081
-
Access hello request, string returned successfully!

-
-
Type the project into a jar package
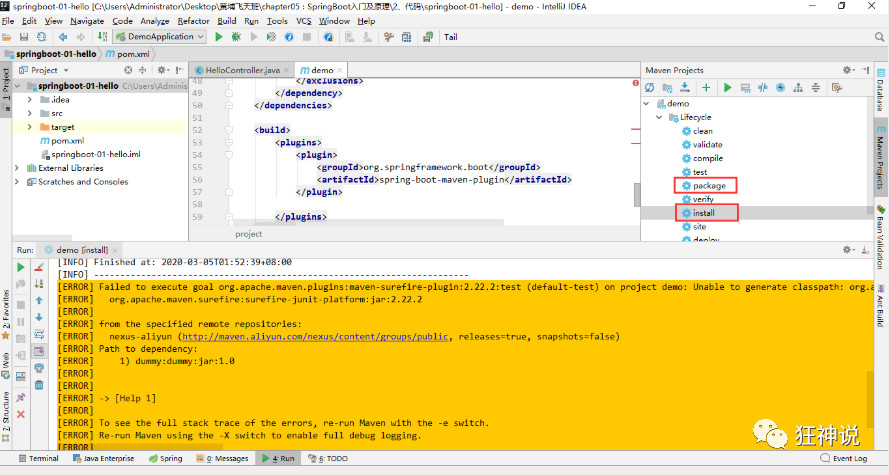
If you encounter the above errors, you can configure to skip the project and run test cases during packaging
<!--
    At work,In many cases, we don't want to execute test cases
    Maybe the test case is not finished,Or test examples will affect database data
    Skip test case execution
    -->
<plugin>
    <groupId>org.apache.maven.plugins</groupId>
    <artifactId>maven-surefire-plugin</artifactId>
    <configuration>
        <!--Skip project run test case-->
        <skipTests>true</skipTests>
    </configuration>
</plugin>
If the package is successful, a jar package will be generated in the target directory
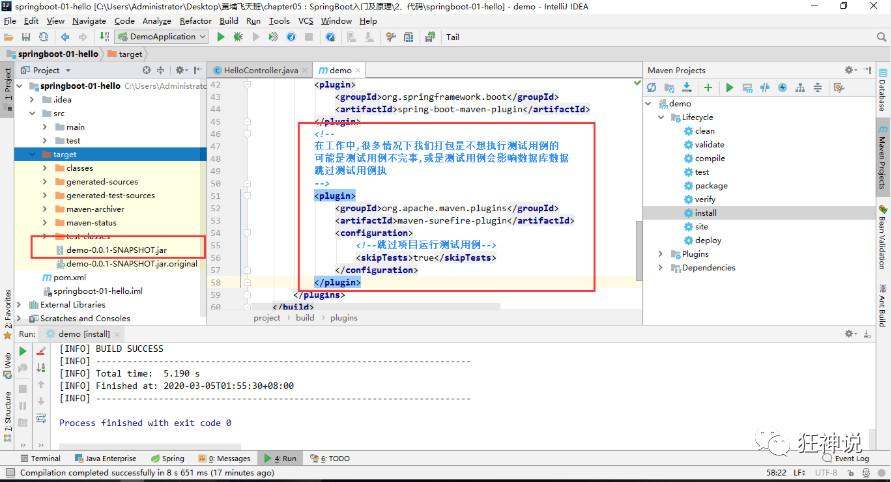
- After the jar package is typed, it can run anywhere! OK
Summary
- In a few simple steps, the development of a web interface is completed. SpringBoot is so simple. So we often use it to build our micro service project!
Easter egg
How to change the letters formed by the characters displayed at startup, SpringBoot?
Click this link , directly input the letters to be generated, and the system will automatically convert them, and then copy the converted characters below;
Just create a new TXT file in the resources directory under the project, banner txt
 /\/\/\                            /  \
| \  / |                         /      \
|  \/  |                       /          \
|  /\  |----------------------|     /\     |
| /  \ |                      |    /  \    |
|/    \|                      |   /    \   |
|\    /|                      |  | (  ) |  |
| \  / |                      |  | (  ) |  |
|  \/  |                 /\   |  |      |  |   /\
|  /\  |                /  \  |  |      |  |  /  \
| /  \ |               |----| |  |      |  | |----|
|/    \|---------------|    | | /|   .  |\ | |    |
|\    /|               |    | /  |   .  |  \ |    |
| \  / |               |    /    |   .  |    \    |
|  \/  |               |  /      |   .  |      \  |
|  /\  |---------------|/        |   .  |        \|
| /  \ |              /   NASA   |   .  |  NASA    \
|/    \|              (          |      |           )
|/\/\/\|               |    | |--|      |--| |    |
------------------------/  \-----/  \/  \-----/  \--------
                        \\//     \\//\\//     \\//
                         \/       \/  \/       \/
Then restart and try!
Use IDEA to quickly build projects
Previously, we directly and quickly built a springboot project on the official website, and IDEA can also do it. Let's look at the following specific steps:
-
Create a new project
-
Select spring initalizr, and you can see that the default is to implement it in the quick build tool on the official website
-
Fill in project information
-
Select the component to initialize
-
Fill in the project path
-
Wait for the project to build successfully
-
Under the same path of springboot application, we build a package controller and a class hellospprinboot
-
Write code
//@RestController means that all the methods in the Controller are output in json format @RestController public class HelloSpringBoot { @RequestMapping("/hello") public String hello(){ return "Hello,SpringBoot!"; } } -
Start the main program and open the browser to access http://localhost:8080/hello , you can see the effect!
In our later study, we can directly use IDEA to create a project, which is convenient and fast! There must be a story behind such a simple thing. We will conduct a wave of source code analysis later!
2.6 research on operation principle
pom.xml
How exactly does the hellospprinboot we wrote earlier run? Let's look at POM XML file
It mainly depends on a parent project
<parent>
   <groupId>org.springframework.boot</groupId>
   <artifactId>spring-boot-starter-parent</artifactId>
   <version>2.1.9.RELEASE</version>
   <relativePath/> <!-- lookup parent from repository -->
</parent>
Enter parent project
<parent>
  <groupId>org.springframework.boot</groupId>
  <artifactId>spring-boot-dependencies</artifactId>
  <version>2.1.9.RELEASE</version>
  <relativePath>../../spring-boot-dependencies</relativePath>
</parent>
This is the place to really manage all dependent versions in the SpringBoot application, the SpringBoot version control center;
In the future, we will import dependency. By default, we don't need to write a version; However, if the imported package is not managed in the dependency, you need to manually configure the version;
starter
<dependency>
    <groupId>org.springframework.boot</groupId>
    <artifactId>spring-boot-starter</artifactId>
</dependency>
<dependency>
    <groupId>org.springframework.boot</groupId>
    <artifactId>spring-boot-starter-web</artifactId>
</dependency>
Springboot boot starter: it is the scenario starter of spring boot (under what conditions to start)
For example, under the Web: spring boot starter web helps us import the components that the web module depends on for normal operation;
SpringBoot extracts all functional scenarios and makes them into starters. You only need to introduce these starters into the project, and all related dependencies will be imported. We can import the scenario starters with what functions we want to use;
main program
//@Spring Boot application to mark a main program class, indicating that it is a Spring Boot application
@SpringBootApplication
public class Springboot01HelloworldApplication {

   public static void main(String[] args) {
     //Start the SpringBoot application
      SpringApplication.run(Springboot01HelloworldApplication.class, args);
   }
}
But a simple startup class is not simple! Let's analyze what these annotations do
@SpringBootApplication
Meaning: the SpringBoot application is marked on a class, which indicates that this class is the main configuration class of SpringBoot. SpringBoot should run the main method of this class to start the SpringBoot application;
Enter this annotation: you can see that there are many other annotations above!
@SpringBootConfiguration
@EnableAutoConfiguration
@ComponentScan(
    excludeFilters = {@Filter(
    type = FilterType.CUSTOM,
    classes = {TypeExcludeFilter.class}
), @Filter(
    type = FilterType.CUSTOM,
    classes = {AutoConfigurationExcludeFilter.class}
)}
)
public @interface SpringBootApplication {
    //.....
}
@ComponentScan
- This annotation is important in Spring and corresponds to the elements in the XML configuration.
- The function is to automatically scan and load qualified components or beans, and load the bean definition into the IOC container;
- Meaning: SpringBoot configuration class; Marked on a class, indicating that it is a SpringBoot configuration class;
Let's move on to this annotation
@Configuration //Click in to get the following @ Component
public @interface SpringBootConfiguration {
}
@Component
public @interface Configuration {
}
@Configuration: this annotation is marked on the configuration class to indicate that it is a configuration class, that is, a configuration file;
We continue to click in and find that the configuration class is also a component in the container@ Component . This shows that the startup class itself is just a component in Spring and is responsible for starting the application!
@EnableAutoConfiguration
Let's go back to the spring boot application annotation and continue.
[external chain picture transfer failed. The source station may have anti-theft chain mechanism. It is recommended to save the picture and upload it directly (img-n1haweue-1627865813998)( https://blog.kuangstudy.com/usr/uploads/2019/10/3676838154.png )]
@EnableAutoConfiguration: enables the auto configuration function
Previously, we needed to configure things ourselves, but now SpringBoot can automatically configure them for us@ EnableAutoConfiguration tells SpringBoot to enable the auto configuration function so that the auto configuration can take effect;
Let's click to see. Discovery annotation @ AutoConfigurationPackage: autoconfiguration package
@AutoConfigurationPackage //Auto configuration package
@Import({AutoConfigurationImportSelector.class}) //Selectors for which components are imported
public @interface EnableAutoConfiguration {
}
Click in again to see a @ Import({Registrar.class})
@Import({Registrar.class})
public @interface AutoConfigurationPackage {
}
@import
The Spring underlying annotation @ import imports a component into the container
Registrar.class scans the package of the main configuration class [i.e. the class marked by @ SpringBootApplication] and all components in all sub packages under the package to the Spring container;
Go back to the previous step and continue to look at: @ Import({AutoConfigurationImportSelector.class}): import components to the container;
AutoConfigurationImportSelector: to automatically configure the import selector, which component selectors will it import;
Let's click this class to see the source code:
-
There is one such method in this class
// Obtain candidate configurations protected List<String> getCandidateConfigurations(AnnotationMetadata metadata, AnnotationAttributes attributes) { //The getSpringFactoriesLoaderFactoryClass () method here //The returned annotation class is the annotation class that we first saw to start the automatic import configuration file; EnableAutoConfiguration List<String> configurations = SpringFactoriesLoader.loadFactoryNames(this.getSpringFactoriesLoaderFactoryClass(), this.getBeanClassLoader()); Assert.notEmpty(configurations, "No auto configuration classes found in META-INF/spring.factories. If you are using a custom packaging, make sure that file is correct."); return configurations; } -
This method also calls the static method of the springfactoryesloader class! We enter the loadFactoryNames() method of the springfactoryesloader class
public static List<String> loadFactoryNames(Class<?> factoryClass, @Nullable ClassLoader classLoader) { String factoryClassName = factoryClass.getName(); //Here it calls the loadSpringFactories method again return (List)loadSpringFactories(classLoader).getOrDefault(factoryClassName, Collections.emptyList()); } -
Let's continue to click to view the loadSpringFactories method
private static Map<String, List<String>> loadSpringFactories(@Nullable ClassLoader classLoader) { //After obtaining the classLoader, we can see that what we get here is the class itself marked with EnableAutoConfiguration MultiValueMap<String, String> result = (MultiValueMap)cache.get(classLoader); if (result != null) { return result; } else { try { //Go to get a resource "META-INF/spring.factories" Enumeration<URL> urls = classLoader != null ? classLoader.getResources("META-INF/spring.factories") : ClassLoader.getSystemResources("META-INF/spring.factories"); LinkedMultiValueMap result = new LinkedMultiValueMap(); //Traverse the read resources and encapsulate them into a property while(urls.hasMoreElements()) { URL url = (URL)urls.nextElement(); UrlResource resource = new UrlResource(url); Properties properties = PropertiesLoaderUtils.loadProperties(resource); Iterator var6 = properties.entrySet().iterator(); while(var6.hasNext()) { Entry<?, ?> entry = (Entry)var6.next(); String factoryClassName = ((String)entry.getKey()).trim(); String[] var9 = StringUtils.commaDelimitedListToStringArray((String)entry.getValue()); int var10 = var9.length; for(int var11 = 0; var11 < var10; ++var11) { String factoryName = var9[var11]; result.add(factoryClassName, factoryName.trim()); } } } cache.put(classLoader, result); return result; } catch (IOException var13) { throw new IllegalArgumentException("Unable to load factories from location [META-INF/spring.factories]", var13); } } } -
We open spring according to the source For the configuration files of factories, you can see many automatic configuration files; This is the root of automatic configuration!
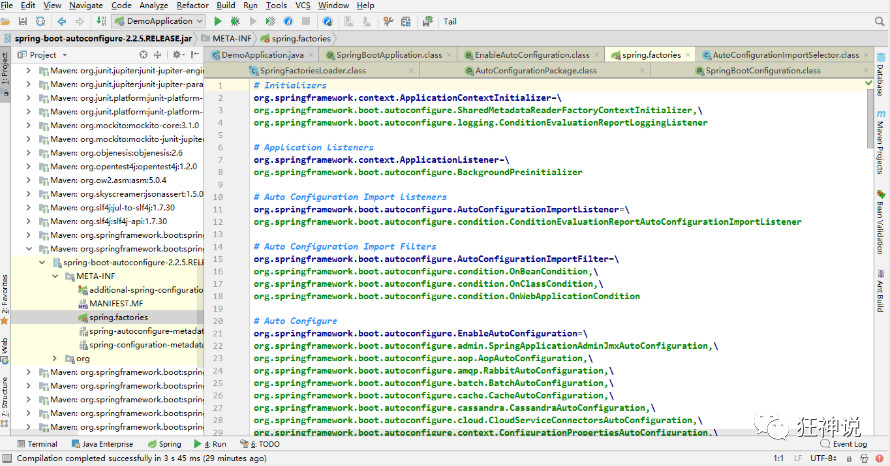
WebMvcAutoConfiguration
Let's open any one of the automatic configuration classes above, such as webmvcoautoconfiguration
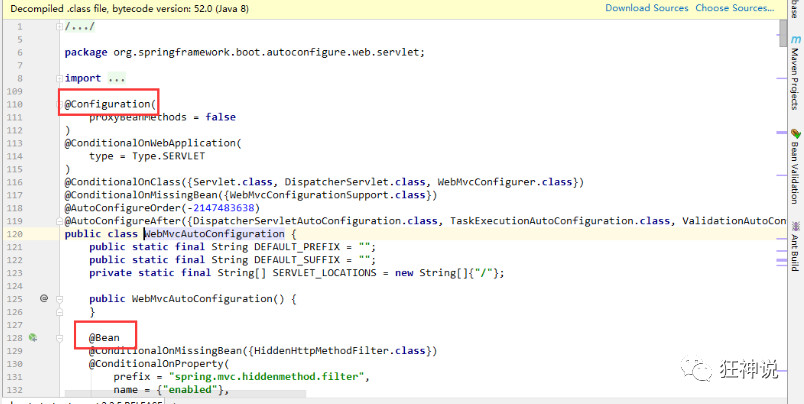
You can see that these are JavaConfig configuration classes one by one, and some beans are injected. You can find some classes you know and get familiar with them!
Therefore, the real implementation of automatic Configuration is to search for all meta-inf / spring. Inf from the classpath Factories Configuration file, and the corresponding org. Org springframework. boot. autoconfigure. The Configuration items under the package are instantiated into IOC container Configuration classes in the form of JavaConfig marked with @ Configuration through reflection, and then these are summarized into an instance and loaded into the IOC container.
Principle analysis of automatic configuration xmind
All automatic configurations of spring boot are scanned and loaded at startup: spring All automatic configurations of factories are here, but they do not necessarily take effect. To judge whether the conditions are true, as long as the corresponding start is imported, there will be a corresponding starter. Our automatic assembly will take effect, and then the configuration will be successful!
Conclusion:
- SpringBoot starts from meta-inf / spring. Inf in the classpath Get the value specified by EnableAutoConfiguration from factories
- Import these values into the container as automatic configuration classes, and the automatic configuration class will take effect to help us with automatic configuration;
- In the past, we needed to configure things ourselves, and the automatic configuration class helped us solve them
- The whole J2EE solution and automatic configuration are in the jar package of springboot autoconfigure;
- It returns all components to be imported in the form of full class names, and these components will be added to the container;
- It will import many automatic configuration classes (xxxAutoConfiguration) into the container, that is, import all components required for this scenario into the container and configure these components;
- With the automatic configuration class, it eliminates the work of manually writing configuration injection function components;
Run
At first, I thought I was running a main method, but I didn't expect to start a service;
@SpringBootApplication
public class SpringbootDemo02Application {

    public static void main(String[] args) {
        //This method returns a ConfigurableApplicationContext object
        //Parameter 1: class of application entry parameter class: command line parameter
        SpringApplication.run(SpringbootDemo02Application.class, args);
    }
}
SpringApplication.run analysis
The analysis of this method is mainly divided into two parts: one is the instantiation of spring application, and the other is the execution of run method;
SpringApplication
This class mainly does the following four things
- Infer whether the type of application is a normal project or a Web project
- Find and load all available initializers and set them in the initializers property
- Find all application listeners and set them to the listeners property
- Infer and set the definition class of the main method, and find the main class to run
View constructor
public SpringApplication(ResourceLoader resourceLoader, Class... primarySources) {
    this.sources = new LinkedHashSet();
    this.bannerMode = Mode.CONSOLE;
    this.logStartupInfo = true;
    this.addCommandLineProperties = true;
    this.addConversionService = true;
    this.headless = true;
    this.registerShutdownHook = true;
    this.additionalProfiles = new HashSet();
    this.isCustomEnvironment = false;
    this.resourceLoader = resourceLoader;
    Assert.notNull(primarySources, "PrimarySources must not be null");
    this.primarySources = new LinkedHashSet(Arrays.asList(primarySources));
    this.webApplicationType = WebApplicationType.deduceFromClasspath();
    this.setInitializers(this.getSpringFactoriesInstances(ApplicationContextInitializer.class));
    this.setListeners(this.getSpringFactoriesInstances(ApplicationListener.class));
    this.mainApplicationClass = this.deduceMainApplicationClass();
}
run method
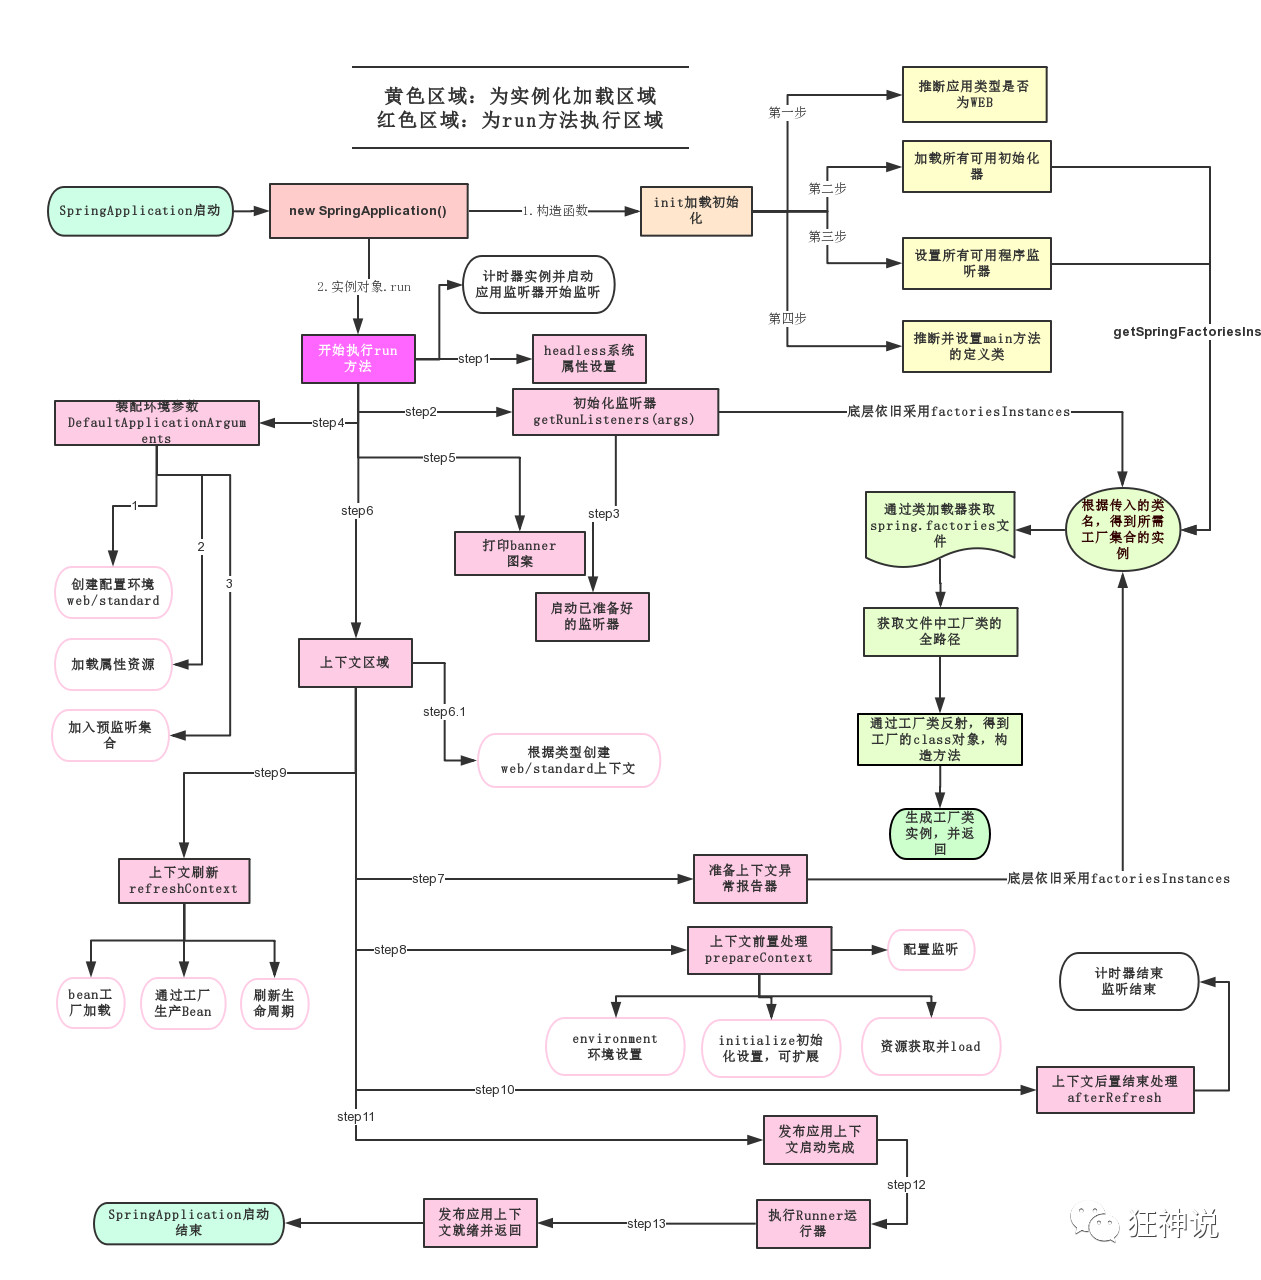
3. Springboot: configuration file and automatic configuration principle
configuration file
SpringBoot uses a global configuration file with a fixed name
- application.properties
- Syntax structure: key=value
- application.yml
- Syntax structure: key: space value
**Function of configuration file: modify the default value of SpringBoot automatic configuration, because SpringBoot is automatically configured at the bottom;
**
YAML
YAML is a recursive abbreviation of "YAML Ain't a Markup Language".
When developing this language, YAML actually means "Yet Another Markup Language"
YAML A Markup Language: is a markup language
Yaml isn't markup language: not a markup language
Markup Language
Most of the previous configuration files were configured using xml; For example, a simple port configuration, let's compare yaml and xml
yaml configuration:
server:
    prot: 8080
xml configuration:
<server>
    <port>8081<port>
</server>
YAML syntax
Basic syntax:
k:(Space) v
This is used to represent a pair of key value pairs (spaces cannot be omitted); the indentation of spaces is used to control the hierarchical relationship. As long as a column of data aligned on the left is at the same level.
Note: attributes and values are case sensitive. example:
server:
    port: 8081
    path: /hello
Value writing
Literal: normal value [number, Boolean, string]
k: v
The literal quantity can be written directly after the string. By default, double quotation marks or single quotation marks are not added to the string;
"" double quotation marks will not escape the special characters in the string, and the special characters will be used as the meaning they want to express;
For example: name: "kuang \n shen" output: kuang newline shen
’’Single quotation marks will escape special characters, which will eventually be output as ordinary characters
For example: name: 'kuang \n shen' output: kuang \n shen
Object, Map (key value pair)
k:
    v1:
    v2:
Write the attribute and value relationship of the object in the next line, and pay attention to the indentation; For example:
student:
    name: qinjiang
    age: 3
Inline writing
student: {name: qinjiang,age: 3}
Array (List, set)
Use the - value to represent an element in the array, for example:
pets:
 - cat
 - dog
 - pig
Inline writing
pets: [cat,dog,pig]
Modify the default port number of SpringBoot
Add the parameter of port number in the configuration file to switch ports;
server.port=8081
Injection profile
.yml
1. If you want to use the properties configuration file, there may be garbled code during import, which needs to be adjusted in the IDEA. Here, we directly use the yml file to set the default application Modify the properties suffix to yml
2. Import profile processor
<!--When you import the configuration file processor, you will be prompted to bind the configuration file-->
<dependency>
    <groupId>org.springframework.boot</groupId>
    <artifactId>spring-boot-configuration-processor</artifactId>    					<optional>true</optional>
</dependency>
3. Write yml configuration file
person:
    name: qinjiang
    age: 3
    happy: false
    birth: 2000/01/01
    maps: {k1: v1,k2: v2}
    lists:
      - code
      - girl
      - music
    dog:
      name: Wangcai
      age: 1
4. Build packages in the same level directory of the main program of SpringBoot. Only in this way can the main program take effect for these classes; We build a pojo package and put it into our Person class and Dog class;
@Component //Register bean
@ConfigurationProperties(prefix = "person")
public class Person {

    private String name;
    private Integer age;
    private Boolean happy;
    private Date birth;
    private Map<String,Object> maps;
    private List<Object> lists;
    private Dog dog;

    //get,set method
    //toString method

}
@ConfigurationProperties
- effect:
- Map the value of each attribute configured in the configuration file to this component;
- Tell SpringBoot to bind all properties in this class to the relevant configuration in the configuration file
- Parameter prefix = "person": match all attributes under person in the configuration file one by one
- The @ ConfigurationProperties function provided by the container can only be used if this component is a component in the container
prefix
- Navigate to the beginning of person through prefix
- Ensure the attribute name and application Like in YML, so it can be matched automatically
- Add the get set method. You can't add any less. Otherwise, it won't start successfully
Remember to write the toString () method to facilitate debugging and output results
package com.kuang.springbootdemo03.pojo;
@Component
public class Dog {
    private String name;
    private Integer age;

    //get, set methods
    //toString() method
}
5. After confirmation, test in the test unit to see whether the injection is successful!
@SpringBootTest
class Springboot02ConfigApplicationTests {

    @Autowired
//    private Dog dog;
    private Person person;
    @Test
    void contextLoads() {
//        System.out.println(dog);
        System.out.println(person);
    }
Operation results

.properties
The above methods are the simplest and most commonly used in development;
Then let's talk about other implementation methods. The reason is the same; Write or write like that;
In addition to yml, the configuration file also has the properties we used before. We didn't mention that the properties configuration file will be garbled when writing Chinese. We need to set the encoding format to UTF-8 in the IDEA;
Settings -- > configured in fileencodings;

In addition, our class is directly related to the configuration file. We use @ configurationProperties,
Another way is to use @ value

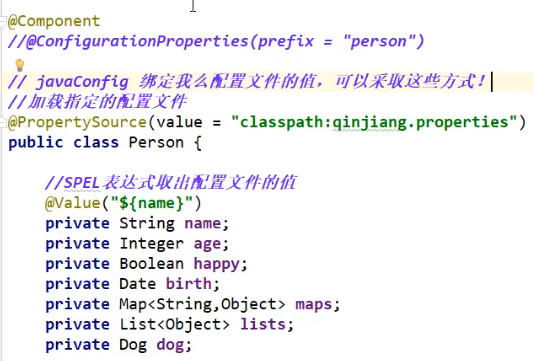
@Component //Register bean
public class Person {
    //Use @ value directly
    @Value("${person.name}") //Take value from configuration file
    private String name;
    @Value("#{11*2}")  //#{SPEL} Spring expression
    private Integer age;
    @Value("true")  // Literal
    private Boolean happy;
}
result

This is not friendly to use! We need to assign a value to each attribute separately, which is troublesome; Let's look at a function comparison diagram
- cp only needs to be written once, and value needs to be added to each field
- Loose binding: what does that mean? For example, the last name written in my yml is the same as lastName, and the letters followed by - are capitalized by default. This is loose binding
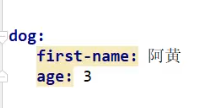
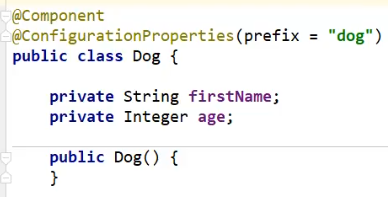

- JSR303 data verification, that is, we can add a layer of filter verification in the field to ensure the legitimacy of the data
- Complex type encapsulation. Objects can be encapsulated in yml, but @ value is not supported
Conclusion:
- Values can be obtained by configuring yml and configuring properties. yml is highly recommended
- If we only need to obtain a value in the configuration file in a business, we can use @ value
- If we have specially written a JavaBean to map with the configuration file, we can directly use @ configurationProperties. Don't hesitate!
JSR303 data verification
-
JSR is the abbreviation of Java Specification Requests, which means Java specification proposal.
- Is pointing JCP (Java Community Process) makes a formal request to add a standardized technical specification.
- Anyone can submit a JSR to add new API s and services to the Java platform.
- JSR has become an important standard in the Java world.
-
JSR-303 is a sub specification in JAVA EE 6, called Bean Validation,
- Hibernate Validator is the reference implementation of Bean Validation
- Hibernate Validator provides the implementation of all built-in constraint s in JSR 303 specification,
- In addition, there are some additional constraint s.
 @NotNull(message="Name cannot be empty")
 private String userName;
 @Max(value=120,message="The oldest can't check 120")
 private int age;
 @Email(message="Mailbox format error")
 private String email;

 Empty check
 @Null         Verify that the object is null
 @NotNull	  Verify that the object is not null,Cannot check string with length 0
 @NotBlank	  Check whether the constraint string is null And by Trim Whether the length of is greater than 0, only for strings, and the front and back spaces will be removed
 @NotEmpty	  Check whether the constraint element is null Or empty

 Boolean inspect
 @AssertTrue	  verification Boolean Whether the object is true
 @AssertFalse  verification Boolean Whether the object is false

 Length check
 @Size(min=,max=)		Validation object(Array,Collection,Map,String) Is the length within the given range
 @Length(min=,max=)		Validates that the annotated string is between min and max included.

 Date check
 @Past		verification Date and Calendar Is the object before the current time
 @Future		verification Date and Calendar Is the object before the current time
 @Pattern	verification String Whether the object conforms to the rules of regular expressions: regular expressions

 ......wait
 In addition, we can also customize some data verification rules
- In spring boot, @ validated can be used to verify the data. If the data is abnormal, exceptions will be thrown uniformly to facilitate the unified processing of the exception center. Let's write a comment here so that our name can only support Email format
@Component //Register bean
@ConfigurationProperties(prefix = "person")
@Validated  //data verification
public class Person {
    //@Value("${person.name}")
    @Email //name must be in mailbox format
    private String name;
}
Operation results

Using data verification can ensure the correctness of data;
Load the specified profile
1. @PropertySource: load the specified configuration file; Use @ configurationProperties to obtain values from the global configuration file by default;
Let's create a new person in the resources directory Properties file
name=kuangshen
Then specify in our code to load person Properties file
@PropertySource(value = "classpath:person.properties")
@Component //Register bean
public class Person {

    @Value("${name}")
    private String name;

    ......
}
Profile placeholder
random number
${random.value},${random.int},
${random.long},${random.int(10)}wait
Placeholders refer to the values of other properties. If they do not exist, you can set the default value
person:
    name: qinjiang${random.uuid}
    age: ${random.int}
    happy: false
    birth: 2000/01/01
    maps: {k1: v1,k2: v2}
    lists:
      - code
      - girl
      - music
    dog:
      name: ${person.hello:hello}_Wangcai
      age: 1
Multi environment switching
profile is Spring's support for different configuration functions for different environments. You can quickly switch environments by activating different environment versions;
Method 1: multiple configuration files
When we write the main configuration file, the file name can be application - {profile} Properties / YML, used to specify multiple environment versions;
For example: application test Properties represents the test environment configuration. application-dev.properties represents the development environment configuration
However, Springboot does not start these configuration files directly. It uses application. Com by default Properties master configuration file;
We need to select the environment to be activated through a configuration;
#For example, if the dev environment is specified in the configuration file, we can test by setting different port numbers;
#When we start SpringBoot, we can see that the configuration has been switched to dev; spring.profiles.active=dev
Method 2: multiple document blocks of yml
It is the same as in the properties configuration file, but it is more convenient to use yml to implement without creating multiple configuration files. Use - split and profiles to specify the name of the configuration environment
server:
  port: 8081
#Select the environment block to activate
spring:
  profiles:
    active: prod
---
server:
  port: 8083
#Name of the configuration environment
spring:
  profiles: dev
---
server:
  port: 8084
spring:
  profiles: prod  #Name of the configuration environment
Note: if both yml and properties are configured with ports and no other environment is activated, the properties configuration file will be used by default!
Configuration file loading location
springboot startup will scan the application at the following location Properties or application The YML file is used as the default configuration file for Spring boot
Priority 1: under the project path config Folder profile
 Priority 2: configuration file under project path
 Priority 3: under resource path config Folder profile
 Priority 4: configuration file under resource path
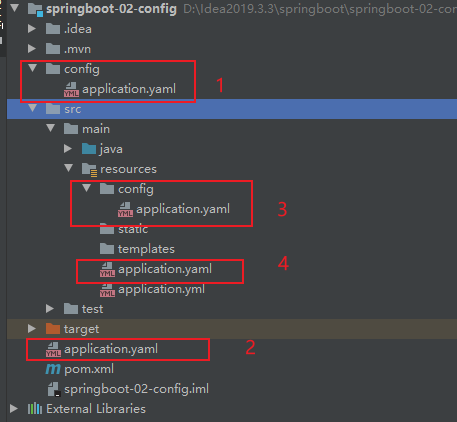
The priority is from high to bottom, and the configuration of high priority will overwrite the configuration of low priority;
SpringBoot will load all the main configuration files from these four locations; Complementary configuration;
We set up a project access path configuration in the lowest level configuration file to test the complementarity problem;
#Configure the access path of the project
server.servlet.context-path=/kuang
[Extension] load the configuration file at the specified location
We can also use spring config. Location to change the default configuration file location
After the project is packaged, we can use the form of command line parameters to specify the new location of the configuration file when starting the project;
In this case, there are usually many operations and maintenance in the later stage. For the same configuration, the externally specified configuration file has the highest priority
java -jar spring-boot-config.jar --spring.config.location=F:/application.properties
There are many ways to load configuration files externally. We can select the most commonly used one and configure it in the developed resource file!
Official external configuration file description reference document
Automatic configuration principle
What can a configuration file write? How do you write it?
SpringBoot official documentation
Analyze the principle of automatic configuration
We take * * Http encoding autoconfiguration) * * as an example to explain the principle of automatic configuration;
//Indicates that this is a configuration class. Like the previously written configuration file, you can also add components to the container;
@Configuration

//Start the ConfigurationProperties function of the specified class;
  //Enter the HttpProperties view and bind the corresponding values in the configuration file with HttpProperties;
  //And add HttpProperties to the ioc container
@EnableConfigurationProperties({HttpProperties.class})

//Spring underlying @ Conditional annotation
  //According to different conditions, if the specified conditions are met, the configuration in the whole configuration class will take effect;
  //This means to judge whether the current application is a web application. If so, the current configuration class will take effect
@ConditionalOnWebApplication(
    type = Type.SERVLET
)

//Judge whether the current project has this class CharacterEncodingFilter; Filter for garbled code resolution in spring MVC;
@ConditionalOnClass({CharacterEncodingFilter.class})

//Determine whether a configuration exists in the configuration file: spring http. encoding. enabled;
  //If it does not exist, the judgment is also valid
  //Even if pring. Is not configured in our configuration file http. encoding. Enabled = true, which is also effective by default;
@ConditionalOnProperty(
    prefix = "spring.http.encoding",
    value = {"enabled"},
    matchIfMissing = true
)

public class HttpEncodingAutoConfiguration {
    //He has mapped to the SpringBoot configuration file
    private final Encoding properties;
    //When there is only one constructor with parameters, the value of the parameter will be taken from the container
    public HttpEncodingAutoConfiguration(HttpProperties properties) {
        this.properties = properties.getEncoding();
    }

    //Add a component to the container. Some values of this component need to be obtained from properties
    @Bean
    @ConditionalOnMissingBean //Determine that the container does not have this component?
    public CharacterEncodingFilter characterEncodingFilter() {
        CharacterEncodingFilter filter = new OrderedCharacterEncodingFilter();
        filter.setEncoding(this.properties.getCharset().name());
        filter.setForceRequestEncoding(this.properties.shouldForce(org.springframework.boot.autoconfigure.http.HttpProperties.Encoding.Type.REQUEST));
        filter.setForceResponseEncoding(this.properties.shouldForce(org.springframework.boot.autoconfigure.http.HttpProperties.Encoding.Type.RESPONSE));
        return filter;
    }
    //. . . . . . .
}
One sentence summary: determine whether this configuration class is effective according to different current conditions!
- Once the configuration class takes effect; This configuration class will add various components to the container;
- The properties of these components are obtained from the corresponding properties classes, and each property in these classes is bound to the configuration file;
- All properties that can be configured in the configuration file are encapsulated in the xxproperties class;
- The attribute class corresponding to a function can be referenced for what can be configured in the configuration file
//Get the specified value from the configuration file and bind it with the properties of the bean
@ConfigurationProperties(prefix = "spring.http")
public class HttpProperties {
    // .....
}
Let's try the prefix in the configuration file and see the tips!
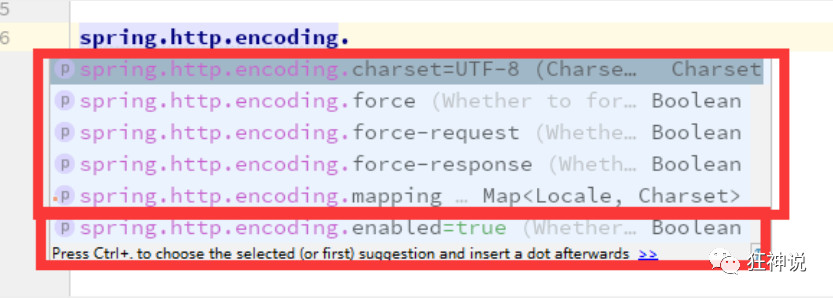
This is the principle of automatic assembly!
Essence:
1) Spring boot will load a large number of automatic configuration classes
2) Let's see if the functions we need are in the auto configuration class written by SpringBoot by default;
3) Let's look at which components are configured in this automatic configuration class; (as long as the component we want to use exists in it, we don't need to configure it manually)
4) When adding components to the automatic configuration class in the container, some properties will be obtained from the properties class. We only need to specify the values of these attributes in the configuration file;
Xxxautoconfiguration: automatically configure classes and add components to containers
Xxxproperties: encapsulates the related properties in the configuration file;
@Conditional
After understanding the principle of automatic assembly, let's pay attention to a detail. The automatic configuration class must take effect under certain conditions;
@Conditional derived annotation (the native @ conditional function of Spring annotation version)
Function: only when the conditions specified by @ Conditional are met can components be added to the container and all contents in the configuration configuration take effect;
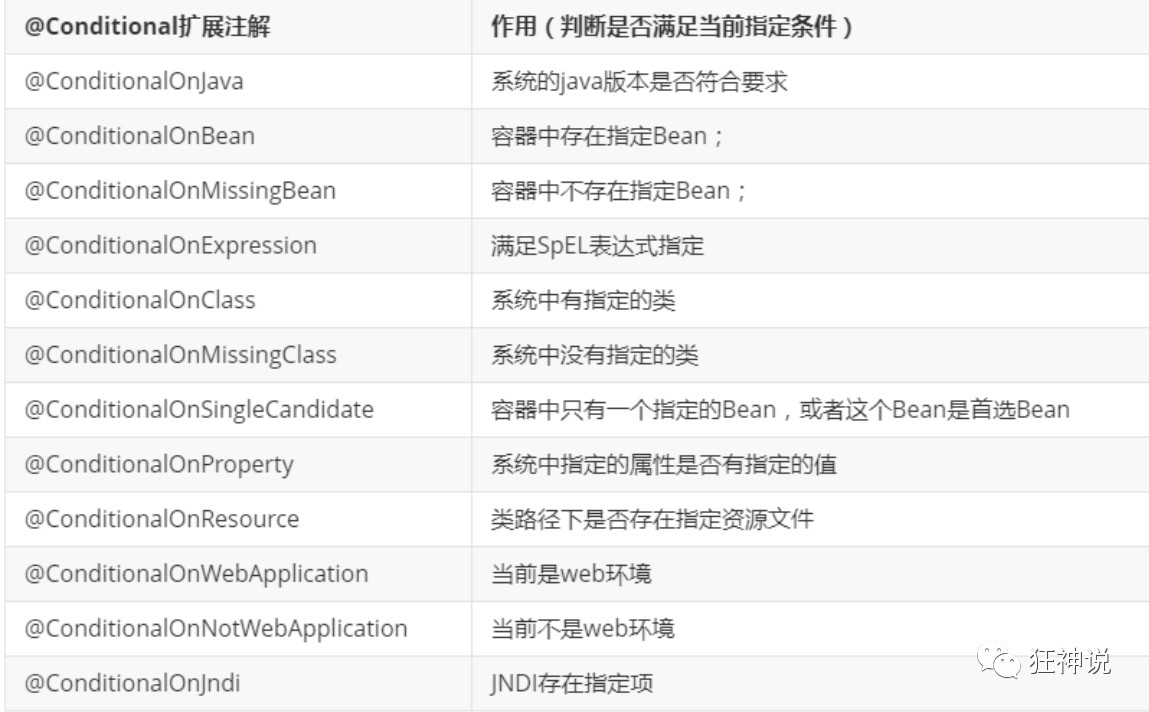
So many auto configuration classes can only take effect under certain conditions; In other words, we loaded so many configuration classes, but not all of them took effect.
How do we know which automatic configuration classes are effective; We can enable the debug=true attribute; To let the console print the automatic configuration report, so that we can easily know which automatic configuration classes are effective;
#Open the debugging class of springboot
debug=true
Positive matches: (auto configuration class enabled: positive matches)
Negative matches: (no startup, no matching successful automatic configuration class: negative matching)
Unconditional classes: (unconditional classes)
4 SpringBoot: Web Development
brief introduction
Steps to use SpringBoot:
- Create a SpringBoot application, select the modules we need, and SpringBoot will automatically configure the modules we need by default
- Manually configure some configuration items in the configuration file to run
- Focus on writing business code without considering a lot of configurations like before.
To be familiar with and master the development, you must understand the principle of automatic configuration learned before!
For example, what does SpringBoot configure for us? Can we change it? What configurations can we modify? Can we expand?
- Automatic configuration of components into containers: xxxautoconfiguration
- Automatic configuration class, encapsulating the contents of the configuration file: xxxproperties
Static resource mapping rules
First, let's build an ordinary SpringBoot project and review the HelloWorld program! [demonstration]
Then we need to introduce the test resources of our small experiment. There are many static resources in our project, such as css, js and other files. How to deal with this SpringBoot?
If we are a web application, there will be a webapp under our main. We used to import all the pages here, right!
But our current pom is packaged as jar. Can SpringBoot write pages for us in this way? Of course, it is possible, but SpringBoot has regulations on the location of static resources!
home page
@Bean
public WelcomePageHandlerMapping welcomePageHandlerMapping(ApplicationContext
	applicationContext) {

    return new WelcomePageHandlerMapping(new TemplateAvailabilityProviders
    (applicationContext),
    applicationContext,
    this.getWelcomePage(),
    this.mvcProperties.getStaticPathPattern());
}
Click in and keep looking
        private Optional<Resource> getWelcomePage() {
            String[] locations = getResourceLocations(this.resourceProperties.getStaticLocations());
            return Arrays.stream(locations).map(this::getIndexHtml).filter(this::isReadable).findFirst();
        }

        private Resource getIndexHtml(String location) {
            return this.resourceLoader.getResource(location + "index.html");
        }
Welcome page, all indexes under the static resource folder HTML page; Is / mapped * *.
For example, when I visit localhost: 8080 /, I will find index. In the static resource folder HTML [test]
Icon
@Configuration
@ConditionalOnProperty(
    value = {"spring.mvc.favicon.enabled"},
    matchIfMissing = true
)
public static class FaviconConfiguration implements ResourceLoaderAware {
    private final ResourceProperties resourceProperties;
    private ResourceLoader resourceLoader;

    public FaviconConfiguration(ResourceProperties resourceProperties) {
        this.resourceProperties = resourceProperties;
    }

    public void setResourceLoader(ResourceLoader resourceLoader) {
        this.resourceLoader = resourceLoader;
    }

    @Bean
    public SimpleUrlHandlerMapping faviconHandlerMapping() {
        SimpleUrlHandlerMapping mapping = new SimpleUrlHandlerMapping();
        mapping.setOrder(-2147483647);
        mapping.setUrlMap(Collections.singletonMap
                          ("**/favicon.ico", this.faviconRequestHandler()));
        return mapping;
    }

    @Bean
    public ResourceHttpRequestHandler faviconRequestHandler() {
        ResourceHttpRequestHandler requestHandler = new ResourceHttpRequestHandler();
        requestHandler.setLocations(this.resolveFaviconLocations());
        return requestHandler;
    }

    private List<Resource> resolveFaviconLocations() {
        String[] staticLocations = WebMvcAutoConfiguration.
            WebMvcAutoConfigurationAdapter.
            getResourceLocations(this.resourceProperties.getStaticLocations());
        List<Resource> locations = new ArrayList(staticLocations.length + 1);
        Stream var10000 = Arrays.stream(staticLocations);
        ResourceLoader var10001 = this.resourceLoader;
        this.resourceLoader.getClass();
        var10000.map(var10001::getResource).forEach(locations::add);
        locations.add(new ClassPathResource("/"));
        return Collections.unmodifiableList(locations);
    }
}
"* * / favicon.ico" is the format defined by our icon! It is also defined in our static resource folder. We can customize it to test [test]
Put an icon in yourself, and then close the default SpringBoot icon in the configuration file!
#Turn off default icon
spring.mvc.favicon.enabled=false
Clear browser cache! Refresh the web page and find that the icon has become your own!
We can also specify which folders we need to put static resource files through the configuration file. In application Configure in properties;
spring.resources.static-locations=classpath:/hello/,classpath:/kuang/
Once you define the path of the static folder, the original will become invalid!
template engine
1. Why use html pages instead of jsp
- The page given to us by the front end is an html page.
- If we developed them before, we need to turn them into JSP pages. The advantage of JSP is that when we find out that some data is forwarded to JSP pages, we can easily realize data display and interaction with JSP.
- jsp supports very powerful functions, including being able to write Java code,
- However, in our current situation, the SpringBoot project first uses jar instead of war. Second, we still use embedded Tomcat. Therefore, it does not support jsp by default.
- It does not support jsp. If we directly use pure static pages, it will bring us great trouble in development. What should we do? SpringBoot recommends that you can use the template engine.
2. The idea of template engine
- In fact, we have heard a lot about this template engine. In fact, jsp is a template engine, and there are many freemakers to use, including Thymeleaf recommended by SpringBoot. There are many template engines, but no matter how many template engines, their ideas are the same. What kind of ideas? Let's take a look at this figure.
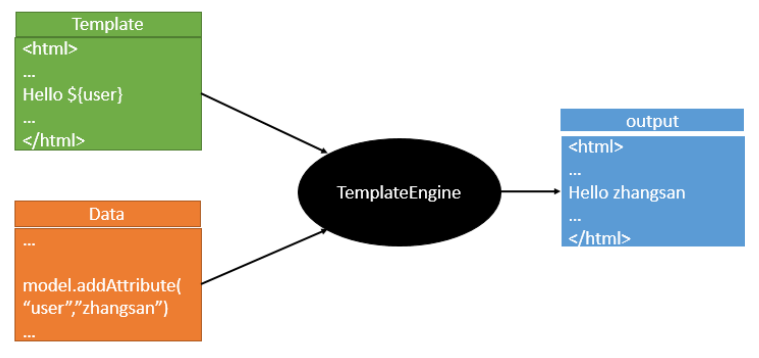
- The function of the template engine is that we write a page template. For example, some values are dynamic. We write some expressions.
- Where do these values come from? Let's assemble some data and find them.
- Then give the template and data to the template engine. The template engine parses and fills the expression to the specified position according to the data, and then finally generates a content we want to write out. This is our template engine, whether jsp or other template engines.
- It's just that the syntax may be a little different between different template engines.
- I won't introduce others. I'll mainly introduce the Thymeleaf template engine recommended by SpringBoot. This template engine is a high-level language template engine, and its syntax is simpler. And it's more powerful.
3,Thymeleaf
2,Thymeleaf is on Github's home page
3,Spring official documentation
① Steps
1 import dependency
<!--thymeleaf Template-->
<dependency>
    <groupId>org.thymeleaf</groupId>
    <artifactId>thymeleaf-spring5</artifactId>
</dependency>
<dependency>
    <groupId>org.thymeleaf.extras</groupId>
    <artifactId>thymeleaf-extras-java8time</artifactId>
</dependency>
- maven will automatically download the jar package. We can go and see the downloaded things;

2 find Thymeleaf's auto configuration class
- Previously, we have introduced Thymeleaf. How can we use this?
First, we have to take a look at the automatic configuration rule of Thymeleaf according to the automatic configuration principle of SpringBoot. According to that rule, we use it.
Let's look for Thymeleaf's auto configuration class;
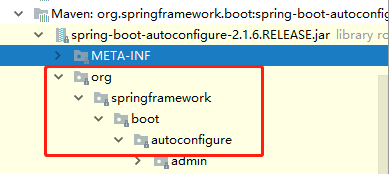
- There is our thymeleaf under this package. Look at our configuration class, we choose the part
@ConfigurationProperties(
    prefix = "spring.thymeleaf"
)
public class ThymeleafProperties {
    private static final Charset DEFAULT_ENCODING;
    public static final String DEFAULT_PREFIX = "classpath:/templates/";
    public static final String DEFAULT_SUFFIX = ".html";
    private boolean checkTemplate = true;
    private boolean checkTemplateLocation = true;
    private String prefix = "classpath:/templates/";
    private String suffix = ".html";
    private String mode = "HTML";
    private Charset encoding;
}
- We can see the default prefix and suffix in it! We just need to put our html page under the templates under the classpath, and thymeleaf can help us render automatically.
- We can test it, write a Controller and jump to a specified page, which needs to be in the template directory under the classpath
- There is no need to configure anything to use thymeleaf, just put it in the specified folder!
3 close the cache of thymeleaf
spring.thymeleaf.cache=false
Why turn off thymeleaf's cache?
- thymeleaf is a template engine. Caching means that the template will not be loaded after it is loaded once,
- The cache should be added to the production environment, but if the cache is opened during the development process, it is not convenient for developers to debug.
- Just imagine that if you change a line of html, you need to restart the server. It must be inconvenient.
- To sum up:
In the local development environment, the cache needs to be closed, otherwise the debugging cost is too high. The cache needs to be turned on in other environments.
4 controller layer
Find out some data and display it on the page
@RequestMapping("/success")
public String success(Model model){
    //Store data
    model.addAttribute("msg","Hello,Thymeleaf");
    //classpath:/templates/success.html
    return "success";
}
5 use thymeleaf constraint
//You need to import namespace constraints in the html file
xmlns:th="http://www.thymeleaf.org"
6 front page
<!DOCTYPE html>
<html lang="en" xmlns:th="http://www.thymeleaf.org">
<head>
    <meta charset="UTF-8">
    <title>Madness theory</title>
</head>
<body>
<h1>Success</h1>

<!--th:text Is to div The content in is set to the value it specifies, and the previous learning Vue equally-->
<div th:text="${msg}"></div>
</body>
</html>
OK, the introduction is done. Let's seriously study the usage grammar of Thymeleaf!
② th grammar
Use any th:attr to replace the value of the native attribute in Html!
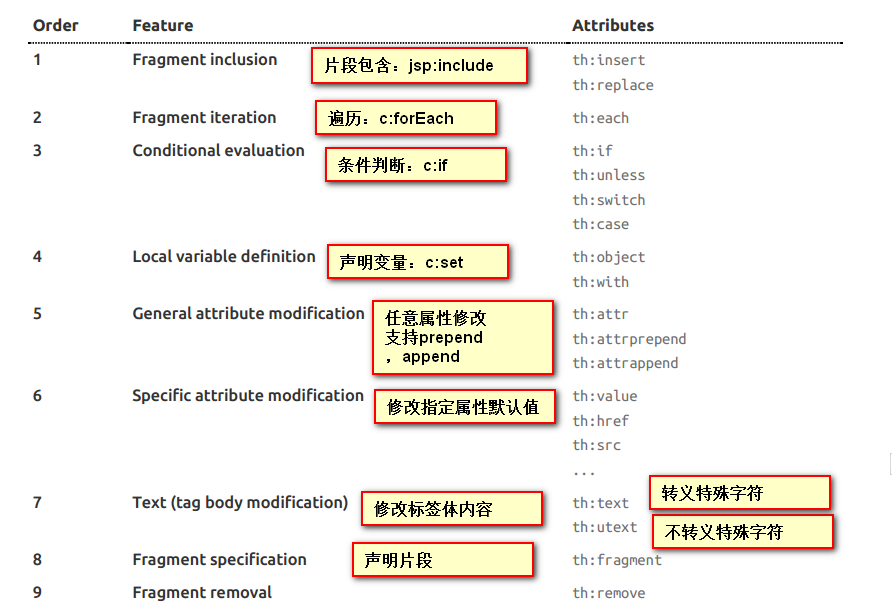
③ Expression syntax
1. ${...}: get variable value;
-
Get the properties and call methods of the object
-
Use built-in base objects: #18
-
ctx : the context object.
-
vars: the context variables.
-
locale : the context locale.
-
request : (only in Web Contexts) the HttpServletRequest object.
-
response : (only in Web Contexts) the HttpServletResponse object.
-
session : (only in Web Contexts) the HttpSession object.
-
servletContext : (only in Web Contexts) the ServletContext object.
-
-
Some built-in tool objects: ${session.foo}
-
execInfo : information about the template being processed.
-
messages : methods for obtaining externalized messages inside variables expressions, in the same way as they would be obtained using
-
{...} syntax.
-
uris : methods for escaping parts of URLs/URIs
-
conversions : methods for executing the configured conversion service (if any).
-
dates : methods for java.util.Date objects: formatting, component extraction, etc.
-
calendars : analogous to
-
dates , but for java.util.Calendar objects.
-
numbers : methods for formatting numeric objects.
-
strings : methods for String objects: contains, startsWith, prepending/appending, etc.
-
objects : methods for objects in general.
-
bools : methods for boolean evaluation.
-
arrays : methods for arrays.
-
lists : methods for lists.
-
sets : methods for sets.
-
maps : methods for maps.
-
aggregates : methods for creating aggregates on arrays or collections.
-
ids : methods for dealing with id attributes that might be repeated (for example, as a result of an iteration).
-
2. * {...}: selection expression: the function is the same as ${};
- Supplement: cooperate with th:object="${session.user}":
<div th:object="${session.user}">
    <p>Name: <span th:text="*{firstName}">Sebastian</span>.</p>
    <p>Surname: <span th:text="*{lastName}">Pepper</span>.</p>
    <p>Nationality: <span th:text="*{nationality}">Saturn</span>.</p>
</div>
3. #{...}: get international content
4. @ {...}: define URL
- @{/order/process(execId=${execId},execType='FAST')}
5. ~ {...}: fragment reference expression
-
<div th:insert="~{commons :: main}">...</div>
6. Literal quantity
-
Text literals: 'one text' , 'Another one!' ,...
-
Number literals: 0 , 34 , 3.0 , 12.3 ,...
-
Boolean literals: true , false
-
Null literal: null
-
Literal tokens: one , sometext , main ,...
7. Text operation
- String concatenation: +
- Literal substitutions: |The name is ${name}|
8. Mathematical operation
- Binary operators: + , - , * , / , %
- Minus sign (unary operator): -
9. Boolean operation
- Binary operators: and , or
- Boolean negation (unary operator): ! , not
10. Comparison operation
- Comparators: > , < , >= , <= ( gt , lt , ge , le )
- Equality operators: == , != ( eq , ne )
11. Conditional operation (ternary operator)
- If-then: (if) ? (then)
- If-then-else: (if) ? (then) : (else)
- Default: (value) ?: (defaultvalue)
12,Special tokens
- No-Operation: _
④ Test exercise
We write a Controller and put some data
@RequestMapping("/success2")
public String success2(Map<String,Object> map){
    //Store data
    map.put("msg","<h1>Hello</h1>");
    map.put("users", Arrays.asList("qinjiang","kuangshen"));
    //classpath:/templates/success.html
    return "success";
}
front end
<!DOCTYPE html>
<html lang="en" xmlns:th="http://www.thymeleaf.org">
<head>
    <meta charset="UTF-8">
    <title>Madness theory</title>
</head>
<body>
<h1>Success</h1>

<div th:text="${msg}"></div>
<!--No escape-->
<div th:utext="${msg}"></div>

<!--Traversal data-->
<!--th:each Each traversal will generate the current tag: official website#9-->
<h4 th:each="user :${users}" th:text="${user}"></h4>

<h4>
    <!--In line writing: Official Website#12-->
    <span th:each="user:${users}">[[${user}]]</span>
</h4>

</body>
</html>
Many styles will be forgotten even if we learn them now, so what we need to use in the learning process is the most important to query according to the official documents. We should skillfully use the official documents!
Spring MVC auto configuration
Before testing, we also need to know what configuration SpringBoot has made for our spring MVC, including how to extend and customize it. Only by making these clear can we use them more easily in the future. Approach 1: source code analysis, approach 2: official documents
Let's read an official document:
//29.1.1 Spring MVC Auto-configuration
Spring Boot provides auto-configuration for Spring MVC that works well with most applications.

The auto-configuration adds the following features on top of Spring's defaults:
//Include view parser
Inclusion of ContentNegotiatingViewResolver and BeanNameViewResolver beans.
//Support the path of static resource folder and webjars
Support for serving static resources, including support for WebJars (covered later in this document)).
//Automatically registered Converter:
[Converter, which is what we automatically encapsulate the data submitted by the web page into objects in the background, such as automatically converting 18 strings into int [type]
//Formatter: [formatter, for example, the page gives us a 2019-8-10, which will automatically format it as a Date object]

Automatic registration of Converter, GenericConverter, and Formatter beans.
//HttpMessageConverters: Spring MVC is used to convert Http requests and responses. For example, if we want to convert a User object into a JSON string, you can see the official website document explanation;
Support for HttpMessageConverters (covered later in this document).
//To define error code generation rules
Automatic registration of MessageCodesResolver (covered later in this document).
//Home page customization
Static index.html support.
//icons customizing
Custom Favicon support (covered later in this document).
//Initialize the data binder: help us bind the request data to the JavaBean!
Automatic use of a ConfigurableWebBindingInitializer bean (covered later in this document).
If you want to keep Spring Boot MVC features and you want to add additional MVC configuration (interceptors, formatters, view controllers, and other features), you can add your own @Configuration class of type WebMvcConfigurer but without @EnableWebMvc. If you wish to provide custom instances of RequestMappingHandlerMapping, RequestMappingHandlerAdapter, or ExceptionHandlerExceptionResolver, you can declare a WebMvcRegistrationsAdapter instance to provide such components.

If you want to take complete control of Spring MVC, you can add your own @Configuration annotated with @EnableWebMvc.
Let's compare it carefully and see how it is implemented. It tells us that SpringBoot has automatically configured SpringMVC for us, and then what has been automatically configured?
ContentNegotiatingViewResolver
ViewResolver is automatically configured, It is the View parser of spring MVC that we learned before: that is, get the View object according to the return value of the method, and then the View object determines how to render (forward and redirect). Let's take a look at the source code here: we find webmvccautoconfiguration, and then search ContentNegotiatingViewResolver. Find the following method!
@Bean //We do see here that a bean has been registered in the container
@ConditionalOnBean({ViewResolver.class})
@ConditionalOnMissingBean(name = {"viewResolver"},value =
                          {ContentNegotiatingViewResolver.class})
public ContentNegotiatingViewResolver viewResolver(BeanFactory beanFactory) {
    ContentNegotiatingViewResolver resolver = new ContentNegotiatingViewResolver();
    resolver.setContentNegotiationManager(
        (ContentNegotiationManager)beanFactory.
        getBean(ContentNegotiationManager.class));
    resolver.setOrder(-2147483648);
    return resolver;
}
We can click into this class to see! Find the code of the corresponding parsing view
Note: @ Nullable means that the parameter can be null
@Nullable
public View resolveViewName(String viewName, Locale locale) throws Exception {
    RequestAttributes attrs = RequestContextHolder.getRequestAttributes();
    Assert.state(attrs instanceof ServletRequestAttributes,
    	"No current ServletRequestAttributes");
    List<MediaType> requestedMediaTypes = this.getMediaTypes(
    	((ServletRequestAttributes)attrs).getRequest());
    if (requestedMediaTypes != null) {
    	//Get candidate view objects
        List<View> candidateViews = this.getCandidateViews(viewName,
        	locale, requestedMediaTypes);
        //Select the most appropriate view object, and then return this object
        View bestView = this.getBestView(candidateViews, requestedMediaTypes, attrs);
        if (bestView != null) {
            return bestView;
        }
    }

    String mediaTypeInfo = this.logger.isDebugEnabled() &&
    	requestedMediaTypes != null ? " given " + requestedMediaTypes.toString() : "";
    if (this.useNotAcceptableStatusCode) {
        if (this.logger.isDebugEnabled()) {
            this.logger.debug("Using 406 NOT_ACCEPTABLE" + mediaTypeInfo);
        }
        return NOT_ACCEPTABLE_VIEW;
    } else {
        this.logger.debug("View remains unresolved" + mediaTypeInfo);
        return null;
    }
}
Let's continue to click in and see how he gets the candidate view? In getCandidateViews, you can see that it brings all view parsers, performs a while loop, and parses them one by one!
Iterator var5 = this.viewResolvers.iterator();
Therefore, it is concluded that the view parser content negotiation view resolver is used to combine all view parsers
Let's study his combinatorial logic and see that there is an attribute viewResolvers to see where it is assigned!
protected void initServletContext(ServletContext servletContext) {
    //Here, it obtains all the view parsers in the container from the beanFactory tool,
    //ViewRescolver.class, which combines all view parsers
    Collection<ViewResolver> matchingBeans = BeanFactoryUtils.
        beansOfTypeIncludingAncestors(this.obtainApplicationContext(),
             ViewResolver.class).values();
    ViewResolver viewResolver;
    if (this.viewResolvers == null) {
        this.viewResolvers = new ArrayList(matchingBeans.size());
Since it is looking for the view parser in the container, can we guess that we can implement customization?
We can add a view parser to the container by ourselves; This class will help us automatically combine it; Let's do it
Let's try to write a view parser in our main program;
@Bean //Put in bean
public ViewResolver myViewResolver(){
    return new MyViewResolver();
}

//When we write a static inner class, the view parser needs to implement the ViewResolver interface
private static class MyViewResolver implements ViewResolver{
    @Override
    public View resolveViewName(String s, Locale locale) throws Exception {
        return null;
    }
}
What do you think about whether the view parser we wrote ourselves works? We add a breakpoint to the doDispatch method in the dispatcher servlet for debugging, because all requests will go to this method

We start our project, then visit a random page to see the Debug information;
Find this;

Find the view parser, and we see that our own definition is here;
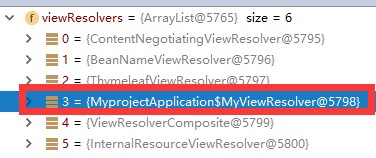
Therefore, if we want to use our own customized things, we just need to add this component to the container! SpringBoot will do the rest for us
Converter and formatter
Format converter found
@Bean
public FormattingConversionService mvcConversionService() {
//Get the formatting rules in the configuration file
    WebConversionService conversionService = new WebConversionService(
        this.mvcProperties.getDateFormat());
    this.addFormatters(conversionService);
    return conversionService;
}
Click go
public String getDateFormat() {
    return this.dateFormat;
}
You can see that in our Properties file, we can automatically configure it! If you register your own formatting method, it will be registered in the Bean, otherwise it will not be registered
We can configure date formatting rules in the configuration file:

Modify the default configuration of SpringBoot
Mode 1
-
The principle of so many automatic configurations is the same. Through the analysis of the automatic configuration principle of WebMVC, we should learn a learning method and draw a conclusion through source code exploration; This conclusion must belong to itself and be all-round.
-
The bottom layer of SpringBoot uses a lot of these design details, so you need to read the source code! come to conclusion;
-
When spring boot automatically configures many components,
- First, check whether the container is configured by the user (if the user configures @ bean s),
- If yes, use user configured; if not, use auto configured;
- If there are multiple components, such as our view parser, you can combine the user configured with your own default!
Extension using spring MVC
-
If you want to keep Spring Boot MVC features and you want to add additional MVC configuration (interceptors, formatters, view controllers, and other features), you can add your own @Configuration class of type WebMvcConfigurer but without @EnableWebMvc. If you wish to provide custom instances of RequestMappingHandlerMapping, RequestMappingHandlerAdapter, or ExceptionHandlerExceptionResolver, you can declare a WebMvcRegistrationsAdapter instance to provide such components.
-
If you want to keep the Spring Boot MVC feature, And you want to add other MVC configurations** (interceptor, formatter, view controller and other functions), you can add your own @ configuration class with the type of webmvcconfigur, but do not add @ EnableWebMvc. If you want to provide a custom instance of RequestMappingHandlerMapping, RequestMappingHandlerAdapter or ExceptionHandlerExceptionResolver, you can declare the webmvcreationadapter * * implementation Example to provide such components.
-
All we need to do is write a @ Configuration annotation class, and the type should be WebMvcConfigurer, and the @ EnableWebMvc annotation cannot be marked; Let's write one by ourselves;
We create a new package called config and write a class MyMvcConfig;
package com.kuang.myproject.config;

import org.springframework.context.annotation.Configuration;
import org.springframework.web.servlet.config.annotation.ViewControllerRegistry;
import org.springframework.web.servlet.config.annotation.WebMvcConfigurer;

//The expected type requires WebMvcConfigurer, so we implement its interface
//You can use custom classes to extend the functionality of MVC
@Configuration
public class MyMvcConfig implements WebMvcConfigurer {

    @Override
    public void addViewControllers(ViewControllerRegistry registry) {
        //When the browser sends / Liang, it will jump to the success page;
        registry.addViewController("/kuang").setViewName("success");
    }
}
Let's visit the browser:
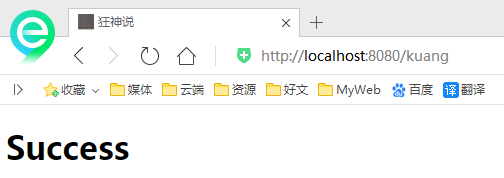
It did jump over! Therefore, we want to extend spring MVC. The official recommends that we use it in this way, so that we can not only keep all the automatic configurations of spring boot, but also use our extended configurations!
We can analyze the principle:
-
Webmvcoautoconfiguration is the automatic configuration class of spring MVC, which has a class webmvcoautoconfigurationadapter
-
There is an annotation on this class, which will be imported during other automatic configuration: @ import ({webmvcoautoconfiguration. Enablewebmvcconfiguration. Class})
-
Let's click the EnableWebMvcConfiguration class to see that it inherits a parent class: DelegatingWebMvcConfiguration. There is such a piece of code in this parent class
-
 private final WebMvcConfigurerComposite configurers = new WebMvcConfigurerComposite();
      //Get all webmvcconfigurers from the container
    @Autowired(required = false)
    public void setConfigurers(List<WebMvcConfigurer> configurers) {
        if (!CollectionUtils.isEmpty(configurers)) {
            this.configurers.addWebMvcConfigurers(configurers);
        }
    }
We can find a viewController we just set in this class as a reference and find that it calls a
this.configurers.addViewControllers(registry);
Let's go in and have a look
 public void addViewControllers(ViewControllerRegistry registry) {
        Iterator var2 = this.delegates.iterator();

        while(var2.hasNext()) {            //Call all WebMvcConfigurer related configurations together! Including those configured by ourselves and those configured by Spring
         WebMvcConfigurer delegate = (WebMvcConfigurer)var2.next();
            delegate.addViewControllers(registry);
        }
    }
- Therefore, it is concluded that all WebMvcConfiguration will be used, not only Spring's own configuration class, but also our own configuration class will be called;
Fully take over spring MVC
If you want to take complete control of Spring MVC, you can add your own @Configuration annotated with @EnableWebMvc.
Full takeover: spring boot does not need to automatically configure spring MVC. We configure everything ourselves! Just add @ EnableWebMvc. In our configuration class
Let's take a look. If we take over spring MVC, the static resource mapping configured by SpringBoot will be invalid. We can test it;
Visit the home page without comments

Annotate the configuration class: @ EnableWebMvc
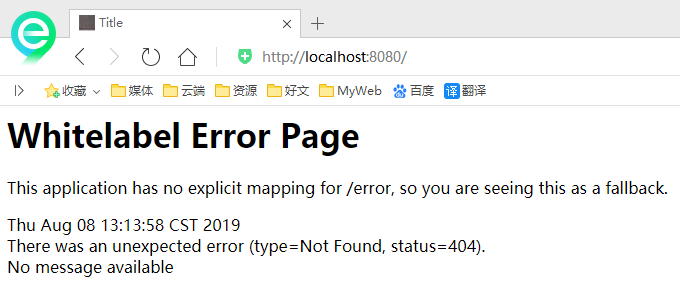
We found that all spring MVC auto configuration failed! Return to the original appearance;
Of course, it is not recommended to use spring MVC in our development
Thinking? Why is the automatic configuration invalid when an annotation is added! Let's look at the source code:
- It is found that it imports a class. We can continue to look at it
@Import({DelegatingWebMvcConfiguration.class})
public @interface EnableWebMvc {
}
- It inherits a parent class
public class DelegatingWebMvcConfiguration extends WebMvcConfigurationSupport {
}
3. Let's review the Webmvc auto configuration class
@Configuration
@ConditionalOnWebApplication(
    type = Type.SERVLET
)
@ConditionalOnClass({Servlet.class, DispatcherServlet.class, WebMvcConfigurer.class})//This annotation means that the autoconfiguration class takes effect only when there is no component in the container
@ConditionalOnMissingBean({WebMvcConfigurationSupport.class})
@AutoConfigureOrder(-2147483638)
@AutoConfigureAfter({DispatcherServletAutoConfiguration.class, TaskExecutionAutoConfiguration.class, ValidationAutoConfiguration.class})
public class WebMvcAutoConfiguration {
}
- To sum up: @ EnableWebMvc has imported the WebMvcConfigurationSupport component; The imported WebMvcConfigurationSupport is only the most basic function of spring MVC!
There are many XXXX configurers in SpringBoot to help us with extension configuration. As long as we see this, we should pay more attention
RestfulCRUD
preparation
We can now import all our resources!
Put pojo and dao under the corresponding path of the project:
pojo entity class
Department.java
@Data
@AllArgsConstructor
@NoArgsConstructor
public class Department {
    private Integer id;
    private String departmentName;
}
Employee.java
@Data
@AllArgsConstructor
@NoArgsConstructor
public class Employee {
    private Integer id;
    private String lastName;
    private String email;
    private Integer gender;//0: female 1: Male
    private Department department;
    private Date birth;
}
dao layer
 DepartmentDao
@Repository
public class DepartmentDao {
    //Simulate data in database
    private static Map<Integer, Department> departments = null;
    static {
        departments = new HashMap<Integer, Department>();//Create a department table
        departments.put(101, new Department(101,"Teaching Department"));
        departments.put(102, new Department(102,"Marketing Department"));
        departments.put(103, new Department(103,"Teaching and Research Department"));
        departments.put(104, new Department(104,"Operation Department"));
        departments.put(105, new Department(105,"Logistics Department"));
    }
    //Get all department information
    public Collection<Department> getDepartments(){
        return departments.values();
    }
    //Get department by id
    public Department getDepartmentById(Integer id){
        return departments.get(id);
    }
}
EmployeeDao
@Repository
public class EmployeeDao {
    //Data of simulation database
    private static Map<Integer, Employee> employees = null;
    //Department to which the employee belongs
    @Autowired
    private DepartmentDao departmentDao;
    static {
        employees = new HashMap<Integer, Employee>();//Create a department table
        employees.put(1001,new Employee(1001,"AA","1@qq.com",0, new Department(101,"Teaching Department")));
        employees.put(1002,new Employee(1002,"BB","2@qq.com",1, new Department(102,"Marketing Department")));
        employees.put(1003,new Employee(1003,"CC","3@qq.com",0, new Department(103,"Teaching and Research Department")));
        employees.put(1004,new Employee(1004,"DD","4@qq.com",1, new Department(104,"Operation Department")));
        employees.put(1005,new Employee(1005,"EE","5@qq.com",0, new Department(105,"Logistics Department")));
    }
    //Primary key auto increment
    private static Integer initId = 1006;
    //Add an employee
    public void save(Employee employee){
        if (employee.getId() == null){
            employee.setId(initId++);
        }
        employee.setDepartment(departmentDao.getDepartmentById(employee.getId()));
        employees.put(employee.getId(), employee);
    }
    //Query all employees
    public Collection<Employee> getAll(){
        return employees.values();
    }
    //Query employees by id
    public Employee getEmployeeById(Integer id){
        return employees.get(id);
    }
    //Delete employee by id
    public void delete(Integer id){
        employees.remove(id);
    }
}
After importing these, we also need to import our front-end pages and static resource files!
- css, js, etc. are placed in the static folder
- html is placed in the templates folder
Preparation: OK!!!
Home page implementation
Requirement 1: visit the home page by default
Method 1: write a controller implementation!
//It will be parsed to index. In the templates directory HTML page
@RequestMapping({"/","/index.html"})
public String index(){
    return "index";
}
Method 2: write your own MVC extension configuration
package com.kuang.myproject.config;

import org.springframework.context.annotation.Configuration;
import org.springframework.web.servlet.config.annotation.ViewControllerRegistry;
import org.springframework.web.servlet.config.annotation.WebMvcConfigurer;

@Configuration
public class MyMvcConfig implements WebMvcConfigurer {

    @Override
    public void addViewControllers(ViewControllerRegistry registry) {
        registry.addViewController("/").setViewName("index");
        registry.addViewController("/index.html").setViewName("index");
    }
}
Solve a resource import problem;
We changed the start name of our project
server.servlet.context-path=/kuang
Now you can't visit localhost:8080. You need to visit localhost:8080/kuang
In order to ensure the stability of resource import, we recommend using th: to replace the original resource path when importing all resources!
The corresponding html file header should introduce the namespace of thymeleaf
<html lang="en" xmlns:th="http://www.thymeleaf.org">
<link href="asserts/css/bootstrap.min.css"
th:href="@{/css/bootstrap.min.css}" rel="stylesheet">
For example, no matter how our project name changes, it can be found automatically! You can see the difference by looking at the source code: for example
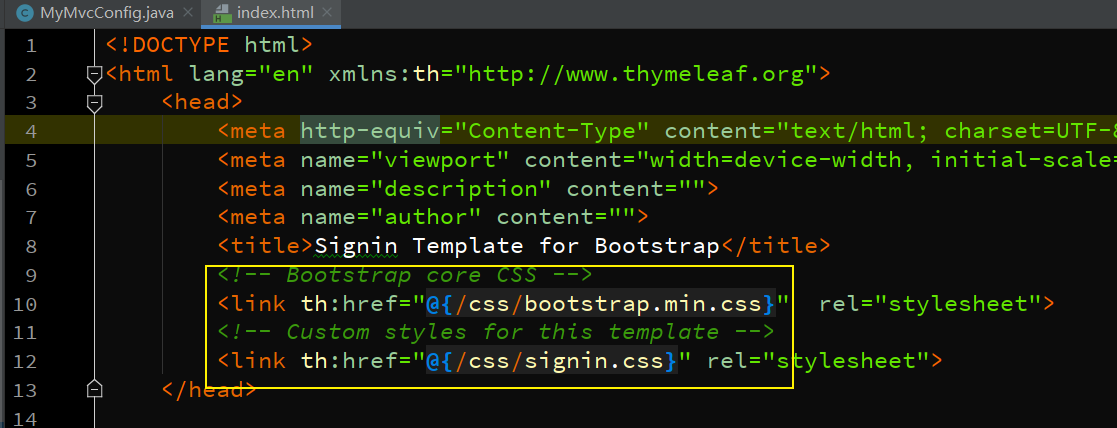
Page internationalization
Step 1: write an internationalization configuration file and extract the internationalization page messages to be displayed on the page. We can check the login page
First, uniformly set the encoding of properties in the IDEA!
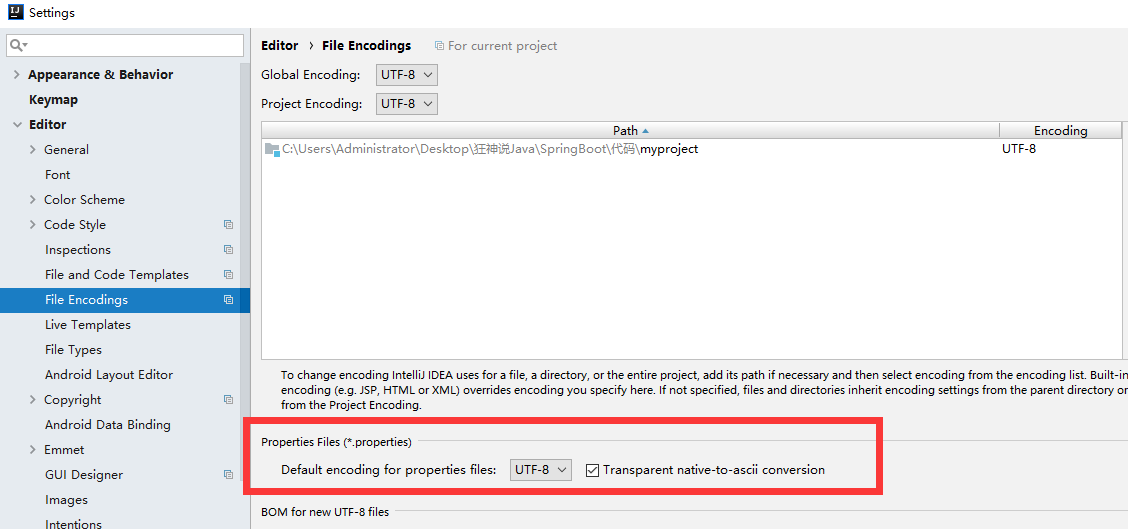
We create a new i18n directory under the resources resource file and create a login Properties file and a login_zh_CN.properties, it is found that IDEA automatically identifies the internationalization operation we want to do; The folder has changed

We can create a new file on it;

The following page pops up: let's add another one in English;
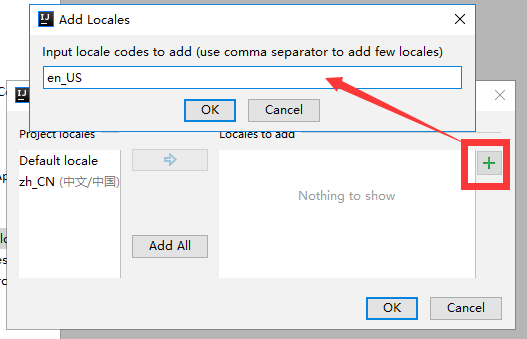
This is much faster!

Next, let's write the configuration. We can see another view under the idea;

In this view, we can directly add attributes by clicking the + sign; Let's create a new login Tip, you can see that there are three file boxes on the side for input
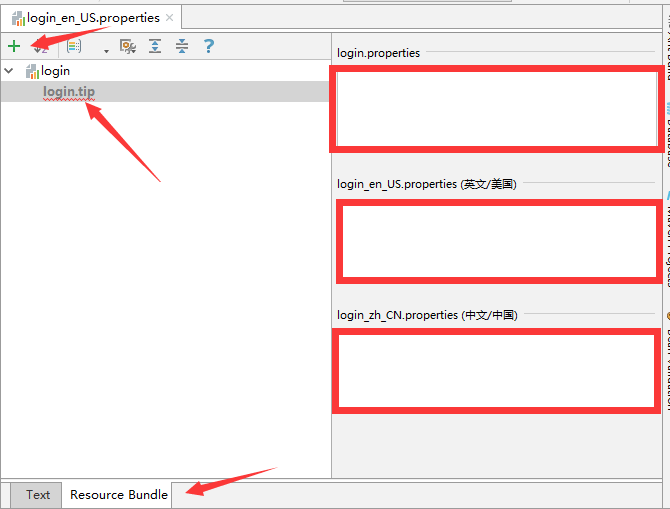
Let's add the content of the home page!
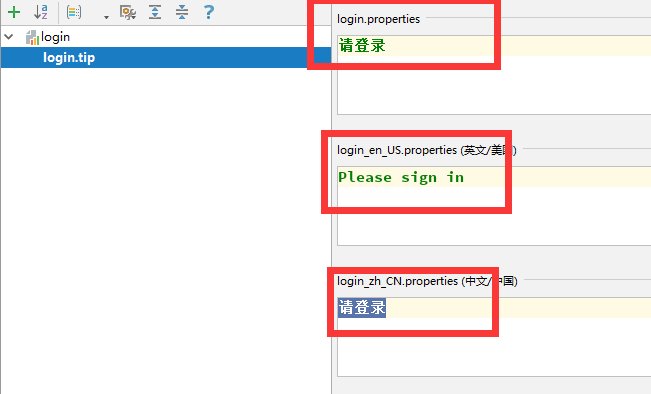
Then add other page contents in turn!
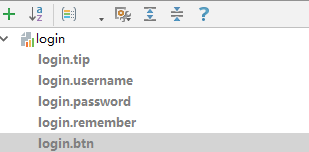
Then check our configuration file;
login.properties: default
login.btn=Sign in
login.password=password
login.remember=Remember me
login.tip=Please login
login.username=user name
english:
login.btn=Sign in
login.password=Password
login.remember=Remember me
login.tip=Please sign in
login.username=Username
chinese:
login.btn=Sign in
login.password=password
login.remember=Remember me
login.tip=Please login
login.username=user name
OK, done!
Step 2: let's take a look at the automatic configuration of internationalization by SpringBoot!
This involves another class: MessageSourceAutoConfiguration, which has a method. It is found that SpringBoot has automatically configured the component ResourceBundleMessageSource for managing our international resource files;
public class MessageSourceAutoConfiguration {
    private static final Resource[] NO_RESOURCES = new Resource[0];

    public MessageSourceAutoConfiguration() {
    }

    @Bean
    @ConfigurationProperties(prefix = "spring.messages")
    //Our configuration file can be placed directly under the classpath, called messages Properties, you can perform internationalization operations
    public MessageSourceProperties messageSourceProperties() {
        return new MessageSourceProperties();
    }

    @Bean
    public MessageSource messageSource(MessageSourceProperties properties) {
        ResourceBundleMessageSource messageSource = new ResourceBundleMessageSource();
        if (StringUtils.hasText(properties.getBasename())) {
        //Set the basic name of the internationalization file (excluding the language country code)
            messageSource.setBasenames(StringUtils.commaDelimitedListToStringArray(StringUtils.trimAllWhitespace(properties.getBasename())));
        }

        if (properties.getEncoding() != null) {
            messageSource.setDefaultEncoding(properties.getEncoding().name());
        }

        messageSource.setFallbackToSystemLocale(properties.isFallbackToSystemLocale());
        Duration cacheDuration = properties.getCacheDuration();
        if (cacheDuration != null) {
            messageSource.setCacheMillis(cacheDuration.toMillis());
        }

        messageSource.setAlwaysUseMessageFormat(properties.isAlwaysUseMessageFormat());
        messageSource.setUseCodeAsDefaultMessage(properties.isUseCodeAsDefaultMessage());
        return messageSource;
    }
}
Our real situation is that it is placed in the i18n directory, so we need to configure the path of messages;
spring.messages.basename=i18n.login
Step 3: go to the page to get the internationalization value;
Check the Thymeleaf document and find the message value. The operation is: #{...}.
Let's go to the page test;

The rest is the same! IDEA also has tips, very intelligent!
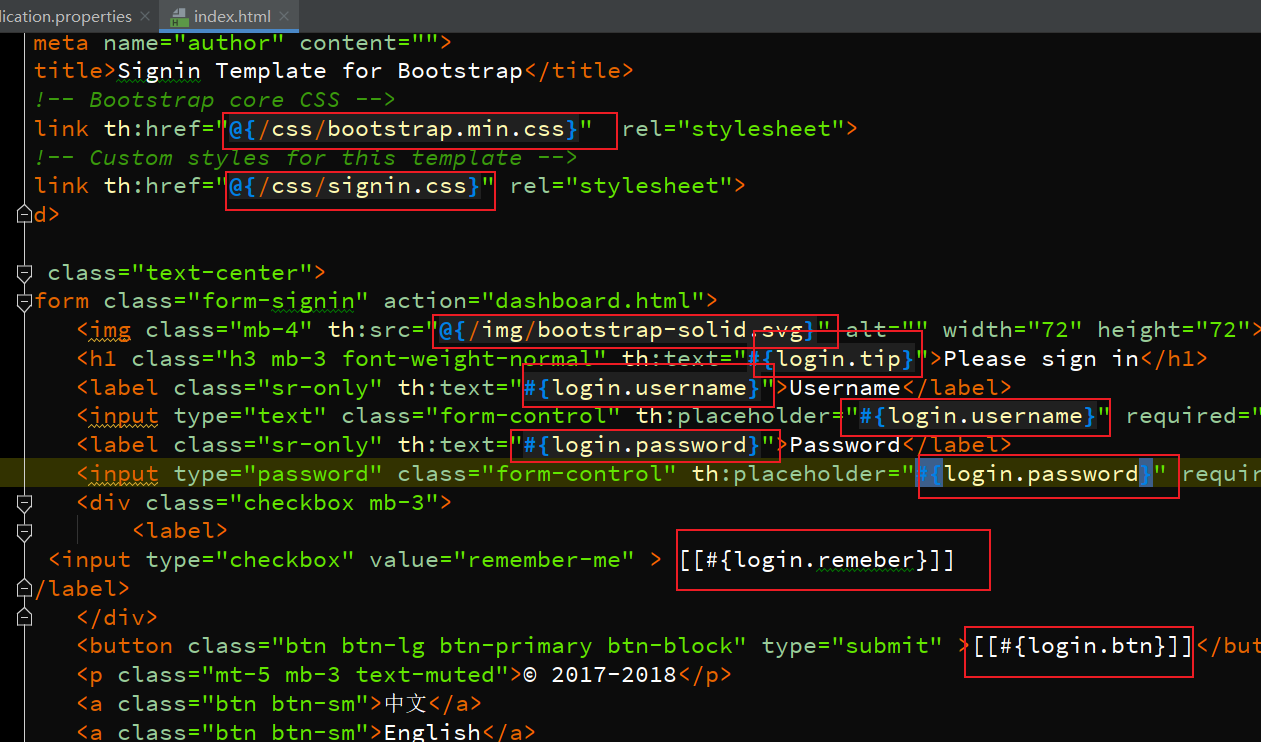
We can open the project, visit it and find that it has been automatically recognized as Chinese!
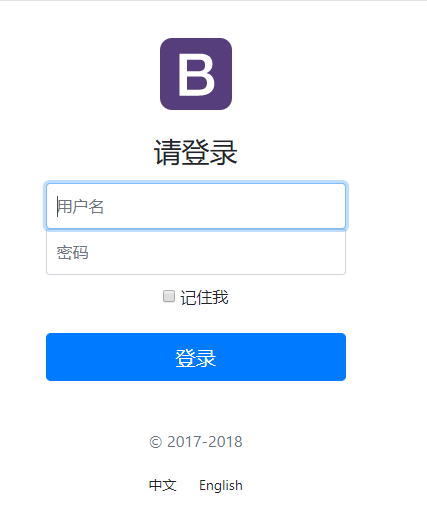
But we want better! You can automatically switch between Chinese and English according to the button!
In Spring, there is an international Locale (region information object); there is a parser called Locale resolver (get region information object)
Let's go to our webmvc automatic configuration file and look for it! See the default configuration of SpringBoot
@Bean
@ConditionalOnMissingBean
@ConditionalOnProperty(
    prefix = "spring.mvc",
    name = {"locale"}
)
public LocaleResolver localeResolver() {
//If there is no self configuration in the container, use the user configuration
    if (this.mvcProperties.getLocaleResolver() == org.springframework.boot.
    autoconfigure.web.servlet.WebMvcProperties.LocaleResolver.FIXED) {
        return new FixedLocaleResolver(this.mvcProperties.getLocale());
    } else {
        AcceptHeaderLocaleResolver localeResolver = new AcceptHeaderLocaleResolver();
        localeResolver.setDefaultLocale(this.mvcProperties.getLocale());
        return localeResolver;
    }
}
There is a method in the AcceptHeaderLocaleResolver class
public Locale resolveLocale(HttpServletRequest request) {
    Locale defaultLocale = this.getDefaultLocale();
    //By default, the Locale is obtained according to the region information brought by the request header for internationalization
    if (defaultLocale != null && request.getHeader("Accept-Language") == null) {
        return defaultLocale;
    } else {
        Locale requestLocale = request.getLocale();
        List<Locale> supportedLocales = this.getSupportedLocales();
        if (!supportedLocales.isEmpty() &&
        !supportedLocales.contains(requestLocale)) {
            Locale supportedLocale = this.findSupportedLocale
            (request, supportedLocales);
            if (supportedLocale != null) {
                return supportedLocale;
            } else {
                return defaultLocale != null ? defaultLocale : requestLocale;
            }
        } else {
            return requestLocale;
        }
    }
}
If we want to click the link to make our international resources effective now, we need to make our own locale effective!
We write our own LocaleResolver, which can carry regional information on the link!
Modify the jump connection of the front-end page;
//The parameter passed in here does not need to be used? Use (key=value)
<a class="btn btn-sm" th:href="@{/index.html(l='zh_CN')}">chinese</a>
<a class="btn btn-sm" th:href="@{/index.html(l='en_US')}">English</a>
Let's write a component class for processing
//You can carry area information on the link
public class MyLocaleResolver implements LocaleResolver {

    //Parse request
    @Override
    public Locale resolveLocale(HttpServletRequest request) {

        String language = request.getParameter("l");
        Locale locale = Locale.getDefault(); //If it is not obtained, the system default is used
        //If the request link is not empty
        if (!StringUtils.isEmpty(language)){
            //Split request parameters
            String[] split = language.split("_");
            //Country, region
            locale = new Locale(split[0],split[1]);
        }
        return locale;
    }

    @Override
    public void setLocale(HttpServletRequest httpServletRequest, HttpServletResponse httpServletResponse, Locale locale) {

    }
}
In order for our regionalization information to take effect, we need to configure this component again! Add bean s under our own mvcconfig;
@Bean
public LocaleResolver localeResolver(){
    return new MyLocaleResolver();
}
We restart the project and visit it. We found that clicking the button can achieve successful switching!
Login + interceptor
We won't connect to the database first. You can log in successfully by entering any user name!
State an issue not mentioned before:
The pages under templates can only be realized through Controller jump, while the pages under static can be accessed directly by the outside world and can be accessed normally.
We write the form submission address of the login page as a controller!
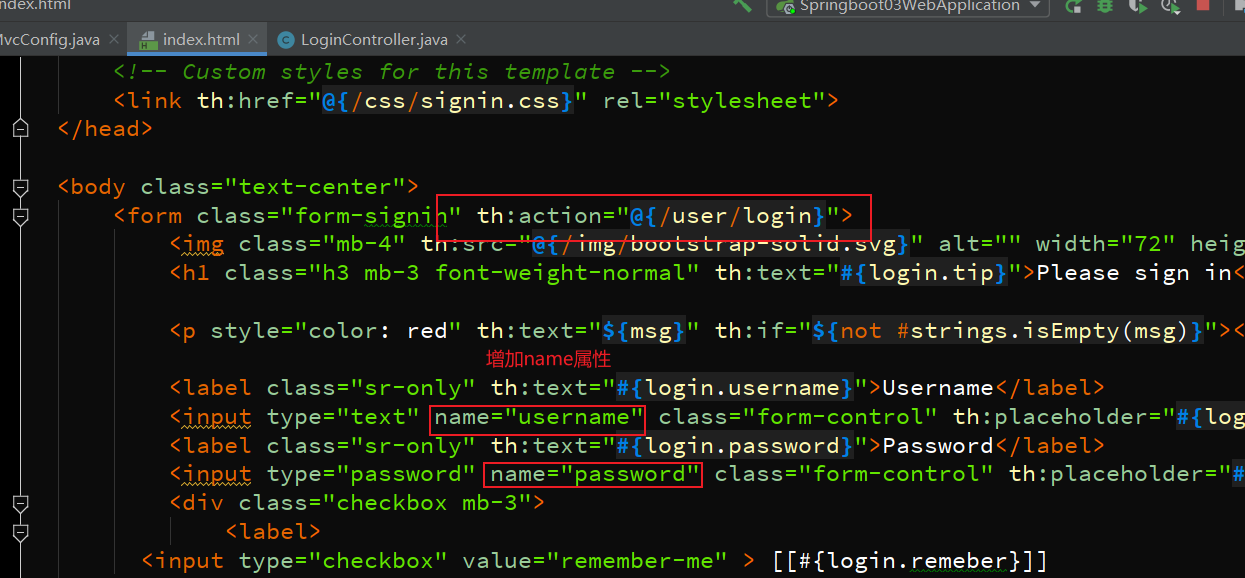
<form class="form-signin" th:action="@{/user/login}">
			<img class="mb-4" th:src="@{/img/bootstrap-solid.svg}" alt="" width="72" height="72">
			<h1 class="h3 mb-3 font-weight-normal" th:text="#{login.tip}">Please sign in</h1>

			<p style="color: red" th:text="${msg}" th:if="${not #strings.isEmpty(msg)}"></p>

			<label class="sr-only" th:text="#{login.username}">Username</label>
			<input type="text" name="username" class="form-control" th:placeholder="#{login.username}" required="" autofocus="">
			<label class="sr-only" th:text="#{login.password}">Password</label>
			<input type="password" name="password" class="form-control" th:placeholder="#{login.password}" required="">
			<div class="checkbox mb-3">
Write the corresponding controller
@Controller
public class LoginController {
//    @RequestMapping(value = "/user/login",method = RequestMethod.POST)
    @RequestMapping("/user/login")
    public String login(@RequestParam("username") String username,
                        @RequestParam("password") String password,
                        Model model){

        if (!StringUtils.isEmpty(username) && "123456".equals(password)){
            //Login succeeded!
//            return "dashboard";
            return "redirect:/main.html";
        }else {
            //Login failed! Store error messages
            model.addAttribute("msg","Wrong user name and password");
            return "index";
        }
    }
    //Test whether it works first
//    @RequestMapping("/user/login")
//    @ResponseBody
//    public String login(){
//        return "ok";
//    }
}
There is a cache on the page, so we need to disable the cache of the template engine
#Disable template caching
spring.thymeleaf.cache=false
After the template engine is modified, you want to take effect in real time! After the page is modified, the IDEA tip: Ctrl + F9 recompile!
OK, test login succeeded!
If a 500 error occurs in the template, refer to processing the connection: https://blog.csdn.net/fengzyf/article/details/83341479
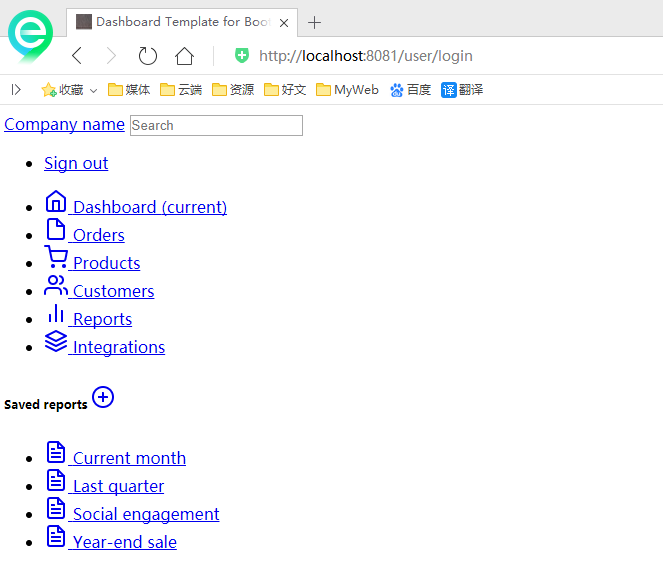
Login succeeded. Static resource import problem found!
If the login fails, we need to output the background information to the foreground. We can add judgment under the title of the home page!
<!--Judge whether to display and use if, ${}You can use tool classes to see thymeleaf Chinese documents for-->
<p style="color: red" th:text="${msg}" th:if="${not #strings.isEmpty(msg)}"></p>
Refresh test:
Optimization. After successful login, because it is forwarding and the link remains unchanged, we can redirect to the home page!
We add another view control mapping in our own MyMvcConfig:
registry.addViewController("/main.html").setViewName("dashboard");
Change the Controller code to redirect;
//Login succeeded! To prevent the form from being submitted repeatedly, we redirect
return "redirect:/main.html";
After successful redirection! We solved the problem that resources were not loaded before! The background home page is displayed normally!
However, new problems are found. We can log in directly to the background home page without logging in!
How to deal with this problem? We can use the interceptor mechanism to realize login check!
Let's customize an interceptor first
package com.kuang.myproject.component;

import org.springframework.web.servlet.HandlerInterceptor;

import javax.servlet.http.HttpServletRequest;
import javax.servlet.http.HttpServletResponse;

public class LoginHandlerInterceptor implements HandlerInterceptor {
    //Before the target method is executed
    @Override
    public boolean preHandle(HttpServletRequest request, HttpServletResponse response, Object handler) throws Exception {
        Object user = request.getSession().getAttribute("loginUser");
        if (user == null){//If you are not logged in, return to the login page
            request.setAttribute("msg","No permission, please log in first");
            request.getRequestDispatcher("/index.html").forward(request,response);
            return false;
        }else {
            //Login, release
            return true;
        }
    }
}
Then register the interceptor into our spring MVC configuration class!
//Register interceptor
@Override
public void addInterceptors(InterceptorRegistry registry) {
    //Register interceptor, and intercept requests and which requests to reject!
    //We also need to filter static resource files, otherwise the style will not be displayed
    registry.addInterceptor(new LoginHandlerInterceptor())
        .addPathPatterns("/**").excludePathPatterns("/index.html","/","/user/login","/asserts/**");
}
We then get the user login information on the background home page
<!--The background home page displays the information of the login user-->
[[${session.loginUser}]]
Then we log in and test! Perfect!
Employee list function
Requirement: we need to use Restful style to implement our crud operation!

Look at some specific requirements, that is, the architecture of our small experiment;

According to these requirements, we complete the first function, which is our employee list function!
Click Customers on the home page to display the list page; Let's revise it
1. Change the sidebar Customers of the home page to employee management
2.a link add request
<a class="nav-link" href="#"Th: href =" @ {/ EMPs} "> employee management</a>
3. Put the list under the emp folder

4. Write the controller to process the request
@Controller
public class EmployeeController {

    @Autowired
    EmployeeDao employeeDao;

    //Query all employees and return to the list page
    @RequestMapping("/emps")
    public String list(Model model){
        Collection<Employee> employees = employeeDao.getAll();
        //Put results in request
        model.addAttribute("emps",employees);
        return "emp/list";
    }

}
We start the project, test to see if we can jump, test OK! We just need to render the data in!
But there is a problem. The sidebar and the top are the same. Should we extract it?
Thymeleaf public page element extraction
1. Extract the public fragment th:fragment and define the template name
2. Introduce public fragment th:insert template name
Let's extract it and use the list for demonstration! We're going to extract the head, nav tag
We define a template name in the nav part of the dashboard;
<nav class="navbar navbar-dark sticky-top bg-dark flex-md-nowrap p-0" th:fragment="topbar" >
    <!--The background home page displays the information of the login user-->
    <a class="navbar-brand col-sm-3 col-md-2 mr-0" href="http://getbootstrap.com/docs/4.0/examples/dashboard/#">[[${session.loginUser}]]</a>
    <input class="form-control form-control-dark w-100" type="text" placeholder="Search" aria-label="Search">
    <ul class="navbar-nav px-3">
        <li class="nav-item text-nowrap">
            <a class="nav-link" href="http://getbootstrap.com/docs/4.0/examples/dashboard/#">Sign out</a>
        </li>
    </ul>
</nav>
Then we introduce it in the list page and delete the original nav
        <!--Introduce extracted topbar-->
        <!--Template name: will use thymeleaf The pre suffix configuration rule of is parsed
        use~{Template::Tag name}-->
        <div th:insert="~{dashboard::topbar}"></div>
Effect: you can see that it has been successfully loaded!

In addition to insert, you can also use replace or include. There are some small differences between the three methods, as can be seen from the meaning of the name;
We can solve the problem of redundant div by using replace. You can view the thymeleaf document for learning
The same is true for the sidebar. You can synchronize it as a practice!
Make sure this step is done!
We found a small problem, the problem of sidebar activation, which always activates the first one; Logically, this should be dynamic!
In order to reuse more clearly, we set up a commons folder to store public pages;
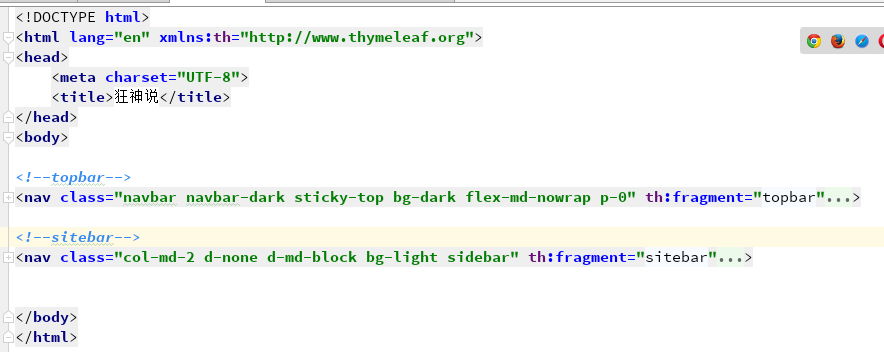
Let's introduce it into the page
<div th:replace="~{commons/bar::topbar}"></div>
<div th:replace="~{commons/bar::sitebar}"></div>
Let's test it first to ensure that there is no problem with all the pages! ok!
Let's solve our sidebar activation problem!
1. Change the hyperlink address of the home page to the project
2. We add a judgment in the a tag and use class to change the value of the tag;
<a class="nav-link active" th:class="${activeUrl=='main.html'?'nav-link active':'nav-link'}" href="#"Th: href =" @ {/ main. HTML} "> the rest are the same. Judge the parameters carried in the request and conduct the activation test
3. Modify request link
<div th:replace="~{commons/bar::sitebar(activeUrl='main.html')}"></div>
<div th:replace="~{commons/bar::sitebar(activeUrl='emps')}"></div>The rest are the same.
Let's refresh the page and test it. OK, dynamic activation is done!
Now let's traverse our employee information! By the way, beautify some pages and add, modify and delete buttons
<main role="main" class="col-md-9 ml-sm-auto col-lg-10 pt-3 px-4">
    <!--Add employee button-->
    <h2> <button class="btn btn-sm btn-success">Add employee</button></h2>
    <div class="table-responsive">
        <table class="table table-striped table-sm">
            <thead>
                <tr>
                    <th>id</th>
                    <th>lastName</th>
                    <th>email</th>
                    <th>gender</th>
                    <th>department</th>
                    <th>birth</th>
                    <!--We can also bring some operation buttons when displaying-->
                    <th>operation</th>
                </tr>
            </thead>
            <tbody>
                <tr th:each="emp:${emps}">
                    <td th:text="${emp.id}"></td>
                    <td>[[${emp.lastName}]]</td>
                    <td th:text="${emp.email}"></td>
                    <td th:text="${emp.gender==0?'female':'male'}"></td>
                    <td th:text="${emp.department.departmentName}"></td>
                    <!--<td th:text="${emp.birth}"></td>-->
                    <!--Using the time formatting tool-->
                    <td th:text="${#dates.format(emp.birth,'yyyy-MM-dd HH:mm')}"></td>

                    <!--operation-->
                    <td>
                        <button class="btn btn-sm btn-primary">edit</button>
                        <button class="btn btn-sm btn-danger">delete</button>
                    </td>
                </tr>
                </tr>
            </tbody>
        </table>
    </div>
</main>
OK, all employees are displayed!
Add employee information
- Change the added employee information to a hyperlink
<!--Add employee button-->
<h2> <a class="btn btn-sm btn-success" href="emp" th:href="@{/emp}">Add employee</a></h2>
- Write the corresponding controller
    //to employee add page
    @GetMapping("/emp")
    public String toAddPage(){
        return "emp/add";
    }
- Add front-end page; Copy the list page and modify it
bootstrap official website document: https://v4.bootcss.com/docs/4.0/components/forms/ , we can go inside and find our favorite style!
I have provided you with a well edited
<form>
    <div class="form-group">
        <label>LastName</label>
        <input type="text" class="form-control" placeholder="kuangshen">
    </div>
    <div class="form-group">
        <label>Email</label>
        <input type="email" class="form-control" placeholder="24736743@qq.com">
    </div>
    <div class="form-group">
        <label>Gender</label><br/>
        <div class="form-check form-check-inline">
            <input class="form-check-input" type="radio" name="gender"  value="1">
            <label class="form-check-label">male</label>
        </div>
        <div class="form-check form-check-inline">
            <input class="form-check-input" type="radio" name="gender"  value="0">
            <label class="form-check-label">female</label>
        </div>
    </div>
    <div class="form-group">
        <label>department</label>
        <select class="form-control">
            <option>1</option>
            <option>2</option>
            <option>3</option>
            <option>4</option>
            <option>5</option>
        </select>
    </div>
    <div class="form-group">
        <label>Birth</label>
        <input type="text" class="form-control" placeholder="kuangstudy">
    </div>
    <button type="submit" class="btn btn-primary">add to</button>
</form>
4. The data provided by us should be selected in the Department information drop-down box, so we need to modify the front-end and back-end
controller
//to employee add page
@GetMapping("/emp")
public String toAddPage(Model model){
    //Find out all departments and provide options
    Collection<Department> departments = departmentDao.getDepartments();
    model.addAttribute("departments",departments);
    return "emp/add";
}
front end
<div class="form-group">
    <label>department</label>
    <!--Submitted by Department ID-->
    <select class="form-control">
        <option th:each="dept:${departments}" th:text="${dept.departmentName}" th:value="${dept.id}">1</option>
    </select>
</div>
OK, modify the controller and restart the project test!
Let's specifically implement the add function;
1. Modify the form submission address and method of the add page
<form th:action="@{/emp}" method="post">
2. Write controller;
    //Employee add function, use post to receive
    @PostMapping("/emp")
    public String addEmp(){

        //Back to the employee list page, you can use redirect or forward, which will not be parsed by the view parser
        return "redirect:/emps";
    }
Recall: redirection and forwarding and / or problems?
Principle Exploration: ThymeleafViewResolver
public static final String REDIRECT_URL_PREFIX = "redirect:";
public static final String FORWARD_URL_PREFIX = "forward:";

protected View createView(String viewName, Locale locale) throws Exception {
    if (!this.alwaysProcessRedirectAndForward && !this.canHandle(viewName, locale)) {
        vrlogger.trace("[THYMELEAF] View \"{}\" cannot be handled by ThymeleafViewResolver. Passing on to the next resolver in the chain.", viewName);
        return null;
    } else {
        String forwardUrl;
        if (viewName.startsWith("redirect:")) {
            vrlogger.trace("[THYMELEAF] View \"{}\" is a redirect, and will not be handled directly by ThymeleafViewResolver.", viewName);
            forwardUrl = viewName.substring("redirect:".length(), viewName.length());
            RedirectView view = new RedirectView(forwardUrl, this.isRedirectContextRelative(), this.isRedirectHttp10Compatible());
            return (View)this.getApplicationContext().getAutowireCapableBeanFactory().initializeBean(view, viewName);
        } else if (viewName.startsWith("forward:")) {
            vrlogger.trace("[THYMELEAF] View \"{}\" is a forward, and will not be handled directly by ThymeleafViewResolver.", viewName);
            forwardUrl = viewName.substring("forward:".length(), viewName.length());
            return new InternalResourceView(forwardUrl);
        } else if (this.alwaysProcessRedirectAndForward && !this.canHandle(viewName, locale)) {
            vrlogger.trace("[THYMELEAF] View \"{}\" cannot be handled by ThymeleafViewResolver. Passing on to the next resolver in the chain.", viewName);
            return null;
        } else {
            vrlogger.trace("[THYMELEAF] View {} will be handled by ThymeleafViewResolver and a {} instance will be created for it", viewName, this.getViewClass().getSimpleName());
            return this.loadView(viewName, locale);
        }
    }
}
OK, after reading the source code, we continue to write code!
We want to receive the property passed from the front end and encapsulate it into an object! First, you need to write the name attribute of the front-end page space! [operation]
Write controller to receive debugging and print [ operation ]
    //Employee add function
    //Receive the parameters passed by the front end and automatically encapsulate them into objects [the parameter name passed by the front end is required to be consistent with the attribute name]
    @PostMapping("/emp")
    public String addEmp(Employee employee){
        System.out.println(employee);
        employeeDao.save(employee); //Save employee information
        //Back to the employee list page, you can use redirect or forward
        return "redirect:/emps";
    }
Fill in the data at the front end and pay attention to the time
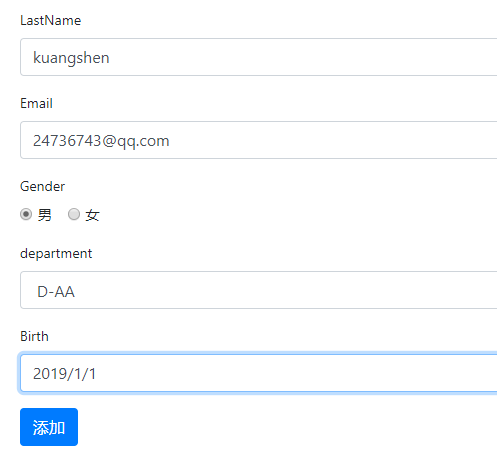
Click Submit and the background output is normal! Page Jump and data display are normal! OK!
Then we'll submit the time in a different format

An error occurred on the submit discovery page!

We submit a date for birthday. The first time we use / normal submission is successful, and the later use - is wrong, so there should be a problem with date formatting;
Spring MVC will convert the value submitted by the page to the specified type. The default date is submitted in the form of /; For example, convert 2019 / 01 / 01 to a date object.
So think about a question? Can we change the default format?
Let's look at the automatic configuration file of webmvc; Find a date formatting method, we can have a look
@Bean
public FormattingConversionService mvcConversionService() {
    WebConversionService conversionService = new WebConversionService(this.mvcProperties.getDateFormat());
    this.addFormatters(conversionService);
    return conversionService;
}
The getDateFormat method is called;
    public String getDateFormat() {
        return this.dateFormat;
    }
This is in the configuration class, so we can modify this time format problem by ourselves. We can modify it in our configuration file;
spring.mvc.date-format=yyyy-MM-dd
In this case, we support the format of -, but we don't support / anymore. 2333
Test OK!
Employee modification function
To realize the employee modification function, we need to implement two steps;
\1. Click the Modify button to go to the edit page. We can directly use the page of adding employees
2. Display the original data and jump back to the list page after modification!
Let's implement it: first, modify the location of the jump link;
<a class="btn btn-sm btn-primary" th:href="@{/emp/}+${emp.id}">edit</a>
Write the corresponding controller
//to employee modification page
@GetMapping("/emp/{id}")
public String toUpdateEmp(@PathVariable("id") Integer id,Model model){
    //Find out the employee by id
    Employee employee = employeeDao.get(id);
    //Return employee information to the page
    model.addAttribute("emp",employee);
    //Find out all departments and provide modification options
    Collection<Department> departments = departmentDao.getDepartments();
    model.addAttribute("departments",departments);

    return "emp/update";
}
We need to copy the add page here and change it to the update page; The page needs to be modified to echo our background query data
<form th:action="@{/emp}" method="post">
    <div class="form-group">
        <label>LastName</label>
        <input name="lastName" type="text" class="form-control"
        th:value="${emp.lastName}">
    </div>
    <div class="form-group">
        <label>Email</label>
        <input name="email" type="email" class="form-control" th:value="${emp.email}">
    </div>
    <div class="form-group">
        <label>Gender</label><br/>
        <div class="form-check form-check-inline">
            <input class="form-check-input" type="radio" name="gender" value="1"
                   th:checked="${emp.gender==1}">
            <label class="form-check-label">male</label>
        </div>
        <div class="form-check form-check-inline">
            <input class="form-check-input" type="radio" name="gender" value="0"
                   th:checked="${emp.gender==0}">
            <label class="form-check-label">female</label>
        </div>
    </div>
    <div class="form-group">
        <label>department</label>
        <!--Submitted by Department ID-->
        <select class="form-control" name="department.id">
            <option th:selected="${dept.id == emp.department.id}"
            th:each="dept:${departments}"
                    th:text="${dept.departmentName}" th:value="${dept.id}">1
            </option>
        </select>
    </div>
    <div class="form-group">
        <label>Birth</label>
        <input name="birth" type="text" class="form-control" th:value="${emp.birth}">
    </div>
    <button type="submit" class="btn btn-primary">modify</button>
</form>
Test OK!
It is found that our date display is not perfect. You can use the date tool to format the date!
<input name="birth" type="text" class="form-control" th:value="${#dates.format(emp.birth,'yyyy-MM-dd HH:mm')}">
Data echo OK, we continue to complete the data modification problem!
Modify the address of form submission:
<form th:action="@{/updateEmp}" method="post">
Write the corresponding controller
@PostMapping("/updateEmp")
public String updateEmp(Employee employee){
    employeeDao.save(employee);
    //Return to the employee list page
    return "redirect:/emps";
}
It is found that the submitted page has no id; We add a hidden field in the front end to submit the id;
<input name="id" type="hidden" class="form-control" th:value="${emp.id}">
Restart, modify the information and test OK!
Delete employee
list page, write the submission address
<a class="btn btn-sm btn-danger" th:href="@{/delEmp/}+${emp.id}">delete</a>
Write Controller
    @GetMapping("/delEmp/{id}")
    public String delEmp(@PathVariable("id") Integer id){
        employeeDao.delete(id);
        return "redirect:/emps";
    }
Test OK!
Custom error page
We only need to add an error folder in the template directory, where we can store our corresponding error pages, such as 404 HTML or 4xx HTML and so on, SpringBoot will help us use it automatically!
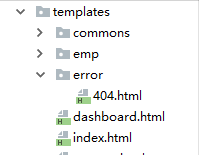
Logout function
<a class="nav-link" href="#" th:href="@{/user/loginOut}">Sign out</a>
Corresponding controller
    @GetMapping("/user/loginOut")
    public String loginOut(HttpSession session){
        session.invalidate();
        return "redirect:/index.html";
    }
After learning this, there will be no problem with the basic development of SpringBoot. Let's learn how SpringBoot operates the database and configures Mybatis later;
5. Springboot: Mybatis + Druid data access
brief introduction
For the data access layer, whether SQL (relational database) or NoSQL (non relational database), the bottom layer of Spring Boot adopts the way of Spring Data for unified processing.
The bottom layer of Spring Boot uses Spring Data to uniformly process various databases. Spring Data is also a well-known project in spring as well as Spring Boot and Spring Cloud.
Spring data official website: https://spring.io/projects/spring-data
For database related initiators, please refer to the official documents: https://docs.spring.io/spring-boot/docs/2.1.7.RELEASE/reference/htmlsingle/#using-boot-starter
JDBC
The bottom layer of the data source is jdbc
I'm going to create a new project test: springboot_demo_data ; Introduce corresponding modules! Basic module
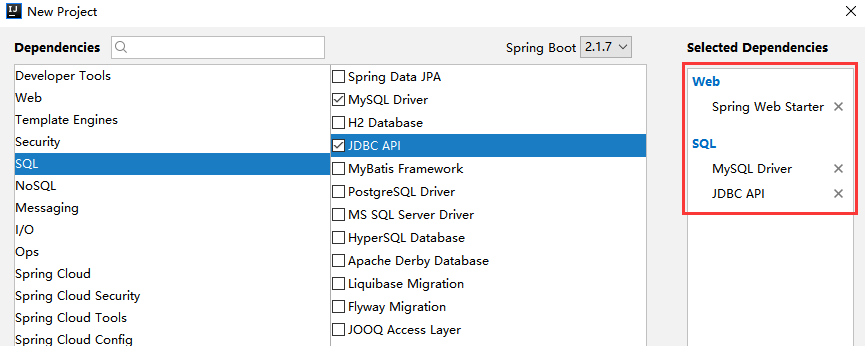
After the project was completed, we found that the following initiators were automatically imported for us:
<dependency>
    <groupId>org.springframework.boot</groupId>
    <artifactId>spring-boot-starter-jdbc</artifactId>
</dependency>
<dependency>
    <groupId>mysql</groupId>
    <artifactId>mysql-connector-java</artifactId>
    <scope>runtime</scope>
</dependency>
So how should we write to access the database?
-
We first connect to the database and directly use IDEA to connect [operation]
-
In spring boot, we only need simple configuration to connect the database;
We use the configuration file of yml to operate!
spring:
  datasource:
    username: root
    password: 123456
    #? serverTimezone=UTC resolves the error in the time zone
    url: jdbc:mysql://localhost:3306/mybatis?serverTimezone=UTC&useUnicode=true&characterEncoding=utf-8
    driver-class-name: com.mysql.jdbc.Driver
- After configuring these things, we can use them directly, because SpringBoot has automatically configured them for us by default; Let's test the class
@RunWith(SpringRunner.class)
@SpringBootTest
public class SpringbootDemoDataApplicationTests {

    //DI injection data source
    @Autowired
    DataSource dataSource;

    @Test
    public void contextLoads() throws SQLException {
        //Take a look at the default data source
        System.out.println(dataSource.getClass());
        //Get connection
        Connection connection =   dataSource.getConnection();
        System.out.println(connection);
        //Close connection
        connection.close();
    }
}
Output result: we can see that the default data source configured for us is: class com zaxxer. hikari. Hikaridatasource, we did not configure it manually
Let's search globally and find that all automatic configurations of the data source are under the data source properties file; We can explore the principle of automatic configuration here and what attributes can be configured;
As you can see, spring boot 2.1 7. Com is used by default zaxxer. hikari. Hikaridatasource data source, while previous versions, such as Spring Boot 1.5, use org. By default apache. tomcat. jdbc. pool. Datasource as the data source;
HikariDataSource is known as the fastest data source of Java WEB, which is better than traditional connection pools such as C3P0, DBCP and Tomcat jdbc;
We will not introduce the data source. With database connection, it is obvious that CRUD can operate the database.
Crud operation
1. With the data source (com.zaxxer.hikari.HikariDataSource), you can get the database connection (java.sql.Connection). With the connection, you can use the connection and native JDBC statements to operate the database
2. Even without the use of third-party database operation frameworks, such as MyBatis, Spring itself makes a lightweight encapsulation of the native JDBC, namely org springframework. jdbc. core. JdbcTemplate.
3. All CRUD methods for database operations are in the JdbcTemplate.
4. Spring Boot not only provides the default data source, but also the configured JdbcTemplate is placed in the container by default. Programmers only need to inject it themselves
5. The automatic configuration principle of JdbcTemplate depends on org springframework. boot. autoconfigure. Org. Under JDBC package springframework. boot. autoconfigure. jdbc. Jdbctemplateautoconfiguration class
JdbcTemplate mainly provides the following methods:
- Execute method: it can be used to execute any SQL statement, generally used to execute DDL statements;
- Update method and batchUpdate method: the update method is used to execute new, modify, delete and other statements; The batchUpdate method is used to execute batch related statements;
- Query method and queryForXXX method: used to execute query related statements;
- call method: used to execute stored procedures, functions and related statements.
test
@RestController
public class JdbcController {

    //JdbcTemplate is the core class of the core package. It is used to simplify JDBC operations and avoid some common errors, such as forgetting to close the database connection
    //Spring Boot provides the data source by default, and org.com by default springframework. jdbc. core. JdbcTemplate
    //The data source will be injected into the JdbcTemplate itself, and you don't have to close the database connection yourself
    @Autowired
    JdbcTemplate jdbcTemplate;

    //Query all data in student table
    //One Map in the List corresponds to one row of data in the database
    //The key in the Map corresponds to the field name of the database, and the value corresponds to the field value of the database
    @GetMapping("/userList")
    public List<Map<String, Object>> userList(){
        String sql = "select * from user";
        List<Map<String, Object>> maps = jdbcTemplate.queryForList(sql);
        return maps;
    }

    //Add a new user
    @GetMapping("/addUser")
    public String addUser(){
        //Insert statement
        String sql = "insert into mybatis.user(id, name, pwd) values (4,'Xiao Ming','123456')";
        jdbcTemplate.update(sql);
        //query
        return "addUser-ok";
    }

    //Modify user information
    @GetMapping("/updateUser/{id}")
    public String updateUser(@PathVariable("id") int id){
        //Insert statement
        String sql = "update mybatis.user set name=?,pwd=? where id="+id;
        //data
        Object[] objects = new Object[2];
        objects[0] = "Xiaoming 2";
        objects[1] = "zxcvbn";
        jdbcTemplate.update(sql,objects);
        //query
        return "updateUser-ok";
    }

    //delete user
    @GetMapping("/delUser/{id}")
    public String delUser(@PathVariable("id") int id){
        //Insert statement
        String sql = "delete from user where id=?";
        jdbcTemplate.update(sql,id);
        //query
        return "delUser-ok";
    }
}
Page access test, OK!
Principle Exploration:
org.springframework.boot.autoconfigure.jdbc.DataSourceConfiguration data source configuration class function: add data sources after logical judgment;
SpringBoot supports the following data sources by default:
com.zaxxer.hikari.HikariDataSource (Spring Boot 2.0 or above, this data source is used by default)
org.apache.tomcat.jdbc.pool.DataSource
org.apache.commons.dbcp2.BasicDataSource
You can use spring datasource. Type specifies the custom data source type, and the value is the fully qualified name of the connection pool implementation to be used. By default, it is automatically detected from the classpath.
@Configuration
@ConditionalOnMissingBean({DataSource.class})
@ConditionalOnProperty(
    name = {"spring.datasource.type"}
)
static class Generic {
    Generic() {
    }

    @Bean
    public DataSource dataSource(DataSourceProperties properties) {
        return properties.initializeDataSourceBuilder().build();
    }
}
Custom data source DruidDataSource
Introduction to DRUID
Druid is a database connection pool implementation on Alibaba's open source platform. It combines the advantages of DB pools such as C3P0, DBCP and PROXOOL, and adds log monitoring.
Druid can well monitor DB pool connections and SQL execution. It is naturally a DB connection pool for monitoring.
For Spring Boot 2.0 and above, Hikari data source is used by default. It can be said that Hikari and Driud are the best data sources on the current Java Web. Let's focus on how Spring Boot integrates Druid data source and how to realize database monitoring.
com. alibaba. druid. pool. The basic configuration parameters of druiddatasource are as follows:
| to configure | Default value | explain |
|---|---|---|
| name | The significance of configuring this attribute is that if there are multiple data sources, they can be distinguished by name during monitoring. If there is no configuration, a name will be generated in the format of "DataSource -" + system identityHashCode(this). In addition, configure this property at least 1.0 It doesn't work in version 5. If you force the setting of name, an error will occur Details - click here. | |
| url | The url to connect to the database is different from database to database. For example: MySQL: JDBC: mysql://10.20.153.104:3306/druid2 oracle : jdbc:oracle:thin:@10.20. 149.85:1521:ocnauto | |
| username | User name to connect to the database | |
| password | Password to connect to the database. If you don't want the password written directly in the configuration file, you can use configfilter. See here for details: https://github.com/alibaba/druid/wiki/%E4%BD%BF%E7%94%A8ConfigFilter | |
| driverClassName | Automatic identification according to url | This item can be configured or not. If druid is not configured, it will automatically identify the dbType according to the url, and then select the corresponding driverClassName |
| initialSize | 0 | The number of physical connections established during initialization. Initialization occurs when the display calls the init method or the first getConnection |
| maxActive | 8 | Maximum number of connection pools |
| maxIdle | 8 | It is no longer used, and the configuration has no effect |
| minIdle | Minimum number of connection pools | |
| maxWait | Maximum wait time to get a connection, in milliseconds. After maxWait is configured, the fair lock is enabled by default, and the concurrency efficiency will be reduced. If necessary, you can use a non fair lock by configuring the useUnfairLock attribute to true. | |
| poolPreparedStatements | false | Whether to cache preparedStatement, that is, PSCache. PSCache greatly improves the performance of databases that support cursors, such as oracle. It is recommended to close under mysql. |
| maxOpenPreparedStatements | -1 | To enable PSCache, it must be configured to be greater than 0. When greater than 0, poolPreparedStatements is automatically triggered and modified to true. In Druid, there will be no problem that PSCache in Oracle occupies too much memory. You can configure this value to be larger, such as 100 |
| validationQuery | The sql used to check whether the connection is valid requires a query statement. If validationQuery is null, testonmirror, testOnReturn, and testwhiteidle will not work. | |
| validationQueryTimeout | Unit: second, the timeout for detecting whether the connection is valid. The underlying layer calls the void setQueryTimeout(int seconds) method of the jdbc Statement object | |
| testOnBorrow | true | When applying for a connection, execute validationQuery to check whether the connection is valid. This configuration will reduce performance. |
| testOnReturn | false | When returning the connection, execute validationQuery to check whether the connection is valid. This configuration will reduce the performance |
| testWhileIdle | false | It is recommended to configure to true, which will not affect performance and ensure security. Check when applying for a connection. If the idle time is greater than timebetween evictionrunsmillis, run validationQuery to check whether the connection is valid. |
| timeBetweenEvictionRunsMillis | 1 minute (1.0.14) | There are two meanings: 1) the destroy thread will detect the connection interval. If the connection idle time is greater than or equal to minEvictableIdleTimeMillis, the physical connection will be closed. 2) the judgment basis of testwhiteidle. See the description of testwhiteidle property for details |
| numTestsPerEvictionRun | No longer used, a DruidDataSource only supports one EvictionRun | |
| minEvictableIdleTimeMillis | 30 minutes (1.0.14) | The maximum time a connection remains idle without being evicted |
| connectionInitSqls | sql executed during physical connection initialization | |
| exceptionSorter | Automatic identification according to dbType | When the database throws some unrecoverable exceptions, the connection is discarded |
| filters | The attribute type is string. The extension plug-ins are configured by alias. The commonly used plug-ins are: filter for monitoring statistics: stat, filter for log: log4j, filter for defending sql injection: wall | |
| proxyFilters | The type is list < com alibaba. druid. filter. Filter >, if both filters and proxyFilters are configured, it is a combination relationship, not a replacement relationship |
Import data source
1. Add Druid data source dependency on.
The first step needs to be in the POM of the application Add Druid data source dependency to the XML file, and this dependency can be downloaded from the Maven warehouse official website Maven Repository Get in
<!-- https://mvnrepository.com/artifact/com.alibaba/druid -->
<dependency>
    <groupId>com.alibaba</groupId>
    <artifactId>druid</artifactId>
    <version>1.1.12</version>
</dependency>
View project dependencies, import succeeded!

2. Switch data sources; As mentioned earlier, com.com is used by default for Spring Boot 2.0 and above zaxxer. hikari. Hikaridatasource data source, but it can be accessed through spring datasource. Type specifies the data source.
spring:
  datasource:
    username: root
    password: 123456
    url: jdbc:mysql://localhost:3306/springboot?serverTimezone=UTC&useUnicode=true&characterEncoding=utf-8
    driver-class-name: com.mysql.cj.jdbc.Driver
    type: com.alibaba.druid.pool.DruidDataSource # Custom data source
    filters: stat,wall,log4j
    maxPoolPreparedStatementPerConnectionSize: 20
    useGlobalDataSourceStat: true
    connectionProperties: druid.stat.mergeSql=true;druid.stat.slowSqlMillis=500
 3. After data source switching, inject DataSource into the test class, obtain it, and output it to see whether the switching is successful;

4. Switching succeeded! Now that the switch is successful, you can set the initialization size, maximum number of connections, waiting time, minimum number of connections and other settings of the data source connection; You can view the source code
We can configure some parameters to test;
spring:
  datasource:
    username: root
    password: 123456
    #? serverTimezone=UTC resolves the error in the time zone
    url: jdbc:mysql://localhost:3306/mybatis?serverTimezone=UTC&useUnicode=true&characterEncoding=utf-8
    driver-class-name: com.mysql.jdbc.Driver
    type: com.alibaba.druid.pool.DruidDataSource

    #Spring Boot does not inject these attribute values by default and needs to bind itself
    #druid data source proprietary configuration
    initialSize: 5
    minIdle: 5
    maxActive: 20
    maxWait: 60000
    timeBetweenEvictionRunsMillis: 60000
    minEvictableIdleTimeMillis: 300000
    validationQuery: SELECT 1 FROM DUAL
    testWhileIdle: true
    testOnBorrow: false
    testOnReturn: false
    poolPreparedStatements: true

    #Configure filters for monitoring statistics interception, stat: monitoring statistics, log4j: logging, wall: defending sql injection
    #If allowed, an error occurs in Java lang.ClassNotFoundException: org. apache. log4j. Priority
    #Then import the log4j dependency. Maven address: https://mvnrepository.com/artifact/log4j/log4j
    filters: stat,wall,log4j
    maxPoolPreparedStatementPerConnectionSize: 20
    useGlobalDataSourceStat: true
    connectionProperties: druid.stat.mergeSql=true;druid.stat.slowSqlMillis=500
5. Import Log4j dependencies
log4j log dependency
<!-- https://mvnrepository.com/artifact/log4j/log4j -->
<dependency>
    <groupId>log4j</groupId>
    <artifactId>log4j</artifactId>
    <version>1.2.17</version>
</dependency>
6. Now programmers need to bind the parameters in the global configuration file for DruidDataSource and add them to the container instead of using the automatic generation of Spring Boot; We need to add the DruidDataSource component to the container and bind the properties;
package com.kuang.springdata.config;

import com.alibaba.druid.pool.DruidDataSource;
import org.springframework.boot.context.properties.ConfigurationProperties;
import org.springframework.context.annotation.Bean;
import org.springframework.context.annotation.Configuration;

import javax.sql.DataSource;

@Configuration
public class DruidConfig {

    /*
       Add the custom Druid data source to the container and no longer let Spring Boot create it automatically
       Bind the Druid data source attribute in the global configuration file to com alibaba. druid. pool. Druiddatasource to make them effective
       @ConfigurationProperties(prefix = "spring.datasource"): The function is to add the global configuration file
       The prefix is spring The attribute value of datasource is injected into com alibaba. druid. pool. Druiddatasource is in a parameter with the same name
     */
    @ConfigurationProperties(prefix = "spring.datasource")
    @Bean
    public DataSource druidDataSource() {
        return new DruidDataSource();
    }

}
7. Test in the test class; See if it succeeds!
public class SpringbootDemoDataApplicationTests {

    //Injection data source
    @Autowired
    DataSource dataSource;

    @Test
    public void contextLoads() throws SQLException {
        //Take a look at the default data source
        System.out.println(dataSource.getClass());
        //Get connection
        Connection connection =   dataSource.getConnection();
        System.out.println(connection);

        DruidDataSource druidDataSource = (DruidDataSource) dataSource;
        System.out.println("druidDataSource Maximum connections to data source:" + druidDataSource.getMaxActive());
        System.out.println("druidDataSource Number of data source initialization connections:" + druidDataSource.getInitialSize());

        //Close connection
        connection.close();
    }
}
Output result: visible configuration parameters have taken effect

Configure Druid data source monitoring
Druid data source has the function of monitoring and provides a web interface for users to view. Similarly, when installing a router, people also provide a default web page.
Therefore, the first step is to set Druid's background management page, such as login account, password, etc; Configure background management;
//Configure the Servlet of Druid monitoring management background;
//There is no web when the Servlet container is built in XML file, so the Servlet registration method of Spring Boot is used
@Bean
public ServletRegistrationBean statViewServlet() {
    ServletRegistrationBean bean = new ServletRegistrationBean
    	(new StatViewServlet(), "/druid/*");

    Map<String, String> initParams = new HashMap<>();
    initParams.put("loginUsername", "admin"); //Login account of background management interface
    initParams.put("loginPassword", "123456"); //Login password of background management interface

    //Who is allowed to access in the background
    //initParams.put("allow", "localhost"): indicates that only the local machine can access it
    //initParams.put("allow", ""): when it is empty or null, it means that all access is allowed
    initParams.put("allow", "");
    //deny: Druid, who is denied access in the background
    //initParams.put("kuangshen", "192.168.1.20"); Indicates that this ip access is prohibited

    //Set initialization parameters
    bean.setInitParameters(initParams);
    return bean;
    //These parameters can be found on COM alibaba. druid. support. http. The parent class of statviewservlet is com alibaba. druid. support. http. Found in resourceservlet
}
After configuration, we can choose to access: http://localhost:8080/druid/login.html

After entering
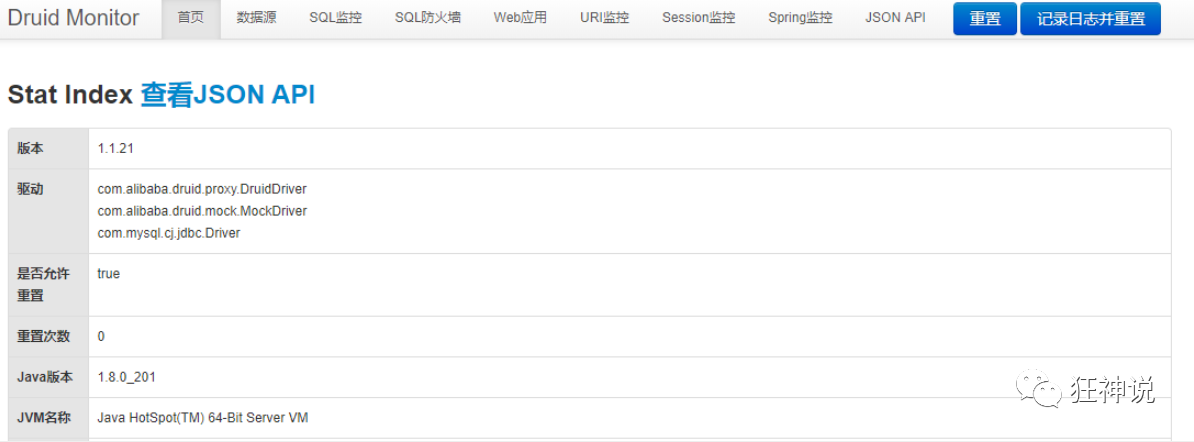
Configure Druid web monitoring filter
The function of this filter is to count all database information in web application requests, such as issued sql statements, sql execution time, request times, request url address, seesion monitoring, database table access times, etc.
//Configure the filter of web monitoring for Druid monitoring
//WebStatFilter: used to configure management association monitoring statistics between Web and Druid data sources
@Bean
public FilterRegistrationBean webStatFilter() {
    FilterRegistrationBean bean = new FilterRegistrationBean();
    bean.setFilter(new WebStatFilter());

    //exclusions: sets which requests are filtered and excluded so that statistics are not performed
    Map<String, String> initParams = new HashMap<>();
    initParams.put("exclusions", "*.js,*.css,/druid/*");
    bean.setInitParameters(initParams);

    //"/ *" means to filter all requests
    bean.setUrlPatterns(Arrays.asList("/*"));
    return bean;
}
After configuration, we can start to test!
Let's send an sql statement and take a look at the background message;

Test OK!
Spring boot integrates mybatis
Official documents: http://mybatis.org/spring-boot-starter/mybatis-spring-boot-autoconfigure/
Maven warehouse address: https://mvnrepository.com/artifact/org.mybatis.spring.boot/mybatis-spring-boot-starter/2.1.1
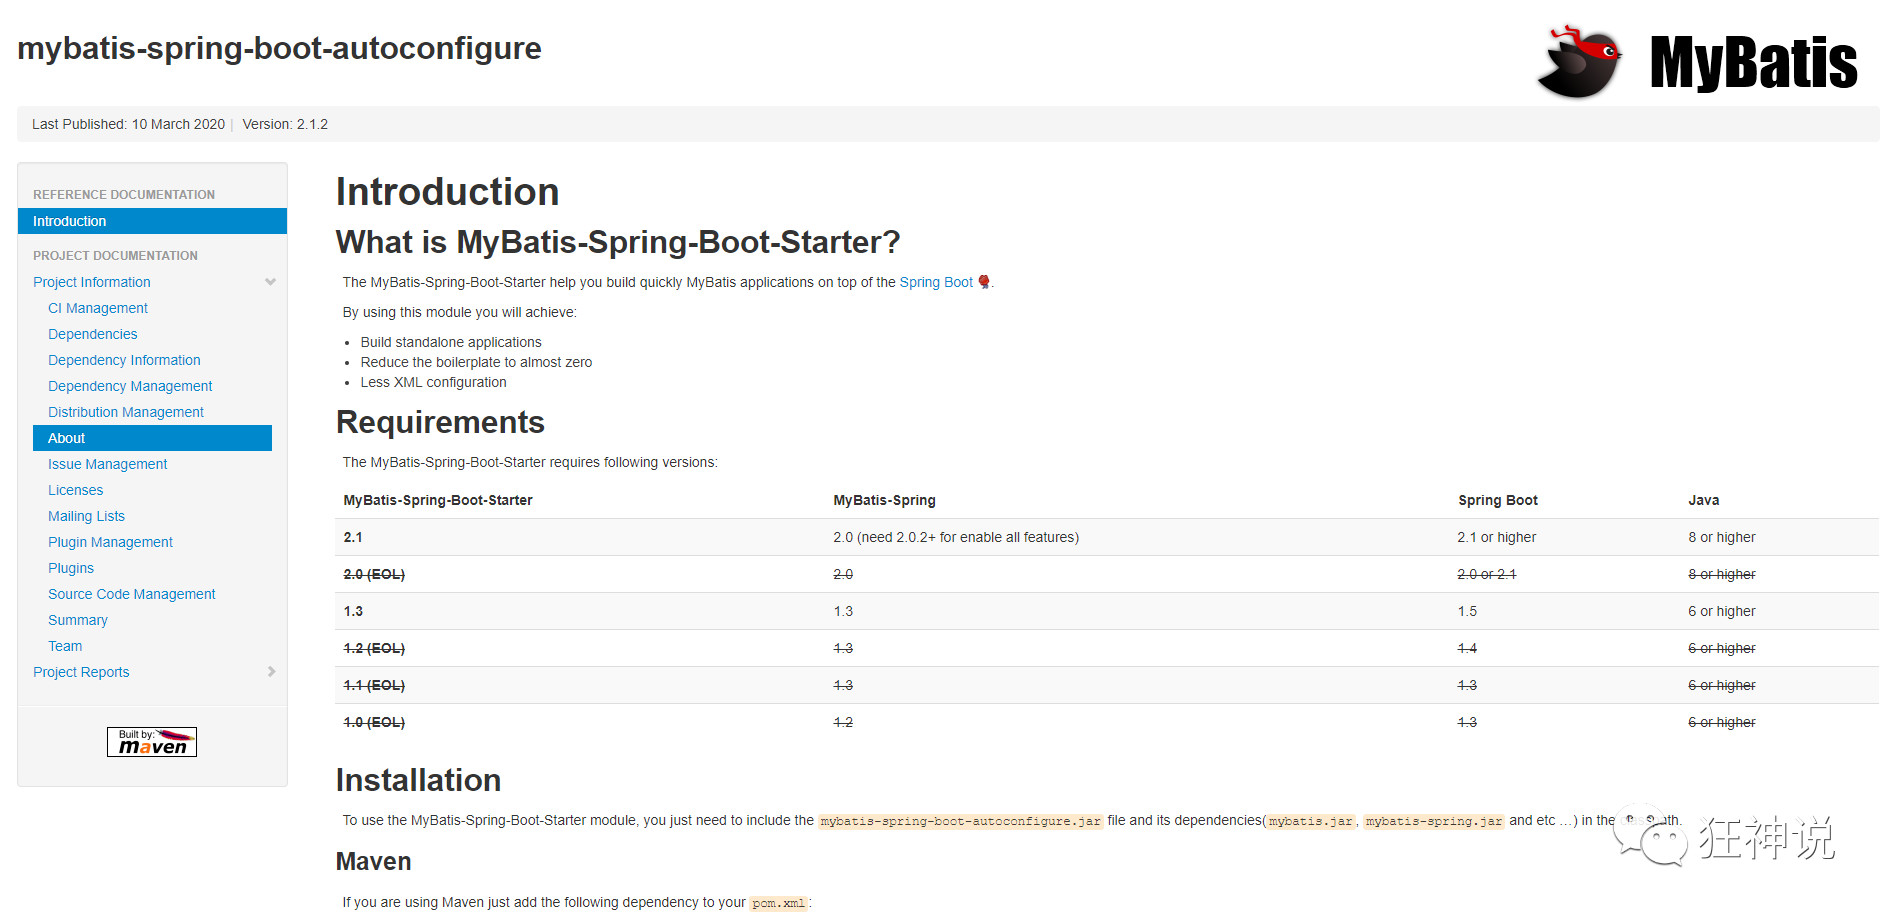
1. Import the dependencies required by mybatis
<!-- introduce myBatis,This is MyBatis Officially provided adapter Spring Boot Yes, not Spring Boot own-->
<dependency>
    <groupId>org.mybatis.spring.boot</groupId>
    <artifactId>mybatis-spring-boot-starter</artifactId>
    <version>2.1.0</version>
</dependency>
2. Configure database connection information
spring:
  datasource:
    username: root
    password: 123456
    #? serverTimezone=UTC resolves the error in the time zone
    url: jdbc:mysql://localhost:3306/springboot?serverTimezone=UTC&useUnicode=true&characterEncoding=utf-8
    driver-class-name: com.mysql.cj.jdbc.Driver
    type: com.alibaba.druid.pool.DruidDataSource

    #Spring Boot does not inject these attribute values by default and needs to bind itself
    #druid data source proprietary configuration
    initialSize: 5
    minIdle: 5
    maxActive: 20
    maxWait: 60000
    timeBetweenEvictionRunsMillis: 60000
    minEvictableIdleTimeMillis: 300000
    validationQuery: SELECT 1 FROM DUAL
    testWhileIdle: true
    testOnBorrow: false
    testOnReturn: false
    poolPreparedStatements: true

    #Configure filters for monitoring statistics interception, stat: monitoring statistics, log4j: logging, wall: defending sql injection
    #If allowed, an error occurs in Java lang.ClassNotFoundException: org. apache. log4j. Priority
    #Then import the log4j dependency. Maven address: https://mvnrepository.com/artifact/log4j/log4j
    filters: stat,wall,log4j
    maxPoolPreparedStatementPerConnectionSize: 20
    useGlobalDataSourceStat: true
    connectionProperties: druid.stat.mergeSql=true;druid.stat.slowSqlMillis=500
We use the default data source here; First test whether the connection is successful!
@RunWith(SpringRunner.class)
@SpringBootTest
public class SpringbootDemoMybatisApplicationTests {

    @Autowired
    DataSource dataSource;

    @Test
    public void contextLoads() throws SQLException {

        System.out.println("data source>>>>>>" + dataSource.getClass());
        Connection connection = dataSource.getConnection();
        System.out.println("connect>>>>>>>>>" + connection);
        System.out.println("Connection address>>>>>" + connection.getMetaData().getURL());
        connection.close();
    }
}
3. View the output results, and the database configuration is OK!
4. Create an entity class and import Lombok!
package com.kuang.mybatis.pojo;

public class User {

    private int id;
    private String name;
    private String pwd;

    public User() {
    }

    public User(int id, String name, String pwd) {
        this.id = id;
        this.name = name;
        this.pwd = pwd;
    }

    public int getId() {
        return id;
    }

    public void setId(int id) {
        this.id = id;
    }

    public String getName() {
        return name;
    }

    public void setName(String name) {
        this.name = name;
    }

    public String getPwd() {
        return pwd;
    }

    public void setPwd(String pwd) {
        this.pwd = pwd;
    }

    @Override
    public String toString() {
        return "User{" +
                "id=" + id +
                ", name='" + name + '\'' +
                ", pwd='" + pwd + '\'' +
                '}';
    }

}
5. Configure Mapper interface class
-
@Mapper's role
-
Indicates that this class is a Mapper of MyBatis, which is equivalent to the Mapper interface when Spring integrates MyBatis
- To hand over the DAO mapper to Spring for management
-
After the @ Mapper annotation is added, the interface will generate the corresponding implementation class at compile time
-
From mybatis3 The @ mapper annotation was added in 4.0 to stop writing mapper mapping files
-
@The Mapper annotation marks this interface as a mapping interface
-
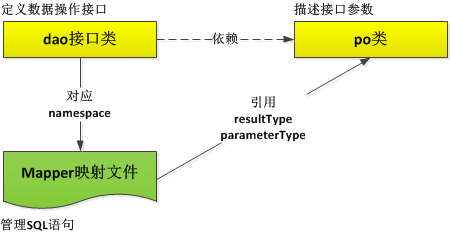
- @Use of Mapper and @ Repository
- All of them inject the interface layer of mybatis,
- The difference is that when using @ Repository, @ MapperScan needs to be added to the startup function for scanning, and when using @ MapperScan, @ Repository can also be written without the interface layer.
- @ Mapper can be used alone.
- @Repository is the annotation of spring, @ Mapper is the annotation of ibatis, @ MapperScan is the annotation of mybatis and spring integration.
package com.kuang.mybatis.pojo.mapper;

import com.kuang.mybatis.pojo.User;
import org.apache.ibatis.annotations.Mapper;
import org.springframework.stereotype.Repository;
import java.util.List;
//The core annotation cannot be lost. If @ Mapper does not have this, the automatic configuration is invalid. If @ Repository does not have this, it is not managed by spring

@Mapper//Indicates that this is a mapper class of mybatis: Dao; Specify that this is a mapper that operates the database
@Repository
public interface UserMapper {

    //Select all users
    List<User> selectUser();
    //Select user by id
    User selectUserById(int id);
    //Add a user
    int addUser(User user);
    //Modify a user
    int updateUser(User user);
    //Delete user by id
    int deleteUser(int id);

}
6. Mapper mapping file
<?xml version="1.0" encoding="UTF-8" ?>
<!DOCTYPE mapper
        PUBLIC "-//mybatis.org//DTD Mapper 3.0//EN"
        "http://mybatis.org/dtd/mybatis-3-mapper.dtd">

<mapper namespace="com.kuang.mybatis.pojo.mapper.UserMapper">

    <select id="selectUser" resultType="User">
    select * from user
  </select>

    <select id="selectUserById" resultType="User">
    select * from user where id = #{id}
</select>

    <insert id="addUser" parameterType="User">
    insert into user (id,name,pwd) values (#{id},#{name},#{pwd})
</insert>

    <update id="updateUser" parameterType="User">
    update user set name=#{name},pwd=#{pwd} where id = #{id}
</update>

    <delete id="deleteUser" parameterType="int">
    delete from user where id = #{id}
</delete>
</mapper>
7. SpringBoot integration!
In the past, when mybatis was not integrated with spring, the data source, transaction, account and password connected to the database were configured in the mybatis core configuration file
After mybatis is integrated with spring, the configuration of data sources, transactions, accounts and passwords connecting to the database will be managed by spring. Therefore, here we are completely ok even if we do not use the mybatis configuration file!
Now that you have provided the mapping configuration files for myBatis, it is natural to tell spring boot where these files are located
#Specify the core configuration file and Mapper mapping file for myBatis
mybatis.mapper-locations=classpath:mybatis/mapper/*.xml
# Note: the path of the corresponding entity class
mybatis.type-aliases-package=com.kuang.mybatis.pojo
It has been said that the official spring boot does not provide the starter of myBaits. It is the development package officially provided by myBatis to adapt the spring boot from POM It can also be seen from the dependent package name in the XML file that it does not start with spring boot;
Similarly, the two lines of configuration in the global configuration file above also start with mybatis instead of spring, which fully shows that these are officially provided by mybatis
Available from org mybatis. spring. boot. autoconfigure. View all configuration items in mybatisproperties
@ConfigurationProperties(
    prefix = "mybatis"
)
public class MybatisProperties {
    public static final String MYBATIS_PREFIX = "mybatis";
    private static final ResourcePatternResolver resourceResolver = new PathMatchingResourcePatternResolver();
    private String configLocation;
    private String[] mapperLocations;
    private String typeAliasesPackage;
    private Class<?> typeAliasesSuperType;
    private String typeHandlersPackage;
    private boolean checkConfigLocation = false;
    private ExecutorType executorType;
    private Class<? extends LanguageDriver> defaultScriptingLanguageDriver;
    private Properties configurationProperties;
    @NestedConfigurationProperty
    private Configuration configuration;
You can also check it directly Official documents
8. Write controller
maven configuration resource filtering problem
<resources>
    <resource>
        <directory>src/main/java</directory>
        <includes>
            <include>**/*.xml</include>
        </includes>
        <filtering>true</filtering>
    </resource>
</resources>
package com.kuang.mybatis.controller;

import com.kuang.mybatis.pojo.User;
import com.kuang.mybatis.pojo.mapper.UserMapper;

import org.springframework.beans.factory.annotation.Autowired;
import org.springframework.web.bind.annotation.GetMapping;
import org.springframework.web.bind.annotation.RestController;

import java.util.List;

@RestController
public class UserController {

    @Autowired
    private UserMapper userMapper;

    //Select all users
    @GetMapping("/selectUser")
    public String selectUser(){
        List<User> users = userMapper.selectUser();
        for (User user : users) {
            System.out.println(user);
        }

        return "ok";
    }
    //Select user by id
    @GetMapping("/selectUserById")
    public String selectUserById(){
        User user = userMapper.selectUserById(1);
        System.out.println(user);
        return "ok";
    }
    //Add a user
    @GetMapping("/addUser")
    public String addUser(){
        userMapper.addUser(new User(5,"A Mao","456789"));
        return "ok";
    }
    //Modify a user
    @GetMapping("/updateUser")
    public String updateUser(){
        userMapper.updateUser(new User(5,"A Mao","421319"));
        return "ok";
    }
    //Delete user by id
    @GetMapping("/deleteUser")
    public String deleteUser(){
        userMapper.deleteUser(5);
        return "ok";
    }

}
Run the test OK!
6 Spring Security
concept
-
Spring security is a security framework that provides declarative security protection for spring based applications.
-
Spring security provides a complete security solution that handles authentication and authorization at the web request level and method invocation level.
-
Because it is based on the spring framework, spring security makes full use of dependency injection and aspect oriented technology.
-
The declarative security access control function is provided for the application system, which reduces the work of writing a large number of duplicate codes for enterprise system security control.
-
Spring security addresses security issues from two perspectives
- Use the Filter in the Servlet specification to protect web requests and restrict URL level access.
- Spring security can use spring AOP to protect method calls -- with the help of object proxy and usage notification, it can ensure that only users with appropriate permissions can access the secured methods.
-
It has all the functions of shiro except that it can't be separated from Spring.
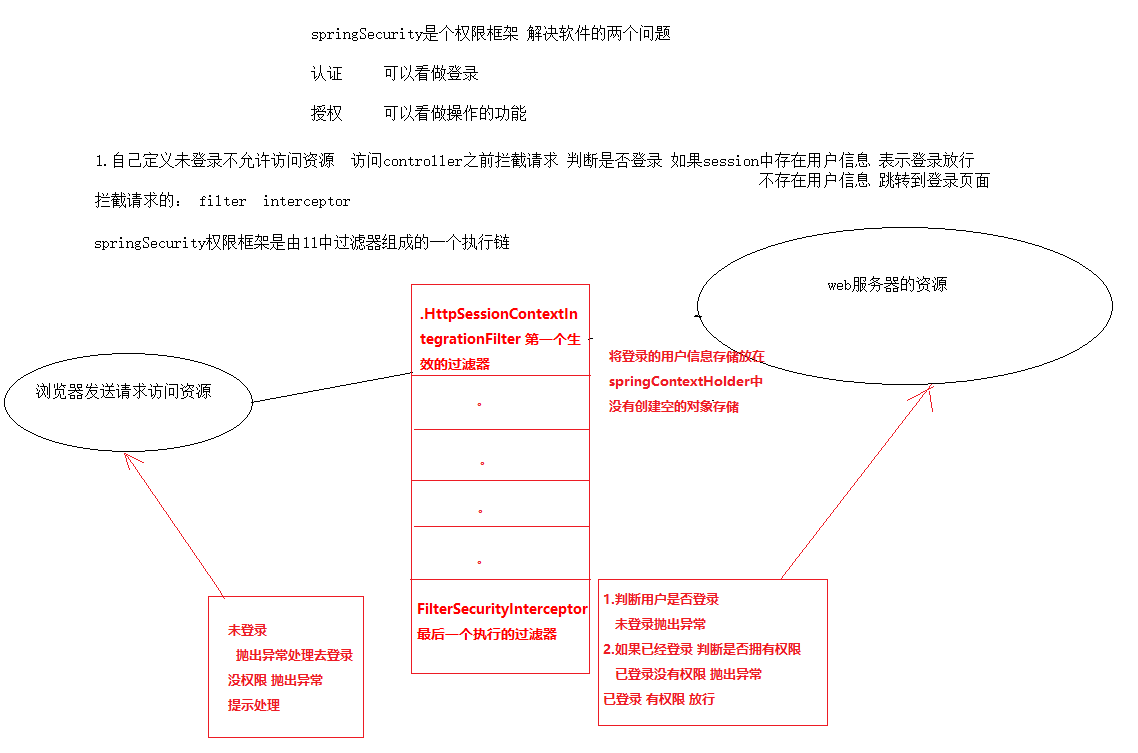
6.1 setting up spring security environment
Remember several classes:
-
WebSecurityConfigurerAdapter: custom Security policy
-
AuthenticationManagerBuilder: custom authentication policy
-
@Enable WebSecurity: enable WebSecurity mode
The two main goals of Spring Security are "authentication" and "authorization" (access control).
Import dependency
<dependency>
    <groupId>org.springframework.boot</groupId>
    <artifactId>spring-boot-starter-security</artifactId>
</dependency>

<dependency>
    <groupId>org.springframework.security</groupId>
    <artifactId>spring-security-web</artifactId>
</dependency>

<dependency>
    <groupId>org.thymeleaf</groupId>
    <artifactId>thymeleaf-spring5</artifactId>
</dependency>
<dependency>
    <groupId>org.thymeleaf.extras</groupId>
    <artifactId>thymeleaf-extras-java8time</artifactId>
</dependency>
6.2 user authentication and authorization
Routing control
@Controller
public class RouterController {
    @RequestMapping({"/","/index","/index.html"})
    public String index() {
        return "index";
    }

    @RequestMapping("/toLogin")
    public String toLogin() {
        return "/views/login";
    }

    @RequestMapping("/level1/{id}")
    private String level1(@PathVariable("id") int id) {
        return "/views/level1/" + id;
    }

    @RequestMapping("/level2/{id}")
    private String level2(@PathVariable("id") int id) {
        return "/views/level2/" + id;
    }

    @RequestMapping("/level3/{id}")
    private String level3(@PathVariable("id") int id) {
        return "/views/level3/" + id;
    }
}
So far, our WebSecurityConfig only contains information about how to authenticate users. How does Spring Security know that we require all users to be authenticated? How does Spring Security know that we want to support form based authentication? The reason is that WebSecurityConfigurerAdapter provides a default configuration in the configure(HttpSecurity http) method
@EnableWebSecurity
public class SecurityConfig extends WebSecurityConfigurerAdapter {
    @Override
    protected void configure(HttpSecurity http) throws Exception {
        //The home page can be accessed by everyone, and the function page can only be accessed by the corresponding authorized person
        http
            .authorizeRequests().antMatchers("/").permitAll()
            .antMatchers("/level1/**").hasRole("vip1")
            .antMatchers("/level2/**").hasRole("vip2")
            .antMatchers("/level3/**").hasRole("vip3");

        //If you don't have permission, you will default to the login page
        http.formLogin();
    }
}
The above specifies the pages that can be accessed by roles at all levels. Run the test
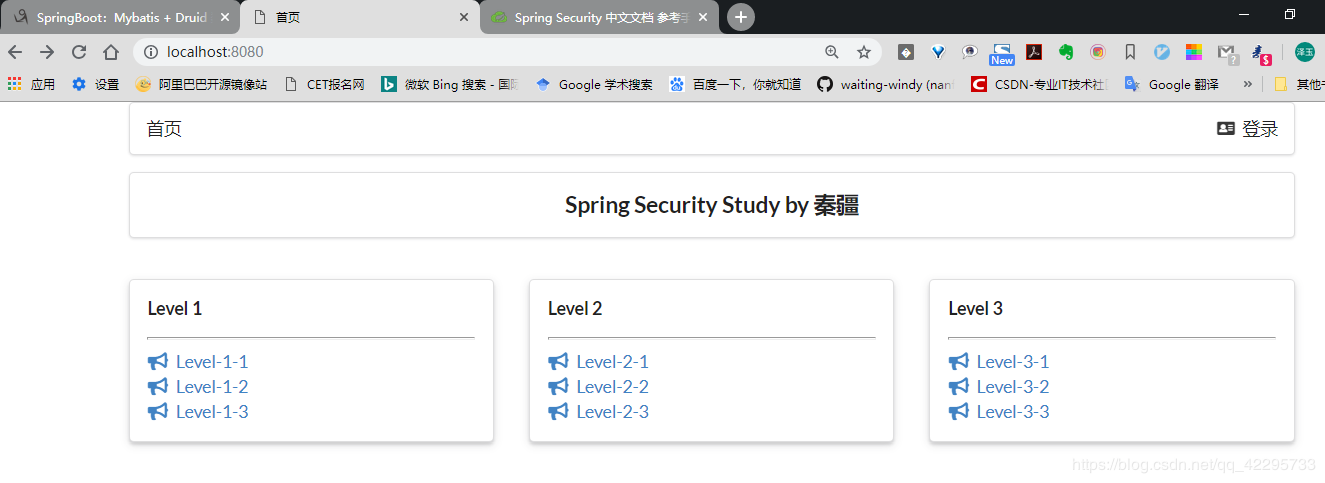
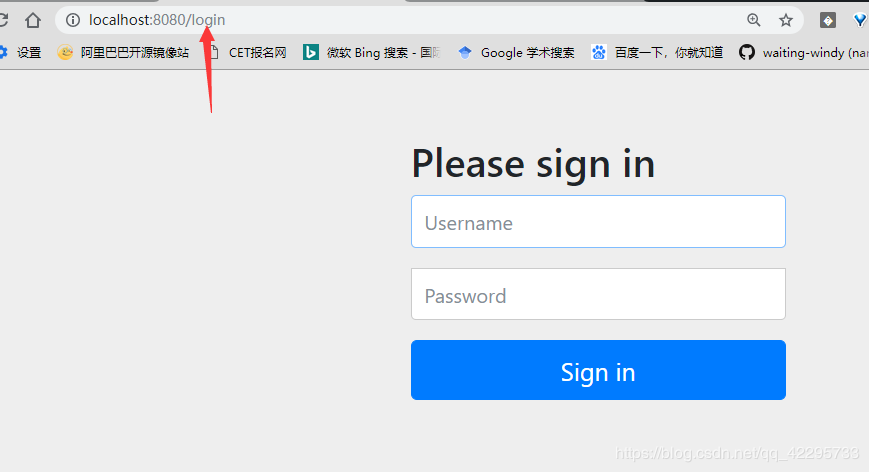
6.3 cancellation and authority control
Before assigning a role, click any page and automatically add / login after the url. This is when our configuration takes effect
Now continue to rewrite a method, protected void configure(AuthenticationManagerBuilder auth)
@Override
protected void configure(AuthenticationManagerBuilder auth) throws Exception {
    //Here, the memory is used to verify the user account and password, or the database can be used
    auth.inMemoryAuthentication()//Assign role permissions to each user
            .withUser("lizeyu").password("111111").roles("vip2", "vip3")
            .and()
            .withUser("root").password("111111").roles("vip1", "vip2", "vip3")
            .and()
            .withUser("guest").password("111111").roles("vip1");
}
An error will be found after running
Login with ordinary user

Remind us that the password needs to be encrypted. The complete code is as follows
//Certification: springboot 2.1 X can be used directly
//Password code: PasswordEncoder()
//In spring security 5.0 +, many encryption methods have been added
@Override
protected void configure(AuthenticationManagerBuilder auth) throws Exception {
    auth.inMemoryAuthentication().passwordEncoder(new BCryptPasswordEncoder())
            .withUser("lizeyu").password(new BCryptPasswordEncoder().encode("111111")).roles("vip2", "vip3")
            .and()
            .withUser("root").password(new BCryptPasswordEncoder().encode("111111")).roles("vip1", "vip2", "vip3")
            .and()
            .withUser("guest").password(new BCryptPasswordEncoder().encode("111111")).roles("vip1");
}
Again, the normal user logs in and accesses the directory under level 1. It can be seen from the above that it is the vip1 role

In this way, OJBK
Add logoff function
//cancellation
http.logout();
Using semantic UI as a template
<link href="https://cdn.bootcss.com/semantic-ui/2.4.1/semantic.min.css" rel="stylesheet">

<!--cancellation-->
    <a class="item" th:href="@{/logout}">
       <i class="sign-out icon"></i>cancellation
    </a>
test

Logout succeeded, OJBK
If we want to log out and jump to the home page:
//Log off, turn on the log off function and jump to the home page
http.logout().logoutSuccessUrl("/");
In order to enable users with different permissions to display only the pages with their own permissions, we introduce the package integrated with thymeleaf and security
<dependency>
    <groupId>org.thymeleaf.extras</groupId>
    <artifactId>thymeleaf-extras-springsecurity4</artifactId>
    <version>3.0.4.RELEASE</version>
</dependency>
Import sec namespace
xmlns:sec="http://www.thymeleaf.org/thymeleaf-extras-springsecurity4"
Only the login button is displayed when you are not logged in, and the user name and logout button are displayed when you log in successfully
<!--If you are not logged in-->
<!--Authenticated Indicates that the user has been authenticated-->
<div sec:authorize="!isAuthenticated()">
    <!--Not logged in-->
    <a class="item" th:href="@{/toLogin}">
        <i class="address card icon"></i> Sign in
    </a>
</div>

<!--If you are already logged in-->
<div sec:authorize="isAuthenticated()">
    <a class="item">
        user name:<span sec:authentication="name"></span>
    </a>
</div>

<div sec:authorize="isAuthenticated()">
    <!--cancellation-->
    <a class="item" th:href="@{/logout}">
        <i class="sign-out icon"></i>cancellation
    </a>
</div>

At this time, we will find a problem. After we log off, we cannot return to the home page and enter a 404 page. The possible reason is that the submission request we use is get. security will think that the plaintext transmission is unsafe and automatically screen it for us. At this time, we can't think that our code is wrong, but there is a configuration problem

//Turn off to prevent website attacks
http.csrf().disable();
OJBK
Implement different pages for users with different permissions
sec:authorize="hasRole('vip2')" <!--Just add it to the display label-->
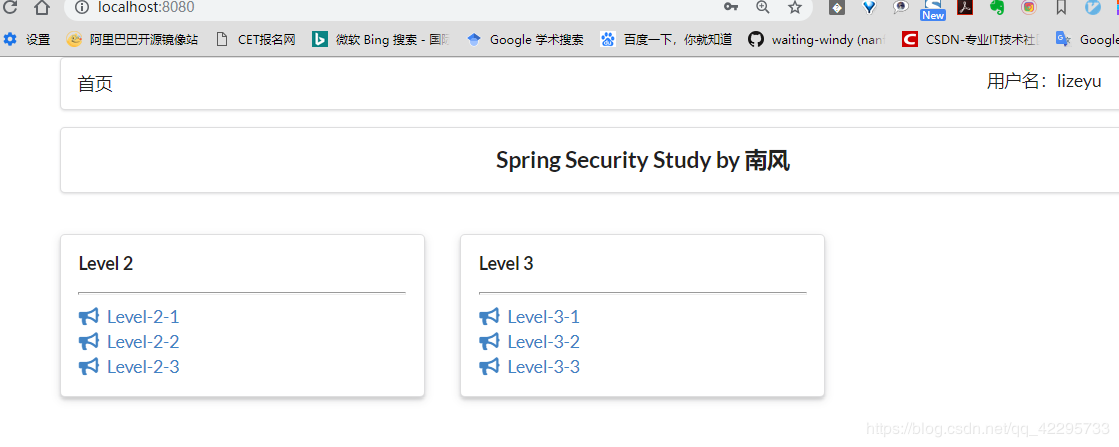
In this way, our permission control is completed
6.4 remember me and home page customization
Remember my function implementation
//Remember my function implementation
http.rememberMe();
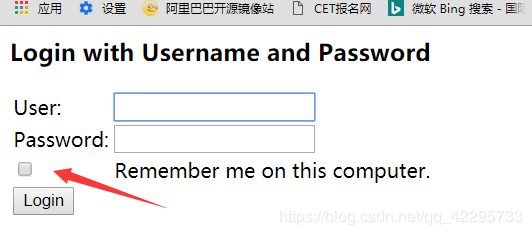
Customize our landing page
//Custom landing page
http.formLogin().loginPage("/toLogin");
ok!
Add the remember me button in the user-defined login interface
//Customize the name of my tag
http.rememberMe().rememberMeParameter("remember");
<div class="field">
   <input type="checkbox" name="remember-me">Remember me
</div>
If you don't customize and remember my parameters, you can see from the source code that the default parameter name is remember me, which can automatically help us set my parameters in the cookie in the background
7 Shiro
concept
-
At present, more and more people use Apache Shiro because it is quite simple, compared with Spring
Security may not be as powerful as Spring Security, but it may not need so complex things in actual work, so it is small and simple to use
Shiro is enough. -
Apache Shiro is a powerful and easy-to-use Java security framework,
-
Shiro is an open source project of Apache, formerly known as the JSecurity project, which began in early 2003.
-
Compared with Spring Security, shiro is small, simple and easy to use.
-
The operation granularity of shiro permission can be controlled on the path and button, and the data granularity is realized through sql.
-
Shrio is simple enough. As for OAuth, the unified login function between OpenID sites,
-
Nowadays, many single sign on have been realized through cookies. Therefore, Shiro is fully competent for the safety certification control of ordinary projects.
-
With Shiro's easy to understand API, you can quickly and easily access any application, from the smallest mobile application to the largest network and enterprise applications
-
Shiro can provide security for any application - from command-line applications and mobile applications to large-scale network and enterprise applications.
-
shiro solves the four elements of application security: (main functions)
- Authentication - user identification, often referred to as user "login";
- Authorization - access control;
- Password encryption - protect or hide data from peeping;
- Session management - per user related time sensitive state.
- At the same time, Shiro also supports some auxiliary features, such as Web application security, unit testing and multithreading. Their existence reinforces the four elements mentioned above.
Shiro advantage
1. Ease of use - ease of use is the ultimate goal of this project. Application security can be very confusing, frustrating, and considered a "necessary evil". If it can be simplified so that novices can get started quickly, it will no longer be a pain.
2. Universality - no other security framework can achieve the breadth claimed by Apache Shiro. It can provide "one-stop" services for your security needs.
3. Flexibility - Apache Shiro can work in any application environment. Although it works in Web, EJB and IoC environments, it does not depend on these environments. Shiro neither imposes any specifications nor requires too many dependencies.
4. Web capabilities - Apache Shiro's support for web applications is amazing. It allows you to create flexible security policies based on application URL s and web protocols (such as REST). At the same time, it also provides a set of JSP tag library to control page output.
5. Pluggable - Shiro's clean API and design patterns make it easy to integrate with many other frameworks and applications. You will see that Shiro can integrate seamlessly with third-party frameworks such as Spring, Grails, Wicket, Tapestry, Mule, Apache Camel and Vaadin.
6. Support - Apache Shiro is a member of the Apache Software Foundation, a recognized organization that acts to maximize the interests of the community. Project development and user groups have friendly members who are ready to help.
Shiro features
1. Easy to understand Java Security API;
2. Simple identity authentication (login) and support multiple data sources (LDAP, JDBC, Kerberos, active directory, etc.);
3. Simple signing authority (access control) for roles, supporting fine-grained signing authority;
4. Support L1 cache to improve application performance;
5. Built in POJO based enterprise session management, suitable for Web and non Web environments;
6. Heterogeneous client session access;
7. Very simple encryption API;
8. It can run independently without binding with any framework or container.
function
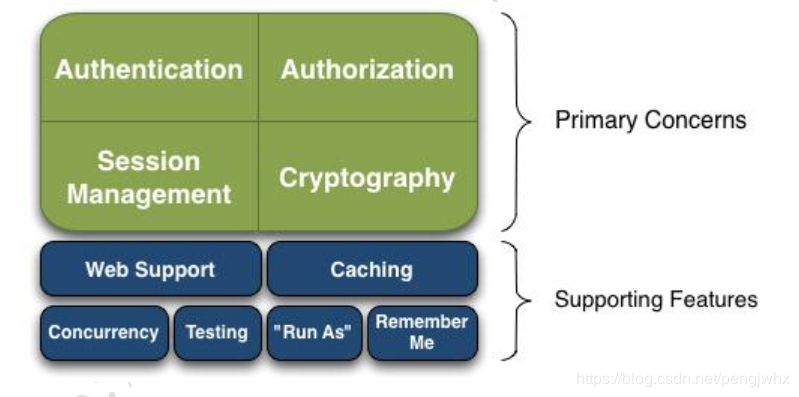
- Authentication: identity authentication / login to verify whether the user has the corresponding identity;
- Authorization: authorization, i.e. permission verification, which verifies whether an authenticated user has a certain permission; For judgment
Whether a user can do something, such as verifying whether a user has a role. Or fine-grained validation of a
Whether the user has certain permissions on a resource; - Session Manager: session management, that is, after a user logs in, it is a session, and all its messages are saved before exiting
All messages are in the conversation; The session can be in an ordinary Java se environment or in a Web environment; - Cryptography: encryption to protect the security of data. For example, the password is encrypted and stored in the database instead of plaintext;
- Web Support: Web Support, which can be easily integrated into the web environment;
- Caching: caching. For example, after a user logs in, the user information and roles / permissions do not need to be checked every time, which can improve efficiency;
- Concurrency: shiro supports concurrent verification of multithreaded applications, that is, if you start another thread in one thread, you can
Automatically propagate permissions to the past; - Testing: provide test support;
- Run As: allow one user to access as another user (if they allow it);
- Remember Me: Remember Me, this is a very common function, that is, after logging in once, you don't need to log in next time
Remember that Shiro will not maintain users and permissions; These need to be designed / provided by ourselves; Then pass
The corresponding interface can be injected into Shiro.
Shiro official documents
View shiro framework from the outside (understanding of shiro implementation principle)
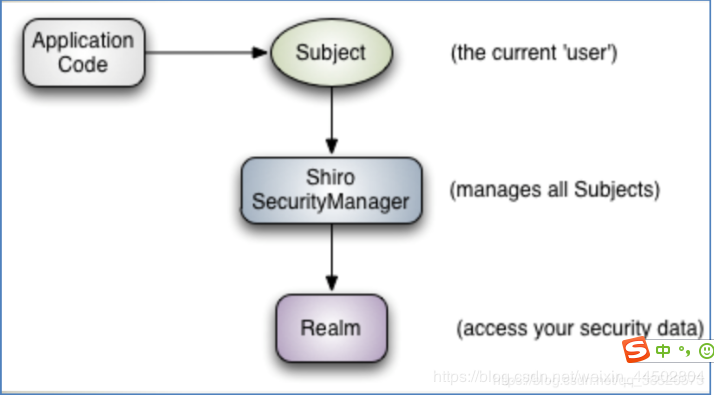
The object that the application code directly interacts with is Subject, that is, the core of Shiro's external API is Subject
In other words, for us, the simplest Shiro application:
The application code is authenticated and authorized through the Subject, which is delegated to the SecurityManager; We need to inject real into Shiro's SecurityManager so that the SecurityManager can obtain legal users and their permissions for judgment.
| api | explain |
|---|---|
| Subject | Principal, representing the current 'user'. This user is not necessarily a specific person. Anything interacting with the current application is a Subject, such as web crawler, robot, etc; An abstract concept; All subjects are bound to the SecurityManager, and all interactions with subjects are delegated to the SecurityManager; You can think of Subject as a facade; The SecurityManager is the actual executor; Represents the main body interacting with the system. Generally, we understand it as the user. It contains authorization information related to user security authentication. |
| Shiro SecurityManager | Safety manager; That is, all security related operations will interact with the SecurityManager, which manages all subjects; It can be seen that it is the core of Shiro. It is responsible for interacting with other components introduced later. It can be regarded as the dispatcherservlet front-end controller; Manage security operations for all users. It is the core of Shiro framework. Shiro manages internal component instances through SecurityManager and provides various services for security management. The final DefaultSecurityManager overrides the rest of the securitymanager functionality. |
| Realm | Domain, Shiro obtains security data (such as users, roles and permissions) from real, that is, if SecurityManager wants to verify user identity, it needs to obtain corresponding users from real for comparison to determine whether the user identity is legal; You also need to get the user's corresponding roles / permissions from Realm to verify whether the user can operate; You can think of Realm as a DataSource, that is, a secure data source. It acts as a "bridge" or "connector" between Shiro and application security data. That is, when performing authentication (login) and authorization (access control) authentication on users, Shiro will query relevant users and their permission information in real. Common Realm implementations include JDBC Realm, IniRealm, and PropertiesRealm, In the actual development, the user's authentication information is usually stored in the database. We can query the database authentication data through JDBC real, Or you can obtain database authentication data by inheriting the authoringrealm custom Realm (JDBC Realm also inherits the authoringrealm) |
Internal structure framework (shiro's architecture understanding)
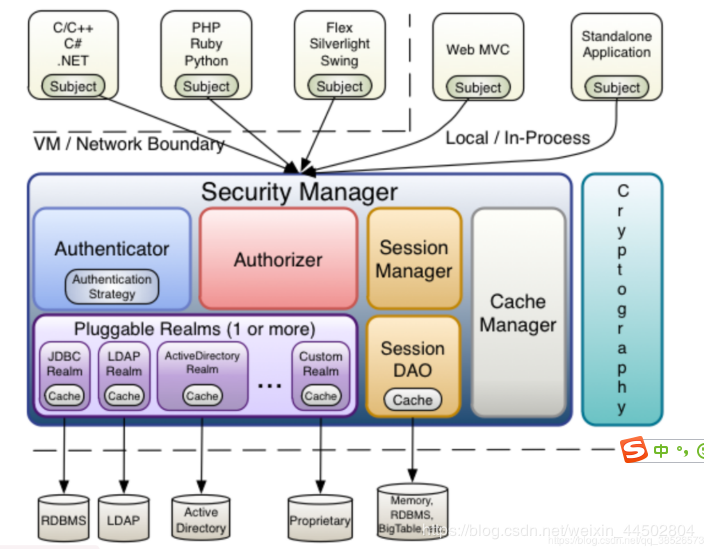
assembly
- Subject: subject. It can be seen that the subject can be any "user" who can interact with the application;
- Security Manager: equivalent to dispatcher servlet in spring MVC or in struts 2
- FilterDispatcher; It's Shiro's heart; All specific interactions are controlled through the SecurityManager; It manages all subjects, and is responsible for authentication and authorization, session and cache management.
- Authenticator: authenticator, which is responsible for principal authentication. This is an extension point. If users think Shiro's default is not good, they can customize the implementation; It requires Authentication Strategy, that is, when the user authentication is passed;
- Authorizer: authorizer or access controller, which is used to determine whether the subject has permission to perform corresponding operations; That is, it controls which functions users can access in the application;
- Realm: there can be one or more realms, which can be considered as the data source of security entity, that is, the data source used to obtain security entity; It can be implemented by JDBC, LDAP or memory; Provided by the user; Note: Shiro does not know where your users / permissions are stored and in what format; Therefore, we generally need to implement our own realm in applications;
- SessionManager: if you have written servlets, you should know the concept of session. Session needs someone to manage its life cycle. This component is SessionManager; Shiro can be used not only in the Web environment, but also in ordinary JavaSE environment, EJB and other environments; In all, Shiro abstracts a session of its own to manage the data interaction between the subject and the application; In this case, for example, when we used it in the Web environment, it was a Web server at the beginning; Then I went to an EJB server; At this time, I want to put the session data of the two servers in one place,
At this time, you can implement your own distributed session (such as putting data on the Memcached server); - SessionDAO: DAO has been used by everyone. Data access objects and CRUD for sessions. For example, if we want to save sessions to the database, we can implement our own SessionDAO and write to the database through JDBC; For example, if you want to put a Session into Memcached, you can implement your own Memcached SessionDAO; In addition, in SessionDAO, Cache can be used for caching to improve performance;
- CacheManager: cache controller to manage the cache of users, roles, permissions, etc; Because these data are basic
There are few changes on the cache. Putting it in the cache can improve the performance of access - Cryptography: password module. Shiro improves some common encryption components, such as password encryption
Description of common words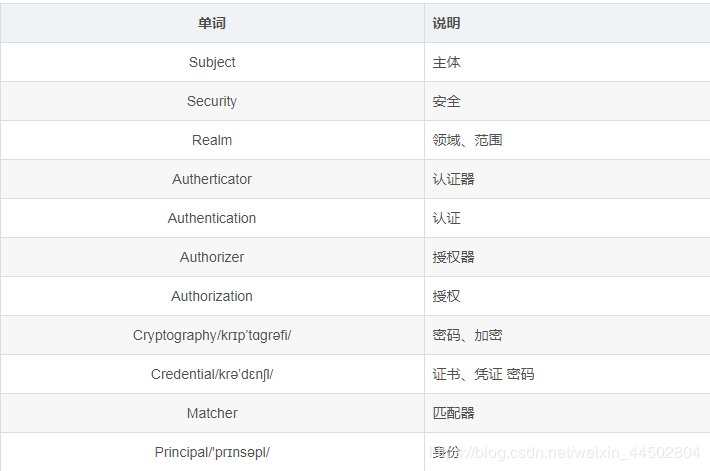
Shiro. In Shiro Ini Description:

(1) main
Provides the configuration of the root object securityManager and its dependent objects
#create object
securityManager=org.apache.shiro.mgt.DefaultSecurityManager
Its constructor must be a public null parameter constructor to create the corresponding instance through reflection.
1. Object name = fully qualified class name, which is equivalent to calling the public parameterless constructor to create an object
2. Object name Property name = value is equivalent to calling setter method to set constant value
3. Object name Property name = $object reference is equivalent to calling setter method to set object reference
(2) users
It provides the configuration of users / passwords and their roles. User name = password, role 1 and role 2
username=password,role1,role2
For example, configure the user name / password and its role. The format is "user name = password, role 1, role 2". The role part can be omitted. For example:
[users]
zhang=123,role1,role2
wang=123
(3) roles
It provides the configuration of the relationship between roles and permissions. Role = permission 1, permission 2, role1 = permission1, permission2
For example, configure the relationship between roles and permissions. The format is: "role = permission 1, permission 2"; For example:
[roles]
role1=user:create,user:update
role2=*
(4) urls
It is used for web and provides configuration related to web url interception. url = interceptor [parameter], interceptor
/index.html = anon
/admin/** = authc, roles[admin],perms["permission1"]
7.1 shiro construction environment
0. Database design
1,sys_menu
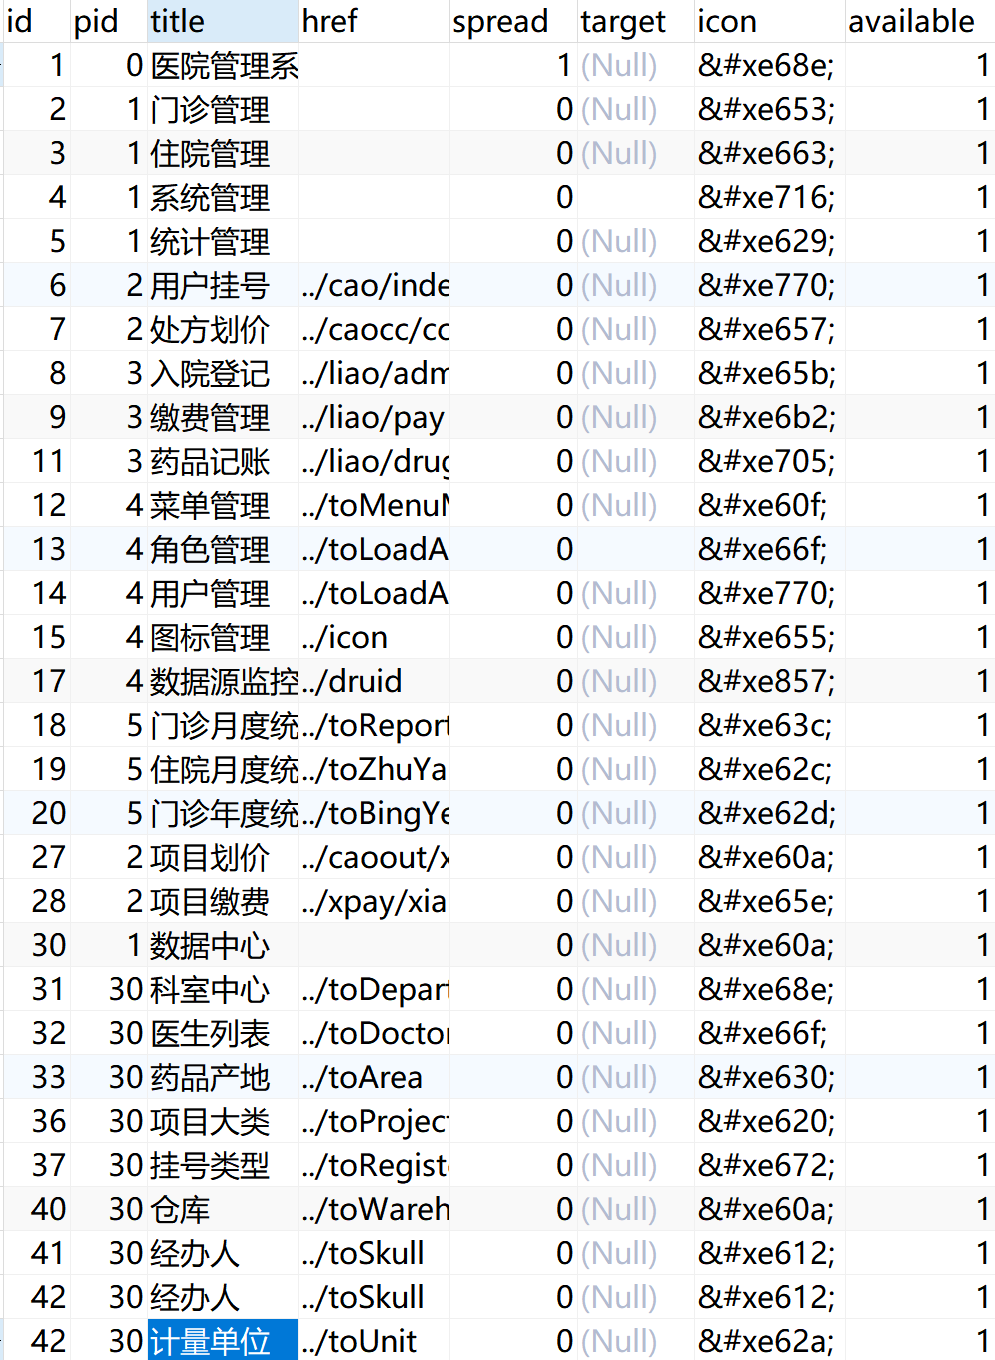
2,sys_role

3,sys_role_menu

4,sys_user

5,sys_role_user
1. Add dependency
<dependencies>
  <dependency>
	<groupId>org.apache.shiro</groupId>
	<artifactId>shiro-core</artifactId>
	<version>1.1.0</version>
</dependency>
<dependency>
	<groupId>org.slf4j</groupId>
	<artifactId>slf4j-simple</artifactId>
	<version>1.6.1</version>
	<scope>test</scope>
</dependency>

<dependency>
	<groupId>junit</groupId>
	<artifactId>junit</artifactId>
	<version>4.12</version>
	<scope>test</scope>
</dependency>
<dependency>
	<groupId>commons-logging</groupId>
	<artifactId>commons-logging</artifactId>
	<version>1.2</version>
</dependency>
</dependencies>
2. Add Shiro INI file
[users]
root=123456
# The account number is root and the password is 123456
3. Authentication operation
import org.apache.shiro.SecurityUtils;
import org.apache.shiro.authc.AuthenticationToken;
import org.apache.shiro.authc.IncorrectCredentialsException;
import org.apache.shiro.authc.UnknownAccountException;
import org.apache.shiro.authc.UsernamePasswordToken;
import org.apache.shiro.config.IniSecurityManagerFactory;
import org.apache.shiro.mgt.SecurityManager;
import org.apache.shiro.subject.Subject;
import org.apache.shiro.util.Factory;

/**
 * @author Administrator
 *shiro The first introductory case
 */
public class HelloTest {
	public static void main(String[] args) {
		//1. Load the configuration file to obtain the Factory object
		Factory<SecurityManager> factory=new IniSecurityManagerFactory("classpath:shiro.ini");
		//2. Get SecurityManager object
		SecurityManager securityManager =factory.getInstance();
		//3. Add SecurityManager to the system
		SecurityUtils.setSecurityManager(securityManager);
		//4. Obtain Subject object through SecurityManager
		Subject subject=SecurityUtils.getSubject();
		//The account password is the data submitted by the client
		AuthenticationToken token=new UsernamePasswordToken("root","123456");
		//5. Realize authentication operation
		try{
			subject.login(token);
			System.out.println("Authentication successful");
		}catch(UnknownAccountException e){
			System.out.println("Account number input error.,,,");
		}catch (IncorrectCredentialsException e) {
			System.out.println("Wrong password...");
		}
	}
}
4. Realize

7.2 Shiro's Subject analysis
Subject is described by Shiro as a subject. For web applications, it can be simply understood as a user.
Here we will elaborate an important concept of Shiro design, that is, the construction of security system based on subject. Quote:
When considering application security, the most common question you ask may be "who is the current user?" Or "the current user is allowed to do X Are you sure? ". When we write code or design user interfaces, it is common to ask ourselves these questions: applications are usually built based on user stories, and you want the function description (and security) to be based on each user. Therefore, for us, the most natural way to consider application security is based on the current user. Shiro of API Use it Subject The concept fundamentally reflects this way of thinking.
In the application, we can get the user principal of the current operation anywhere:
import org.apache.shiro.subject.Subject;
import org.apache.shiro.SecurityUtils;
...
Subject currentUser = SecurityUtils.getSubject();
After obtaining the Subject, we can perform most security operations on it through this object: login, logout, access session, perform authorization check, etc.
Shiro's api is very intuitive. It reflects the natural trend that developers think about security control "every user".
7.3 SpringBoot integration Shiro
1. Shiro's configuration class
2. Custom Realm
Through the above, we found that only defining the data information in the ini file is very incompatible with our actual development environment, so we hope to define Realm ourselves.
1. Implementation of custom Realm
Create a java file, inherit the AuthorizingRealm class, and override two abstract methods:
public class SecurityRealm  extends AuthorizingRealm{

	/**
	 * Method of authentication
	 * It is the UserPassWoldToken object defined in the test code: there is the account password information that we save to be verified
	 */
	@Override
	protected AuthenticationInfo doGetAuthenticationInfo(AuthenticationToken token) throws AuthenticationException {
		UsernamePasswordToken t=(UsernamePasswordToken) token;
		//Get login account
		String username=t.getUsername();
		System.out.println("Login account:"+username);
		//Query the corresponding records of the account in the database through jdbc
		if(!"root".equals(username)){
			//Account does not exist
			return null;
		}
		//The password queried in the database is 123456
		String password="123456";
		//Identity information (account or object) password realmname (user defined)
		return new SimpleAuthenticationInfo(username,password,"tang");
	}

	/**
	 * Authorization method
	 */
	@Override
	protected AuthorizationInfo doGetAuthorizationInfo(PrincipalCollection arg0) {
		// TODO Auto-generated method stub
		return null;
	}
}
| Method name | explain |
|---|---|
| doGetAuthentictionInfo | Method for completing account authentication |
| doGetAuthorizationInfo | Method for completing user authorization |
2. Configure ini XML file:
[main]
#Custom realm
customRealm=com.sxt.realm.SecurityRealm
#Set realm to securityManager
securityManager.realms=$customRealm
3. Test (the code is the same as above)
//shiro's first introductory case
public class HelloTest {
	public static void main(String[] args) {
		//1. Load the configuration file to obtain the Factory object
		Factory<SecurityManager> factory=new IniSecurityManagerFactory("classpath:shiro.ini");
		//2. Get SecurityManager object
		SecurityManager securityManager =factory.getInstance();
		//3. Add SecurityManager to the system
		SecurityUtils.setSecurityManager(securityManager);
		//4. Obtain Subject object through SecurityManager
		Subject subject=SecurityUtils.getSubject();
-----------------------------------------------------------------------------------
		//The account password is the data submitted by the client
		AuthenticationToken token=new UsernamePasswordToken("root","123456");
		//5. Realize authentication operation
		try{
			subject.login(token);
			System.out.println("Authentication successful");
		}catch(UnknownAccountException e){
			System.out.println("Account number input error.,,,");
		}catch (IncorrectCredentialsException e) {
			System.out.println("Wrong password...");
		}
	}
}

Principle analysis
Why inherit authoringrealm?
By analyzing the authentication process, we find that the core code in the authentication process is:
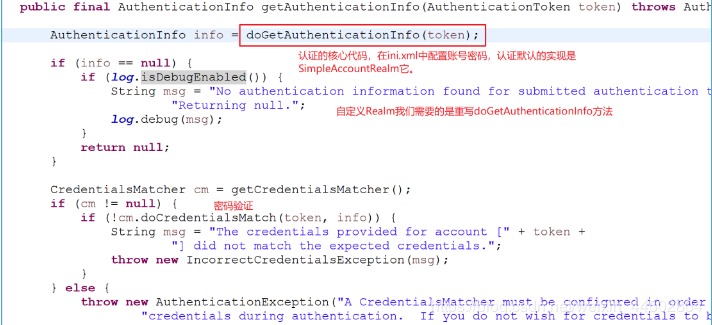
The core method is doGetAuthenticationInfo(token)
In the structure of Realm
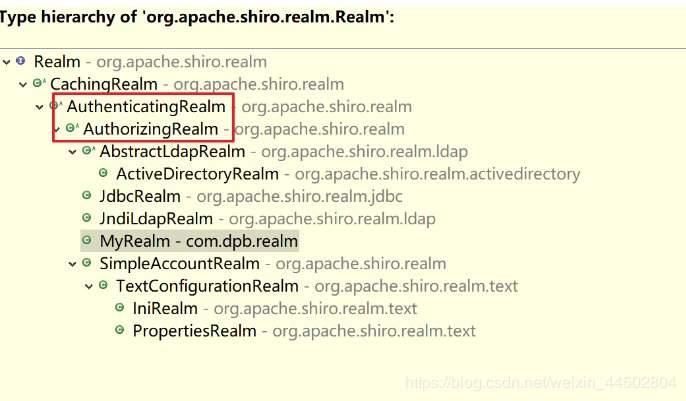
- Both authorizing realm and authenticating realm provide abstract methods with doGetAuthenticationInfo(token).
- However, there are too many abstract methods to rewrite in AuthenticatingRealm, and AuthorizingRealm only needs to rewrite two methods,
- And these two methods are what we need to use. Therefore, you choose to inherit the AuthorizingRealm
When was the custom Realm called?
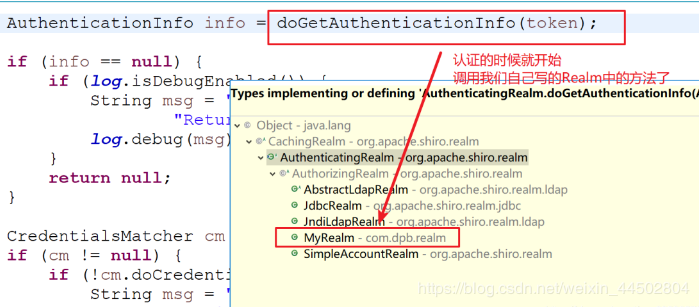
When is password verification performed?
Note: only account authentication is completed in the custom Realm. Password authentication is still completed in authenticating Realm, but we have set the password in custom Realm.

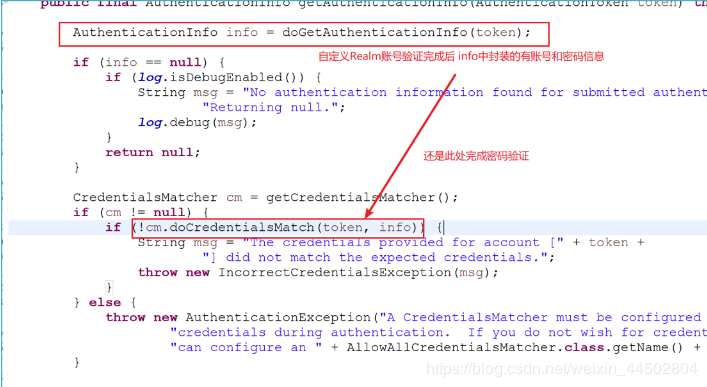

7.4 Shiro realizes login interception
public String testShiroLogin(HttpServletRequest request) {
    Subject subject = SecurityUtils.getSubject();
    String username = request.getParameter("username");
    String password = request.getParameter("password");
    UsernamePasswordToken upt = new UsernamePasswordToken(username, password);
    subject.login(upt);
    return "success";
}
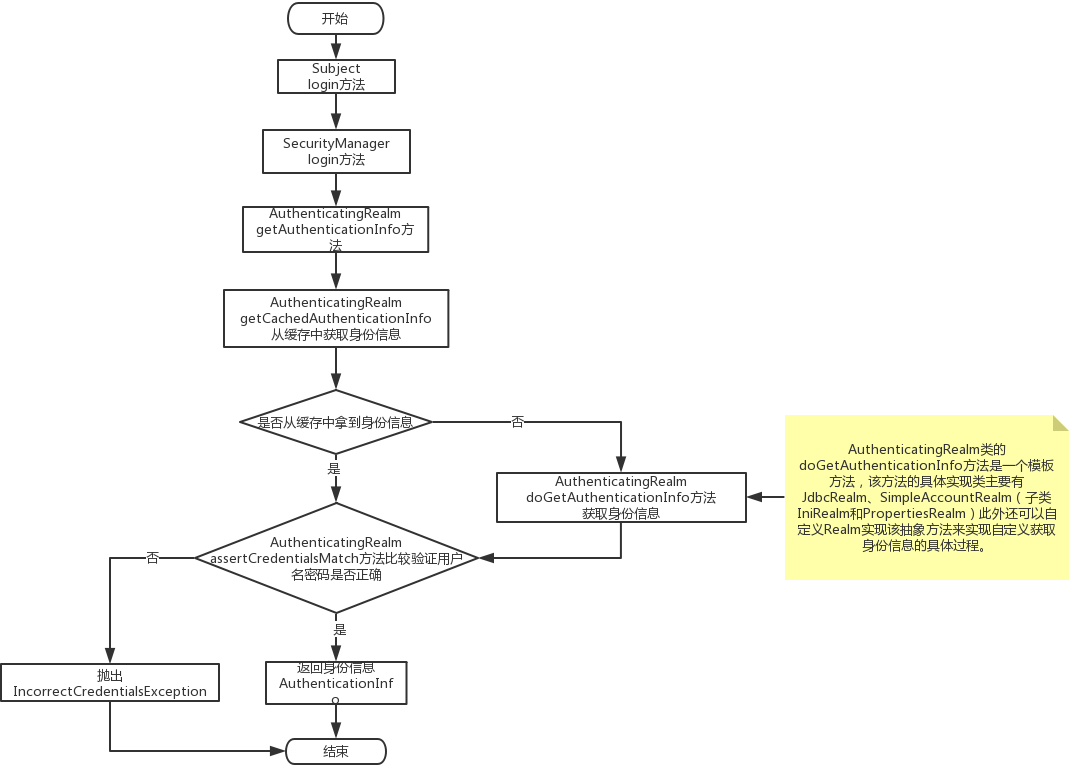
7.5 Shiro realizes user authentication
Although some arbitrary, but the general web application authentication is the login function. In other words, when users use the application for authentication, they are proving that they are the person they say.
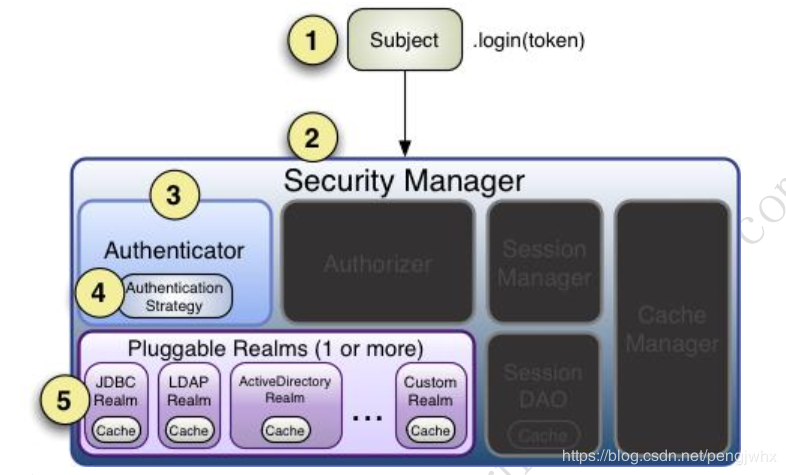
- This is a typical three-step process:
1,Collect user identity information and become a party( principal),And supporting proof of identity, called certificate( Credential).
2,Submit the parties and certificates to the system.
3,If the submitted certificate matches the user identity (party) expected by the system, the user is considered authenticated, otherwise it is considered unauthenticated.
@Test
public void testHelloworld() {
    //1. Get the SecurityManager factory. Here, initialize the SecurityManager using the Ini configuration file
    Factory<org.apache.shiro.mgt.SecurityManager> factory =
    new IniSecurityManagerFactory("classpath:shiro.ini");
    //2. Get the SecurityManager instance and bind it to SecurityUtils
    org.apache.shiro.mgt.SecurityManager securityManager = factory.getInstance();
    SecurityUtils.setSecurityManager(securityManager);
    //3. Get the Subject and create a user name / password authentication Token (i.e. user identity / certificate)
    Subject subject = SecurityUtils.getSubject();
    // UsernamePasswordToken inheritance
    UsernamePasswordToken token = new UsernamePasswordToken("zhang", "123");
    try {
    //4. Login, i.e. authentication
    subject.login(token);
    } catch (AuthenticationException e) {
    //5. Authentication failed
    }
    Assert.assertEquals(true, subject.isAuthenticated()); //Assert that the user is logged in
    //6. Exit
    subject.logout();
}
try {
    currentUser.login(token);
} catch (IncorrectCredentialsException ice) {
    ...
} catch (LockedAccountException lae) {
    ...
}catch (AuthenticationException ae) {...
}
If no exception is thrown, it proves that the Subject login is successful and is considered authenticated.
1. UsernamePasswordToken implements HostAuthenticationToken and RemeberAuthenticationToken, and HostAuthenticationToken implements AuthenticationToken
2. First call * * subject Login (token) * * to log in, which will be automatically delegated to the Security Manager. Before calling, you must go through securityutils Setsecuritymanager() setting;
3. The security manager is responsible for the real authentication logic; It will delegate authentication to Authenticator; The SecurityManager j interface inherits the Authenticator, Authenticator, and sessionManage interfaces
4. Authenticator is the real authenticator. It is the core authentication entry point in Shiro API, which can be accessed from
Define and insert your own implementation;
5. The Authenticator may delegate to the corresponding AuthenticationStrategy for multi Realm authentication. By default
The ModularRealmAuthenticator will call the AuthenticationStrategy for multi Realm authentication;
6. The Authenticator will pass the corresponding token into the real to obtain the authentication information from the real. If no exception is returned / thrown, it indicates that the authentication has failed. Multiple realms can be configured here and will be accessed according to the corresponding order and policy.
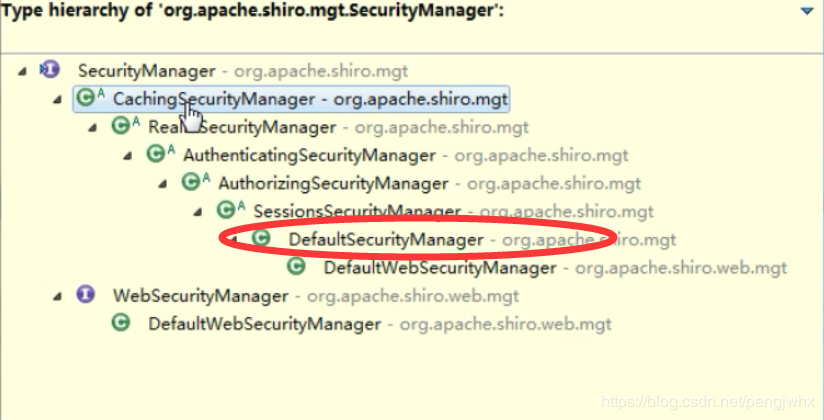
SecurityManager implements class structure relationships
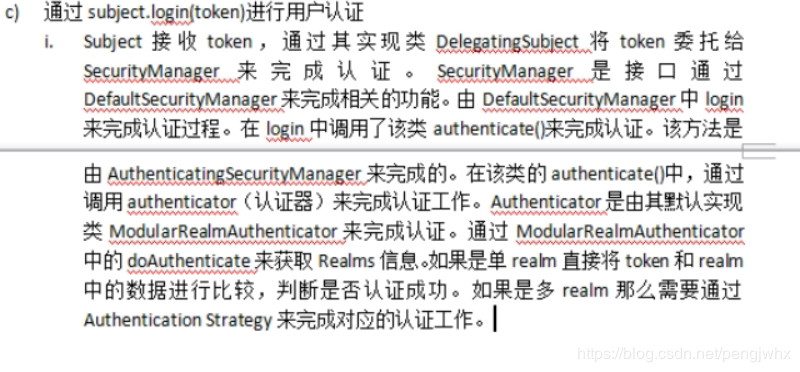
7.6 Shiro request authorization implementation
Authorization is essentially access control, which controls what content of the application can be accessed by authenticated users, such as resources, pages, etc.
-
Role based access control (implicit role)
-
Resource based access control (show roles)
Most users perform access control through the concept of role + permission. Role is a group of all individual users, such as administrators, ordinary users, merchants, etc; Permissions represent specific actions that can be operated, such as querying all users, deleting some users, modifying information, etc. they are directly linked to specific application resources.
Users, roles and permissions are often transformed through roles. Users and permissions are usually not directly bound:
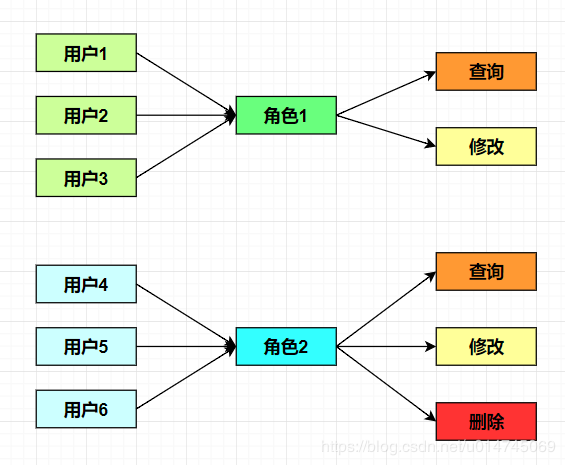
Implementation method:
// 1. Programming (single and multiple roles)
subject.hasRole("admin"), Array.aslist("admin1","admin2");

//2. Notes
@RequiresRoles("admin")

//3. Page control
<shiro:hasRole name="admin">

//4. Configuration in Shiro configuration file
 <property name="filterChainDefinitions">
            <value>
                /commons/** = anon
                /plugins/** = anon
                /assets/** = anon
                /css/** = anon
                /js/** = anon
                /img/** = anon
                /fonts/** = anon
                /bootstrap/** = anon
                /login = anon
                /interface/** = anon
                /** = user
            </value>
</property>
public String testShiro(HttpServletRequest request) {
    Subject subject = SecurityUtils.getSubject();
    String username = subject.getPrincipal().toString();
    subject.isPermitted("admin:test");
    return username + "Request succeeded";
}
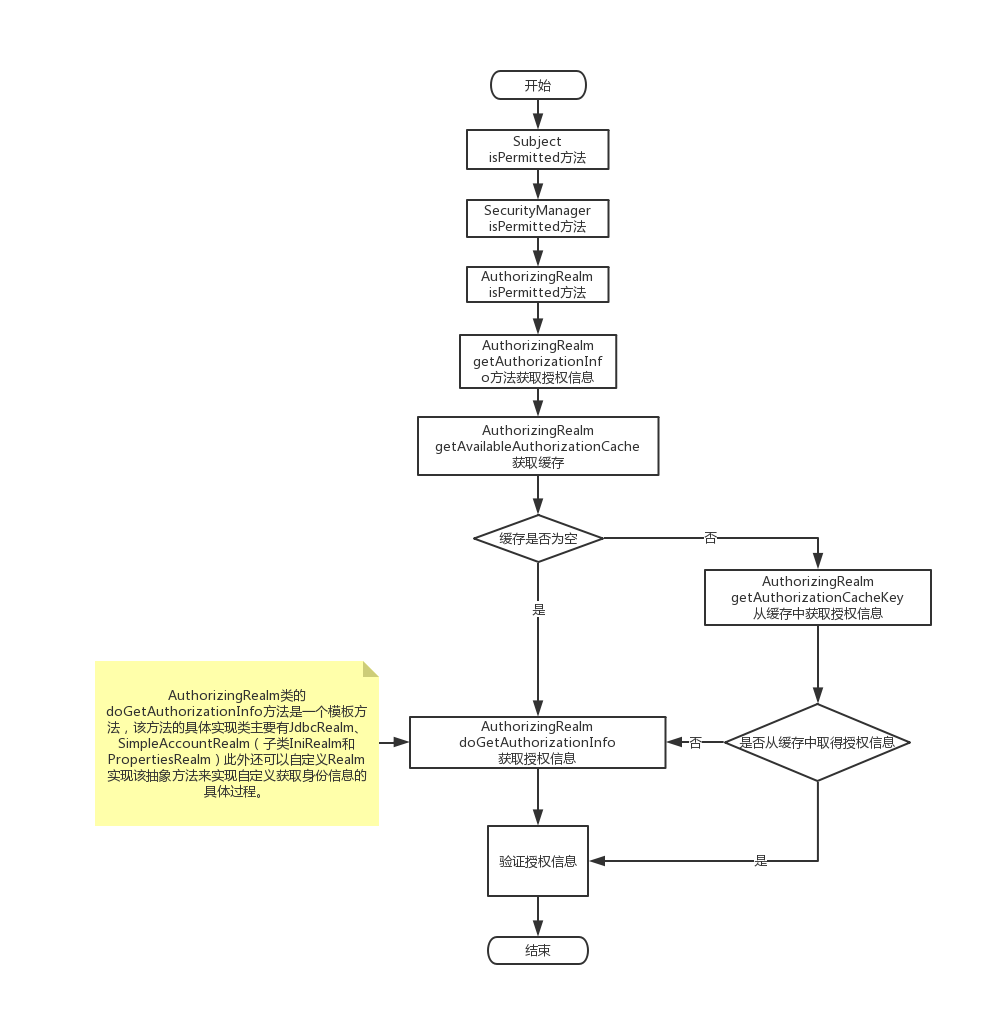
shiro interceptor rule:
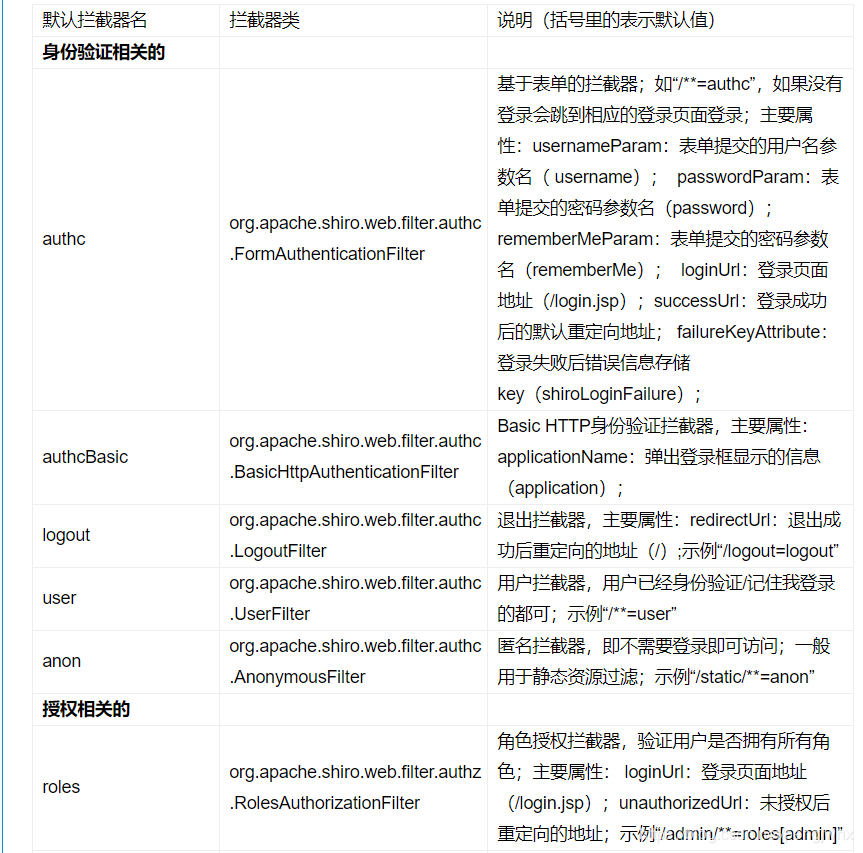
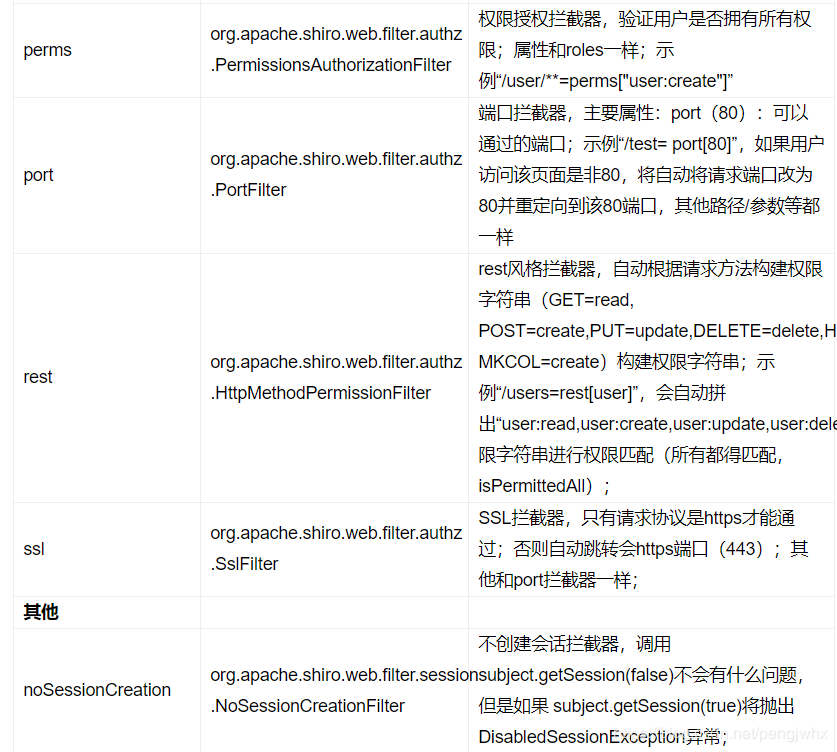
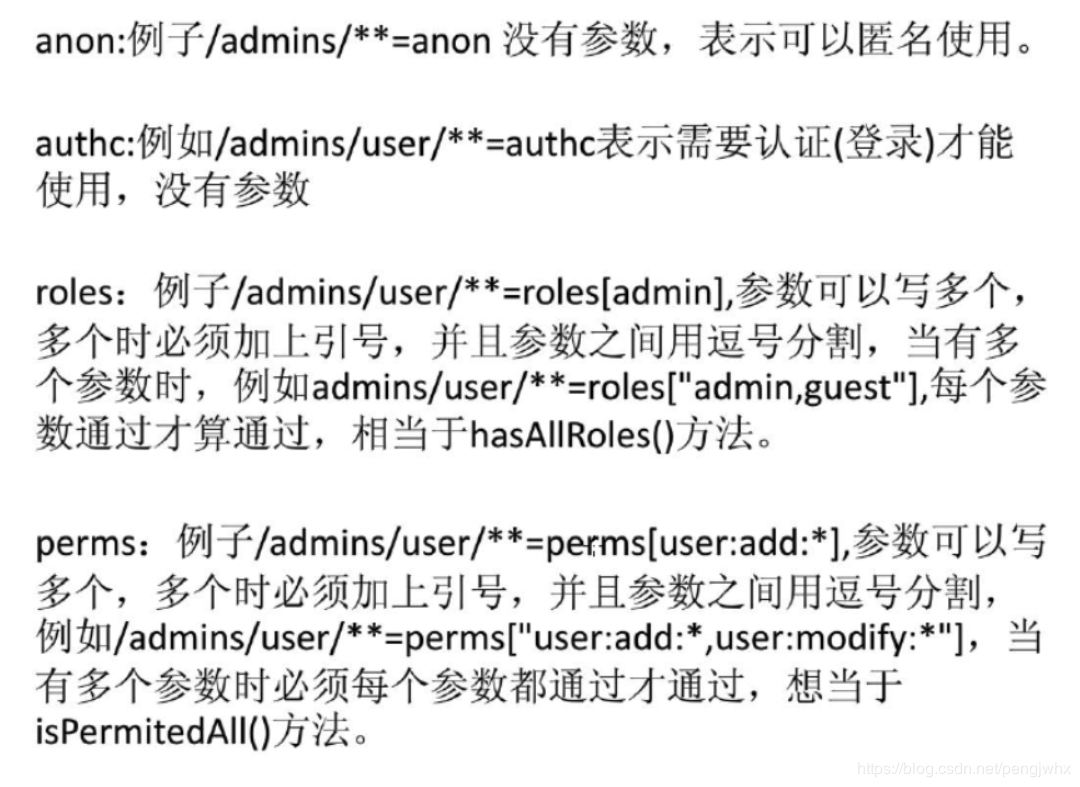
Implementation process:
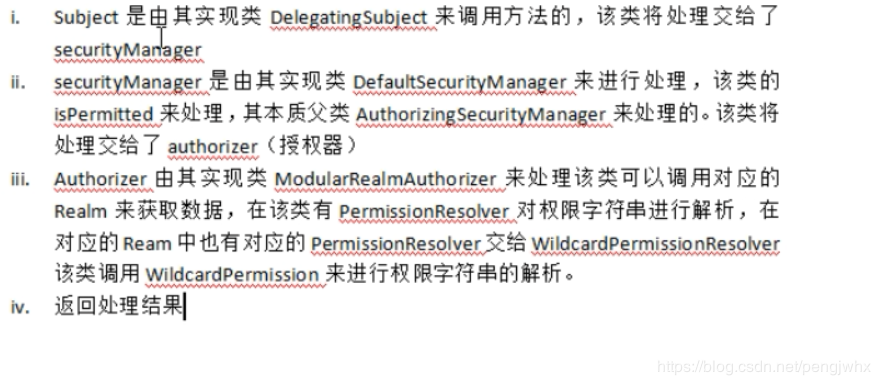
Common permission annotations
- @RequiresAuthentication
Indicates that the current subject has been authenticated through login; Subject Isauthenticated() returns true - @RequiresUser
Indicates that the current Subject has been authenticated or passed. Remember my login. - @RequiresGuest
It means that the current Subject is not authenticated or has passed. Remember that I have logged in, that is, the tourist identity - @RequiresRoles(value={"admin", "user"}, logical= Logical.AND)
Indicates that the current Subject requires the roles admin and user. - @RequiresPermissions (value={"user:a", "user:b"}, logical= Logical.OR)
Indicates that the current Subject requires permission user:a or user:b
7.7 Shiro integrates Thymeleaf
Step 1: introduce dependency
<dependency>
    <groupId>com.github.theborakompanioni</groupId>
    <artifactId>thymeleaf-extras-shiro</artifactId>
    <version>2.0.0</version>
</dependency>
Step 2: modify the settings in Shiro's Config file:
@Bean(name = "shiroDialect") //Custom label
public ShiroDialect shiroDialect(){
    return new ShiroDialect();
}
This code is added to use shiro's custom tag in thymeleaf.
Step 3: now basically all the conditions for using Shiro tag are met. Now give the code example of the front end:
<!DOCTYPE html>
<html xmlns="http://www.w3.org/1999/xhtml"
      xmlns:th="Thymeleaf"
      xmlns:shiro="http://www.pollix.at/thymeleaf/shiro">
<head>
<meta charset="UTF-8" />
<title>Insert title here</title>
</head>
<body>
<h3>index</h3>

<!-- Verify whether the current user is a "guest", that is, an unauthenticated (including unrecognized) user. -->
<p shiro:guest="">Please <a href="login.html">login</a></p>

<!-- Authenticated or remembered users. -->
<p shiro:user="">
Welcome back John! Not John? Click <a href="login.html">here</a> to login.
</p>

<!-- Authenticated users. Do not include remembered users, which is the same as user The difference between labels. -->
 <p shiro:authenticated="">
Hello, <span shiro:principal=""></span>, how are you today?
</p>
<a shiro:authenticated="" href="updateAccount.html">Update your contact information</a>

<!-- Output current user information, usually login account information. -->
<p>Hello, <shiro:principal/>, how are you today?</p>

<!-- Unauthenticated users, and authenticated Corresponding to the label. And guest The difference between tags is that they contain remembered users. -->
<p shiro:notAuthenticated="">
Please <a href="login.html">login</a> in order to update your credit card information.
</p>

<!-- Verify that the current user belongs to this role. -->
<a shiro:hasRole="admin" href="admin.html">Administer the system</a><!-- Own the role -->

<!-- And hasRole The tag logic is opposite. When the user does not belong to the role, the authentication passes. -->
<p shiro:lacksRole="developer"><!-- There is no such role -->
Sorry, you are not allowed to developer the system.
</p>

<!-- Verify that the current user belongs to all of the following roles. -->
<p shiro:hasAllRoles="developer, 2"><!-- Role and judgment -->
You are a developer and a admin.
</p>

<!-- Verify whether the current user belongs to any of the following roles. -->
<p shiro:hasAnyRoles="admin, vip, developer,1"><!-- Role or judgment -->
 You are a admin, vip, or developer. </p>

<!--Verify that the current user has the specified permissions. -->
<a shiro:hasPermission="userInfo:add" href="createUser.html">Add user</a><!-- Have permissions -->

<!-- And hasPermission The tag logic is opposite. When the current user does not have the specified permission, the verification passes. -->
<p shiro:lacksPermission="userInfo:del"><!-- No permission -->
Sorry, you are not allowed to delete user accounts. </p>

<!-- Verify that the current user has all of the following roles. -->
<p shiro:hasAllPermissions="userInfo:view, userInfo:add"><!-- Authority and judgment -->
You can see or add users. </p>

<!-- Verify whether the current user has any of the following permissions. -->
<p shiro:hasAnyPermissions="userInfo:view, userInfo:del"><!-- Authority or judgment -->
You can see or delete users. </p>

<a shiro:hasPermission="pp" href="createUser.html">Create a new User</a>

</body>
</html>
Pay attention to one detail here. Add a tag at the top of the html interface to introduce:
xmlns:shiro="http://www.pollix.at/thymeleaf/shiro"
7.8 shiro encryption
Encryption is to change the original information data with a special algorithm, so that even if the unauthorized user obtains the encrypted information, he still can't understand the content of the information because he doesn't know the decryption method
1. Concept:
The basic process of data encryption is to process the original plaintext file or data according to some algorithm to make it an unreadable piece of code, usually called "ciphertext", so that it can display the original content only after entering the corresponding key. In this way, the purpose of protecting the data from being stolen and read by illegal people can be achieved. The reverse process of this process is decryption, that is, the process of converting the encoded information into its original data.
2. Encryption classification:
(1) Symmetric encryption
The same key used by both parties can be encrypted and decrypted. This encryption method is called symmetric encryption, also known as single key encryption.
(2) Asymmetric encryption
A pair of keys consists of a public key and a private key (many pairs of keys can be used). The private key decrypts the public key encrypted data, and the public key decrypts the private key encrypted data (the private key and the public key can encrypt and decrypt each other).
3. Classification of encryption algorithms
(1) . single encryption
Single encryption is irreversible, that is, it can only be encrypted, not decrypted. It is usually used to transmit the user name and password of the type, and directly submit the encrypted data to the background, because the background does not need to know the user name and password, and can directly store the received encrypted data to the database
(2) 2. Bidirectional encryption
It is usually divided into symmetric encryption algorithm and asymmetric encryption algorithm. For symmetric encryption algorithm, both sides of information receiving need to know the key and encryption and decryption algorithm in advance, and the key is the same, and then encrypt and decrypt the data. The asymmetric algorithm is different. A and B both send a bunch of keys in advance, then a sends its own public key to B, and B sends its own public key to A. if a wants to send a message to B, it needs to encrypt the message with B's public key first, and then send it to B. at this time, B decrypts the message with its own private key, The same is true when B sends a message to a.
4. Common algorithms
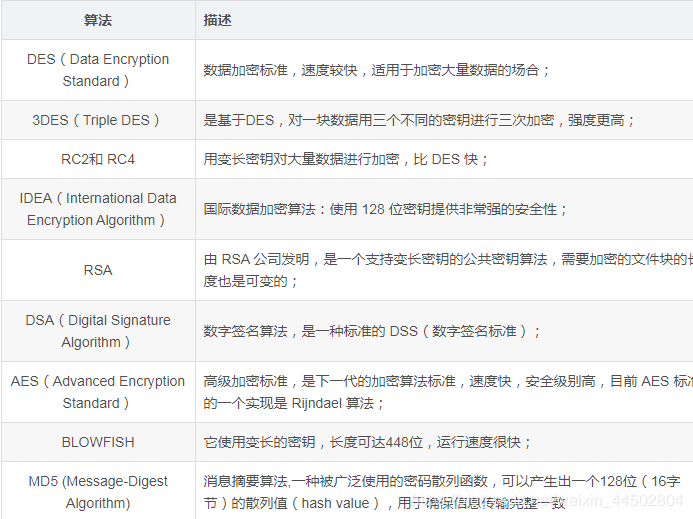
Use of MD5:
import org.apache.shiro.crypto.hash.Md5Hash;

public class Md5HashTest {
	public static void main(String[] args) {
		// Encrypt a single message
		Md5Hash md5 = new Md5Hash("123456");
		System.out.println(md5.toString());
		// Adding salt value to encryption increases the difficulty of decryption
		md5 = new Md5Hash("123456","aaa");
		System.out.println(md5.toString());
		// Adding salt value for encryption increases the difficulty of decryption and iterates 1024 times
		md5 = new Md5Hash("123456","aaa",1024);
		System.out.println(md5);
	}
}
Output results:

Effect of salt value:
There is a problem with using MD5. The hash value generated by the same password is the same. If two users set the same password, two identical values will be stored in the database, which is extremely unsafe. Adding Salt can solve this problem to a certain extent. The so-called adding Salt method is to add some "seasoning". The basic idea is that when the user provides the password for the first time (usually during registration), the system automatically sprinkles some "seasoning" into the password and then hashes it. When the user logs in, the system sprinkles the same "seasoning" on the code provided by the user, then hashes it, and then compares the hash value to determine whether the password is correct.
Principle of salt addition:
Add a random number to the original text to generate a new MD5 value
MD5 encryption in shiro
1. Modification in certification method
@Override
protected AuthenticationInfo doGetAuthenticationInfo(AuthenticationToken token) throws AuthenticationException {
	// Get account information
	String principal = (String) token.getPrincipal();
	// In normal logic, you should query the database according to the account. The default account here is root password 123456
	// Verify account number
	if(!"root".equals(principal)){
		// Account error
		return null;
	}
	//String pwd = "123456";
	// 12345 ciphertext obtained by salt value aaa encryption
	//88316675d7882e3fdbe066000273842c 1 iteration ciphertext
	//A7cf41c6537065fe724cc9980f8b5635 2 iterations ciphertext
	String pwd = "88316675d7882e3fdbe066000273842c";
	// Verify password
	AuthenticationInfo info = new SimpleAuthenticationInfo(
			principal, pwd,new SimpleByteSource("aaa"),"myrealm");
	return info;
}
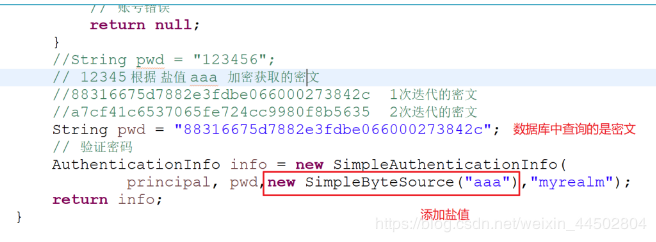
2.ini. Modification of XML file:
[main]
#Define voucher matcher
credentialsMatcher=org.apache.shiro.authc.credential.HashedCredentialsMatcher
#Hash algorithm
credentialsMatcher.hashAlgorithmName=md5
#Hash times
credentialsMatcher.hashIterations=1

#Set credential matcher to realm
customRealm=com.dpb.realm.MyRealm
customRealm.credentialsMatcher=$credentialsMatcher
securityManager.realms=$customRealm
3. Test:
@Test
public void test() {
	// 1. Get the SecurityManager factory object
	Factory<SecurityManager> factory =
			new IniSecurityManagerFactory("classpath:shiro.ini");
	// 2. Obtain the SecurityManager object through the Factory object
	SecurityManager securityManager = factory.getInstance();
	// 3. Add the SecurityManager object to the current running environment
	SecurityUtils.setSecurityManager(securityManager);

	// 4. Get Subject object
	Subject subject = SecurityUtils.getSubject();
	AuthenticationToken token = new UsernamePasswordToken("root", "123456");
	// Login operation
	try {
		subject.login(token);
	} catch (UnknownAccountException e) {
		System.out.println("Account error...");
	} catch(IncorrectCredentialsException e){
		System.out.println("Password error...");
	}
	// Get login status
	System.out.println(subject.isAuthenticated());
}
4. Number of iterations:

Done.
Shiro's security encryption is mainly used in several places:
- Hash algorithm: related classes such as Md5Hash, Sha256Hash, Sha512Hash and DefaultHashService can be used to calculate the hash value of specific data.
- Encryption / decryption: Shiro also provides support for symmetric encryption / decryption algorithms, such as AES, Blowfish, etc. AesCipherService and BlowfishCipherService service classes can be used to encrypt and decrypt relevant data
- PasswordService/CredentialsMatcher: Shiro provides PasswordService and CredentialsMatcher to provide encryption password and password verification services.
public interface PasswordService {
    //encryption
    String encryptPassword(Object var1) throws IllegalArgumentException;
    //matching
    boolean passwordsMatch(Object var1, String var2);
}
The commonly used PasswordService implementation is DefaultPasswordService
public interface CredentialsMatcher {
    //The certificate matching the token entered by the user (unencrypted) and the certificate provided by the system (encrypted)
    boolean doCredentialsMatch(AuthenticationToken token, AuthenticationInfo info);
}
The commonly used CredentialsMatcher implementations are PasswordMatcher and HashedCredentialsMatcher.
(1)PasswordMatcher
DefaultPasswordService cooperates with PasswordMatcher to implement simple password encryption and authentication services. There is a member variable of PasswordService type in PasswordMatcher, and PasswordService can be specified through setPasswordService() method.
The following code specifies the CredentialsMatcher in the custom Realm:
//MyCsutomRealm is a custom Realm that inherits the AuthorizingRealm class
public MyCustomRealm() {
    PasswordMatcher passwordMatcher = new PasswordMatcher();
    passwordMatcher.setPasswordService(defaultPasswordService);
    this.setCredentialsMatcher(passwordMatcher);
}
**Note: * * in actual project use, for convenience, we can configure DefaultPasswordService as a bean object through annotation or xml, and directly inject a PasswordService to encrypt the password. In actual use, we need to use PasswordService in the Service layer to encrypt the password and coexist it in the database. You can use @ Autowired injection, or use the constructor Arg tag in the configuration file to inject through the constructor, or use the property tag in the configuration file to inject through the set method.
(2)HashedCredentialsMatcher
Shiro provides HashedCredentialsMatcher, a hash implementation of CredentialsMatcher. Different from the previous PasswordMatcher, it is only used for password verification and can provide its own salt instead of randomly generating salt. Moreover, the algorithm for generating password hash value needs to be written by itself, because it can provide its own salt.
Because HashedCredentialsMatcher can only be used for password authentication. Therefore, PasswordMatcher is often used as the CredentialsMatcher in the real project.
7.9 session management
- Shiro provides complete enterprise session management capabilities, Independent of the underlying container (such as web container tomcat), which can be used in both JavaSE and JavaEE environments, provides session management, session event listening, session storage / persistence, container independent clustering, invalidation / expiration support, transparent support for the web, SSO single sign on support, etc. that is, directly using Shiro's session management can directly replace the session management of web container .
conversation
Shiro provides the Session interface and has multiple implementations, such as DelegatingSession, HttpServletSession, SimpleSession and so on. We can also implement the Session interface and customize the Session.
- Gets the Session object of the current user
Session session = subject.getSession();
Session session = subject.getSession(boolean create);
- Some methods of Shiro Session
Session session = subject.getSession();
session.getAttribute("key", someValue);
Date start = session.getStartTimestamp();
Date timestamp = session.getLastAccessTime();
session.setTimeout(millis);
Session manager
- The session manager manages the creation, maintenance, deletion, invalidation and verification of all Subject sessions in the application.
- It is the core component of Shiro. The top-level component SecurityManager directly inherits the SessionManager.
- SessionsSecurityManager is an implementation of SecurityManager, which internally defines the SessionManager member variable.
- DefaultSecurityManager and DefaultWebSecurityManager, the two most commonly used securitymanagers, inherit SessionsSecurityManager.
Shiro provides three default implementations:
-
DefaultSessionManager: the default implementation used by DefaultSecurityManager for Java se environment;
-
DefaultWebSessionManager: inherits the implementation of DefaultSessionManager for Web environment and can replace it
ServletContainerSessionManager maintains the session itself and directly discards the session management of the Servlet container.
-
ServletContainerSessionManager: the default implementation used by DefaultWebSecurityManager, which is used in the Web environment and directly uses the session of the Servlet container;
Session timeout management
According to the implementation of the default SessionManager provided by Shiro:
-
Both DefaultSessionManager and DefaultWebSessionManager implement the AbstractSessionManager abstract class. The member variable globalSessionTimeout defined in AbstractSessionManager represents the Session timeout. In practical use, we can set the specific Session timeout through the configuration file or set method.
-
The session in ServletContainerSessionManager is HttpServletSession. This class is actually Shiro packaging the traditional HttpSession, which is still HttpSession in essence. Therefore, in practice, we can not only set the timeout through the set method, but also through the web XML to configure the traditional session timeout.
Session listening -
Shiro provides the SessionListener interface. We can customize the session listening function by implementing this interface.
Session storage -
Shiro provides the SessionDao interface and defines the AbstractSessionDao abstract class. We can inherit the AbstractSessionDao interface, customize the storage of sessions, and combine it with caching tools such as Redis to store sessions in the cache. If distributed caching is needed, Redis can also be used to build distributed clusters.
8 SpringBoot distributed: Dubbo+zookeeper
Basic knowledge
Distributed theory
What is a distributed system?
In the Book Principles and models of distributed systems, it is defined as follows: "a distributed system is a collection of several independent computers, which are like a single related system to users";
Distributed system is a system composed of a group of computer nodes that communicate through the network and coordinate to complete common tasks. The emergence of distributed system is to use cheap and ordinary machines to complete the computing and storage tasks that a single computer cannot complete. Its purpose is to use more machines to process more data.
distributed system is a software system based on network.
First of all, it should be clear that only when the processing capacity of a single node can not meet the increasing computing and storage tasks, And hardware improvement (add memory, add disk and use better CPU) when the cost is too high to pay off, and the application can not be further optimized, we need to consider the distributed system. Because the problem to be solved by the distributed system itself is the same as that of the single machine system, and due to the multi node and network communication topology of the distributed system, many single machine systems will be introduced There are no problems. In order to solve these problems, more mechanisms and protocols will be introduced, resulting in more problems...
Dubbo document
With the development of the Internet and the continuous expansion of the scale of website applications, the conventional vertical application architecture can not cope with it. The distributed service architecture and mobile computing architecture are imperative, and a governance system is urgently needed to ensure the orderly evolution of the architecture.
There is such a picture on Dubbo's official website
Single application architecture
When the website traffic is very small, only one application is needed to deploy all functions together to reduce the deployment nodes and costs. At this time, the data access framework (ORM) used to simplify the workload of addition, deletion, modification and query is the key.
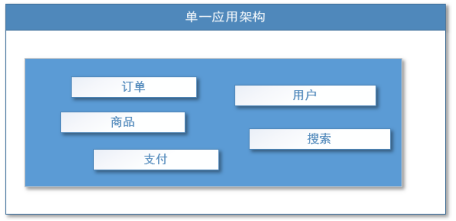
It is applicable to small websites and small management systems. All functions are deployed into one function, which is simple and easy to use.
Disadvantages:
1. Performance scaling is difficult
2. Collaborative development problem
3. Not conducive to upgrade and maintenance
Vertical application architecture
When the number of visits increases gradually, the acceleration brought by a single application increases and the machine decreases. The application is divided into several unrelated applications to improve efficiency. At this point, the Web framework (MVC) for accelerating front-end page development is the key.
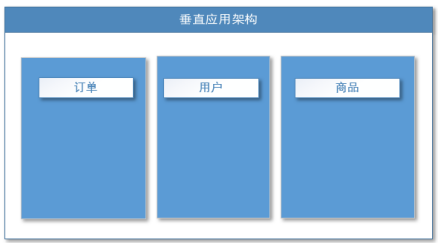
The independent deployment of each module is realized through business segmentation, which reduces the difficulty of maintenance and deployment. The team performs its own duties, which is easier to manage, and the performance expansion is more convenient and targeted.
Disadvantages: common modules cannot be reused, which is a waste of development
Distributed service architecture
When there are more and more vertical applications, the interaction between applications is inevitable. Extract the core business as an independent service, and gradually form a stable service center, so that the front-end applications can respond to the changing market demand more quickly. At this time, the * * distributed service framework (RPC) * * used to improve business reuse and integration is the key.
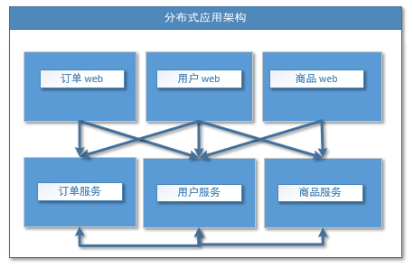
Flow computing architecture
When there are more and more services, problems such as capacity evaluation and waste of small service resources gradually appear. At this time, it is necessary to add a dispatching center to manage the cluster capacity in real time based on the access pressure and improve the cluster utilization. At this time, the resource scheduling and Governance Center (SOA) [Service Oriented Architecture] used to improve machine utilization is the key.
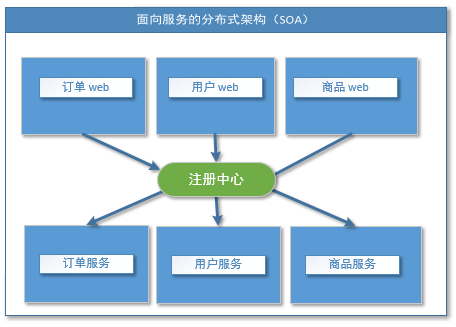
RPC
What is RPC?
RPC [Remote Procedure Call] refers to Remote Procedure Call. It is a way of inter process communication. It is a technical idea, not a specification. It allows programs to call another address space (usually on another machine sharing the network) without the programmer explicitly coding the details of the remote call, that is, whether the programmer calls the local or remote function, the calling code written by the programmer is basically the same.
In other words, two servers A and B, one application deployed on server A, want to call the functions / methods provided by the application on server B. because they are not in the same memory space, they cannot be called directly. They need to express the calling semantics and convey the calling data through the network. Why use RPC? It is A requirement that cannot be completed in A process or even in A computer through local call, such as communication between different systems, or even communication between different organizations. Because the computing power needs to be expanded horizontally, applications need to be deployed on A cluster composed of multiple machines. RPC is to call remote functions like calling local functions;
Recommended reading: https://www.jianshu.com/p/2accc2840a1b
RPC Fundamentals
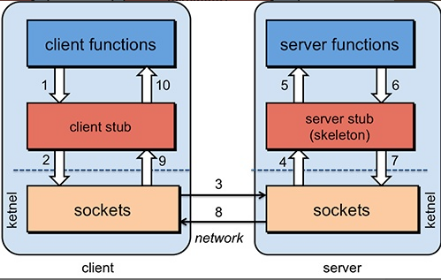
Step resolution:
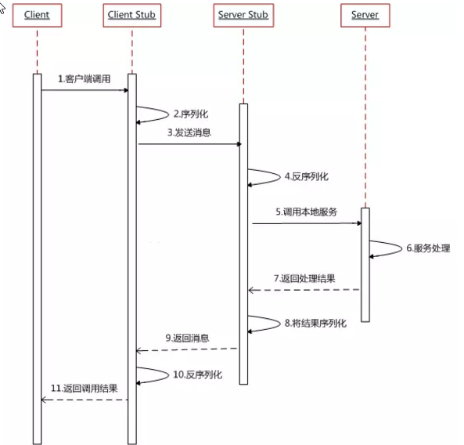
RPC has two core modules: communication and serialization.
Dubbo concept
1. What is dubbo?
- Apache Dubbo | ˈ d ʌ b əʊ| Is a high-performance, lightweight open source Java RPC framework
- The core part includes: (interface oriented remote method invocation, intelligent fault tolerance and load balancing, and automatic service registration and discovery)
- Remote communication: it provides Abstract encapsulation of a variety of NIO frameworks based on long connection, including a variety of thread models, serialization, and information exchange mode of "request response" mode.
- Cluster fault tolerance: provide transparent remote procedure calls based on interface methods, including multi protocol support, soft load balancing, fault tolerance, address routing, dynamic configuration and other cluster support.
- Automatic discovery: Based on the registry directory service, the service consumer can dynamically find the service provider, make the address transparent, and enable the service provider to smoothly add or reduce machines.
- Dubbo is Alibaba's open source Java based high-performance RPC (a remote call) distributed service framework (SOA), which is committed to providing high-performance and transparent RPC remote service call scheme and SOA Service governance scheme.
- To put it bluntly, it is a distributed framework for remote service invocation (bid farewell to WSdl in Web Service mode and register on dubbo in the way of service provider and consumer)
- dubbo official website
- Understand Dubbo's features
- View official documents
2. dubbo basic concept
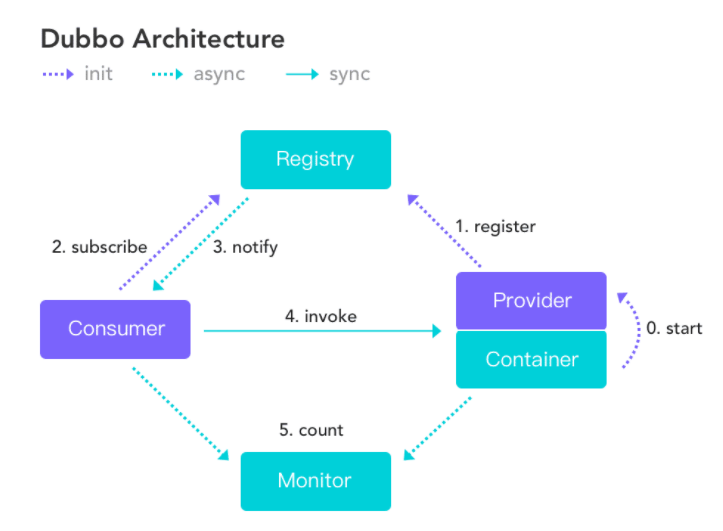
Node role description:
Provider: the service provider that exposes the service.
Consumer: the service consumer that calls the remote service.
Registry: Registry for service registration and discovery.
Monitor: the monitoring center that counts the service invocation times and invocation times.
Container : service run container.
I think this is very good. The roles are clear. You can determine whether the service is normal according to the status of each node role.
3. Call relation description
- The service container is responsible for starting, loading and running the service provider.
- When a service provider starts, it registers its services with the registry.
- When the service consumer starts, it subscribes to the service it needs from the registry.
- The registry returns the service provider address list to the consumer. If there is any change, the registry will push the change data to the consumer based on the long connection.
- From the provider address list, the service consumer selects one provider to call based on the soft load balancing algorithm. If the call fails, it selects another provider to call.
- Service consumers and providers accumulate call times and call times in memory, and regularly send statistical data to the monitoring center every minute.
The fault tolerance of dubbo is obvious, and the performance has not been tested yet. A page of our system needs to drop the interface five times. We originally wanted to recommend a cache, but the business relationship can not be adopted. We still need to study the performance tuning of dubbo
4. What's the meaning of this design?
-
When the Consumer and Provider are decoupled, both sides can increase or decrease the number of nodes horizontally.
-
The registry can be used as a peer-to-peer cluster for itself, and can dynamically increase or decrease nodes. After any one goes down, it will automatically switch to another
-
Decentralization: both parties do not directly rely on the registration center. Even if all the registration centers are down, the service invocation will not be affected in a short time
-
The service provider is stateless. After any one goes down, it will not affect the use
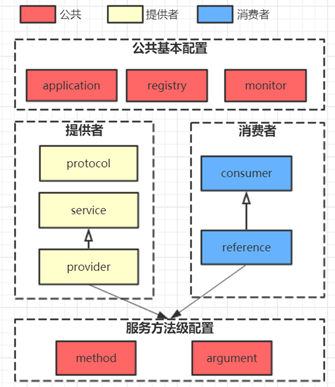
5. What can Dubbo do?
- Transparent remote method calls, like calling local methods, call remote methods with simple configuration and no API intrusion.
- Soft load balancing and fault tolerance mechanism can replace F5 and other hardware load balancers in the intranet to reduce costs and single points.
- Automatic service registration and discovery eliminates the need to write down the service provider address. The registry queries the service provider's IP address based on the interface name, and can smoothly add or delete service providers.
Dubbo uses full spring Configuration mode: transparent access to the application. There is no API intrusion to the application. You only need Spring to load Dubbo's configuration, which is loaded based on the Schema Extension of Spring.
Before using Web Service, I wanted to test the function or performance of the interface through soapui or LR by simulating messages. But now with Dubbo, the interfaces cannot interact directly. I try to test by simulating the consumer address, and the results are ugly. Then I use jmeter to test through junit, but I still need to register with Dubbo. If I don't provide the source code, it's hard to write this test case
Dubbo environment construction
Click the official dubbo document and recommend it to us Zookeeper registry
What is zookeeper? Can view Official documents
Installing zookeeper under Windows
- Download zookeeper: address , we download 3.4 14, the latest version! Unzip zookeeper
- Run / bin / zkserver CMD, an error will be reported during the initial operation, and there is no zoo CFG configuration file;
Possible problems: flash back!
Solution: edit zkserver Add pause at the end of CMD file. In this way, if there is an error in operation, it will not exit, and an error message will be prompted to find the reason.

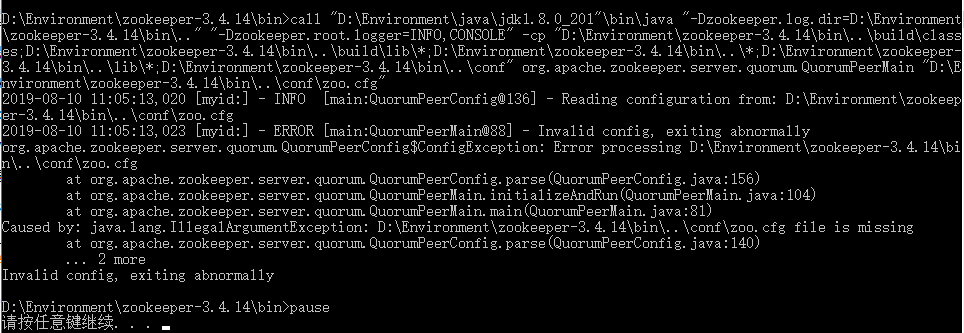 3. Modify zoo CFG configuration file
Put the zoo under the conf folder_ sample. CFG copy and rename it zoo CFG is enough.
Note several important points:
dataDir=./ Directory of temporary data store (writable relative path)
Clientport = 2181 port number of zookeeper
When the modification is complete, start zookeeper again

4. Use zkcli CMD test
ls / lists all the nodes saved under the zookeeper root
[zk: 127.0.0.1:2181(CONNECTED) 4] ls /
[zookeeper]
Create – e /kuangshen 123: create a kuangshen node with a value of 123

get /kuangshen: get the value of the / kuangshen node
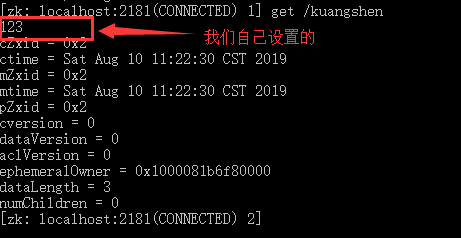
Let's look at the nodes again

Install Dubbo admin under Windows
dubbo itself is not a service software. It is actually a jar package that can help your java program connect to zookeeper and use zookeeper to consume and provide services.
However, in order to enable users to better manage and monitor many dubbo services, the official provides a visual monitoring program dubbo admin, but this monitoring will not affect the use even if it is not installed.
Let's install it here:
1. Download Dubbo admin
Address: https://github.com/apache/dubbo-admin/tree/master
2. Unzip into the directory
Modify Dubbo admin \ SRC \ main \ resources \ application Properties specifies the zookeeper address: Dubbo registry. address=.........
server.port=7001
spring.velocity.cache=false
spring.velocity.charset=UTF-8
spring.velocity.layout-url=/templates/default.vm
spring.messages.fallback-to-system-locale=false
spring.messages.basename=i18n/message
spring.root.password=root
spring.guest.password=guest

dubbo.registry.address=zookeeper://127.0.0.1:2181
3. Package Dubbo admin in the project directory
mvn clean package -Dmaven.test.skip=true
The first packaging process is a little slow and needs to wait patiently! Until success!
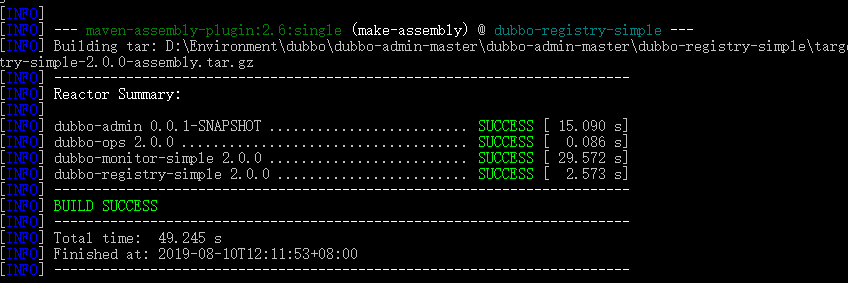
4. Execute dubbo-admin-0.0 under dubbo-admin\target 1-SNAPSHOT. jar
java -jar dubbo-admin-0.0.1-SNAPSHOT.jar
[Note: the zookeeper service must be turned on!]
After execution, let's go and visit http://localhost:7001/ At this time, we need to enter the login account and password. We are the default root root;
After successful login, view the interface
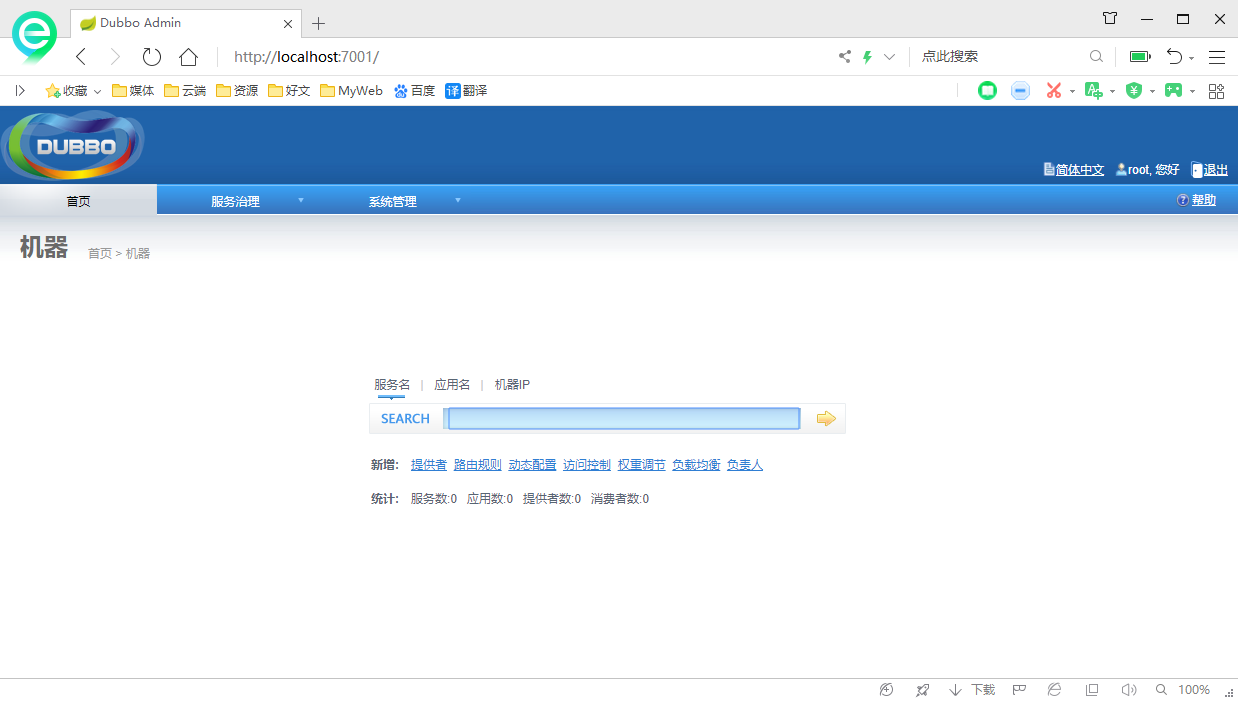
Installation complete!
SpringBoot + Dubbo + zookeeper
1. Frame construction
1. Start zookeeper!
2. IDEA creates an empty project;
3. Create a module to implement the service provider: provider server, and select web dependency
4. After the project is created, we write a service, such as ticket selling service;
Write interface
package com.kuang.provider.service;

public interface TicketService {
    public String getTicket();
}
Writing implementation classes
package com.kuang.provider.service;

public class TicketServiceImpl implements TicketService {
    @Override
    public String getTicket() {
        return "<Madness theory Java>";
    }
}
5. Create a module to realize the service consumer: consumer server, and select web dependency
6. After the project is created, we write a service, such as the user's service;
Write service
package com.kuang.consumer.service;

public class UserService {
    //We need to get the service from the registration center
}
Demand: now our users want to use the ticket buying service. How do we do this?
2. Service provider
- Import dependent package
To register the service provider in the registry, we need to integrate Dubbo and zookeeper, so we need to import the package. We go to github from Dubbo's official website, look at the help document below, find Dubbo springboot, and find the dependent package
<!-- Dubbo Spring Boot Starter -->
<dependency>
    <groupId>org.apache.dubbo</groupId>
    <artifactId>dubbo-spring-boot-starter</artifactId>
    <version>2.7.3</version>
</dependency>
zookeeper's package is downloaded from maven warehouse, zkclient;
<!-- https://mvnrepository.com/artifact/com.github.sgroschupf/zkclient -->
<dependency>
    <groupId>com.github.sgroschupf</groupId>
    <artifactId>zkclient</artifactId>
    <version>0.1</version>
</dependency>
[new version of pit] zookeeper and its dependency package. To solve log conflicts, you also need to eliminate log dependencies: eliminate this slf4j-log4j12
<!-- introduce zookeeper -->
<dependency>
    <groupId>org.apache.curator</groupId>
    <artifactId>curator-framework</artifactId>
    <version>2.12.0</version>
</dependency>
<dependency>
    <groupId>org.apache.curator</groupId>
    <artifactId>curator-recipes</artifactId>
    <version>2.12.0</version>
</dependency>
<dependency>
    <groupId>org.apache.zookeeper</groupId>
    <artifactId>zookeeper</artifactId>
    <version>3.4.14</version>
    <!--Get rid of this slf4j-log4j12-->
    <exclusions>
        <exclusion>
            <groupId>org.slf4j</groupId>
            <artifactId>slf4j-log4j12</artifactId>
        </exclusion>
    </exclusions>
</dependency>
- Configure dubbo related properties in the springboot configuration file!
#Current app name
dubbo.application.name=provider-server
#Address of Registration Center
dubbo.registry.address=zookeeper://127.0.0.1:2181
#Scan the services under the specified package
dubbo.scan.base-packages=com.kuang.provider.service
- Configure the service annotation in the service implementation class and publish the service! Pay attention to the problem of guide package
import org.apache.dubbo.config.annotation.Service;
import org.springframework.stereotype.Component;

@Service //Publish services
@Component //Place in container
public class TicketServiceImpl implements TicketService {
    @Override
    public String getTicket() {
        return "<Madness theory Java>";
    }
}
Logical understanding: when the application starts, dubbo will scan the service with @ component annotation under the specified package and publish it in the specified registry!
3. Consumer
- Import dependency, the same as the previous dependency;
<!--dubbo-->
<!-- Dubbo Spring Boot Starter -->
<dependency>
    <groupId>org.apache.dubbo</groupId>
    <artifactId>dubbo-spring-boot-starter</artifactId>
    <version>2.7.3</version>
</dependency>
<!--zookeeper-->
<!-- https://mvnrepository.com/artifact/com.github.sgroschupf/zkclient -->
<dependency>
    <groupId>com.github.sgroschupf</groupId>
    <artifactId>zkclient</artifactId>
    <version>0.1</version>
</dependency>
<!-- introduce zookeeper -->
<dependency>
    <groupId>org.apache.curator</groupId>
    <artifactId>curator-framework</artifactId>
    <version>2.12.0</version>
</dependency>
<dependency>
    <groupId>org.apache.curator</groupId>
    <artifactId>curator-recipes</artifactId>
    <version>2.12.0</version>
</dependency>
<dependency>
    <groupId>org.apache.zookeeper</groupId>
    <artifactId>zookeeper</artifactId>
    <version>3.4.14</version>
    <!--Get rid of this slf4j-log4j12-->
    <exclusions>
        <exclusion>
            <groupId>org.slf4j</groupId>
            <artifactId>slf4j-log4j12</artifactId>
        </exclusion>
    </exclusions>
</dependency>
- configuration parameter
#Current app name
dubbo.application.name=consumer-server
#Address of Registration Center
dubbo.registry.address=zookeeper://127.0.0.1:2181
- Bring the service interface directly
Originally, the normal step is to package the service provider's interface and import it with pom file. Here, we use a simple method to directly take the service interface. The path must be correct, that is, the same as that of the service provider;
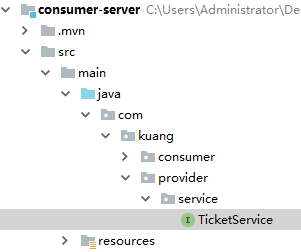
- Improve consumer services
package com.kuang.consumer.service;

import com.kuang.provider.service.TicketService;
import org.apache.dubbo.config.annotation.Reference;
import org.springframework.stereotype.Service;

@Service //Inject into container
public class UserService {

    @Reference //If the specified service is referenced remotely, it will match according to the full class name to see who has registered the full class name in the registry
    TicketService ticketService;

    public void bugTicket(){
        String ticket = ticketService.getTicket();
        System.out.println("Buy it at the registry"+ticket);
    }
}
- Test class preparation;
@RunWith(SpringRunner.class)
@SpringBootTest
public class ConsumerServerApplicationTests {

    @Autowired
    UserService userService;

    @Test
    public void contextLoads() {

        userService.bugTicket();
    }
}
4. Start test
- Start zookeeper
- Open Dubbo admin to realize monitoring [can be omitted]
- Open server
- Consumer consumption test, results:

Monitoring center:

ok, this is SpingBoot + dubbo + zookeeper to realize distributed development;