3. Application development
3.1 file upload and download
SpringBoot does not have its own file upload and download technology. It relies on the file upload and download technology of Spring MVC, but it is further simplified and more convenient in SpringBoot.
3.1.1 single file upload
To upload a file, you must set the form method to POST and the enctype to multipart / form data. Only in this way will the browser send the binary data of the file selected by the user to the server. When uploading a file, Spring MVC will map the uploaded file to a MultipartFile object, and parse and save the MultipartFile object.
MultipartFile interface has the following common methods:
- byte[]getBytes(): get file data.
- String getContentType(): get the MIME type of the file, such as application/pdf, image/pdf, etc.
- InputStream getInputStream(): get the file stream.
- String get()riginalFileName(): get the original name of the uploaded file.
- long getSize(): gets the Byte size of the file, in bytes.
- boolean isEmpty(): whether there are uploaded files.
- void transfrtTO(File dest): save the uploaded file to a target file.
First, create a SpringBoot project and add the spring boot starter web dependency. Then create a new upload. Net file in the static directory under src/main/resources HTML file:
<!DOCTYPE html>
<html>
<head>
    <meta http-equiv="Content-type" content="text/html; charset=UTF-8">
    <meta http-equiv="X-UA-Compatible" content="IE=edge,chrome=1"/>
    <title>Single file upload</title>
</head>
<body>
<form method="post" action="/file/upload" enctype="multipart/form-data">
    <input type="file" name="file">
    <input type="submit" value="Submit">
</form>
</body>
</html>
Next, in application Add the following configuration to the YML file:
server:
  port: 8080

spring:
  servlet:
    multipart:
      enabled: true
      #Maximum supported file size
      max-file-size: 100MB
      #Maximum supported request size
      max-request-size: 100MB
Next, create the FileController class of the file upload processing interface:
package com.shenziyi.demo.controller;

import org.springframework.beans.factory.annotation.Value;
import org.springframework.stereotype.Controller;
import org.springframework.web.bind.annotation.*;
import org.springframework.web.multipart.MultipartFile;
import org.springframework.web.multipart.MultipartHttpServletRequest;

import javax.servlet.http.HttpServletRequest;
import javax.servlet.http.HttpServletResponse;
import java.io.*;
import java.net.URLEncoder;
import java.nio.file.Files;
import java.nio.file.Path;
import java.nio.file.Paths;
import java.util.List;
import java.util.UUID;
@Controller
@RequestMapping("/file/")
public class FileController {
    /*Single file upload*/
    @RequestMapping("upload")
    @ResponseBody
    public String upload (@RequestParam("file") MultipartFile file) {
        // Get original name
        String fileName = file.getOriginalFilename();
        // File save path
        String filePath = "d:/file/";
        // Rename files to prevent duplication
        fileName = filePath + UUID.randomUUID() + fileName;
        // File object
        File dest = new File(fileName);
        // Judge whether the path exists. If it does not exist, create it
        if(!dest.getParentFile().exists()) {
            dest.getParentFile().mkdirs();
        }
        try {
            // Save to server
            file.transferTo(dest);
            return "Upload successful";
        } catch (Exception e) {
            e.printStackTrace();
        }
        return "Upload failed";
    }
}
After the project starts, enter in the browser http://localhost:8080/upload.html Upload files.
3.1.2 multi file upload
The upload method of multiple files is basically the same as that of a single file, but there is only one more traversal step in the controller. First, upload Add multi file upload code to HTML:
<p>Multi file upload</p>
<form method="POST" enctype="multipart/form-data" action="/file/uploads">
    <!--add to multiple Properties, you can press and hold ctrl Multiple selected files-->
    <p>File:<input type="file" multiple name="file" /></p>
    <p><input type="submit" value="upload" /></p>
</form>
Then add the logic code of multi file upload in the background controller:
/*Multi file upload*/
    @PostMapping("/uploads")
    @ResponseBody
    public String handleFileUpload(HttpServletRequest request) {
        List<MultipartFile> files = ((MultipartHttpServletRequest) request)
                .getFiles("file");
        MultipartFile file = null;
        for (int i = 0; i < files.size(); ++i) {
            file = files.get(i);
            if (!file.isEmpty()) {
                try {
                    // Get original name
                    String fileName = file.getOriginalFilename();
                    // File save path
                    String filePath = "d:/file/";
                    // Rename files to prevent duplication
                    fileName = filePath + UUID.randomUUID() + fileName;
                    // File object
                    File dest = new File(fileName);
                    // Save to server
                    file.transferTo(dest);
                } catch (Exception e) {
                    e.printStackTrace();
                    return "Upload failed";
                }
            }else {
                return "Upload failed";
            }
        }
        return "Upload successful";
    }
In this way, multiple files can be uploaded at the same time.
3.1.3 file download
For file download, there is no need to create html file at this time. You can directly enter the website for download. The core code is as follows:
@RequestMapping("download")
    public void download(HttpServletResponse response) throws Exception {
        // File address, the real environment is stored in the database
        String filename="a.txt";
        String filePath = "D:/file" ;
        File file = new File(filePath + "/" + filename);
        // Create input object
        FileInputStream fis = new FileInputStream(file);
        // Set relevant formats
        response.setContentType("application/force-download");
        // Set the downloaded file name and header
        response.setHeader("Content-Disposition", "attachment;fileName=" +filename);
        // Create output object
        OutputStream os = response.getOutputStream();
        // Routine operation
        byte[] buf = new byte[1024];
        int len = 0;
        while((len = fis.read(buf)) != -1) {
            os.write(buf, 0, len);
        }
        fis.close();
    }
Start the project and enter in the address field http://localhost:8080/file/download Found that it can be downloaded. (but I sent it again)
3.2 timer
Timed tasks are particularly important in enterprise development. Many businesses need timed tasks to complete. For example, a product is sold at 10 o'clock, the number of registrants is counted at 0 a.m., and other information is counted. At this time, it is impossible to turn on a switch or count some data artificially.
The SpringBoot timer can be implemented in the following ways:
- Timer: at this time, Java comes with Java util. Timer class, which allows scheduling a Java util. TimerTask task. In this way, the program can be executed according to a certain frequency, but it cannot run at a specified time, which is generally less used.
- ScheduledExecutorService: jdk's own class is a scheduled task class designed based on the thread pool. Each scheduled task will be assigned to a thread in the thread pool for execution, that is, the task is executed concurrently. They do not affect each other.
- SpringTask: Spring3. The Task built after 0 can be regarded as a lightweight Quartz, and it is much simpler to use than Quartz.
- Quartz: This is a powerful scheduler that allows programs to be executed at a specified time or at a certain frequency. The configuration is slightly complex.
Simple timing tasks can be implemented directly through the task provided by Spring, and complex timing tasks can be implemented through the integrated Quartz.
3.2.1 Task
-
Create project
First, create a SpringBoot Web engineering project.
-
Start scheduled task
Add the @ enableshcheduling annotation to the startup class to enable support for scheduled tasks:
package com.shenziyi.demo; import org.springframework.boot.SpringApplication; import org.springframework.boot.autoconfigure.SpringBootApplication; import org.springframework.scheduling.annotation.EnableScheduling; @SpringBootApplication @EnableScheduling public class DemoApplication { public static void main(String[] args) { SpringApplication.run(DemoApplication.class, args); } } -
Set scheduled tasks
Scheduled tasks are mainly realized through @ scheduled annotation:
@Component
public class ScheduledTask{
    private Logger log=LoggeerFactory.getLogger(ScheduledTask.class);
    @Scheduled(cron="0 0/1 * * * ?")
    public void testOne(){
        log.info("Every minute");
    }

    @Scheduled(fixedRate=30000)
    public void testTwo(){
        log.info("Every 30 s Execute once");
    }

    @Scheduled(cron="0 0 1  * * ?")//It means to execute at 1 a.m. every day
    public void initTask(){
        log.info("Perform tasks"+new Date());
    }
}
After the configuration is completed, start the SpringBoot project and observe the console log printing information, as follows:

- cronExpression expression
reference resources: https://www.cnblogs.com/pipi-changing/p/5697481.html
3.2.2 Quartz
SpringBoot can use quartz to realize the function of timer. It is an open-source task scheduling framework completely written in Java. It sets the regular running rules of jobs and controls the running time of jobs through triggers. Quartz timer has many functions, such as sending information regularly, generating reports regularly, etc.
The main core components of Quartz framework include scheduler, trigger and job. The scheduler is the General Commander of the job, the trigger is the operator of the job, and the job is the functional module of the application. The relationship between components is as follows:
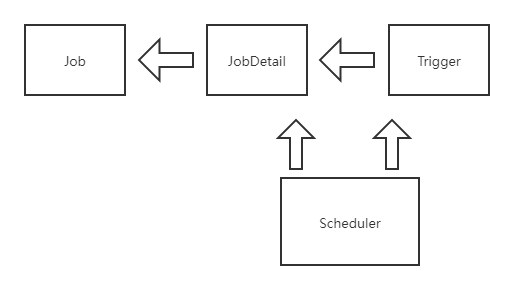
- Job refers to a task (work) and the specific content to be performed.
- JobDetail represents a specific executable scheduler. Job is the content to be executed by the executable scheduler. In addition, JobDetail also includes the scheme and strategy of task scheduling. Tell the scheduler which method of which class (job) to execute in the future.
- Trigger is a class that represents the configuration of a scheduling parameter and describes the time and triggering rules that trigger Job execution. A Job can correspond to multiple triggers, but a trigger can only correspond to one Job.
- Scheduler represents a scheduling container. Multiple jobdetails and triggers can be registered in a scheduling container. The scheduler can bind the Trigger to a JobDetail, so that when the Trigger is triggered, the corresponding Job will be executed.
After JobDetail and Trigger are registered on the Scheduler container, the assembled job (a pair of JobDetail and Trigger) is formed, so that it can be scheduled and executed with the container startup.
Add Quartz dependency:
<!--Timer dependency-->
        <dependency>
            <groupId>org.quartz-scheduler</groupId>
            <artifactId>quartz</artifactId>
            <version>2.2.1</version>
        </dependency>
        <!-- The dependence must be added. There are sping yes schedule Support of -->
        <dependency>
            <groupId>org.springframework</groupId>
            <artifactId>spring-context-support</artifactId>
        </dependency>
        <!--Must be added, otherwise an error will occur and the project cannot be started-->
        <dependency>
            <groupId>org.springframework</groupId>
            <artifactId>spring-tx</artifactId>
        </dependency>
Task execution class (task execution and dynamic modification of time interval through the interface of controller):
package com.shenziyi.demo.timerset;


import org.springframework.context.annotation.Configuration;
import org.springframework.scheduling.annotation.EnableScheduling;
import org.springframework.stereotype.Component;

import java.text.SimpleDateFormat;
import java.util.Date;

@Configuration
@Component
@EnableScheduling
public class JobTask {
    public void start() throws InterruptedException {
        SimpleDateFormat format=new SimpleDateFormat("yyyy-MM-dd HH:mm:ss");
        System.err.println("The scheduled task starts execution."+format.format(new Date()));
    }
}
Detailed configuration class of Quartz:
package com.shenziyi.demo.timerset;


import org.quartz.Trigger;
import org.springframework.context.annotation.Bean;
import org.springframework.context.annotation.Configuration;
import org.springframework.scheduling.quartz.CronTriggerFactoryBean;
import org.springframework.scheduling.quartz.MethodInvokingJobDetailFactoryBean;
import org.springframework.scheduling.quartz.SchedulerFactoryBean;

@Configuration
public class QuartzConfigration {
    @Bean(name = "jobDetail")
    public MethodInvokingJobDetailFactoryBean detailFactoryBean(JobTask task) {
        // ScheduleTask is the task to be executed
        MethodInvokingJobDetailFactoryBean jobDetail = new MethodInvokingJobDetailFactoryBean();
        /*
         *  Concurrent execution
         *  For example, the task is executed every 3 seconds, but the current task has not been executed, and it has passed 3 seconds
         *  If this is true, the next task will be bing executed. If this is false, the next task will wait for the execution of the previous task before starting execution
         */
        jobDetail.setConcurrent(true);
        jobDetail.setName("scheduler");// Set the name of the task
        jobDetail.setGroup("scheduler_group");// Set the grouping of tasks. These properties can be stored in the database and used when multitasking

        /*
         * These two lines of code represent the execution of the scheduleTest method in the task object. The logic of scheduled execution is in scheduleTest.
         */
        jobDetail.setTargetObject(task);
        jobDetail.setTargetMethod("start");
        return jobDetail;
    }

    @Bean(name = "jobTrigger")
    public CronTriggerFactoryBean cronJobTrigger(MethodInvokingJobDetailFactoryBean jobDetail) {
        CronTriggerFactoryBean tigger = new CronTriggerFactoryBean();
        tigger.setJobDetail(jobDetail.getObject());
        tigger.setCronExpression("*/5 * * * * ?");//Every five seconds
        tigger.setName("myTigger");// trigger's name
        return tigger;
    }
    @Bean(name = "scheduler")
    public SchedulerFactoryBean schedulerFactory(Trigger cronJobTrigger) {
        SchedulerFactoryBean bean = new SchedulerFactoryBean();
        //Set whether any defined Job will overwrite the current Job. The default is false, that is, the defined Job will not overwrite the existing Job.
        bean.setOverwriteExistingJobs(true);
        // Delay start. The timer will not start until 5 seconds after the application is started
        bean.setStartupDelay(5);
        // Register timing trigger
        bean.setTriggers(cronJobTrigger);
        return bean;
    }
    //Scheduler for multitasking, and Trigger is set dynamically. A SchedulerFactoryBean may have multiple triggers
    @Bean(name = "multitaskScheduler")
    public SchedulerFactoryBean schedulerFactoryBean(){
        SchedulerFactoryBean schedulerFactoryBean = new SchedulerFactoryBean();
        return schedulerFactoryBean;
    }
}
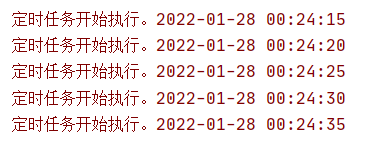
So far, the scheduled task configuration is successful. Start the SpringBoot project and view the console log information:
3.3 Email sent by springboot
In development, we often encounter Email sending scenarios, such as registration, retrieving password, sending verification code, sending Email to customers, sending system information through Email, sending report information through Email, etc. there are many practical application scenarios.
First, introduce the following protocols related to sending and receiving mail:
-
Send mail:
SMPT and mime are "push" protocols that send mail to the mail server through SMPT protocol. MIME Protocol is a supplement to SMPT protocol, such as sending picture attachments.
-
Receive mail:
POP and IMAP are protocols based on "pull". The recipient pulls mail from the mail server through POP protocol.
3.3.1 configuration required for sending mail
Because each major mail operator has its corresponding security system, which can not be used if the project wants to use it, we must obtain its corresponding client authorization code. After obtaining the authorization code, configure the SMTP service protocol and host configuration account in the project, so that each major mail operator can be used to send mail in the project.
Take QQ email as an example. Log in to the QQ mailbox, click the "Settings" button, then select the account option, pull down and select to start the POP3/SMTP service, as follows:

Click the "open" button to enter the verification process. Send SMS according to the guidance. After successful verification, you can get the client authorization code of your QQ mailbox.
After obtaining the authorization code, you can configure the file application in the SpringBoot project YML or properties file.
3.3.2 sending mail using SpringBoot
-
Setting up the environment: first, create the SpringBoot project. You need to introduce the following Email dependencies:
<dependency>
            <groupId>org.springframework.boot</groupId>
            <artifactId>spring-boot-starter-mail</artifactId>
        </dependency>
Then in the configuration file application Add relevant configuration information to YML:
mail: host: smtp.qq.com #outgoing mail server username: 964249279@qq.com #Email address for sending mail password: ***************** #Client authorization code smtp.port: 465 #Port number 465 or 587 from: 964249279@qq.com #The email address is the same as the email address of username above properties.mail.smtp.starttls.enable: true properties.mail.smtp.starttls.required: true properties.mail.smtp.ssl.enable: true default-encoding: UTF-8 -
Send ordinary mail: ordinary mail refers to the most ordinary plain text mail. Create a MailService class to encapsulate the sending of mail. The code is as follows:
package com.shenziyi.demo.mail;


import org.slf4j.Logger;
import org.slf4j.LoggerFactory;
import org.springframework.beans.factory.annotation.Autowired;
import org.springframework.beans.factory.annotation.Value;
import org.springframework.mail.SimpleMailMessage;
import org.springframework.mail.javamail.JavaMailSender;
import org.springframework.stereotype.Service;

@Service
public class MailService {
    private final Logger logger = LoggerFactory.getLogger(this.getClass());
    /**
     * Spring Boot It provides a simple abstraction for sending e-mail. It uses the following interface, which can be directly injected here
     */
    @Autowired
    private JavaMailSender mailSender;

    /**
     * Get your qq mailbox in the configuration file
     */
    @Value("${spring.mail.from}")
    private String from;

    /**
     * Simple text mail
     * @param to addressee
     * @param subject theme
     * @param content content
     */
    public void sendSimpleMail(String to, String subject, String content) {
        //Create a SimpleMailMessage object
        SimpleMailMessage message = new SimpleMailMessage();
        //Mail sender
        message.setFrom(from);
        //Mail recipient
        message.setTo(to);
        //Mail subject
        message.setSubject(subject);
        //Mail content
        message.setText(content);
        //Send the mail through the JavaMailSender class
        mailSender.send(message);
    }
}
Code interpretation:
- JavaMailSender is a mail sending interface provided by SpringBoot. It can be used by direct injection.
- Simple mail encapsulates the packaged data through the SimpleMailMessage object, and finally sends the data through the JavaMailSender class.
After configuration, test in the main test class provided by SpringBoot:
package com.shenziyi.demo;

import com.shenziyi.demo.mail.MailService;
import org.junit.Test;
import org.junit.runner.RunWith;
import org.springframework.beans.factory.annotation.Autowired;
import org.springframework.boot.test.context.SpringBootTest;
import org.springframework.test.context.junit4.SpringRunner;
import org.thymeleaf.TemplateEngine;

@RunWith(SpringRunner.class)
@SpringBootTest
public class DemoApplicationTests {


    /*Inject email sending interface*/
    @Autowired
    private MailService mailService;

    /*TemplateEngine To render the template*/
    @Autowired
    private TemplateEngine templateEngine;

    /** Test sending text mail*/
    @Test
    public void sendmail() {
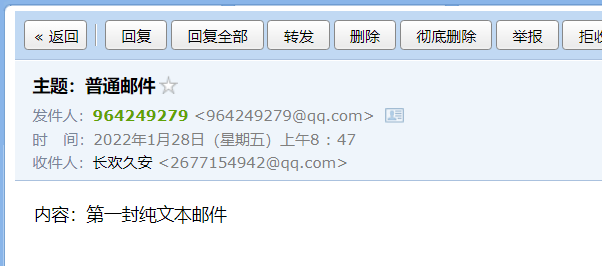
        mailService.sendSimpleMail("2677154942@qq.com","Subject: ordinary mail","Content: first plain text email");
    }
}
be careful:
- After adding, add @ RunWith(SpringRunner.class) to the test class and import the relevant packages@ The test package is org junit. Test instead of org junit. jupiter. api. Test.
- Set classes and methods to public to run.
Execution result:
-
Send HTML mail:
Most of the time, we need beautiful style of email. You can use HTML style at this time. We need to use the createMimeMessage method of JavaMailSender to build a MimeMessage, then use the MimeMessage instance to create a MimeMessageHelper, and add the following methods to the MailService:
/**
     * html mail
     * @param to addressee
     * @param subject theme
     * @param content content
     */
    public void sendHtmlMail(String to, String subject, String content) {
        //Get MimeMessage object
        MimeMessage message = mailSender.createMimeMessage();
        MimeMessageHelper messageHelper;
        try {
            messageHelper = new MimeMessageHelper(message, true);
            //Mail sender
            messageHelper.setFrom(from);
            //Mail recipient
            messageHelper.setTo(to);
            //Mail subject
            message.setSubject(subject);
            //Mail content, html format
            messageHelper.setText(content, true);
            //send out
            mailSender.send(message);
            //log information
            logger.info("The message has been sent.");
        } catch (Exception e) {
            logger.error("An exception occurred while sending mail!", e);
        }
    }
Add the following methods to the test class for testing:
@Test
    public void sendmailHtml(){
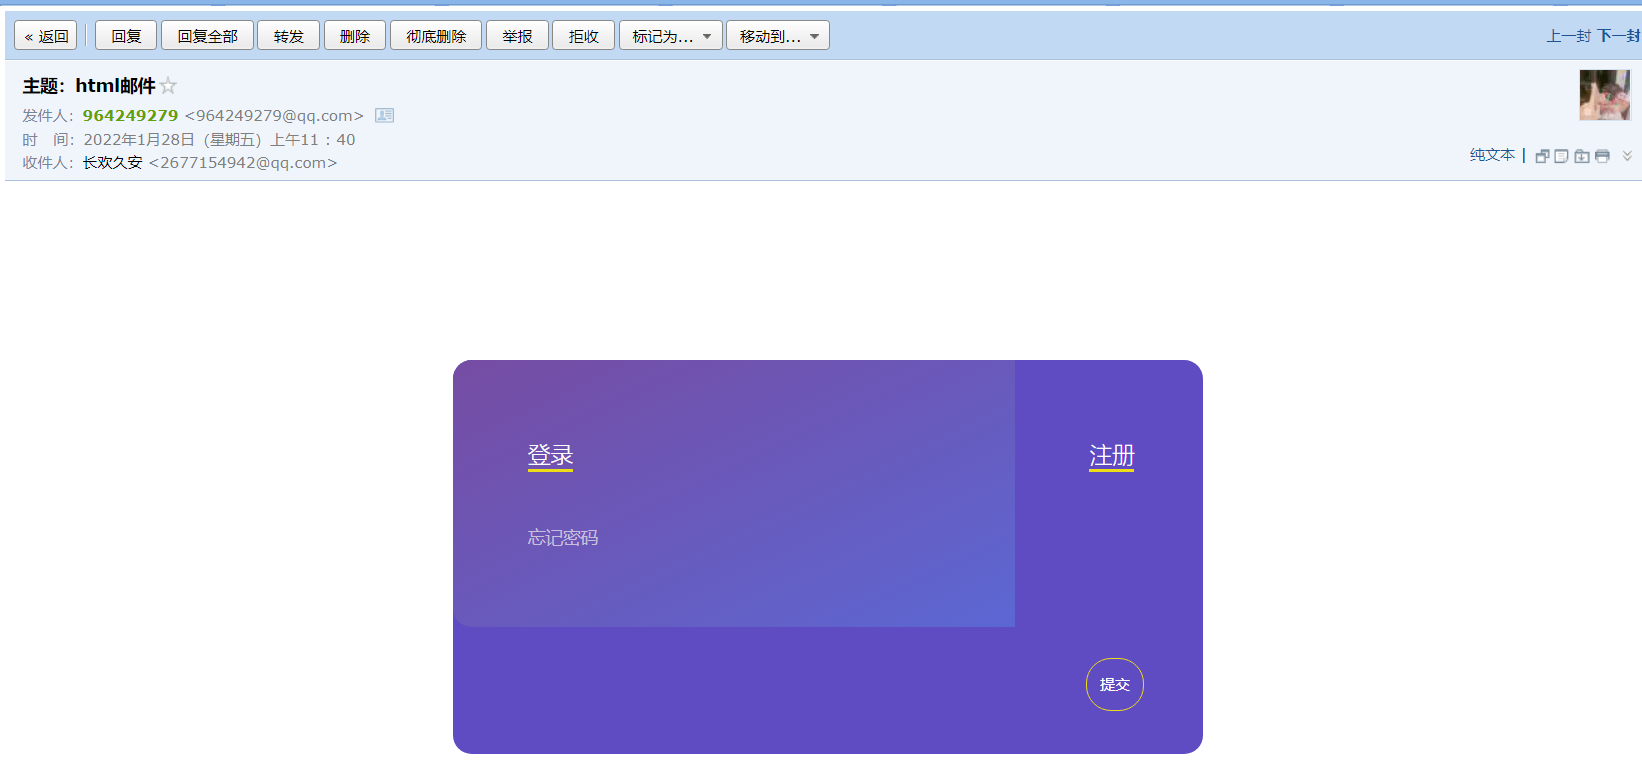
        mailService.sendHtmlMail("2677154942@qq.com","Subject: html mail","<div><h1>This is a html Interface</h1></div>");
    }
The effect is as follows:
-
Messages with attachments:
In many cases, when sending mail, you need to send it with some attachments. There are also methods with attachments in JavaMailSender. Add the following methods in MailService:
/* Mail with attachments*/
    public void sendAttachmentMail(String to, String subject, String content, String filePath) {
        logger.info("Start sending mail with attachments:{},{},{},{}", to, subject, content, filePath);
        MimeMessage message = mailSender.createMimeMessage();
        MimeMessageHelper helper;
        try {
            helper = new MimeMessageHelper(message, true);
            //true means multiple components are supported, such as attachments, pictures, etc
            helper.setFrom(from);
            helper.setTo(to);
            helper.setSubject(subject);
            helper.setText(content, true);
            FileSystemResource file = new FileSystemResource(new File(filePath));
            String fileName = file.getFilename();
            helper.addAttachment(fileName, file);//To add attachments, you can call this method multiple times to add multiple attachments
            mailSender.send(message);
            logger.info("Mail with attachments sent successfully");
        } catch (MessagingException e) {
            logger.error("Failed to send mail with attachments", e);
        }
    }
Add the following content to the test class:
/**
     * Send mail with attachments
     */
    @Test
    public void sendAttachmentMail() {
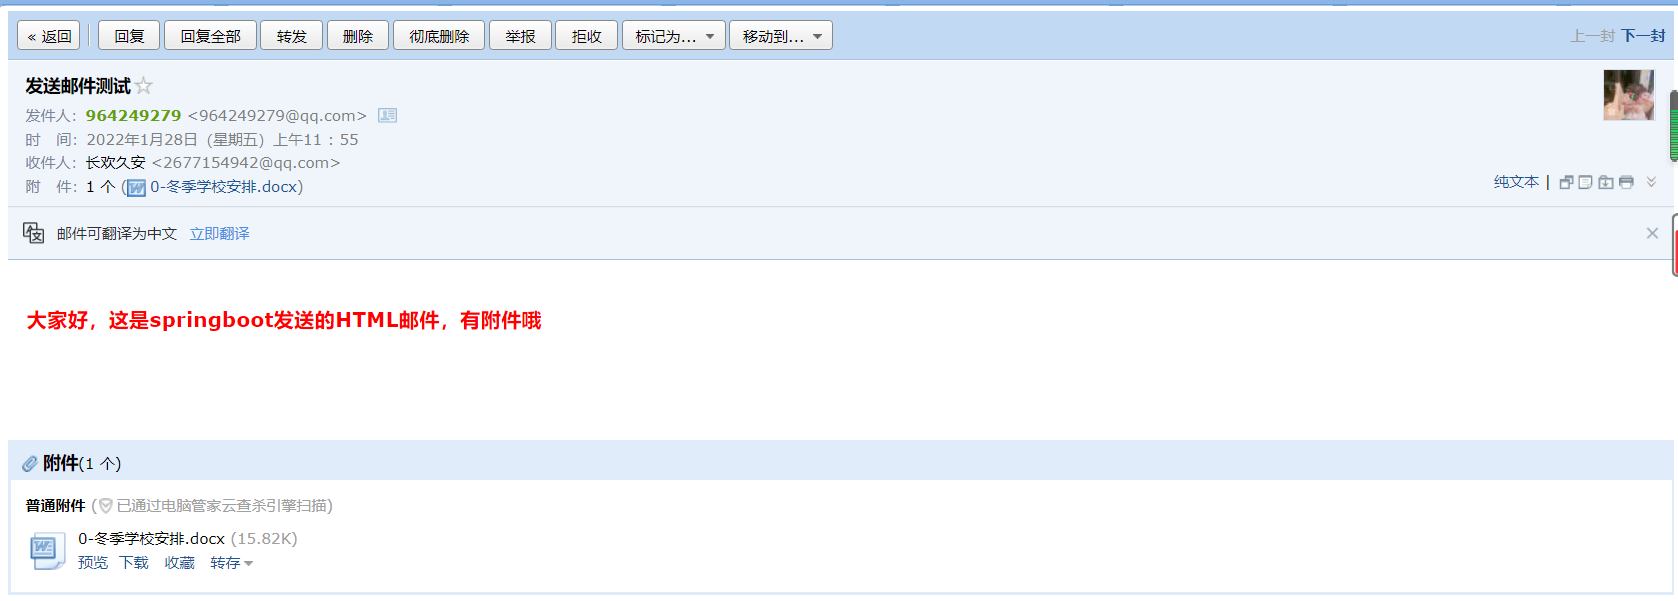
        String content = "<html><body><h3><font color=\"red\">" + "Hello, this is springboot Sent HTML Email, with attachments" + "</font></h3></body></html>";
        String filePath = "E:\\2021-2022-1 semester\\Winter school arrangement\\0-Winter school arrangement.docx";
        mailService.sendAttachmentMail("2677154942@qq.com", "Send mail test", content, filePath);
    }
After executing the method, you can see that the mail has been sent successfully:
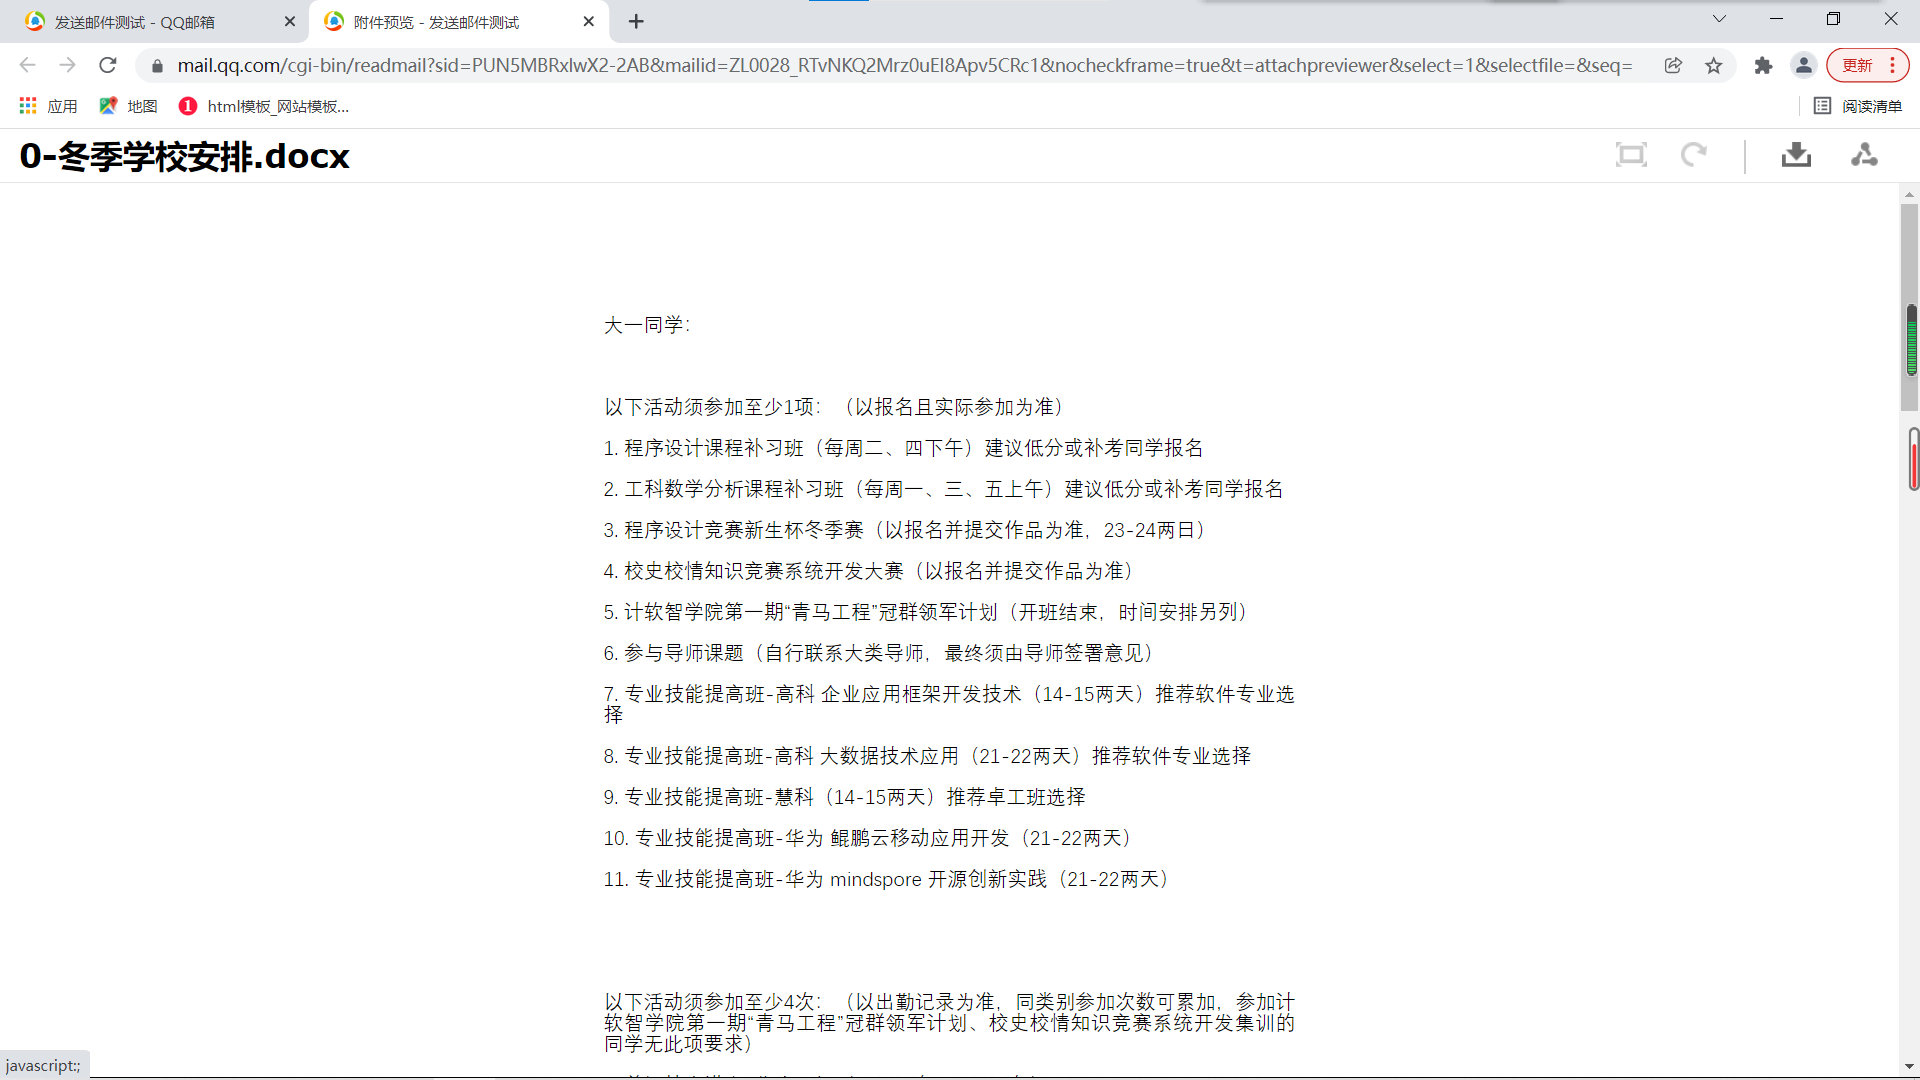
Through the preview, it is found that the file is correct:
-
Send message with picture:
With pictures, that is, use the < img > tag in the body, set the photos we need to send, and add some parameters on the basis of HTML. Add the following methods in MailService:
 /*Send mail with pictures*/
    public void sendInlineResourceMail(String to, String subject, String content, String rscPath, String rscId) {

        logger.info("Start sending email with picture:{},{},{},{},{}", to, subject, content, rscPath, rscId);
        MimeMessage message = mailSender.createMimeMessage();

        MimeMessageHelper helper;
        try {
            helper = new MimeMessageHelper(message, true);
            helper.setFrom(from);
            helper.setTo(to);
            helper.setSubject(subject);
            helper.setText(content, true);
            FileSystemResource res = new FileSystemResource(new File(rscPath));
            helper.addInline(rscId, res);//Reuse add multiple pictures
            mailSender.send(message);
            logger.info("Sending email with picture succeeded");
        } catch (MessagingException e) {
            logger.error("Failed to send mail with picture", e);
        }
    }
Add the following methods to the test class:
@Test
    public void sendInlineResourceMail() {
        String rscPath = "D:\\wallpaper\\Yinlin.jpg";
        String rscId = "001";
        /*Use cid to mark out static resources*/
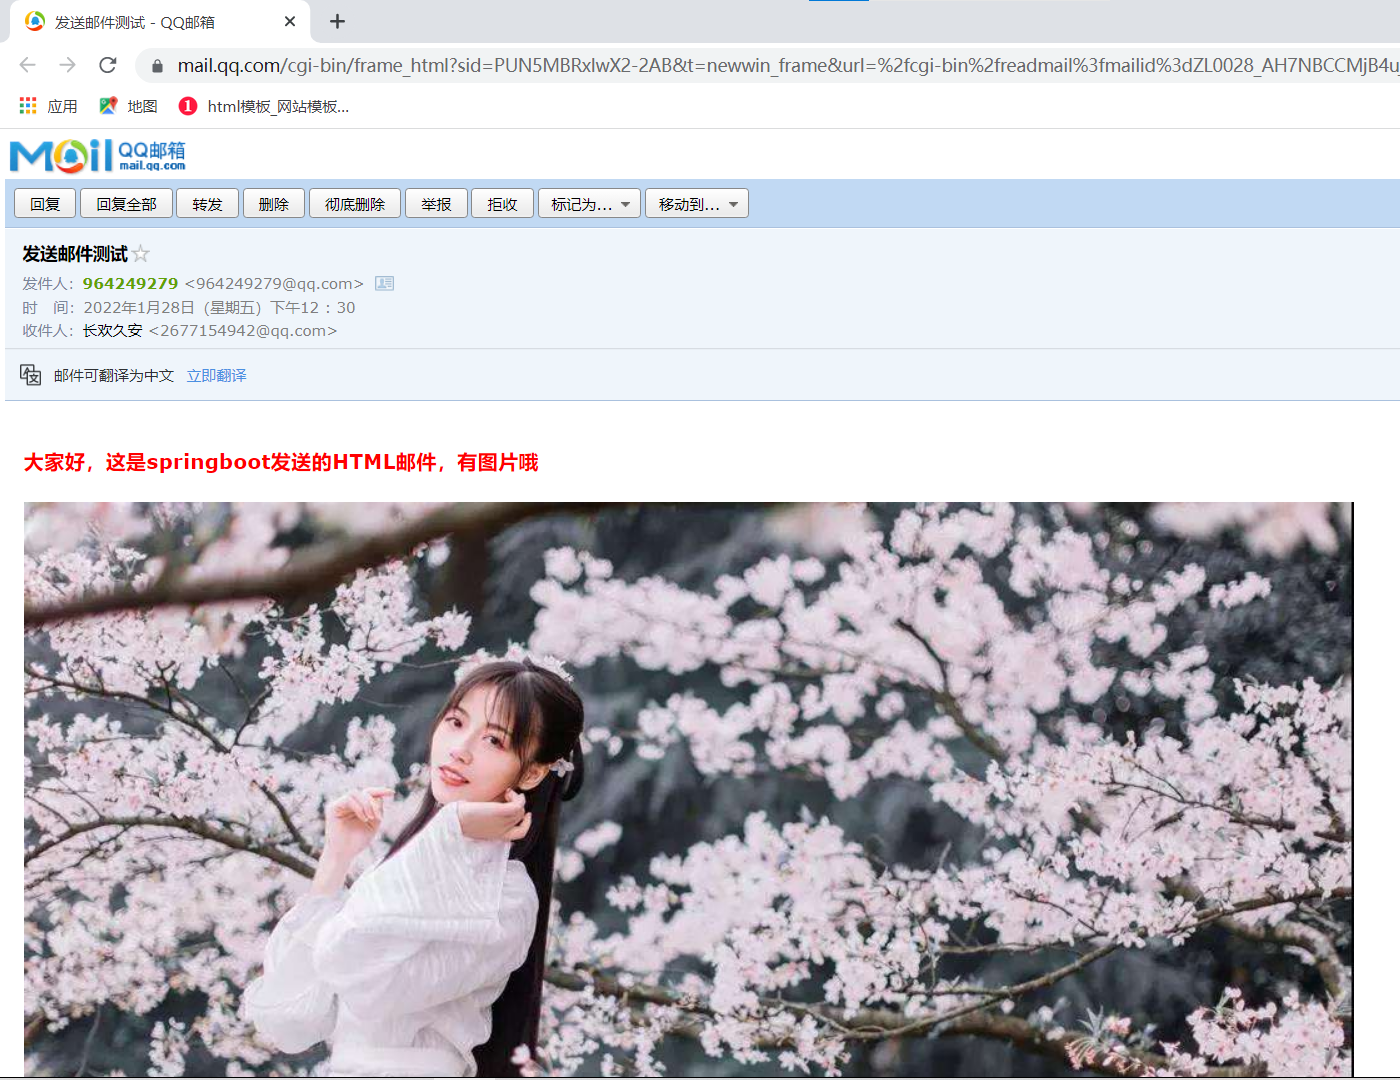
        String content = "<html><body><h3><font color=\"red\">" + "Hello, this is springboot Sent HTML Mail, there are pictures" + "</font></h3>"
                + "<img src=\'cid:" + rscId + "\'></body></html>";
        mailService.sendInlineResourceMail("2677154942@qq.com", "Send mail test", content, rscPath, rscId);
    }
The effect is as follows:
-
Template mail:
Usually, when we use email to send the required service information, there will be some fixed scenarios, such as password reset, registration confirmation, etc. only a small part of the content sent to each user may change. Therefore, we often use the template engine to set all kinds of emails as templates, so we only need to replace the parameters of the transformation part when sending.
It is also very easy to use the template engine to realize templated email sending in SpringBoot. Let's take Thymeleaf as an example to realize templated email sending.
-
First, add the Thymeleaf dependency.
-
Create an emailtemplate under the template folder html:
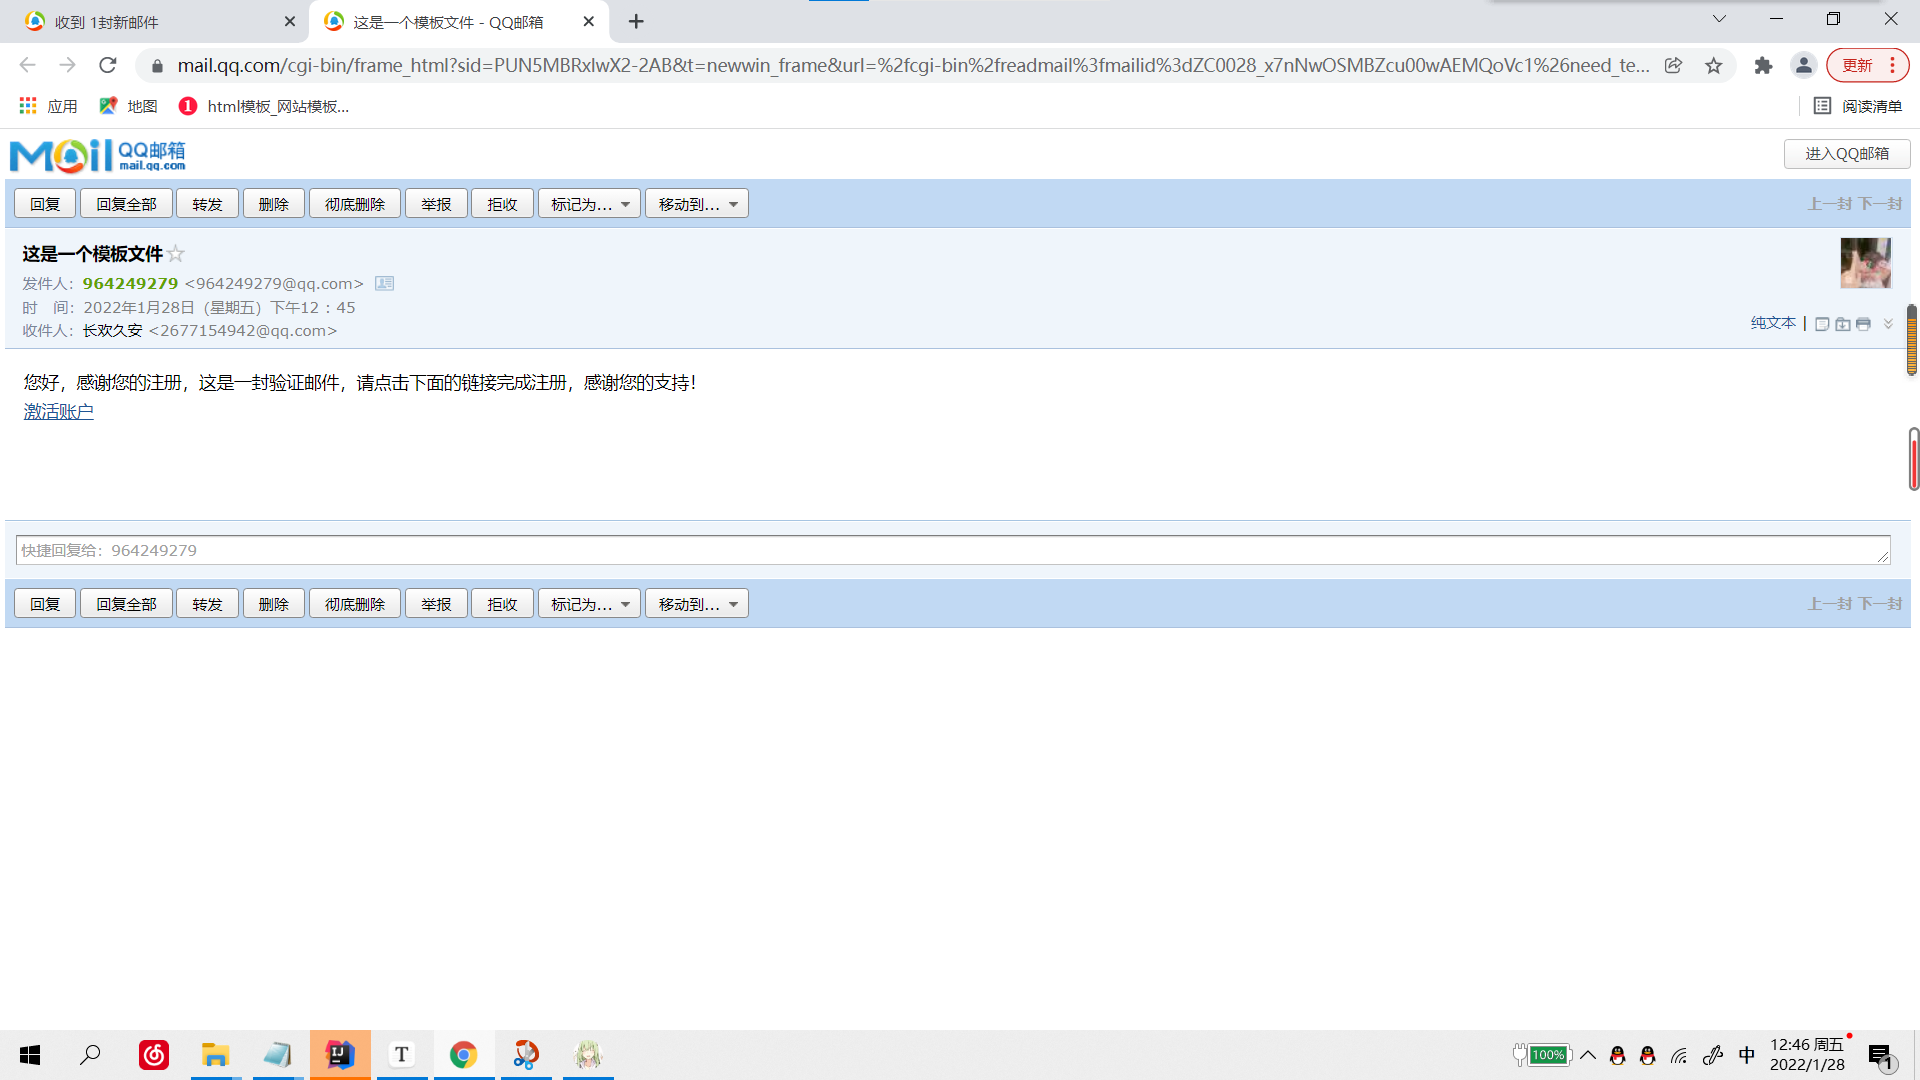
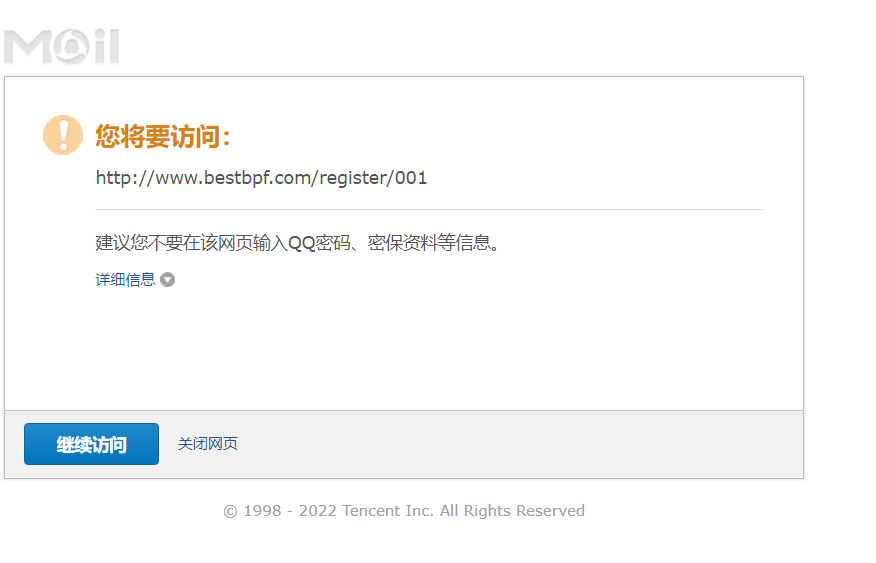
<!DOCTYPE html> <html lang="en" xmlns:th="http://www.thymeleaf.org"> <head> <meta charset="UTF-8"> <title>Mail template</title> </head> <body> Hello, thank you for your registration. This is a verification email. Please click the link below to complete the registration. Thank you for your support!<br> <a href="#" th:href="@{ http://www.bestbpf.com/register/ {ID} (id = ${ID})} "> activate account</a> </body> </html> -
In the template page, the id changes dynamically and parameter setting is required. In fact, after parameter transmission, the page is parsed into HTML string as the main content of e-mail. Add the following code to the test class for testing:
@Test
    public void testTemplateMail() {
        //Pass the value to the Thymeleaf template and parse it into a string
        Context context = new Context();
        context.setVariable("id", "001");
        String emailContent = templateEngine.process("emailTemplate", context);

        mailService.sendHtmlMail("2677154942@qq.com", "This is a template file", emailContent);
    }
The effect is as follows:
-