preface
This blog will introduce the establishment and simple use of Eureka registry of spring cloud, which is mainly divided into the following aspects:
1. Overall structure of the project;
2. Construction process and detailed explanation of each service;
3. Simple call between Eureka services;
1, What is Eureka?
Eureka is the registration and configuration center of spring cloud, which has roughly the same role as Zookeeper and nacos. In Eureka, you can register and monitor the services in the project and control the operation of each service in real time; In addition, Eureka is the AP principle (the famous CAP principle). A is the service availability and P is the fault tolerance of the service to the network partition failure.
2, Project implementation steps
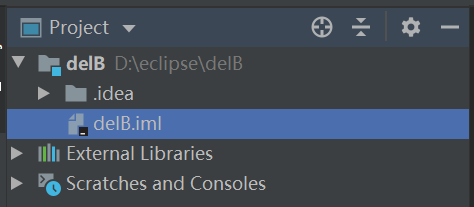
1. Construction of project shell
The project shell is built by maven project. After creating maven project, delete the src and other useless parts of maven project, and only keep the empty shell as the overall shell of each service.
The effect diagram is shown in the figure below:
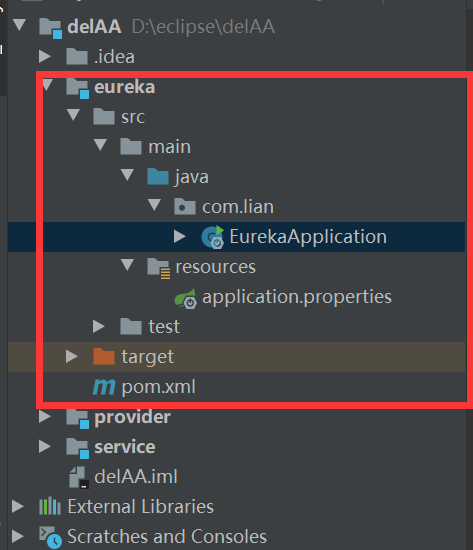
2. Establishment of Eureka Registration Center Service
Eureka registration center is still built on maven project, but it has been manually modified to become a SpringBoot project;
The project structure is shown in the figure below:
The code for starting class EurekaApplication is:
@SpringBootApplication  //Spring boot boot class core annotation
@EnableEurekaServer  //Eureka server
@EnableDiscoveryClient  //Service discovery
public class EurekaApplication {
    public static void main(String[] args) {
        SpringApplication.run(EurekaApplication.class,args);
    }
}
The corresponding properties configuration file is as follows:
# When an error occurs, an exception is thrown directly
spring.mvc.throw-exception-if-no-handler-found=true
# Do not map the resource files in our project
spring.resources.add-mappings=true
#Get port number
#server.port=${server.port}

spring.application.name=eureka-server
server.port=8761
#Since the application is a registration center, it is set to false, which means that you do not register yourself with the registration center
eureka.client.register-with-eureka=false
# Since the responsibility of the registry is to maintain service instances, it does not need to retrieve services, so it is also set to false
eureka.client.fetch-registry=false
#Turn off self-protection mode
eureka.server.enable-self-preservation=false
#Scan interval for failed services
#eureka.server.eviction-interval-timer-in-ms=1000
eureka.instance.hostname=localhost
After the above configuration, it can be started normally. The normal startup page is as follows:
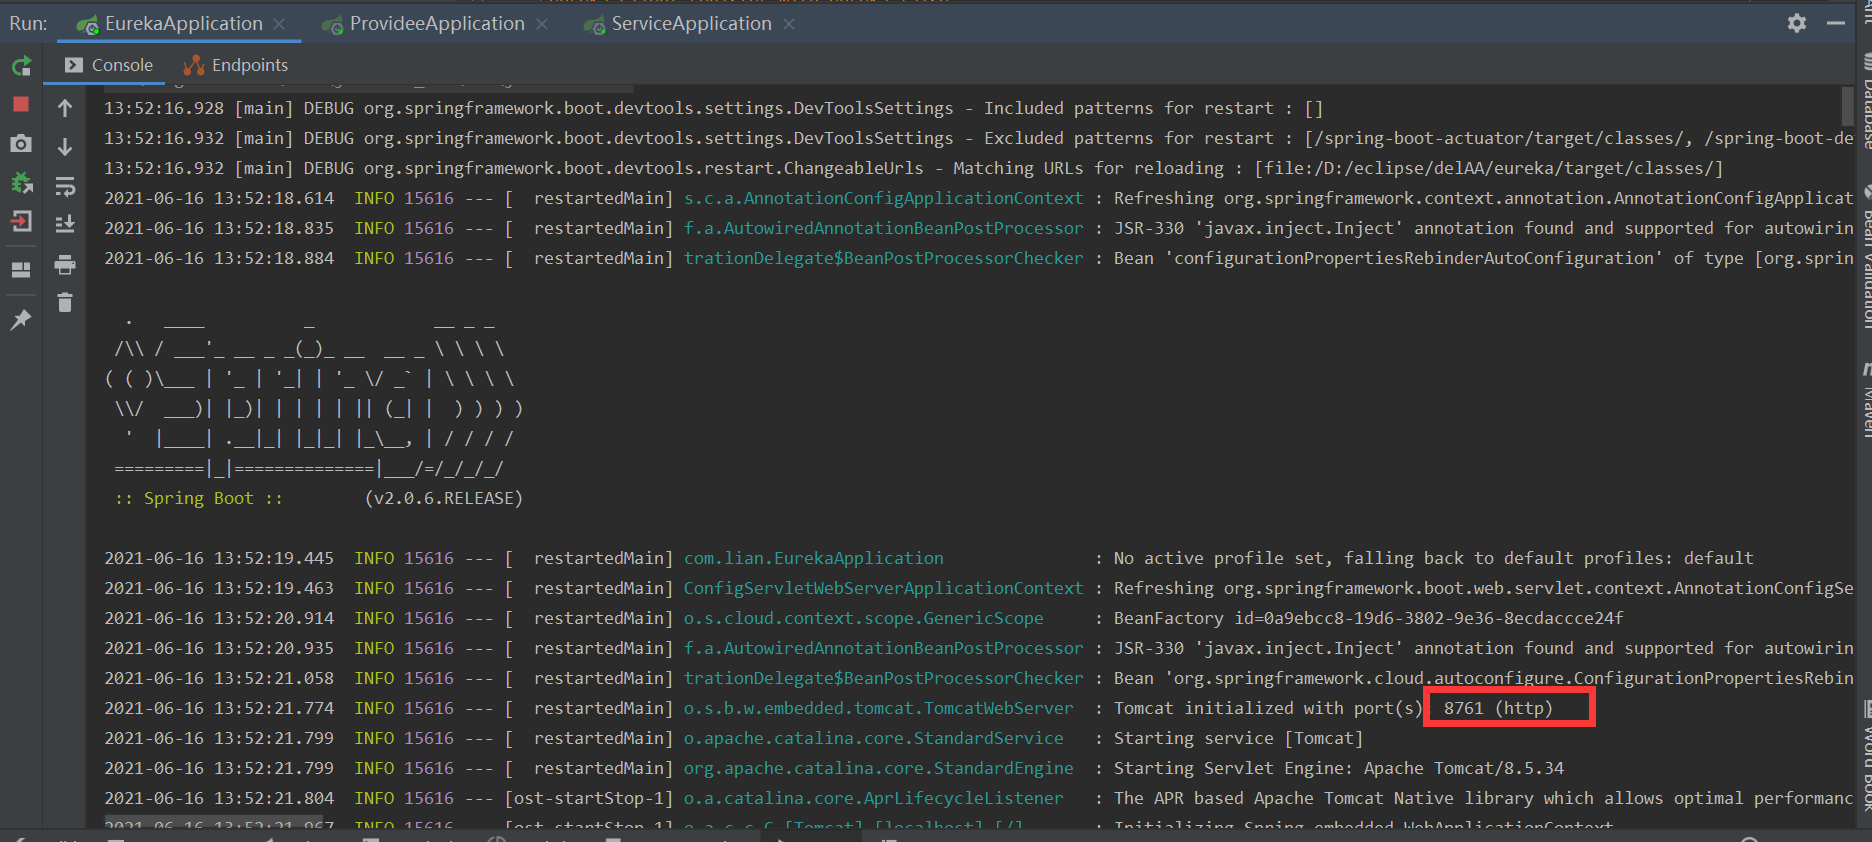
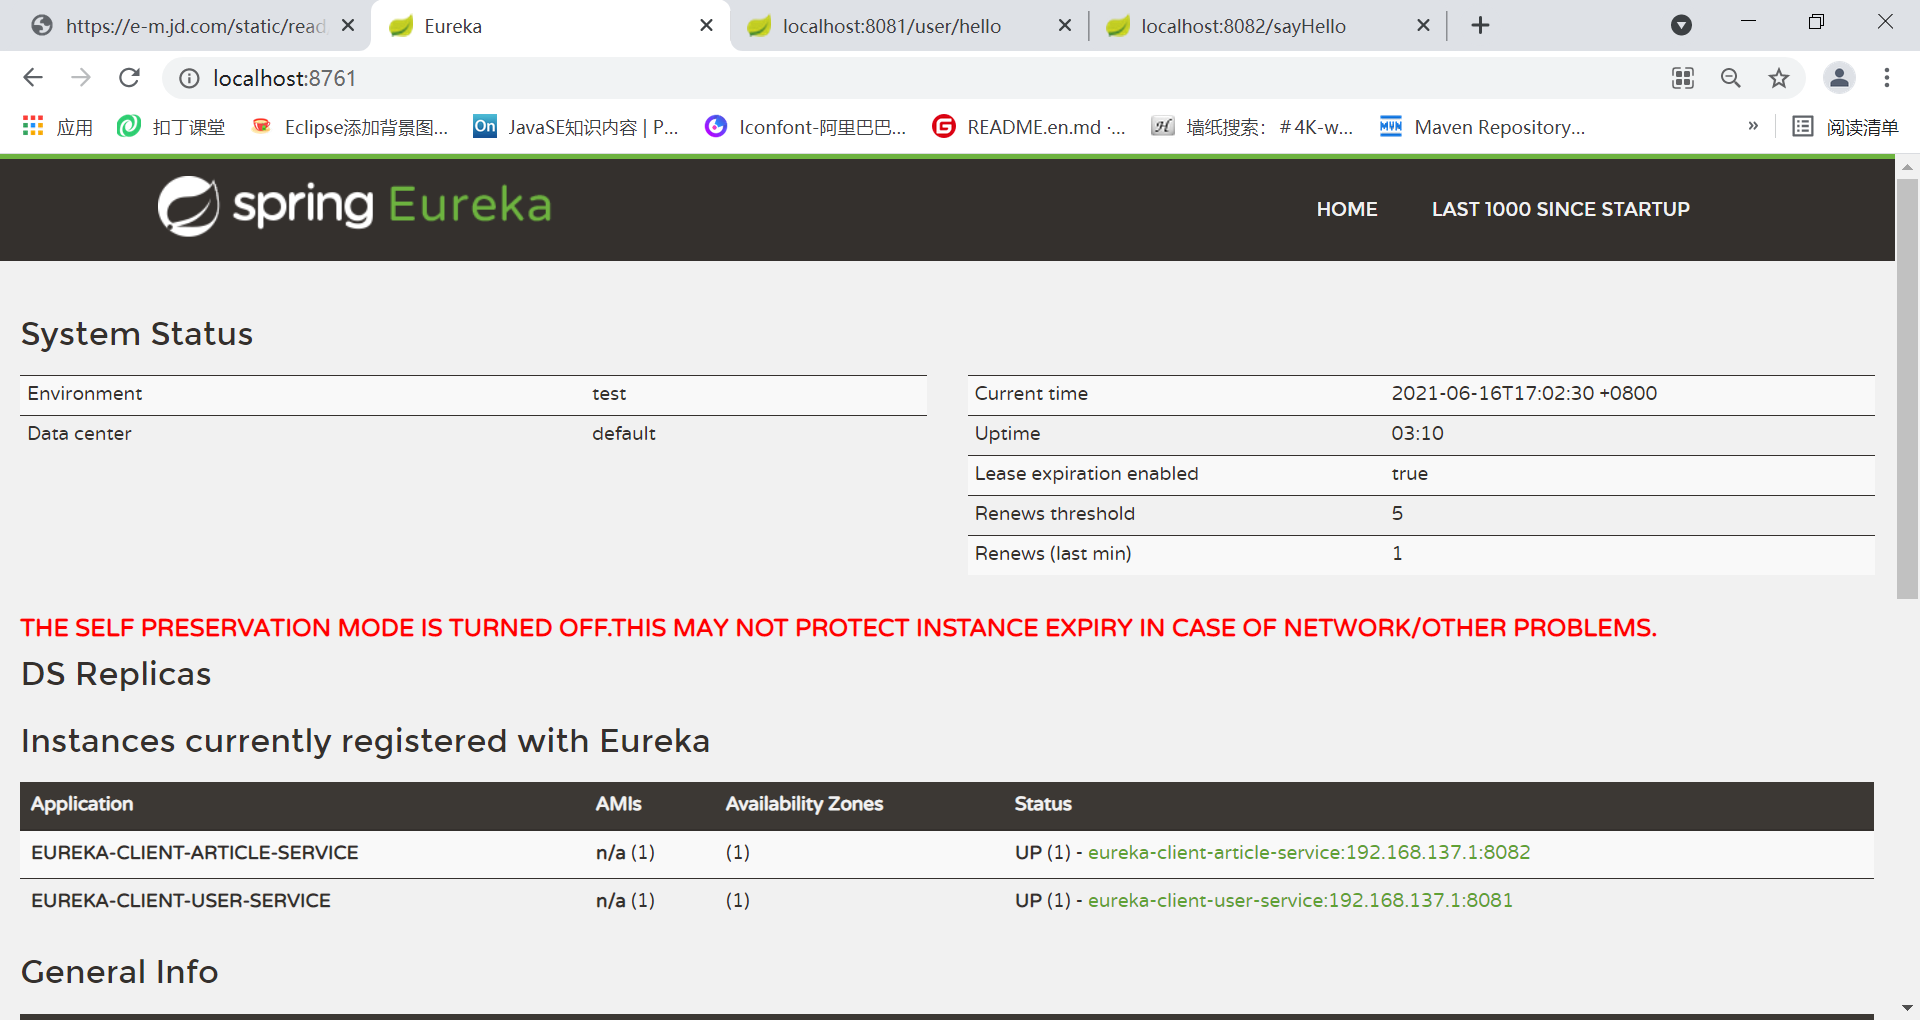
If the port number can be displayed normally (port 8761 is Eureka dedicated port and cannot be changed, otherwise an error will be reported), it indicates that the loading is successful. At this time, access it in the local browser: http://localhost:8761/ , you can see Eureka's page. So far, congratulations on completing the configuration of the registry. As shown in the figure below:
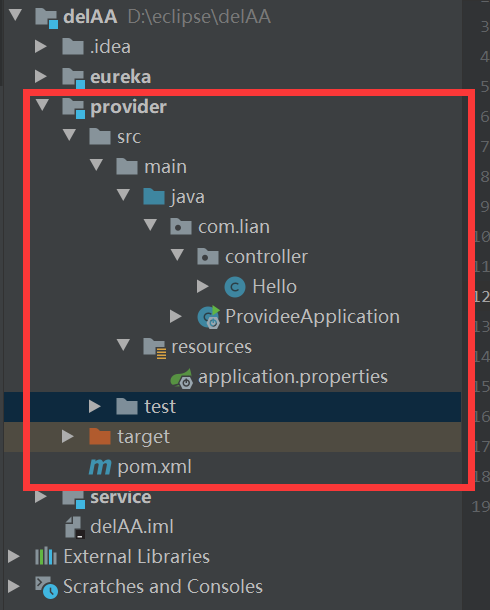
3.Provider service setup
After we have a registry, we start to create providers and register them in Eureka registry to test whether the interface is available locally:
The provider still chooses maven project for construction. Later, it is still modified to become SpriingBoot project. Its project structure is shown in the following figure:
The controller is the test interface. The function of the interface returns a string Hello World. Its main purpose is to test whether the project can operate normally. Hello's content is:
@RestController  //@Combined annotation of Response and @ Controller annotation
public class Hello {
    @RequestMapping("/user/hello")
    public String SayHello(){
        return "Hello World!";
    }
}
In the service startup class annotation, pay special attention to @ EnableEurekaClient, which represents the client of the service, which is different from that in Eureka. The startup class code is as follows:
@SpringBootApplication
@EnableEurekaClient  //Service client
public class ProvideeApplication {
    public static void main(String[] args) {
        SpringApplication.run(ProvideeApplication.class,args);
    }
}
Its configuration file is as follows:
#service name
spring.application.name=eureka-client-user-service
#Port number
server.port=8081
#Registry URL
eureka.client.serviceUrl.defaultZone=http://localhost:8761/eureka/
# Use IP registration
eureka.instance.preferIpAddress=true
# Define instance ID format
eureka.instance.instance-id=${spring.application.name}:${spring.cloud.client.ip-address}:${server.port}
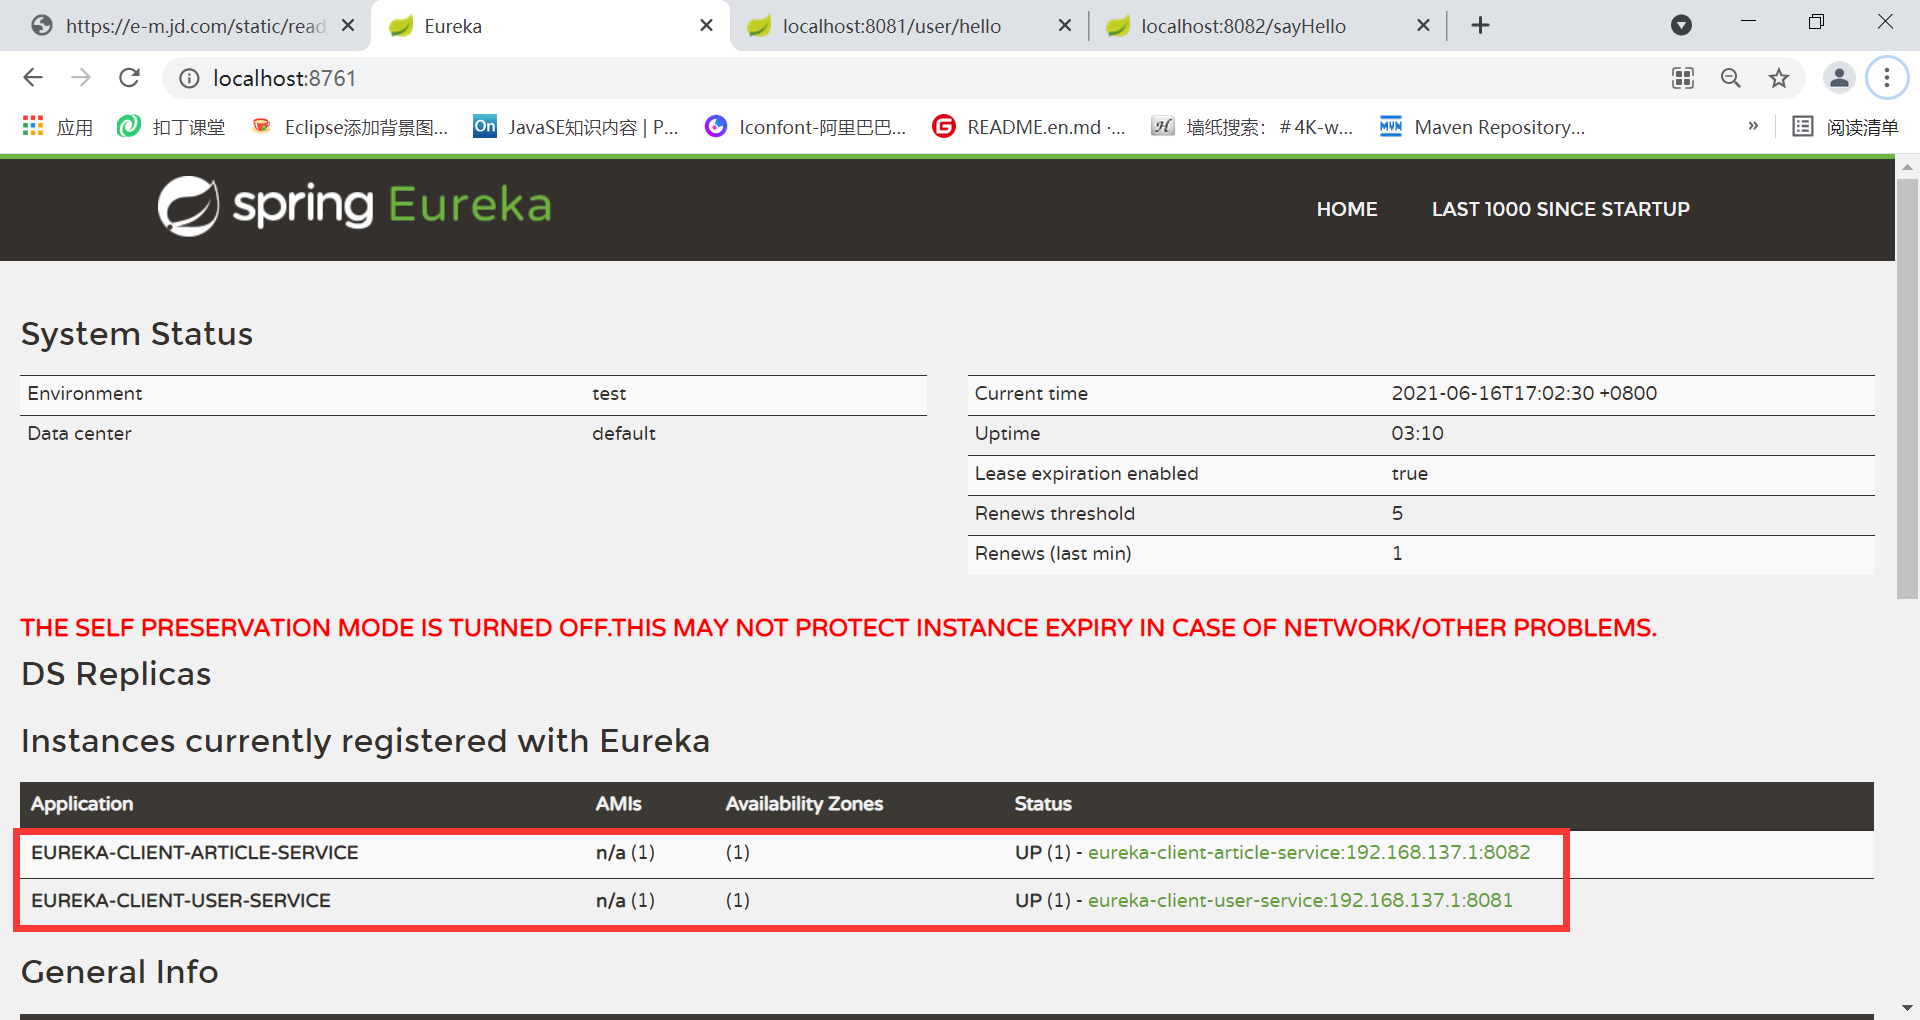
After starting Prodiver, you can see the registration information of the service on the page of Eureka registration center, and find the specific service according to the port number you configured. As shown in the figure below:
Test whether the test interface of the Provider is available. You can access it in the browser according to the interface name you set. My address is: http://localhost:8081/user/hello , the normal access page is as follows:
So far, congratulations on completing the configuration of the Provider service.
4.Service construction
summary
Above, I have made a brief introduction to Eureka of SpringCloud, as well as the construction and simple use of the project. The later words will be continuously updated, because I am also learning. If there are deficiencies and mistakes, I beg the boss to correct them.