What are spring IOC and spring AOP?
IoC (inversion of control) and AOP (aspect oriented) are the two cores of the Spring framework. Java Spring framework can flexibly manage transactions in a declarative way to improve development efficiency and quality.
IoC control reversal
Ioc Inversion of Control is not a technology, but a design idea.
IoC means that in program development, the creation of instances is no longer managed by the caller, but created by the Spring container. The Spring container is responsible for controlling the relationship between programs, rather than being directly controlled by the program code. Therefore, the control is transferred from the program code to the Spring container, and the control is reversed. This is Spring's IoC idea.
Next, we will introduce SpringIOC with examples.
How to use SpringIOC
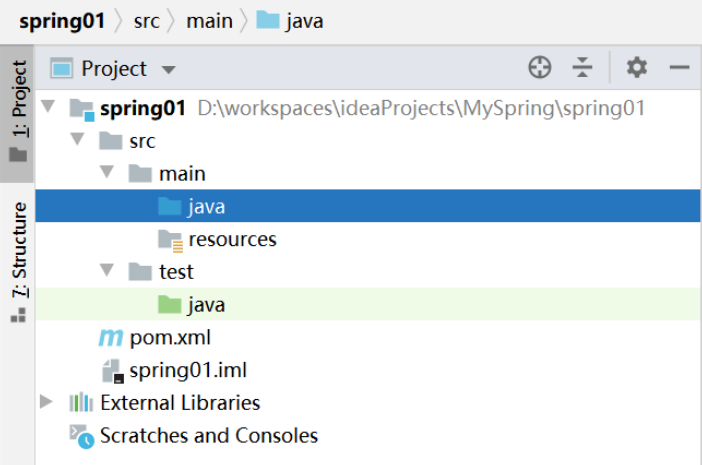
1. Create a maven project
2,pom. Add dependencies and plug-ins to XML files
<!--rely on-->
<dependencies>
    <!--unit testing -->
    <dependency>
      <groupId>junit</groupId>
      <artifactId>junit</artifactId>
      <version>4.12</version>
      <scope>test</scope>
    </dependency>
 <!--spring rely on-->
    <dependency>
      <groupId>org.springframework</groupId>
      <artifactId>spring-context</artifactId>
      <version>5.2.13.RELEASE</version>
    </dependency>
</dependencies>

<!--assembly-->
  <build>
    <plugins>
      <!--Compiling plug-ins-->
      <plugin>
        <groupId>org.apache.maven.plugins</groupId>
        <artifactId>maven-compiler-plugin</artifactId>
        <version>3.8.0</version>
        <configuration>
          <source>1.8</source>
          <target>1.8</target>
        </configuration>
      </plugin>
    </plugins>
  </build>
3. Create an entity class

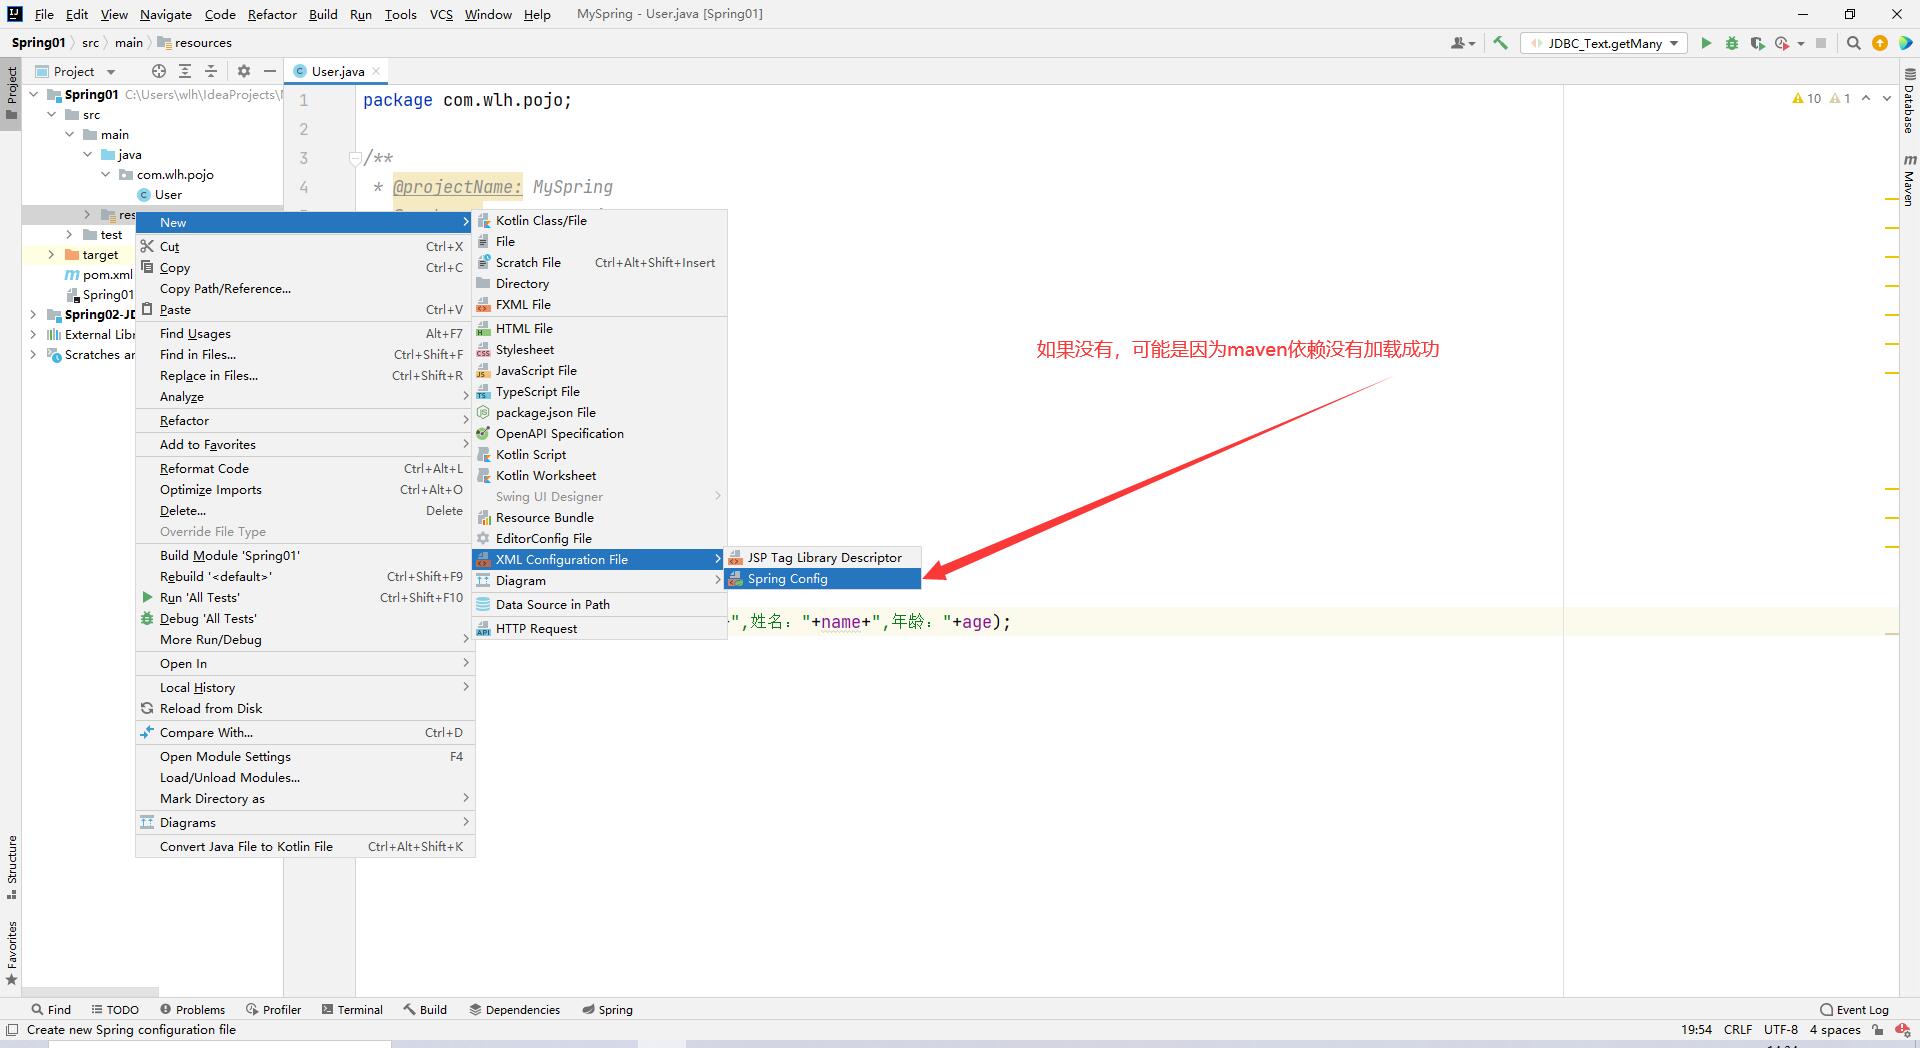
4. Create spring's configuration file application xml

5. Creating objects using Spring containers
Create object in configuration file
<?xml version="1.0" encoding="UTF-8"?>
<!--
    Spring Configuration file for
    beans: Follow label
        spring in Java The object is called Java bean
        spring-beans. xsd Is a constraint file constraint xml Files can write those labels
-->
<beans xmlns="http://www.springframework.org/schema/beans"
       xmlns:xsi="http://www.w3.org/2001/XMLSchema-instance"
       xsi:schemaLocation="http://www.springframework.org/schema/beans http://www.springframework.org/schema/beans/spring-beans.xsd">

    <!--
        Creating objects: declarations bean,inform spring The container creates those objects
            One bean Represents an object
            id="Object name",Unique value required
            class="Fully qualified name (with package name and class name)",spring The bottom layer of is to create objects through reflection, so you can't write interfaces
            amount to com.wlh.bin.Team team1 = new com.wlh.bin.Team();Then put the created object into spring A collection of containers Map in
            springMap.put(id,object)for example springMap. put("team1",new Team());
            scope="singleton":Singleton, the default value. After the container is started, the singleton object is created, and there is only one object in the container
            scope="prototype":Multiple instances. The objects of multiple instances are created when they are used. New objects are created every time they are obtained
    -->
    <bean id="user1" name="team1" class="com.wlh.pojo.User" scope="singleton"></bean>
</beans>
6. Get spring container
Spring provides two kinds of IoC containers, BeanFactory and ApplicationContext.
6.1,BeanFactory
Bean factory is an IoC container of basic types. It is a factory for managing beans. It is mainly responsible for initializing various beans and calling
Their life cycle approach.
BeanFactory interface has multiple implementation classes, the most common of which is
org.Springframework.beans.factory.xml.XmlBeanFactory, which is assembled according to the definition in the XML configuration file
Bean's.
BeanFactory beanFactory = new XmlBeanFactory(new FileSystemResource(Spring configuration file
 Name of));
6.2,ApplicationContext
ApplicationContext is a sub interface of BeanFactory, also known as application context. It not only provides BeanFactory
For all functions, it also adds good support for i18n (internationalization), resource access, event propagation and so on.
The ApplicationContext interface has two common implementation classes:
6.2.1 ClassPathXmlApplicationContext - Common
This class looks for the specified XML configuration file from the ClassPath classpath, finds and loads the instantiation of ApplicationContext
work
ApplicationContext applicationContext=new ClassPathXmlApplicationContext(Spring match
 Set the name of the file.xml);
6.2.2,FileSystemXmlApplicationContext
The difference between FileSystemXmlApplicationContext and ClassPathXmlApplicationContext is that when reading the configuration file of Spring, FileSystemXmlApplicationContext no longer reads the configuration file from the class path, but specifies the location of the configuration file through parameters. It can obtain resources outside the class path, such as "D:\application.xml".
ApplicationContext applicationContext = new
FileSystemXmlApplicationContext(String configLocation);
7. Gets the object in the container through the context object
package com.wlh.test;

import com.wlh.pojo.User;
import org.junit.Test;
import org.springframework.beans.factory.BeanFactory;
import org.springframework.beans.factory.xml.XmlBeanFactory;
import org.springframework.context.ApplicationContext;
import org.springframework.context.support.ClassPathXmlApplicationContext;
import org.springframework.core.io.FileSystemResource;

/**
 * @projectName: MySpring
 * @package: com.wlh.test
 * @className: Test01
 * @author: Wang Lihong
 * @description: TODO
 * @date: 2022/1/10 21:38
 * @version: 1.0
 */
public class Test01 {

    @Test
    public void test01() {
        //How the spring container creates objects
        String springConfig="application.xml";
        //Get container
        //  Method 1: there will be a problem reading the path
        //BeanFactory beanFactory = new XmlBeanFactory(new FileSystemResource(springConfig));
        //Object team1 = beanFactory.getBean("team1");// Get object from IOC container based on id
        //  Method 2:
        //ApplicationContext applicationContext = new ClassPathXmlApplicationContext("C: / specific path")
        //  Method 3: common methods
        ClassPathXmlApplicationContext applicationContext = new ClassPathXmlApplicationContext(springConfig);
        //Get object from container by ID
        User team1 = (User) applicationContext.getBean("team1");
        System.out.println(team1);

		//Close the container
		applicationContext.close();

    }
}
8. Close the container
applicationContext.close();
Properties of the bean tag

Implementing spring IOC based on annotations -- important
For di (DI Dependency Injection, i.e. "Dependency Injection") using annotations, it is no longer necessary to declare bean instances in the Spring configuration file. To use annotations in Spring, you need to make some changes based on the original Spring running environment.
1. Declare the annotation @ Component of Bean
Add the annotation @ Component on the class to indicate that the permission of the class to create objects is handed over to the Spring container. The value attribute of the annotation is used to specify
The id value of the bean. Value can be omitted.
@Component does not specify the value attribute, and the bean id is the lowercase initial of the class name.
package com.wlh.pojo;

import org.springframework.stereotype.Component;

/**
 * @projectName: MySpring
 * @package: com.wlh.pojo
 * @className: Team
 * @author: Wang Lihong
 * @description: TODO
 * @date: 2022/1/10 21:23
 * @version: 1.0
 */
@Component(value = "user")
public class User {

    private int id;
    private String name;
    private int age;

    public User() {
        System.out.println("id: "+id+",full name:"+name+",Age:"+age);
    }
}
In addition, Spring also provides three other annotations for creating objects:
@Repository: Annotation for dao implementation class
@Service: Annotation of user service implementation class
@Controller: Annotation for controller implementation class
These three annotations and @ Component can create objects, but these three annotations have other meanings, @ Service creates business layer objects, which can add transaction functions, and the objects created by @ Controller annotation can be used as processors to receive user requests.
@Repository, @ Service, @ Controller is the refinement of @ Component annotation, marking objects of different layers. That is, persistence layer object, business layer object and control layer object.
2. Packet scanning
The component scanner needs to be configured in the Spring configuration file to scan annotations in the specified basic package. If there is no package scan, the added annotation of the created object will not take effect.
If there are multiple packages to scan, you can scan them in the following ways:
2.1. Use multiple context: component scan to specify different package paths
<?xml version="1.0" encoding="UTF-8"?>
<!--
    Spring Configuration file for
    beans: Follow label
        spring in Java The object is called Java bean
        spring-beans. xsd Is a constraint file constraint xml Files can write those labels
-->
<beans xmlns="http://www.springframework.org/schema/beans"
       xmlns:xsi="http://www.w3.org/2001/XMLSchema-instance"
       xmlns:context="http://www.springframework.org/schema/context"
       xsi:schemaLocation="http://www.springframework.org/schema/beans
        http://www.springframework.org/schema/beans/spring-beans.xsd
        http://www.springframework.org/schema/context
        http://www.springframework.org/schema/context/spring-context.xsd
        ">

    <!--
        context:component-scan Express notification spring Packages to scan
        If the classes in these packages and sub packages are added@Component Comments, these are added@Component The annotated class is handed over to spring Container creation object
        Note: in beans Add the following content to the label
            xmlns:context="http://www.springframework.org/schema/context"
            xsi:schemaLocation="
                http://www.springframework.org/schema/context
                http://www.springframework.org/schema/context/spring-context.xsd
                "
    -->

    <context:component-scan base-package="com.wlh.bin"></context:component-scan>
    <context:component-scan base-package="com.wlh.service"></context:component-scan>
    <context:component-scan base-package="com.wlh.controller"></context:component-scan>

</beans>
2.2. Specify the separator for the value of base package
Separators can use commas (,) semicolons (;) You can also use spaces. Spaces are not recommended.
<context:component-scan base-package="com.wlh.bin:com.wlh.service:com.wlh.controller"></context:component-scan>
2.3. Base package is the name assigned to the parent package
The value of base package indicates the basic package. When the container is started, it will scan the annotations in the package and its sub packages. Of course, it will also scan the sub packages under the sub packages. So base package can specify a parent package.
However, it is not recommended to use the top-level parent package. There are many scanning paths, resulting in slower container startup time. Assign to the target package and the appropriate. That is, the full path of the package where the annotation is located.
<!--Scanning of multiple packages: Mode 3: base-package Directly declare the parent package of multiple packages to be scanned-->
  <context:component-scan base-package="com.wlh"></context:component-scan>
3. Property injection @ Value
The @ value annotation needs to be used on the attribute. The value attribute of the annotation is used to specify the value to be injected. When using this annotation to complete attribute injection, there is no need for setters in the class. Of course, if the property has a setter, it can also be added to the setter.

(1) byType auto injection @ Autowired
The annotation @ Autowired needs to be used on the reference attribute. By default, the annotation uses the method of automatically assembling beans by type. When using this annotation to complete attribute injection, there is no need for setters in the class. Of course, if the property has a setter, it can also be added to the setter.
(2) byName automatically injects @ Autowired and @ Qualifier
The annotation @ Autowired and @ Qualifier need to be used together on the reference attribute@ The value attribute of Qualifier is used to specify the id value of the Bean to be matched. Class does not need a set method, but can also be added to the set method.
@Autowired also has an attribute required, and the default value is true, which means that the program will be terminated when the matching fails. If the value is set to false, the matching fails and will be ignored. The unmatched property value is null.
(3) . automatically inject @ Resource
Spring provides support for @ resource annotation in JDK@ Resource annotations can match beans by name or type. The default is to inject by name. Using this annotation requires that the JDK must be version 6 or above@ Resource can be on property or set method.
(3.1). byType injection reference type attribute
@If the Resource annotation does not take any parameters, it is injected by name by default. If Bean cannot be injected by name, Bean matching injection will be carried out according to type.
(3.2). byName injection reference type attribute
@If the Resource annotation specifies its name attribute, the value of name is the id of the Bean matched by name.
AOP facing section
AOP is the abbreviation of Aspect Oriented Programming, which means Aspect Oriented Programming. It is a technology to realize the unified maintenance of program functions through precompiled mode and runtime dynamic agent.
Function of AOP: enhance the function of the method during program operation without modifying the source code.
Benefits:
1. Reduce code duplication, improve development efficiency and facilitate maintenance.
2. Focus on the development of core business.
Core business and service code are mixed together
In development: do what they are good at, and weave the service code into the core business when running.
Through the spring factory, the service code is automatically added to the core business code in a faceted way.
Implementation mechanism of AOP - dynamic agent
What is the agent model?
Agent: if you don't do it yourself, find someone to do it for you.
Agent mode: add new functions on the basis of an original function.
Classification: static agent and dynamic agent.
Static proxy
1. Original method: core business and service methods are written together
package  com.wlh.service;
public class UserService {
	public void add(){
		try {
			System.out.println("Start transaction");
			System.out.println("UserService---- add----");// core business
			System.out.println("Commit transaction");
		} catch (Exception e) {
			e.printStackTrace();
			System.out.println("Rollback transaction");
		}
	}
}
2. Class based static proxy
Separate the service code, and only the save function is available in the core business - save business
package  com.wlh.service;
public class UserService {
	public void add(){
		System.out.println("UserService---- add----");// core business
	}
}
package com.wlh.staticproxy;
import com.wlh.service.UserService;
/**
* Class based static proxy:
*   Requires inheritance from the proxied class
*   Disadvantages: only one class can be represented at a time
*/
public class ProxyUserService extends UserService {
	  public void add(){
		  try {
		       System.out.println("Start transaction");
		       super.add();//The core business is completed by the proxy object; Other service functions are completed by the agent class
		       System.out.println("Commit transaction");
		   }catch (Exception e){
		       System.out.println("Rollback transaction");
		   }
	  }
}
public static void main(String[] args) {
	UserService us=new ProxyUserService();
	us.add();
}
Disadvantages: a proxy class can only proxy one class
3. Interface based static proxy
Create an interface for the core business (save add), and expose the proxy method through the interface
Requirement: both proxy class and proxy class implement the same interface
package com.wlh.service;
/**
* Interface definition core method
*/
public interface IService {
	void add();
}
package  com.wlh.service;
public class UserService implements IService{
	  @Override
	  public void add(){
	    System.out.println("UserService---- add----");// core business
	 }
}
package com.wlh.staticproxy;
import com.wlh.service.IService;
/**
* Interface based static proxy:
* The proxy class and the proxy class implement the same interface
*/
public class ProxyTranService implements IService {
	  private IService service;//Proxied object
	  public ProxyTranService(IService service) {
	       this.service = service;
	  }
	  @Override
	  public void add() {
		   try {
		       System.out.println("Start transaction");
		       service.add();//The core business is completed by the proxy object; Other service functions are completed by the agent class
		       System.out.println("Commit transaction");
		   }catch (Exception e){
		       System.out.println("Rollback transaction");
		   }
	 }
}
package com.wlh.staticproxy;
import com.wlh.service.IService;

public class ProxyLogService implements IService {
	  private IService service;//Proxied object
	  public ProxyLogService(IService service) {
	      this.service = service;
	  }

	  @Override
	  public void add() {
	       try {
	           System.out.println("Start log");
	           service.add();//The core business is completed by the proxy object; Other service functions are completed by the agent class
	           System.out.println("End log");
	       }catch (Exception e){
	           System.out.println("Exception log");
	       }
	  }
}
Test class
public static void main(String[] args) {
    UserService userService=new UserService();//Proxied object

    ProxyTranService tranService=new ProxyTranService(userService);//Transaction agent object -- primary agent
    //tranService.add();// Proxy object

    ProxyLogService logService=new ProxyLogService(tranService);//Proxy object of log -- secondary agent
    logService.add();
}
4. Extract the section code as the AOP interface
There are four places to weave the section code into the core business code.
package com.wlh.aop;

/**
* Aspect: service code, cut into the core code, where to cut into, give four positions
*/
public interface AOP {
	  void before();
	  void after();
	  void exception();
	  void myFinally();
}
package com.wlh.aop;

public class TranAOP implements AOP {
	  @Override
	  public void before() {
	      System.out.println("affair----before");
	  }
	  @Override
	  public void after() {
	      System.out.println("affair----after");
	  }
	  @Override
	  public void exception() {
	      System.out.println("affair----exception");
	  }
	  @Override
	  public void myFinally() {
	      System.out.println("affair----myFinally");
	  }
}
package com.wlh.aop;

public class LogAop implements AOP{
	  @Override
	  public void before() {
	      System.out.println("journal----before");
	  }
	  @Override
	  public void after() {
	      System.out.println("journal----after");
	  }
	  @Override
	  public void exception() {
	      System.out.println("journal----exception");
	  }
	  @Override
	  public void myFinally() {
	      System.out.println("journal----myFinally");
	  }
}
package com.wlh.staticproxy;
import com.wlh.aop.AOP;
import com.wlh.service.IService;

public class ProxyAOPService implements IService {
      private IService service;//Proxied object
      private AOP aop;//To add cut

	  public ProxyAOPService(IService service, AOP aop) {
	       this.service = service;
	       this.aop = aop;
	  }

 	  @Override
	  public void add() {
		   try {
		        aop.before();
		        service.add();//Proxy object
		        aop.after();
		   }catch (Exception e){
		        aop.exception();
		   }finally {
		        aop.myFinally();
		   }
 	 }

 }
  @Test
  public void test02(){
	    IService userService=new UserService();//Proxied object -- core content
	    AOP logAop=new LogAop();//Aspect - service content
	    AOP tranAop=new TranAOP();
	    IService service=new ProxyAOPService(userService,logAop); //Proxy object -- primary proxy
	    IService service2=new ProxyAOPService(service,tranAop);//Proxy object -- secondary proxy
	    service2.add();
  }
Summarize static agents:
   (1)advantage:
   		   You can extend the function of the target object without modifying the function of the target object.
   (2)Disadvantages:
           Because the proxy object needs to implement the same interface as the target object. So there will be many proxy classes, too many classes.
           Once a method is added to the interface, both the target object and the proxy object must be maintained.
Dynamic agent
Static proxy: the proxy class must exist,
Dynamic agent: when the program is running, the agent class is dynamically generated according to the object to be represented.
Type:
1. Dynamic agent based on JDK
2. Dynamic agent based on CGLIB
Dynamic agent based on JDK

1. Write test classes directly
/*
newProxyInstance(ClassLoader loader, Class<?>[] interfaces, InvocationHandlerh)

ClassLoader : Class loader, because of the dynamic proxy class, with the help of other people's class loader. Generally, the class loader of the proxy object is used.

Class<?>[] interfaces:The collection of interface class objects, the proxy for the interface, and which interface to proxy, generally use the interface of the proxy object.
InvocationHandler: Handle, callback function, write the rule code of the agent

public Object invoke(Object arg0, Method arg1, Object[] arg2)
Object arg0: Proxy object
Method arg1: Proxy method
Object[] arg2: An array of parameters when the proxied method is executed
*/
package com.wlh.dynamicproxy;

import com.wlh.service.IService;
import com.wlh.service.UserService;

import java.lang.reflect.InvocationHandler;
import java.lang.reflect.Method;
import java.lang.reflect.Proxy;

public class MyJDKProxy {
   public static void main(String[] args) {
       	//Target object -- proxied object
	    UserService userService=new UserService();
	    //Return the Proxy object and call the static method newProxyInstance in the Proxy class in JDK to get the instance of the dynamic Proxy class
	    IService proxyService= (IService) Proxy.newProxyInstance(
	          userService.getClass().getClassLoader(),
	          userService.getClass().getInterfaces(),
        	  new InvocationHandler() {//Write proxy rules for callback functions
		          @Override
		          public Object invoke(Object proxy, Method method, Object[] args) throws Throwable {
			           try {
			                System.out.println("Start transaction");
			                Object invoke = method.invoke(userService, args);//core business
			                System.out.println("Commit transaction");
			                return invoke;
			           }catch (Exception e){
			                System.out.println("Rollback transaction");
			                e.printStackTrace();
			                throw e;
			           }finally {
			                System.out.println("finally---------");
			           }
	         	  }
              }
        );
        //Proxy object
        proxyService.add();
        System.out.println(userService.getClass());
        System.out.println(proxyService.getClass()+"--------");
   }
}
2. Structural optimization
Method 1:
package com.wlh.dynamicproxy;

import com.wlh.aop.AOP;
import com.wlh.service.IService;

import java.lang.reflect.InvocationHandler;
import java.lang.reflect.Method;

public class ProxyHandler implements InvocationHandler {
	  private IService service;//Target object
	  private AOP aop;//section
	  public ProxyHandler(IService service, AOP aop) {
		    this.service = service;
		    this.aop = aop;
	  }
	  @Override
	  public Object invoke(Object proxy, Method method, Object[] args) throws Throwable {
		   try {
			      aop.before();
			      Object invoke = method.invoke(service, args);//core business
			      aop.after();
			      return invoke;
		   }catch (Exception e){
			      aop.exception();
			      e.printStackTrace();
			      throw e;
		   }finally {
		     	  aop.myFinally();
		   }
	  }
}
public static void main2(String[] args) {
    //Target object -- proxied object
    UserService userService=new UserService ();
    //section
    AOP tranAop=new TranAOP();
    //Return proxy object JDK based dynamic proxy
    IService proxyService= (IService) Proxy.newProxyInstance(
        userService.getClass().getClassLoader(),
        userService.getClass().getInterfaces(),
        new ProxyHandler(userService,tranAop)
    );
    //Proxy object
    proxyService.add();
    System.out.println(userService.getClass());
    System.out.println(proxyService.getClass()+"------");
}
Method 2:
package com.wlh.dynamicproxy;

import com.wlh.aop.AOP;
import com.wlh.service.IService;

import java.lang.reflect.InvocationHandler;
import java.lang.reflect.Method;
import java.lang.reflect.Proxy;

public class ProxyFactory {
	  private IService service;//Target object
	  private AOP aop;//section
	  public ProxyFactory(IService service, AOP aop) {
	      this.service = service;
	      this.aop = aop;
	  }
	  /**
	  * Get an example of a dynamic proxy
	  * @return
	  */
	  public Object getProxyInstance() {
		    return Proxy.newProxyInstance(
		          service.getClass().getClassLoader(),
		          service.getClass().getInterfaces(),
		          new InvocationHandler() {//Write proxy rules for callback functions
			          @Override
			          public Object invoke(Object proxy, Method method, Object[] args) throws Throwable {
				           try {
				              aop.before();
				              Object invoke = method.invoke(service, args);//core business
				              aop.after();
				              return invoke;
				           }catch (Exception e){
				              aop.exception();
				              e.printStackTrace();
				              throw e;
				           }finally {
				              aop.myFinally();
				           }
			         }
		         }
	        );
	 }
}
public static void main(String[] args) {
	    //Target object -- proxied object
	    UserService userService=new UserService ();
	    //section
	    AOP tranAop=new TranAOP();
	    AOP logAop=new LogAop();
	    //Get proxy object
	    IService service= (IService) new ProxyFactory(userService,tranAop).getProxyInstance();
	    IService service1= (IService) new ProxyFactory(service,logAop).getProxyInstance();
	    service1.add();//The core business + service code is a complete business method mixed together
}
The proxy object does not need to implement the interface, but the target object must implement the interface; Otherwise, JDK dynamic proxy cannot be used.
If you want to extend the function, but the target object does not implement the interface, how to extend the function?
Subclass to implement the proxy CGLIB.
Dynamic agent based on CGLIB
Cglib proxy, also known as subclass proxy. Build a subclass object in memory to expand the function of the target object.
1. One limitation of dynamic proxy in JDK is that objects using dynamic proxy must implement one or more interfaces. If you want to proxy a class that does not implement an interface, you can use CGLIB implementation.
2. CGLIB is a powerful high-performance code generation package, which can extend Java classes and implement Java interfaces at run time. It is widely used by many AOP frameworks, such as Spring AOP and dynaop, to provide them with method interception.
3. The bottom layer of CGLIB package is to convert bytecode and generate new classes by using a small and fast bytecode processing framework ASM. Direct use of ASM is not encouraged because it requires you to be familiar with the internal structure of JVM, including the format of class file and instruction set.
1. Write test classes directly
package com.wlh.cglibproxy;

public class NBAService {
	  public int add(String name,int id){
	    System.out.println("NBAService---- add----");
	    return id;
	  }
}
public static void main(String[] args) {
    //Target object: no interface
    NBAService nbaService=new NBAService();
    //Create proxy object: select cglib dynamic proxy
    NBAService proxyService= (NBAService) Enhancer.create(nbaService.getClass(),
    new MethodInterceptor() {//Write proxy rules for callback functions
        @Override
        public Object intercept(Object o, Method method, Object[] objects, MethodProxy methodProxy) throws Throwable {
		        try {
		          System.out.println("Start transaction");
		          Object invoke = methodProxy.invokeSuper(o, objects);//core
		          System.out.println("Commit transaction");
		          return invoke;
		       }catch (Exception e){
		          System.out.println("Transaction rollback");
		          throw e;
		       }finally {
		          System.out.println("finally------------");
		       }
     	}
    });
    //Proxy object
    int res=proxyService.add("huren",1001);
    System.out.println(res);
}
2. Structured design method
package com.wlh.cglibproxy;

import com.wlh.aop.AOP;
import net.sf.cglib.proxy.Enhancer;
import net.sf.cglib.proxy.MethodInterceptor;
import net.sf.cglib.proxy.MethodProxy;

import java.lang.reflect.Method;

public class CglibProxyFactory {
	  //Target object
	  private NBAService nbaService;//Interface not implemented
	  //section
	  private AOP aop;//section
	  /**
	  * Create proxy object
	  * @param nbaService
	  * @param aop
	  * @return
	  */
	  public Object getProxyInstance(NBAService nbaService,AOP aop){
	      	return  Enhancer.create(nbaService.getClass(), new MethodInterceptor() {
		          @Override
		          public Object intercept(Object o, Method method, Object[] objects, MethodProxy methodProxy) throws Throwable {
		            try {
		              aop.before();
		              Object o1 = methodProxy.invokeSuper(o, objects);
		              aop.after();
		              return o1;
		           }catch (Exception e){
		              aop.exception();
		              throw  e;
		           }             finally {
		              System.out.println("finally-----------");
		           }
		         }
	       });
 	}
}
public static void main(String[] args) {
    //Target object: no interface
    NBAService nbaService=new NBAService();
    //Create slice
    AOP tranAop=new TranAOP();
    //Create proxy object: select cglib dynamic proxy
    NBAService proxyInstance = (NBAService) new CglibProxyFactory().getProxyInstance(nbaService, tranAop);
    int res=proxyInstance.add("huren",1001);
    System.out.println(res);
}
SpringAOP
Spring AOP related concepts
The bottom layer of Spring's AOP implementation is to encapsulate the code of the above dynamic agent. After encapsulation, we only need to code the parts that need attention, and complete the method enhancement of the specified goal through configuration.
Let's first introduce the relevant terms of AOP:
Target:
The object to be enhanced is generally the object of business logic class.
Proxy:
After a class is woven and enhanced by AOP, a result proxy class is generated.
Aspect:
It refers to an enhanced function, which is a function completed by some code, not a business function. It is the combination of entry point and notification.
Joinpoint:
The so-called connection points refer to those intercepted points. In Spring, these points refer to methods (generally business methods in classes), because Spring only supports connection points of method types.
Pointcut:
A pointcut is a collection of one or more declared join points. Specify a set of methods through pointcuts.
Methods marked final cannot be used as join points and pointcuts. Because the final can not be modified, can not be enhanced.
Advice:
The so-called notification refers to what needs to be done after intercepting the Joinpoint. The notification defines the time point when the enhanced code cuts into the target code, whether it is executed before or after the execution of the target method. Different notification types lead to different cut in times.
Types of notification: pre notification, post notification, exception notification, final notification and surround notification.
The pointcut defines the position of the pointcut and notifies the time of the pointcut.
Weaving:
Refers to the process of applying enhancements to the target object to create a new proxy object. spring uses dynamic proxy weaving, while AspectJ uses compile time weaving and class loading time weaving.
Three key factors of section:
1,Function of section--What can a slice do
2,Execution position of section--use Pointcut Indicates where the slice is executed
3,Execution time of section--use Advice Indicates the time before or after the target method is executed.
Implementation of AOP by AspectJ
For the programming idea of AOP, many frameworks have been implemented. Spring is one of them, which can complete aspect oriented programming. AspectJ also realizes the function of AOP, and its implementation method is simpler, and it also supports annotation development. Therefore, spring also introduces AspectJ's implementation of AOP into its own framework.
When using AOP development in Spring, the implementation of AspectJ is generally used
AspectJ Is an excellent aspect oriented framework, which extends Java Language provides a powerful aspect implementation.
Notification type of AspectJ
There are five types of notifications commonly used in AspectJ:
- Before advice
- Post notification
- Around Advice
- Exception notification
- Final notice
Pointcut expression for AspectJ
AspectJ A special expression is defined to specify the pointcut.
The prototype of the expression is as follows:
	execution(modifiers-pattern? ret-type-pattern
	declaring-type-pattern?name-pattern(param-pattern)
	throws-pattern?)
	explain:
		modifiers-pattern] Access type
		ret-type-pattern return type
		declaring-type-pattern Package name class name
		name-pattern(param-pattern) Method name(Parameter type and number)
		throws-pattern Throw exception type
		?Represents an optional part
The above expression consists of four parts.
Execution (access permission method return value method declaration (parameter) exception type)
The object to be matched by the pointcut expression is the method name of the target method. Therefore, the execution expression is the signature of the method.
PS: the black text in the expression indicates the parts that can be omitted, and the parts are separated by spaces. The following symbols can be used:
| Symbol | significance |
|---|---|
| * | 0 - multiple arbitrary characters |
| ... | Used in method parameters to represent any parameter; Used after the package name to indicate the current and its sub package paths |
| + | Used after the class name to represent the current and its subclasses; Used after the interface to represent the current interface and its implementation class |
Example:
execution(* com.kkb.service.*.*(..))
The specified pointcut is: defined in service Any method of any class in the package.

execution(* com.kkb.service..*.*(..))
The specified pointcut is: defined in service Any method of any class in a package or sub package. “.."When it appears in the class name, it must be followed by“*",Represents all classes under package and sub package.

execution(* com.kkb.service.IUserService+.*(..))
The specified entry point is: IUserService If it is an interface, it is any method in the interface and any method in all its implementation classes; If it is a class, it is any method in the class and its subclasses.
Implement AOP by annotation
Development phase: focus on core business and AOP code.
Running phase: the spring framework will weave the core business and AOP code together through dynamic agents.
Choice of proxy mode: whether the interface is implemented: if there is an interface, choose JDK dynamic proxy; No CGLIB dynamic proxy is selected.
1. Create project import dependency
<dependencies>
        <!--spring Core dependency-->
        <dependency>
            <groupId>org.springframework</groupId>
            <artifactId>spring-context</artifactId>
            <version>5.3.15</version>
        </dependency>
        <dependency>
            <groupId>org.springframework</groupId>
            <artifactId>spring-aspects</artifactId>
            <version>5.3.15</version>
        </dependency>
        <!--Test dependency-->
        <dependency>
            <groupId>junit</groupId>
            <artifactId>junit</artifactId>
            <version>4.13.2</version>
            <scope>test</scope>
        </dependency>
    </dependencies>

    <build>
        <plugins>
            <!--Compiling plug-ins-->
            <plugin>
                <groupId>org.apache.maven.plugins</groupId>
                <artifactId>maven-compiler-plugin</artifactId>
                <version>3.8.0</version>
                <configuration>
                    <source>1.8</source>
                    <target>1.8</target>
                </configuration>
            </plugin>
        </plugins>
    </build>
2. Create spring configuration file to introduce constraints
<?xml version="1.0" encoding="UTF-8"?>
<beans xmlns="http://www.springframework.org/schema/beans"
       xmlns:xsi="http://www.w3.org/2001/XMLSchema-instance"
       xmlns:context="http://www.springframework.org/schema/context"
       xmlns:aop="http://www.springframework.org/schema/aop"
       xsi:schemaLocation="http://www.springframework.org/schema/beans
                           http://www.springframework.org/schema/beans/spring-beans.xsd
            http://www.springframework.org/schema/aop
            http://www.springframework.org/schema/aop/spring-aop.xsd
            http://www.springframework.org/schema/context
            http://www.springframework.org/schema/context/spring-context.xsd
            ">

    <!--stay beans Introduced in label AOP and context constraint-->

</beans>
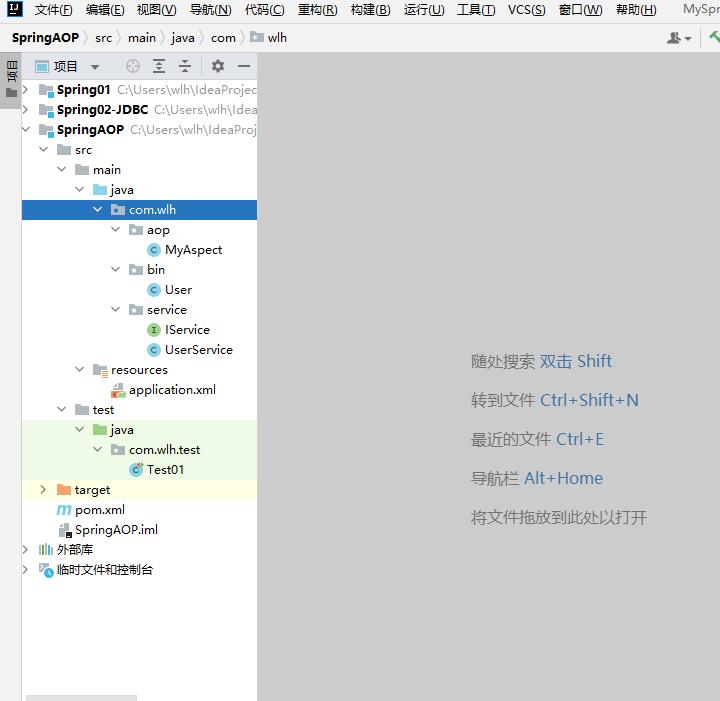
3. Create core business class
File directory created:
package com.wlh.service;

public interface IService {

    void add(int id, String name);

    boolean update(int num);

}
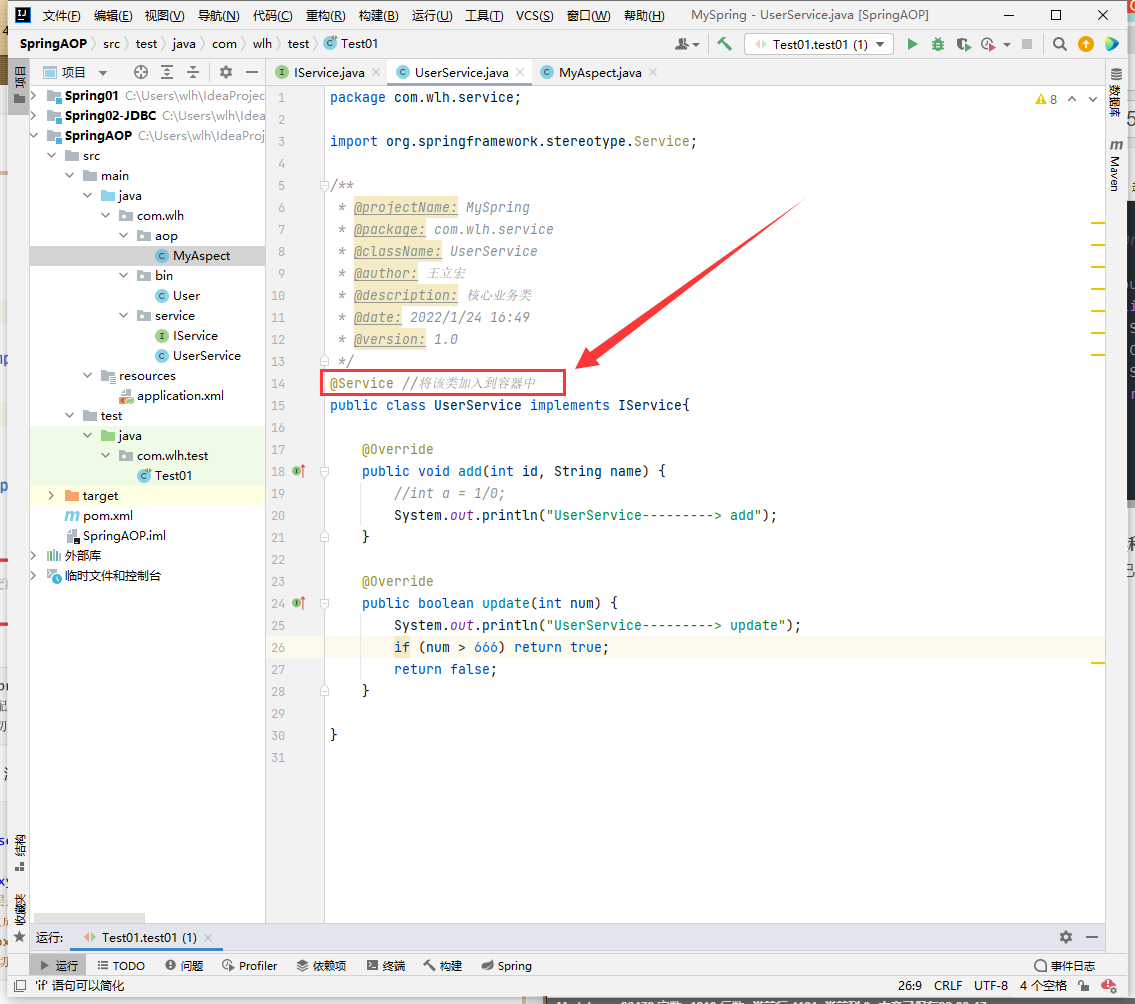
package com.wlh.service;

import org.springframework.stereotype.Service;

/**
 * @projectName: MySpring
 * @package: com.wlh.service
 * @className: UserService
 * @author: Wang Lihong
 * @description: Core business
 * @date: 2022/1/24 16:49
 * @version: 1.0
 */
@Service //Add the class to the container
public class UserService implements IService{

    @Override
    public void add(int id, String name) {
        //int a = 1/0;
        System.out.println("UserService---------> add");
    }

    @Override
    public boolean update(int num) {
        System.out.println("UserService---------> update");
        if (num > 666) return true;
        return false;
    }

}
4. Define facet class
package com.wlh.aop;

import org.aspectj.lang.JoinPoint;
import org.aspectj.lang.ProceedingJoinPoint;
import org.aspectj.lang.annotation.*;
import org.springframework.stereotype.Component;

import java.text.SimpleDateFormat;
import java.util.Date;

/**
 * @projectName: MySpring
 * @package: com.wlh.aop
 * @className: MyAspect
 * @author: Wang Lihong
 * @description: Section class
 * @date: 2022/1/24 16:56
 * @version: 1.0
 */
@Component //The creation permission of the slice object is still given to the sprin g container
@Aspect //The annotation of aspectj framework identifies that the current class is a faceted class
public class MyAspect {

    /**
     * Pointcut Annotations represent pointcut expressions, and methods are generally declared private
     * For other notifications, you can directly use the method name in the value attribute value - > for example, the before method can be changed to the one commented out below
     * Push uses the method of pointcut expression to facilitate the change of expression in the future
     */
    @Pointcut("execution(* com.wlh.service..*.*(..))")
    private void poinCut() {
    }
    @Pointcut("execution(* com.wlh.service..*.add*(..))")
    private void poinCut2() {
    }


    /**
     *   The name is pre notification execution (* com. Wlh. Service.. *. * (..) -- > The expression of the pointcut, indicating the pointcut in front of those methods
     * @param joinPoint
     */
    @Before("execution(* com.wlh.service..*.*(..))")
    public void before(JoinPoint joinPoint) {
        System.out.println("Pre notification: called before the target method is executed");
        String name = joinPoint.getSignature().getName();
        System.out.println("\t\t Name of intercepted method:"+name);
        Object[] args = joinPoint.getArgs();
        System.out.println("\t\t Number of method parameters:"+args.length);
        System.out.println("\t\t Parameter list of method:");
        for (Object arg : args) {
            System.out.println("\t\t\t\t\t"+arg);
        }
    }
    /*@Before("pointCut()")
    public void before(JoinPoint joinPoint) {
        System.out.println("Pre notification: called before the target method is executed. ");
        String name = joinPoint.getSignature().getName();
        System.out.println("\t\t The name of the intercepted method: "+ name";
        Object[] args = joinPoint.getArgs();
        System.out.println("\t\t Number of method parameters: "+ args.length);
        System.out.println("\t\t Parameter list of method: ");
        for (Object arg : args) {
            System.out.println("\t\t\t\t\t"+arg);
        }
    }*/

    /**
     * AfterReturning Post declaration notification
     *      value Property represents a pointcut expression
     *      returning Property represents the returned result. If necessary, you can modify the result in the method of post notification
     * @param resurt  result
     */
    @AfterReturning(value = "execution(* com.wlh.service..*.update*(..))", returning = "resurt")
    public Object afterReturn(Object resurt) {
        if (resurt != null) {
            boolean res = (boolean) resurt;
            res = (boolean) resurt;
            if (res) {
                resurt = false;
            }
        }
        System.out.println("Post notification: called after the target method is executed,result="+resurt);
        return resurt;
    }

    /**
     * AfterThrowing Annotation declaration exception notification method
     * @param ex
     * @param joinPoint Intercepted method
     */
    @AfterThrowing(value = "execution(* com.wlh.service..*.add*(..))",throwing = "ex")
    public void exception(JoinPoint joinPoint, Throwable ex) {
        //Generally, the time, location and cause of the abnormality will be recorded
        System.out.println("Exception notification: called when an exception occurs in the execution of the target method, otherwise it will not be called");
        Date date = new Date();
        SimpleDateFormat simpleDateFormat = new SimpleDateFormat("yyyy-MM-dd hh:mm:ss");
        System.out.println("\t\t Method of reporting exception:"+joinPoint.getSignature()+
                           "\n\t\t Exception information:"+ex.getMessage()+
                           "\n\t\t Abnormal time:"+simpleDateFormat.format(date));
    }
    /*@AfterThrowing(value = "pointCut2()",throwing = "ex")
    public void exception(JoinPoint joinPoint, Throwable ex) {
        //Generally, the time, location and cause of the abnormality will be recorded
        System.out.println("Exception notification: called when an exception occurs in the execution of the target method, otherwise it will not be called ");
        Date date = new Date();
        SimpleDateFormat simpleDateFormat = new SimpleDateFormat("yyyy-MM-dd hh:mm:ss");
        System.out.println("\t\t Exception reporting method: "+ joinPoint.getSignature()"+
                "\n\t\t Exception message: "+ ex.getMessage()"+
                "\n\t\t Exception time: "+ simpleDateFormat.format(date));
    }*/

    /**
     * After The annotation is declared as the final notification, so be careful not to confuse it with the post notification
     */
    @After(value = "execution(* com.wlh.service..*.*(..))")
    public void myFinally() {
        System.out.println("Final notification: it is the last notification to be called regardless of whether an exception occurs");
    }

    /**
     * Around Annotation declaration surround notification
     *     Surround notification: a method that is executed before and after the target method is executed
     *     ProceedingJoinPoint The processed in indicates that the target method is executed
     * @return
     */
    @Around(value = "execution(* com.wlh.service..*.add*(..))")
    public Object around(ProceedingJoinPoint pjp) throws Throwable {
        System.out.println("=======Surround method: before the target method is executed");
        Object proceed = pjp.proceed();
        System.out.println("=======Surround method: after the target method is executed");
        return proceed;
    }

}
5. Add annotation to business class and aspect class
I have completed this part in the previous code, so I will only supplement it here. The added part is shown in the figure:

be careful:
The following contents need to be added to the configuration file:
	<!--Packet scanning-->
    <context:component-scan base-package="com.wlh.service ; com.wlh.aop"/>

    <!--Open annotation AOP Use of-->
    <aop:aspectj-autoproxy proxy-target-class="true"/>
    <!--
    	aop:aspectj-autoproxy The bottom layer is made of AnnotationAwareAspectJAutoProxyCreator Realized,
	Is based on AspectJ Annotation adaptation automatic proxy generator.
	The working principle is, aop:aspectj-autoproxy Found by scanning@Aspect Defined facet class,
	Then the facet class finds the target method of the target class according to the pointcut, and then the notification type finds the pointcut time.
	-->
After defining the section Aspect Notification is required after Spring Container, let the container generate the "target class"+ Proxy object for facet. This agent is
 Automatically generated by the container. Just in Spring Register a profile based on aspectj Automatic proxy generator, which will automatically
 Scan to@Aspect Annotation, and weave it in according to the notification type and pointcut, and generate the agent.
6. Test class
package com.wlh.test;

import com.wlh.service.UserService;
import org.junit.Test;
import org.springframework.context.ApplicationContext;
import org.springframework.context.support.ClassPathXmlApplicationContext;

/**
 * @projectName: MySpring
 * @package: com.wlh.test
 * @className: Test01
 * @author: Wang Lihong
 * @description: TODO
 * @date: 2022/1/24 17:06
 * @version: 1.0
 */
public class Test01 {

    @Test
    public void test01() {
        ApplicationContext ac = new ClassPathXmlApplicationContext("application.xml");
        UserService userService = (UserService) ac.getBean("userService");
        userService.add(1001,"Zhang Daxian");
        System.out.println("============================================================");
        boolean update = userService.update(8888);
        System.out.println("update Results:"+update);

    }

}