SRS streaming media server provides a powerful API for developers to customize their own streaming media services according to their own business scenarios.
Native environment:
Virtual machine VMPRO15 installing Linux system: CentOS7
SRS service version: SRSv4-b2-4.0.215 (SRSv4 has officially released a stable version in December 2021)

Linux open ports and services:

Linux Network Environment: 192.168.5.104

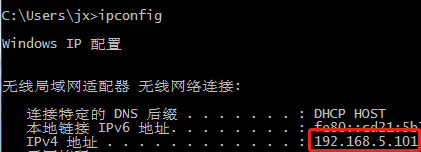
Local network environment of physical machine: 192.168.5.101
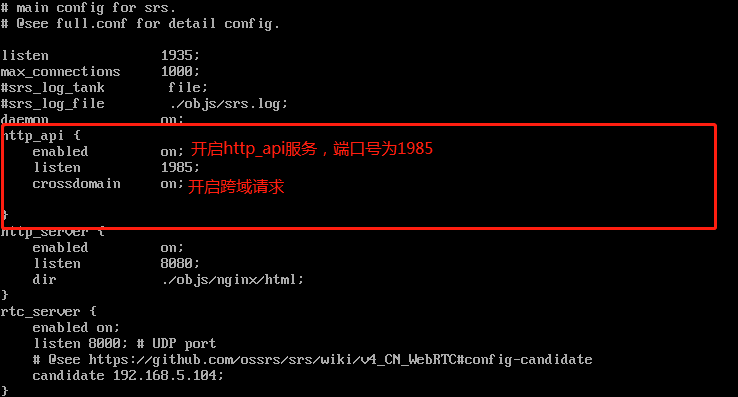
1, To test the http api provided by the SRS service, you first need to open the corresponding service in the SRS configuration file:
2, Access API:
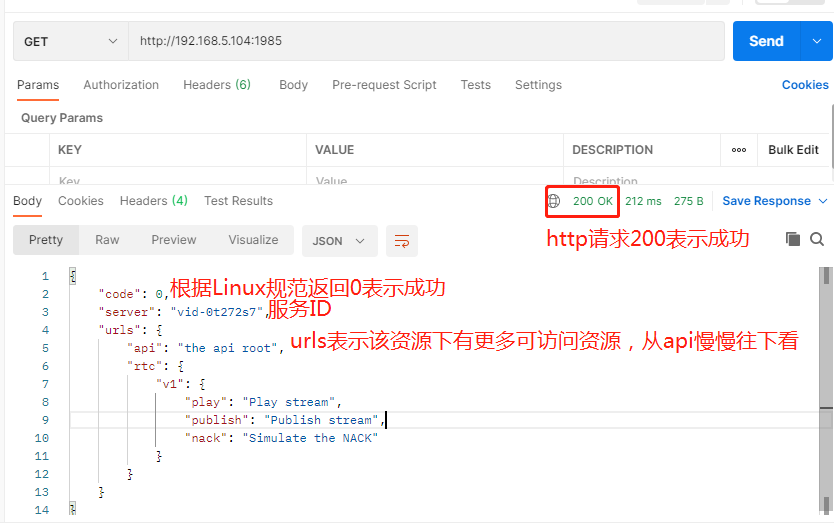
2.1. SRS provides bread crumbs of api, which can navigate from the root directory without any memory. General fields include:
- Code indicates the error code. According to the linux convention, 0 indicates success.
- urls represents breadcrumb navigation, which is a sub api (link) below the api.
- Data represents the api that provides services at the last level and the returned data.
2.2. Use Postman to request the top-level API provided by SRS( http://192.168.5.104:1985 ):
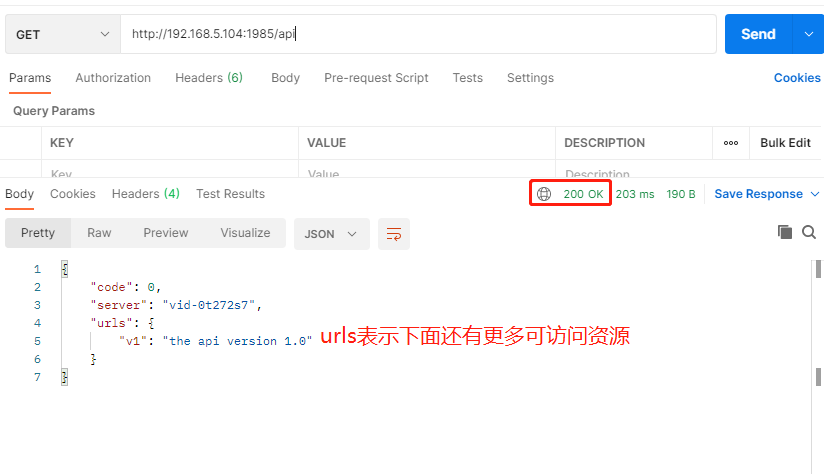
2.3. Visit the next level API again( http://192.168.5.104:1985/api ):
2.4. Continue to watch( http://192.168.5.104:1985/api/v1):
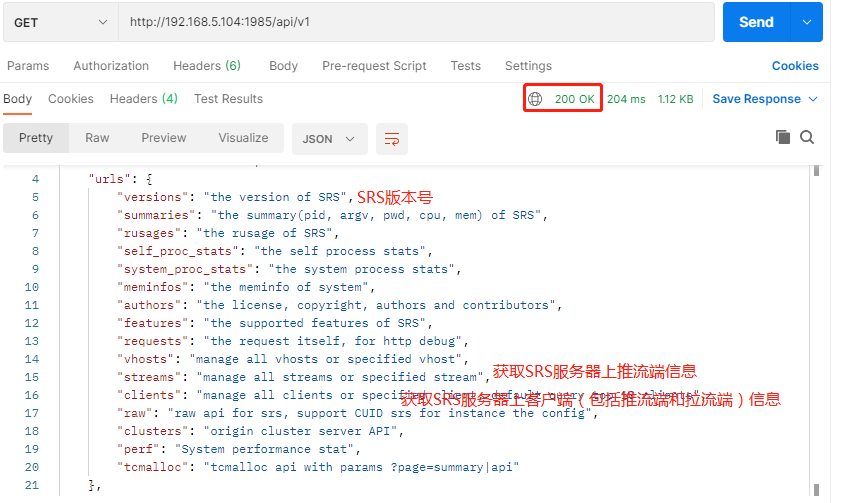
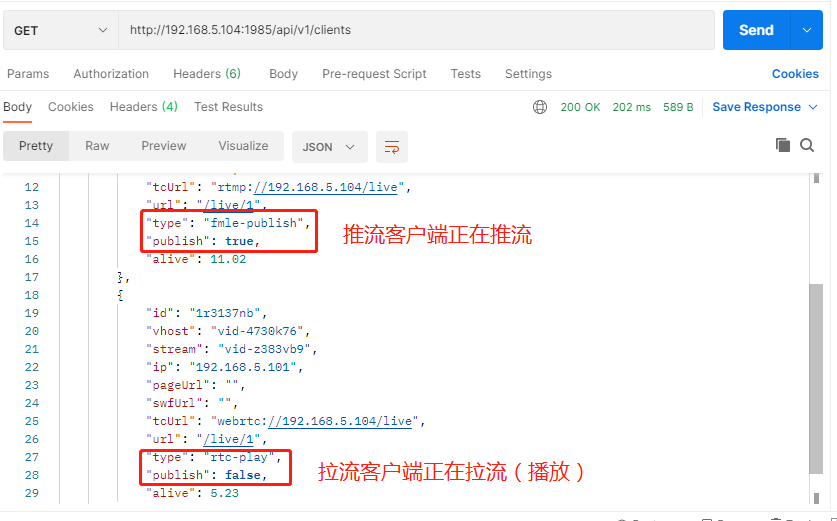
2.5. Try to obtain the connected client information of SRS server( http://192.168.5.104:1985/api/v1/clients):
2.6. SRS HTTP API supports cross domain. js can directly call SRS HTTP API.
SRS supports two cross domain modes:
- OPTIONS: jquery can directly request the API across domains. The browser will send an OPTIONS cross domain request. After SRS allows cross domains, the browser will initiate the API request again.
- JSONP: jquery/angularjs can initiate a JSONP cross domain request, and the server will take the response as a js file. The content is to call a function, and the function name is specified by callback in QueryString.
- JSONP-DELETE: JSONP can only GET, so the DELETE method is specified by the method of QueryString.
2.7. https is supported in SRS_ API, you only need to enable https in the configuration (replace the certificate with your own certificate)
http_api {
    enabled         on;
    listen          1985;
    https {
        #Enable https
        enabled on;
        #port number
        listen 1990;
        #SSL private key file
        #       openssl genrsa -out server.key 2048
        # default: ./conf/server.key
        key ./conf/server.key;
        # SSL public certificate
        #       openssl req -new -x509 -key server.key -out server.crt -days 3650 -subj "/C=CN/ST=Beijing/L=Beijing/O=Me/OU=Me/CN=ossrs.net"
        # default: ./conf/server.crt
        cert ./conf/server.crt;
    }
}
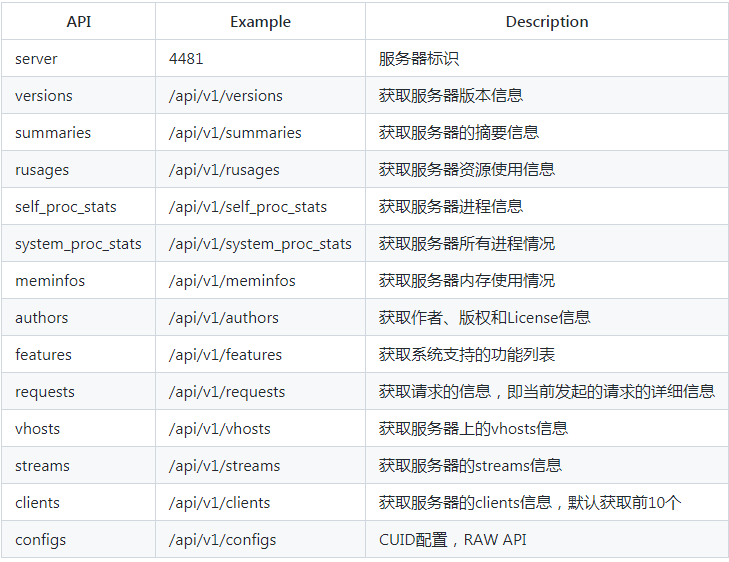
2.8. All API s and descriptions provided by SRS (the version may be inaccurate due to continuous update):
3, The interface test kicks out the client connected to the SRS server
The test kicks out the client connected to SRS through the API provided by SRS. First, a GET request is required( http://192.168.5.104:1985/api/v1/clients )GET all client information, GET the client ID, and then request through DELETE( http://192.168.5.104:1985/api/v1/clients/clientID )Kick the client. If you kick only the streaming client, you can GET the streaming client through the API( http://192.168.5.104:1985/api/v1/streams )Where streams publish. CID is the ID number of the streaming client.
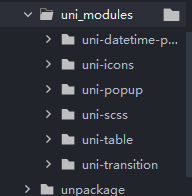
3.1. Use HBuilderX to create a uniapp project, create 2 new index and live pages, use the official UI components of uniapp, uni table and uni pop, which can be installed directly through the HBuilderX plug-in mall, and use the official streaming plug-in live pusher of uniapp to realize video collection and streaming
UI components are as follows:
index.vue
<template>
    <view>
        <live-pusher class="livePusher-top" id="livePusher" @statechange="statechange"  :beauty="beauty" :whiteness="whiteness"  :url="url" :enable-camera="enableCamera" mode="FHD"></live-pusher>
        <button v-if="flag" @click="startLive">Start live</button>
        <button v-if="!flag" @click="stopLive">End live broadcast</button>
		<button  @click="pauseLive">Pause live broadcast</button>
		<button  @click="resumeLive">Resume live broadcast</button>
		<view class="uni-title">Beauty</view>
		<slider min="0" max="9" value="0" @change="sliderChangeBeauty" activeColor="#FFCC33" backgroundColor="#000000" block-color="#8A6DE9" block-size="20" show-value />
		<view class="uni-title">skin whitening</view>
		<slider min="0" max="9" value="0" @change="sliderChangeWhiteness" activeColor="#FFCC33" backgroundColor="#000000" block-color="#8A6DE9" block-size="20" show-value />

		<uni-popup ref="popup" :mask-click="false" type="message">
			<uni-popup-message  type="warn" :message="message" :duration="0"></uni-popup-message>
		</uni-popup>
	</view>
</template>

<script>
	export default {
        data() {
            return {
                url: 'rtmp://192.168.5.104/live/1 ', / / streaming address
                enableCamera: true,//Turn on the camera
                context: null,
				beauty : 0,//Beauty value
				whiteness : 0 ,//Whitening value
				flag : true,
				message : null,//Prompt message
				date : null,//Define time
				dateStr : null
            };
        },
        onReady() {
            this.context = uni.createLivePusherContext('livePusher', this);
            // this.context.switchCamera() / / camera switching (switching to rear)
			setTimeout(()=>{
				this.context.startPreview() // Camera preview (without black screen)
			},1000);

        },
        methods: {
			//Start streaming
            startLive() {
                this.context.start({
                    success: (res) => {
						this.flag=!this.flag;
                        console.log('livePusher.start:' + JSON.stringify(res));
                    },
					fail: (err)=>{
						console.log("livePusher fail:"+JSON.stringify(err));
					},
					complete:(res)=>{
						console.log("livePusher Execution complete:"+JSON.stringify(res));
					}
                });
            },
			//Stop streaming
            stopLive() {
                this.context.stop({
                    success: (res) => {
						this.flag=!this.flag;
                        console.log('livePusher.stop:'+JSON.stringify(res));
						this.context.stopPreview(); // Turn off camera preview
                    }
                });
            },
			//Pause streaming
			pauseLive(){
				this.context.pause({
					success: (res)=>{
						console.log('livePusher.pause:'+JSON.stringify(res));
					}
				});

			},
			//Resume streaming
			resumeLive(){
				this.context.resume({
					success: (res)=>{
						console.log('livePusher.resume:'+JSON.stringify(res));
					}
				});
			},
			//Set beauty
			sliderChangeBeauty(e){
				this.beauty = e.detail.value;
				console.log("Beauty value change"+e.detail.value);
			},
			//Set whitening
			sliderChangeWhiteness(e){
				this.whiteness = e.detail.value;
				console.log("Whitening value change"+e.detail.value);
			},
			//Status change data, some status codes are as follows:
			//1001: successfully connected to RTMP server
			//1002: RTMP starts streaming
			//1003: open camera successfully
			//1007: acquisition of the first frame is completed
			//1008: start hard coding
			//1101: insufficient uplink bandwidth and untimely data transmission
			//1102: start network reconnection
			//3004: UNKNOWN
			//3005: tcp channel sending failure error code [- 4]
			//-1307: all IP attempts have failed. You can give up the treatment
			statechange(e){
				console.log("state"+e.detail.code+e.detail.message);
				if(e.detail.code==3005){//TCP channel disconnected
				this.date = new Date();
				this.dateStr = this.date.getFullYear()+":"
							+this.date.getMonth()+1+":"
							+this.date.getDate()+":"
							+this.date.getHours()+":"
							+this.date.getMinutes()+":"
							+this.date.getSeconds();
					this.flag = true;
					this.message = this.dateStr+"Network disconnect,Reconnecting";
					this.open();
				}if(e.detail.code==1102){//Start network reconnection

				}if(e.detail.code==1001){//Already connected to RTMO server
					// this.close();
					// this.message = "connected to server";
					// this.open();

				}if(e.detail.code==1002){//RTMP starts streaming
					this.flag = false;
					this.close();
				}if(e.detail.code==-1307){//Reconnection failed
					this.close();
					this.message = "Reconnection failed";
					this.open();
				}
			},
			open() {
			        this.$refs.popup.open('top')
			},
			close() {
			        this.$refs.popup.close()
			}

        }
	}

</script>

<style>
.livePusher-top{
	background-color:white;

}
</style>
live.vue
<template>
	<view>
		<uni-table border stripe emptyText="No more data" >
		    <!-- Header row -->
		    <uni-tr>
		        <uni-th  align="center">client ID</uni-th>
		        <uni-th  align="center">client IP</uni-th>
		        <uni-th  align="center">type</uni-th>
				<uni-th  align="center">operation</uni-th>
		    </uni-tr>
		    <!-- Table data row -->
		    <uni-tr v-for="(list,index) in liveList">
		        <uni-td align="center">{{list.id}}</uni-td>
		        <uni-td align="center">{{list.ip}}</uni-td>
		        <uni-td align="center">{{list.type}}</uni-td>
				<uni-td align="center">
					<button @click="tichu(list.id,index)" class="mini-btn" type="warn" size="mini">Kick out</button>
				</uni-td>
		    </uni-tr>


		</uni-table>

	</view>
</template>

<script>

	export default {
		data() {
			return {
				//Define client list
				liveList : null,
			}
		},
		onReady() {
			// Update client list data per second
			setInterval(()=>{
				uni.request({
					url:"http://192.168.5.104:1985/api/v1/clients",
					success: (res) => {
							this.liveList = res.data.clients;
					    },
					fail: (err) =>{
						console.log(err.data);
						console.log("fail");
					}
				})
			},1000)

		},
		methods: {
			tichu(clientID,index){
				uni.request({
					url:"http://192.168.5.104:1985/api/v1/clients/"+clientID,
					method:'DELETE',
					success: (res) => {
							if(res.data.code==0){
								this.liveList.splice(index,1);
							}
					    },
					fail: (err) =>{
						console.log(err.data);
						console.log("fail");
					}
				})
			}
		}
	}
</script>

<style>

</style>
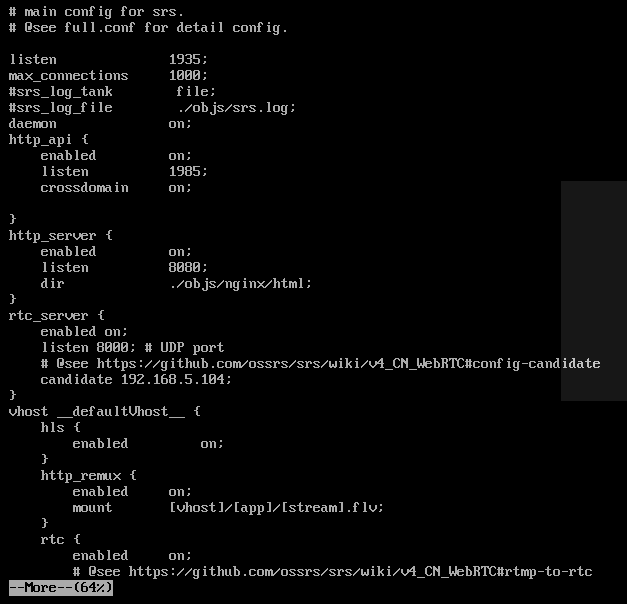
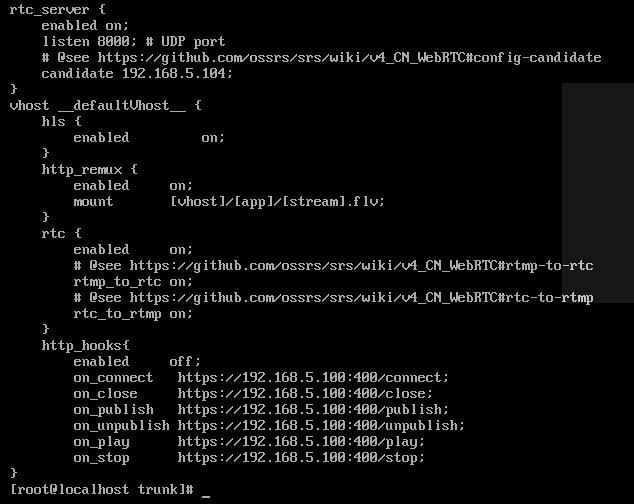
3.2. SRS service configuration, HTTP enabled_ API service, start RTC service, start RTMP to RTC stream, and then use RTMP protocol to push the stream and RTC protocol to pull the stream (play)
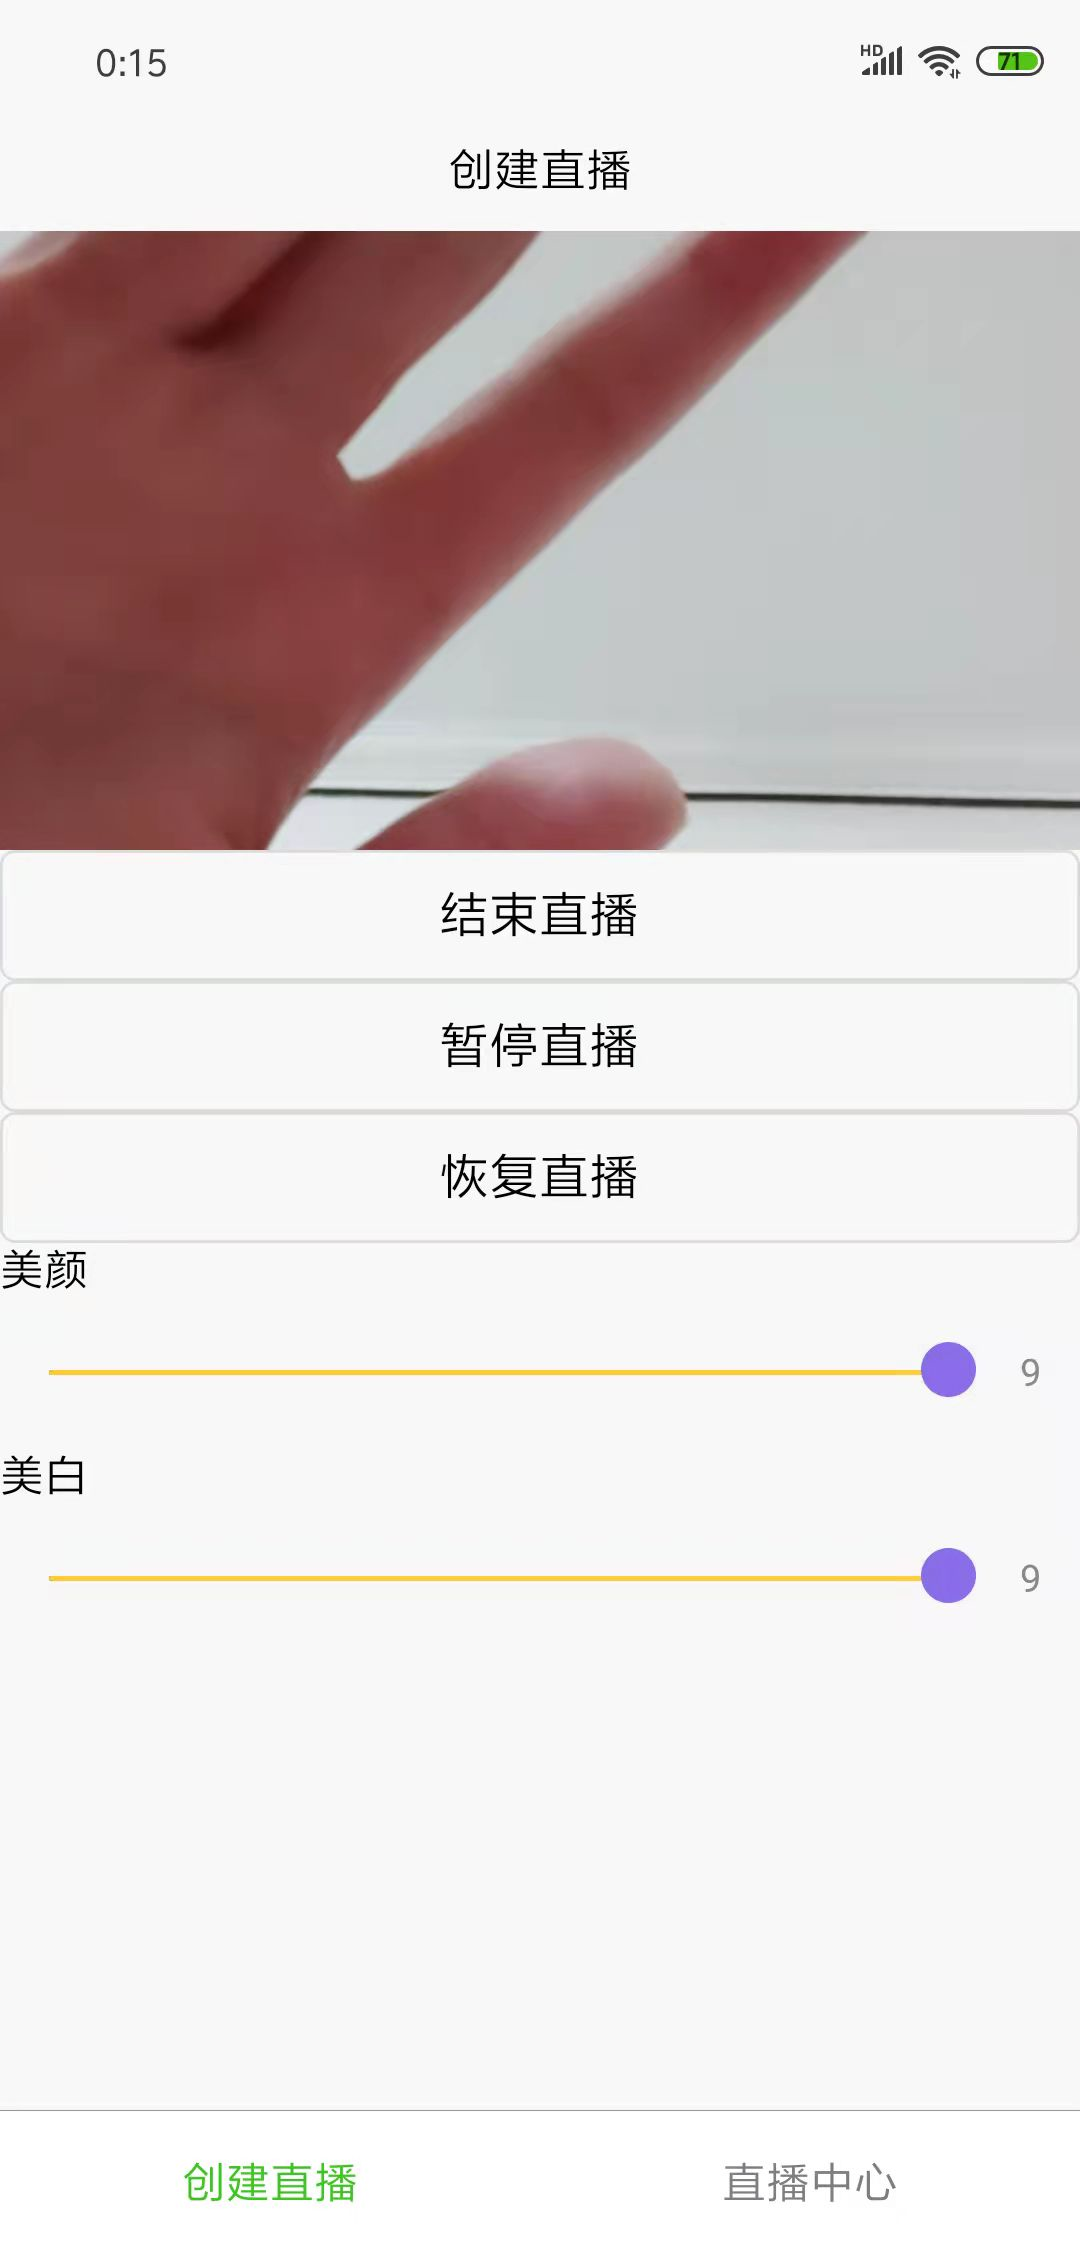
3.3 after the page is written, you can run it directly. Open HBuilderX to connect to the mobile phone, run the real machine, and start live broadcasting (streaming).
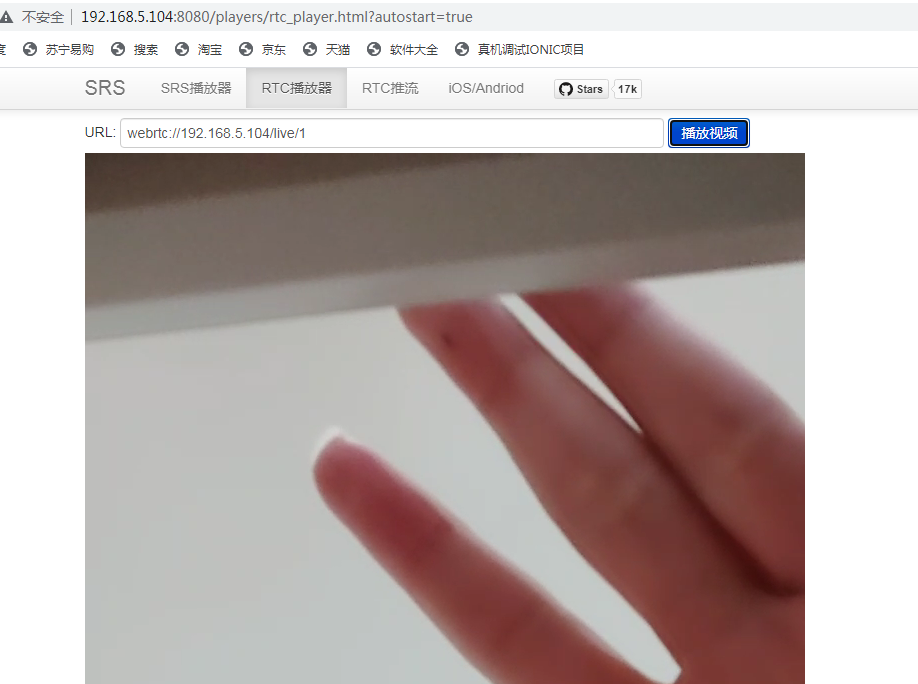
3.4. Open with Google browser http://192.168.5.104:8080 Use RTC player to pull the stream (low playback delay of RTC protocol)
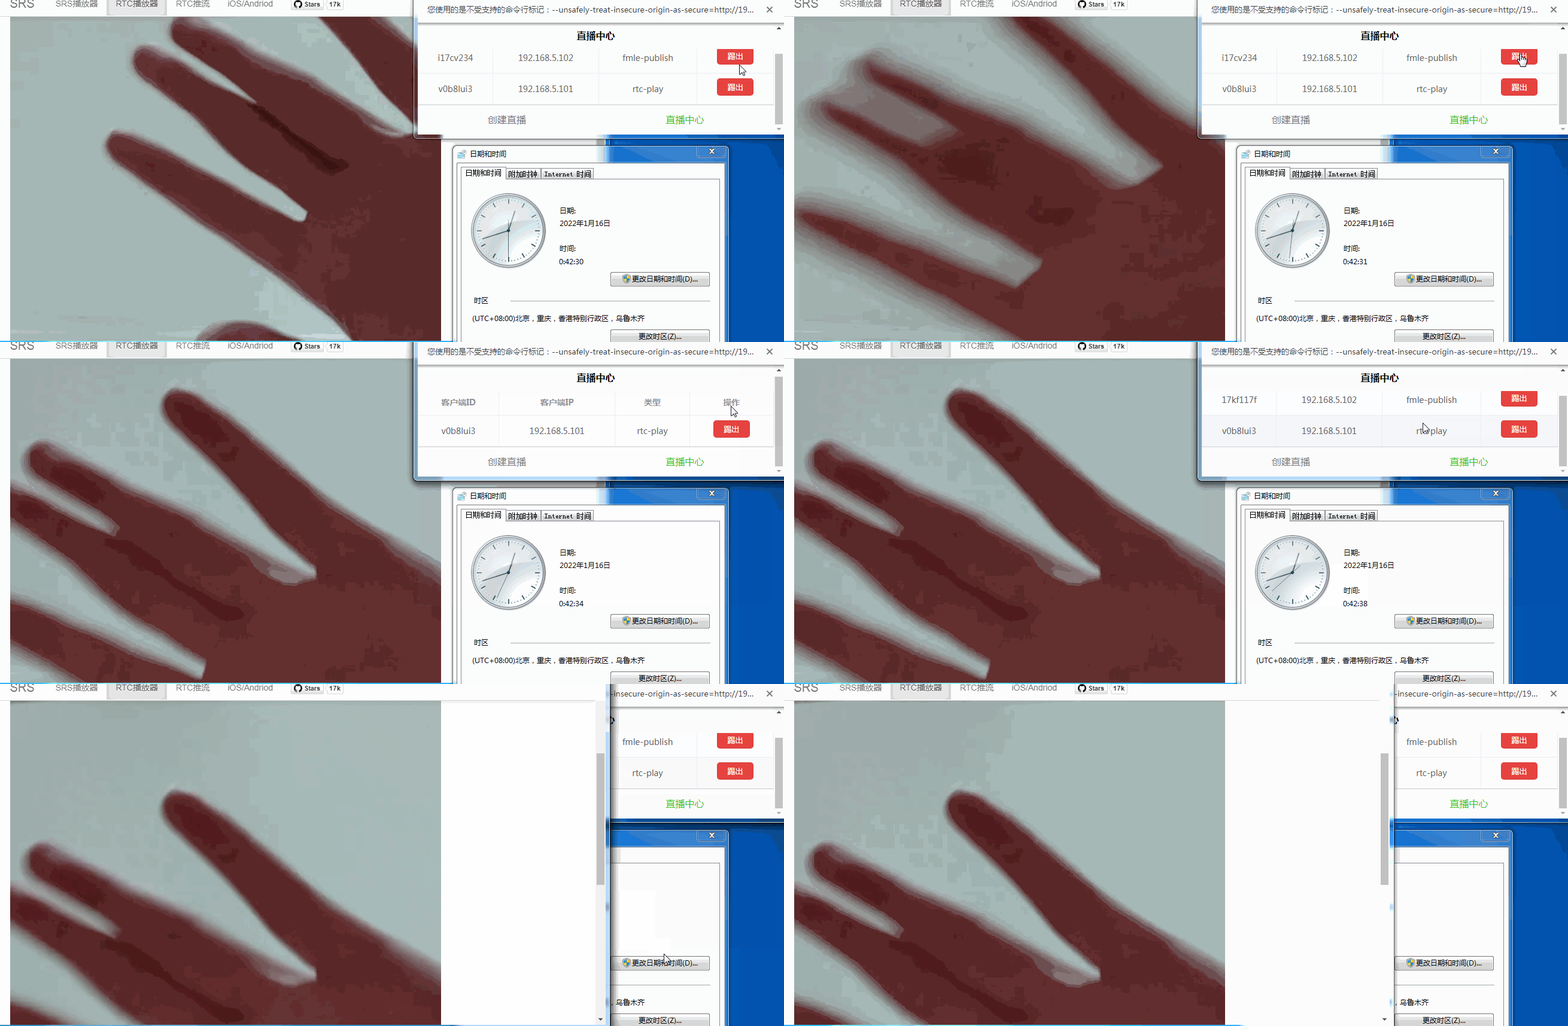
3.5 run HBuilderX to the browser Chrome, open the live broadcast center and kick out the client.

The page shows two client (GET) requests http://192.168.5.104:1985/api/v1/clients ), one push end and one pull end.
GIF screenshot of PC end (the picture quality is hard to say, but CSDN does not support video upload). After kicking the stream in about 32 seconds, the mobile phone end has been disconnected and reconnected, so it will be automatically reconnected after kicking out the streaming end. After kicking out the streaming end, the picture will be static and move again after reconnection.
Screenshot of mobile terminal
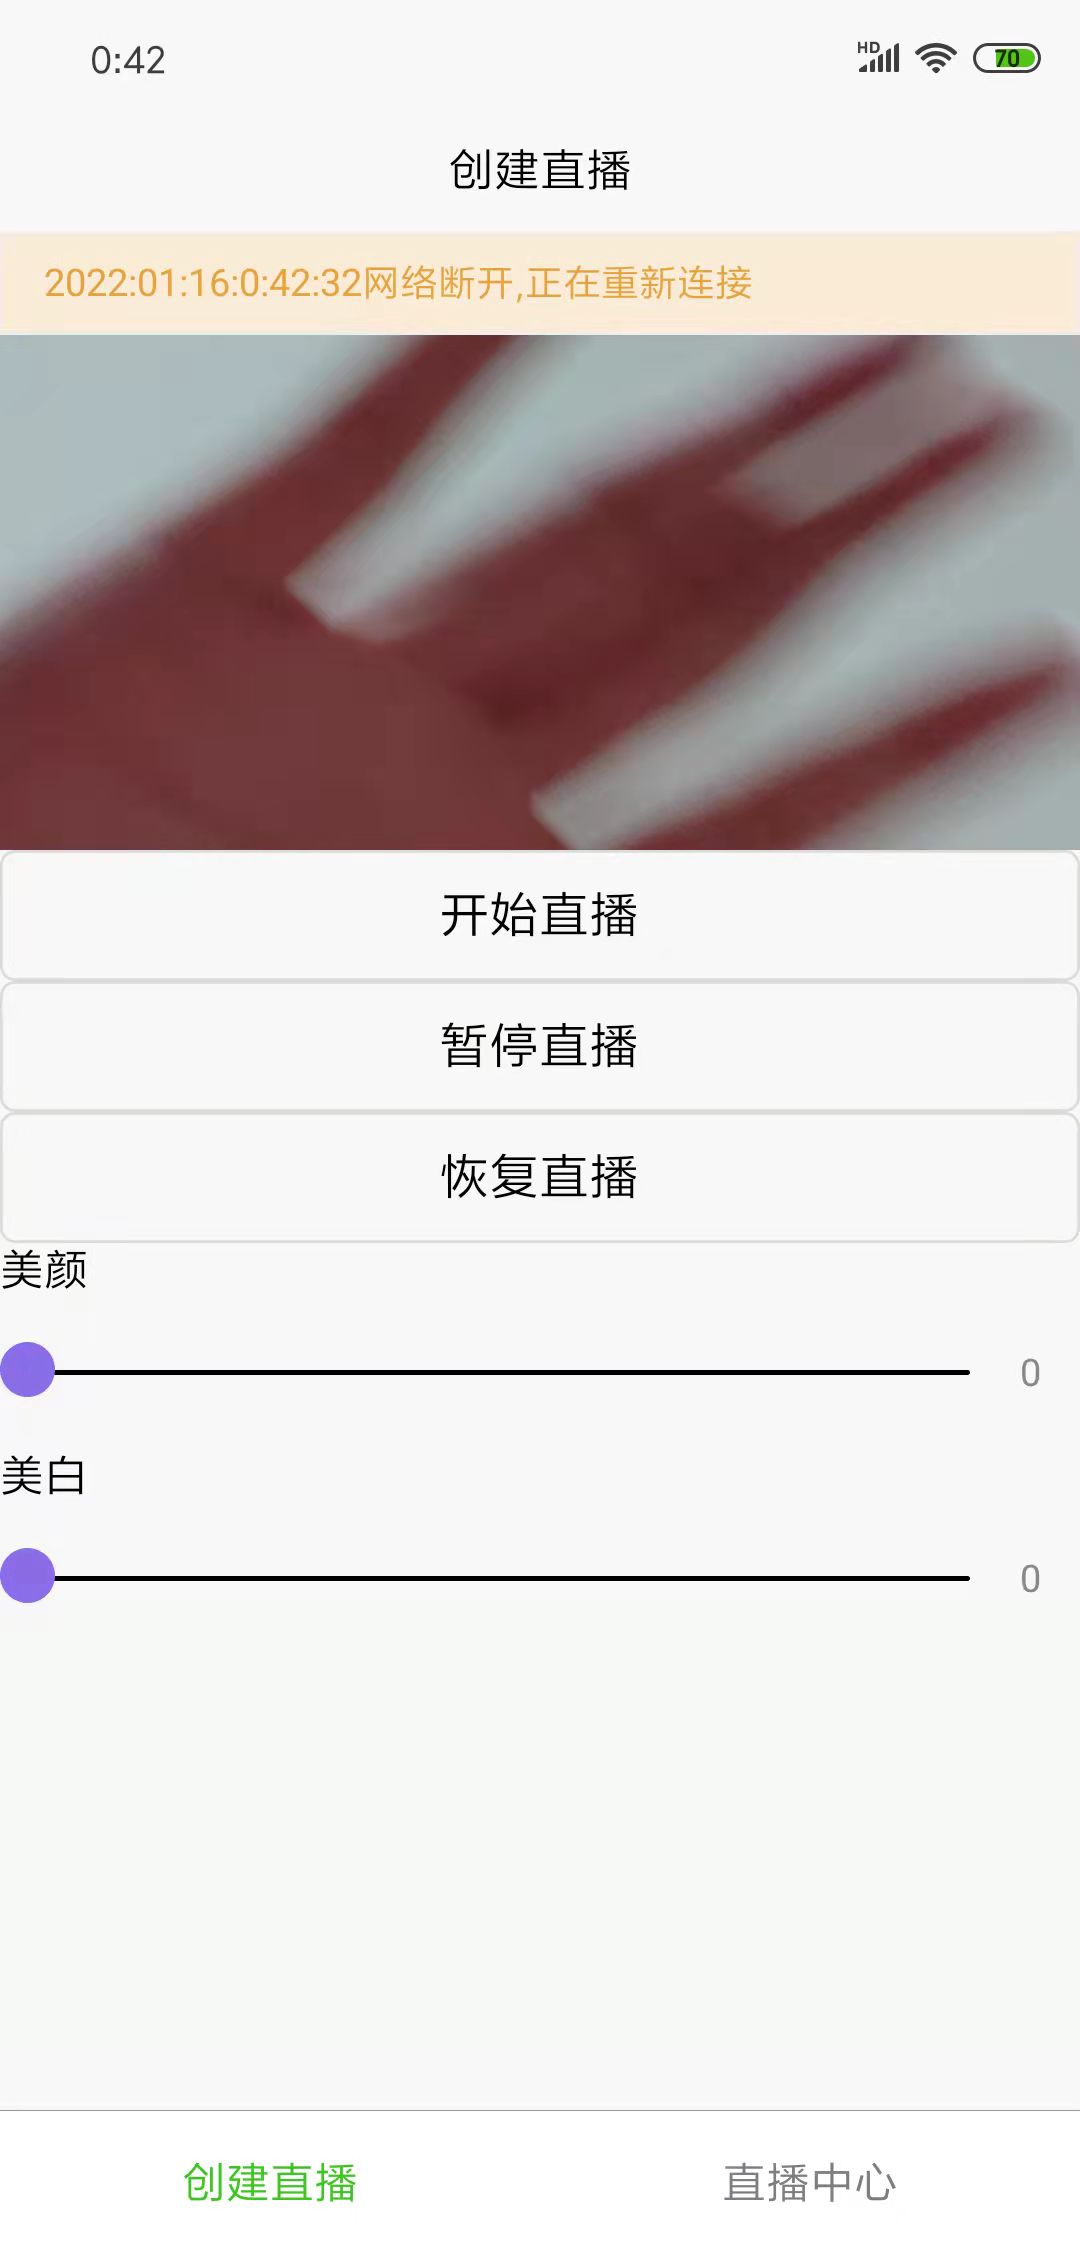
As you can see from above, http_ The SRS service kicked out the client successfully through API operation.