Recently, the company has a project demand and needs to develop a desktop 3D Earth. As I am an Android Developer and have done WorldWind Android development, I am arranged to implement WorldWind on the desktop. At the beginning of the project, it really took a lot of energy. WorldWind development tutorial is as like as two peas, and many tutorials are based on Eclipse, and tutorials are alike. Most of these tutorials are not friendly to novices. All of them record my development process to ensure that beginners can understand it.
1, Download WorldWind source code.
WorldWind website: WorldWind official website;
WorlWind GitHub Repository: WorldWind version 2.0;
The latest version is version 2.2.0, but I use version 2.0.0 here. The reason is that I use version 2.2.0. According to some online tutorials, the program will report errors. Some methods are not available, so I use version 2.0 first. I'll study it later.
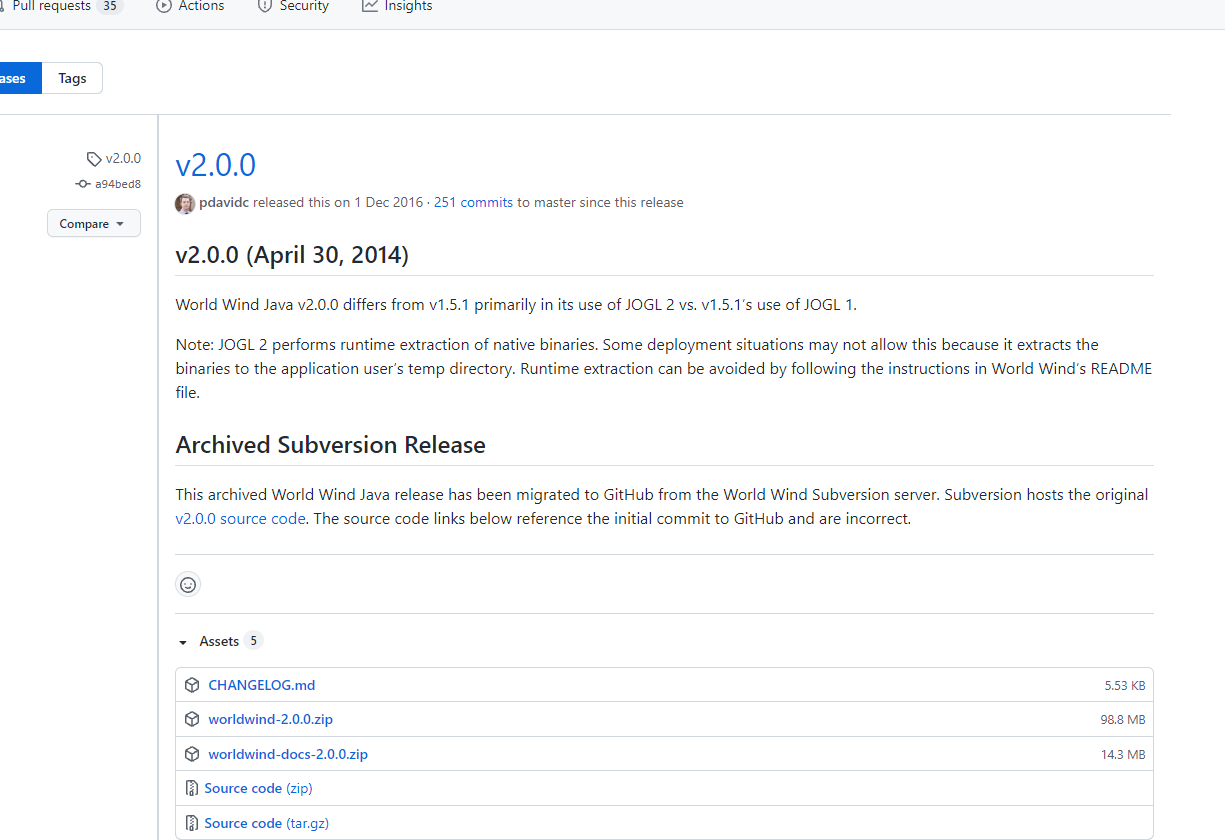
Download WorldWind-2.0.0.zip and unzip it, as shown in the figure below.
2, Create WorldWind app
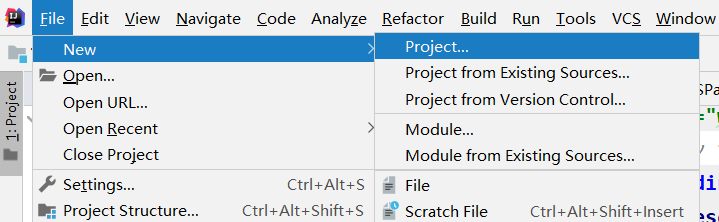
Open the IDEA development tool. File-New-Project.
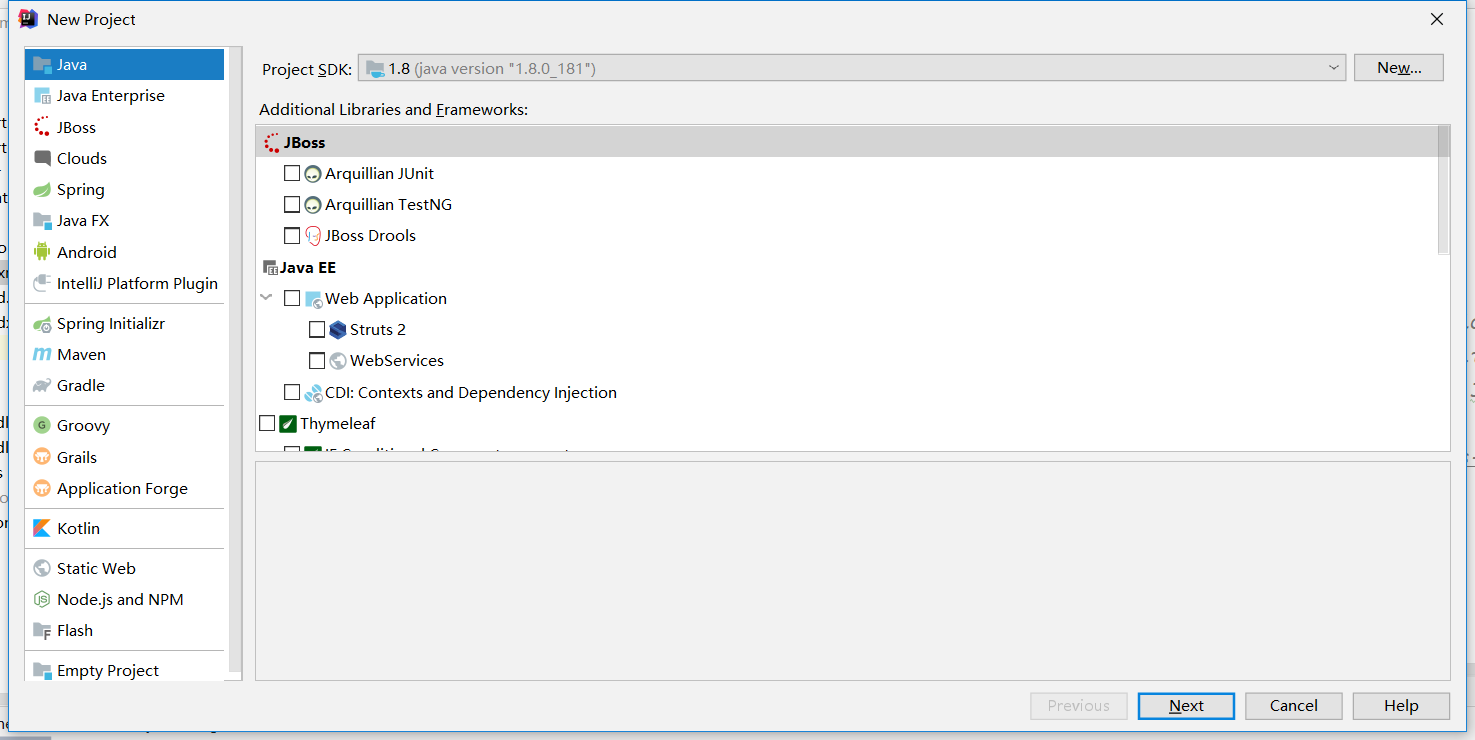
Select Java and click Next.
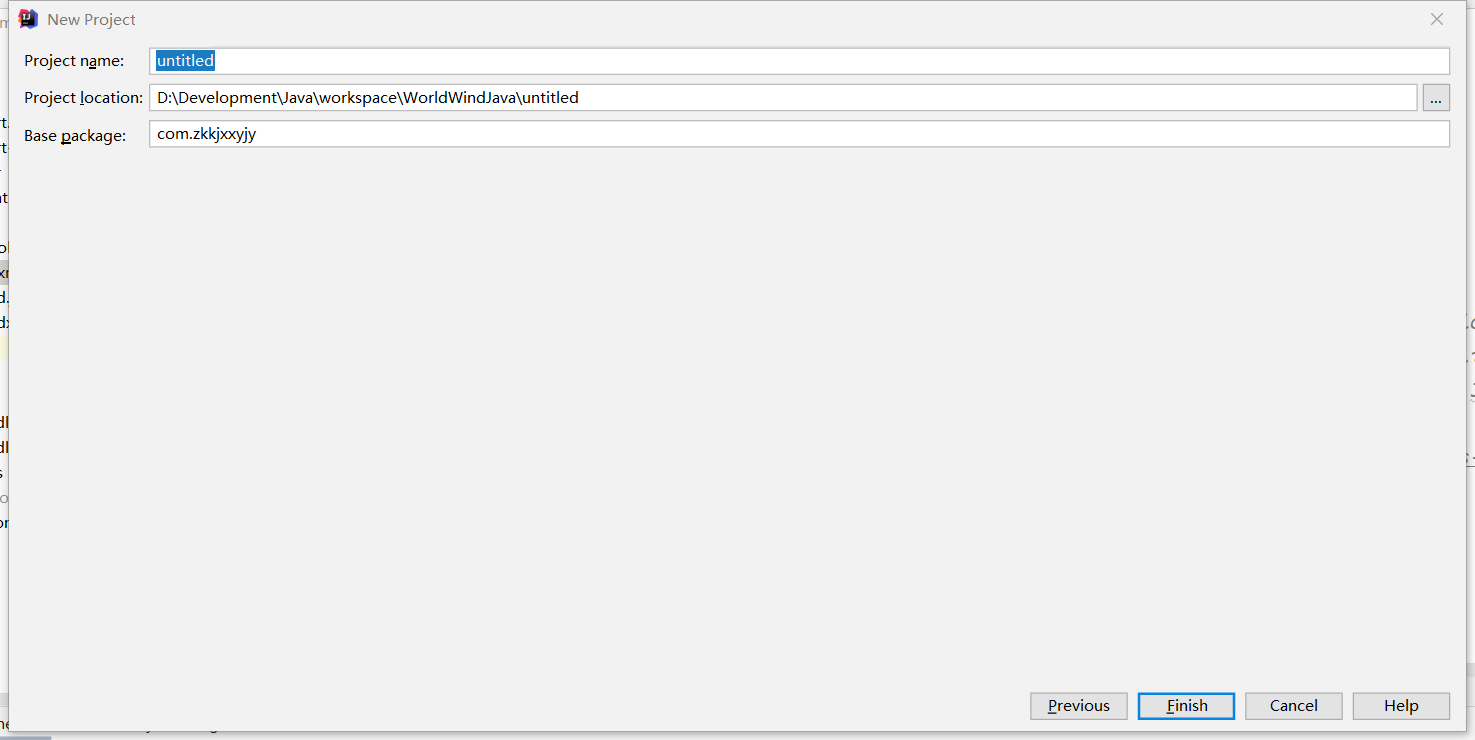
Fill in your project name and save path. Finally, click Find.
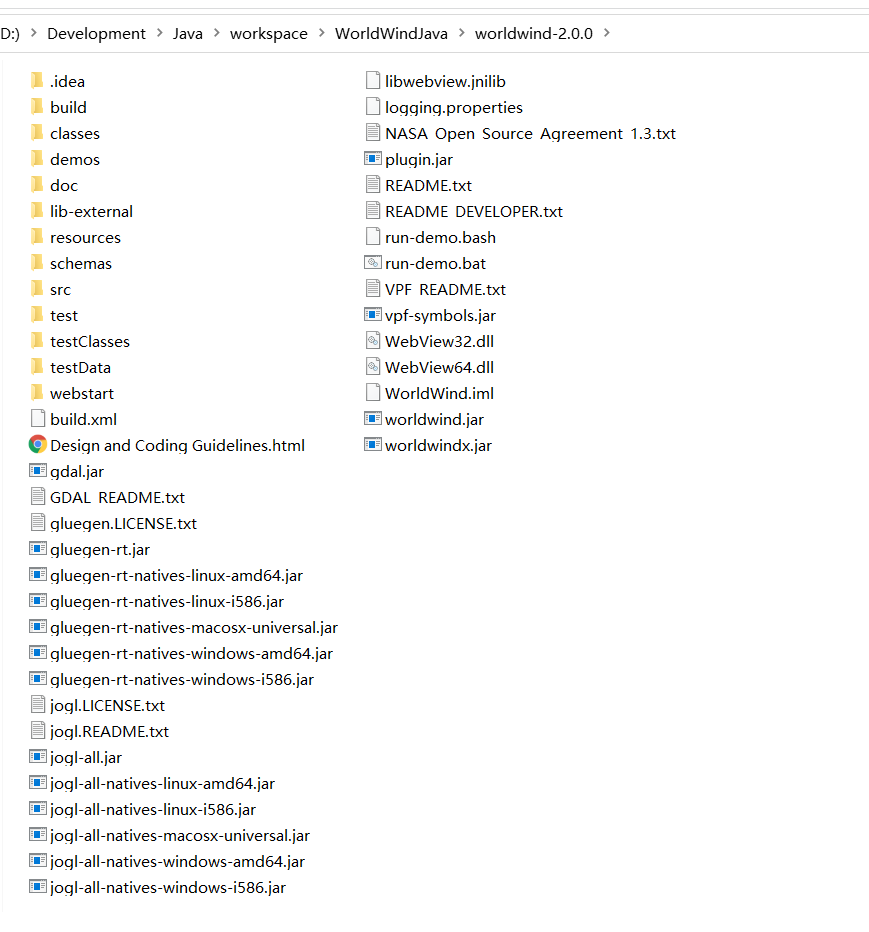
After creation, create a libs folder under the project and directory to place various dependent files, including the dependent jar package of worldwind. The src directory is the main program folder.
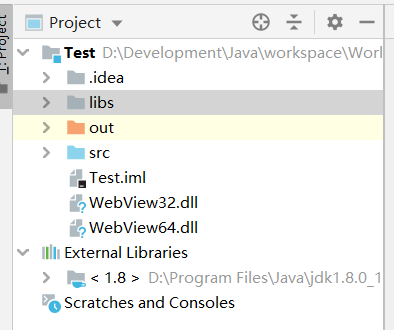
The two dll files in the figure are ignored first, which will be discussed later.
Unzip the zip package downloaded in the previous step, and copy the jar package to the libs folder.
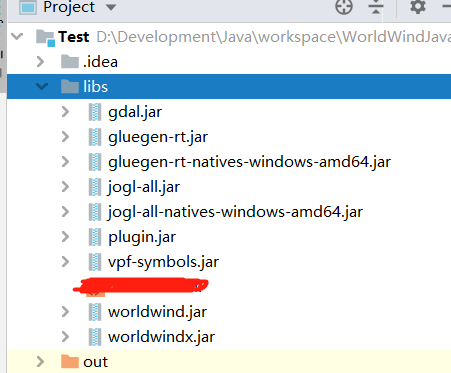
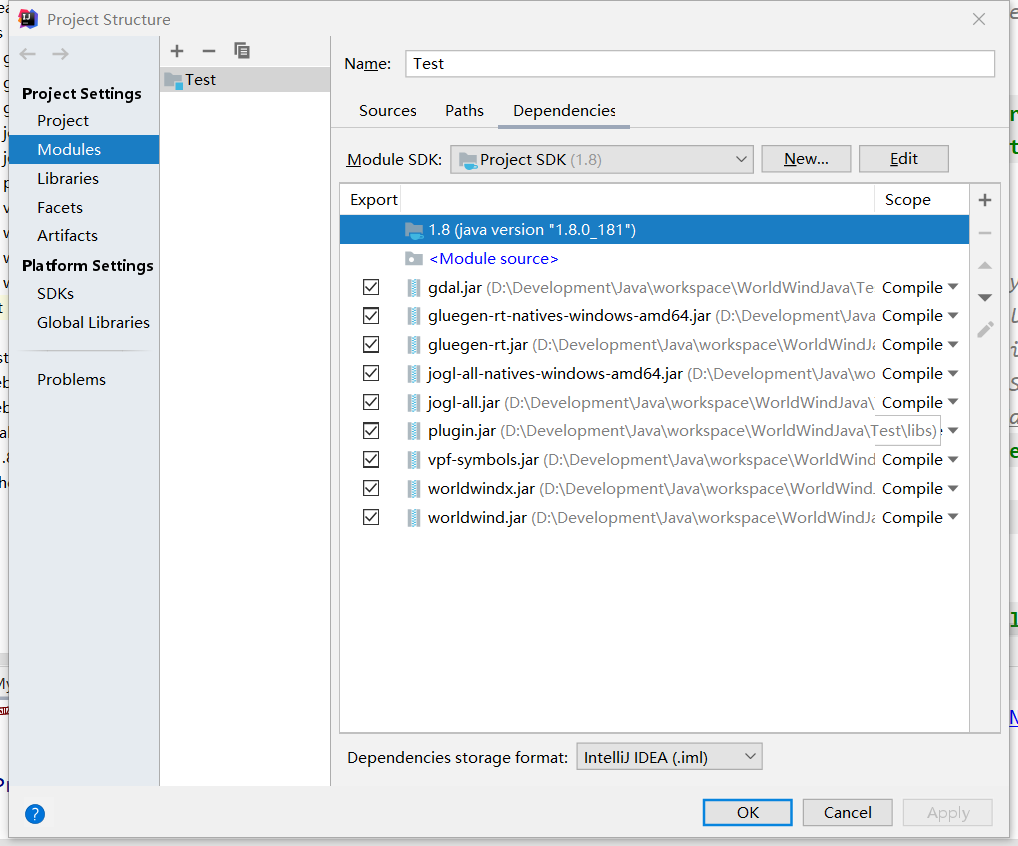
The nine jar packages are gdal.jar, gluegen-rt.jar, gluegen-rt-natives-windows-amd64.jar, jogl-all.jar, jogl-all-natives-windows-amd64.jar, plugin.jar, vpf-symbols.jar, worldwind.jar, worldwindx.jar.
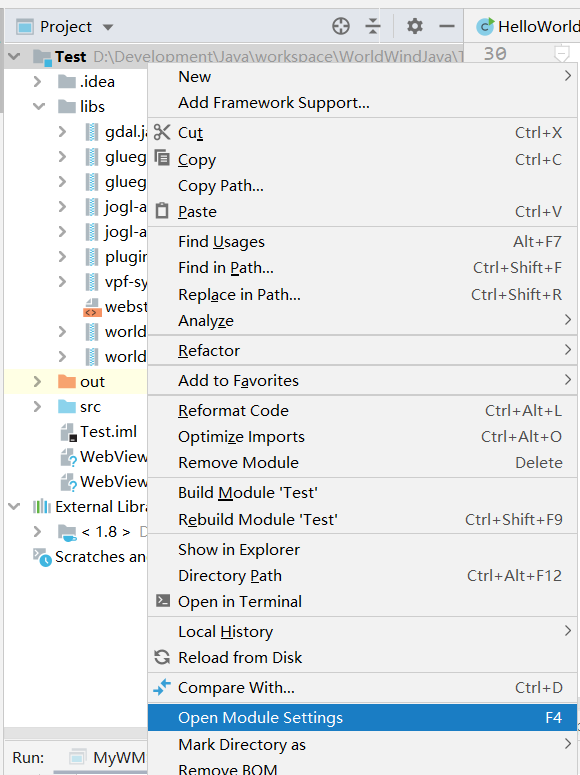
After copying, right-click the item - Open Module Settings
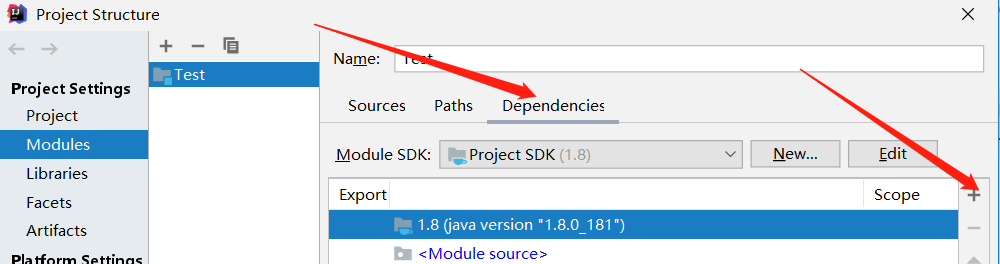
After entering the Project Structure pop-up box, click Dependencies and "+" successively.
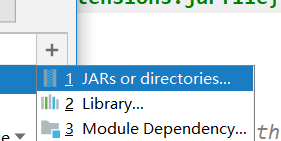
Select JARs or directories. Then select the 9 jar packages just copied and import them all. The final presentation is shown in the figure below. Then click Apply OK.
The import is now complete. Then create the program in the src directory. Right click src new Java class
public class MyWMSPanel extends JFrame {

    private static final long serialVersionUID = 1L;

    private WorldWindowGLCanvas worldWindowGLCanvas;
    private Model modelEarth;
    private JPanel worldWindPanel;

    //Draw main interface
    public MyWMSPanel(){
        this.setExtendedState(Frame.MAXIMIZED_BOTH);
        this.setTitle("Test");       //Here is the title of the application window. Fill it in as required
        int width = (int) java.awt.Toolkit.getDefaultToolkit().getScreenSize().width;
        int height = (int) java.awt.Toolkit.getDefaultToolkit().getScreenSize().height;
        this.setSize(width, height);
        this.setLocationRelativeTo(null);
        this.setDefaultCloseOperation(JFrame.EXIT_ON_CLOSE);

        this.worldWindPanel = new JPanel();
        this.worldWindPanel.setBounds(0,0, width, height);

        Dimension canvasSize = new Dimension(width, height);
        this.worldWindowGLCanvas = new WorldWindowGLCanvas();
        this.worldWindowGLCanvas.setPreferredSize(canvasSize);
        modelEarth = (Model) WorldWind.createConfigurationComponent(AVKey.MODEL_CLASS_NAME);
        this.worldWindowGLCanvas.setModel(modelEarth);

        //The following two methods are used to remove the compass and global thumbnail provided by worldwind, and decide whether to remove them according to needs.
        //Layer compass = worldWindowGLCanvas.getModel().getLayers().getLayerByName("Compass");
        //Layer worldMapLayer = worldWindowGLCanvas.getModel().getLayers().getLayerByName("World Map");
        //worldWindowGLCanvas.getModel().getLayers().remove(compass);
       //worldWindowGLCanvas.getModel().getLayers().remove(worldMapLayer);
        try {
            //The URL of the requested map
            String uri = "http://127.0.0.1:18070/geoserver/ksh/wms "; / / this address is the WMS service published by Geoserver. Of course, other servers can also be used. Just go to WMS.
            URI serverURI = new URI(uri);

            //Get wmschapabilities object
            WMSCapabilities caps= WMSCapabilities.retrieve(serverURI);
            //Parsing wmschapabilities data
            caps.parse();

            AVList params = new AVListImpl();

            //The name of the layer. Note that this layer name is named after the Geoserver layer, and the workspace in front of the layer name is not required,
            params.setValue(AVKey.LAYER_NAMES, "HBLangFang0_5m20180502");
            //Map service protocol, here is OGC:WMS
            params.setValue(AVKey.SERVICE_NAME, "OGC:WMS");
            //Get the uri of the map, that is, the uri defined above
            params.setValue(AVKey.GET_MAP_URL, uri);
            //Name of the file cached locally
            params.setValue(AVKey.DATA_CACHE_NAME, "HBLangFang0_5m20180502");
            params.setValue(AVKey.TILE_URL_BUILDER, new WMSTiledImageLayer.URLBuilder(params));

            WMSTiledImageLayer imageLayer = new WMSTiledImageLayer(caps, params);
            //Layer Name
            imageLayer.setName("HBLangFang0_5m20180502");
            imageLayer.setEnabled(true);
            //Transparency of layers
            imageLayer.setOpacity(1);
            //Maximum display height of the layer
            imageLayer.setMaxActiveAltitude(33500000);
            worldWindowGLCanvas.getModel().getLayers().add(imageLayer);
        } catch (URISyntaxException e) {
            e.printStackTrace();
        } catch (Exception e) {
            e.printStackTrace();
        }

        this.worldWindPanel.add(worldWindowGLCanvas, BorderLayout.CENTER);
        this.add(worldWindPanel);
    }

    public static void main(String[] args) {
        new MyWMSPanel().setVisible(true);
    }
}
After the code is written, run the program at this time. You should see it.
3, Operation results
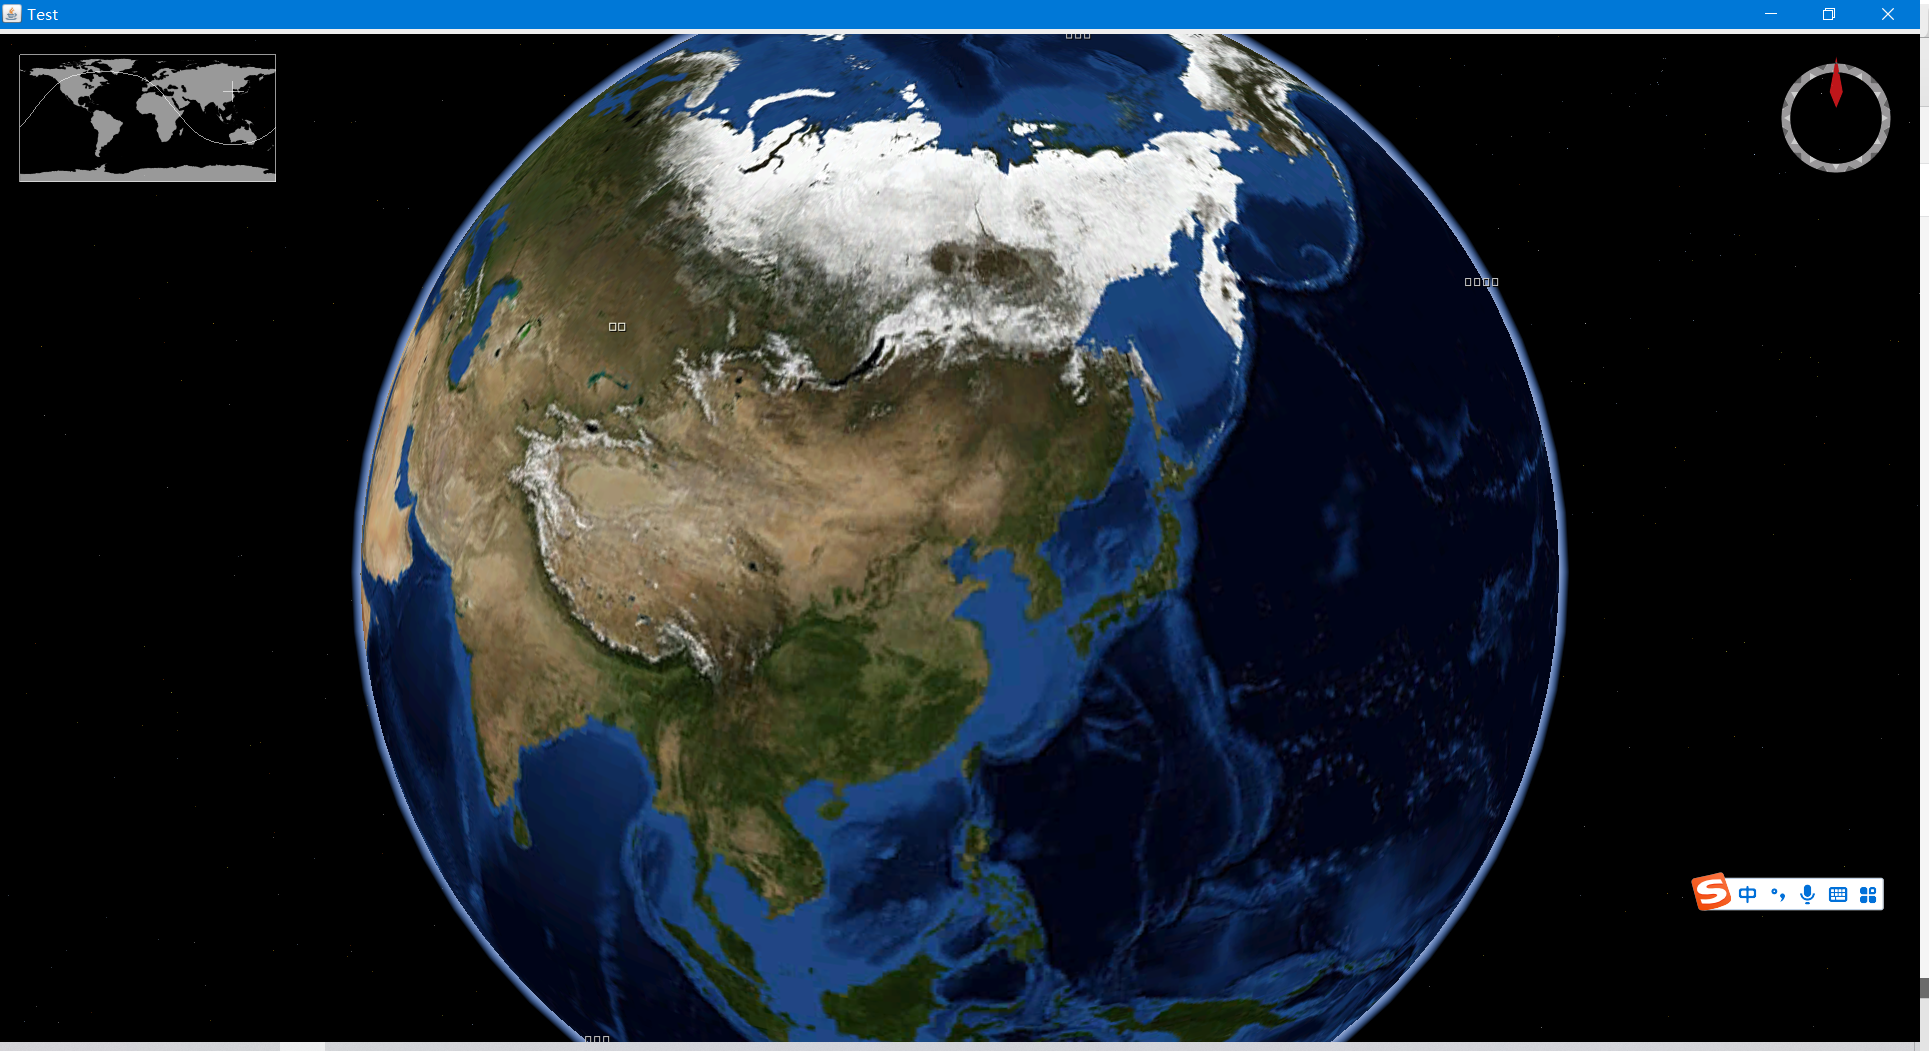
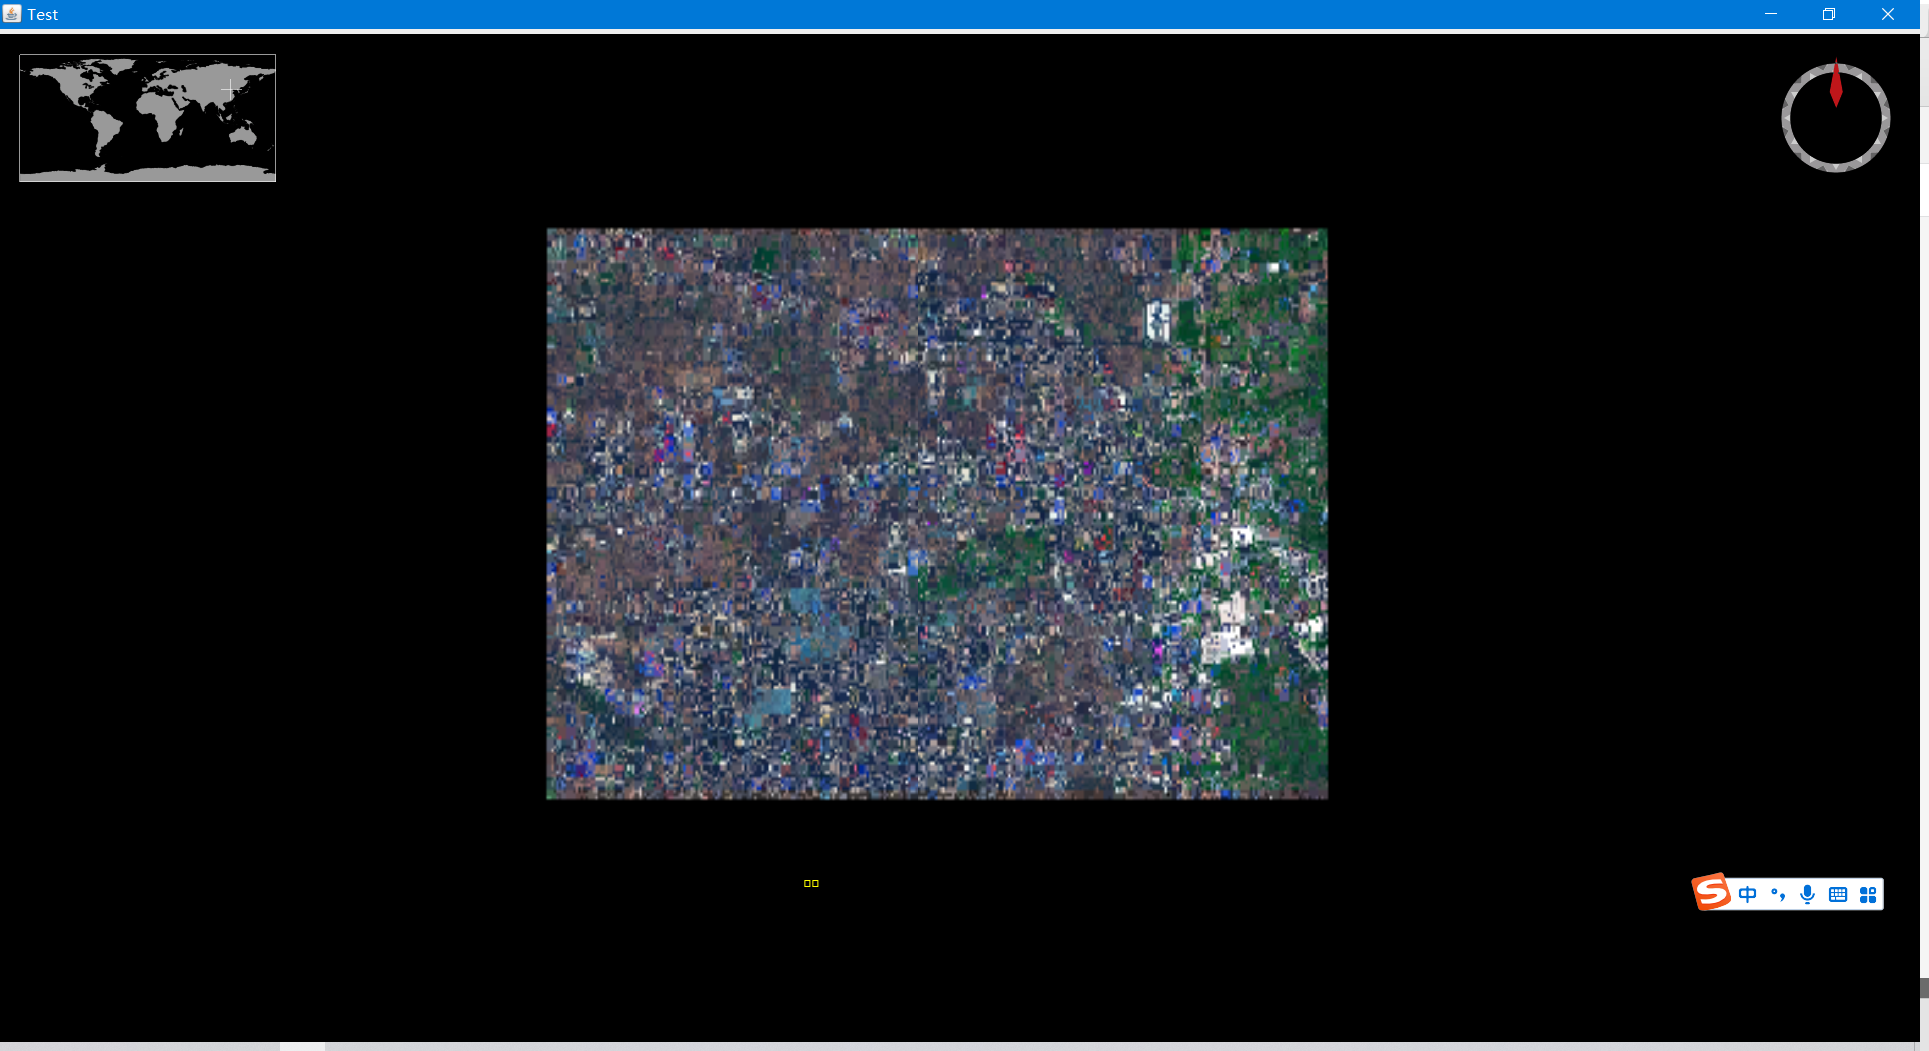
The above figure is the loaded layer. This is the tutorial for loading WMS service in Worlwind java version.
4, Development and expansion
The two dll files in the root directory mentioned above are the solution to webview when it cannot be used. If it cannot be used, the following steps can be ignored.
When WorldWind's Balloons tag is used, an exception may be reported: no WebView64 in java.library.path
Solution: copy the WebView32.dll and WebVIew64.dll files in the worldwind.zip package, put them in the root directory of the project, and then copy the webstart.xml file in the zip package to the libs folder, and then compile at this time.