Before, Jenkins was generally needed to realize automatic packaging deployment. However, Gitlab's CI/CD function can also be deployed automatically, and the operation is simpler. If you are also using Gitlab as a Git repository, you might as well try its CI/CD function.
1, Installation
To realize automatic deployment through Gitlab's CI/CD function, we need to install Gitlab, Gitlab Runner and Maven services.
1.1 installation of Gitlab
First, we need to install Gitlab on our own server. If you don't know how to install it, you can refer to< 10 minutes to build your own Git warehouse .
In order to avoid unnecessary trouble, we can run Gitlab service with the following command. Note that the hostname attribute is added here, so that we can access Gitlab through the domain name, Gitlab_ ROOT_ The password environment variable can directly set the password of the root account in Gitlab:
docker run --detach \
  --hostname git.bilibili.com \
  --publish 10443:443 --publish 1080:80 --publish 1022:22 \
  --name gitlab \
  --restart always \
  --volume /mydata/gitlab/config:/etc/gitlab \
  --volume /mydata/gitlab/logs:/var/log/gitlab \
  --volume /mydata/gitlab/data:/var/opt/gitlab \
  -e GITLAB_ROOT_PASSWORD=12345678 \
  gitlab/gitlab-ce:latest
Then, we can access Gitlab through the domain name git.bilibili.com. If you don't have a domain name, you can modify the host file of this machine:
192.168.7.134 git.bilibili.com
Since our Gitlab runs on port 1080, if we want to access without ports, we can use the reverse proxy of Nginx for processing. Friends unfamiliar with Nginx can take a look There must be something you don't know about these wonderful functions of Nginx . The following is the git.conf configuration file added in the configuration folder of Nginx, as follows:
server {
    listen       80; # HTTP is also supported
    server_name  git.bilibili.com; #Modify domain name

    location / {
        proxy_pass   http://192.168.7.134:1080; #  Set proxy service access address
        index  index.html index.htm;
    }

    error_page   500 502 503 504  /50x.html;
    location = /50x.html {
        root   /usr/share/nginx/html;
    }
}
After that, we can access Gitlab through the domain name git.bilibilili.com. Enter the account password root:12345678 to log in.
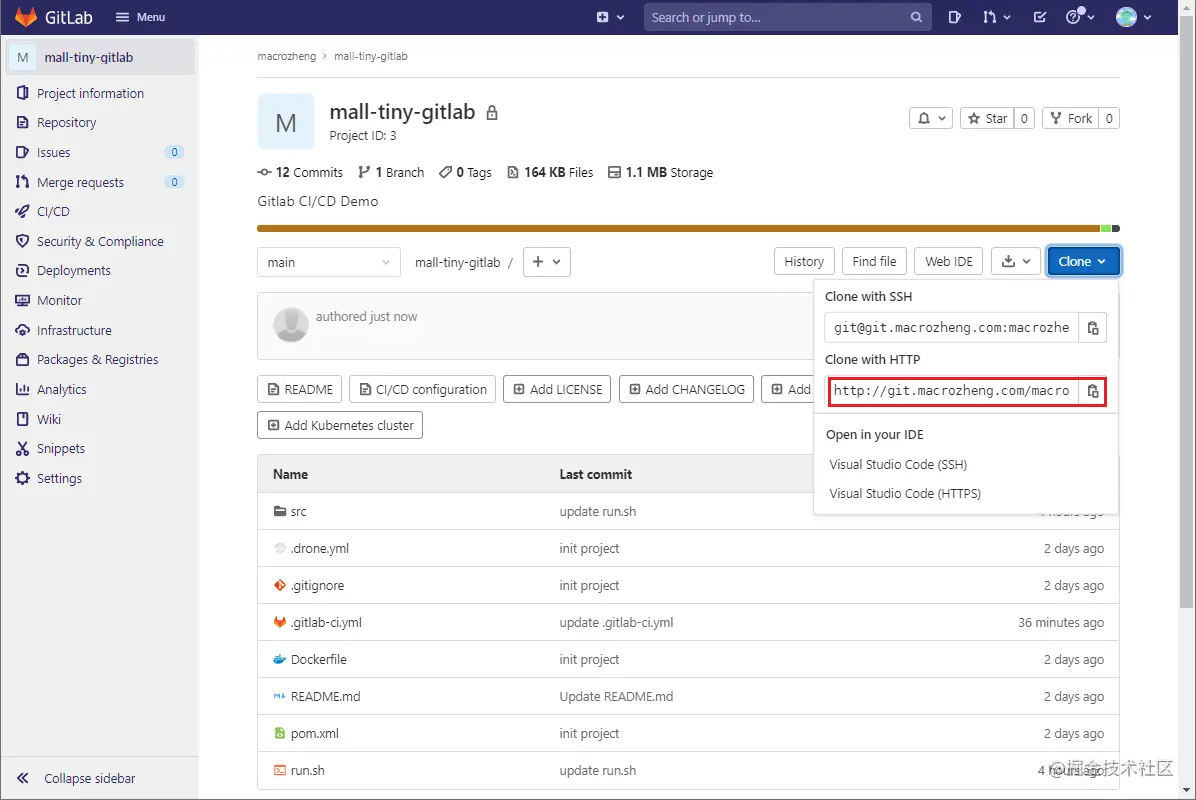
Upload our SpringBoot application code to Gitlab so that Gitlab is ready! It should be noted here that if you do not specify the hostname when starting Gitlab, your project HTTP access address will be the ID of the container, and you will not be able to access the Git warehouse using this address!
1.2 installing Gitlab Runner
Gitlab is just a code warehouse. To implement CI/CD, you need to install gitlab runner. Gitlab runner is equivalent to the executor of tasks in gitlab. Gitlab will call it when it needs to execute tasks.
First, download the Docker image of gitlab runner and select alpine bleding. This version is very compact.
docker pull gitlab/gitlab-runner:alpine-bleeding
Then, run gitlab runner with the following command.
docker run --name gitlab-runner --restart always \
-v /var/run/docker.sock:/var/run/docker.sock \
-v /mydata/gitlab-runner:/etc/gitlab-runner \
-d gitlab/gitlab-runner:alpine-bleeding
At this time, if we check the container log of Gitlab runner, we will find the following error: the config.toml file cannot be found. There is no need to worry about this problem. When we register Gitlab runner with Gitlab, the file will be generated automatically.
ERROR: Failed to load config stat /etc/gitlab-runner/config.toml: no such file or directory builds=0
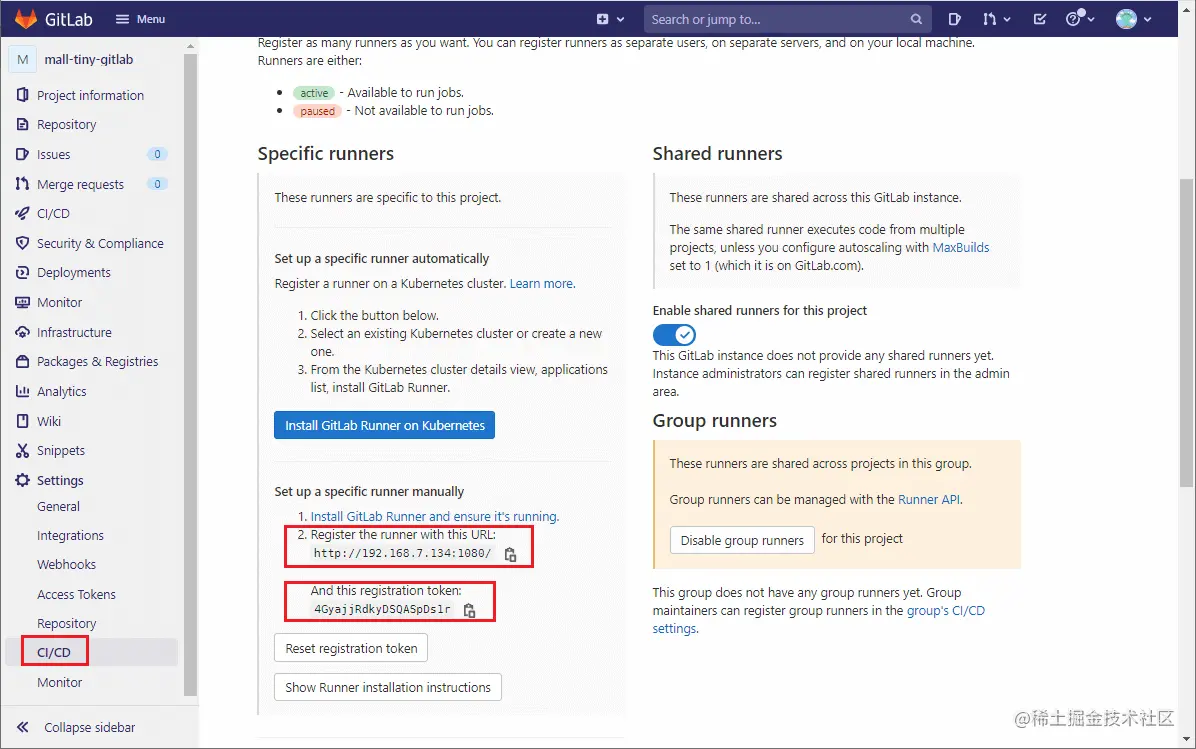
Next, we need to register Gitlab runner with Gitlab, open the project - > Settings - > CI / CD function, and get the address and token used for runner registration.
Next, use the following command to enter the inside of the gitlab runner container.
docker exec -it gitlab-runner /bin/bash
Then, register the runner in the container with the following command.
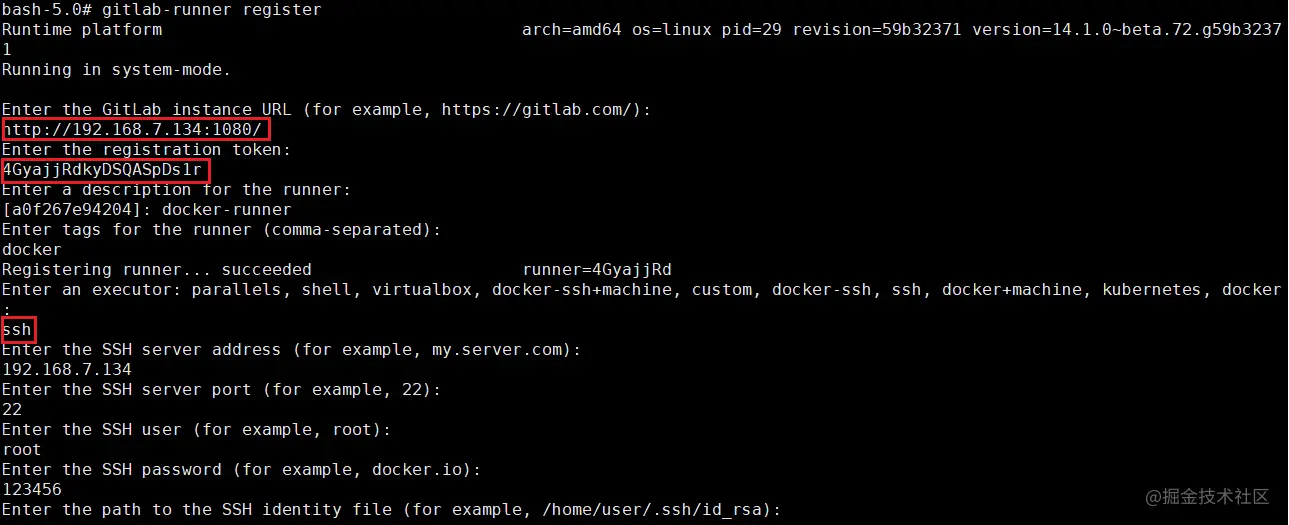
gitlab-runner register
An interactive interface will appear during registration, prompting you to enter the registration address, token, actuator type and other information. The ssh actuator can remotely execute Linux commands, as shown below.
After registration, we can find that the config.toml file has been generated. The contents are as follows. When you want to modify the runner configuration in the future, just change this file directly.
concurrent = 1
check_interval = 0

[session_server]
  session_timeout = 1800

[[runners]]
  name = "docker-runner"
  url = "http://192.168.7.134:1080/"
  token = "c2kpV6tX6woL8TMxzBUN"
  executor = "ssh"
  [runners.custom_build_dir]
  [runners.cache]
    [runners.cache.s3]
    [runners.cache.gcs]
    [runners.cache.azure]
  [runners.ssh]
    user = "root"
    password = "123456"
    host = "192.168.7.134"
    port = "22"
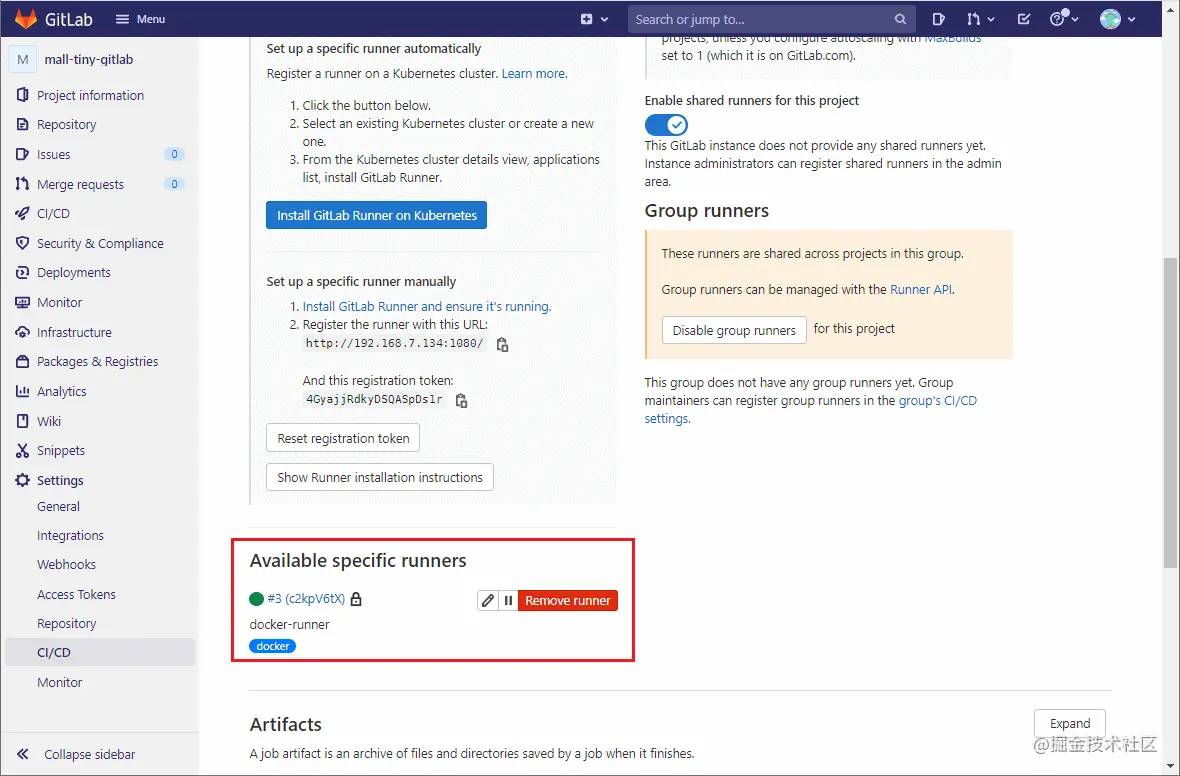
Next, open the project on Gitlab, and then you can find that the runner has successfully registered in the CI/CD settings of Gitlab!
1.3 installation of Maven
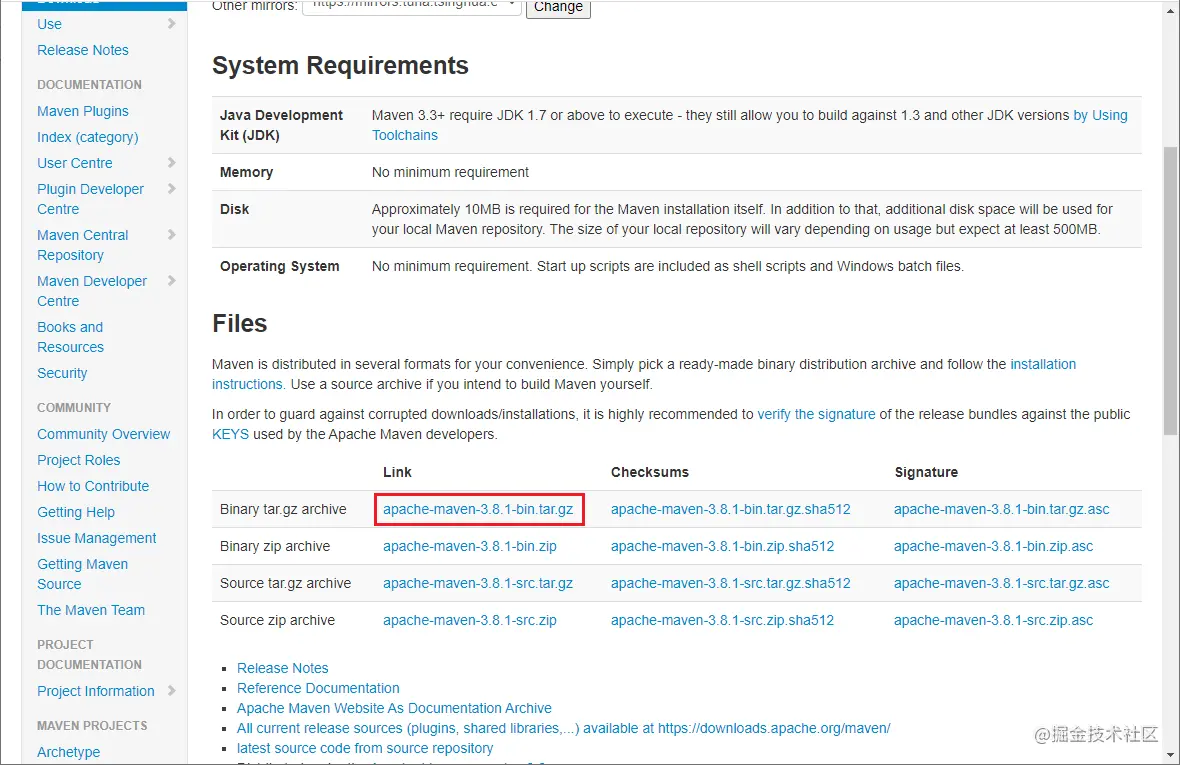
The spring boot project packaging needs to rely on Maven. We need to install it on the server first. First, Download Maven's Linux installation package, Download address.
After downloading, use the following command to unzip to the specified directory.
cd /mydata
tar -zxvf apache-maven-3.8.1-bin.tar.gz
Next, modify the / etc/profile file and add the environment variable configuration.
export MAVEN_HOME=/mydata/apache-maven-3.8.1
export PATH=$PATH:$MAVEN_HOME/bin
We can use the mvn -v command to test whether Maven is successfully installed.
Maven home: /mydata/apache-maven-3.8.1
Java version: 1.8.0_292, vendor: AdoptOpenJDK, runtime: /mydata/java/jdk1.8/jre
Default locale: en_US, platform encoding: UTF-8
OS name: "linux", version: "3.10.0-957.el7.x86_64", arch: "amd64", family: "unix"
1.4 installing JDK
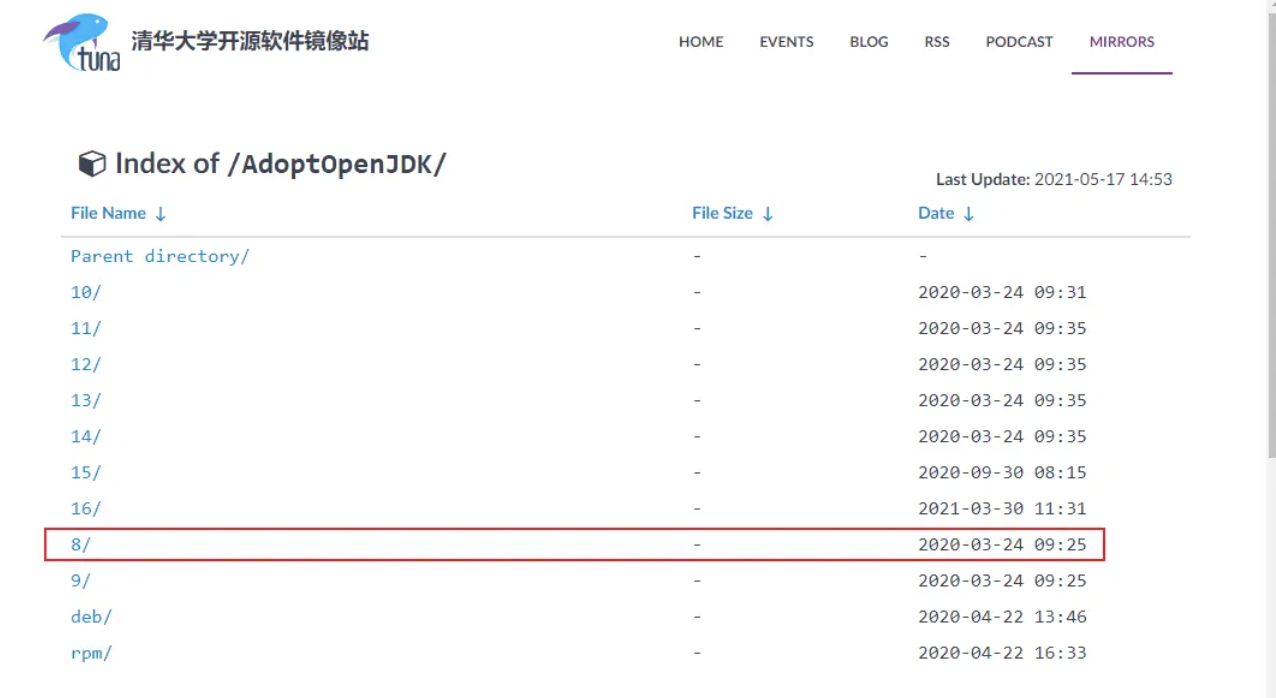
JRE is installed by default on CentOS, and JDK needs to be installed to use Maven. First, Download JDK 8.
 After downloading, unzip the JDK to the specified directory.
cd /mydata/java
tar -zxvf OpenJDK8U-jdk_x64_linux_xxx.tar.gz
mv OpenJDK8U-jdk_x64_linux_xxx.tar.gz jdk1.8
Then, add the environment variable Java in the / etc/profile file_ HOME.
vi /etc/profile
# Add in profile file
export JAVA_HOME=/mydata/java/jdk1.8
export PATH=$PATH:$JAVA_HOME/bin
# Make the modified profile file effective
. /etc/profile
2, Deploy using CI/CD
Everything is ready. Next, you can realize the automatic deployment of SpringBoot applications through gitlab's CI/CD function! First, add the. gitlab-ci.yml file in the root directory of the project, which defines two tasks. One task will package the application code into Jar package and copy it to the specified directory, and the other task will package and run the Docker image of the application by running the script run.sh.
# Package task
build-job:
  stage: build
  # Specify a label that only the runner with the label will execute
  tags:
    - docker
  script:
    # Packaging with Maven
    - mvn clean package
    # Copy the jar package, Dockerfile and running script to the specified directory
    - cp target/mall-tiny-gitlab-1.0-SNAPSHOT.jar /mydata/build/mall-tiny-gitlab-1.0-SNAPSHOT.jar
    - cp Dockerfile /mydata/build/Dockerfile
    - cp run.sh /mydata/build/run.sh

# Deployment task
deploy-job:
  stage: deploy
  tags:
    - docker
  script:
    # Enter the specified directory and execute the run script
    - cd /mydata/build
    - chmod +x run.sh
    - ./run.sh
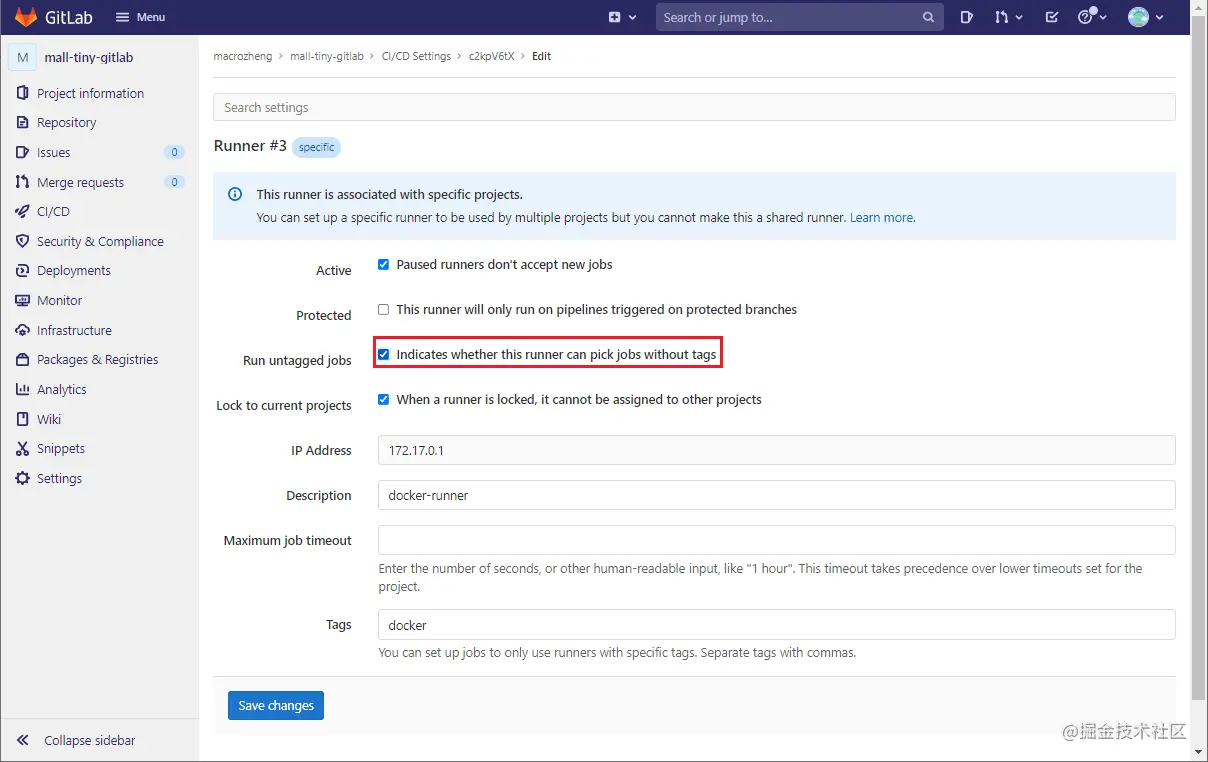
It should be noted that by default, the runner will only execute jobs with the same tag. Since we have set the tag docker for both Job and runner, we can execute them here. If you don't set a label, you need to set the editing interface of the runner so that the runner can execute a Job without a label.
Because our gitlab runner uses ssh executor, it will log in to the server we specify and execute the script command defined in. gitlab-ci.yml. Before that, we will get the code from the Git warehouse. Therefore, we need to modify the host file on the server.
vim /etc/hosts
192.168.7.134 git.bilibili.com
The next step is to submit the script to the Git warehouse. After submission, the executing tasks will be found in project - > CI / CD - > pipelines.
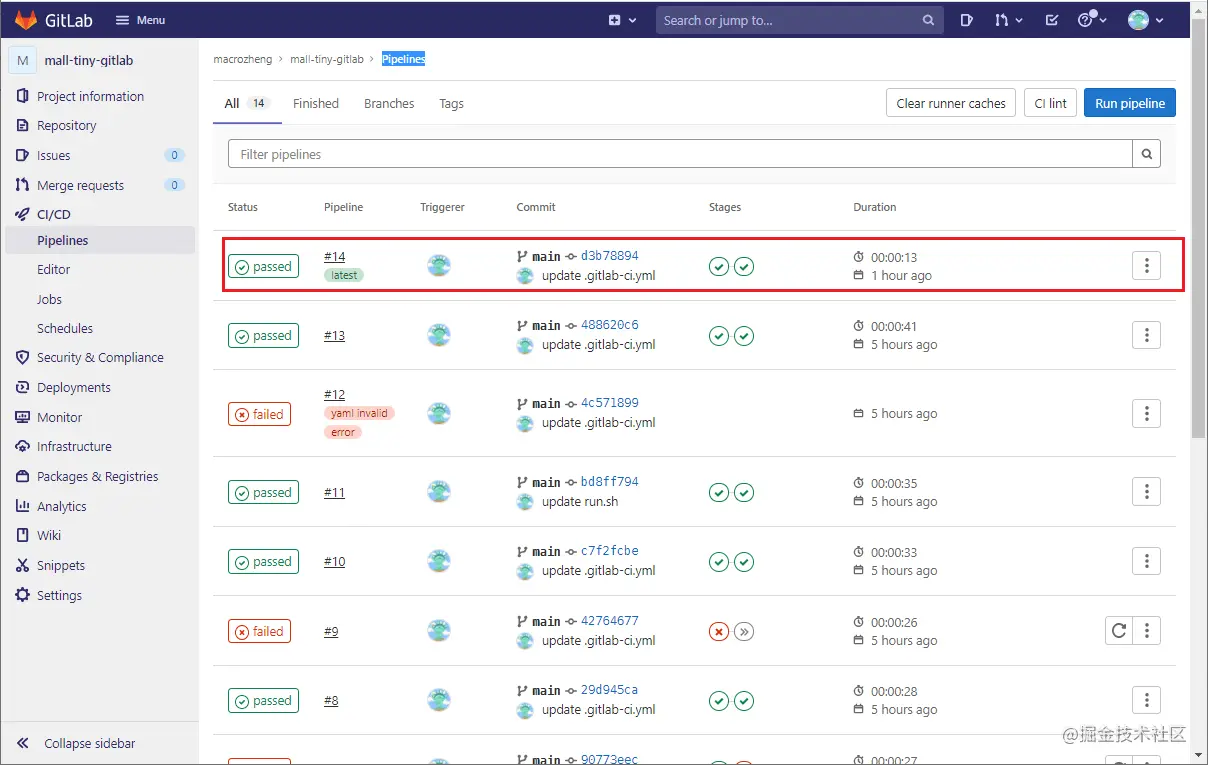
Open the Pipeline details page to find the execution results of the two tasks we defined.
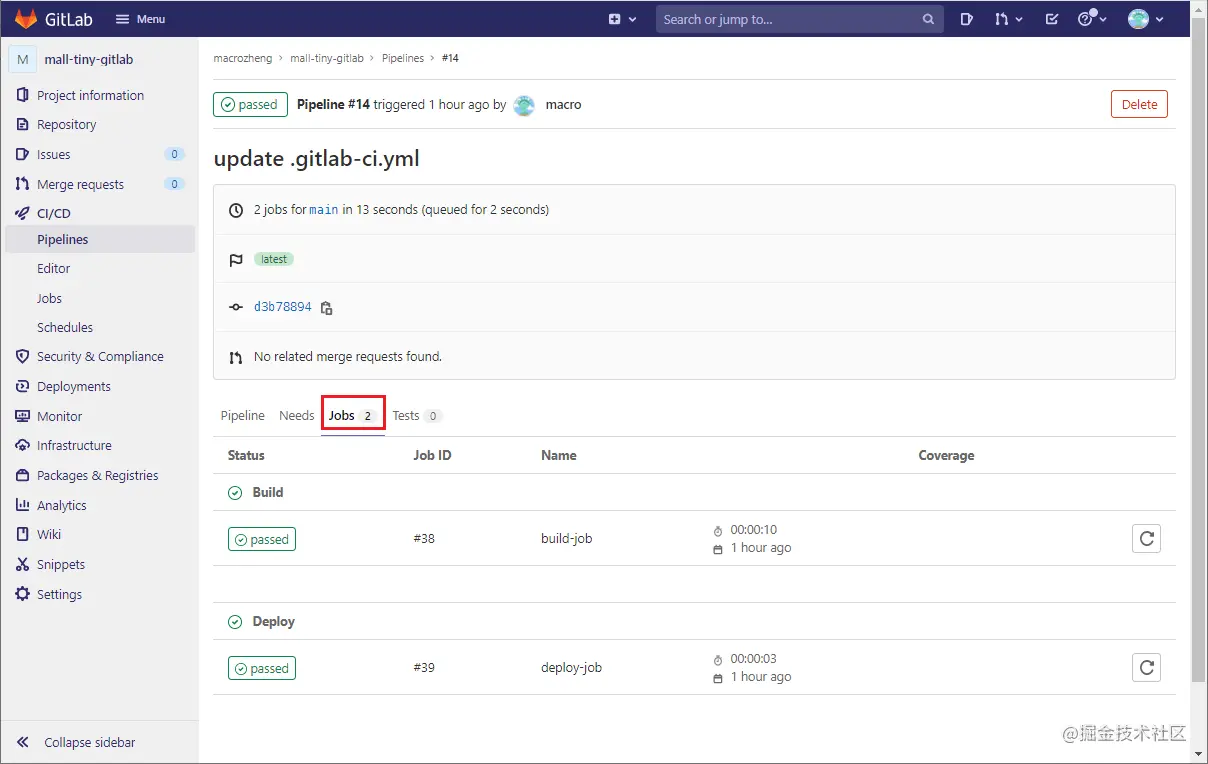
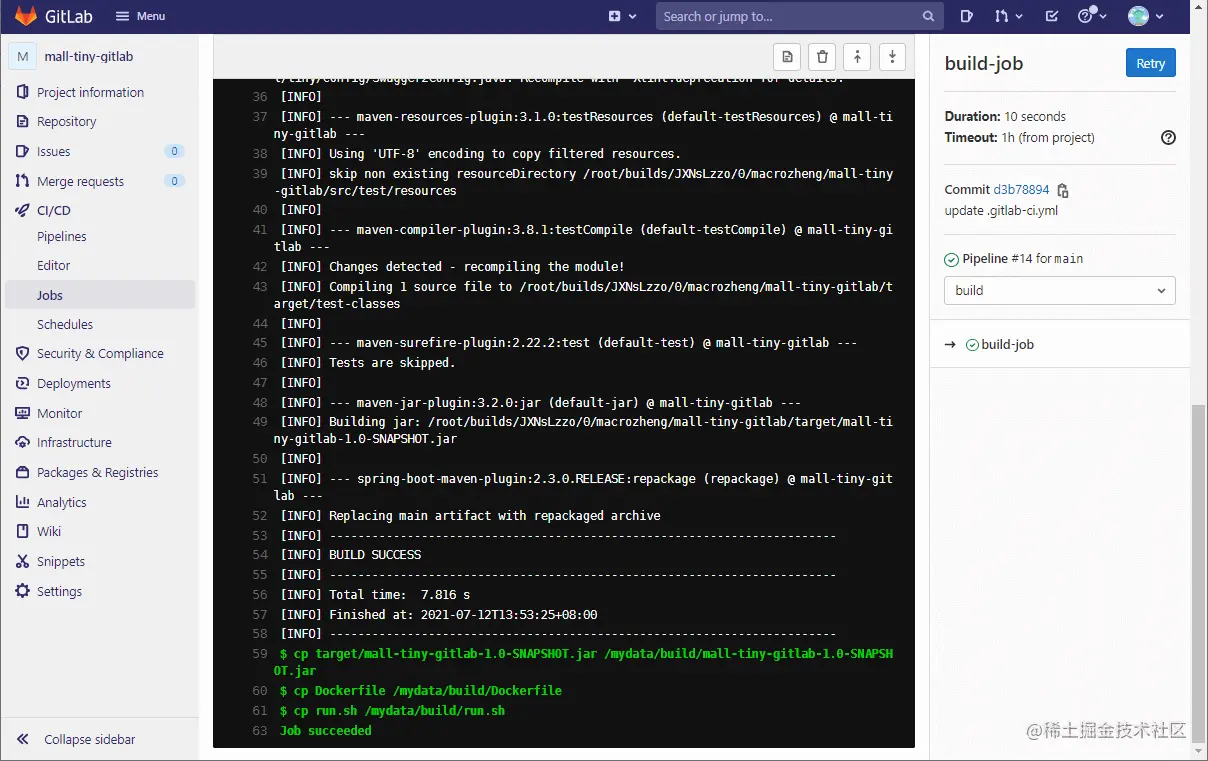
Open the Job details interface, and we can see the log information output during task execution.
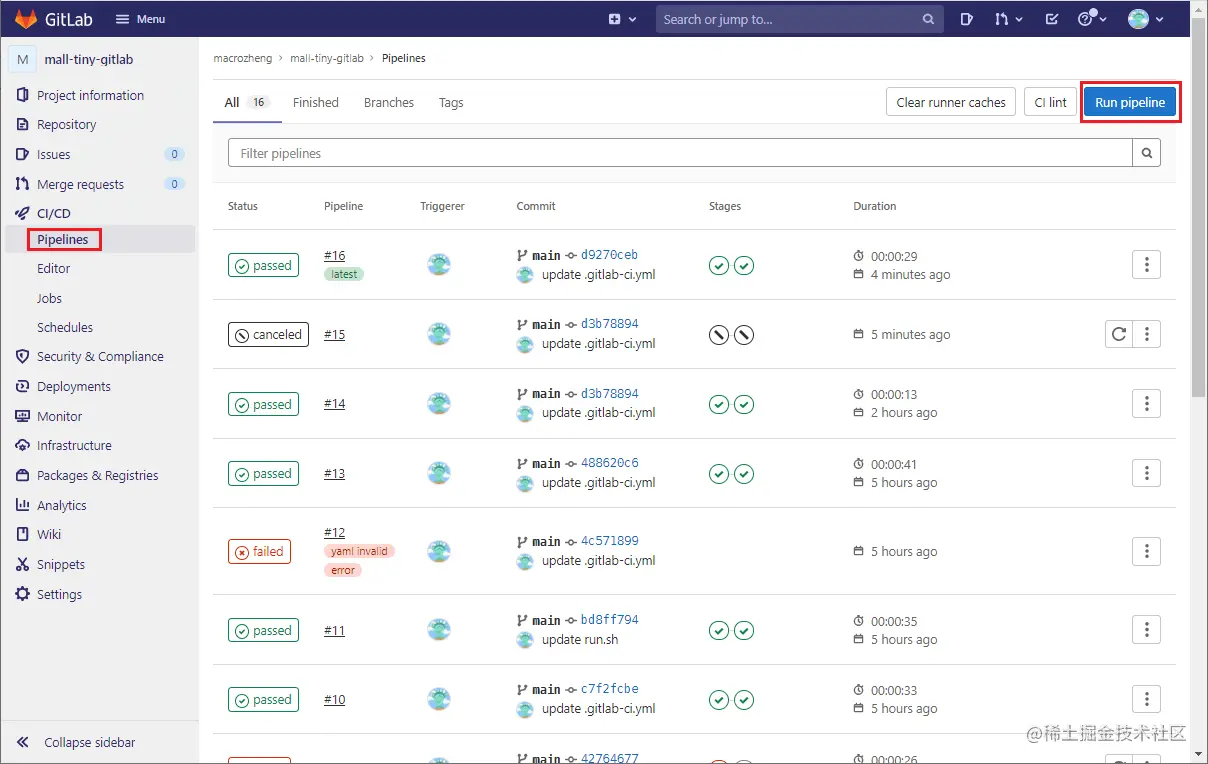
If you want to manually execute the Pipeline instead of submitting the trigger, you can click the Run Pipeline button on the Pipelines page.
You can see that it is really good to use its CI/CD function to realize automatic deployment! Install a lightweight gitlab runner and write a simple. gitlab-ci.yml script file.