Step 1: install the LAMP environment
1. First update the system software package to the latest version
yum update
2.. After the package is updated, you can now install LAMP (Linux, Apache, MySQL and PHP) using all required PHP modules, as shown in the figure
yum install httpd php php-common php-curl php-xml php-json php-mbstring php-zip php-imap pcre pcre-devel zlib-devel mariadb-server
3. After installing LAMP, start Apache and MariaDB services and make them start automatically when the system boots
systemctl start httpd mysql

(
   If an error is reported in this step: Unit mysqld.service could not be found.
    resolvent:
     # Yum install MariaDB server - Y / / if installed, you can omit it
     # systemctl start mariadb.service / / start the service
     # systemctl enable mariadb.service / / start the service
     # mysql -u root -p / / log in to mysql
)

systemctl enable httpd mariadb
4. Now run the following script to secure and strengthen the installation of database server
    mysql_secure_installation
 perhaps
    mysql_secure_installation
5. After running the above security script, the system will ask you to enter the root password, just press [Enter]
Enter current password for root (enter for none):
6. Again, you will also be asked to answer the following questions. Just type y to all the questions, set the root password, delete the anonymous user, close the remote root login, delete the test database and reload the permission table:
Set root password? [Y/n] y Remove anonymous users? [Y/n] y Disallow root login remotely? [Y/n] y Remove test database and access to it? [Y/n] y Reload privilege tables now? [Y/n] y
7. Now you need to configure PHP to allow at least 6MB of files to be uploaded. Open your PHP configuration file (/ etc/php.ini or / etc/php5/apache2/php.ini) and the editor of your choice, and search for upload_max_filesize and set it.
upload_max_filesize = 6M (The one I built here is directly changed to 200. It's OK to make it bigger)
8. Save the file and close it, then restart the HTTP server
systemctl restart httpd
Step 2: create SuiteCRM database
1. In this step, you can create a database to store the data of suiteCRM. Run the following command to access the MariaDB shell (please remember to use your own database name, user and password) (I have created the database suitecrm_db, user name: crmadmin, password: 123. It depends on your own situation. This database will be used during installation at that time)
$ mysql -u root -p
MariaDB [(none)]> CREATE DATABASE suitecrm_db;
MariaDB [(none)]> CREATE USER 'crmadmin'@'localhost' IDENTIFIED BY '123';
MariaDB [(none)]> GRANT ALL PRIVILEGES ON suitecrm_db.* TO 'crmadmin'@'localhost';
MariaDB [(none)]> FLUSH PRIVILEGES;
MariaDB [(none)]> exit;
Step 3: install and set up SuiteCRM
1. First install Git, under the Apache root directory (/ var / www / html /), obtain and clone the latest version of SuiteCRM from the Github resource library with appropriate permissions in the SuiteCRM folder
yum -y install git
cd /var/www/html
git clone https://github.com/salesagility/SuiteCRM.git
mv SuiteCRM suitecrm
chown -R apache:apache suitecrm       [On CentOS/RHEL]
chmod -R 755 suitecrm
ls -ld suitecrm
2. Now open your Web browser and enter the URL below to access the SuiteCRM Web installer wizard
http://SERVER_IP/suitecrm/install.php
 perhaps
http://localhost/suitecrm/install.php
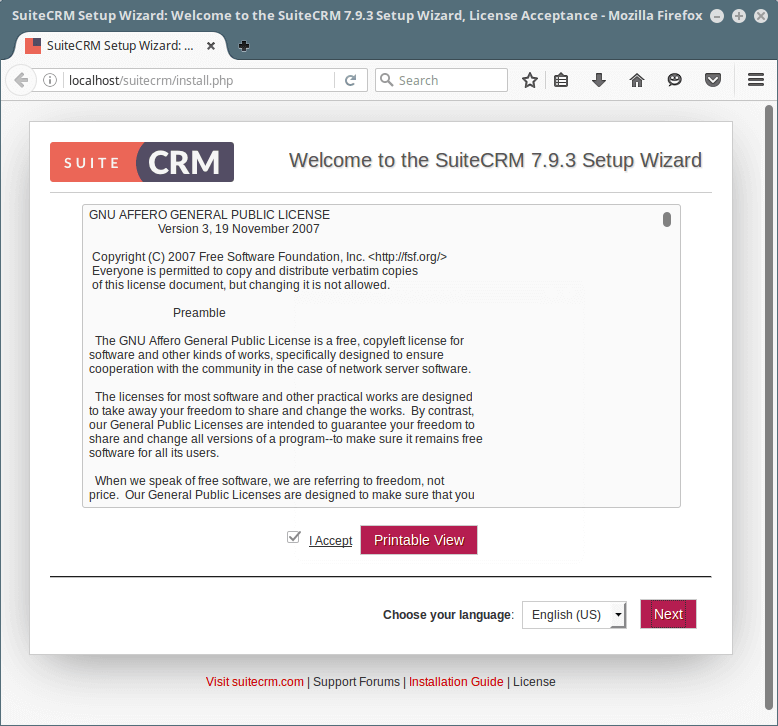
3. You will see the welcome page, which includes the SuiteCRM license agreement. Read the license and check "I accept" and set the installation language. Click next to continue
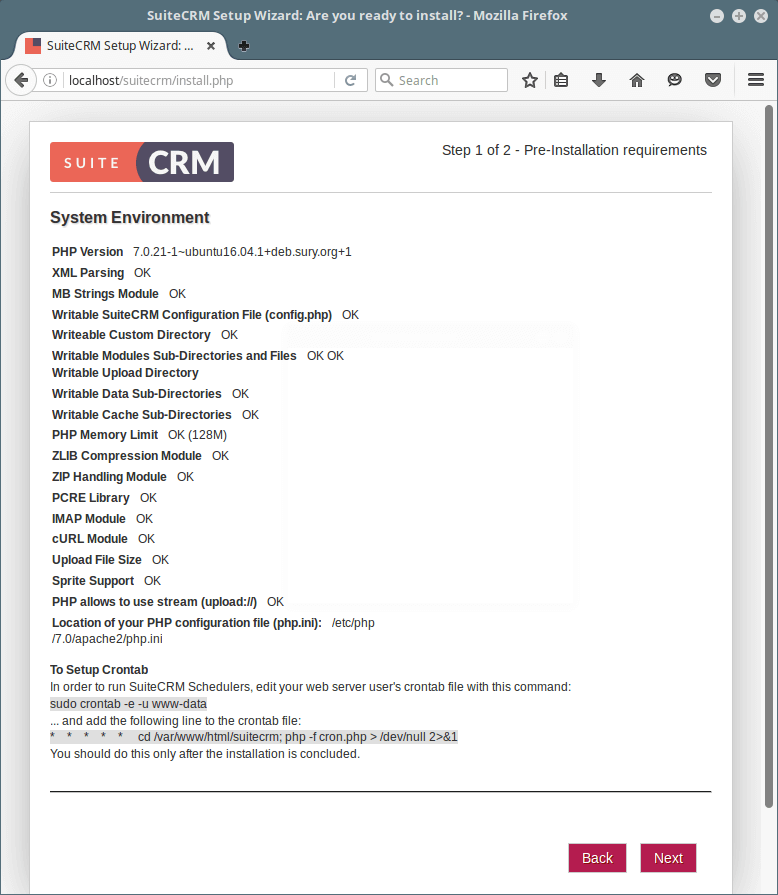
4.SuiteCRM Web installer, you will see the pre installation requirements page below. If everything is fine, as shown in the screenshot below, click next to continue.
If there are errors in the following databases:

Solution (install the following two php plug-ins on the machine):
yum -y install php-pdo
yum -y install php-pdo_mysql
If you encounter the following errors and solutions:
Error: Sprite Supports Currently we are not able to locate the GD library, as a result you will not be able to use the CSS Sprite functionality,

resolvent: yum -y install  php-gd
5. Next, provide SuiteCRM database settings (database name, host, user name and password)
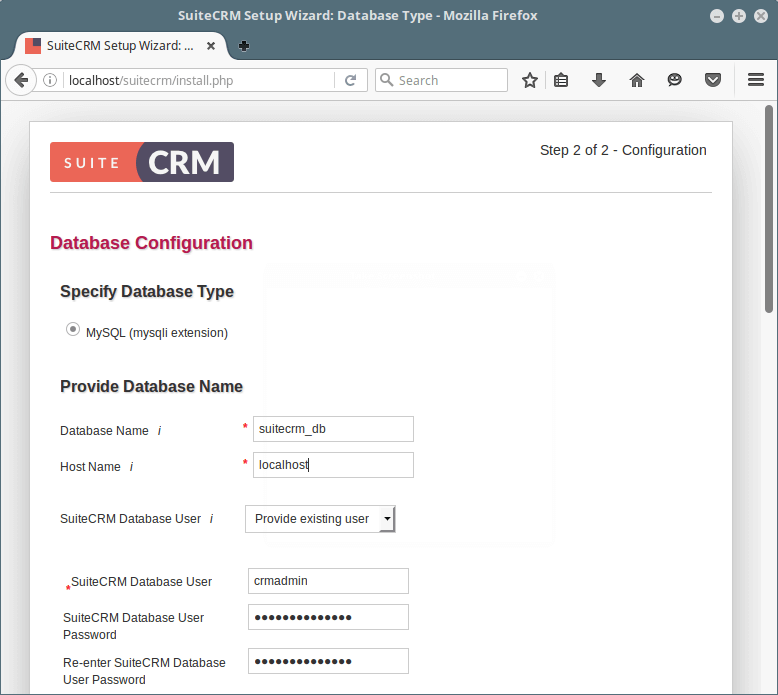
SuiteCRM database settings
On the same page, enter the site configuration (site name, administrator user name, password and email address).
You can also configure more options:
- Presentation data (select Yes if you want to populate the site with presentation data).
- Scenario selection - such as sales, marketing, etc
- SMTP server specification - select your email provider, SMTP server, port, user authentication details.
- Branded details - organization name and logo.
- System locale - date format, time format, time zone, currency, currency symbol and ISO 4217 currency code.
- Site security settings.
When finished, click next to begin the actual installation process in which the installer will create the database tables and default settings.

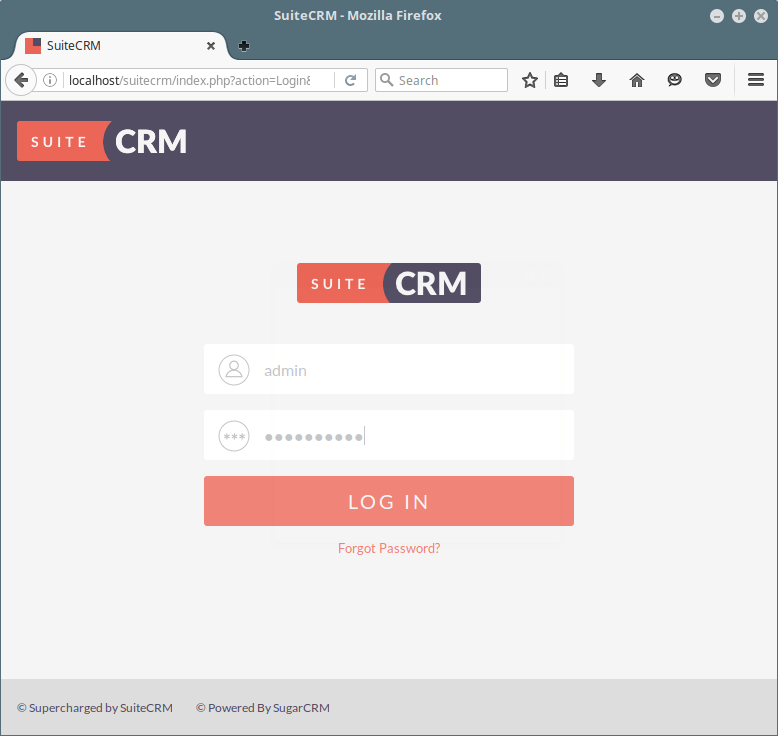
6. After installation, you can log in. Provide the administrator user name and password, and then click "login"
Step 4: Chinese page
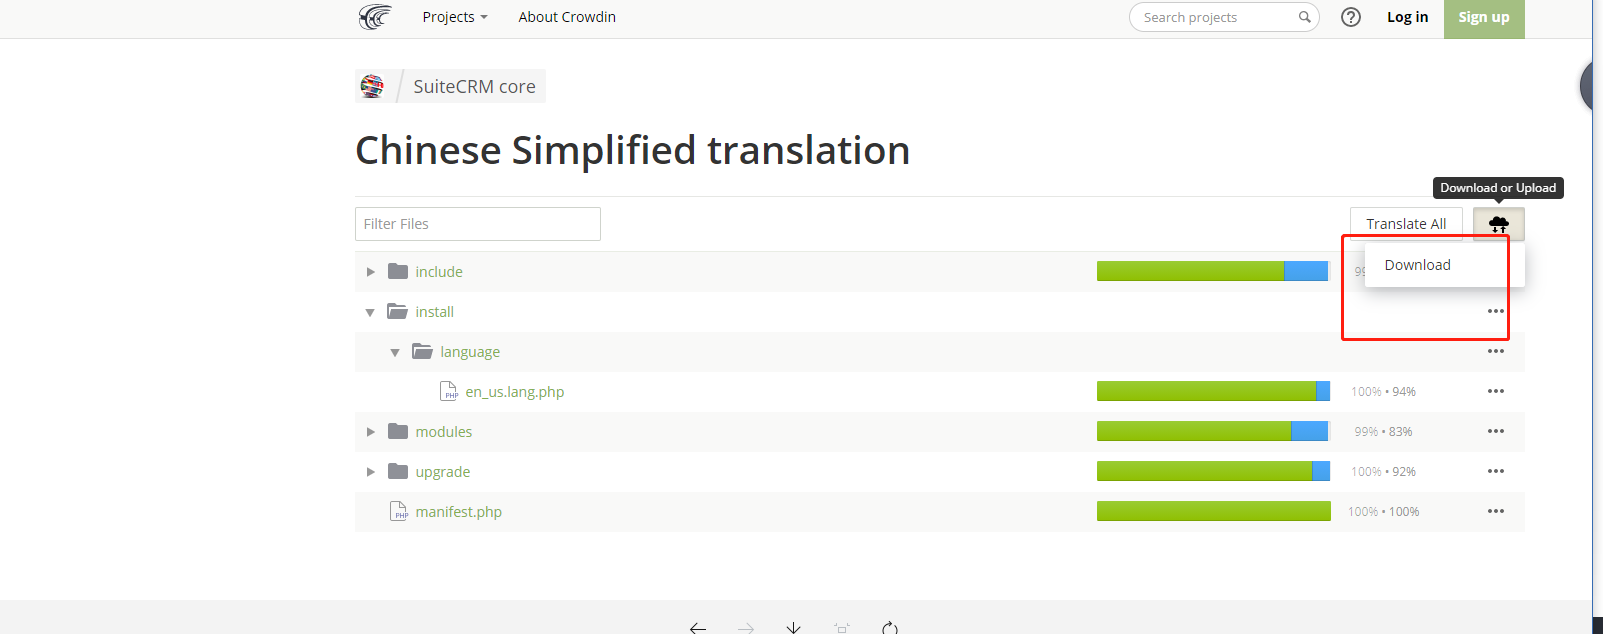
1. Download the Chinese package first
https://crowdin.com/project/suitecrmtranslations/zh-CN
After entering the page (click the link below to download):
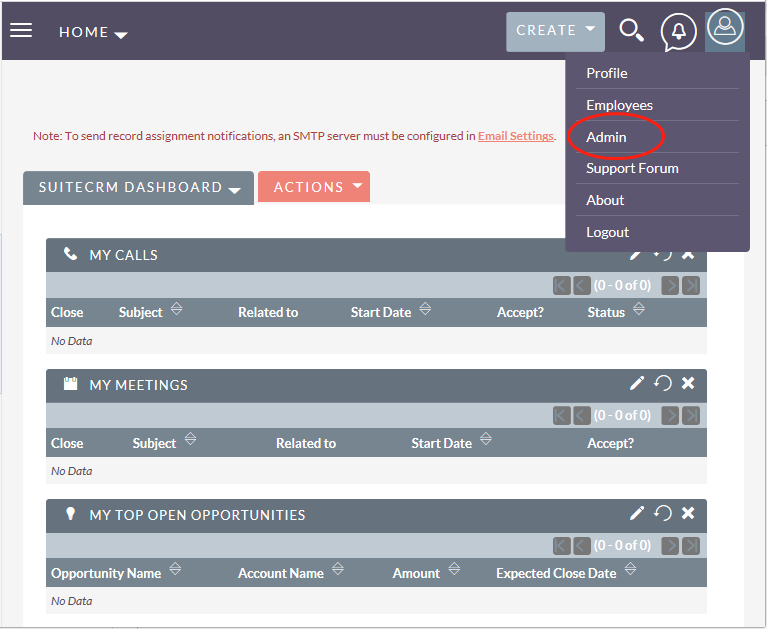
2. Enter suitecrm with administrator account and select "admin"
3. Scroll through the page and find the Module Loader project under Developer Tools below
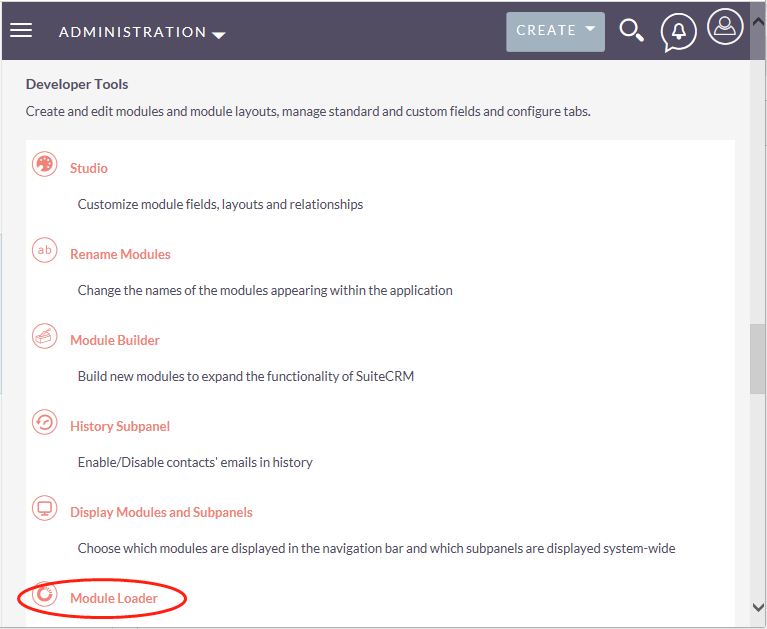
4. Upload and download the Chinese package
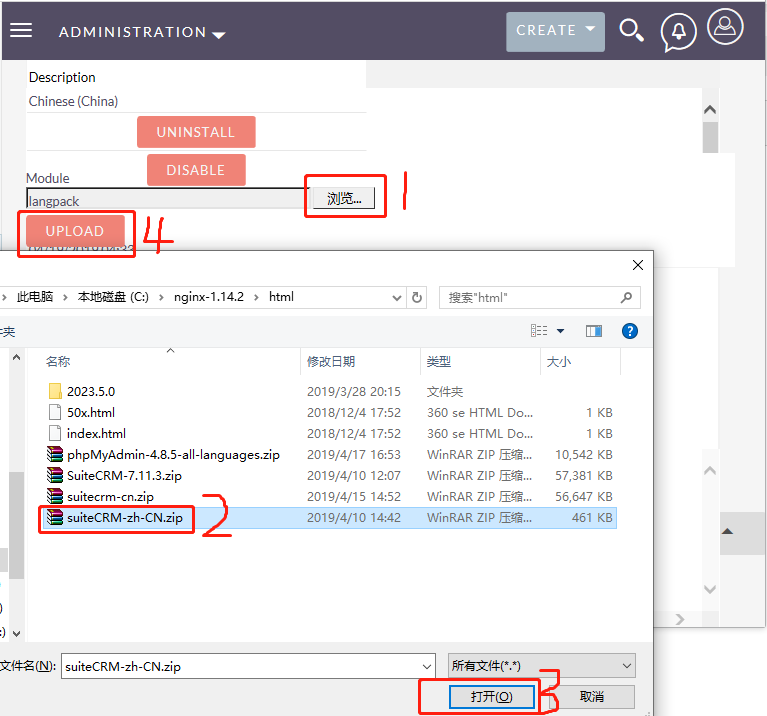
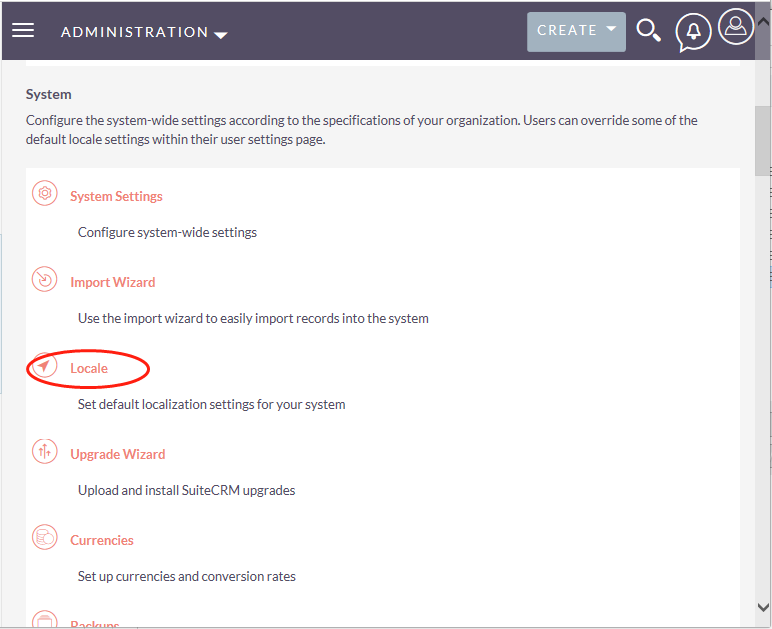
5. Click "INSTALL" that appears on the project after downloading, complete the installation, enter the admin interface again, and select the local entry under system this time
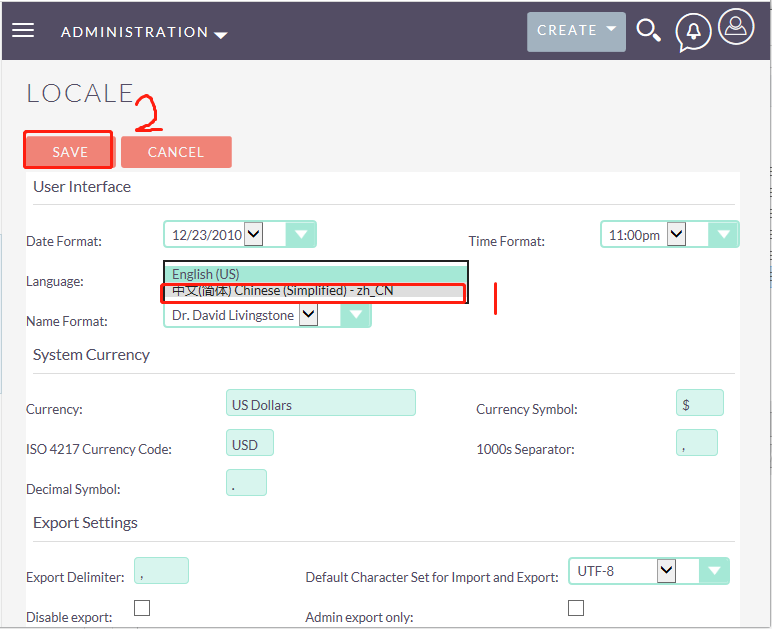
6. Select simplified Chinese from the drop-down list and save it
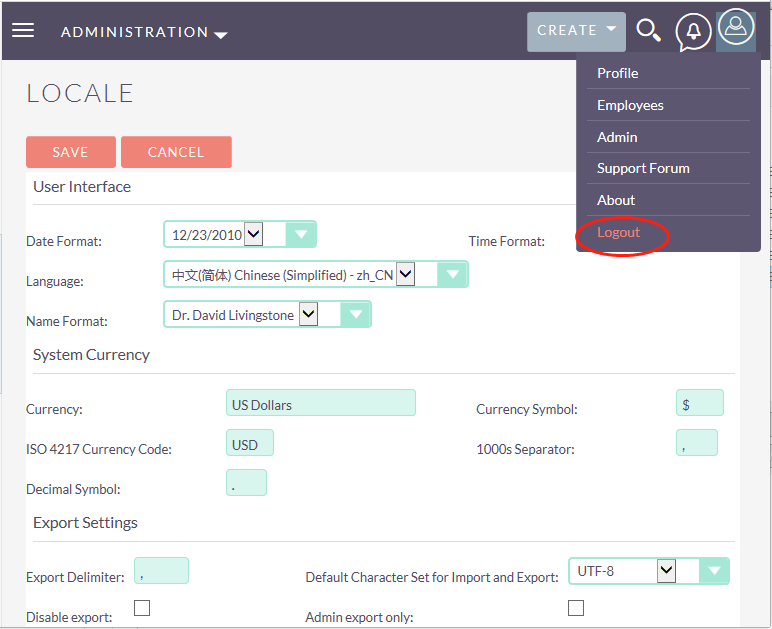
7. Exit the system
8. Reopen the website link of the system and select simplified Chinese
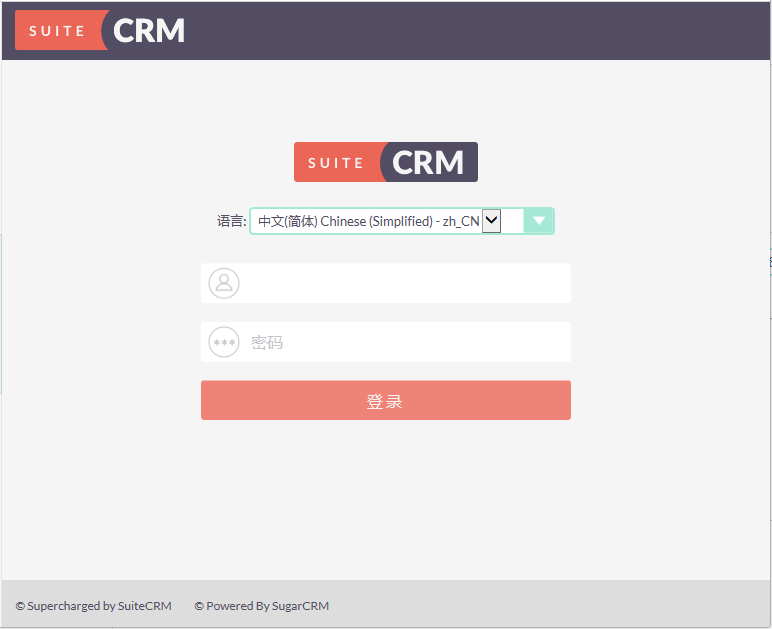
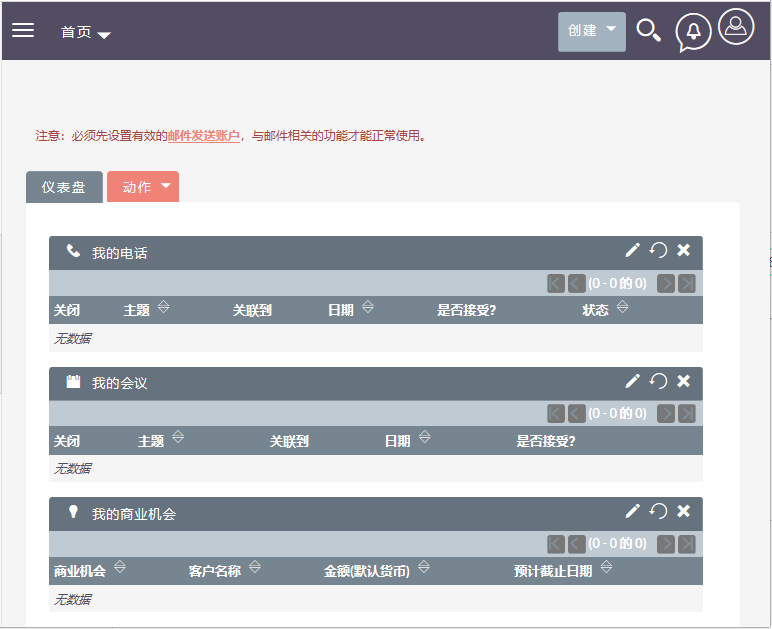
9. Appearance of Chinese interface
