1. Redis transaction
1.1 role of redis transaction
Redis transaction is a separate isolation operation. All commands in the transaction will be serialized and executed sequentially (because of single thread + IO multiplexing). During the execution of the transaction, it will not be interrupted by the command request sent by other clients.
The main function of Redis transaction is to concatenate multiple commands to prevent other commands from jumping in the queue.
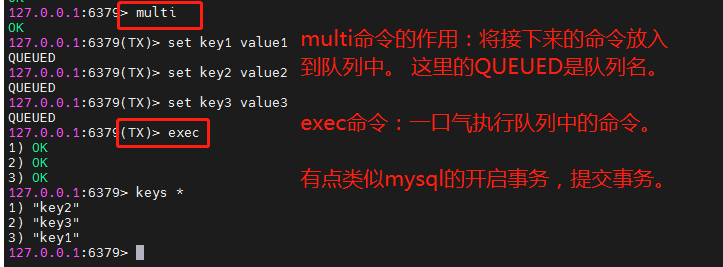
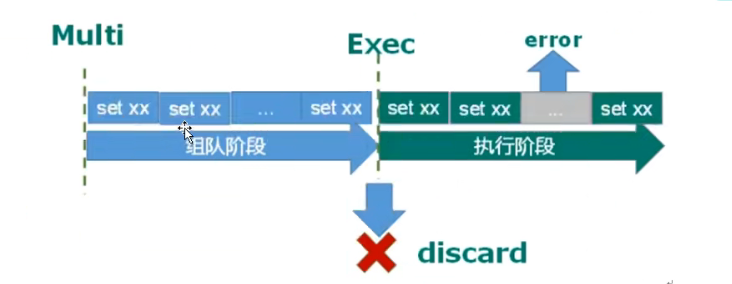
1.2 Multi, Exec and discard commands (three commands commonly used in transactions)
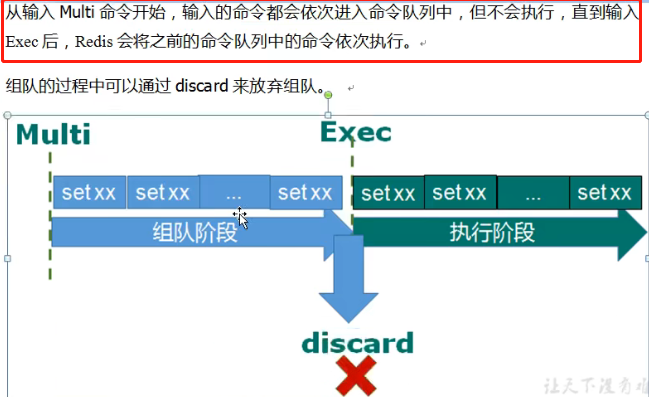
Execute command and exec multi effect:
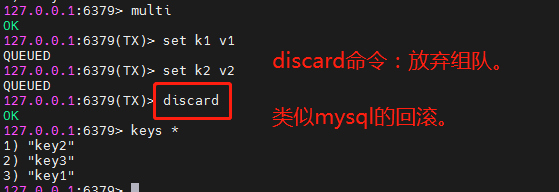
The discard command is to give up teaming, which is similar to mysql rollback.
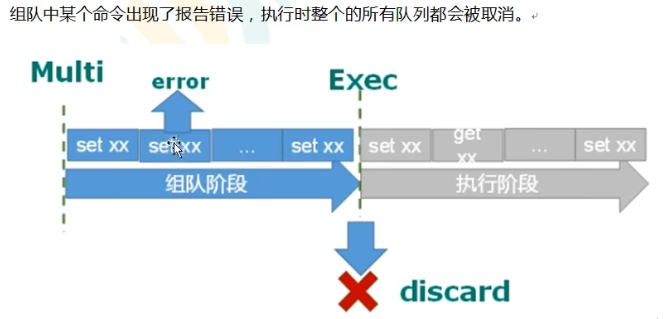
1.3 error handling of transactions
In the queue formation stage, if an error occurs in one of our commands, the commands in the whole queue will be cancelled.
The following paragraph of English should know!!
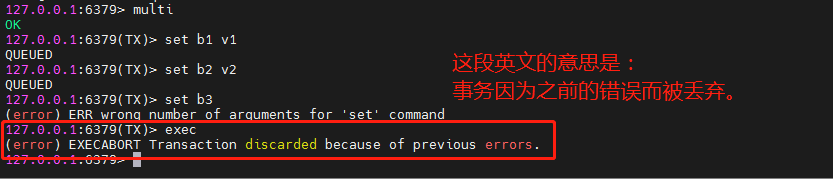
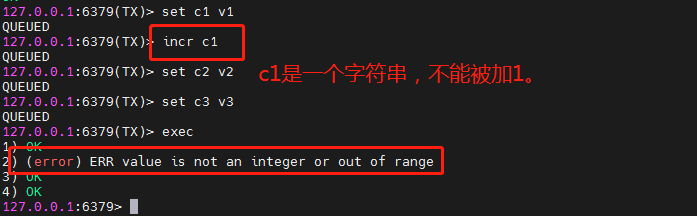
If an error is reported in a command at the execution stage, only the command with an error will not be executed, while other normal commands will be executed and will not be rolled back.
2. Redis transaction conflict
2.1 what is a transaction conflict?
A transaction conflict occurs when multiple transactions operate on one data at the same time.
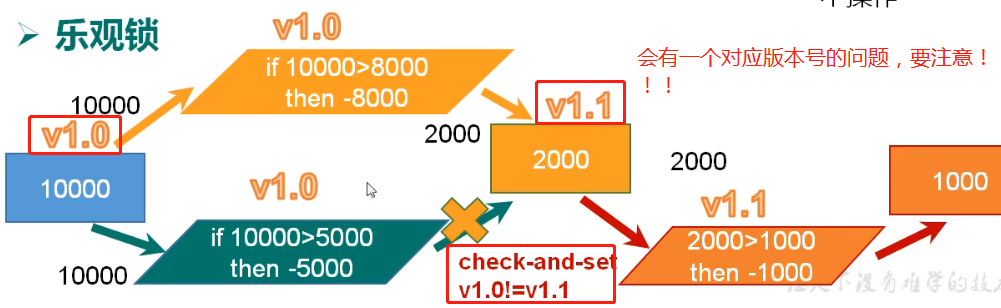
2.2 how to resolve transaction conflicts? Optimistic lock and pessimistic lock
Locks are necessary to resolve transaction conflicts.
Locks are generally divided into pessimistic locks and optimistic locks.
Pessimistic lock: no matter what operation is performed on the data, it will be locked first, so that others cannot add, delete, modify and query the data. Unless unlocked.

(the disadvantage of this lock is its low efficiency.)
Optimistic lock: opposite to pessimistic lock. But pay attention to the mechanism of version number!!

You should know the version number mechanism!!!
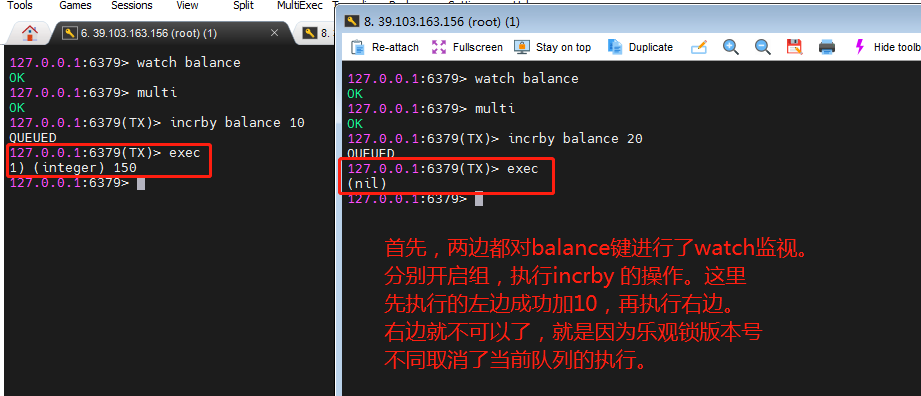
2.3 watch command and unwatch command
Monitor one or more keys through the watch command.
The unwatch command cancels the monitoring of all key s by the watch command.
If the exec command or discard command is executed after the watch command is executed, there is no need to execute unwatch.
2.4 three features of redis transaction
First of all, redis does not support the four features of ACID. Redis has three special features for transactions.

3. Redis transaction spike case
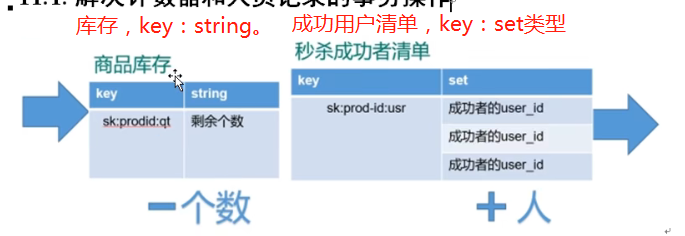
3.1 basic realization of second kill case
First, determine the data types of inventory and successful users to use redis, as follows:
package com.itholmes.jedis;
import java.util.Random;
import redis.clients.jedis.Jedis;
public class SecKill_redis {
public static void main(String[] args) {
Random random = new Random();
//Simulate random users
String uid = "";
for(int i=0;i<4;i++) {
//Randomly generate a number within 10
int rand = random.nextInt(10);
uid += rand;
}
//The product label is 0101
String prodid = "0101";
//Suppose that multiple users call this method for second kill, then the corresponding key value in the database can be operated!
doSecKill(uid, prodid);
}
//In the second kill process, uid is the user id and prodid is the inventory id
public static boolean doSecKill(String uid,String prodid) {
//1.uid and prodid non null judgment
if(uid == null || prodid == null) {
return false;
}
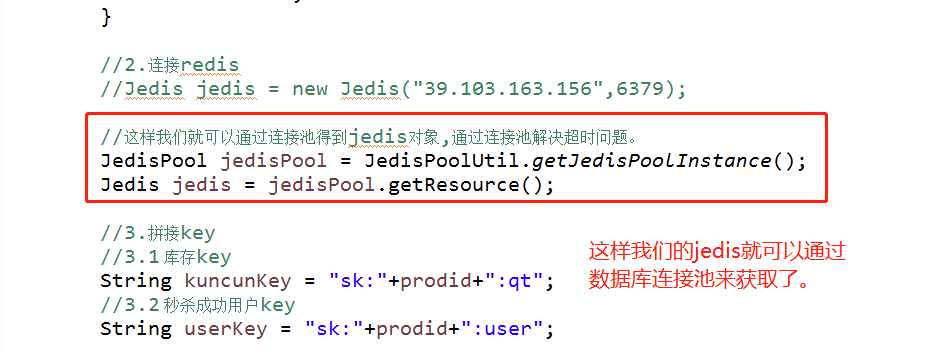
//2. Connect to redis
Jedis jedis = new Jedis("39.103.163.156",6379);
//3. Splicing key
//3.1 inventory key
String kuncunKey = "sk:"+prodid+":qt";
//3.2 second kill successful user key
String userKey = "sk:"+prodid+":user";
//4. Get the inventory. If the inventory itself is null, it means that the second kill has not started
String kuncun = jedis.get(kuncunKey);
if(kuncun == null) {
System.out.println("The second kill hasn't started yet, please wait!");
jedis.close();
return false;
}
//5. Judge whether the user repeats the second kill operation (each user can only second kill once)
Boolean sismember = jedis.sismember(userKey, uid);
if(sismember) {
System.out.println("The second kill has been successful. You can't repeat the second kill!");
jedis.close();
return false;
}
//6. Judge if the commodity quantity and inventory quantity are less than 1, it means that the second kill is over
int i = Integer.parseInt(kuncun);
if(i<1) {
System.out.println("The second kill is over");
jedis.close();
return false;
}
//7. Second kill process
//7.1 inventory should be reduced by 1
jedis.decr(kuncunKey);
//7.2 add successful users to the list
jedis.sadd(userKey, uid);
System.out.println("The second kill succeeded");
jedis.close();
return true;
}
}
3.2 use ab to simulate concurrent second kill
Install httpd tools using Yum install httpd tools or apt get install httpd tools.
We will use its ab, which is the apache performance testing tool.
Parameters of ab.
- -n indicates the current number of requests.
- -c indicates the current concurrent times.
- -p indicates the storage location of the parameters sent by the post method.
- -T indicates the type of post method setting.

It's good to test concurrency in this way!!
As for the spike code of 3.1, there is a serious concurrency problem! For example: the inventory becomes negative (oversold problem), and there will be a timeout problem if there are too many requests!
3.3 solve the problem of connection timeout through connection pool
redis can't handle multiple requests at the same time, so there is the problem of connection timeout.
Connection pool: save the consumption caused by each connection to the redis service, and reuse the connected instances.
Simulate the effect of a jedis database pool:
package com.itholmes.jedis;

import redis.clients.jedis.Jedis;
import redis.clients.jedis.JedisPool;
import redis.clients.jedis.JedisPoolConfig;

public class JedisPoolUtil {
	private static volatile JedisPool jedisPool = null;

	private JedisPoolUtil() {

	}

	public static JedisPool getJedisPoolInstance() {
		if(null == jedisPool) {
			//Lock
			synchronized (JedisPoolUtil.class) {
				if(null == jedisPool) {

					JedisPoolConfig poolConfig = new JedisPoolConfig();
					//Set a bunch of parameters
					poolConfig.setMaxTotal(200);
					poolConfig.setMaxIdle(32);
					poolConfig.setMaxWaitMillis(100*1000);
					poolConfig.setBlockWhenExhausted(true);
					poolConfig.setTestOnBorrow(true);

					jedisPool = new JedisPool(poolConfig,"39.103.163.156",6379,60000);
				}
			}
		}
		return jedisPool;
	}


	public static void release(JedisPool jedisPool, Jedis jedis) {
		if(null != jedis) {
			//Close the return connection.
			jedis.close();
		}
	}
}
3.4 how to solve the oversold phenomenon (negative inventory)
First of all, it can be solved through the watch optimistic lock! (remember the version number correspondence mechanism of optimistic lock)
Note how to start redis transaction (group or queue)!!
package com.itholmes.jedis;

import java.util.List;
import java.util.Random;

import redis.clients.jedis.Jedis;
import redis.clients.jedis.JedisPool;
import redis.clients.jedis.Transaction;

public class SecKill_redis {
	public static void main(String[] args) {

		Random random = new Random();

		//Simulate random users
		String uid = "";
		for(int i=0;i<4;i++) {
			//Randomly generate a number within 10
			int rand = random.nextInt(10);
			uid += rand;
		}

		//The product label is 0101
		String prodid = "0101";

		//Suppose that multiple users call this method for second kill, then the corresponding key value in the database can be operated!
		doSecKill(uid, prodid);
	}

	//In the second kill process, uid is the user id and prodid is the inventory id
	public static boolean doSecKill(String uid,String prodid) {

		//1.uid and prodid non null judgment
		if(uid == null || prodid == null) {
			return false;
		}

		//2. Connect to redis
		//Jedis jedis = new Jedis("39.103.163.156",6379);

		//In this way, we can get the jedis object through the connection pool and solve the timeout problem through the connection pool.
		JedisPool jedisPool = JedisPoolUtil.getJedisPoolInstance();
		Jedis jedis = jedisPool.getResource();

		//3. Splicing key
		//3.1 inventory key
		String kuncunKey = "sk:"+prodid+":qt";
		//3.2 second kill successful user key
		String userKey = "sk:"+prodid+":user";


		//Monitoring the inventory is equivalent to opening the optimistic lock (remember the version number correspondence mechanism of the optimistic lock)
		jedis.watch(kuncunKey);

		//4. Get the inventory. If the inventory itself is null, it means that the second kill has not started
		String kuncun = jedis.get(kuncunKey);
		if(kuncun == null) {
			System.out.println("The second kill hasn't started yet, please wait!");
			jedis.close();
			return false;
		}

		//5. Judge whether the user repeats the second kill operation (each user can only second kill once)
		Boolean sismember = jedis.sismember(userKey, uid);
		if(sismember) {
			System.out.println("The second kill has been successful. You can't repeat the second kill!");
			jedis.close();
			return false;
		}

		//6. Judge if the commodity quantity and inventory quantity are less than 1, it means that the second kill is over
		int i = Integer.parseInt(kuncun);
		if(i<1) {
			System.out.println("The second kill is over");
			jedis.close();
			return false;
		}


		//7. Second kill process

		//Start a queue (group or transaction, understandable)
		Transaction multi = jedis.multi();

		//Team operation
		//7.1 inventory should be reduced by 1
		multi.decr(kuncunKey);
		//7.2 add successful users to the list
		multi.sadd(userKey, uid);

		//After the transaction is started, use the method corresponding to the transaction!! To form a team and so on. You don't operate alone.
		//jedis.decr(kuncunKey);
		//jedis.sadd(userKey, uid);

		//Execute the queue command. The exec() method will return us a list collection result.
		List<Object> results = multi.exec();

		if(results == null || results.size() == 0) {
			System.out.println("Second kill failed!!");
			jedis.close();
			return false;
		}

		System.out.println("The second kill succeeded");

		jedis.close();
		return true;
	}
}
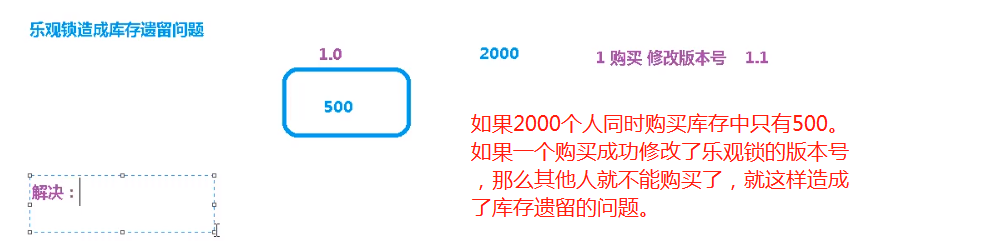
3.5 remaining problems of inventory
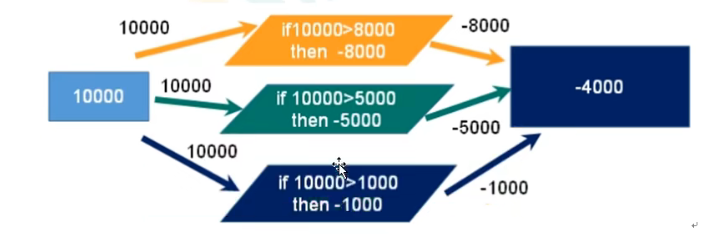
Optimistic lock will cause problems left over by inventory!
The first solution is the pessimistic lock, but the pessimistic lock is in redis, not!!
By default, pessimistic locks cannot be used directly in redis (pessimistic locks are not supported), and only optimistic locks can be used.
- Reason: when Redis is used as a cache server, it mainly uses read operations and few write operations. The corresponding operations are less likely to be interrupted. Pessimistic locking is not used to prevent performance degradation.
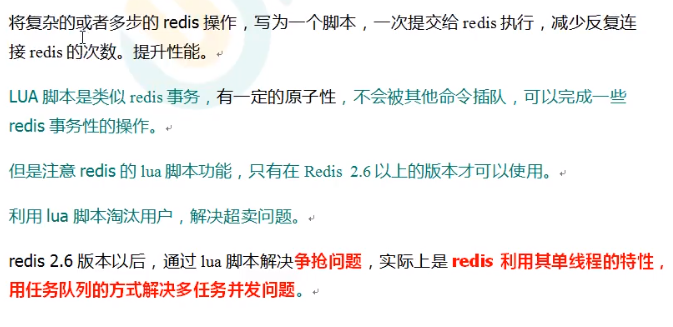
The embedded script language Lua is used to solve the problem of inventory.

3.6 advantages of lua script in Redis
This is to write complex or multi-step redis operations into a LUA script and submit them to redis for execution at one time.
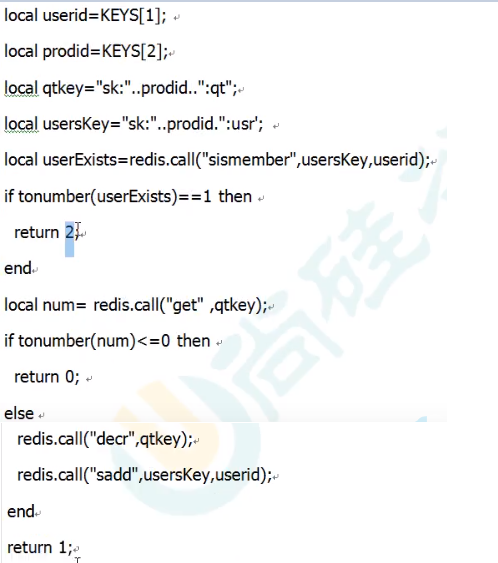
Here is a LUA script (understand):
4. Redis persistent RDB(Redis DataBase)
4.1 persistence
What is persistence?
- Is to write data to the hard disk, which can be stored for a long time! This process is called persistence.
Redis has two different forms of persistence:
- RDB(Redis DataBase), the default persistence mode of redis.
- AOF(Append Of File)
4.2 how does RDB persistence (backup) work?
What is RDB?
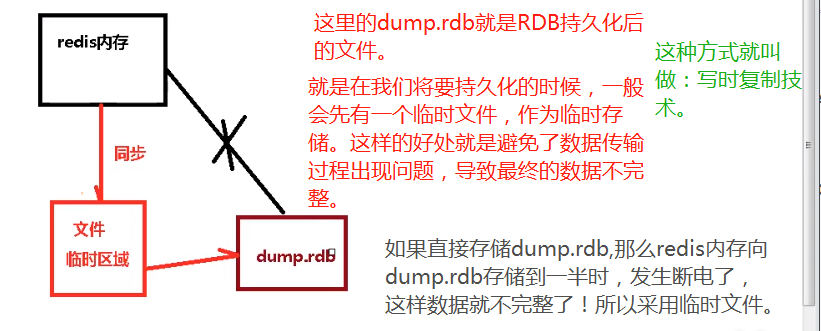
- Write the data set Snapshot in memory to disk within the specified time interval, that is, we take the Snapshot snapshot. When it is restored, the Snapshot file is directly read into memory. This method is called RDB.
RDB execution process:
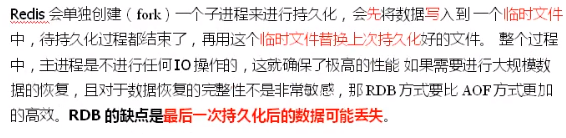
When creating a fork for RDB, we should keep in mind the disadvantages of RDB (the data may be lost after the last persistence).
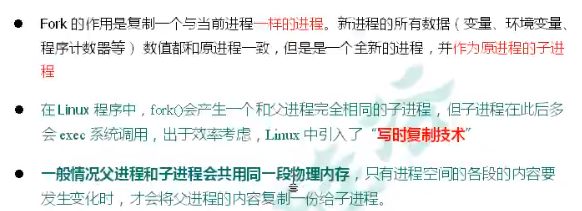
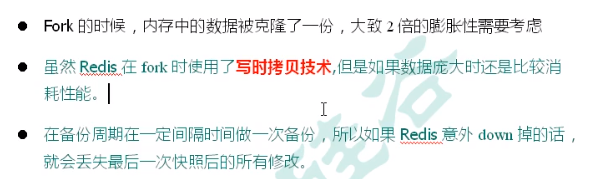
4.3 Fork
RDB has a very important underlying principle called write time replication technology.
Introduction to fork:
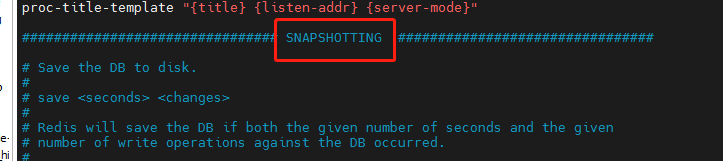
4.4 redis configuration file configuration RDB related information
First, we find redis The snapshot in conf is the information related to configuring snapshots.
Configure dbfilename: configure the file name after persistence.

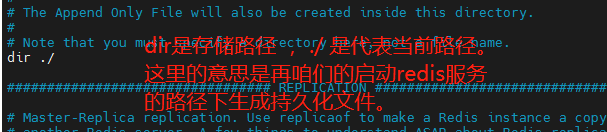
Configure dir: the default is to generate persistent files under the current command to start the redis service.
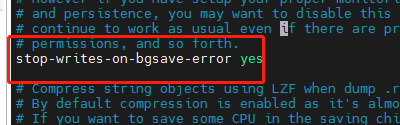
Configure stop writes on bgsave error: if redis cannot write to the disk, turn off the write operation of redis directly. Recommend yes.
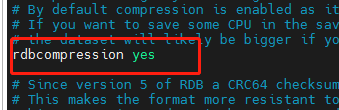
Configure rdbcompression: compress files. yes is recommended. Compress to save space.

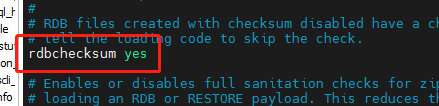
Configuring rdbchecksum: checking integrity is a function of data validation.

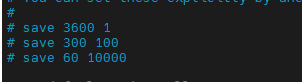
Configure save [seconds] [number of write operations]: that is, the persistence operation is performed according to the number of write operations in seconds.
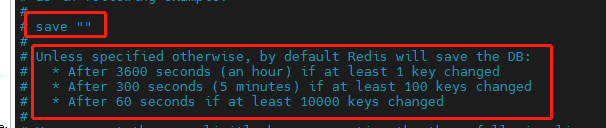
Explain the above English content:
- When one key changes within one hour, the persistence operation is synchronized.
- Within 5 minutes, when 100 key s change, the persistence operation is synchronized.
- In 60 seconds, when 10000 key s change, the persistence operation is synchronized.

The corresponding two persistent redis commands are save and bgsave
(add a lastsave command to the.)
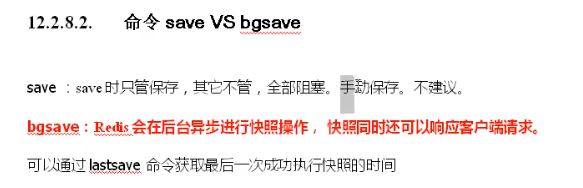
4.5 comparison of advantages and disadvantages of RDB
Advantages: persistent operations are performed periodically.

Disadvantages: the last snapshot information may be lost!
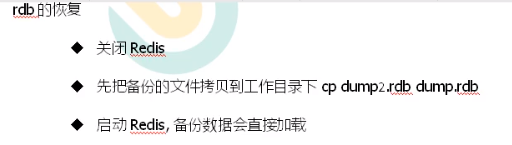
Rd6.6 backup and recovery
If we store dump RDB has a problem! We can restore through the backed up files.
The following cp one of the persistent data is the redis backup operation. Change the cp data to the default name of redis and put it in the same directory. Restarting the redis service is the redis recovery operation.
First, we cp a dump RDB data, such as dump When there is a problem with RDB, we just need to change the name of the backup data of cp and put it here. This is a backup effect.
5. Redis persistent AOF(Append Only File)
5.1 what is AOF?
The meaning of Append Only File can be understood as simply adding information to the file.
Principle of AOF persistence:

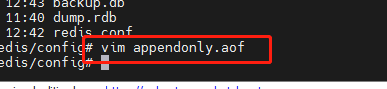
5.2 opening of AOF
AOF persistence is not enabled by default.
Information about configuring AOF is in the append only node module.
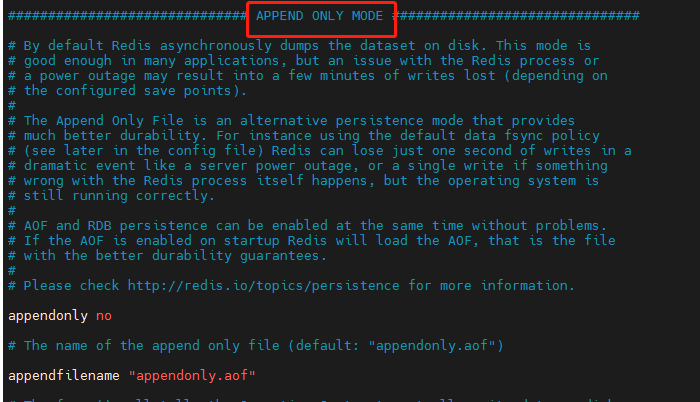
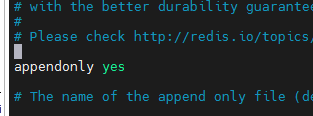
Configure appendonly: yes indicates that AOF mode is enabled.
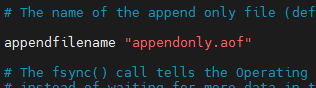
Configure appendfilename: the name of the file generated after persistence.
When we configure the above information and restart the redis service, AOF persistence is enabled!
One thing to note:
- In fact, AOF and RDB are started at the same time during this time period. We do not close RDB in the configuration file. When AOF and RDB are enabled at the same time, the system takes the data of AOF by default (the data will not be lost)
When an AOF file is added, we write an AOF file.
5.3 AOF backup and recovery
The effect of AOF backup and recovery is the same as rdb:

AOF has an additional effect of abnormal recovery.
Abnormal recovery:
- Bad aof files can be restored to normal through / usr / local / bin / redis check aof -- fix.
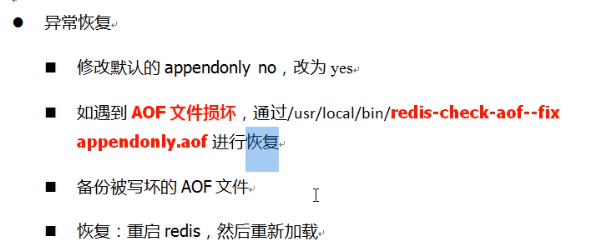
For example: we will append only Aof, just change it.
In this way, we will reject the connection when we make a redis cli connection.

Then, we can use RDIS check aof -- fix XXX aof command to repair the aof file.

5.4AOF synchronization frequency setting
Configure appendfsync: synchronization frequency setting.

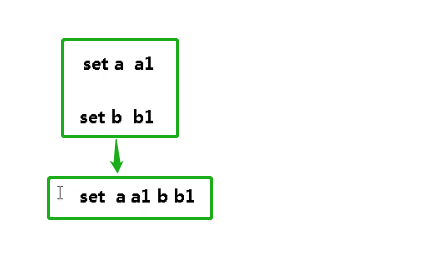
5.5 AOF rewrite operation (compression)
rewrite overwrite compression operation:
To put it simply, multiple instructions are rewritten into one execution for operation.

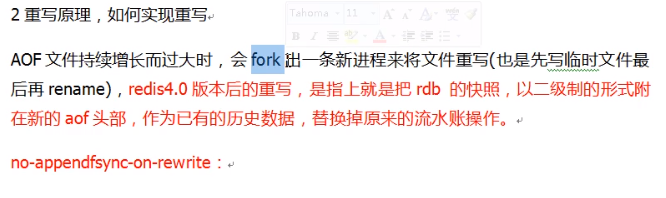
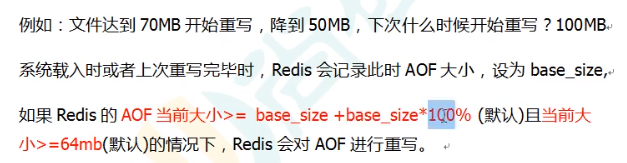
When does the rewrite start?
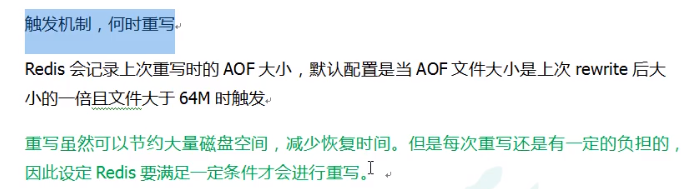
AOF rewriting corresponds to two related configurations:
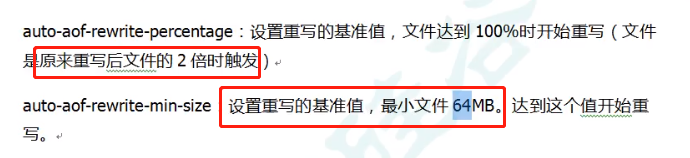
Case:
5.6 AOF implementation process and advantages and disadvantages
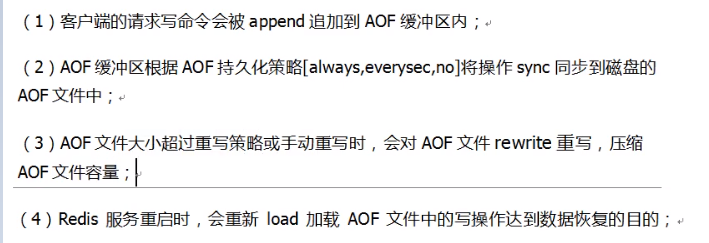
AOF execution process:
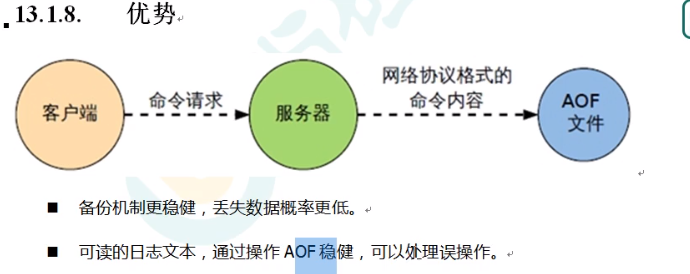
Advantages of AOF:
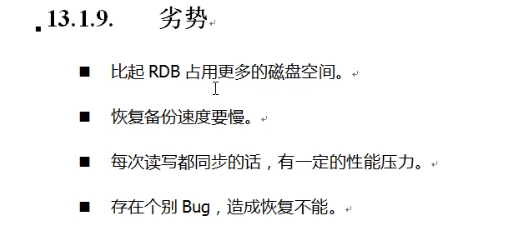
Disadvantages of AOF:
6. Redis master-slave replication
After the host data is updated, it will be automatically synchronized to the master / slave mechanism of the backup machine according to the configuration and policy.
Among them, master is mainly written and slave is mainly read.
As shown in the figure below, this is master-slave replication and read-write separation.
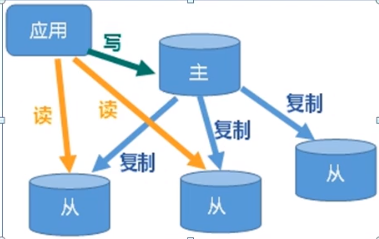
Advantages of master-slave replication:
- Achieve read-write separation and performance expansion.
- Rapid disaster recovery: when we are reading from the database, if there is a problem with this slave database and it goes down, we will quickly switch to another slave database for reading. This operation is called disaster recovery and rapid recovery.
Rapid disaster recovery is used to solve the problem of slave database. After downtime, switch to another slave database. So what if there is a problem with the primary database?
What should I do if the primary database goes down due to problems? Redis cluster is used.
Although each master-slave replication requires the effect of one master and multiple slaves, that is, one master database and multiple slave databases. Redis cluster connects multiple one master and many slaves. When there is a problem with the master database accessed by the user, switch to another master-slave master database through the cluster.

7. Redis master-slave replication builds one master and multiple slaves
Here the effect of one master and two slaves is realized.
Step 1: create a folder to place the configuration files and persistence files of the three redis databases. Here I create the myredis folder.

Step 2: copy cp our redis The conf configuration file is stored in the folder as a public configuration file (the configuration file can be obtained from the directory where redis is installed).

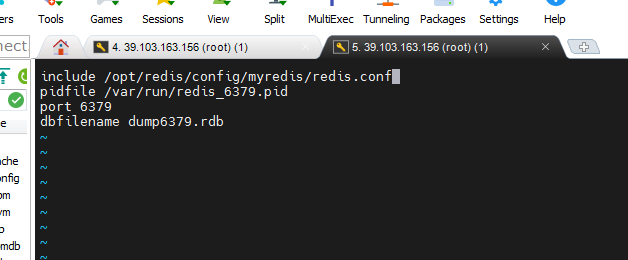
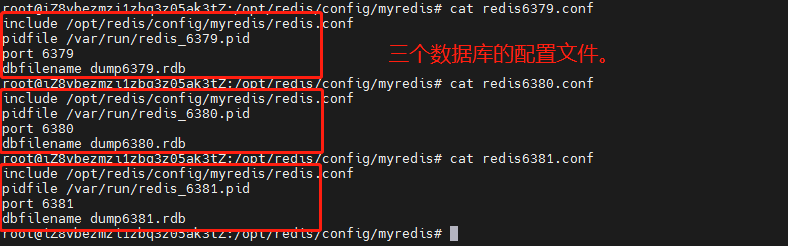
Step 3: configure one master and two slaves, and create three configuration files.
The modified information of the three configuration files are:
- include import redis The common part of conf.
- Modify the path and name of pidfile.
- Modify port
- Modify the dbfilename persistent file name.
The function of include is to introduce the public part. Here, we introduce the redis. Of copy Conf configuration file. Configure the three redis databases respectively.
(generally, we just add the corresponding number after the name. I use 637963806381 here as three redis servers, and set different ports.)
Step 4: create and configure three configuration files respectively.
Step 5: redis server [corresponding. conf file] start three redis servers. And use the slaveof command to configure the slave server.
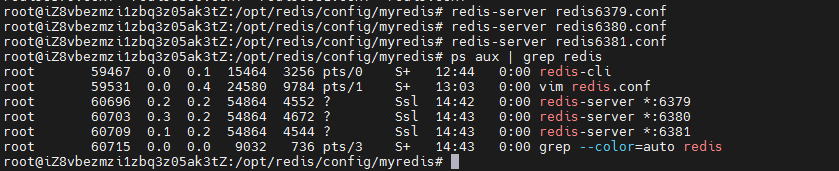
If we want to connect to one of the redis servers, we can use redis cli - P [port number]. Open the client of redis server through the port number.
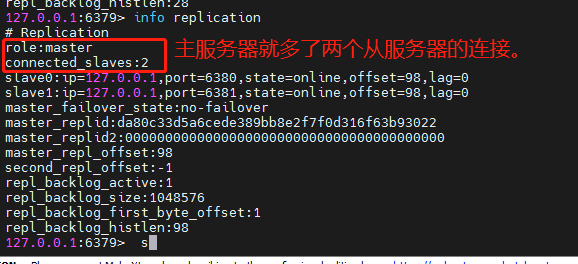
We can use the info replication command to view information about master-slave replication.


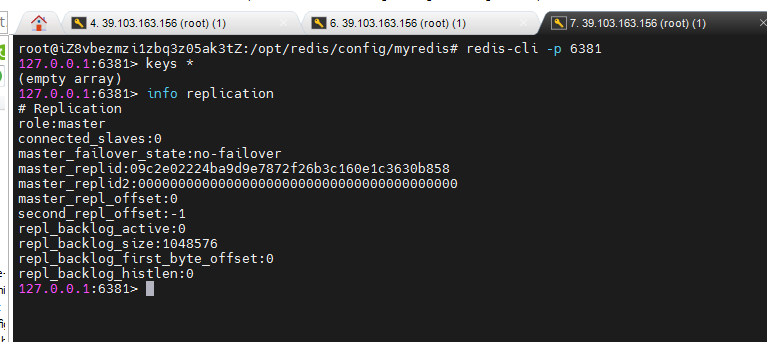
At present, all three redis servers are primary servers. Next, configure the slave server, for example, 6379 as the master server and 6380 and 6381 as the slave server.
With slave (Library) but not master (Library)
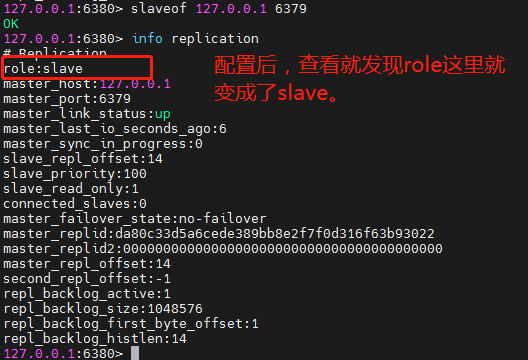
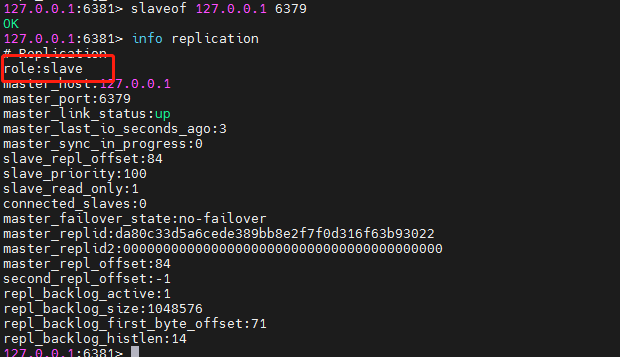
Execute on 6380 and 6381: slaveof [ip] [port]. To configure.
6380 slave server:
6381 slave server:
6379 primary server:
In this way, the effect of one master and two slaves can be achieved.
Step 6: test the effect of three redis servers.
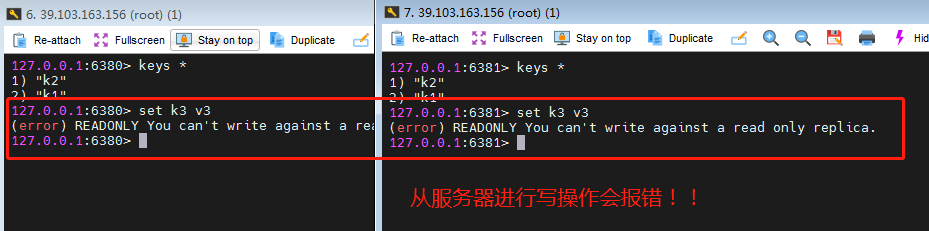
- Test 1: write to the master server, and two slave servers can also read it.

- Read and write operations can only be performed on two master servers, while only two slave servers can perform read and write operations.
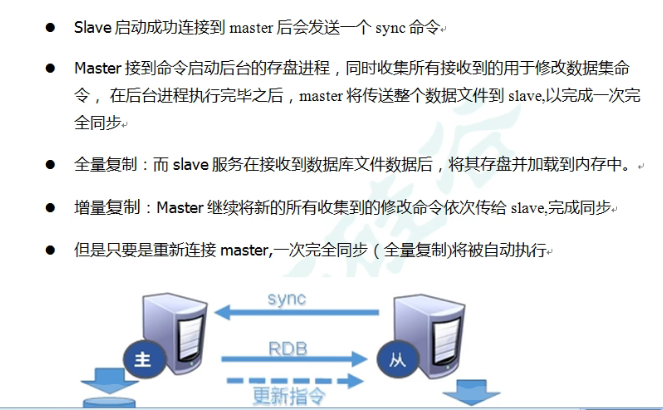
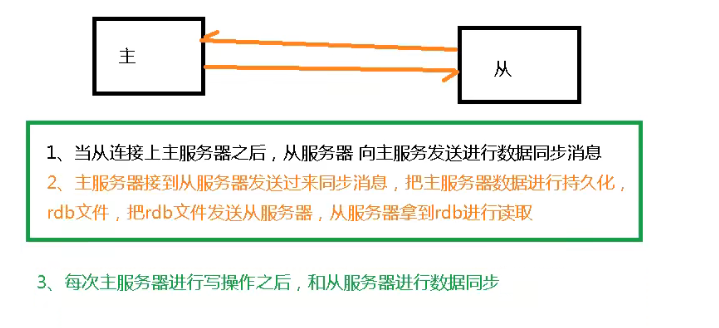
8. Principle of redis master-slave replication
9. Redis master-slave replication: one master and two slave
9.1 when the slave server goes down
If the slave server is down due to a problem, it will become a master server after the slave server is restarted (info replication command, displaying master). If you want it to become a slave server again, you still need to specify it with the slaveof [ip] [port] command.
Of course, after the slaveof command is executed, the server will copy the contents of the primary server (normal copy operation).
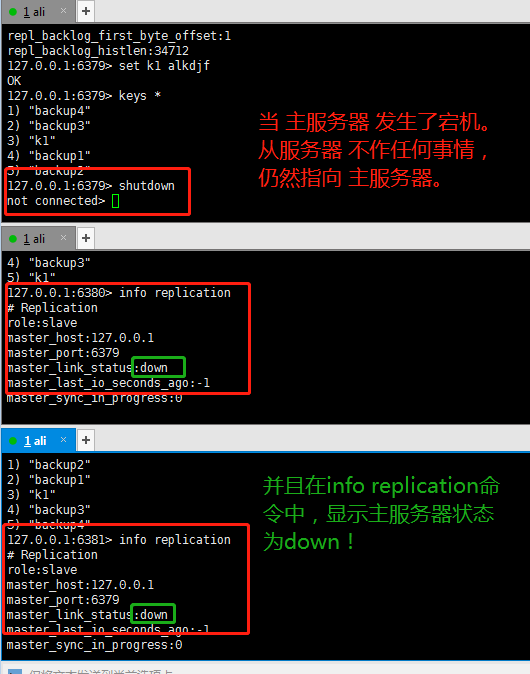
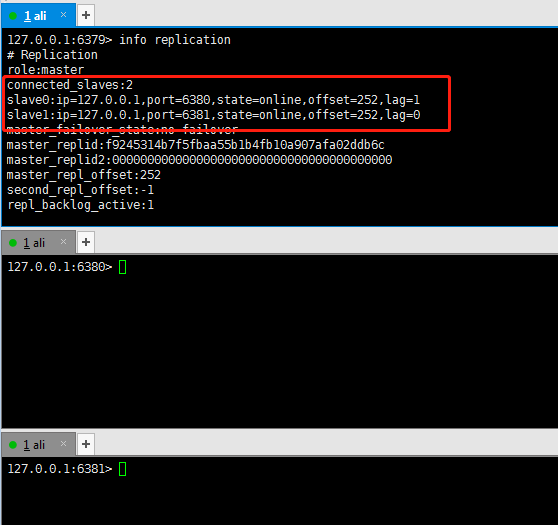
9.2 when the primary server goes down
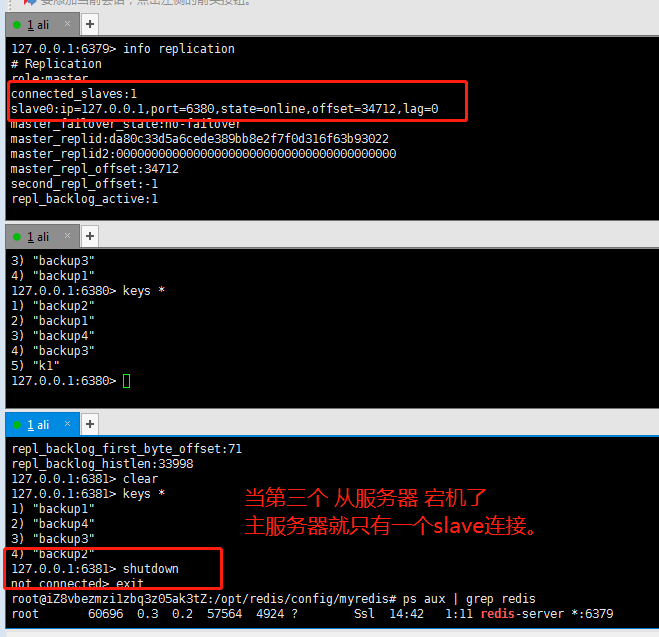
When the master server goes down and something goes wrong, the slave server below it does nothing and still points to the master server, which will not change.
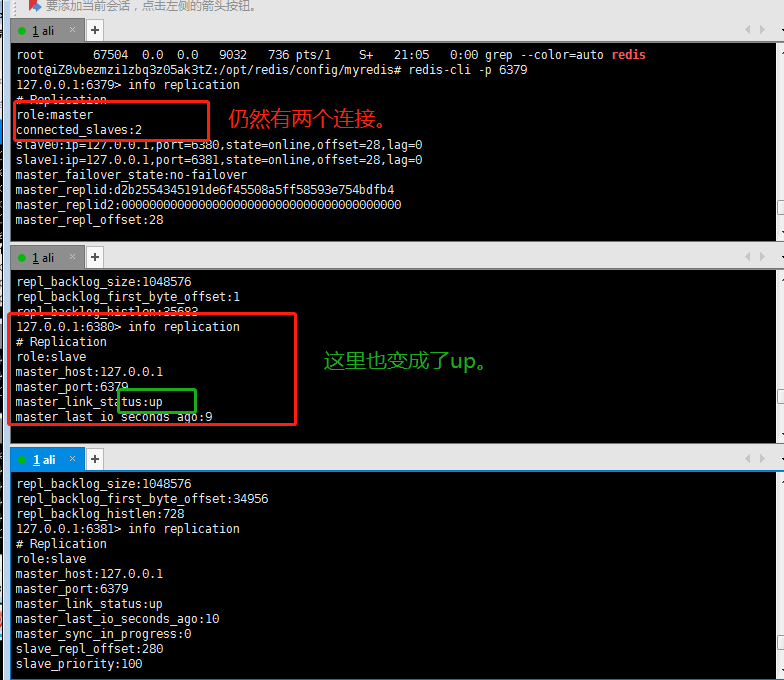
When the master server is restarted, there are still two slave servers under its command, which can be viewed with info replication.
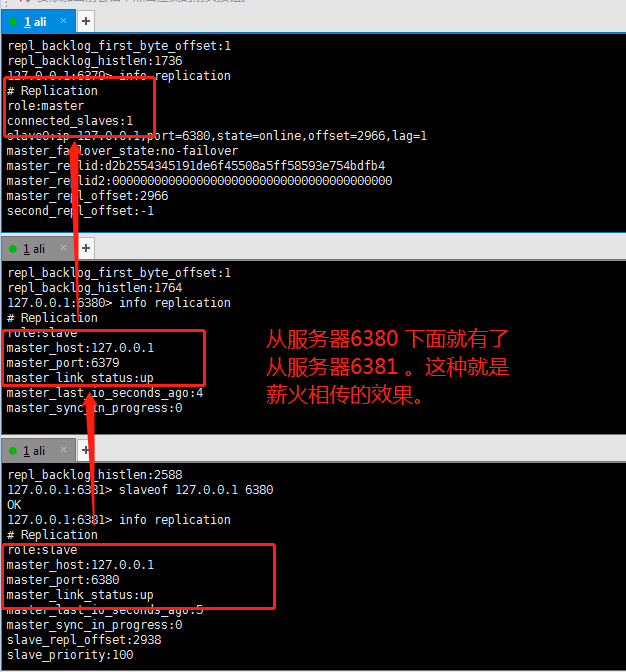
10. Redis's Master-Slave replication is passed down from generation to generation, focusing on customers
10.1 from generation to generation
What is passing on from generation to generation?
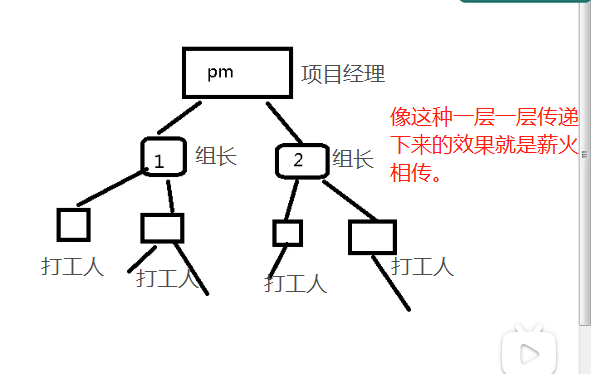
It is also very simple for the master-slave server to achieve this effect, that is, use the slaveof command layer by layer, that is, there can be a slave server under a slave server.
The downtime of the master-slave server is as follows: (the same as the above one master and two servants.)

10.2 anti guest oriented
When a Master goes down, the subsequent slave can be immediately upgraded to master without any modification.
You can use the slaveof no one command to change the slave to the host.
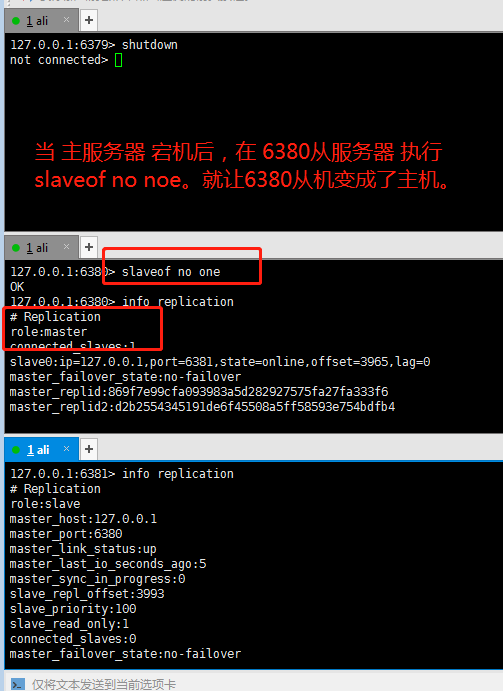
The disadvantage of anti guest is that you need to manually input commands to turn the current slave into the host. In order to solve this shortcoming, the sentinel mode is introduced.
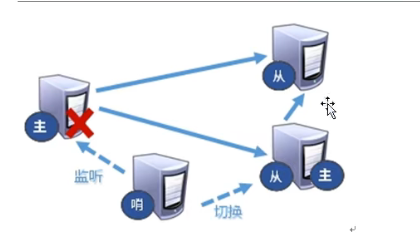
11. Sentinel mode of redis master-slave replication
11.1 what is sentinel mode?
Sentinel mode is an automatic version of anti guest mode, which can monitor whether the host fails in the background. If it fails, it will automatically convert from the library to the main library according to the number of votes.
The renderings are as follows:
11.2 enable sentinel mode
Step 1: first adjust to one master and two servants (others can be!), The effect of one master and two servants is better and obvious.
Step 2: in our myredis directory, create sentinel Conf file, the name here cannot be wrong!
Configure sentinel Conf file: (just add a command)
- mymaster is the name of the server to be monitored.
- Don't forget to add the address and port number.
- The last 1 means that as long as one sentry agrees to move, it will move. Setting to 2 means that as long as two sentinels agree to move, they will move.


Step 3: start the sentry.
Execute redis sentinel Conf command to start sentinel mode.
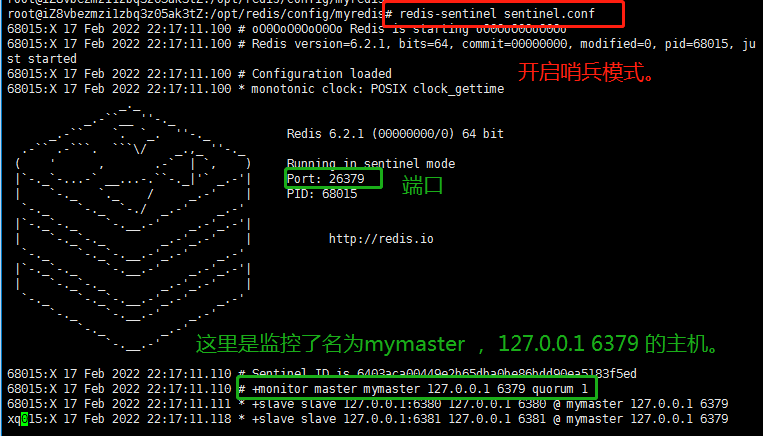
11.3 effect of sentry mode
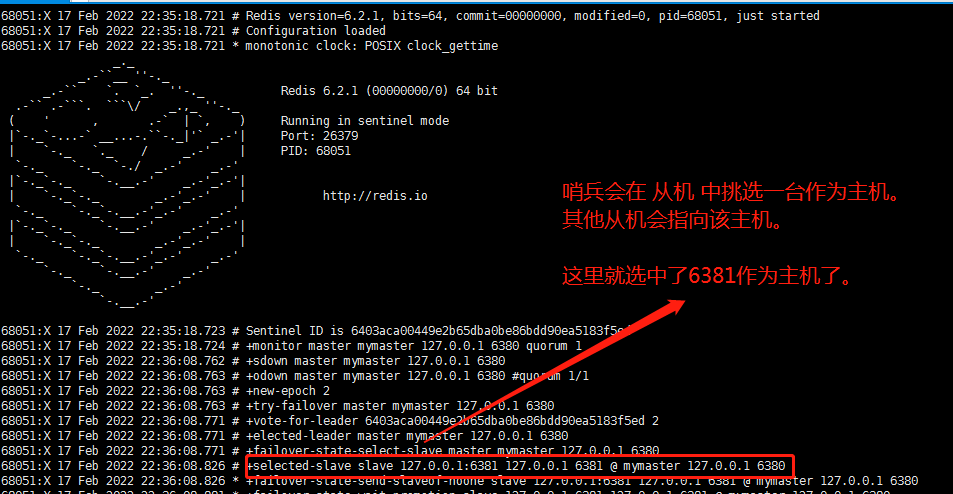
When the host hangs up, a new host is generated from the host election.
First, I will shut down the 6379 host server, which will be adjusted in sentinel mode.
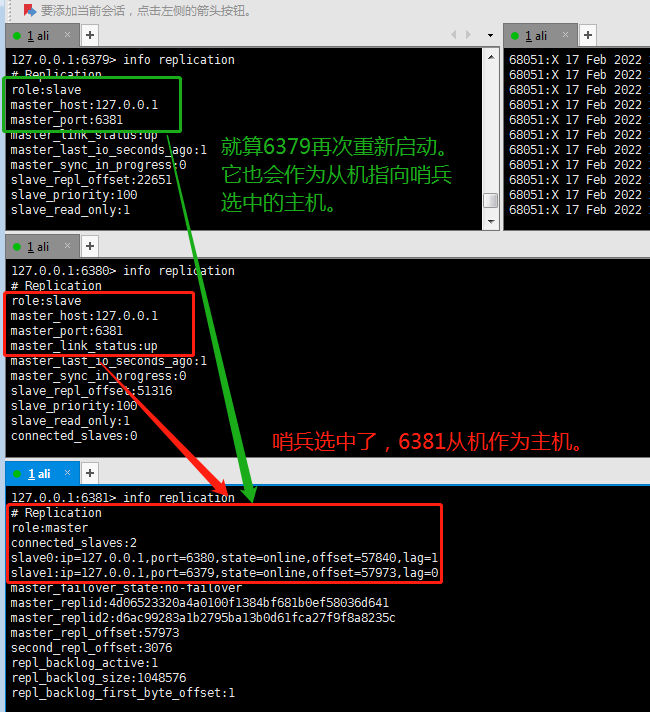
When the down host restarts again, it becomes a slave and points to the host selected by the sentry.
11.4 when the host goes down, what is the basis for selecting the host from the slave?
When the host goes down, what is the basis for selecting the host from the slave?
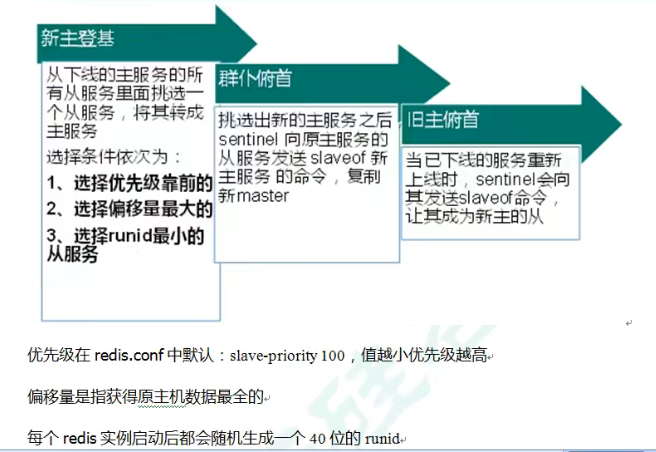
First, determine the priority according to the slave priority (old version) or replica priority (redis6 version). The lower the value, the higher the priority.
If the priority is the same, consider the one with the largest offset (the offset value here is the most complete of the original host).
If the offset is the same, select the slave service with the smallest runid. (a 40 bit runid will be randomly generated after each redis instance is started)
It depends on these three conditions.
11.5 disadvantages of replication delay

11.6 how does the Java code specify the master server in sentinel mode?
The code implementation is as follows:
package com.itholmes.sentinel;

import java.util.HashSet;
import java.util.Set;

import redis.clients.jedis.Jedis;
import redis.clients.jedis.JedisPoolConfig;
import redis.clients.jedis.JedisSentinelPool;

public class JedisSentinelCode {

	private static JedisSentinelPool jedisSentinelPool = null;

	public static Jedis getJedisFromSentinel() {
		if(jedisSentinelPool == null) {

			Set<String> sentinelSet = new HashSet<String>();
			//Set the port number of ip and redis sentinel mode
			sentinelSet.add("39.103.163.156:26379");

			JedisPoolConfig jedisPoolConfig = new JedisPoolConfig();
			jedisPoolConfig.setMaxTotal(10);//Maximum number of available connections
			jedisPoolConfig.setMaxIdle(5);//Maximum idle connections
			jedisPoolConfig.setMinIdle(5);//Minimum number of idle connections
			jedisPoolConfig.setBlockWhenExhausted(true);//Connection exhausted wait
			jedisPoolConfig.setMaxWaitMillis(2000);//Wait event
			jedisPoolConfig.setTestOnBorrow(true);//Test ping when taking the connection

			//The first parameter is the host name of our sentry configuration, the second parameter is a set type with server IP and sentry port number, and the third parameter is jedis pool configuration object.
			jedisSentinelPool = new JedisSentinelPool("mymaster", sentinelSet,jedisPoolConfig);

		}
		Jedis jedis = jedisSentinelPool.getResource();
		return jedis;
	}

	public static void main(String[] args) {

		Jedis jedis = getJedisFromSentinel();

		//Test for successful connection
		String ping = jedis.ping();
		System.out.println(ping);

		//Get info information
		String info = jedis.info();
		System.out.println(info);
	}

}
Tell me about some pits.
- Because I am a cloud server, our host, slave and sentinel mode ports should be configured with access rules.
- We are configuring sentinel The IP of conf (sentinel configuration file) is often written as 127.0.0.1, so the IP we get in Java code is 127.0.0.1, which makes it impossible to access the ECS, because we need to set it as our cloud segment IP address!
