1, Using Spring MVC based on XML configuration and annotation
1. Create a Spring project named SpringMVCDemo01
2. Add dependency in pom file
<?xml version="1.0" encoding="UTF-8"?>
<project xmlns="http://maven.apache.org/POM/4.0.0"
         xmlns:xsi="http://www.w3.org/2001/XMLSchema-instance"
         xsi:schemaLocation="http://maven.apache.org/POM/4.0.0 http://maven.apache.org/xsd/maven-4.0.0.xsd">
    <modelVersion>4.0.0</modelVersion>

    <groupId>net.lxt.spring</groupId>
    <artifactId>SpringMVCDemo01</artifactId>
    <version>1.0-SNAPSHOT</version>

    <properties>
        <!-- spring.version -->
        <spring.version>5.3.4</spring.version>
    </properties>

    <dependencies>
        <!--Spring core-->
        <dependency>
            <groupId>org.springframework</groupId>
            <artifactId>spring-core</artifactId>
            <version>${spring.version}</version>
        </dependency>
        <!--Spring Bean-->
        <dependency>
            <groupId>org.springframework</groupId>
            <artifactId>spring-beans</artifactId>
            <version>${spring.version}</version>
        </dependency>
        <!--Spring container-->
        <dependency>
            <groupId>org.springframework</groupId>
            <artifactId>spring-context</artifactId>
            <version>${spring.version}</version>
        </dependency>
        <!--Spring test-->
        <dependency>
            <groupId>org.springframework</groupId>
            <artifactId>spring-test</artifactId>
            <version>${spring.version}</version>
        </dependency>
        <!--Spring Web-->
        <dependency>
            <groupId>org.springframework</groupId>
            <artifactId>spring-web</artifactId>
            <version>${spring.version}</version>
        </dependency>
        <!--Spring MVC-->
        <dependency>
            <groupId>org.springframework</groupId>
            <artifactId>spring-webmvc</artifactId>
            <version>${spring.version}</version>
        </dependency>
        <!--JSP Standard label Library-->
        <dependency>
            <groupId>javax.servlet</groupId>
            <artifactId>jstl</artifactId>
            <version>1.2</version>
        </dependency>
        <!--Servlet -->
        <dependency>
            <groupId>javax.servlet</groupId>
            <artifactId>javax.servlet-api</artifactId>
            <version>3.1.0</version>
            <scope>provided</scope>
        </dependency>
        <!--Log frame-->
        <dependency>
            <groupId>log4j</groupId>
            <artifactId>log4j</artifactId>
            <version>1.2.17</version>
        </dependency>
        <!--unit testing -->
        <dependency>
            <groupId>junit</groupId>
            <artifactId>junit</artifactId>
            <version>4.13</version>
            <scope>test</scope>
        </dependency>
        <!--yes json Support of-->
        <dependency>
            <groupId>com.fasterxml.jackson.core</groupId>
            <artifactId>jackson-core</artifactId>
            <version>2.9.7</version>
        </dependency>
        <dependency>
            <groupId>com.fasterxml.jackson.core</groupId>
            <artifactId>jackson-databind</artifactId>
            <version>2.9.7</version>
        </dependency>
        <dependency>
            <groupId>com.fasterxml.jackson.core</groupId>
            <artifactId>jackson-annotations</artifactId>
            <version>2.9.7</version>
        </dependency>
        <!--yes xml Support of-->
        <dependency>
            <groupId>com.fasterxml.jackson.dataformat</groupId>
            <artifactId>jackson-dataformat-xml</artifactId>
            <version>2.5.3</version>
        </dependency>

    </dependencies>

</project>
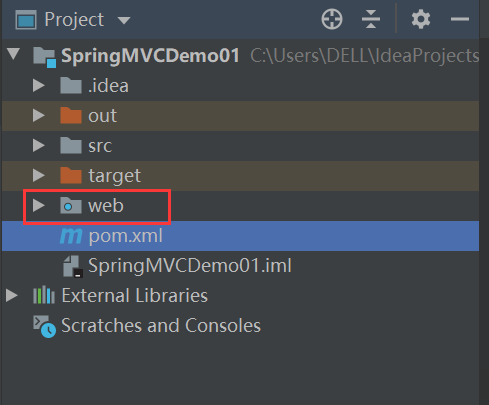
3. Add web function to the project, open the Project Structure window, click the Modules tab, select SpringMVCDemo01, click "+" in the upper left corner, and select "Web"

Click the "OK" button and you can see that the project has a web directory
4. Create views subdirectory in WEB-INF
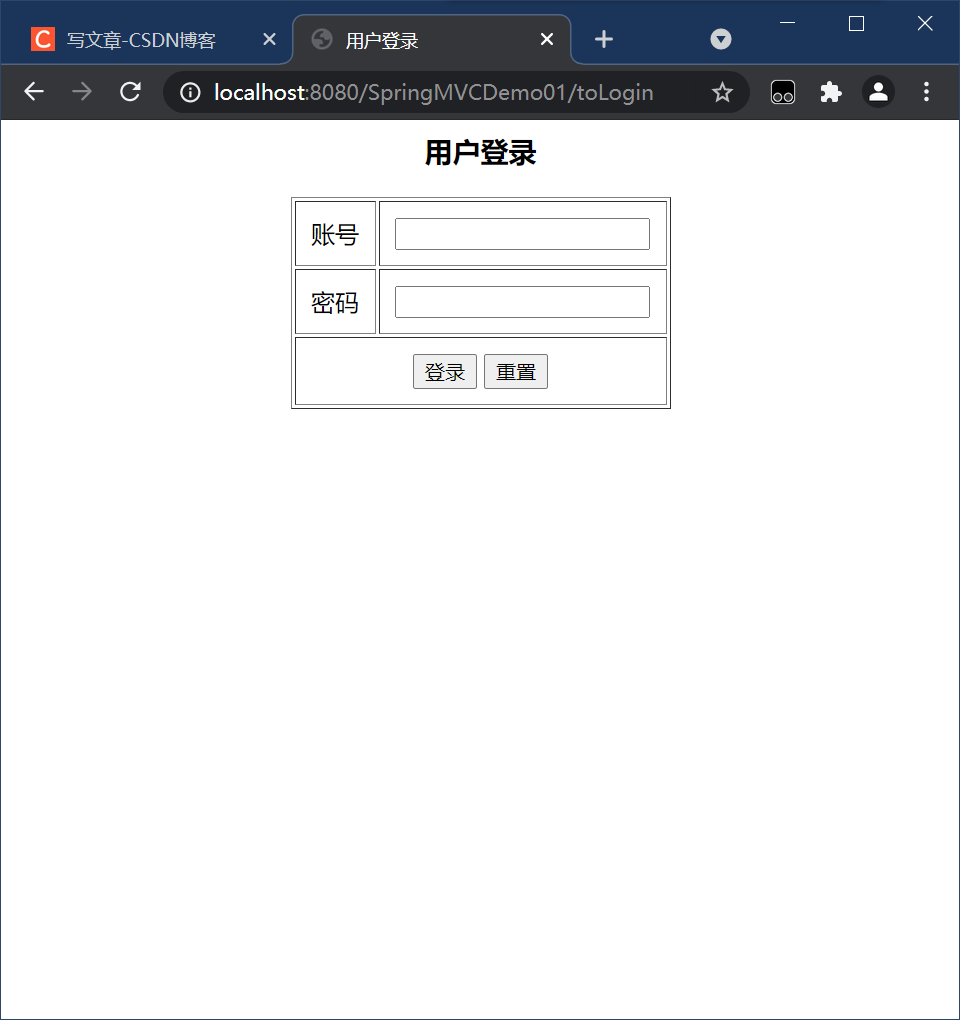
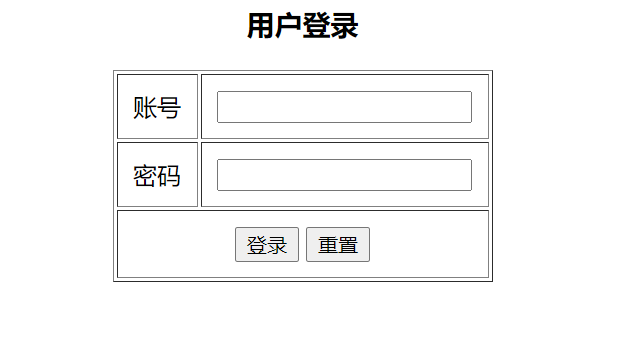
1) Create login JSP login page
<%@ page contentType="text/html;charset=UTF-8" language="java" %>
<html>
<head>
    <title>User login</title>
    <meta http-equiv="Content-Type" content="text/html; charset=utf-8" >
</head>
<body>

<h3 style="text-align: center">User login</h3>
<form id="frmLogin" action="login" method="post">
    <table class="tb" border="1" cellpadding="10" style="margin: 0px auto">
        <tr>
            <td align="center">account number</td>
            <td><input id="username" type="text" name="username"/></td>
        </tr>
        <tr>
            <td align="center">password</td>
            <td><input id="password" type="password" name="password"/></td>
        </tr>
        <tr align="center">
            <td colspan="2">
                <input type="submit" value="Sign in"/>
                <input type="reset" value="Reset"/>
            </td>
        </tr>
    </table>
</form>
<script src="js/check.js"/>

</body>
</html>
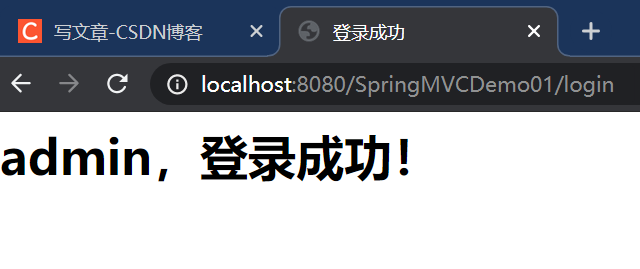
2) Create success JSP login success page
<%@ page contentType="text/html;charset=UTF-8" language="java" %>
<%@taglib prefix="c" uri="http://java.sun.com/jsp/jstl/core" %>
<html>
<head>
    <title>Login successful</title>
</head>
<body>
<h1>${username},Login succeeded!</h1>
</body>
</html>
3) Create failure JSP login failure page
<%@ page contentType="text/html;charset=UTF-8" language="java" %>
<%@taglib prefix="c" uri="http://java.sun.com/jsp/jstl/core" %>
<html>
<head>
    <title>Login failed</title>
</head>
<body>
<h1>${username},Login failed!</h1>
</body>
</html>
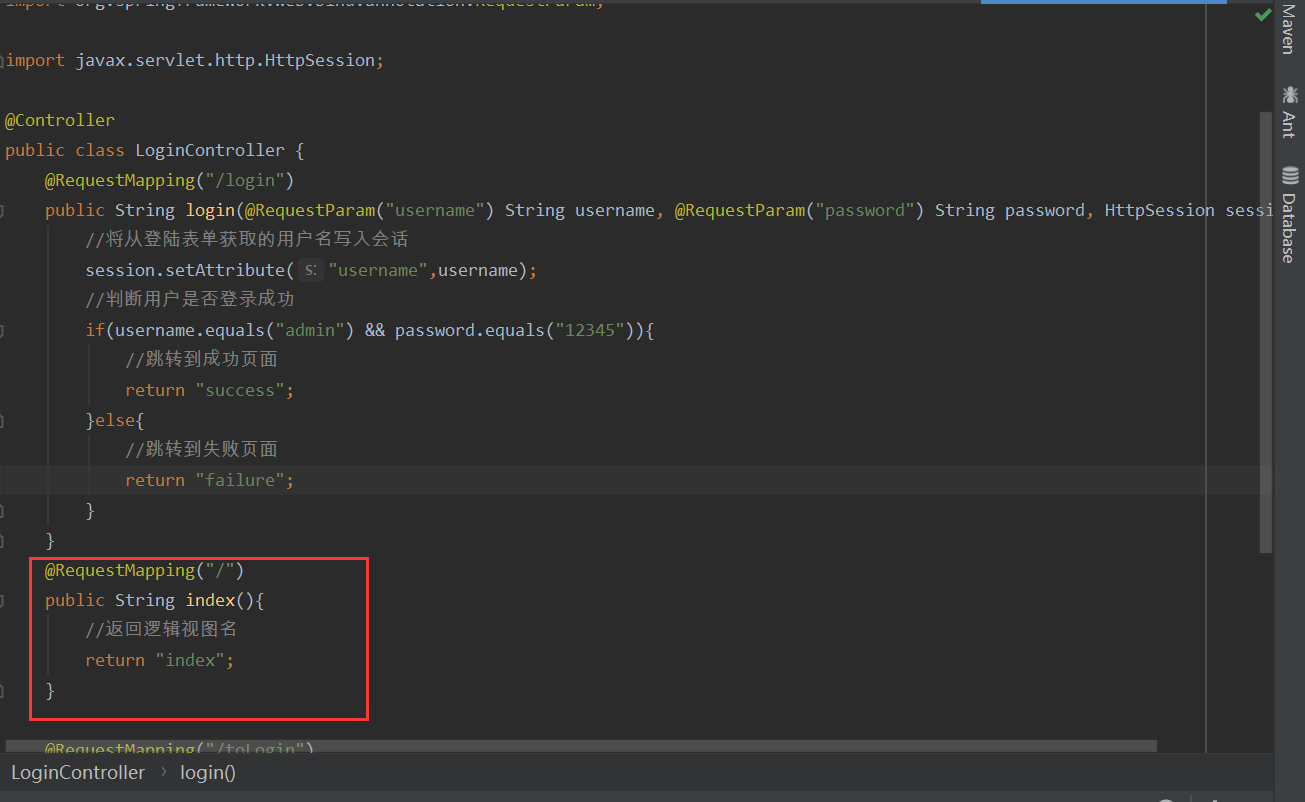
5. Create net lxt. spring. The controller sub package, and then create the LoginController class in the package
package net.lxt.spring.controller;
import org.springframework.stereotype.Controller;
import org.springframework.web.bind.annotation.RequestMapping;
import org.springframework.web.bind.annotation.RequestParam;
import javax.servlet.http.HttpSession;
@Controller
public class LoginController {
@RequestMapping("/login")
public String login(@RequestParam("username") String username, @RequestParam("password") String password, HttpSession session){
//Write the user name obtained from the login form to the session
session.setAttribute("username",username);
//Judge whether the user logs in successfully
if(username.equals("admin") && password.equals("12345")){
//Jump to success page
return "success";
}else{
//Jump to failure page
return "failure";
}
}
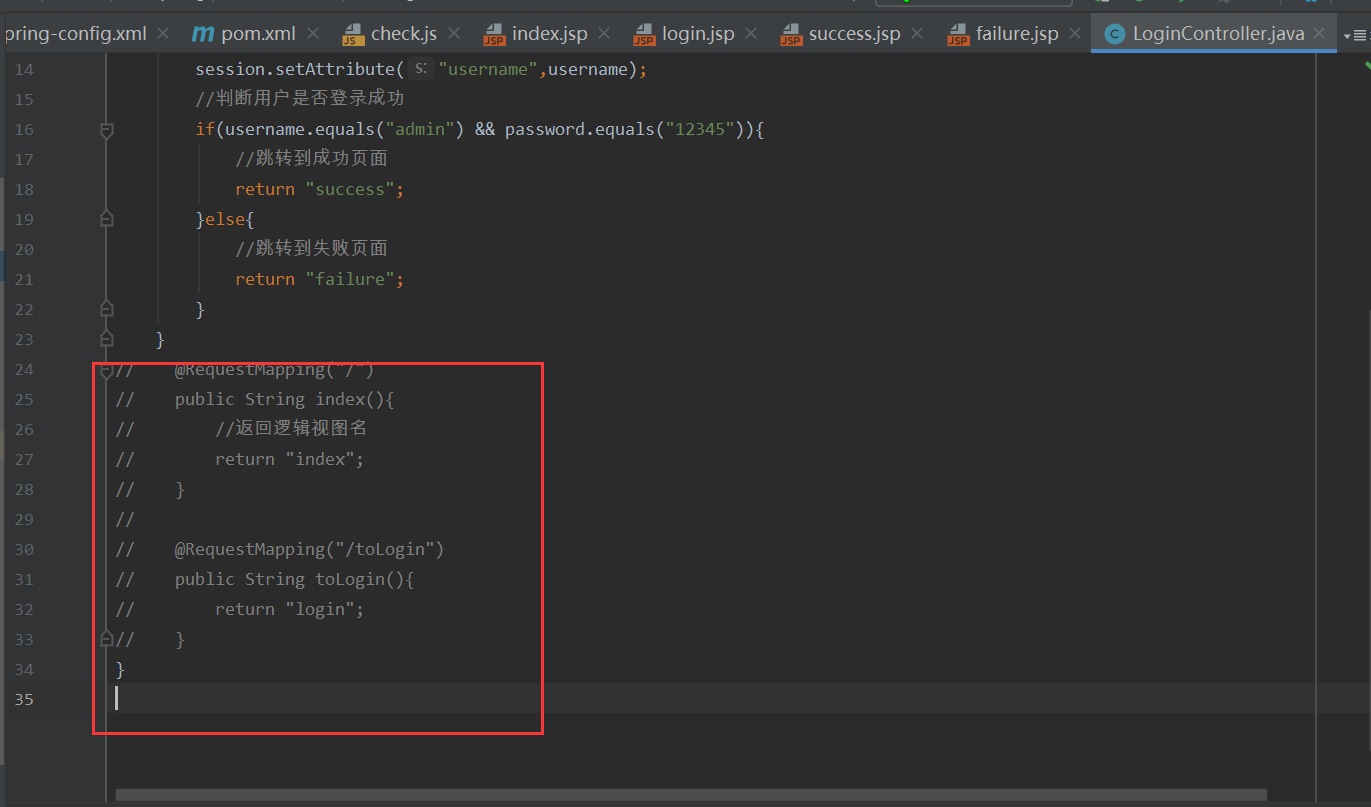
@RequestMapping("/")
public String index(){
//Return logical view name
return "index";
}
@RequestMapping("/toLogin")
public String toLogin(){
return "login";
}
}
6. Create the mvc subdirectory in resources, and then create spring config. Config in the subdirectory xml
<?xml version="1.0" encoding="UTF-8"?>
<beans xmlns="http://www.springframework.org/schema/beans"
       xmlns:xsi="http://www.w3.org/2001/XMLSchema-instance"
       xmlns:context="http://www.springframework.org/schema/context"
       xsi:schemaLocation="http://www.springframework.org/schema/beans http://www.springframework.org/schema/beans/spring-beans.xsd http://www.springframework.org/schema/context https://www.springframework.org/schema/context/spring-context.xsd">

    <!--Component scan-->
    <context:component-scan base-package="net.lxt.spring"/>
</beans>
7. Create spring MVC config. In the resources/mvc directory xml
<?xml version="1.0" encoding="UTF-8"?>
<beans xmlns="http://www.springframework.org/schema/beans"
       xmlns:xsi="http://www.w3.org/2001/XMLSchema-instance" xmlns:mvc="http://www.springframework.org/schema/mvc"
       xmlns:context="http://www.springframework.org/schema/context"
       xsi:schemaLocation="http://www.springframework.org/schema/beans http://www.springframework.org/schema/beans/spring-beans.xsd http://www.springframework.org/schema/mvc https://www.springframework.org/schema/mvc/spring-mvc.xsd http://www.springframework.org/schema/context https://www.springframework.org/schema/context/spring-context.xsd">

    <!--Annotation driven-->
    <mvc:annotation-driven/>

    <!--Scan controller-->
    <context:component-scan base-package="net.lxt.spring.controller"/>

    <!--Define internal resource view parser-->
    <bean class="org.springframework.web.servlet.view.InternalResourceViewResolver">
        <property name="viewClass" value="org.springframework.web.servlet.view.JstlView"/>
        <property name="prefix" value="/WEB-INF/views/"/>
        <property name="suffix" value=".jsp"/>
    </bean>

    <!--Define view controller-->
    <mvc:view-controller path="/" view-name="index"/>
    <mvc:view-controller path="/toLogin" view-name="login"/>

    <!--Processing requests for static resources-->
    <mvc:resources mapping="/images/**" location="/WEB-INF/images/"/>
    <mvc:resources mapping="/css/**" location="/WEB-INF/css/"/>
    <mvc:resources mapping="/js/**" location="/WEB-INF/js/"/>
</beans>
8. On the web Load Spring configuration file and Spring MVC configuration file in XML.
Open the web in the web/WEB-INF directory XML file
<?xml version="1.0" encoding="UTF-8"?>
<web-app xmlns="http://xmlns.jcp.org/xml/ns/javaee"
xmlns:xsi="http://www.w3.org/2001/XMLSchema-instance"
xsi:schemaLocation="http://xmlns.jcp.org/xml/ns/javaee
http://xmlns.jcp.org/xml/ns/javaee/web-app_4_0.xsd"
version="4.0">
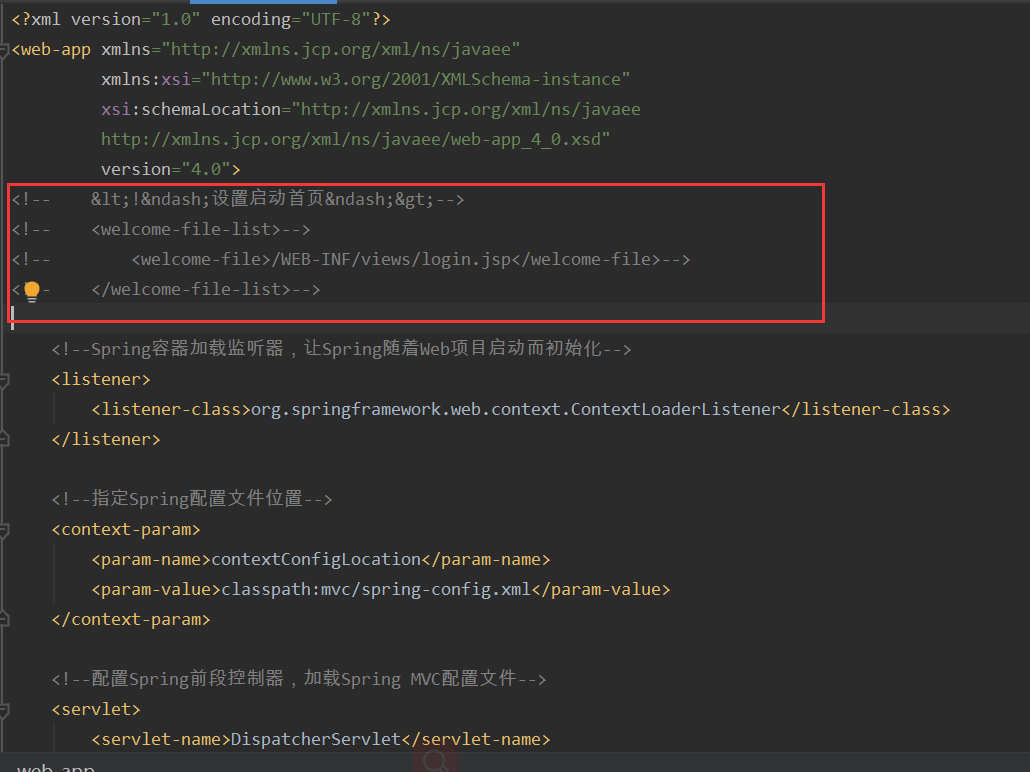
<!--Set startup home page-->
<welcome-file-list>
<welcome-file>/WEB-INF/views/login.jsp</welcome-file>
</welcome-file-list>
<!--Spring The container loads the listener so that Spring along with Web Initialization for project startup-->
<listener>
<listener-class>org.springframework.web.context.ContextLoaderListener</listener-class>
</listener>
<!--appoint Spring Profile location-->
<context-param>
<param-name>contextConfigLocation</param-name>
<param-value>classpath:mvc/spring-config.xml</param-value>
</context-param>
<!--to configure Spring Front controller, loading Spring MVC configuration file-->
<servlet>
<servlet-name>DispatcherServlet</servlet-name>
<servlet-class>org.springframework.web.servlet.DispatcherServlet</servlet-class>
<init-param>
<param-name>contextConfigLocation</param-name>
<param-value>classpath:mvc/spring-mvc-config.xml</param-value>
</init-param>
<load-on-startup>1</load-on-startup>
</servlet>
<servlet-mapping>
<servlet-name>DispatcherServlet</servlet-name>
<url-pattern>/</url-pattern> <!--"/"Indicates that all requests are blocked-->
</servlet-mapping>
<!--Set character encoding filter-->
<filter>
<filter-name>Character Encoding</filter-name>
<filter-class>org.springframework.web.filter.CharacterEncodingFilter</filter-class>
<init-param>
<param-name>encoding</param-name>
<param-value>utf-8</param-value>
</init-param>
</filter>
<filter-mapping>
<filter-name>Character Encoding</filter-name>
<url-pattern>/*</url-pattern>
</filter-mapping>
</web-app>
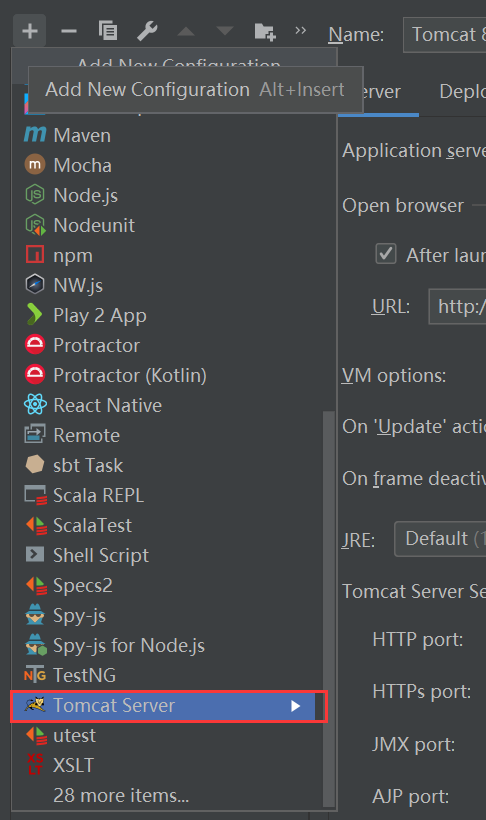
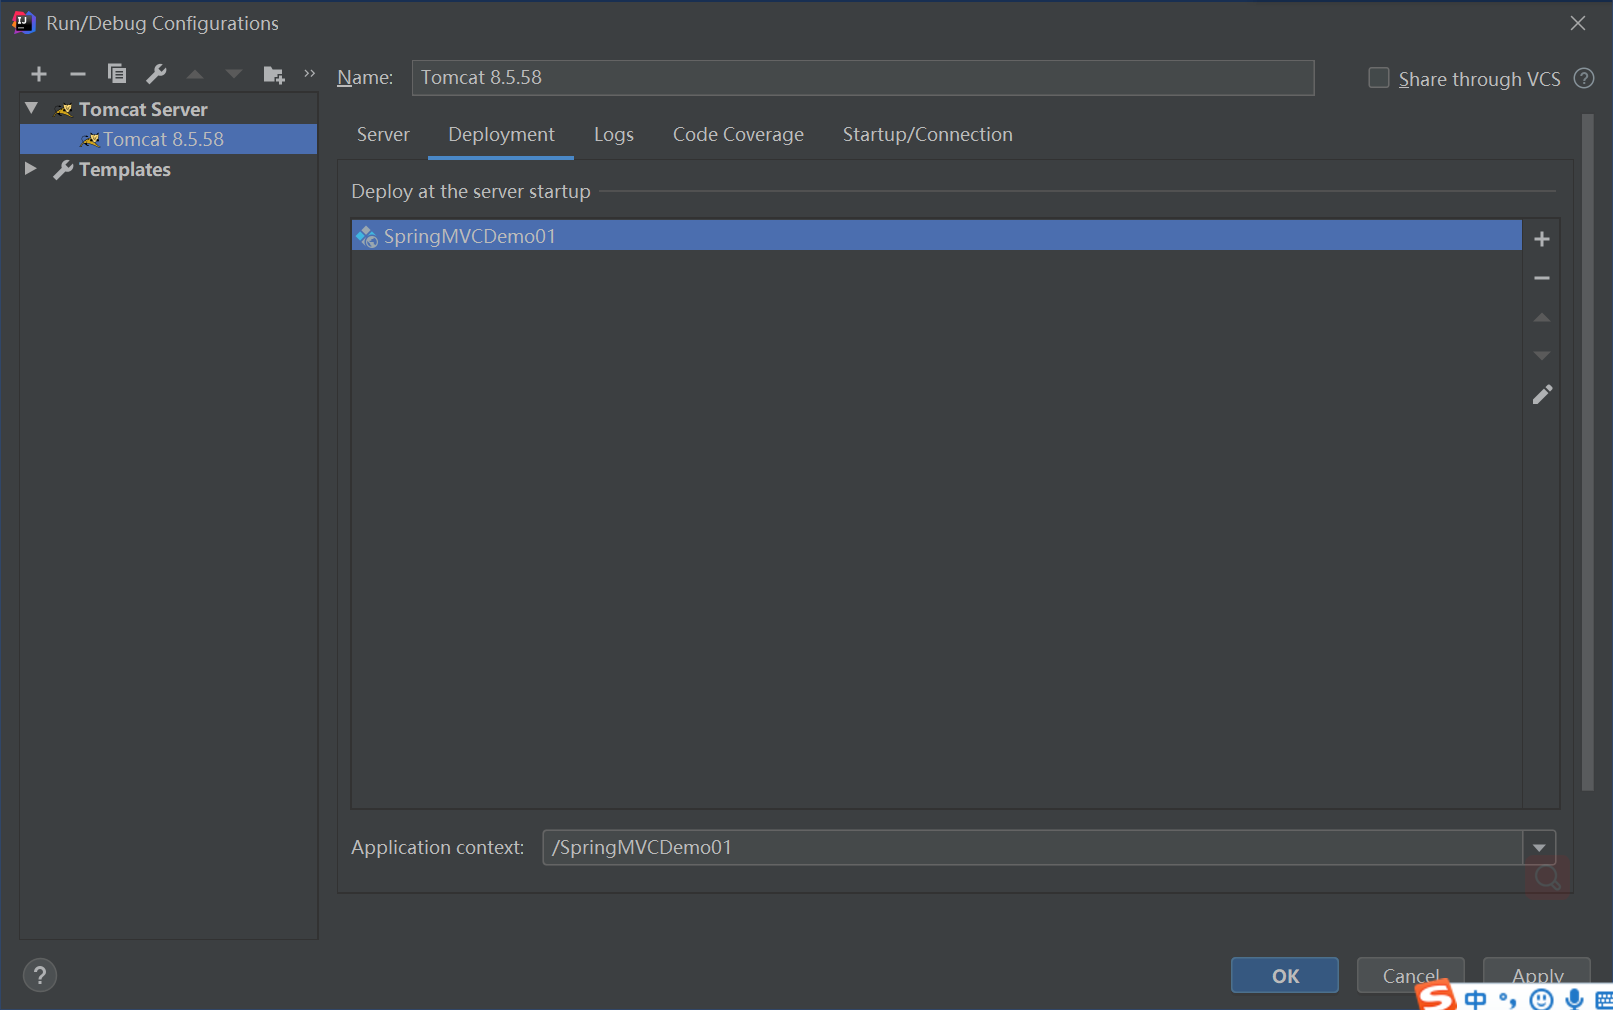
9. Configure Tomcat server
Click Add Configuration on the toolbar to open the Run/Debug Configurations window
Configure the server

Click [fix] and then click [OK]
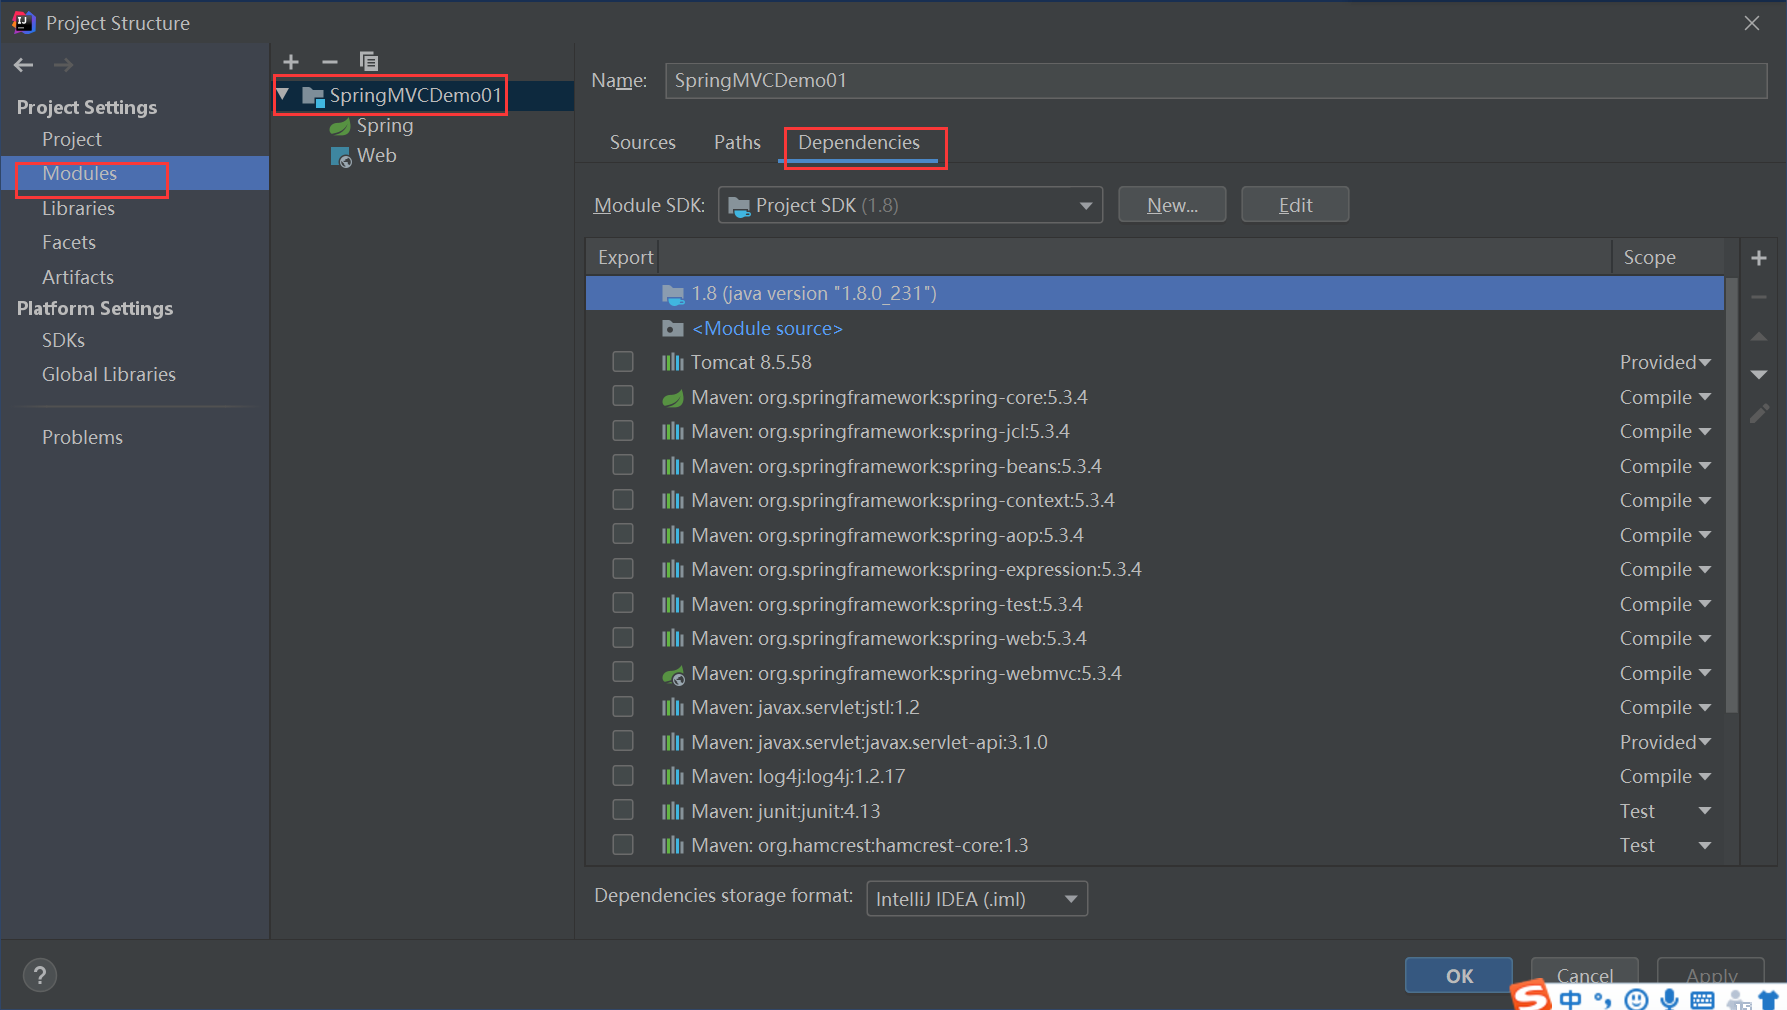
10. Add project dependency on Tomcat
Open the Project Structure window and click the Dependencies tab
Click [+] and select [Library]
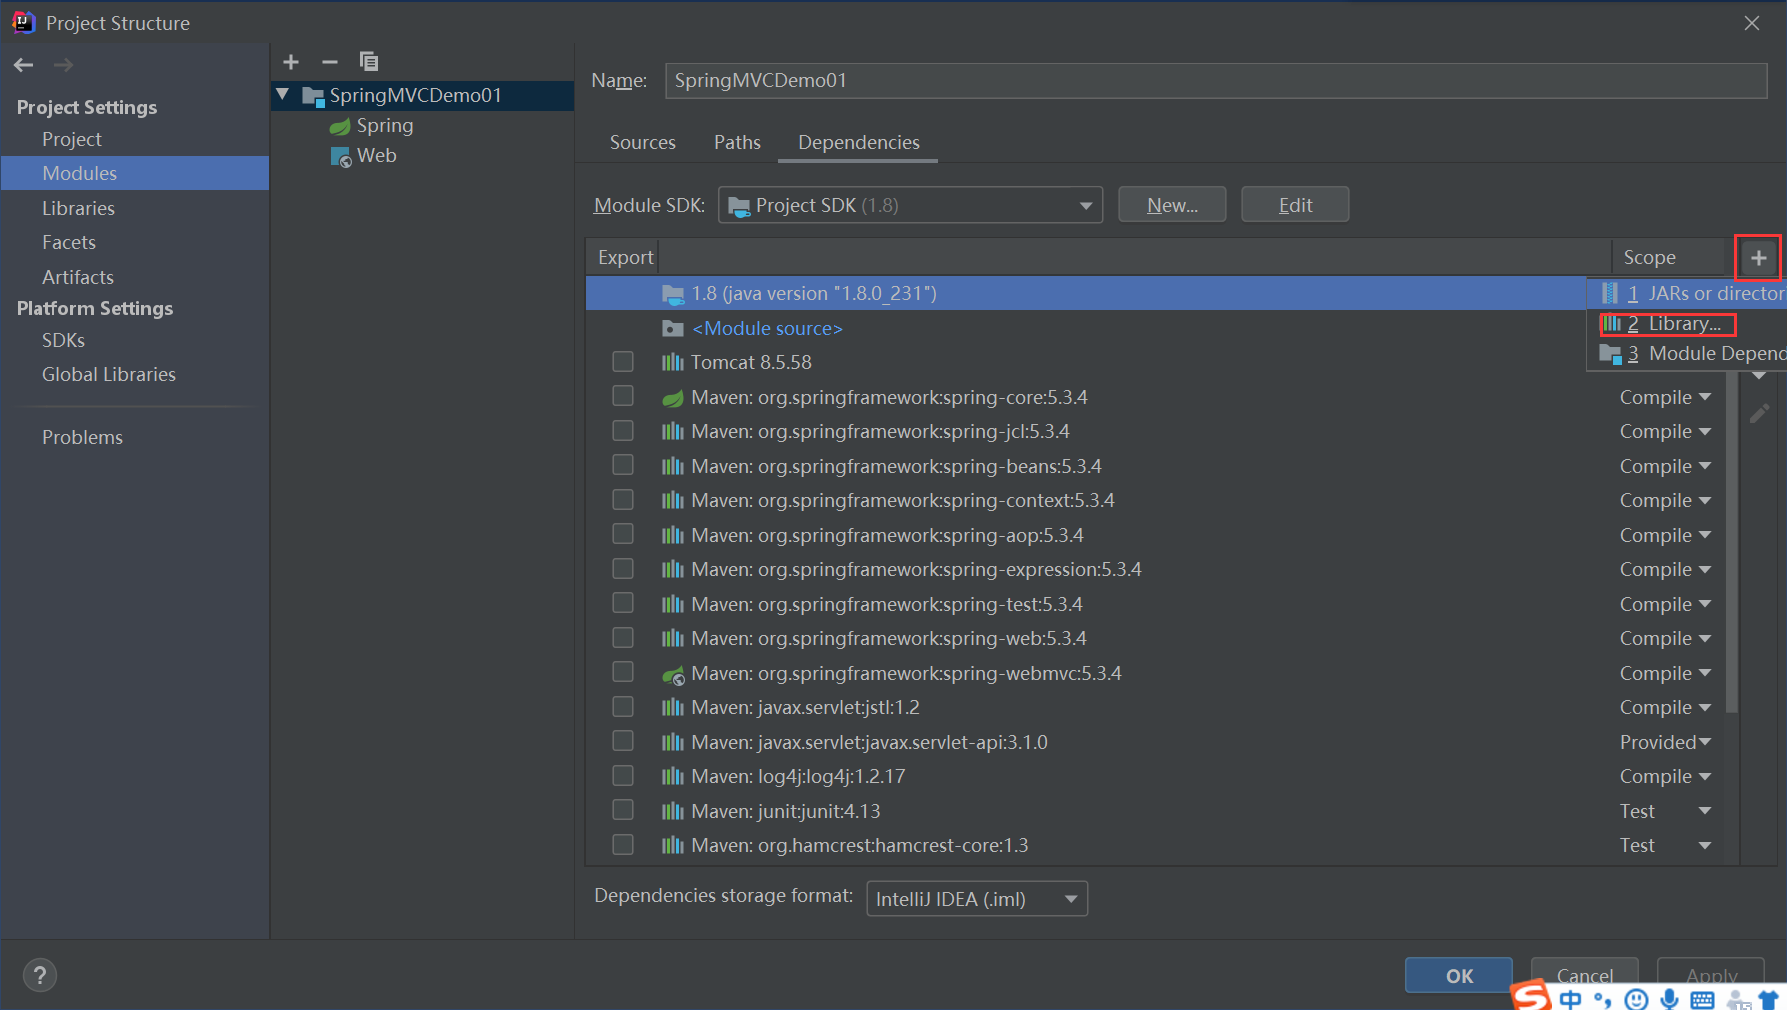
Then select Tomcat 8.5.58, click Add Select, and then click OK.
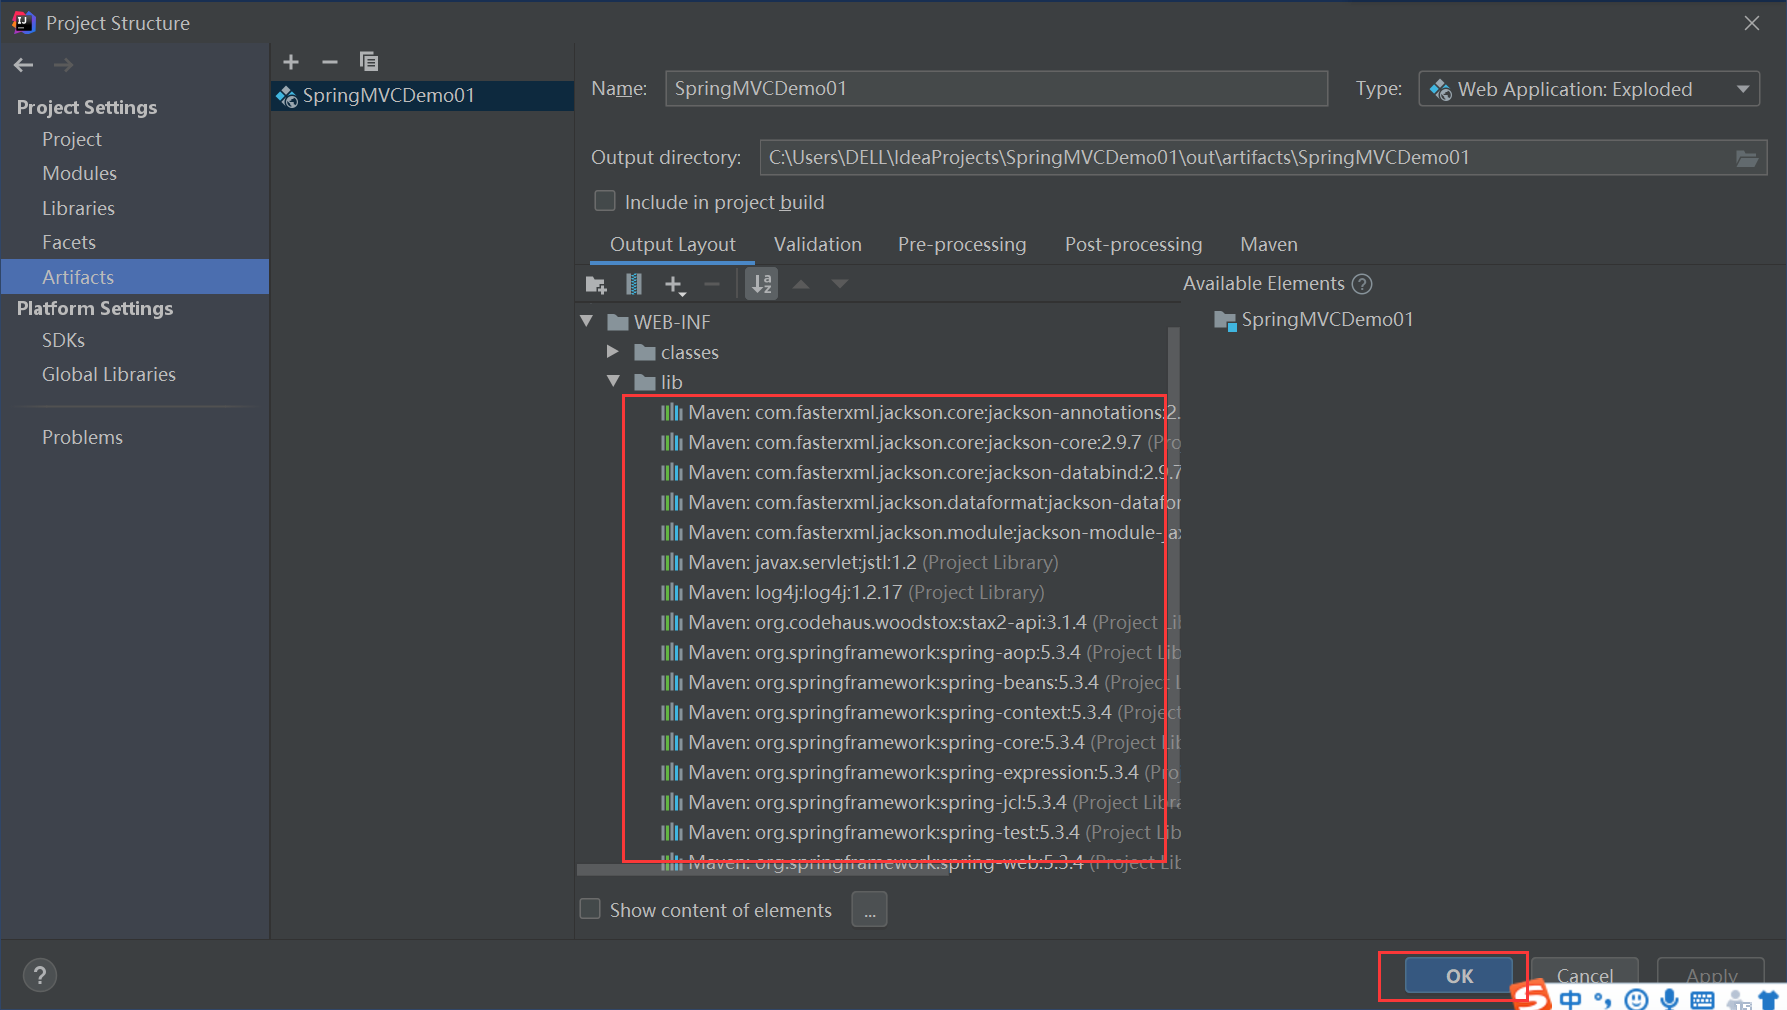
11. Configure Artifacts, add the jar package required for the normal operation of the project, and create a new lib subdirectory under WEB-INF
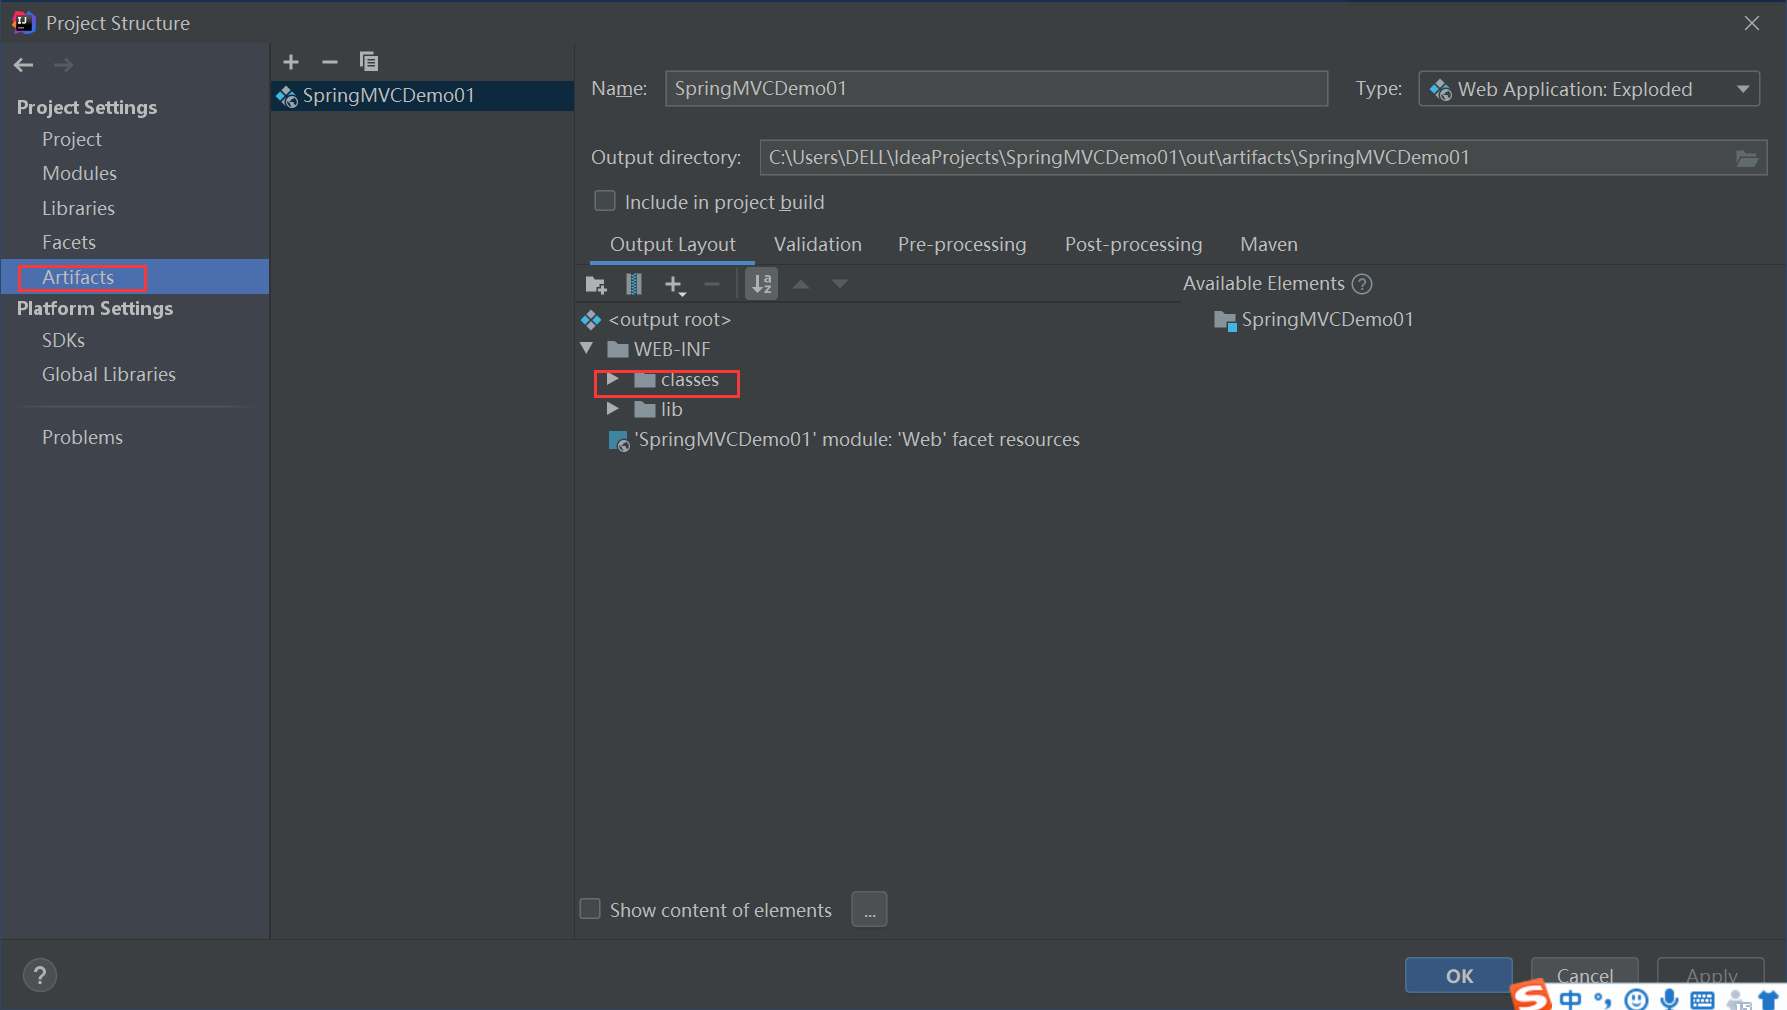
Select all jar packages that the project depends on, right-click, select Put into /WEB-INF/lib, and click OK
12. Run server
2, Actual combat practice
1. Modify web XML file, comment out the "set startup home page" element
2. Create the home page file index. In the views directory jsp
<%@ page contentType="text/html;charset=UTF-8" language="java" %>
<html>
<head>
    <title>home page</title>
</head>
<body>
<h1>Hello, Spring MVC World!</h1>
</body>
</html>
3. Modify login controller - LoginController
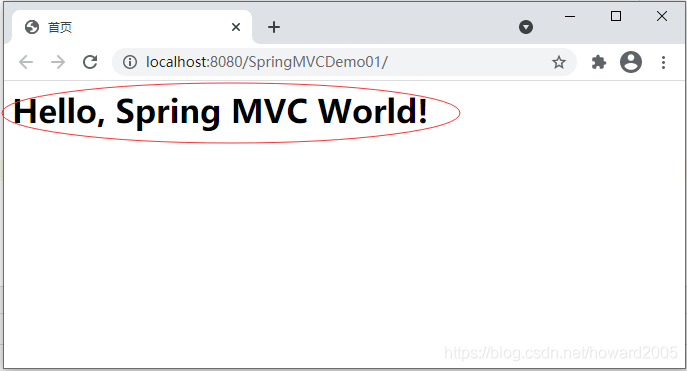
View effect
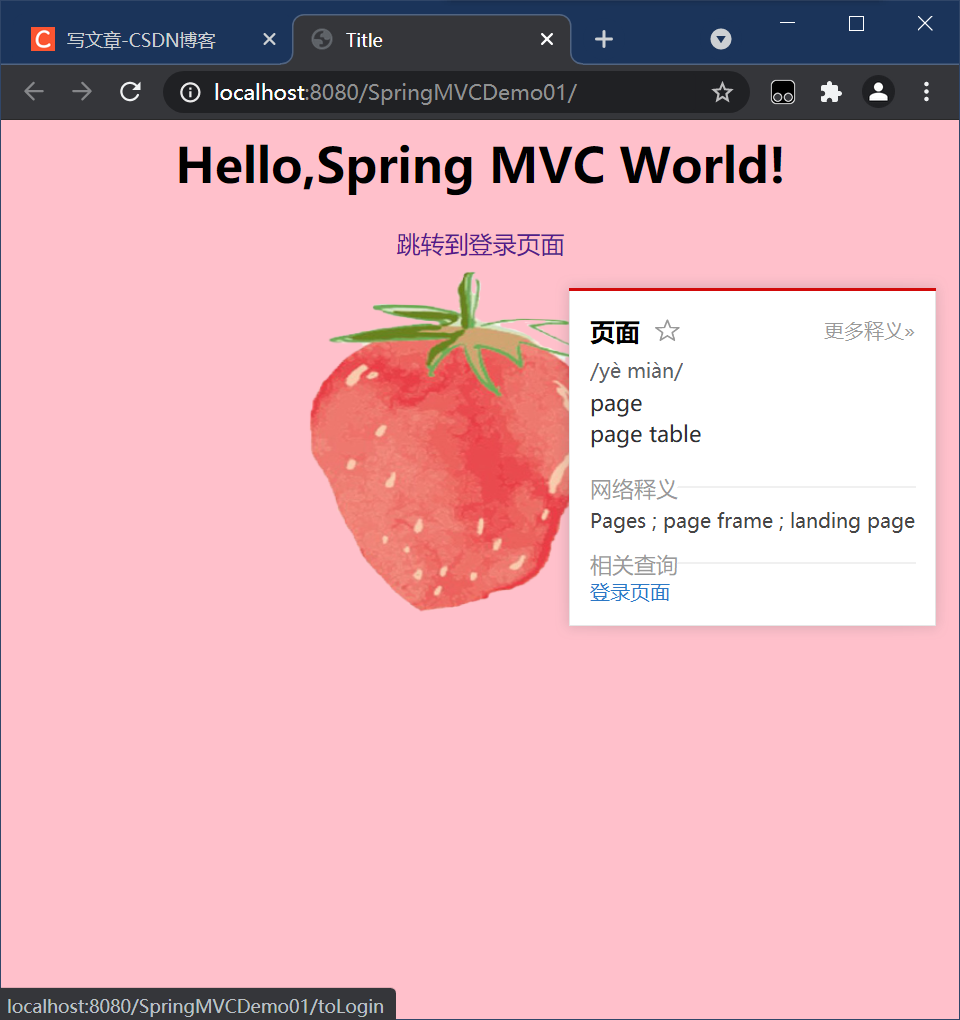
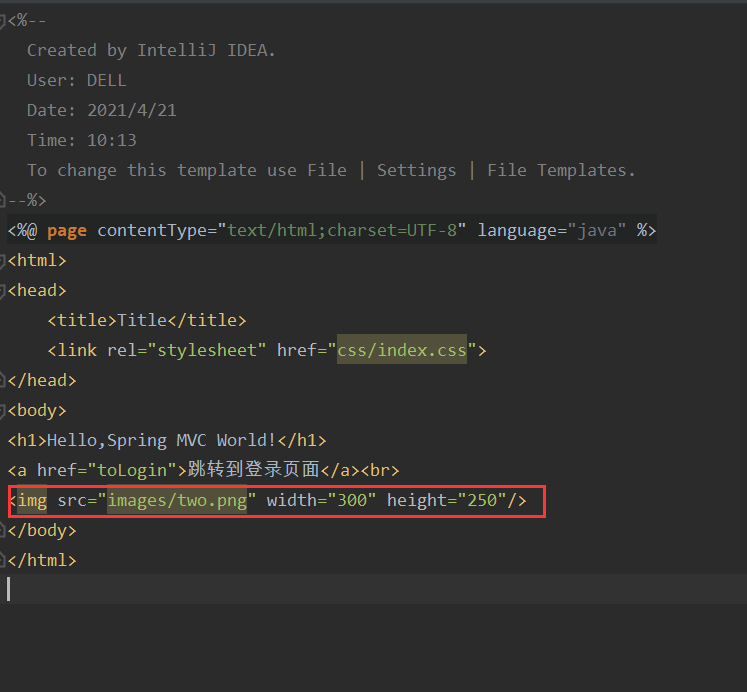
4. Modify homepage file - index jsp
<%--
  Created by IntelliJ IDEA.
  User: DELL
  Date: 2021/4/21
  Time: 10:13
  To change this template use File | Settings | File Templates.
--%>
<%@ page contentType="text/html;charset=UTF-8" language="java" %>
<html>
<head>
    <title>Title</title>
    <link rel="stylesheet" href="css/index.css">
</head>
<body>
<h1>Hello,Spring MVC World!</h1>
<a href="toLogin">Jump to login page</a><br>
<img src="images/two.png" width="300" height="250"/>
</body>
</html>
5. Modify the login controller - LoginController, and comment out two methods responsible for page Jump: index() and toLogin()
6. Modify Spring MVC configuration file - Spring MVC config xml
 <!--Define view controller-->
    <mvc:view-controller path="/" view-name="index"/>
    <mvc:view-controller path="/toLogin" view-name="login"/>
7. Add static resources, let Spring MVC handle correctly, create images directory in WEB-INF, and copy images in.
8. Modify the home page file and add the element of displaying the picture
9. Modify the Spring MVC configuration file to handle static resources separately
 <!--Processing requests for static resources-->
    <mvc:resources mapping="/images/**" location="/WEB-INF/images/"/>
10. Start the server. View effect