preparation
- Download the RT thread nano source code: https://github.com/RT-Thread/rtthread-nano/archive/refs/heads/master.zip.
The latest version is 3.15 (written on March 1, 2022) - New bare metal Keil project of GD32F10x series
This article has been described very clearly, so I won't repeat it. Of course, you can find a keil project that can run successfully.
[super detailed tutorial] build keil project for GD32F10x series
Transplant RT thread
Realize the basic functions of RT thread
In fact, it is more convenient to install RT thread nano Pack: Transplantation of RT thread nano based on Keil MDK.
However, in order to better understand the composition of RT thread in the construction project and the files required by different chips in the construction, I choose to add it manually.
- Create a new folder named rtthread under the project folder directory, and copy the following files to the directory:
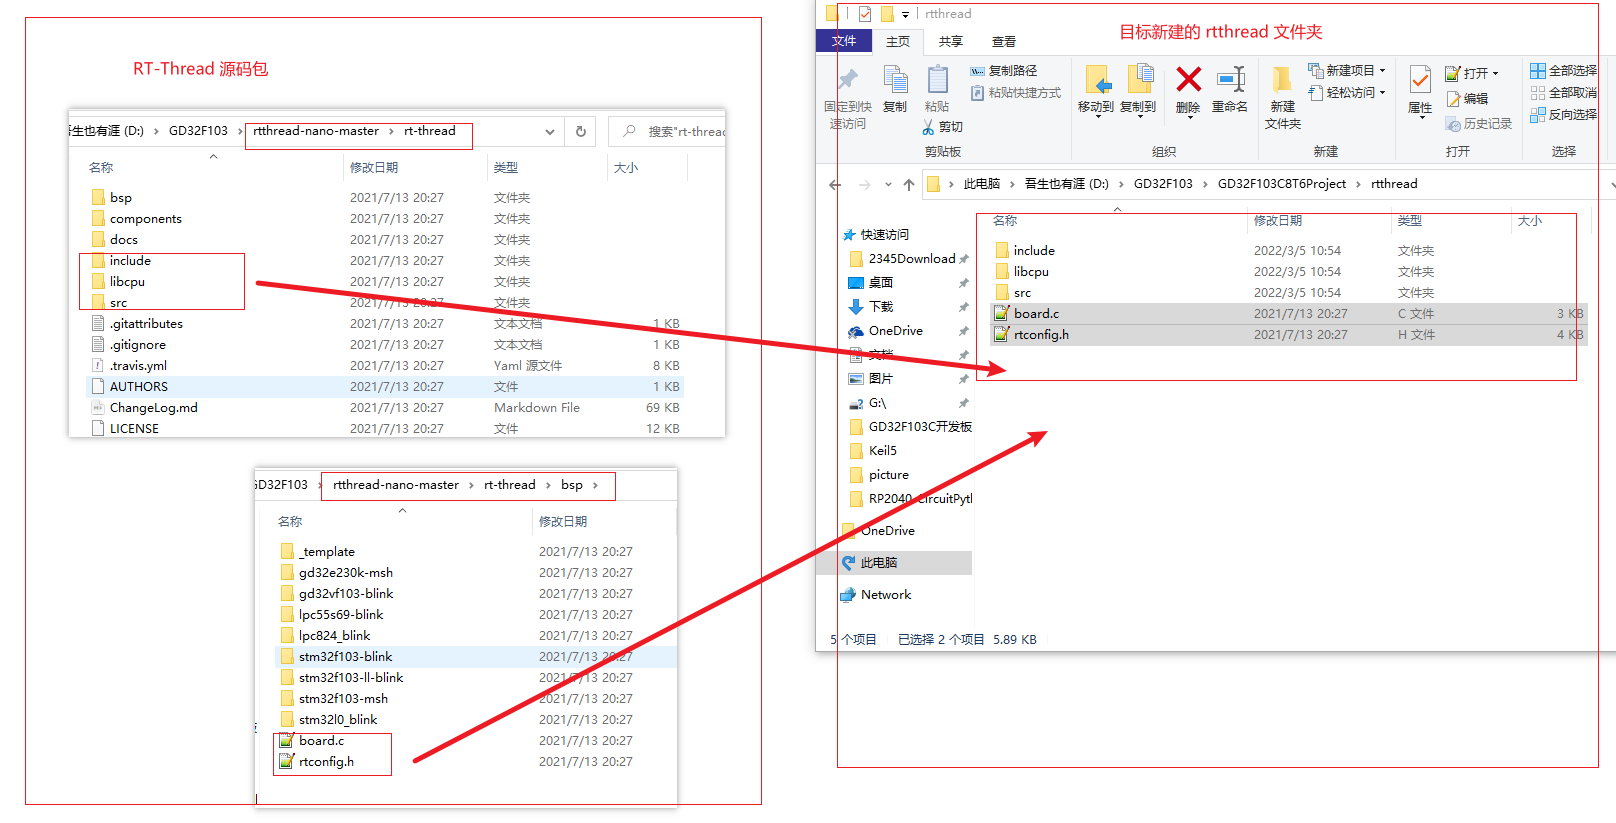
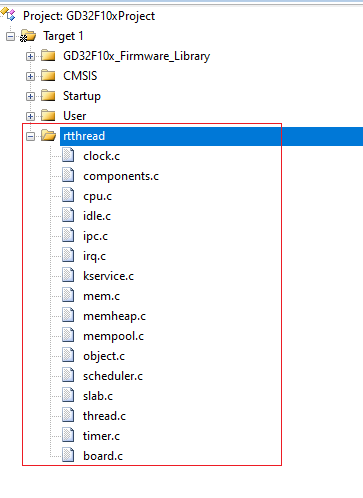
- Add all common codes of RT thread kernel to keil project (also need to create a new group named rtthread), as shown in the following figure:
Add all files in rtthread/src / folder under the project to the project;
Add board under rtthread / folder c .
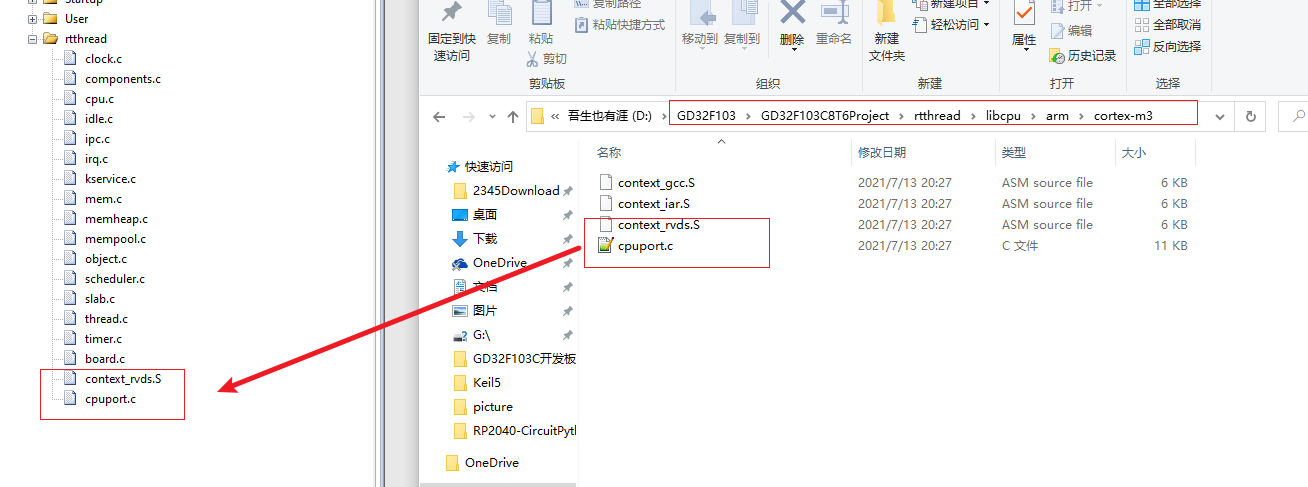
- Add the CPU migration file and context switching file of the kernel of the corresponding chip
Since the chip GDF103C8T6 belongs to the Cortex-M3 series of ARM, it is necessary to add the corresponding series of files: CPU migration file of kernel and context switching file: cpuport C (for specific chip architecture, such as Cortex-M3) and context_rvds.S (for chip architecture and ide, this is used on keil).
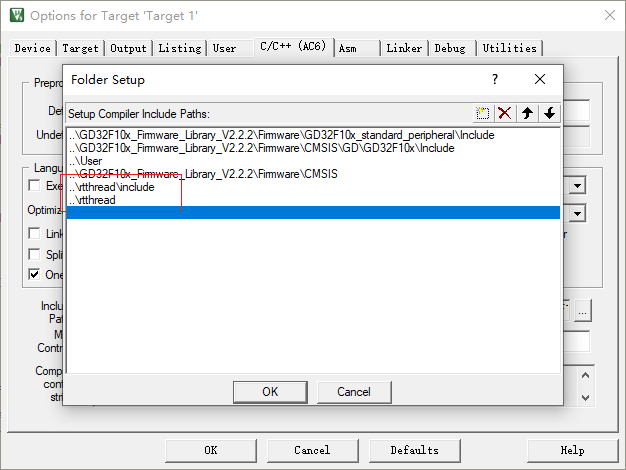
- Add the header file path of rtthread:
- Compile the project and find three errors
 The reason is that these three interrupt functions have been defined in RT thread. We put gd32f10x_ it. Delete the duplicate functions in the C folder.
Delete void systick according to the error prompt of compilation_ Handler(void),void PendSV_Handler(void),void HardFault_Handler(void), there is no error in compiling and issuing again. - So far, the basic project of RT thread has been completed. In main C code into the following code, you can see that the LED light is flashing and beating. This heart beating indicates that the project has completed the basic functions and can start to play happily.
	#include <rtthread.h>
	int main(void)
	{
	    /* enable the led clock Enable IO interface clock */
	    rcu_periph_clock_enable(RCU_GPIOC);
	    /* configure led GPIO port */
	    gpio_init(GPIOC, GPIO_MODE_OUT_PP, GPIO_OSPEED_50MHZ, GPIO_PIN_13);
	    while(1)
	    {
	        gpio_bit_set(GPIOC, GPIO_PIN_13);
	        rt_thread_mdelay(500);
	        gpio_bit_reset(GPIOC, GPIO_PIN_13);
	        rt_thread_mdelay(500);
	    }
	}
Add console and find
Add UART console
This function actually realizes the printing function, which is similar to the printf function we usually use. We can send information through this function to facilitate code debugging.
Generally, serial port is used as the transmission interface of printing.
Then it is very simple to implement it on RT thread: serial port initialization and system output function.
- Serial port initialization
Enable RT_USING_CONSOLE macro definition

At Boart C file can be output and printed by adding the following code
static int uart_init(void)
{
    /* enable GPIO clock Enable serial port 1 pin IO clock */
    rcu_periph_clock_enable(RCU_GPIOA);

    /* enable USART clock */
    rcu_periph_clock_enable(RCU_USART0);

    /* connect port to USARTx_Tx */
    gpio_init(GPIOA, GPIO_MODE_AF_PP, GPIO_OSPEED_50MHZ, GPIO_PIN_9);

    /* connect port to USARTx_Rx */
    gpio_init(GPIOA, GPIO_MODE_IN_FLOATING, GPIO_OSPEED_50MHZ, GPIO_PIN_10);

    /* USART configure */
    usart_deinit(USART0);
    usart_baudrate_set(USART0, 115200);            //Baud rate setting
    usart_word_length_set(USART0, USART_WL_8BIT); //The word length is in 8-bit data format
    usart_stop_bit_set(USART0, USART_STB_1BIT);   //A stop bit
    usart_parity_config(USART0, USART_PM_NONE);    //No parity bit
    usart_hardware_flow_rts_config(USART0, USART_RTS_DISABLE); //No hardware data flow control
    usart_hardware_flow_cts_config(USART0, USART_CTS_DISABLE); //No hardware data flow control
    usart_receive_config(USART0, USART_RECEIVE_ENABLE);        //Transceiver mode
    usart_transmit_config(USART0, USART_TRANSMIT_ENABLE);
    usart_enable(USART0);                          //Enable serial port 0

    return 0;
}
INIT_BOARD_EXPORT(uart_init);  /* The default option is initialization method 1: use the macro INIT_BOARD_EXPORT is automatically initialized */

void rt_hw_console_output(const char *str)
{
    rt_size_t i = 0, size = 0;
    char a = '\r';
    size = rt_strlen(str);

    for (i = 0; i < size; i++)
    {
        if ( *(str+i) == '\n')
        {
             usart_data_transmit(USART0,a);
             while(RESET == usart_flag_get(USART0, USART_FLAG_TBE));
        }
        usart_data_transmit(USART0, *(str+i));
        while(RESET == usart_flag_get(USART0, USART_FLAG_TBE));
    }
}
The effect is as follows:
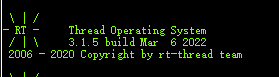
Add a fish component (implement command input)
RT thread fish is the command line component (shell) of RT thread, which provides a set of operation interface for users to call on the command line, which is mainly used to debug or view system information. It can use serial port / Ethernet / USB to communicate with PC. In fact, there are multiple interactive functions. In the past, you can only view the output passively. Now you can take the initiative to obtain some things through input.
- Copy the FinSh file in the RT thread source code to the target project
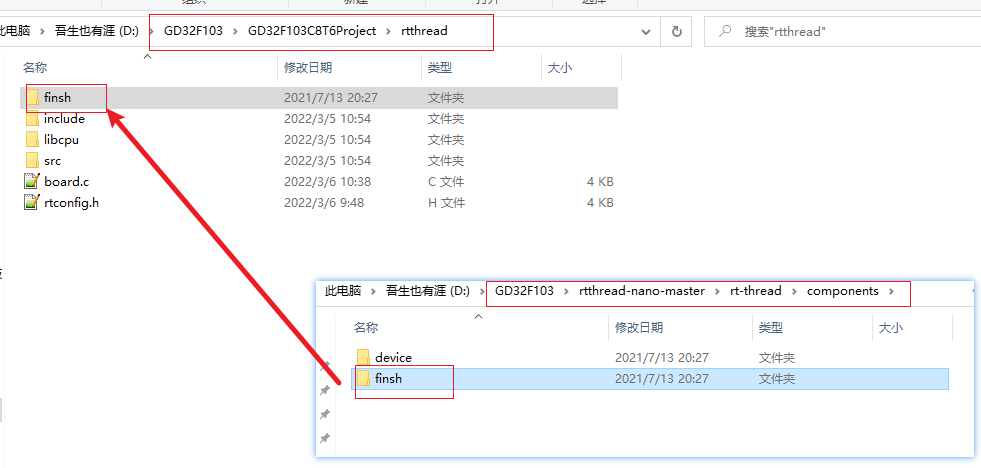
Add to project
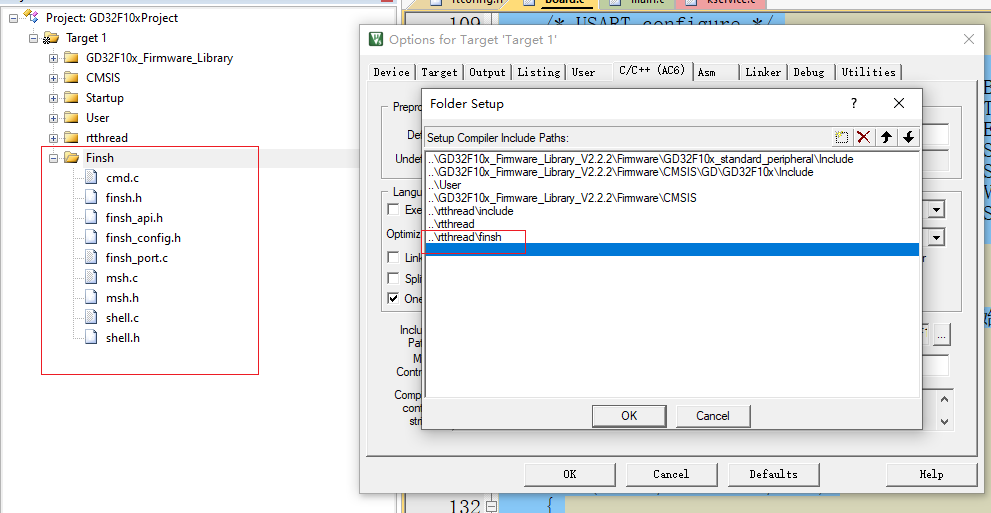
In rtconfig Enable #define RT in H_ USING_ Finsh macro definition, add #defined RTE to this file_ USING_ FINSH. - Implement rt_hw_console_getchar function
char rt_hw_console_getchar(void)
{
    /* the initial value of ch must < 0 */
    int ch = -1;

    if (usart_flag_get(USART0, USART_FLAG_RBNE) != RESET)
    {
        ch = usart_data_receive(USART0);
    }
    else
    {
        rt_thread_mdelay(10);
    }
    return ch;
}