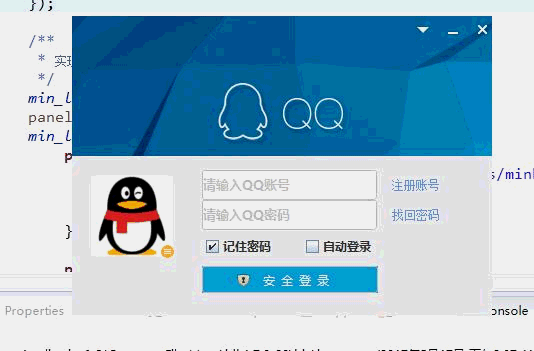
Last time, the theme framework of QQ interface was implemented, but the functions of minimizing and closing buttons have not been completed. This time, the function of QQ login interface has been improved again. This update mainly includes the following aspects:
Minimize, close the window function and implement mouse movement events for these two icons (like most software, when the mouse cursor is moved to the area of these two icons, the icon will have a gradient effect, a little click effect when clicked);
2. The mouse response of the login button and the shadow effect when clicked;
3. Clear prompts in password boxes and account boxes;
4. Mouse response events of account and password boxes, and mouse response events of "registered account" and "forgotten password"
5. Drag events of forms
Overall, the focus of this time is to implement the mouse event monitoring function, and now we will first show the results:
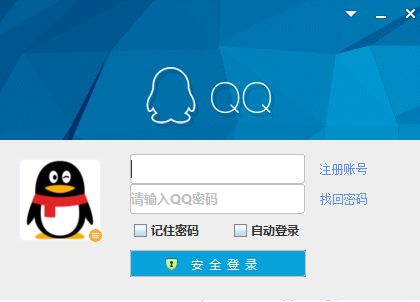
Looking at the gif map recorded by myself, I feel too distorted. So I added a static picture to make comparison. Now I will analyze the implementation method.
1. Functional realization of minimizing and closing:
Prepare three pictures beforehand to show the mouse entering the area, leaving the area and clicking on the state of the area, then realize the mouse click event, insert different pictures each time in different state. Only the implementation code of this part is posted here, and the latter is similar and not cumbersome.
There are several points to note here: First, when adding minimization and closing button icons, we should set the number of added layers in the add method, because the interface we see is layer by layer, if added directly, it will be covered by background images, it will not display small icons correctly; second, the background of icons here is set to transparent, so in the interface. Photos are processed by PS, and how to use PS to make transparent background is a lot of tutorials on Baidu.
2. Mouse response of password box and account box, discoloration effect of "registered account" and "forgotten password":
The implementation also adds mouse monitoring to set different border colors for text boxes, which is similar to the above minimization function, and no code is added.
3. The plaintext display of the password box:
The component set in the password box here is JPassWordField, which will be displayed as "*" if the prompt content is set directly by setText method, so that the effect of prompt can not be achieved. We can see that the setEchoChar method is provided in the java source code to realize this function.
From the source code, you can realize the plaintext display of the password box by setting the setEchoChar parameter to 0. As for the specific font style, it depends on personal preferences. Note that this method does not support ints, so 0 requires mandatory type conversion to char type. Here, we can imagine that many registered pages have the function of providing a preview password. Knowing this function, we can also achieve a preview password function. Next time you have a chance to update it to achieve this function.
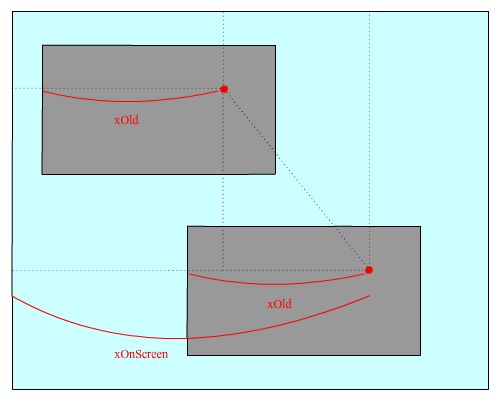
4. Drag a borderless window:
Windows in java swing have maximization, minimization, closing icons and an outer border, but this is beautiful. The outer border is hidden here, but the dragging function of the window is also lost. So we need to implement a drag function by ourselves. The main idea is to get the coordinates of the relative JFrame when the mouse Press is used, then get the coordinates of that point relative to the screen in the mouseDragged method, then subtract the coordinates of the relative JFrame from the coordinates of the relative screen, and finally set its position with setLocation to OK. The code is as follows:
A schematic diagram of the drag window is attached here.
Well, this time almost all the functions have been completed, next time we will continue to update the production of QQ main interface and some database operations, such as login, registration, access to contact list and other functions.