start
Polygon editor is rarely used in some image annotation requirements. It is commonly used in map applications to draw areas, such as Gaode map:
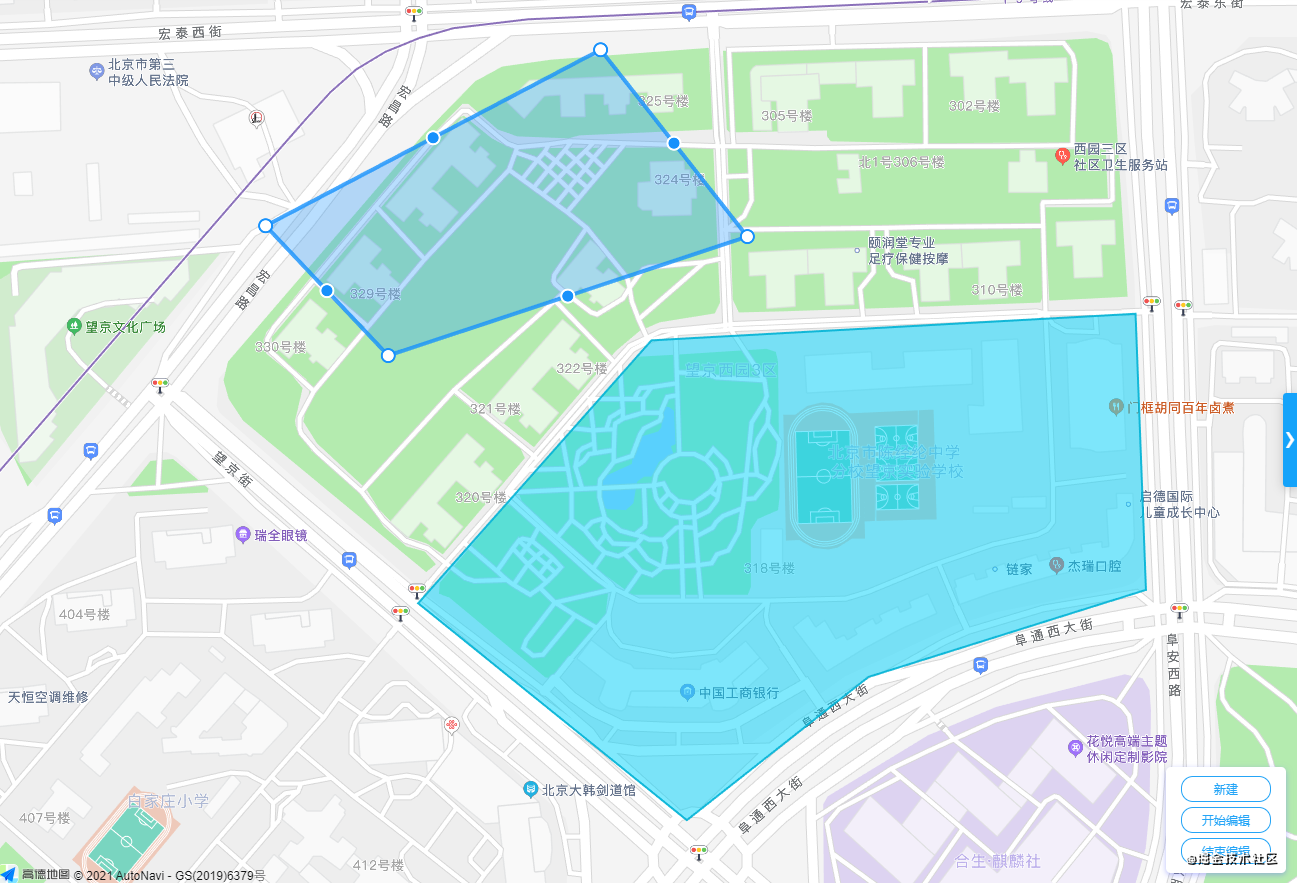
Example address: https://lbs.amap.com/api/jsapi-v2/example/overlay-editor/polygon-editor-avoidpolygon . Please try it first, and then realize all its functions.
Basic preparation
Prepare a canvas element, set the canvas width and height, and obtain the drawing context:
<div class="container" ref="container">
    <canvas ref="canvas"></canvas>
</div>
init () {
let { width, height } = this.$refs.container.getBoundingClientRect()
this.width = width
this.height = height
let canvas = this.$refs.canvas
canvas.width = width
canvas.height = height
this.ctx = canvas.getContext('2d')
}add vertex
The basic operation of creating a polygon is to click and add vertices, so you need to listen to the click event, and then connect the click points with lines. The clientX and clientY of the mouse click event object are relative to the browser window, so you need to subtract the offset of the canvas and the browser window to obtain the coordinates relative to the canvas:
toCanvasPos (e) {
    let { left, top } = this.$refs.canvas.getBoundingClientRect()
    return {
        x: e.clientX - left,
        y: e.clientY - top
    }
}
Next, click bind event:
<canvas ref="canvas" @click="onClick"></canvas>
Then we use an array to save the vertices we add each time we click:
export default {
    data() {
        pointsArr: []
    },
    methods: {
        onClick (e) {
            let { x, y } = this.toCanvasPos(e)
            this.pointsArr.push({
                x,
                y
            })
        }
    }
}
When there is a vertex, let's traverse it and draw the line:
render () {
// Clear the canvas first
this.ctx.clearRect(0, 0, this.width, this.height)
// Vertex line
this.ctx.beginPath()
this.pointsArr.forEach((item, index) => {
if (index === 0) {
this.ctx.moveTo(item.x, item.y)
} else {
this.ctx.lineTo(item.x, item.y)
}
})
this.ctx.lineWidth = 5
this.ctx.strokeStyle = '#38a4ec'
this.ctx.lineJoin = 'round'// It's better to be smooth at the connection of line segments
this.ctx.stroke()
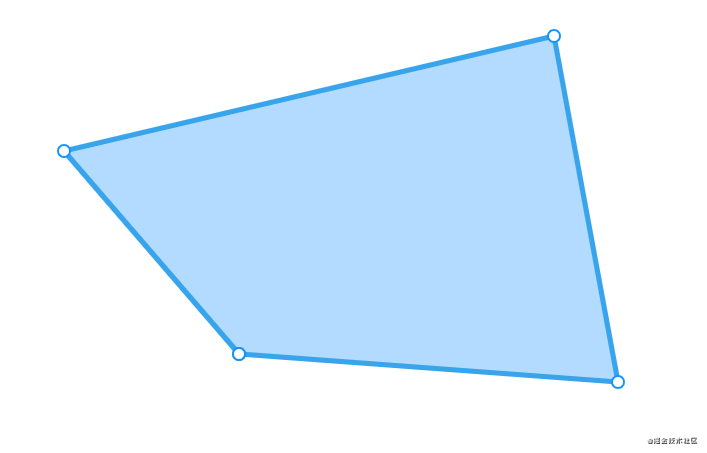
}This method needs to be called to redraw each click. The effect is as follows:

But this is not what we want. We want an area that is closed from beginning to end. This is very simple. Connect the first and last points, but it will not change with the current position of the mouse. Therefore, we need to add the current position of the mouse as a vertex, but it is only a temporary point before clicking, It's not appropriate to put it in pointsArr. We use a new variable to store it.
Listen for mouse movement events to store the current position:
<canvas ref="canvas" @click="onClick" @mousemove="onMousemove"></canvas>
export default {
    data () {
        return {
            // ...
            tmpPoint: null
        }
    },
    methods: {
        onMousemove (e) {
            let { x, y } = this.toCanvasPos(e)
            if (this.tmpPoint) {
                this.tmpPoint.x = x
                this.tmpPoint.y = y
            } else {
                this.tmpPoint = {
                    x,
                    y
                }
            }
            this.render()// Refresh and redraw continuously when the mouse moves
        }
    }
}
Next, add this point when connecting, and also set the filling pattern:
render () {
    this.ctx.clearRect(0, 0, this.width, this.height)
    this.ctx.beginPath()
    let pointsArr = this.pointsArr.concat(this.tmpPoint ? [this.tmpPoint] : [])// ++Appends the current mouse position to the end
    pointsArr.forEach((item, index) => {
        if (index === 0) {
            this.ctx.moveTo(item.x, item.y)
        } else {
            this.ctx.lineTo(item.x, item.y)
        }
    })
    this.ctx.closePath()// ++Closed path
    this.ctx.lineWidth = 5
    this.ctx.strokeStyle = '#38a4ec'
    this.ctx.lineJoin = 'round'
    this.ctx.fillStyle = 'rgba(0, 136, 255, 0.3)'// ++
    this.ctx.fill()// ++
    this.ctx.stroke()
}
The effects are as follows:

Finally, add a double-click event to complete the addition of vertices:
<canvas ref="canvas" @click="onClick" @mousemove="onMousemove" @dblclick="onDbClick"></canvas>
{
    onDbClick () {
        this.isClosePath = true// Add a variable to indicate whether the shape is closed
        this.tmpPoint = null// Empty temporary point
        this.render()
    },
    onClick (e) {
        if (this.isClosePath) {
            return
        }
        // ...
    },
    onMousemove (e) {
        if (this.isClosePath) {
            return
        }
        // ...
    }
}
It should be noted that when the dbClick event is triggered, the click event will be triggered twice at the same time. As a result, the last double-click position will be added and added twice. You can manually remove the last two points or use the click event to simulate the double-click event. This article will not deal with it for convenience.
Drag Vertex
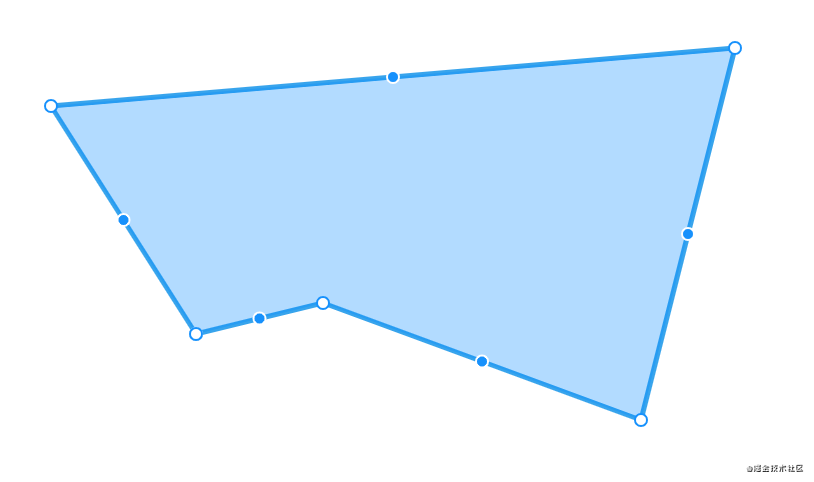
After the polygon is closed, it is allowed to drag each vertex to modify the position. For intuition, draw a circle for each vertex like golde's example:
render() {
    // ...
    // Draws a circle of vertices
    if (this.isClosePath) {
        this.ctx.save()// Because you want to reset the drawing style, you need to save the drawing state in order not to affect the line segments
        this.ctx.lineWidth = 2
        this.ctx.strokeStyle = '#1791fc'
        this.ctx.fillStyle = '#fff'
        this.pointsArr.forEach((item, index) => {
            this.ctx.beginPath()
            this.ctx.arc(item.x, item.y, 6, 0, 2 * Math.PI)
            this.ctx.fill()
            this.ctx.stroke()
        })
        this.ctx.restore()// Restore drawing state
    }
}
To drag, you must first know which vertex the current mouse is in. You can use the isPointPath method in the mousedown event to detect:
<canvas
    ref="canvas"
    @click="onClick"
    @mousemove="onMousemove"
    @dblclick="onDbClick"
    @mousedown="onMousedown"
></canvas>
export default {
onMousedown (e) {
if (!this.isClosePath) {
return
}
this.isMousedown = true
let { x, y } = this.toCanvasPos(e)
this.dragPointIndex = this.checkPointIndex(x, y)
},
// Detect whether it is within a vertex
checkPointIndex (x, y) {
let result = -1
// The difference between traversing vertices to draw circular paths and drawing vertex circles above is that there is no need for actual tracing and filling, only path
this.pointsArr.forEach((item, index) => {
this.ctx.beginPath()
this.ctx.arc(item.x, item.y, 6, 0, 2 * Math.PI)
// Detect whether it is within the current path
if (this.ctx.isPointInPath(x, y)) {
result = index
}
})
return result
}
}After you know which vertex you are currently dragging, you can update the position of the vertex in real time in the mousemove event:
onMousemove (e) {
    // Updates the current dragged vertex position in real time
    if (this.isClosePath && this.isMousedown && this.dragPointIndex !== -1) {
        let { x, y } = this.toCanvasPos(e)
        // Delete the original point and insert a new point
        this.pointsArr.splice(this.dragPointIndex, 1, {
            x,
            y
        })
        this.render()
    }
    // ...
}
The effects are as follows:
Drag whole
Gaode's example does not have the function of dragging the whole, but it does not affect our support. The logic of dragging the whole is similar to that of dragging a single vertex. First judge whether it is in the polygon when the mouse is pressed, and then update the position of all vertices during the moving process. The moving offset is recorded and applied when dragging a single area, This requires caching the position of the mouse button and the vertex data at the moment.
Detect whether it is within a polygon:
export default{
    onMousedown (e) {
        // ...
        // Record the starting position pressed
        this.startPos.x = x
        this.startPos.y = y
        // Record current vertex data
        this.cachePointsArr = this.pointsArr.map((item) => {
            return {
                ...item
            }
        })
        this.isInPolygon = this.checkInPolygon(x, y)
    },
    // Check whether it is within the polygon
    checkInPolygon (x, y) {
        // Draws and closes the path without actual stroke
        this.ctx.beginPath()
        this.pointsArr.forEach((item, index) => {
            if (index === 0) {
                this.ctx.moveTo(item.x, item.y)
            } else {
                this.ctx.lineTo(item.x, item.y)
            }
        })
        this.ctx.closePath()
        return this.ctx.isPointInPath(x, y)
    }
}
Update all vertex positions:
onMousemove (e) {
    // Update all vertex positions
    if (this.isClosePath && this.isMousedown && this.dragPointIndex === -1 && this.isInPolygon) {
        let diffX = x - this.startPos.x
        let diffY = y - this.startPos.y
        this.pointsArr = this.cachePointsArr.map((item) => {
            return {
                x: item.x + diffX,
                y: item.y + diffY
            }
        })
        this.render()
    }
    // ...
}
The effects are as follows:
Adsorption function
The adsorption function can improve the use experience. First, it is relatively simple to adsorb to the vertex. Traverse all vertices, calculate the distance from the current vertex, and mutate the position of the current vertex if it is less than a certain value.
Add the following when dragging to update the position of a single vertex:
onMousemove (e) {
    if (this.isClosePath && this.isMousedown && this.dragPointIndex !== -1) {
        let { x, y } = this.toCanvasPos(e)
        let adsorbentPos = this.checkAdsorbent(x, y)// ++Determine whether adsorption is required
        this.pointsArr.splice(this.dragPointIndex, 1, {
            x: adsorbentPos[0],// ++Change to adsorbed value
            y: adsorbentPos[1]// ++Change to adsorbed value
        })
        this.render()
    }
    // ...
}
Method for judging adsorption:
checkAdsorbent (x, y) {
    let result = [x, y]
    // Adsorb to vertex
    let minDistance = Infinity
    this.pointsArr.forEach((item, index) => {
        // Skip comparison with itself
        if (this.dragPointIndex === index) {
            return
        }
        // Get two-point distance
        let distance = this.getTwoPointDistance(item.x, item.y, x, y)
        // If it is less than 10, the position of the vertex is used to replace the current mouse position
        if (distance <= 10 && distance < minDistance) {
            minDistance = distance
            result = [item.x, item.y]
        }
    })
    return result
}
The getTwoPointDistance method is used to calculate the distance between two points:
getTwoPointDistance (x1, y1, x2, y2) {
    return Math.sqrt(Math.pow(x1 - x2, 2) + Math.pow(y1 - y2, 2))
}
The effects are as follows:
In addition to adsorption when dragging, adsorption can also be added when adding vertices. This is not done here. In addition, in addition to adsorbing to the vertex, you also need to adsorb to the line segment, that is, the point on the line segment closest to the current point. Take dragging a single vertex as an example.
First, you need to create the following segments based on vertices:
createLineSegment () {
    let result = []
    // Create segment
    let arr = this.pointsArr
    let len = arr.length
    for (let i = 0; i < len - 1; i++) {
        result.push([
            arr[i],
            arr[i + 1]
        ])
    }
    // Add a segment consisting of a start point and an end point
    result.push([
        arr[len - 1],
        arr[0]
    ])
    // Removes the segment containing the current drag point
    if (this.dragPointIndex !== -1) {
        // If you drag the start point, the first and last segments are removed
        if (this.dragPointIndex === 0) {
            result.splice(0, 1)
            result.splice(-1, 1)
        } else { // The other middle points remove the former and the latter
            result.splice(this.dragPointIndex - 1, 2)
        }
    }
    return result
}
When creating a segment, it is best to filter out the segments with the same two endpoints, and then add the logic of adsorbing segments in the checkAdsorbent method. Note that before adding to the code adsorbed to the vertex, it will be adsorbed to the vertex first.
checkAdsorbent (x, y) {
    let result = [x, y]
    // Adsorb to segment
    let segments = this.createLineSegment()// ++
    // Adsorb to vertex
    // ...
}
With a line segment, you can traverse the line segment, calculate the line segment closest to the current point, and use the distance formula from point to line:
The standard straight-line equation is: Ax+By+C=0, there are three unknown variables, we only have two points, obviously we can't calculate three variables, so we use the oblique section formula: y=kx+b, that is, the straight line not perpendicular to the x-axis, to calculate K and b, so: Ax+By+C = kx-y+b = 0, to get A = k, B = -1, C = b, so as long as we calculate A and C:
getLinePointDistance (x1, y1, x2, y2, x, y) {
    // The straight line perpendicular to the x axis is specially treated, and the abscissa subtraction is the distance
    if (x1 === x2) {
        return Math.abs(x - x1)
    } else {
        let B = -1
        let A, C
        A = (y2 - y1) / (x2 - x1)
        C = 0 - B * y1 - A * x1
        return Math.abs((A * x + B * y + C) / Math.sqrt(A * A + B * B))
    }
}
After knowing the nearest line segment, the problem comes again. We have to know the point closest to the point on the line segment. Assuming that the two endpoints of line segment s are: (x1,y1), (x2,y2) and point p is: (x0,y0), then the following derivation is made:
// Slope of line segment s
let k = (y2 - y1) / (x2 - x1)
// Substitution of endpoint 1 into oblique section formula y=kx+b
let y1 = k * x1 + b
// Get b
let b = y1 - k * x1
// k and b are known, so is the straight line formula
let y = k * x + b = k * x + y1 - k * x1 = k * (x - x1) + y1
// The line formed by the point closest to the point p and p on the line segment must be perpendicular to the line segment s, that is, the vertical line. The product of the slope k1 of the vertical line and the slope k of the line segment is - 1, then
let k1 = -1 / k
// Point p is substituted into the oblique section formula y=kx+b to obtain the straight line equation of the vertical line
let y0 = k1 * x0 + b
let b = y0 - k1 * x0
let y = k1 * x + y0 - k1 * x0 = k1 * (x - x0) + y0 = (-1 / k) * (x - x0) + y0
// Finally, the point where the two lines intersect is the closest point, that is, the two straight-line equations are established to find x and y
let y = k * (x - x1) + y1
let x = (k * k * x1 + k * (y0 - y1) + x0) / (k * k + 1)
According to the above derivation, the nearest point can be calculated, but finally, it is necessary to judge whether the point is on the line segment, perhaps in other positions of the straight line:
getNearestPoint (x1, y1, x2, y2, x0, y0) {
    let k = (y2 - y1) / (x2 - x1)
    let x = (k * k * x1 + k * (y0 - y1) + x0) / (k * k + 1)
    let y = k * (x - x1) + y1
    // Judge whether the x coordinate of the point is between the two endpoints of the line segment
    let min = Math.min(x1, x2)
    let max = Math.max(x1, x2)
    // If it is in the line segment, it is the point we want
    if (x >= min && x <= max) {
        return {
            x,
            y
        }
    } else { // Otherwise, null is returned
        return null
    }
}
Next, just like the adsorption to the vertex, it suddenly changes to this position:
checkAdsorbent (x, y) {
    let result = [x, y]
    // Adsorb to segment
    let segments = this.createLineSegment()// Create segment
    let nearestLineResult = this.getPintNearestLine(x, y, segments)// Find the nearest line segment
    if (nearestLineResult[0] <= 10) {// Adsorption at a distance of less than 10
        let segment = nearestLineResult[1]// Two endpoints of a segment
        let nearestPoint = this.getNearestPoint(segment[0].x, segment[0].y, segment[1].x, segment[1].y, x, y)// Find the nearest point on the line segment
        if (nearestPoint) {
            result = [nearestPoint.x, nearestPoint.y]
        }
    }
    // Adsorb to vertex
    // ...
}
The effects are as follows:
Delete and add vertices
Gaud's polygon editor will display a solid dot in the center of each line segment without dragging. If you don't click it, it will be a flash in the pan. When you drag it, it will become a real vertex and complete the addition of vertices.
First, insert the virtual vertex and render it without dragging, and then remove it before dragging. Because the virtual vertex is added, it needs to be converted into a real index without virtual vertex when calculating the dragPointIndex. When it is detected that the dragged virtual node is a virtual node, it can be converted into a real vertex.
Insert a virtual vertex first, and add a fictitious field to the vertex to represent whether it is a virtual vertex:
render () {
    // Remove the previously inserted virtual vertices first
    this.pointsArr = this.pointsArr.filter((item) => {
        return !item.fictitious
    })
    if (this.isClosePath && !this.isMousedown) {// Insert virtual vertex
        this.insertFictitiousPoints()
    }
    // ...
    // Clear the canvas first
}
Inserting a virtual vertex is to insert the midpoint coordinates of the two vertices between each two vertices. This is very simple and no code is attached. In addition, if the vertex is a virtual vertex, reverse the stroke color and fill color to distinguish it. The effect is as follows:
Next, modify the mousemove method. If you drag a virtual vertex, convert it to a real vertex, that is, delete the ficitious field:
onMousemove (e) {
    if (this.isClosePath && this.isMousedown && this.dragPointIndex !== -1) {
        // If it is a virtual vertex, convert it to a real vertex
        if (this.pointsArr[this.dragPointIndex].fictitious) {
            delete this.pointsArr[this.dragPointIndex].fictitious
        }
        // Convert to real index without virtual vertices
        let prevFictitiousCount = 0
        for (let i = 0; i < this.dragPointIndex; i++) {
            if (this.pointsArr[i].fictitious) {
                prevFictitiousCount++
            }
        }
        this.dragPointIndex -= prevFictitiousCount
        // Remove virtual vertices
        this.pointsArr = this.pointsArr.filter((item) => {
            return !item.fictitious
        })
        // Previous drag logic
    }
    // ...
}
The effects are as follows:
Finally, fix the bug when dragging as a whole:
this.pointsArr = this.cachePointsArr.map((item) => {
    return {
        ...item,// ++, don't lose the fictitious state
        x: item.x + diffX,
        y: item.y + diffY
    }
})
Deleting vertices is easy. You can remove them directly from the array. See the source code for details.
Support the coexistence of multiple polygons
The above only completes the creation and editing of a polygon. If multiple polygons need to exist at the same time and each polygon can be selected for editing, the above code cannot be implemented. You need to adjust the code organization mode. Each polygon needs to maintain its own state, so you can create a polygon class, Move some of the above states and methods to this class, and then select which class to operate.
ending
The source code of the sample code is: https://github.com/wanglin2/PolygonEditDemo.
In addition, a slightly improved version is written, which can be used directly: https://github.com/wanglin2/markjs.
Thanks for reading. Bye~