If you have Ubuntu 16 installed on your computer 04, and the computer comes with an NVIDIA GeForce GPU graphics card, so it's a pity not to run the deep learning model! There are many online tutorials in this regard, but most of them are mixed. This article will teach you how to install GPU graphics driver and cuda9 0 and cuDNN7. It's worth a try!
Note: CUDA and cuDNN corresponding to different GPUs are different in different systems. This paper only takes Ubuntu 16 04,NVIDIA GeForce GPU,CUDA9.0 and cuDNN7 as examples to introduce the installation process. The process of other versions is similar, but there are slight differences. Please focus on practice.
necessary condition
If you want to do a good job, you must first sharpen your tools. First, make sure your computer meets the following two conditions.
- Install Ubuntu 16 04
- The computer comes with an NVIDIA GeForce GPU graphics card
1, Install GPU graphics driver
One NVIDIA GPU graphics card is not enough. You also need to install a GPU graphics card driver.
1. First log in to GeForce's official website:
https://www.geforce.cn/drivers
In the manual search driver, select your own system. Note that "Linux 64 bit". Other options can be selected by default. Then, click start search to automatically search the GPU graphics card driver matching your computer. The search results are shown in the following figure:

As shown in the figure above, the results will show the available GPU graphics card drivers. Determine the version you need, and click directly to download it. For example, the version I selected is 418.43, and the downloaded file is NVIDIA-Linux-x86_64-418.43.run.
2. Open the Terminal and first uninstall the NVIDIA graphics card driver installed before the system, just in case. (if there is no installation, this step can be ignored)
$ sudo apt-get --purge remove nvidia-*
3. Open blacklist:
$ sudo gedit /etc/modprobe.d/blacklist.conf
Add a few lines at the end:
blacklist vga16fb
blacklist nouveau
blacklist rivafb
blacklist nvidiafb
blacklist rivatv
At this time, input at the terminal:
$ lsmod | grep nouveau
If there is no output, you can directly proceed to the next step to install the driver. If there is still output, input at the terminal:
$ sudo gedit /etc/modprobe.d/blacklist-nouveau.conf
Direct write:
blacklist nouveau
blacklist lbm-nouveau
options nouveau modeset=0
alias nouveau off
alias lbm-nouveau off
Save and close, and then enter the following command in the terminal to verify whether there is no output.
$ sudo update-initramfs -u
$ lsmod | grep nouveau
# If there is still output, reboot once
At this step, there should be no output and the driver can be installed.
4. Before installing the driver, please remember the of your driver The download path and full file name of the run file. Press Ctrl+Alt+F1 to enter the command line interface, and enter the following command:
$ sudo /etc/init.d/lightdm stop
$ sudo init 3
get into. The download path of the run file is added using the chmod command The run permission of the run file.
$ chmod a+x NVIDIA-Linux-x86_64-418.43.run

$ sudo ./NVIDIA-Linux-x86_64-418.43.run -no-x-check -no-nouveau-check -no-opengl-files #Here is to close the x server, nouveau and do not download opengl files
Then the installation program will be started. After the installation is completed, enter the following command:
$ nvidia-smi
If a result similar to the following appears, the driver installation is successful.

Finally, return to the image interface.
$ sudo /etc/init.d/lightdm start
In this way, the driver is successfully installed.
2, Install cuda9 0
1. First, log in to CUDA's download website:
https://developer.nvidia.com/cuda-downloads
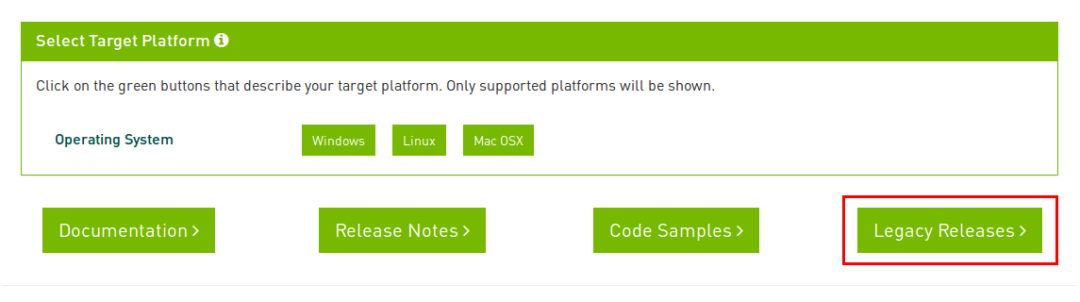
Since the version of CUDA has been updated to 10, we need to install version 9.0. Therefore, click Legacy Releases to enter the list of previous versions.
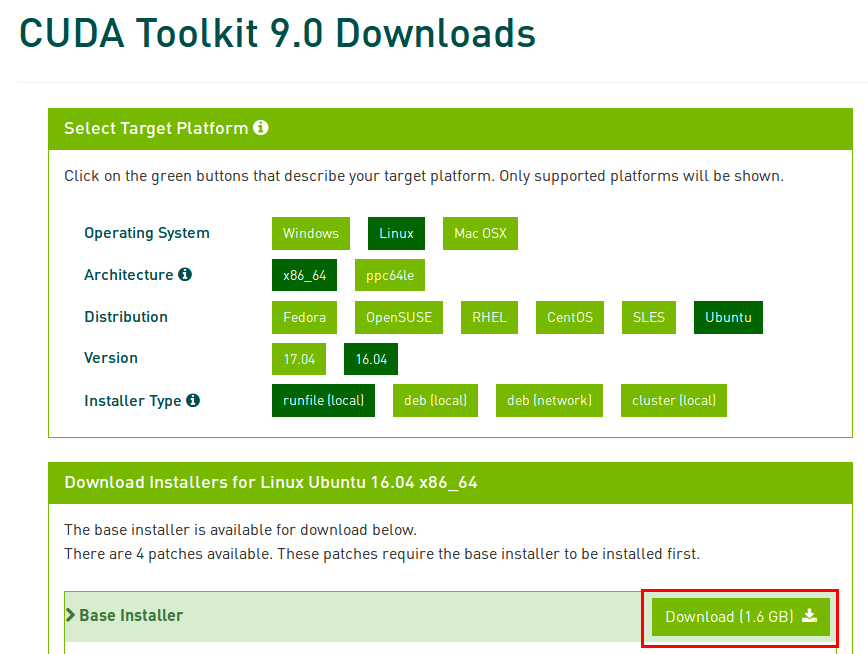
Then, in the CUDA version list, select version 9.0.

Select the corresponding system and other information, and then click Download to Download. Note the option to Download the runfile file.
2. Open the terminal and enter cuda9 0's download directory, enter:
$ chmod a+x cuda_9.0.176_384.81_linux.run
$ sudo ./cuda_9.0.176_384.81_linux.run
Then it will enter the installation. During the installation process, you will be asked for some configuration information. Generally, you can directly select the default option. One thing you must pay attention to is that it will let you choose whether to install Graphics Driver for Linux-x86_64: XXXX version, this place must select no! Otherwise, the previous drive will be overwritten.
3. After installation, declare the environment variables. Open bashrc file, enter at the terminal:
$ sudo gedit ~/.bashrc
Add at the end of the document:
export PATH=/usr/local/cuda-9.0/bin${PATH:+:${PATH}}
export LD_LIBRARY_PATH=/usr/local/cuda-9.0/lib64${LD_LIBRARY_PATH:+:${LD_LIBRARY_PATH}}
Save and exit.
$ source ~/.bashrc
4. Verify GPU driver version: 418.43
$ cat /proc/driver/nvidia/version

Verify CUDA version: 9.0
$$ nvcc -V

5. Another possible problem is that gcc is not installed or the gcc version is too high and needs to be downgraded manually. It is easy to solve, so I won't repeat it here.
3, Install cuDNN
1. First, go to cuDNN's download website:
https://developer.nvidia.com/rdp/cudnn-download
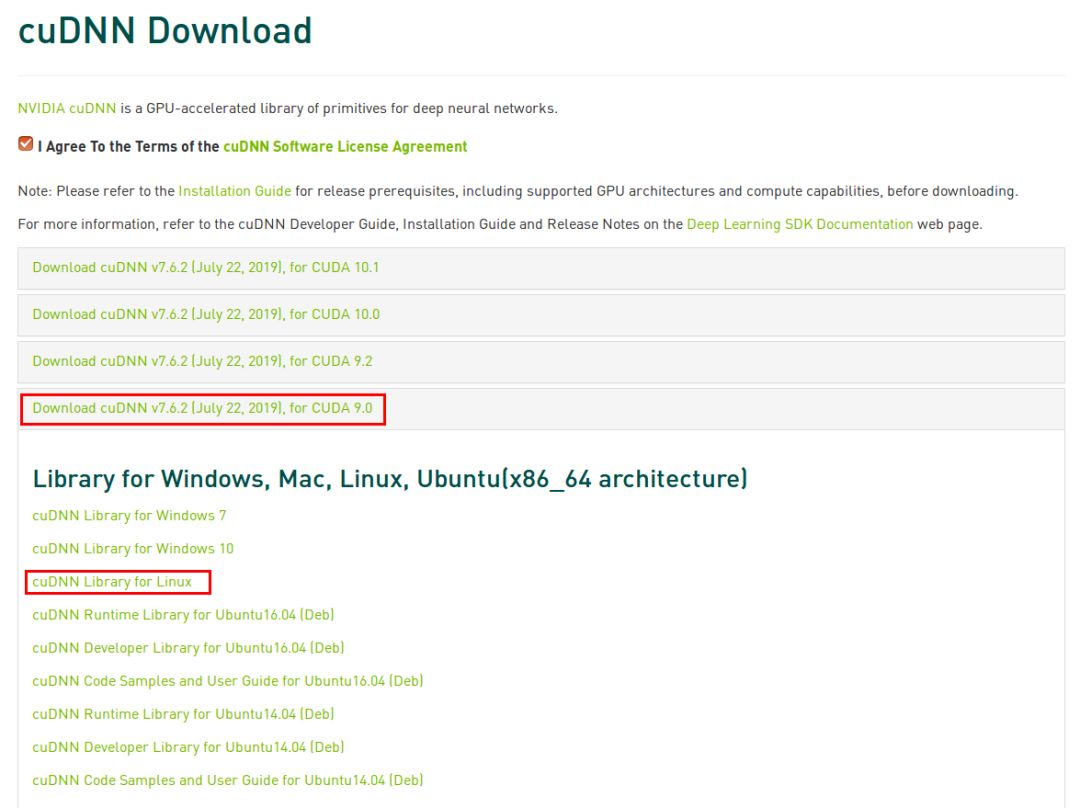
It is worth mentioning that you need to register your account before downloading. In the version list shown in the following figure, select adapt cuda9 0, corresponding to Linux system.
2. After downloading, unzip:
$ tar -zxvf cudnn-9.0-linux-x64-v7.6.1.34.tgz
The output of the decompression command is as follows:
cuda/include/cudnn.h
cuda/NVIDIA_SLA_cuDNN_Support.txt
cuda/lib64/libcudnn.so
cuda/lib64/libcudnn.so.7
cuda/lib64/libcudnn.so.7.6.1
cuda/lib64/libcudnn_static.a
Copy relevant files to the specified directory:
$ sudo cp cuda/include/cudnn.h /usr/local/cuda/include/
$ sudo cp cuda/lib64/libcudnn* /usr/local/cuda/lib64/
3. To local cuda path, create soft connection, terminal input:
$ cd /usr/local/cuda/lib64
$ sudo chmod +r libcudnn.so.7.6.1
$ sudo ln -sf libcudnn.so.7.6.1 libcudnn.so.7
$ sudo ln -sf libcudnn.so.7 libcudnn.so
$ sudo ldconfig
Note that the file name here, that is, the version number, is written with reference to the previously extracted file name.
4. Check under the local cuda path:
$ cd /usr/local/cuda/lib64
$ ll
The version number corresponding to cuDNN indicates that the installation is successful!
lrwxrwxrwx 1 root root 13 3 June 19-16:02 libcudnn.so -> libcudnn.so.7*
lrwxrwxrwx 1 root root 17 3 June 19-16:02 libcudnn.so.7 -> libcudnn.so.7.6.1*
-rwxr-xr-x 1 root root 287641664 3 June 19-16:00 libcudnn.so.7.6.1*
be accomplished! GPU graphics card driver + cuda9 0 + cudnn7 environment configuration completed.
reference:
https://blog.csdn.net/weixin_41864878/article/details/79621210