If you still pack each market manually, you will feel very painful without saying that Low is not low, right? Some students even need 3-5 minutes to pack one time with Windows build. Half an hour to pack six market packages has passed. Most importantly, errors may occur in the process, which will increase the difficulty and cost of testing.
There are many ways of multi-channel packaging, such as remote jenkins + gradle +github, etc. There are a lot of information on the Internet, because the configuration environment required by this way is complex, suitable for enterprises that need a lot of packaging, and need remote packaging. This article will introduce the method of Android Studio local one-button packaging and auto-configuration signature.
That's a lot of nonsense. Now we're starting to work out multi-channel packaging.
Setting Dynamic Channel Variables in Android Manifest.xml
<!-- Automatic upgrade type  self,_360,baidu -->
        <meta-data
            android:name="sdk_key_version_update_type"
            android:value="${CHANNEL_VALUE}" />
2. Setting up product Flavors in build.gradle
Let's assume that we need to pack 360, google, Baidu and our company.
Method 1: Configure directly under app:gradle
android {

    defaultConfig {
        ...
        flavorDimensions "versionCode"
    }
    productFlavors {
        google {
            manifestPlaceholders = [CHANNEL_VALUE: "google"]
        }
        qh360 {
            manifestPlaceholders = [CHANNEL_VALUE: "360"]
        }
        baidu {
            manifestPlaceholders = [CHANNEL_VALUE: "baidu"]
        }
        self {
            manifestPlaceholders = [CHANNEL_VALUE: "self"]
        }
    }
}

//Or batch modification

defaultConfig {
        ...
        flavorDimensions "versionCode"
    }

android {
    productFlavors {
        kuan {}
        xiaomi {}
        qh360 {}
        baidu {}
        wandoujia {}
    }

    productFlavors.all {
        flavor -> flavor.manifestPlaceholders = [CHANNEL_VALUE: name]
    }
}
The purpose of the above configuration is to generate different CHANNEL_VALUE values for each channel package. It should be noted here that your corresponding label must be consistent with the configured Name acquisition logic, otherwise there will be logic exceptions that can not be found.
Method 2: Open the configuration interface by shortcut command +. (Windows corresponding shortcut key Ctrl + Alt + Shift + S) and add the corresponding configuration channel. The following picture:
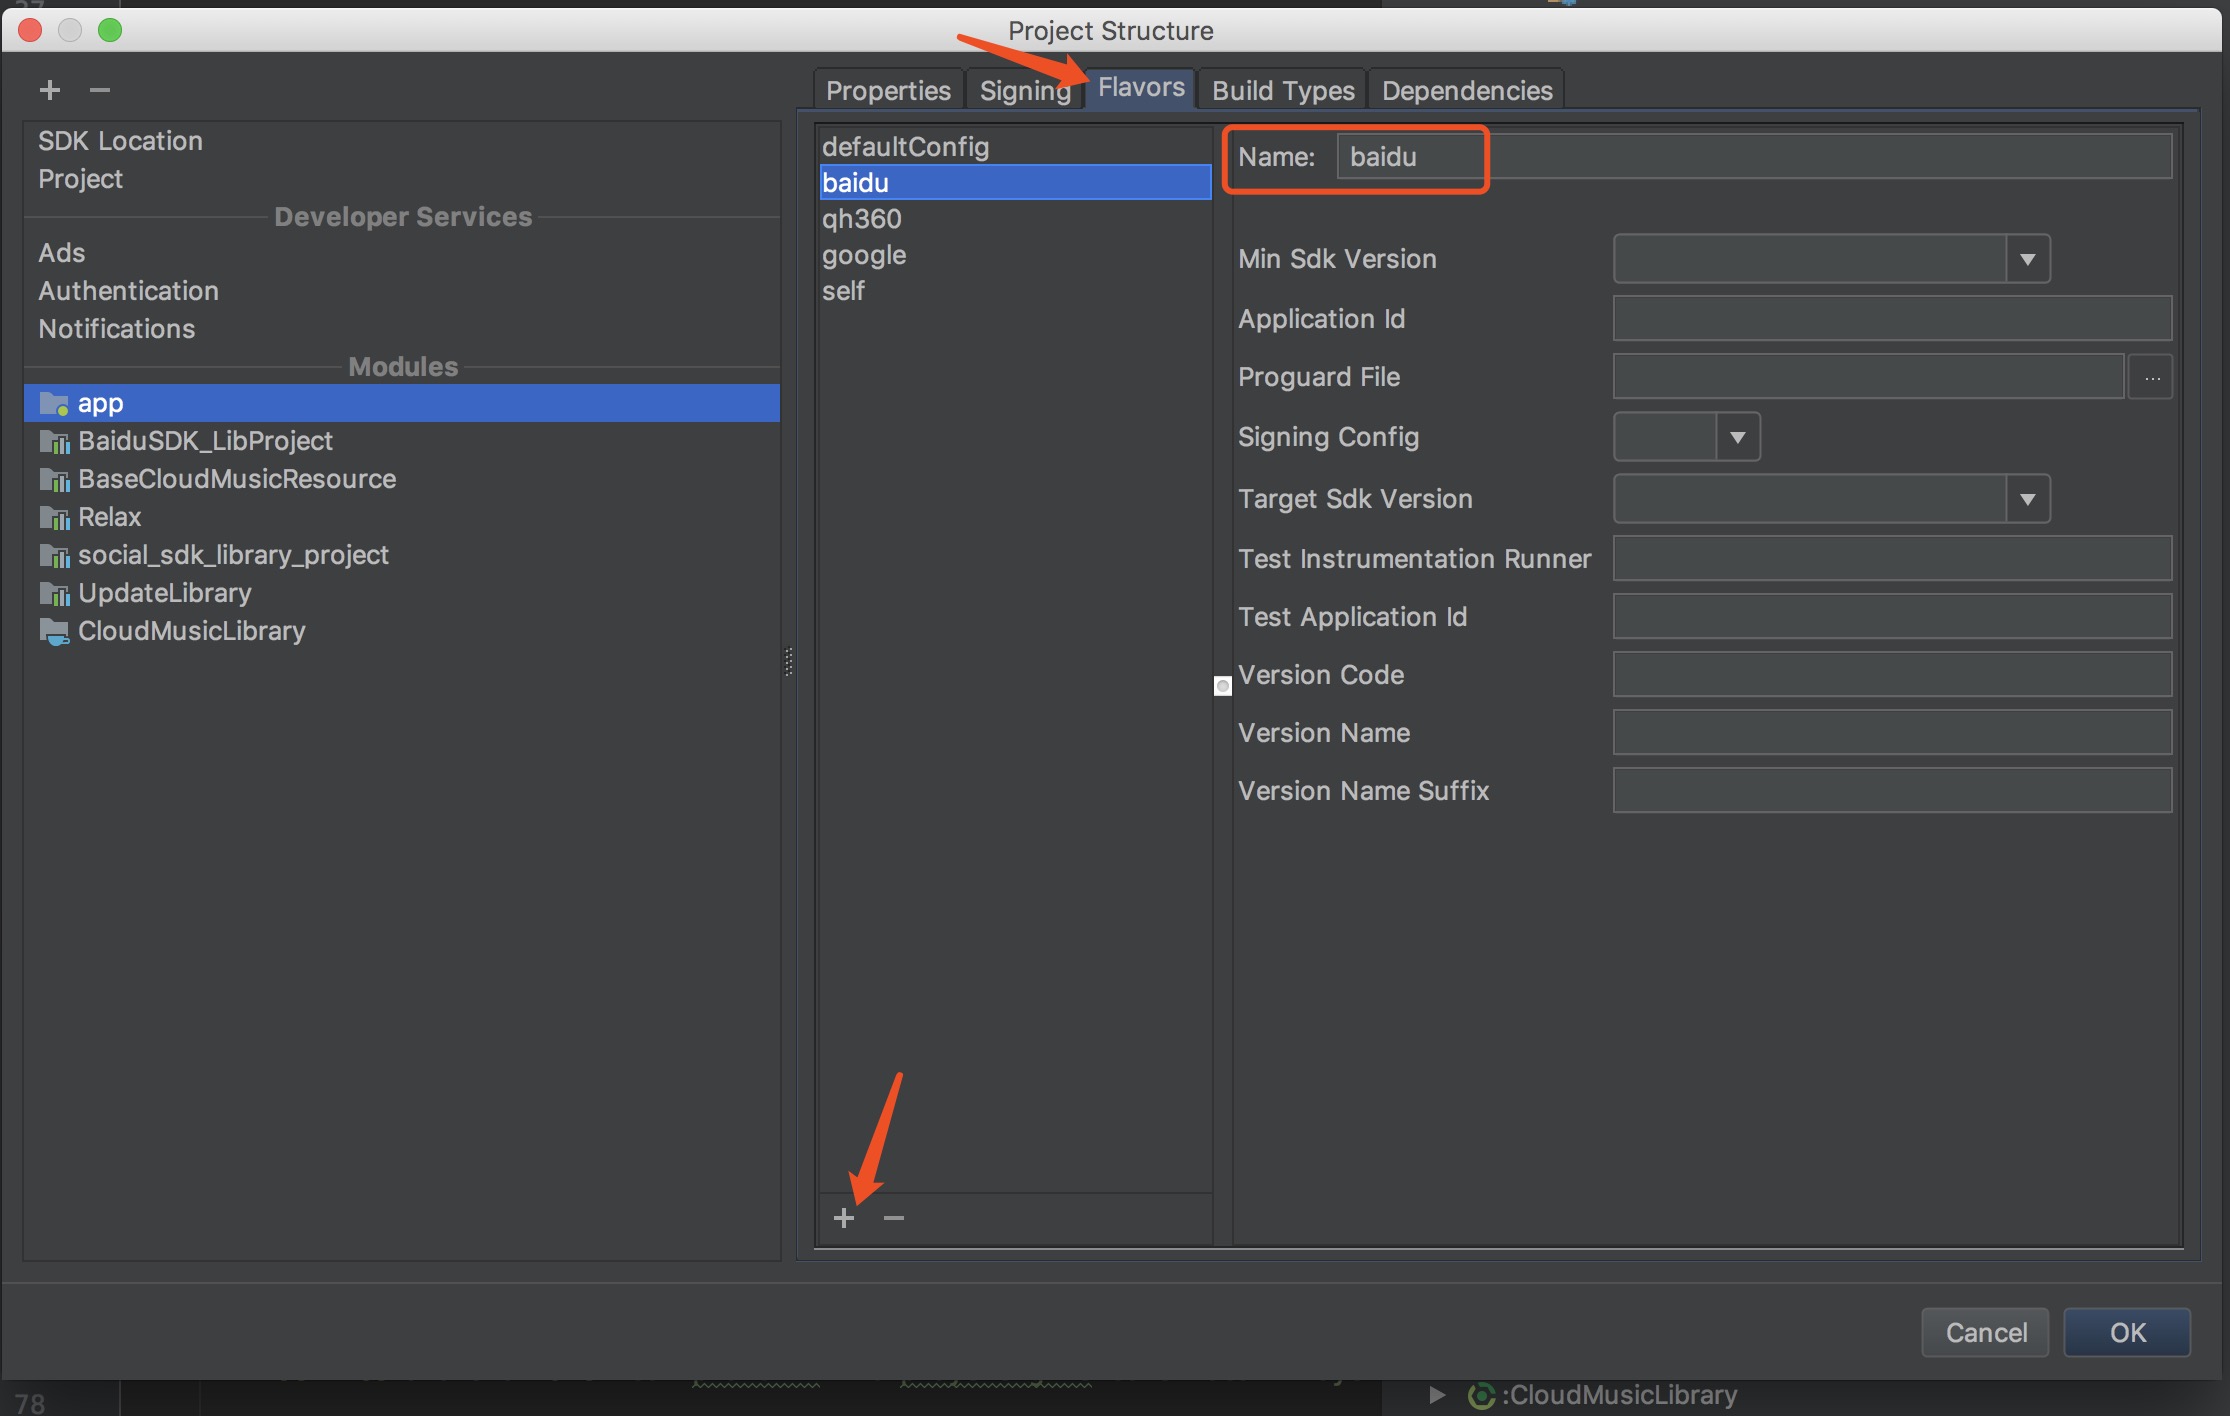
Note: Only Name can be modified here. Do not modify other information without special requirements.
Implementing Packing Operations
Open the Build App interface:
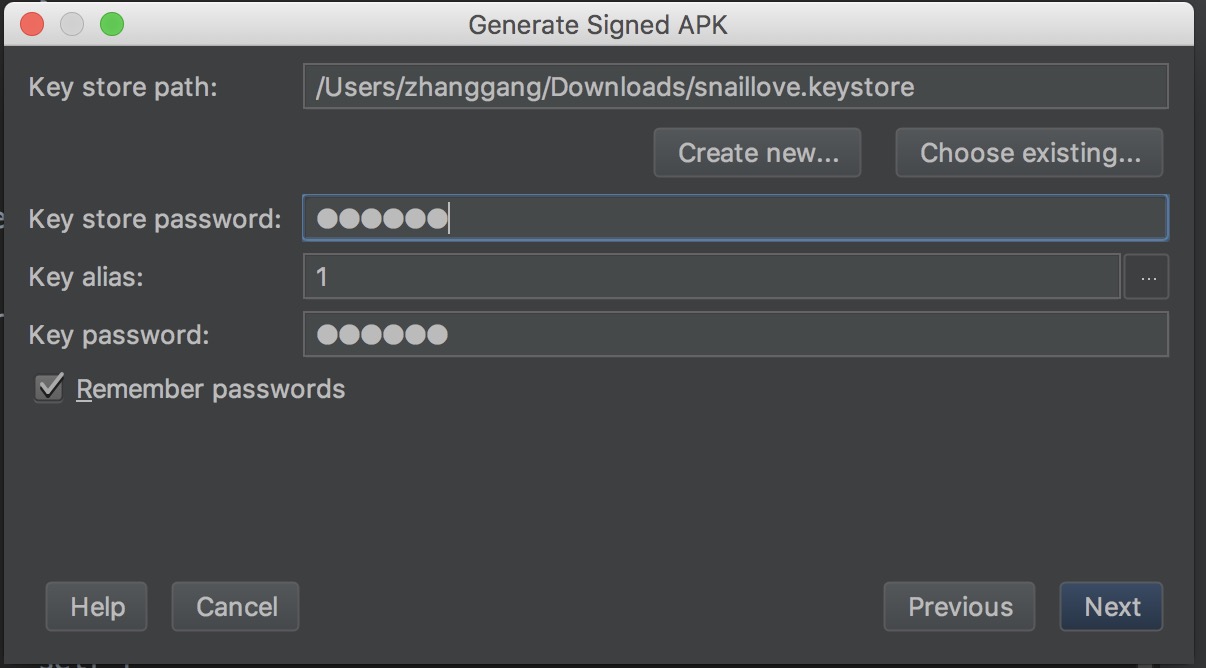
Enter the corresponding information and click Next:
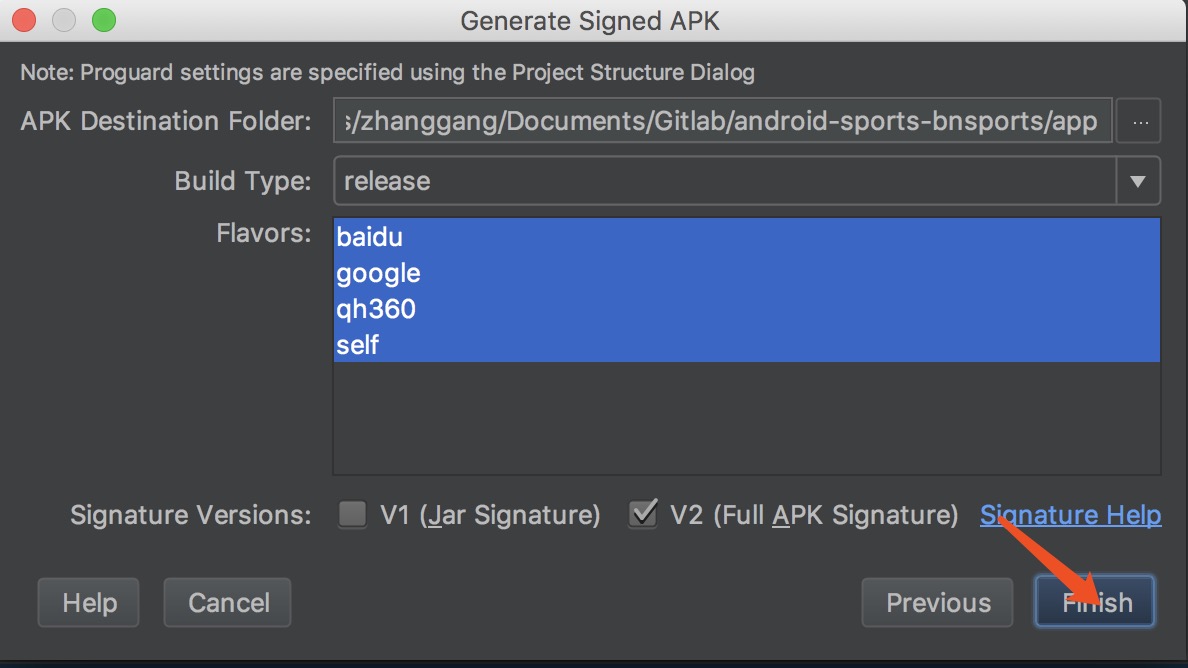
Select the corresponding channel version and click Finish to see the corresponding apk file in the app: directory of the project.
4. Execute packing commands. / gradlew assemble Release
In addition to using Android Studio graphics packaging operations, we can also use the command line for packaging operations, the specific steps are as follows:
Open the Terminal panel in the bottom left corner of the Android Studio window and enter the gradlew assemble Release command.
Configuration signature file
Since the package typed out when using the command is an unsigned file, there are some flaws in this and our one-click package. For this we need to configure the signature file.
First, the keyPassWord and storePassWord of the signature file are configured under gradle. properties in the project directory.
APK_SIGN_KEY_PASSWORD=******
APK_SIGN_STORE_PASSWORD=******
The advantage of doing this is that there is no need to expose the corresponding password.
    //autograph
    signingConfigs {
        release{
            keyAlias '1'
            keyPassword APK_SIGN_KEY_PASSWORD
            storeFile file('../snaillove.keystore')
            storePassword APK_SIGN_STORE_PASSWORD
        }
        debug{
            keyAlias '1'
            keyPassword APK_SIGN_KEY_PASSWORD
            storeFile file('../snaillove.keystore')
            storePassword APK_SIGN_STORE_PASSWORD
        }

    }

    buildTypes {
        release {
            //Enabling obfuscation code
            minifyEnabled false
            //Specify obfuscation rules that need to be compressed to optimize obfuscation by replacing proguard-android.txt with proguard-android.txt
            proguardFiles getDefaultProguardFile('proguard-android.txt'), 'proguard-rules.pro'
            signingConfig signingConfigs.release
        }
    }
Note: Be sure to configure the signingConfigs file in front of buildTypes or an exception will be thrown at compile time that can't find property'debugConfig'on SigningConfig container.
Configure custom packing paths and names
After generating the corresponding APK, if we need to manually modify the corresponding name or path, is there still some distance between the key of the root title? OK, then, here we output the path of APK named com_biniusports_app_bnsports_v1.0.0_20171205_baidu.apk:
    android {
        // Custom APK output configuration
        applicationVariants.all { variant ->
        variant.outputs.all { output ->
            def outputFile = output.outputFile
            if (outputFile != null && outputFile.name.endsWith('.apk')) {
                // The output APK name is com_biniusports_app_bnsports_v1.0.0_20171205_baidu.apk
                def fileName = "com_biniusports_app_bnsports_v${defaultConfig.versionName}_${getNowTime()}_${variant.productFlavors[0].name}.apk"
                outputFileName = fileName
                }
            }
        }
    }

//Get the timestamp
def getNowTime() {
    def date = new Date()
    def now = date.format('yyyyMMdd')
    return now
}
Note: When Android Studio version is larger than 3.0, do not use v ariant.outputs.each to find content and do not use new File (output File. parent, fileName), otherwise the exception Android Gradle 3.0.0-alpha2 plugin, Cannot set the value of read-only property'output File'.
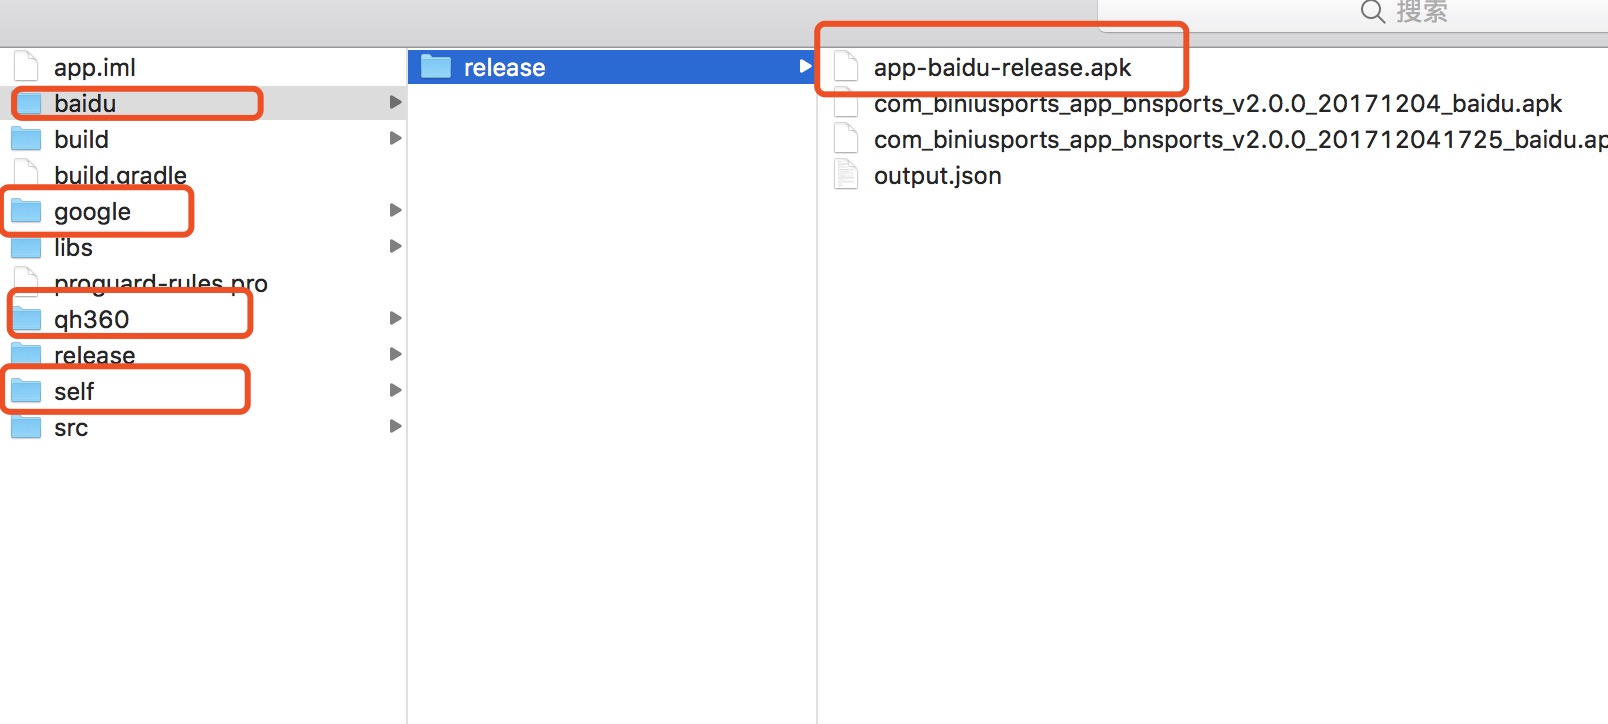
After completing the above configuration, you can happily click on the run button for signature packaging.
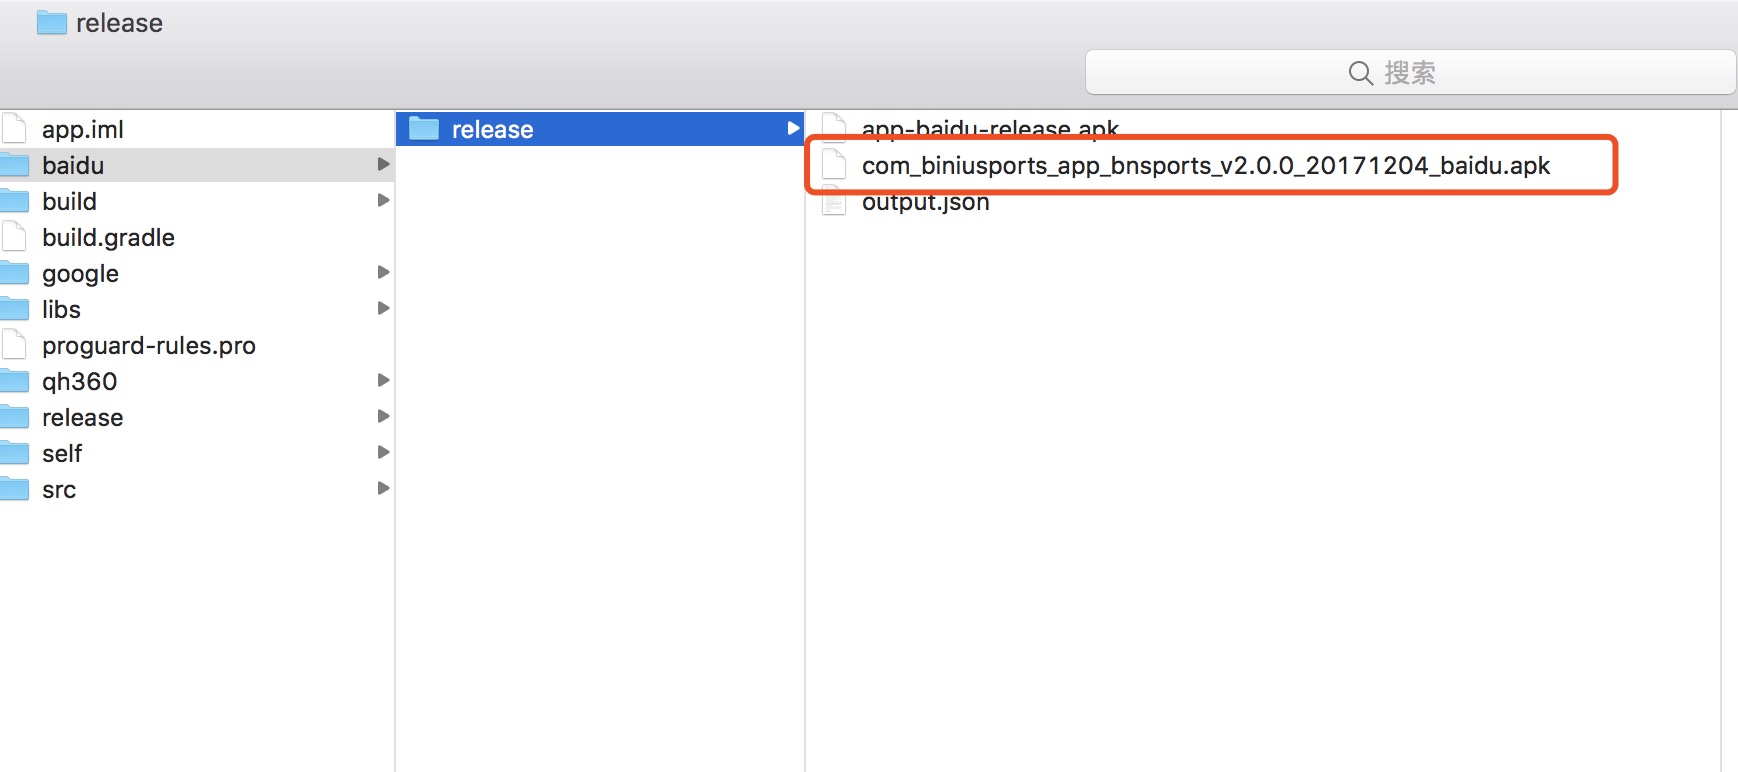
If the path shown in the figure and the corresponding APK name appear, congratulations, the local one-click multi-channel packaging has been included in the pocket.