One is written in front
Recently, the development in the company adopts the development mode of distributed microservices. Different microservices use RPC framework for communication and data call. Usually, when developing an interface, you need to call the interfaces of other micro services to obtain the desired data. Because with the RPC framework, it is very convenient to call the interfaces of other services, just as simple as calling local methods. So I really want to learn the principle of RPC framework and implement an RPC framework myself. In order to record this process, I have this series of articles. Interested friends, remember to click three times
II. Basic principles of RPC framework
The use diagram of the simplest RPC framework is shown in the following figure:
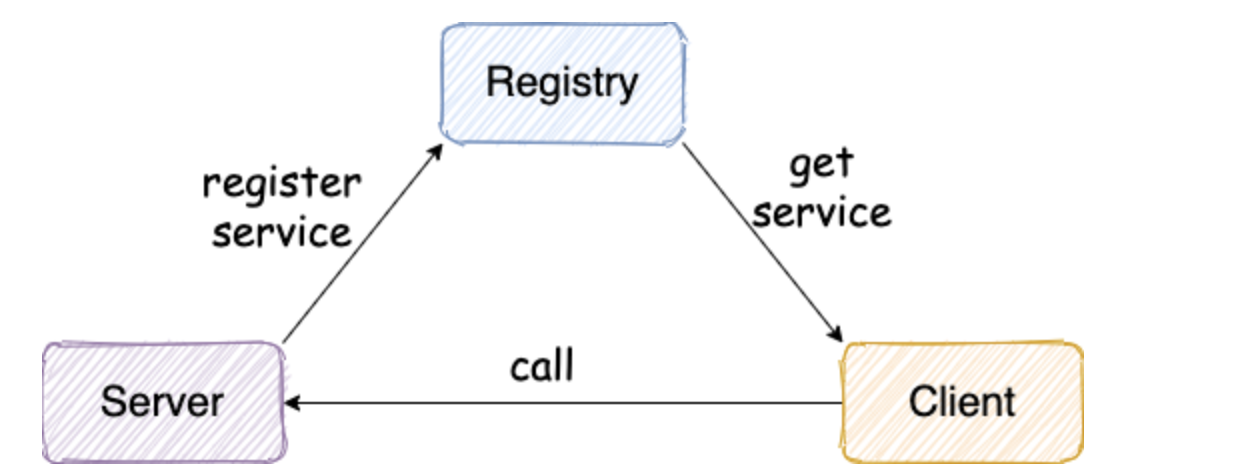
First, the service provider Server registers the service with the registry and registers its own metadata such as IP address, port number and method information in the registry. The service consumer Client obtains the service related information through the registry, and then requests the service provider Server through the network.
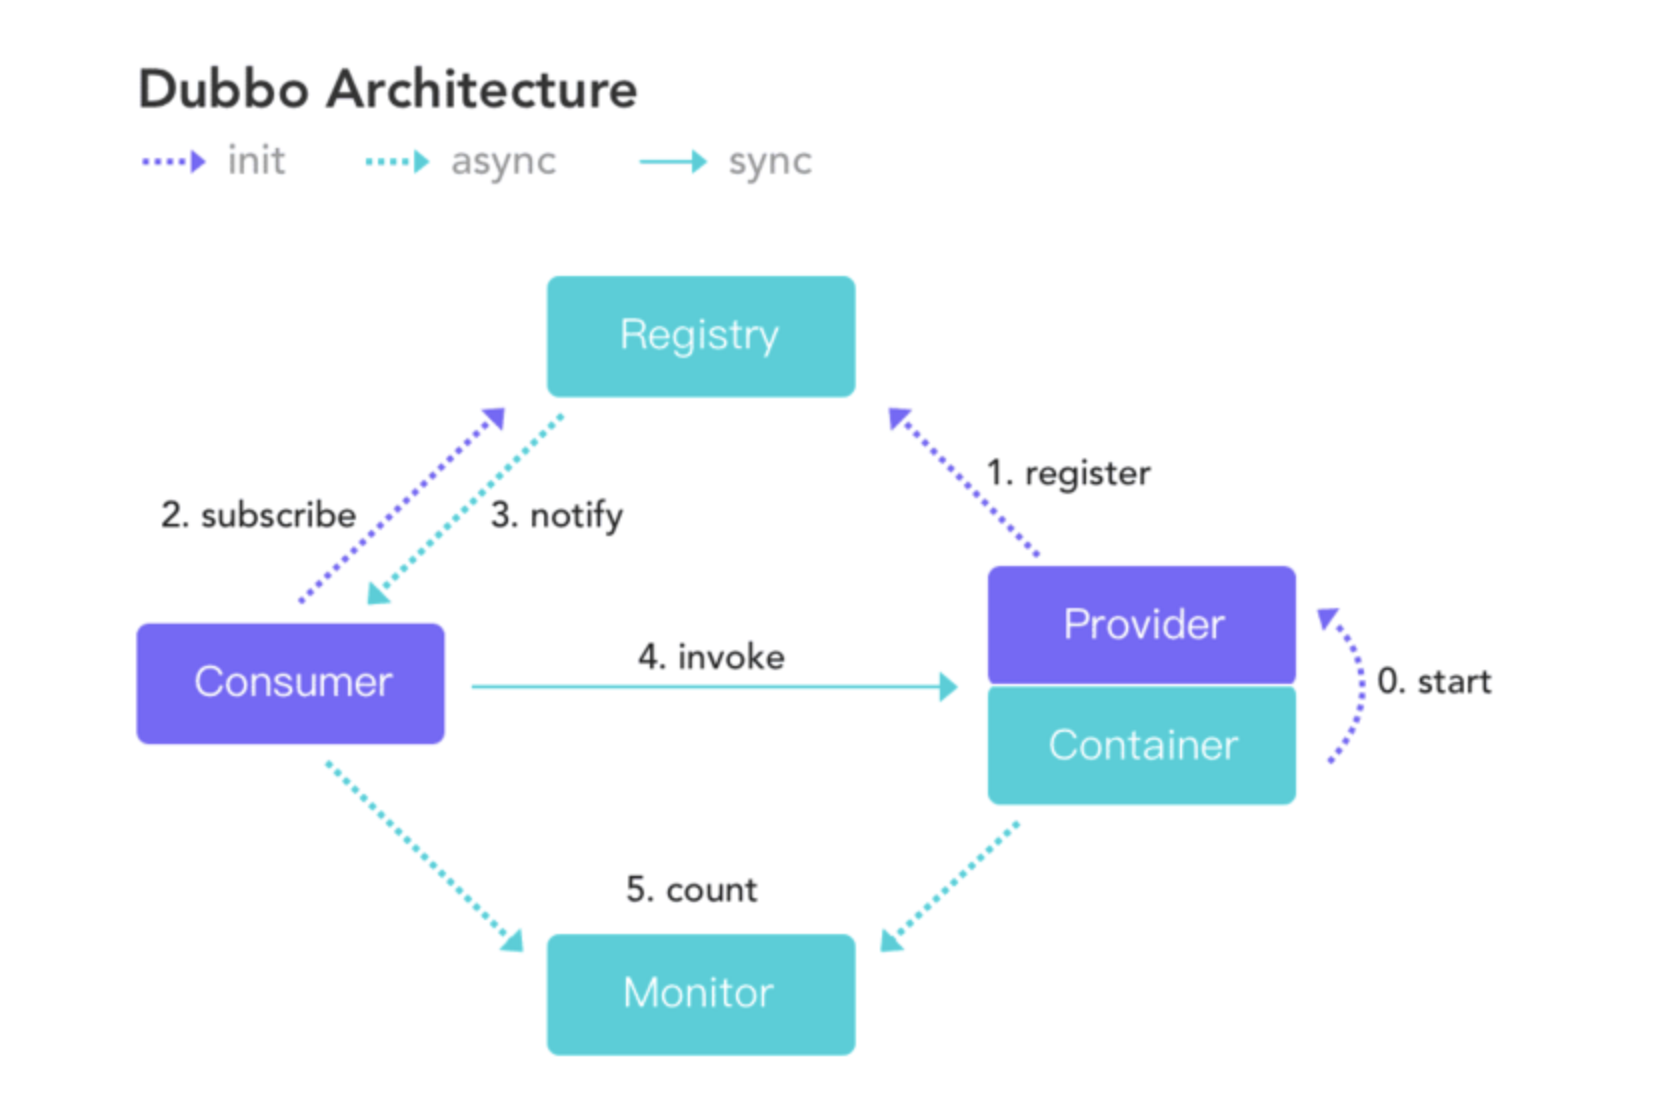
Take another look at the excellent RPC framework in the industry: Dubbo's architecture diagram, which is actually similar to the above schematic diagram:
After understanding the architecture diagram, let's look at what components need to be implemented to design an RPC framework?
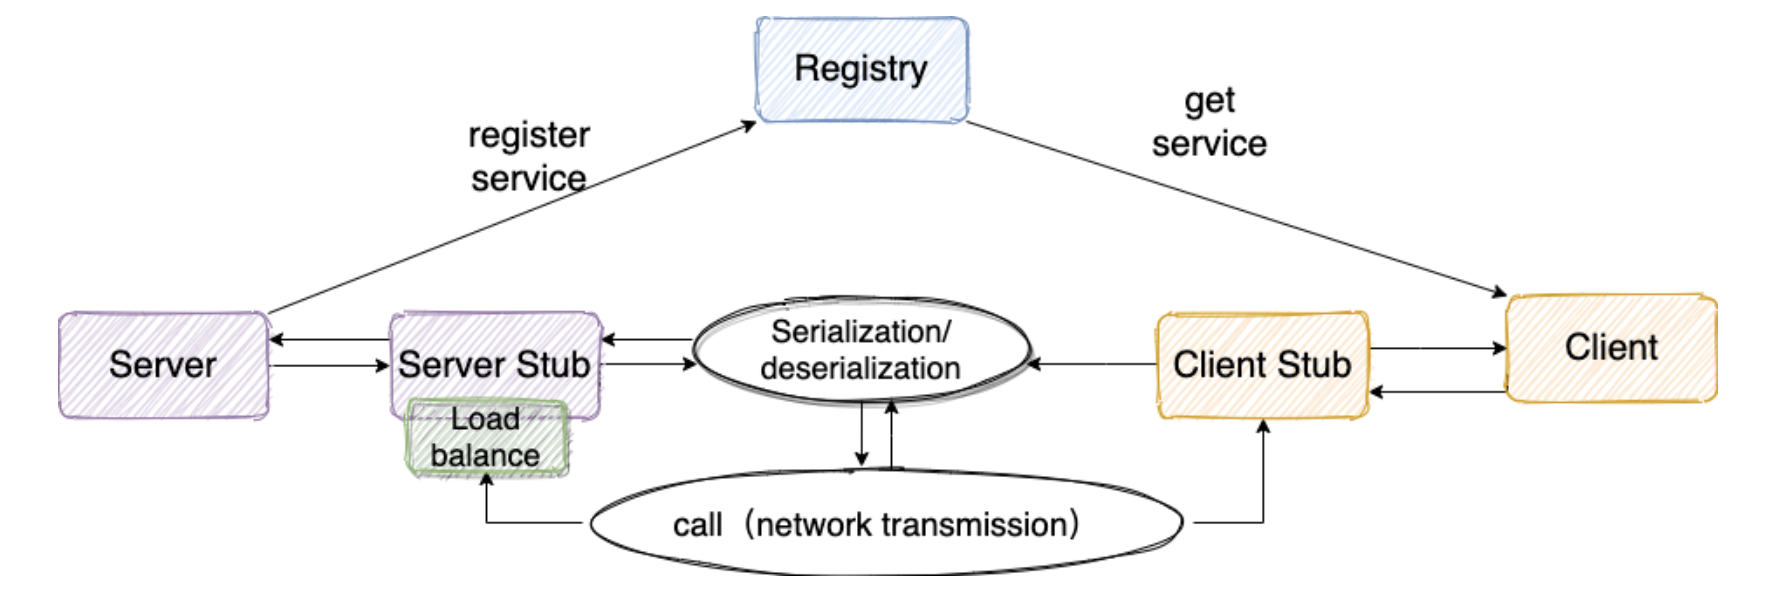
- Registration Center: the first is the registration center. Service providers write their own IP address, port number and other information into the registration center, so that service consumers can find the address to request the service from the registration center, and then send the request to the correct place. Excellent registration centers in the industry include Zookeeper, Nacos, Consul and Eureka.
- Serialization: since the service consumer wants to send a network request to the service provider, it certainly needs to be transmitted through the network. We know that the network transmission is actually a binary stream. When the server consumer sends a request, it must serialize the request body into a binary stream before it can be transmitted to the service provider through the network; Similarly, the service provider also needs to serialize the response results and send them back to the service consumer.
- Network transmission: network transmission is mentioned above. Of course, the technical framework related to network transmission is also required.
- Dynamic proxy: the main purpose of RPC is to make calling remote methods as simple as calling local methods. Using dynamic proxy can mask the details of remote method calls, such as network transmission. That is, when we call remote methods, we will actually transmit network requests through proxy objects. The Client Stub and Server Stub in the above figure are actually proxy objects.
In my opinion, the above four components are necessary to implement the simplest RPC framework. If you want to make the RPC framework better, you should also consider load balancing, fault tolerance, monitoring, etc. if you are interested, you can refer to Dubbo's implementation.
Third, write a Spring Boot Starter
First of all, I hope that the RPC framework I wrote can be used by other projects in the form of Maven dependencies, and Spring Boot projects are very commonly used in our microservice projects. We can observe that there are many Spring Boot stat XXX dependencies in Spring Boot projects. Therefore, I also hope that my RPC framework can be well applied to the Spring Boot project. So I decided to write the RPC framework as a Spring Boot Starter. How to name it? It is concluded by referring to the official website of Spring Boot:
- The official naming format of the starter is spring boot starter - {XXXX}, such as spring boot starter ActiveMQ
- The naming format of the third party is {XXXX} - spring boot starter. For example, mybatis spring boot starter. If we ignore this agreement, will it appear that what we write is not "professional".
So I gave my RPC framework a simple name: zhongger RPC spring boot starter
1. First, create a maven project in IDEA and introduce relevant Maven dependencies:
 	<dependencies>
        <dependency>
            <groupId>org.springframework.boot</groupId>
            <artifactId>spring-boot-configuration-processor</artifactId>
            <version>${spring-boot.version}</version>
        </dependency>
        <dependency>
            <groupId>org.springframework.boot</groupId>
            <artifactId>spring-boot-autoconfigure</artifactId>
            <version>${spring-boot.version}</version>
        </dependency>
    </dependencies>
2. Write the AutoConfiguration Configuration class. Use the @ Configuration annotation to indicate that it is a Configuration class, and use the @ Bean annotation to indicate that the StarterDemoService class is a class that needs to be registered in the Spring container
package com.zhongger.rpc.config;

import com.zhongger.rpc.service.StarterDemoService;
import com.zhongger.rpc.service.StarterDemoServiceImpl;
import org.springframework.context.annotation.Bean;
import org.springframework.context.annotation.Configuration;

/**
 * @author zhongmingyi
 * @date 2021/12/7 6:40 afternoon
 */
@Configuration
public class AutoConfiguration {
    @Bean
    public StarterDemoService getStarterDemoService() {
        return new StarterDemoServiceImpl();
    }
}
3. Create a new META-INF in the resource directory and a new spring.factories file in the META-INF directory. The classes configured in this file will be loaded when the Spring Boot project is started.
org.springframework.boot.autoconfigure.EnableAutoConfiguration=com.zhongger.rpc.config.AutoConfiguration
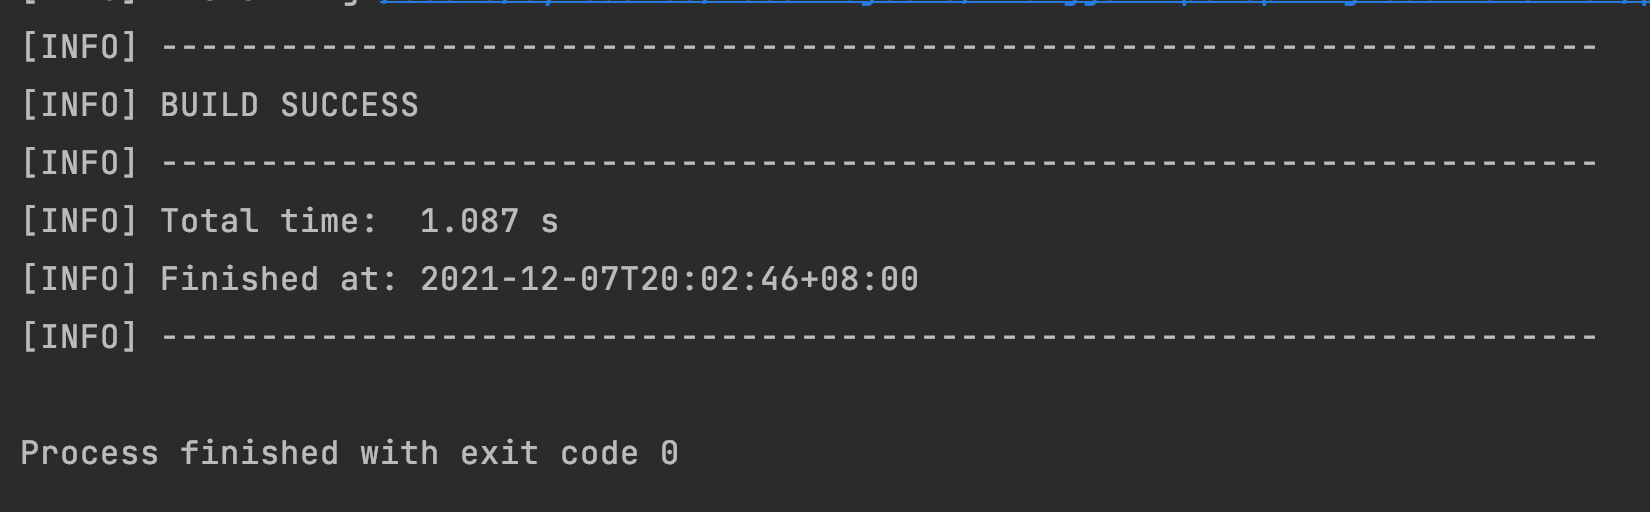
4.mvn install is packaged in the local warehouse. It is very simple under the IDEA. Just click this button.
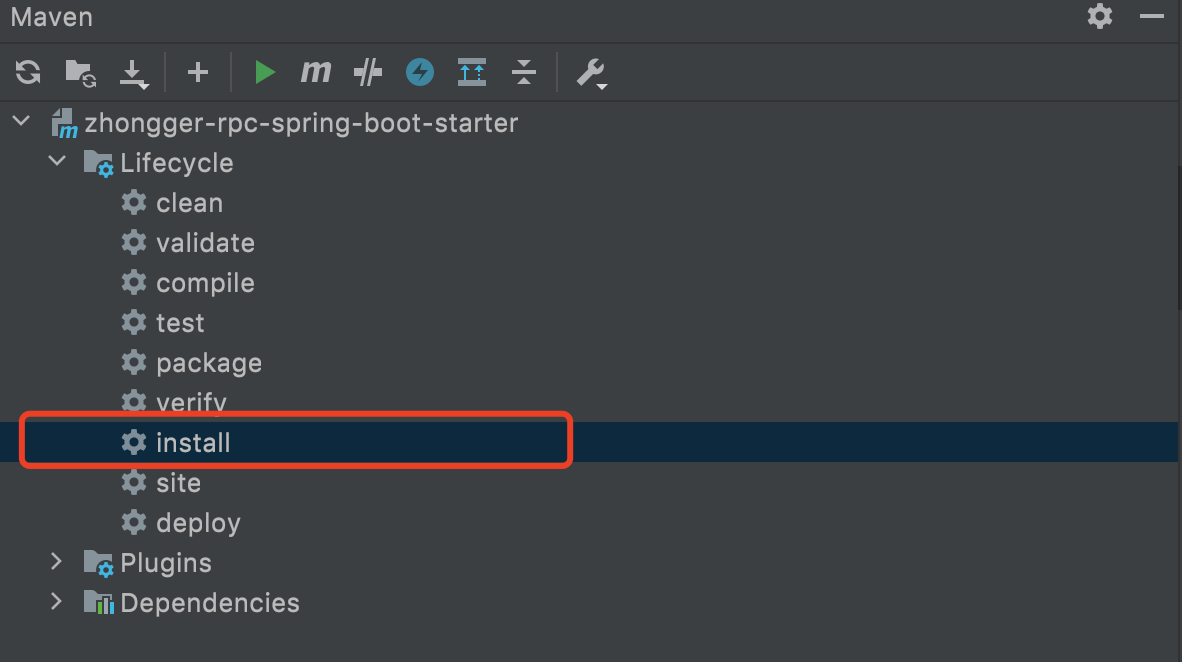
If the package is successful, the console displays:
5. Reference zhongger RPC spring boot starter in other projects. The steps are also very simple. You can directly introduce the following dependencies in pom.xml
 		<dependency>
            <groupId>com.zhongger</groupId>
            <artifactId>zhongger-rpc-spring-boot-starter</artifactId>
            <version>1.0-SNAPSHOT</version>
        </dependency>
Then write a test and directly inject @ Autowired annotation into the StarterDemoService in zhongger RPC spring boot starter to call its methods
import com.zhongger.rpc.service.StarterDemoService;
import org.springframework.beans.factory.annotation.Autowired;
import org.springframework.web.bind.annotation.GetMapping;
import org.springframework.web.bind.annotation.RestController;

/**
 * @author zhongmingyi
 * @date 2021/12/7 7:52 afternoon
 */
@RestController
public class StarterDemoController {
    @Autowired
    private StarterDemoService starterDemoService;

    @GetMapping("/test")
    public String test() {
        starterDemoService.hello();
        return "success";
    }
}
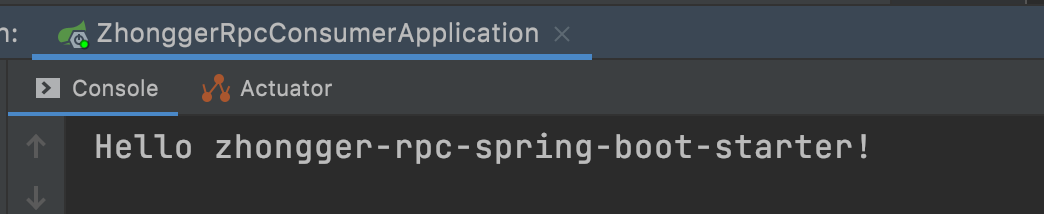
Enter localhost:8080/test and find that the console prints out the contents output in the hello method of StarterDemoService in zhongger RPC spring boot starter!
To sum up, this Spring Boot Starter has been written! Why can a Spring Boot Starter be generated like this? Let's learn about the principle of Spring Boot automatic configuration!
IV. principle of Spring Boot automatic configuration
First of all, we know that each Spring Boot project has a startup class with an annotation @ SpringBootApplication. Around this annotation, let's uncover the principle of Spring Boot automatic configuration!
package com.zhongger.rpc.consumer;

import org.springframework.boot.SpringApplication;
import org.springframework.boot.autoconfigure.SpringBootApplication;

@SpringBootApplication
public class ZhonggerRpcConsumerApplication {

    public static void main(String[] args) {
        SpringApplication.run(ZhonggerRpcConsumerApplication.class, args);
    }

}
@SpringBootApplication consists of the following three core annotations:
- @SpringBootConfiguration (actually the encapsulation of @ Configuration)
- @EnableAutoConfiguration
- @ComponentScan
@SpringBootConfiguration
@EnableAutoConfiguration
@ComponentScan(
    excludeFilters = {@Filter(
    type = FilterType.CUSTOM,
    classes = {TypeExcludeFilter.class}
), @Filter(
    type = FilterType.CUSTOM,
    classes = {AutoConfigurationExcludeFilter.class}
)}
)
public @interface SpringBootApplication {

}
According to the introduction of Spring Boot official website
- @Configuration: run to register additional bean s in the Spring container or import other configuration classes
- @Enable autoconfiguration: allows you to enable the autoconfiguration mechanism of SpringBoot
- @ComponentScan: scan beans annotated by @ Component (@Service,@Controller). The annotation will scan all classes under the package where the startup class is located by default. You can customize not to scan some beans.
@EnableAutoConfiguration is an important note for realizing automatic assembly:
@Target({ElementType.TYPE})
@Retention(RetentionPolicy.RUNTIME)
@Documented
@Inherited
@AutoConfigurationPackage
@Import({AutoConfigurationImportSelector.class})
public @interface EnableAutoConfiguration {
    String ENABLED_OVERRIDE_PROPERTY = "spring.boot.enableautoconfiguration";

    Class<?>[] exclude() default {};

    String[] excludeName() default {};
}
- @AutoConfigurationPackage: register all components under the main package into the container
- @Import({AutoConfigurationImportSelector.class}): used to load auto assembly class: xxxAutoConfiguration
The AutoConfigurationImportSelector class is responsible for loading the auto assembly class
Through reading the source code, it is found that the AutoConfigurationImportSelector class implements the ImportSelector interface, that is, the selectImports method in this interface. This method is mainly used to obtain the fully qualified class names of all qualified classes, which need to be loaded into the IoC container. The getAutoConfigurationEntry method in the selectImports method has three steps:
- 1 judge whether the automatic assembly switch is on. Default spring boot. Enableautoconfiguration = true, available in application Properties or application Set in YML
- 2. It is used to obtain the exclude and excludeName in the EnableAutoConfiguration annotation
- 3 get all configuration classes that need to be automatically assembled and read meta-inf / spring Factories, all spring under Starter All configuration classes in the factories file will be scanned, but not necessarily loaded into the container. This class will be loaded into the container only after various @ ConditionalOnXXX filters.
Summary
Well, this section will be written here first. In the next article, I will officially write this RPC framework. Later, I will put the source code on Github. You can pay more attention!