Teach you to write background management with VUE(X) (1)
The following code is for reference only. It is recommended to type more
1. Create a new file with vue create xxx command (provided that Vue has been installed on your computer)
2. We need to use element UI to write this background. If you don't understand it, you must go to the official documents. The content of this section is to form a basic framework to realize the page Jump of sub route
Writing this background will certainly involve a lot of routing,
Files stored in each folder
src/router/index: store and import routes
src/views / create a new route for each page
plugins/ element is automatically generated after downloading
1. Landing page
1.1 landing page (page, function later)
Index. In router file JS is where the routing file is stored
  {
    path:'/login',
    component:login
  }
]
1.2
Create a new login route login vue
  <div>land</div>
</template>
1.3
In router index JS
import login from '@/views/login.vue'
Start the project after import
1.4 after the landing page is completed, we will go to the home page
In router index Introduction of home page routing in JS
    path:'/',
    component:index
  }
1.4.1 then, like the login route, create a new index in views Vue, and then in router index JS
ps: what if we visit a page that doesn't exist? This requires creating a new 404 page. When we visit a route that does not exist, we jump to 404
   path:'/*',
   component:()=>import('@/views/error/404.vue')
Note: / * means to match all routes. You can't put this on top of other routes. Once you put this on top, you won't be able to match other routes. The priority in front is higher
2. Layout
Build the structure we want in the home page and create a new lauout (layout) folder in src
We should be clear about the page layout we want, whether it is the overall top, bottom, left and right layout or others, and then find the layout in the element UI
Container layout container:
El container: outer container. When the child element contains or, all child elements will be arranged vertically up and down, otherwise they will be arranged horizontally left and right. (refer to the element UI document for details)
El header: top bar container.
El aside: sidebar container.
El Main: main area container.
El footer: bottom column container
2.1 then create a new index in the new Layout Vue, and then use local registration in the home page routing
import Layout from '@/Layout'   //index is special and can be omitted here
components:{
    Layout
  }
Remember to write<Layout></Layout>label
2.2 next, we just need to go to / layout / index The layout is written in Vue (download the element component in advance, and the latest command: vue add element. After downloading, delete the things in the automatically generated app.vue)
<!-- Outer container -->
  <el-container>
    <!-- Sidebar container -->
    <el-aside> left</el-aside>
    <!-- Outer container -->
  <el-container>
    <!-- Top rail container -->
    <el-header>head</el-header>
    <!-- Main area container -->
    <el-main></el-main>
  </el-container>
  </el-container>
2.3 in layout / index In Vue /, find the ER main tag. Because the contents in it will be switched in the future, you should add the keep alive tag to it
<keep-alive></keep-alive>
keep-alive usage:
activated:   keep-alive Called when the component is activated
deactivated: keep-alive Called when a component is deactivated
<keep-alive> When wrapping dynamic components,Inactive component instances are cached,Instead of destroying them
<keep-alive> Is an abstract component:It doesn't render one by itself DOM element,Nor does it appear in the parent component chain
 When the component is<keep-alive>Internal switch,its activated and deactivated These two life cycle hook functions will be executed accordingly
<el-main>
       <keep-alive>
        <!-- this router-view The content in the will be switched in the future, so add it to him keep-alive -->
        <router-view :key="$router.fullPath"></router-view>
      </keep-alive>
</el-main>

2.5 after doing this, there will be many detail errors, such as inaccurate page height. At this time, we should go to / APP Vue joins sass
<style>
body{
  margin:0;
}
</style>
Add a class name to El container
<el-container class="layout">
Set his height
<style>
.layout{
  height:100vh;
}
</style>
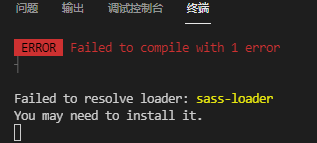
At this time, the terminal may report an error, saying that it lacks modules, and we will download what it wants us to download (everyone writes different codes, and we will download what modules are missing)

Download sass module and sass loader


3. Menu bar
3.1 left menu bar
We also create a new menu in the Layout file Vue, this is the content of the menu bar. Where is the menu bar on the page? It should be in the left column, so we need to introduce the route of the menu bar (Menu.vue) to Layout / index In the El side tag in Vue
 <!-- Sidebar container -->
    <el-aside>
      <Menu></Menu>
      left</el-aside>
      <script>
   		 import Menu from "./Menu.vue"
		export default {
 		 components:{
    		 Menu
 		 }
		}
		 </script>
index.vue (home page) and menu Vue (menu bar)

Page effect

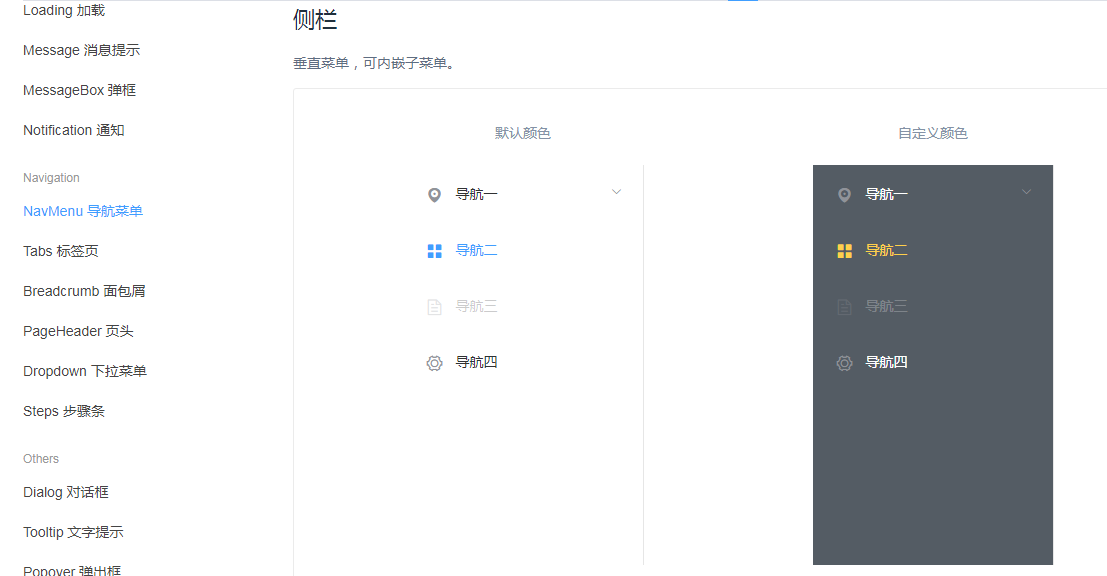
Then, according to the document of element UI, click menu Write menu bar in Vue (handwritten and reproducible)

<template>
  <el-menu>
    <!-- Secondary menu -->
    <el-submenu>
      <template v-slot:title>
        <!-- Related Icon -->
        <i class="el-icon-location"></i>
        <span>Navigation one</span>
      </template>
      <el-menu-item>
        <i class="el-icon-menu"></i>
        <template v-slot:title>content</template>
      </el-menu-item>
    </el-submenu>
  </el-menu>
</template>
effect

ps: if the page reports this error, don't worry about it first, or add index = "1" to the secondary menu El submenu first
, El menu item index = "1-1", no error will be reported when refreshing the page

Then change the background color and font color, eliminate some spaces, and copy the secondary menu. The final style is as follows. The menu name can be changed

In menu The codes in Vue are as follows:
<template>
  <el-menu
  class="layout-menu"
  text-color="rgba(255,255,255,0.7)"
  active-text-color="#fff"
  background-color="#191a23">
    <!-- Secondary menu copy this secondary menu to realize the style shown in the figure above-->
    <el-submenu index="1">
      <template v-slot:title>
        <!-- Related Icon -->
        <i class="el-icon-location"></i>
        <span>Navigation one</span>
      </template>
      <el-menu-item index="1-1">
        <i class="el-icon-menu"></i>
        <template v-slot:title>content</template>
      </el-menu-item>
    </el-submenu>
  </el-menu>
</template>
<script>
export default {};
</script>

<style>
/* Remove the right border of the menu */
.layout-menu{
  border-right:none!important;
}
.layout-menu .el-menu-item.is-active{
  background:#2d8cf0 !important;
}
</style>
In index Slightly modified in Vue
<!-- Outer container -->
  <el-container class="layout">
    <!-- Sidebar container -->
    <el-aside class="aside">
    ----------------------------------------------------
 <style>
	.layout{
 	 height:100vh;
	}
	.aside{
 	 background:#191a23;
	}
</style>
The menu can be rendered by routing in the later stage. It doesn't matter here
3.2 menu routing
When we click the console, monitoring page and workbench of the menu, different pages can be presented, but they are under the same route, so that they can be rendered in the same parent route. Then, we don't need the index home page, and we can directly use Layout as our home page. The effect is the same. We can use route / index JS, change the index to Layout, and add three sub routes to the home page to realize the jump of routes by clicking on the monitoring page
import Layout from '@/Layout'               //Introduction home page
 {
    path:'/dashboard',
    component:Layout,      //Change the previous index to Layout
    children:[
      // console,monitor,workplace
      {
        path:'/dashboard/console' //Console routing
      },
      {
        path:'/dashboard/monitor' //Monitor page routing
      },
      {
        path:'/dashboard/workplace'   // Workbench routing
      }
    ]
  },
Do you remember that the page just now reported an error because of index? At this time, we can change index="1" and index="1-1" to the corresponding route, such as
//Start the router first
<el-menu  router>

<el-submenu index="/dashboard">
//There are also three sub routes with corresponding names
<el-menu-item index="/dashboard/console">
<el-menu-item index="/dashboard/monitor">
 <el-menu-item index="/dashboard/workplace">
At this time, we click different menus and the route will be changed


ps: I modified the names of some menus, copied and pasted the < El menu item > label three times, and changed the navigation to Dashboard
Then create a new Dashboard folder and three new routes in views

The most basic framework is generated in each route, and so are the other two
<template>
  <div>Console</div>    		//Monitoring page and workbench
</template>
<script>
export default {
}
</script>
<style>
</style>
Because these three are sub routes of / Dashboard, they should be introduced under Dashboard with children
{
    path:'/dashboard',
    component:Layout,
    children:[
      // console, monitor and workplace
      {
        path:'/dashboard/console' ,//Console routing
        component:()=>import('@/views/Dashboard/Console')
      },
      {
        path:'/dashboard/monitor' ,//Monitor page routing
        component:()=>import('@/views/Dashboard/Monitor')
      },
      {
        path:'/dashboard/workplace' ,  // Workbench routing
        component:()=>import('@/views/Dashboard/Workplace')
      }
    ]
  }
3.4 menu bar jump (key)
Focus of sidebar jump!!! a key!!!!
To add in the El menu tab
:default-active="$route.fullPath
After that, let's look at the page. When you click the console, the content of the page is the console, and the routing of the address bar is also / dashboard/console. The other two are the same

4. The above is the sidebar jump and basic style of background management. The following is all the codes (remember to download the module yourself)
4.1/Layout/index.vue
<template>
                  <!-- / layout -->
  <!-- Outer container -->
  <el-container class="layout">
    <!-- Sidebar container -->
    <el-aside class="aside" width="256px">
      <Menu></Menu>
      </el-aside>
    <!-- Outer container -->
  <el-container>
    <!-- Top rail container -->
    <el-header>head
    </el-header>
    <!-- Main area container -->
    <el-main>
       <keep-alive>
        <!-- this router-view The content in the will be switched in the future, so add it to him keep-alive -->
        <router-view :key="$router.fullPath"></router-view>
      </keep-alive>
    </el-main>
  </el-container>
  </el-container>
</template>
<script>
import Menu from "./Menu"
export default {
  components:{
     Menu
  }
}
</script>
<style>
.layout{
  height:100vh;
}
.aside{
  background:#191a23;
}
</style>
4.2/Layout/Menu.vue
<template>
<!-- Turn on Routing router pattern -->
  <el-menu
  :default-active="$route.fullPath"
  router
  class="layout-menu"
  text-color="rgba(255,255,255,0.7)"
  active-text-color="#fff"
  background-color="#191a23">
    <!-- Secondary menu -->
    <el-submenu index="/dashboard">
      <template v-slot:title>
        <!-- Related Icon -->
        <i class="el-icon-s-platform"></i>
        <span>Dashboard</span>
      </template>
      <el-menu-item index="/dashboard/console">
        <!-- <i class="el-icon-menu"></i> -->
        <template v-slot:title>Console</template>
      </el-menu-item>
       <el-menu-item index="/dashboard/monitor">
        <!-- <i class="el-icon-menu"></i> -->
        <template v-slot:title>Monitoring page</template>
      </el-menu-item>
       <el-menu-item index="/dashboard/workplace">
        <!-- <i class="el-icon-menu"></i> -->
        <template v-slot:title>workbench</template>
      </el-menu-item>
    </el-submenu>
     <el-submenu index="2">
      <template v-slot:title>
        <!-- Related Icon -->
        <i class="el-icon-location"></i>
        <span>Navigation II</span>
      </template>
      <el-menu-item index="2-1">
        <i class="el-icon-menu"></i>
        <template v-slot:title>content</template>
      </el-menu-item>
    </el-submenu>
     <el-submenu index="3">
      <template v-slot:title>
        <!-- Related Icon -->
        <i class="el-icon-location"></i>
        <span>Navigation III</span>
      </template>
      <el-menu-item index="3-1">
        <i class="el-icon-menu"></i>
        <template v-slot:title>content</template>
      </el-menu-item>
    </el-submenu>
     <el-submenu index="4">
      <template v-slot:title>
        <!-- Related Icon -->
        <i class="el-icon-location"></i>
        <span>Navigation IV</span>
      </template>
      <el-menu-item index="4-1">
        <i class="el-icon-menu"></i>
        <template v-slot:title>content</template>
      </el-menu-item>
    </el-submenu>
     <el-submenu index="5">
      <template v-slot:title>
        <!-- Related Icon -->
        <i class="el-icon-location"></i>
        <span>Navigation V</span>
      </template>
      <el-menu-item index="5-1">
        <i class="el-icon-menu"></i>
        <template v-slot:title>content</template>
      </el-menu-item>
    </el-submenu>
  </el-menu>
</template>

<script>
export default {};
</script>

<style>
/* Remove the right border of the menu */
.layout-menu{
  border-right:none!important;
}
.layout-menu .el-menu-item.is-active{
  background:#2d8cf0 !important;
}
</style>
4.3 /router/index.js
import Vue from 'vue'
import VueRouter from 'vue-router'
import login from '@/views/login.vue'
// import index from '@/views/index.vue'
// home page
import Layout from '@/Layout'
// import { component } from 'vue/types/umd'
Vue.use(VueRouter)
const routes = [
  {
    path:'/login',
    component:login
  },
  {
    path:'/dashboard',
    component:Layout,
    children:[
      // console,monitor,workplace
      {
        path:'/dashboard/console' ,//Console routing
        component:()=>import('@/views/Dashboard/Console')
      },
      {
        path:'/dashboard/monitor' ,//Monitor page routing
        component:()=>import('@/views/Dashboard/Monitor')
      },
      {
        path:'/dashboard/workplace' ,  // Workbench routing
        component:()=>import('@/views/Dashboard/Workplace')
      }
    ]
  },
  {
    path:'/*',
    component:()=>import('@/views/error/404.vue')
  }
]
const router = new VueRouter({
  routes
})
export default router
4.4 /views/Dashboard/Console.vue
<template>
  <div>Console</div>
</template>
<script>
export default {
}
</script>
<style>
</style>
The other two routes are written in the same way as this. The routes on the landing page and home page have been written at the beginning. The above is the jump of the route in the side menu bar