
This article is a serial of Jiang Zhibi, the author of the rookie nest. "Develop a Live APP Series from 0" to talk about the most popular live APP, how to complete the realization of a commercial project like "Tencent Live Broadcasting"
Tencent Cloud Communication and SDK Integration
[Developing a Live APP from 0] 11 IM Logon Implementation
So many basic knowledge points and various encapsulations have not been formally mentioned before. Today, I will explain Tencent Cloud IM login to you. Before that, the author first explained how to view the official documents of Tencent Cloud. If you don't have a certain understanding of the documents, it would be very difficult to read the code directly, and I don't know why, because the author also tried to read the code directly, forced to see a class or method do not know what it is, and then went to check the articles, but the knowledge point is trivial, or decided to finish. Read the whole document and then code it. Here is only for friends who are not very good at technology (such as the author and me), God passes by, do not spray.
Cloud communication
First entry Tencent Cloud Official Website Open Cloud Communications, the first time to enter the need to register the account, not registered please register the account first.
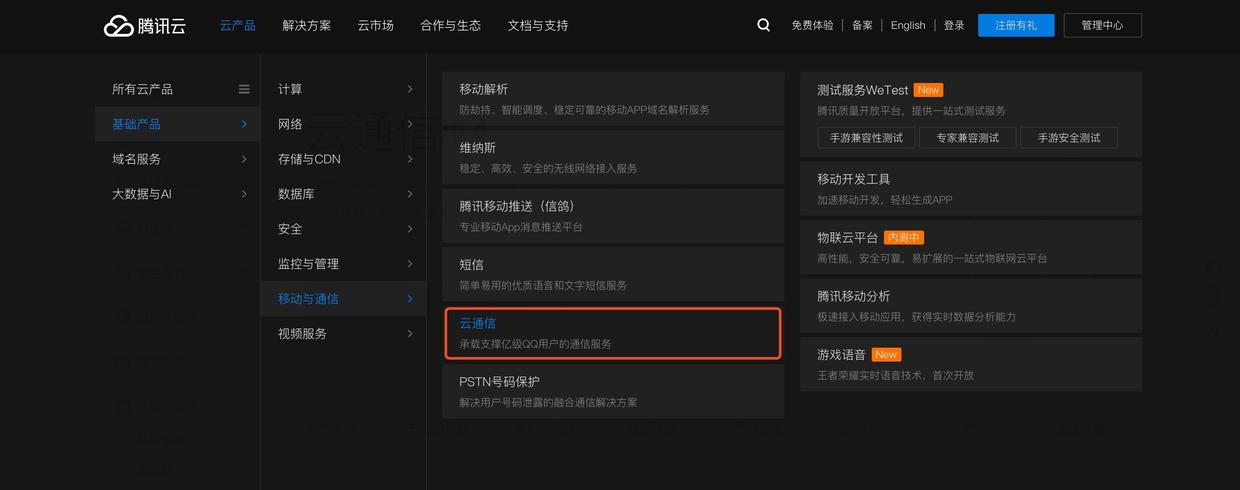
Clicking on Cloud Communications will lead to the following interface.
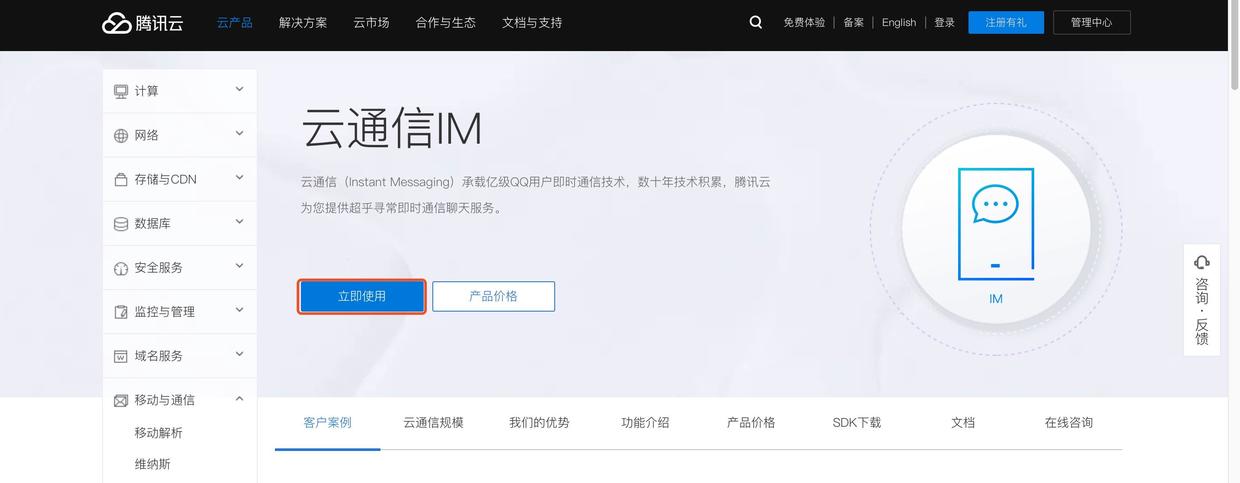
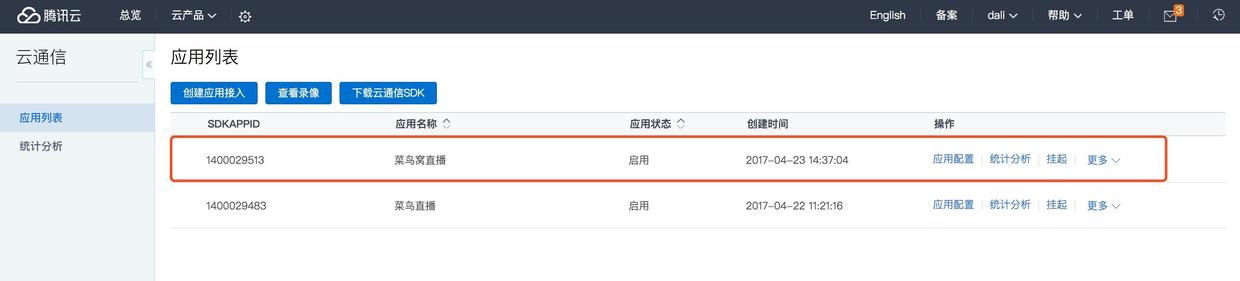
Click on immediate use, registered account friends will enter the application list, the first entry here is no application, the following author briefly describes how to create the application.
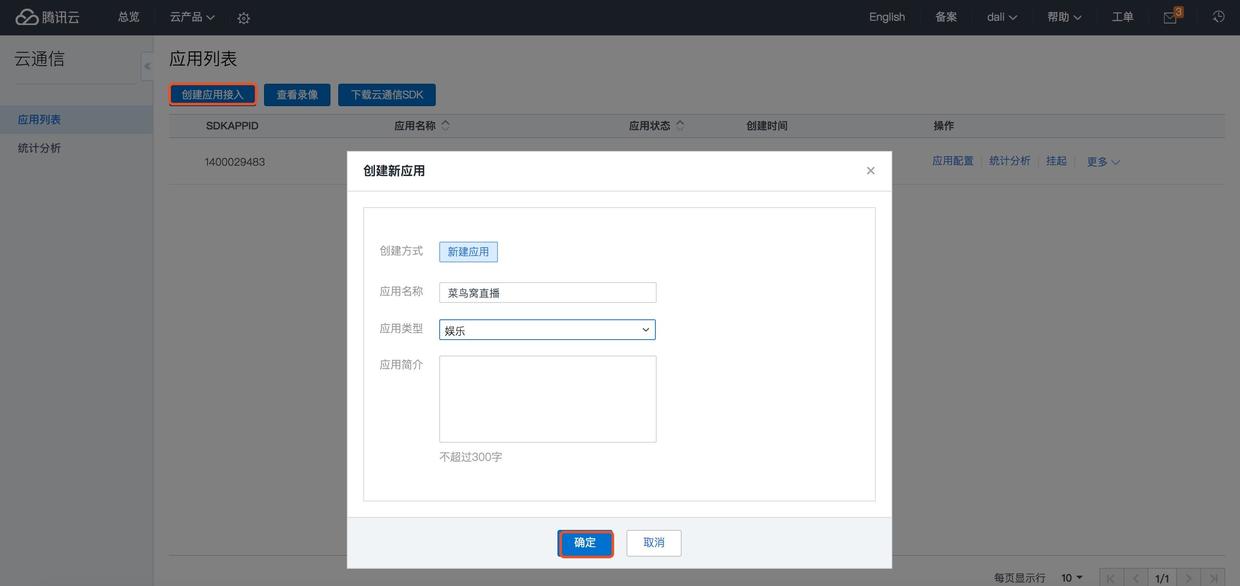
Click on the top left corner to create application access and pop up to create application list. Name the application according to your needs and click OK to create the application.
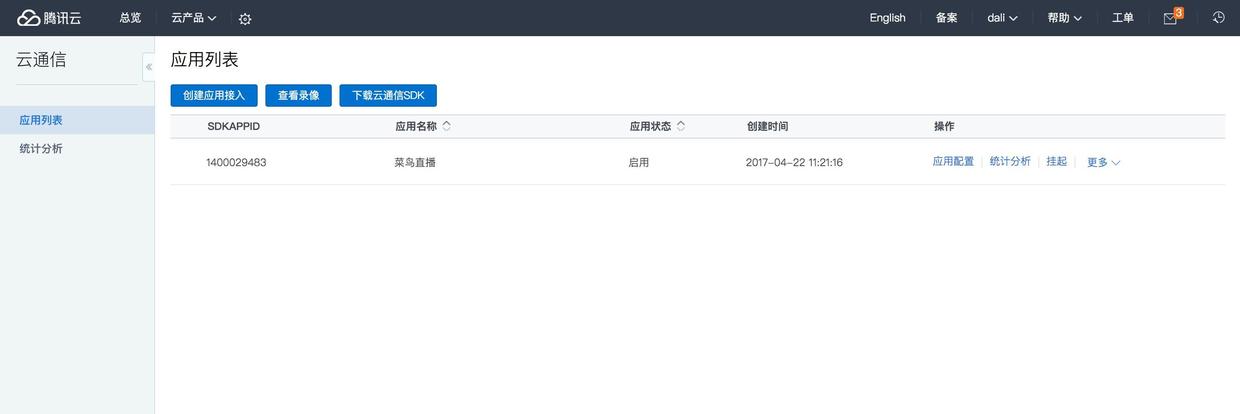
In the red rectangle box is the newly created application. Click on the application configuration to enter the configuration interface.
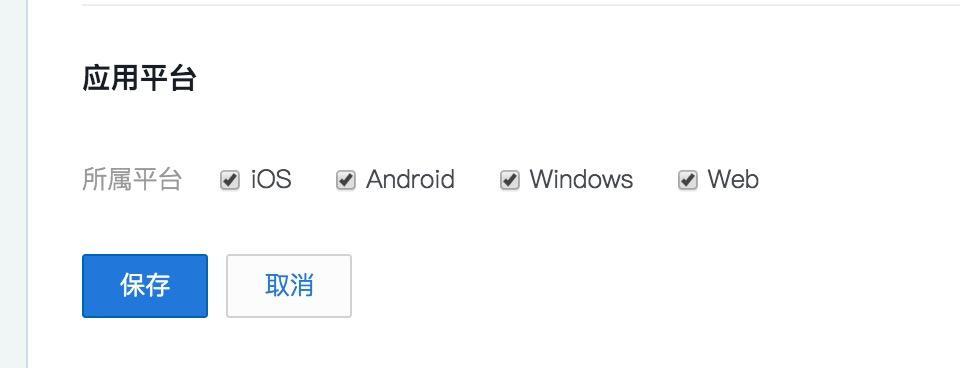
Click Edit the Application Platform Column.

Suggestions for full selection, Click Save after selection.
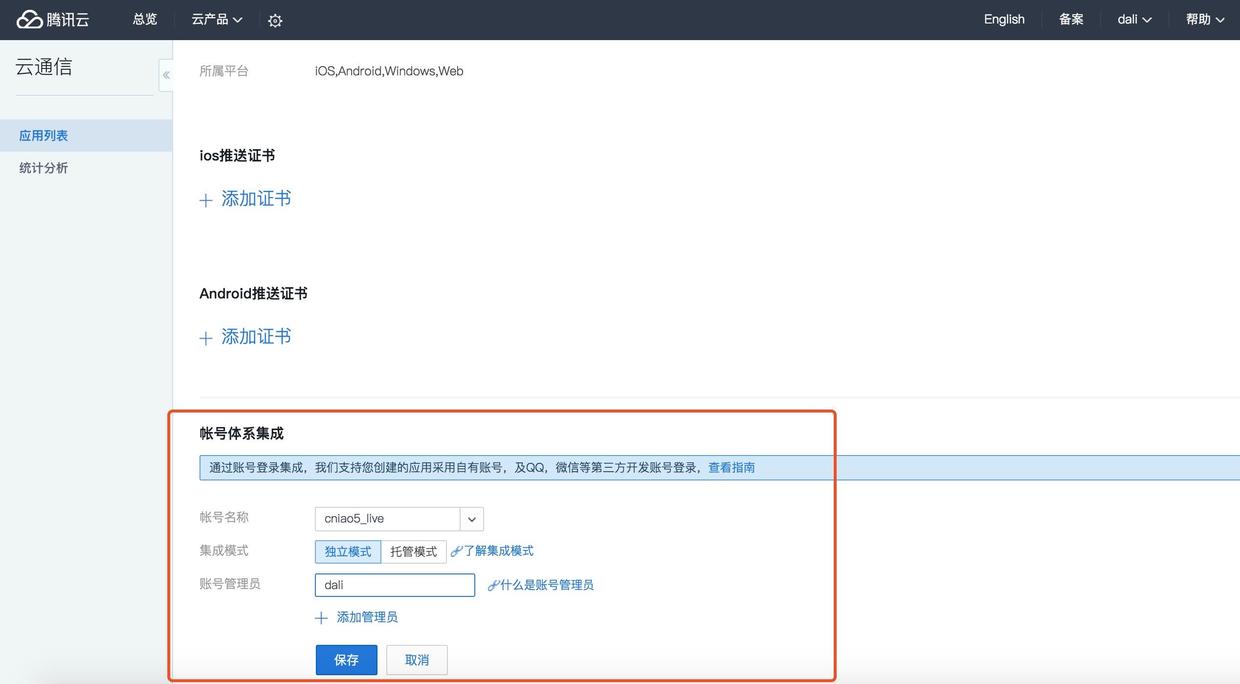
Click on the edit of the Account System Integration column and go to the following page to fill in the relevant information according to the needs. Select the stand-alone mode here (the stand-alone mode and hosting mode will be explained later), and then click Save.
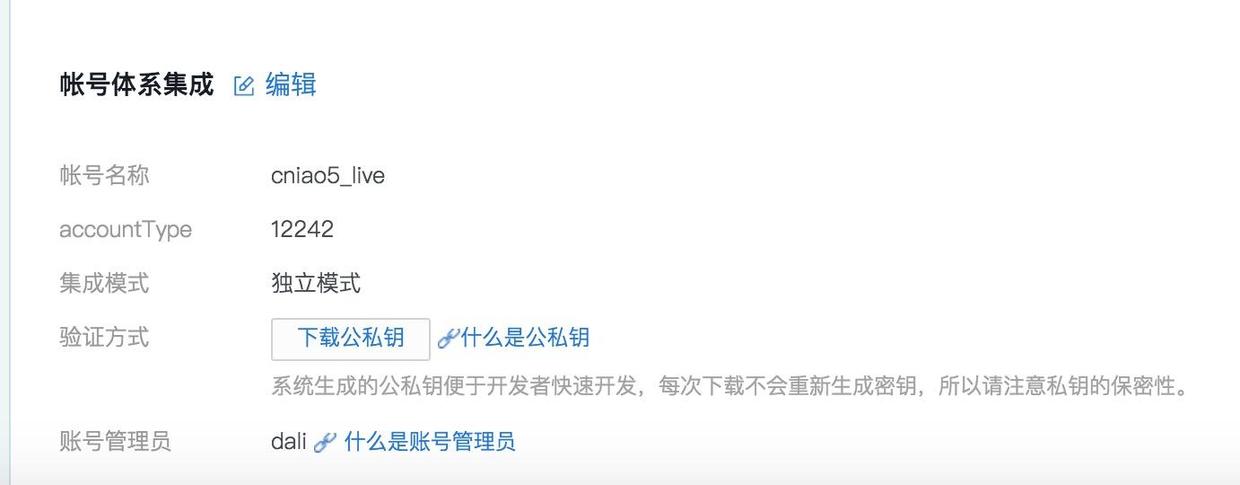
When you click on it, you will see the following information. You will see that the download of the "Public and Private Key" is generated in the figure, which will be introduced later. You can see that accountType is generated here, and SdkAppId is generated when the application was created. This is the parameter that we need to use for IM login in our project. I'll talk about it later. The creation of the application is complete. Now I will start to explain how to integrate IMSDK to achieve login.
Client Integration
Open Tencent Cloud Help and Documentation Explain the use of documents for IM login function.
1. IMSDK Integration
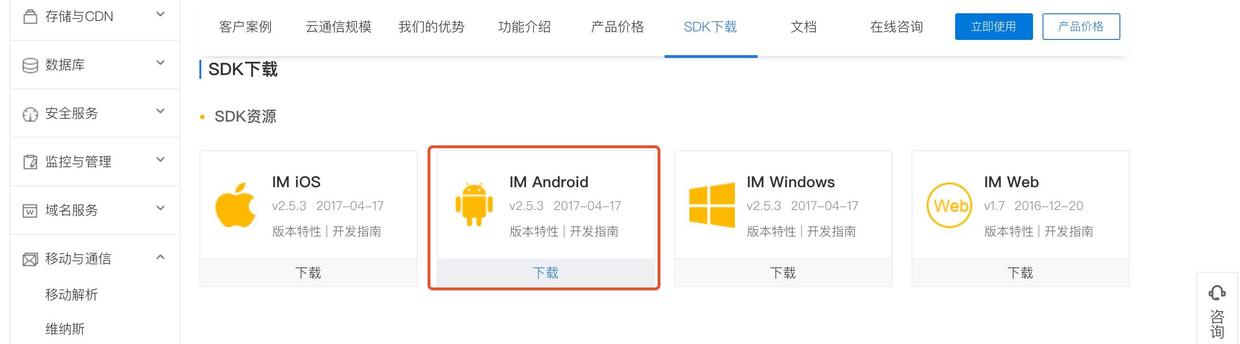
Open the official website and download the library files related to IMSDK.
Go to the download page and select IM Android Download.
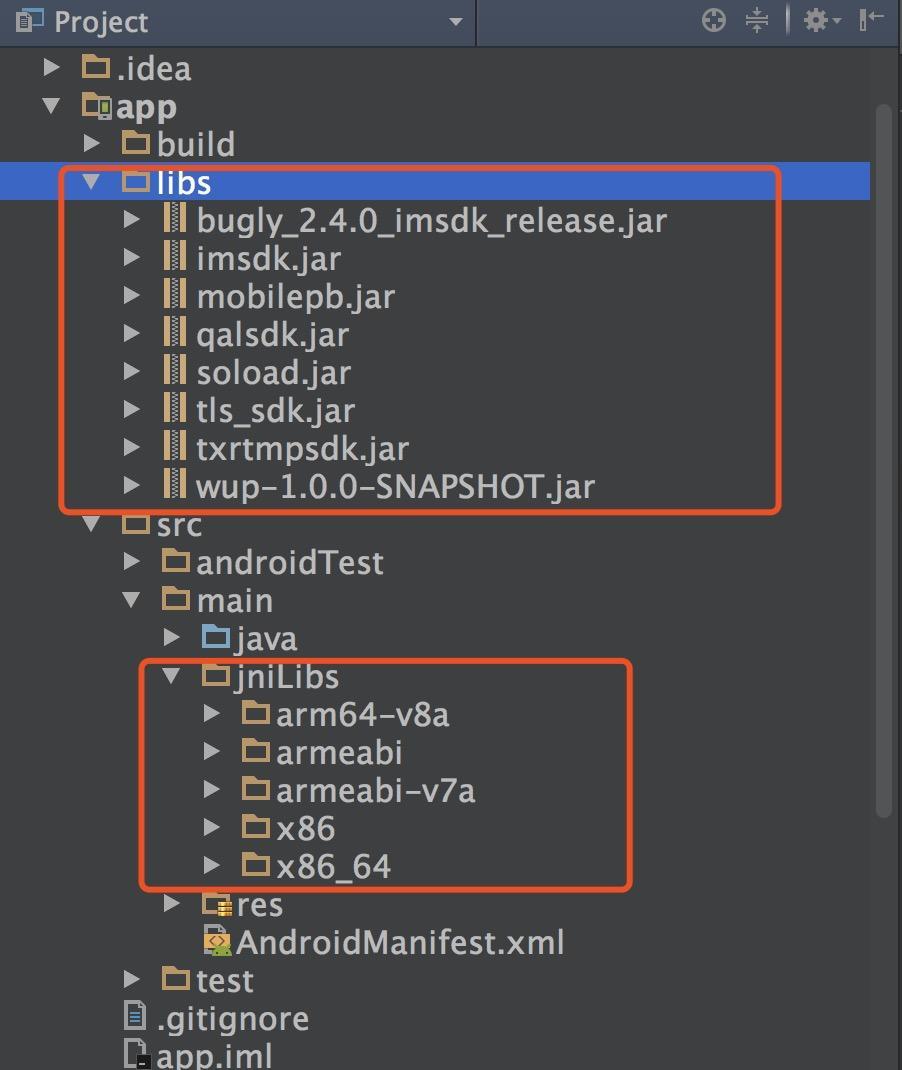
After downloading, decompress, open and find the libs directory, copy all the jar packages and paste them under the project libs package, and then click Synchronize.
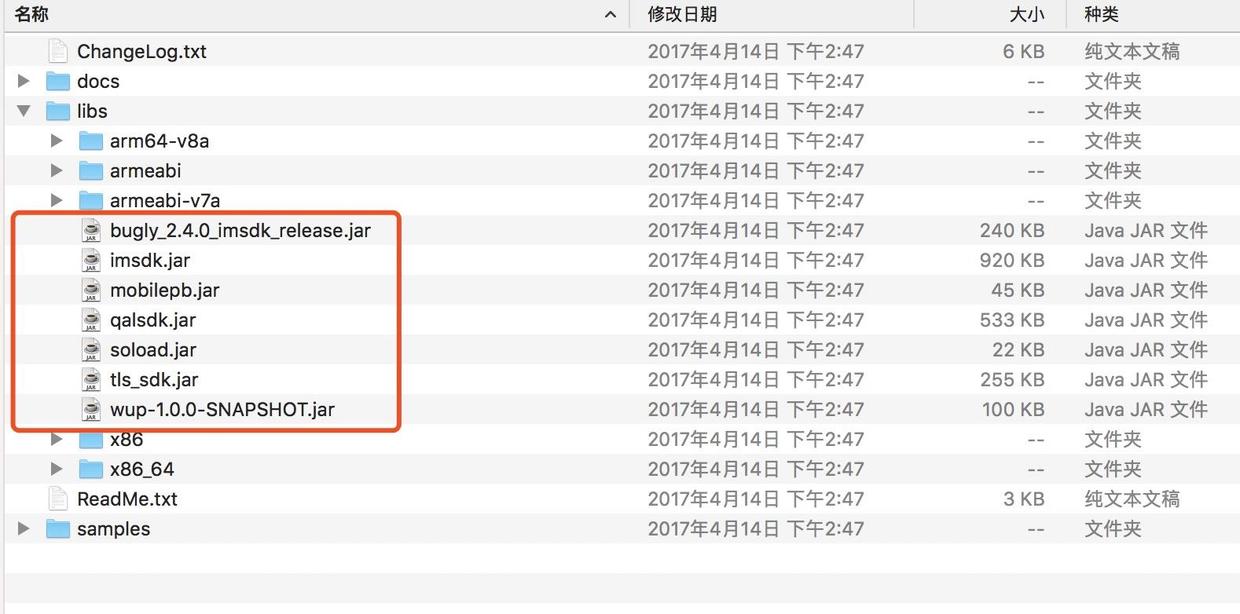
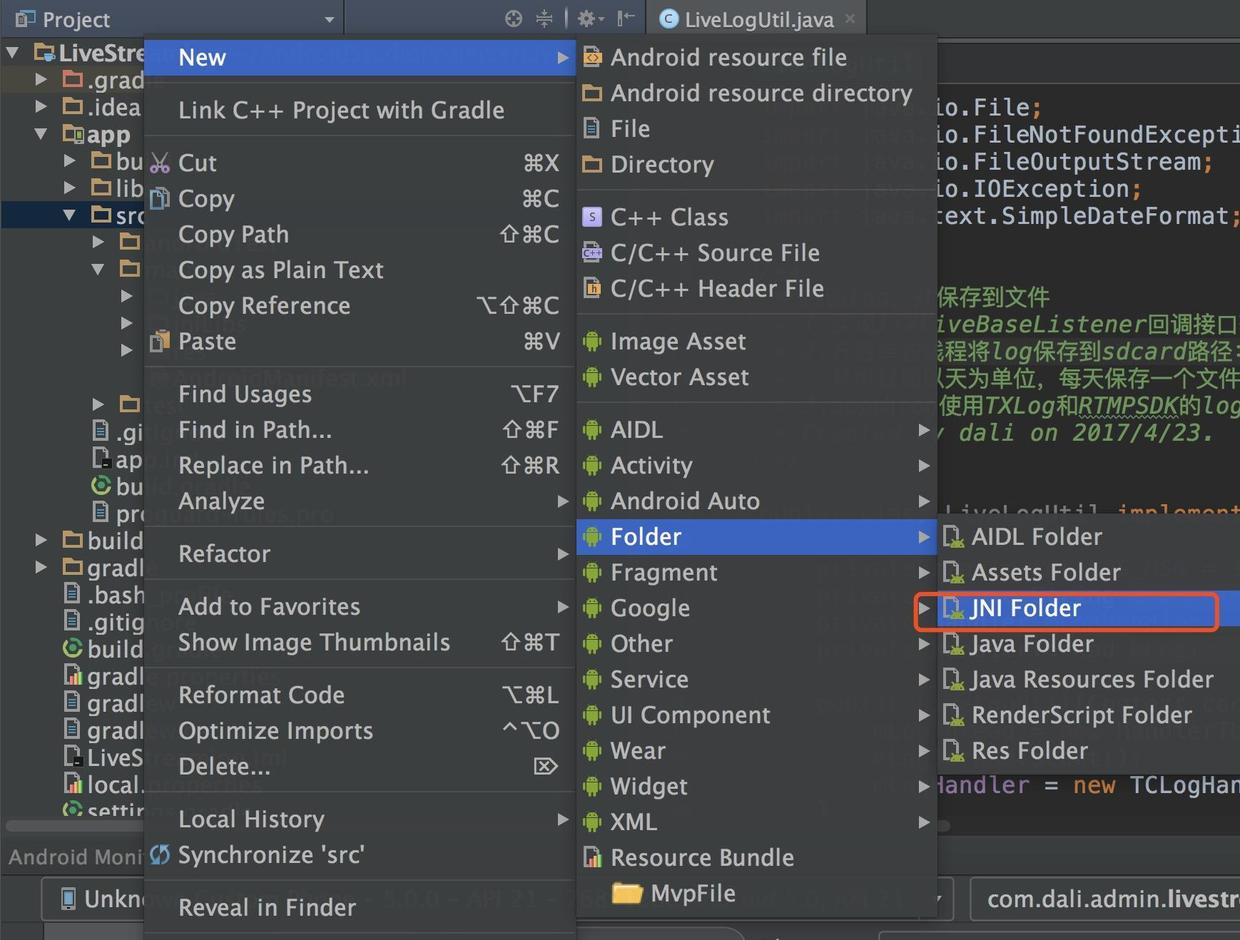
Create a jniLibs folder and copy the remaining files to the directory. (Official recommendation is that we copy all the files to the libs directory, the author copies the jar package and puts the others under the jniLibs directory.) Directory details under Android jniLibs (.so file) I don't know. so file can be seen.
That's it when it's all done.
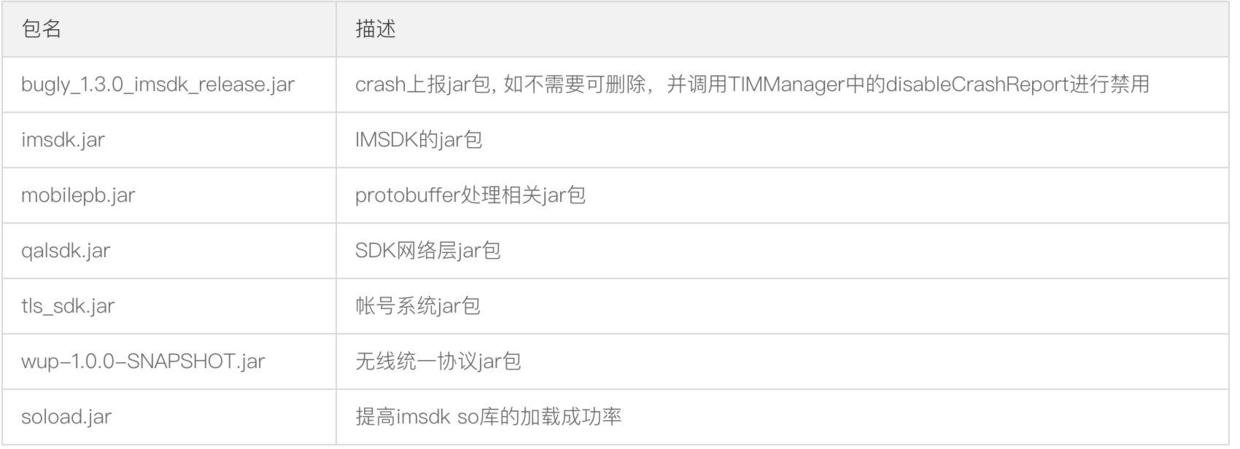
Official website will have a brief introduction of the package name, here the author carried out screenshots, convenient for children who do not want to see the official website shoe view.
Create a new project and add the following permissions to AndroidManifest.xml:
<uses-permission android:name="android.permission.ACCESS_NETWORK_STATE" />
<uses-permission android:name="android.permission.ACCESS_WIFI_STATE" />
<uses-permission android:name="android.permission.CAMERA" />
<uses-permission android:name="android.permission.CHANGE_NETWORK_STATE" />
<uses-permission android:name="android.permission.GET_TASKS" />
<uses-permission android:name="android.permission.INTERNET" />
<uses-permission android:name="android.permission.MODIFY_AUDIO_SETTINGS" />
<uses-permission android:name="android.permission.READ_LOGS" />
<uses-permission android:name="android.permission.READ_PHONE_STATE" />
<uses-permission android:name="android.permission.RECEIVE_BOOT_COMPLETED" />
<uses-permission android:name="android.permission.RECORD_AUDIO" />
<uses-permission android:name="android.permission.VIBRATE" />
<uses-permission android:name="android.permission.WAKE_LOCK" />
<uses-permission android:name="android.permission.WRITE_EXTERNAL_STORAGE" />
Versions 1.8.0 and above need to add the following configuration in <application></application> of Android Manifest.xml (I added some comments for each service or receiver to help readers quickly understand its role):
<!--Responsible for sending and receiving network packets-->
<!--  Message sending and receiving service -->
<service
    android:name="com.tencent.qalsdk.service.QalService"
    android:exported="false"
    android:process=":QALSERVICE" >
</service>
<!--Responsible for protection logic-->
<!--  Message Receiving and Sending Assistance service -->
<service
    android:name="com.tencent.qalsdk.service.QalAssistService"
    android:exported="false"
    android:process=":QALSERVICE" >
</service>
<!--service After receiving the message, app Called in the absence of the main process-->
<!--  Offline Message Broadcasting Receiver -->
<receiver
    android:name="com.tencent.qalsdk.QALBroadcastReceiver"
    android:exported="false">
    <intent-filter>
        <action android:name="com.tencent.qalsdk.broadcast.qal" />
    </intent-filter>
</receiver>
<!--1,Re-establishment of network when network changes TCP Connections, such as: Wi-Fi switch-->
<!--2,When receiving the latest broadcast, if service No, it will be pulled up again.-->
<!--  System Message Broadcasting Receiver -->
<receiver
    android:name="com.tencent.qalsdk.core.NetConnInfoCenter"  android:process=":QALSERVICE">
    <intent-filter>
        <action android:name="android.intent.action.BOOT_COMPLETED" />
    </intent-filter>
    <intent-filter>
        <action android:name="android.net.conn.CONNECTIVITY_CHANGE" />
    </intent-filter>
    <intent-filter>
        <action android:name="android.intent.action.TIME_SET" />
    </intent-filter>
    <intent-filter>
        <action android:name="android.intent.action.TIMEZONE_CHANGED" />
    </intent-filter>
</receiver>
Matters needing attention:
1. When integrating versions of IMSDK over 1.9.0, it is necessary to refer to ANDROID SDK API LEVEL 23+. android-support-v4.jar.
2. Since the http-related features have been removed from the ANDROID SDK since API LEVEL 23, it is necessary to add a reference to org.apache.http.legacy.jar when compiling ANDROID SDK versions above API LEVEL 23. Specific reference Android 6.0 Changes.
Popularize another knowledge point Android API Level vs. sdk version I don't know what version of API I I is to check this blog and download the relevant documents.
The latter ones ask the reader to look at the official documents by himself, and the content is too much, and the author also does not write well officially.
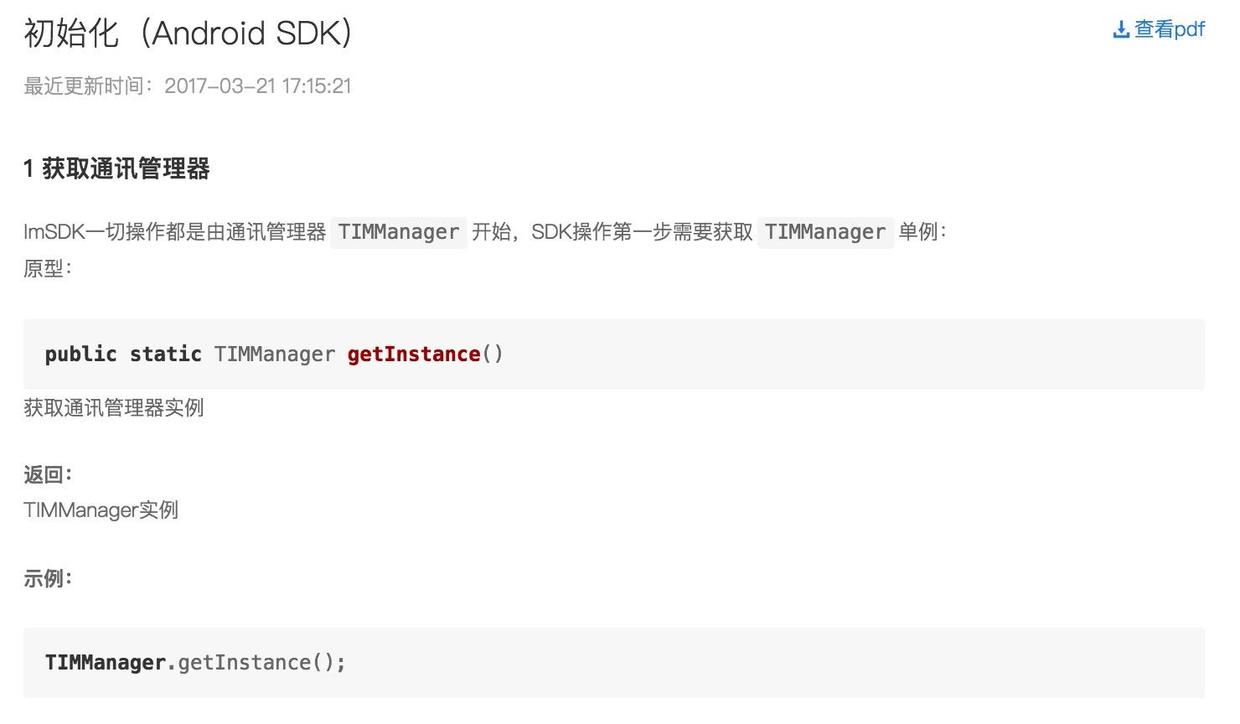
2. Initialization of SDK
The Initialization Example Official introduced us to a management class TIMManager, and gave a related introduction, the initialization operation in the Application.
Create an Application class to inherit Application, implement the onCreate() method, and register it in the Android Manifest. XML file.

public class LiveApplication extends Application{
    private static LiveApplication instance;
    @Override
    public void onCreate() {
        super.onCreate();
        instance = this;
        //Initialize imsdk
        TIMManager.getInstance().init(getApplicationContext());
        //Detection of initialization and integration success
        Log.e("LiveApplication",TIMManager.getInstance().getVersion());
    }
    public static LiveApplication getInstance(){
        return instance;
    }
}
Run the project and see the following information in the console to show that the integration has been successful.

This chapter only explains Tencent cloud communication and SDK integration, and the next section explains IM login implementation.
Be careful:
SDK integration may not be a one-time success, will encounter some problems (I have integrated more than once), children's shoes encounter problems do not panic, careful reference to official documents and examples, as well as error codes and other serious modifications, will be successful.
Client Integration Document Introduction to IMSDK Document
Error code document The error codes encountered in the integration are basically all above, and can be integrated smoothly by correcting the error codes
FAQ There are solutions to common problems encountered in use
Tencent cloud Demo profile, including source code and Demo, casual broadcasting I have downloaded and played, the basic functions of live broadcasting have been achieved, interested to see the source code.
Small live DEMO
Broadcast iLiveSDK at will
Knowledge Structure of Live Broadcasting Technology
Add newbie nest operation Wechat: Miranda_0720, remark [live broadcast], pull you into live APP Development Exchange Group

(Rookie Bird's Nest - Whampoa Military Academy of Programmed Apes. If you need to reproduce, please indicate the source.
Focus on the Public Number to receive "140 Excellent Open Source Program Sources" free of charge