Understanding and application of dependency injection
1. Why use dependency injection (DI)
What is dependency injection and why? In simple and popular terms, when a class needs the help of another class, it generates dependencies, so the required dependencies need to be injected to work together.
There is a dependency inversion principle (DIP) in the software design principle, which says that we should rely on abstraction instead of concrete. High-level modules should not rely on low-level modules, and both should rely on abstraction. In short, it is for better decoupling. Inversion of control (Ioc) is such an implementation idea, one of which is dependency injection (DI)
I feel a little windy. Take a chestnut: Lao Li is a maintenance worker. Now he has to apply for a wrench to repair.
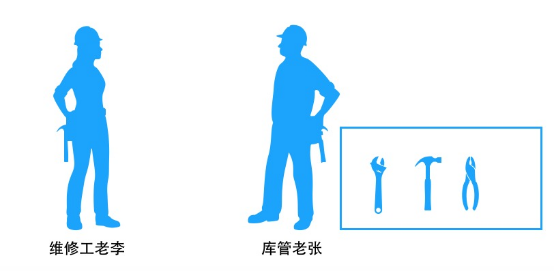
Lao Li: "please give me a wrench that can tighten a 7mm hexagon screw.", Then the warehouse keeper Lao Zhang took such a powerful wrench from the warehouse to Lao Li.
In this example, Lao Li, the maintenance worker, just told the warehouse keeper that I wanted a wrench that "can screw a 7mm hexagon screw". He didn't care about the brand and style of the wrench, nor did he buy a wrench, let alone how the wrench came from. For the warehouse keeper, he only needs to provide a wrench that meets such rules. He doesn't have to care what Lao Li does after holding the wrench. Therefore, Lao Li and Lao Zhang only care about the rule that "hexagon screws with the size of 7mm can be screwed", that is, if the warehouse no longer provides Dali brand wrenches in the later stage, but provides such Daniel brand wrenches, no matter what brand and style are changed, Lao Li can still work normally as long as this rule is satisfied. They define a rule (such as interface IWrench7mm), both of which depend on this rule, and the warehouse will not affect the normal operation whether it provides energetically (wrenchdali: IWrench7mm) or Daniu (wrenchdaniu: IWrench7mm)
This is to rely on the inversion principle (DIP), not on the specific (brand), the high-level module (Lao Li) should not rely on the low-level module (Dali brand wrench), and the two should rely on abstraction (IWrench7mm: you can screw a 7mm hexagon screw). If Lao Li gets the new brand wrench directly, we will modify Lao Li's code when the business changes and requires the adoption of Daniel brand. In order to decouple, in this example, we only need to change the warehouse from providing strong brand to providing Daniel brand in the configuration. When Lao Li wants to use it, he can provide the wrench instance provided by the warehouse to Lao Li through injection (constructor, attribute and method).
2. Understanding of dependency injection
The purpose of introducing dependency injection is to decouple. To put it bluntly, it is interface oriented programming, which is called by calling the methods of the interface rather than directly instantiating the object.
The advantage of this is that if another implementation class is added, there is no need to modify the previous code, but only need to modify the injected place to replace the implementation class. In fact, when calling methods through an interface, we still need to instantiate the implementation class of the interface, but we don't need to manually new construct the implementation class, but hand it to tools such as Microsoft's Di and Autofac to build the implementation class. We just need to tell them that a class is the implementation class of an interface. When used, tools (such as Microsoft DI) will automatically instantiate the class through the constructor.
3. How to inject dependent services
Open the Startup file and look at the ConfigureServices method inside. As the name suggests, this method is used to configure services. By default, the system has added some services, and the rest is for us to add what we need. The parameter is the IServiceCollection object of the service collection. This object provides AddSingleton, AddScoped and AddTransient methods to add services. The service life cycles added by the three methods are different.
example:
Add a named DIDemo NET CORE MVC project, under which a service folder (Servers) is created
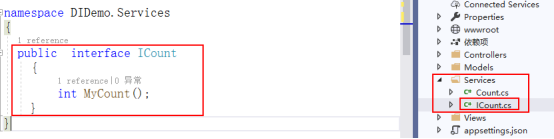
(1) Define interface ICount
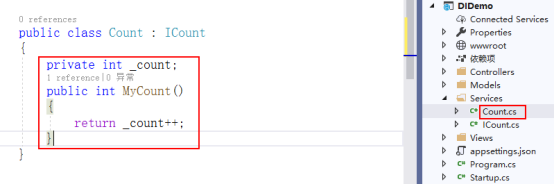
(2) Implement interface class Count
So far, the service (class) has been, so how can we make this service available to us? Or serve us?
(3) Inject the class (service) into the service through the ConfigureServices method in the Startup file.
The DI container in. NET Core can be understood as startup CS file—— inaccurate
The advantage of using containers is that containers manage the creation and destruction of instances in a unified way. You only need to care about how to use them, and you don't need relationships to create and destroy them.
Of course, all instances created by containers have a life cycle. The three creation methods create different instance lifecycles.
- Transient: Transient mode. Each visit will create a new instance
- Scoped: domain mode. Only one instance is initialized in the same Scope, which can be understood as (each request level creates only one instance, the same http)
Request will be in a scope). Objects are the same in one request, but different in different requests. - singleton: Singleton mode. Only one instance is created within the entire application life cycle. In addition, there are three common injection methods.
public void ConfigureServices(IServiceCollection services)
        {
           ......
            //The following describes the three commonly used injection methods with the AddScopend method
            //1. The most commonly used injection method exposes services in the form of interfaces. The following two methods have the same meaning
            //1.1 AddScopend is followed by (), in which the interface and implementation class must be set with a layer of typeof
            services.AddScoped(typeof(ICount), typeof(Count));
            //1.2 AddScopend is followed by < >, which directly writes interfaces and implementation classes. Of course, there is one () at the end
            services.AddScoped<ICount, Count>();
            //2. Inject yourself and expose the service in the form of realization
            services.AddScoped(typeof(Count));
            services.AddScoped<Count>();
            //3. Class injection of the constructor that needs to pass parameters (the application will be explained in the following examples)
            // services. Addscoped (typeof (Icount), SP = > {return new count (parameter);});
            //services. Addscoped < Icount > (SP = > {return new count (parameter);});
......
        }
(4) Next, analyze and demonstrate the differences between the three injection methods:
The following transient mode is retained in the ConfigureServices method above
//Type 1: transient mode. A new instance is created for each access
services.AddTransient<ICount, Count>();
After service injection, we will use it. Switch to the controller. So can you inject service instances into the controller? There are attribute injection, construction method injection and method injection. The construction method is generally used here.
public class HomeController : Controller
{
private ICount _count;//It is convenient to call other methods of this class, so a private field is defined to receive
public HomeController(ICount count)//Inject instances through construction methods, ASP Net core has built-in dependency injection container
{
_count = count;
}
//Note: when a request is sent to the home controller, the construction method of the home controller is naturally called. An ICount type object is required in the construction method. How does it come from? This is because NET Core has built-in dependency injection container, which will arrive at startup Find the corresponding dependency in the ConfigureServices method in the CS file, and tell the ICount to be implemented by Count (services. Addtransient < ICount, Count > ();), Therefore, the Count constructor will be called to instantiate the Count object.
//Then it can be used in the controller_ count
public IActionResult Index()
{
int c = _count.MyCount();
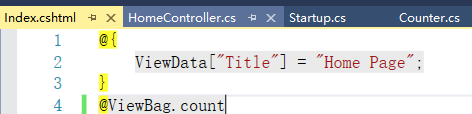
ViewBag.count = c;
return View();
}
Front end display
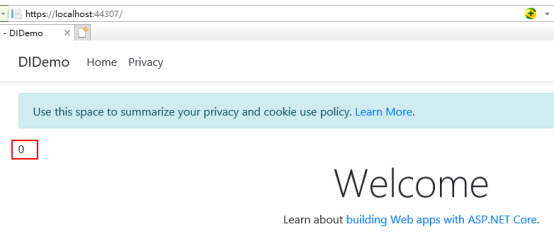
Running effect, constantly refreshing the page is always 0, because the transient mode injected service will create a new instance every time it visits.
Change the above ConfigureServices method to the following singleton mode
//The second is the single instance mode, in which only one instance is created within the whole application life cycle
services.AddSingleton<ICount, Count>();
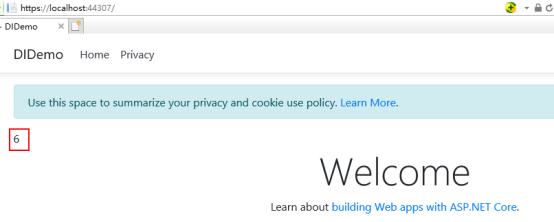
Running effect, constantly refreshing the page, increasing 1
Continue to change the above ConfigureServices method to the following domain mode
//Type 3: domain mode. Only one instance is initialized in the same scope, which can be understood as (only one instance is created for each request level, and the same http request will be in the same scope)
services.AddScoped<ICount, Count>();
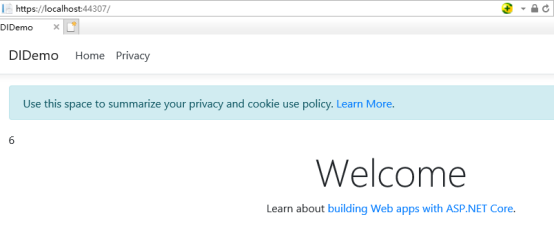
Running effect: continuously refresh the page and keep it at 0. Because each page refresh is a new request, it is always 0. The instance object generated in a request is the only one.
Improved test code
public class HomeController : Controller
    {
        private IServiceProvider _provider;
        private ICount _count;//It is convenient to call other methods of this class, so a private field is defined to receive
        public HomeController(ICount count,IServiceProvider provider)//Inject instances through construction methods, ASP Net core has built-in dependency injection container
        {
            _count = count;
            _provider = provider;
        }
        //Then it can be used in the controller_ count
        public IActionResult Index()
        {
            //int c = _count.MyCount();
            //ViewBag.count = c;
            //Note: import using Microsoft Extensions. DependencyInjection;
            ICount count1 = _provider.GetService<ICount>();
            ICount count2 = _provider.GetService<ICount>();
            int c1=count1.MyCount();
            int c2 = count2.MyCount();
            ViewBag.c1 = c1;
            ViewBag.c2 = c2;
            //ICount counter1 = _provider.GetService<ICount>();
            //ICount counter2 = _provider.GetService<ICount>();
            //int c1 = counter1.Get();
            //int c2 = counter2.Get();
            return View();
        }
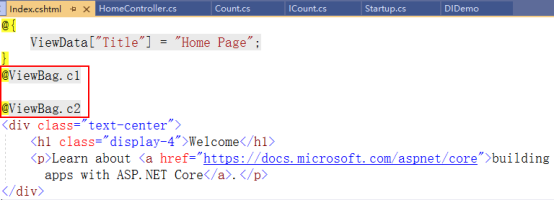
It is found that c1 and c2 are 0 and 1 respectively
But each refresh is reset to 0, 1
Because each page refresh is a new request, it is always 0, and the instance object generated in a request is the only one
4. How to use dependency injection directly in the view
Modify the view as shown in the following figure, mainly injecting instance objects through @ inject
@inject DIDemo.Services.ICount count
@{
int c = count.MyCount();
}

The running result is 2 because 0 and 1 have been obtained in the instance generated in the controller, and the instance in the view is still the instance generated during controller injection, so it is 2 at this time
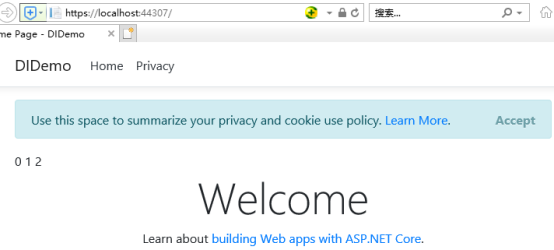
If it is injected in transient mode in startup, it is all 0, and constant refresh is also all 0; If the injection is in the single instance mode, the start is 0 1 2, and the continuous refresh will add 1 in turn, that is, the first refresh will become 3 4 5, and then refresh will become 6 7 8
8, Understanding and preliminary application of Middleware
1. Popular understanding of middleware concept
A web application encapsulates http requests into a pipeline. Generally speaking, every request must first go through a series of operations of the pipeline and finally reach the code (main program) we write. Then, middleware is a component in the application pipeline, which is used to intercept the request process for some other processing and response (such as verifying whether the user's identity is legal, whether there are exceptions in the program, etc.). There can be many middleware. Each middleware can intercept the request in the pipeline, and it can decide whether to transfer the request to the next middleware.
In short: middleware is a component used to form an application pipeline to process requests and responses. Similar to filters, they belong to AOP applications.
In ASP Net core uses pipeline to process HTTP requests, and many middleware (processing logic) can be mounted in the pipeline container to "connect" to process HTTP requests. Each middleware has the right to decide whether to execute the next middleware or respond directly. This mechanism enables HTTP requests to be well processed and controlled layer by layer, with clear layers and convenient processing.
So when to use middleware? Generally, in our applications, some things that have little to do with business that need to be done in the pipeline can be used, such as authentication, Session storage, logging, etc.
An official middleware pipeline request diagram of Microsoft:
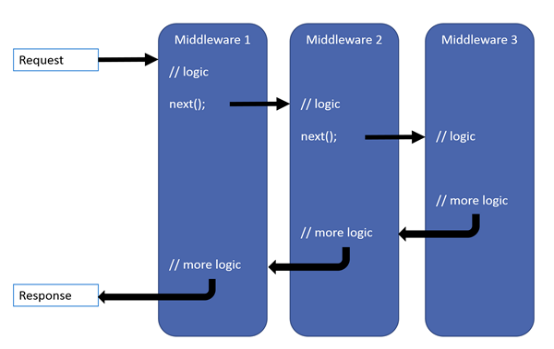
As can be seen from the above figure, except for the last middleware, each middleware includes three parts: one is the processing logic when entering, one is to call the next method to enter the next middleware, and the other is the processing logic when exiting the middleware.
This means that each delegate can perform operations before and after the next delegate.
In addition, the delegate can decide not to pass the request to the next delegate, which is to short circuit the request pipeline.
2. Custom Middleware
After each middleware is built, it is a RequestDelegate delegate object. Instance: create one under the current solution NET Core mvc project, named MiddlewareDemo, then create a folder Middlewares in it, and then create the MyMiddleware class in it.
 public class MyMiddleware
    {
        //private IConfiguration _configuration;
        //Step 1:
        private RequestDelegate _next;// using Microsoft.AspNetCore.Http;
        //Add a construction method The first parameter of the construction method must be RequestDelegate type, which is expressed as middleware type, that is, as the next middleware. When defining a middleware, you must include a reference to the next middleware.
        public MyMiddleware(RequestDelegate next)
        {
            _next = next;//Receive the reference of the next middleware through the private field, because we need to use the next Middleware in other places. This step is the key. It is necessary that this implementation connects the middleware in series
            //_configuration = configuration;
        }
        //Step 2: add the Task InvokeAsync (httpcontext) method. The method name is fixed as InvokeAsync and the return value is Task
        public async Task InvokeAsync(HttpContext context)
        {
            await context.Response.WriteAsync("test");
            await _next.Invoke(context);
        }
}
Next, in startup The middleware is injected and enabled in the Configure method of the. CS file. Register using the UseMiddleware method:
public void Configure(IApplicationBuilder app, IHostingEnvironment env)
        {
            if (env.IsDevelopment())
            {
                app.UseDeveloperExceptionPage();
            }
            else
            {
                app.UseExceptionHandler("/Home/Error");
                // The default HSTS value is 30 days. You may want to change this for production scenarios, see https://aka.ms/aspnetcore-hsts.
                app.UseHsts();
            }

            app.UseHttpsRedirection();
            app.UseStaticFiles();
            app.UseMiddleware<MyMiddleware>();
            app.UseCookiePolicy();

            app.UseMvc(routes =>
            {
                routes.MapRoute(
                    name: "default",
                    template: "{controller=Home}/{action=Index}/{id?}");
            });
        }
The middleware pipeline is built when the application starts. By default, the execution order of the middleware is based on startup CS file, execute in the order of registration in the public void configure (iaapplicationbuilder APP) {} method.
Summary of customized middleware:
- custom middleware classes
• the construction method takes the RequestDelegate (reference of the next Middleware) parameter
• add task invokeasync (httpcontext) method - Register and enable Middleware
IApplicationBuilder.UseMiddleware()
In addition, you can Use the Run, Map, and Use extension methods to register and enable middleware.
app.Use(), provided by iaapplicationbuilder interface, is used for registration, etc. Use will not actively short circuit the entire HTTP pipeline, but it will not actively call the next middleware. It must call await next by itself Invoke(); If you do not use this method to call the next middleware, the effect of use at this time is actually the same as that of Run.
app.Run() is an extension method. It requires a RequestDelegate delegate, which contains the context information of Http and has no next parameter, because it is always executed at the last step of the pipeline. The run method will enable the pipeline to be short circuited. As the name suggests, it is to terminate the pipeline and execute downward without calling the next() delegate. Therefore, the run method is best executed at the end of the pipeline.
app.Map() is also an extension method, similar to MVC routing. It is generally used to process some special request paths. Map can route middleware according to the provided URL. See example (3) below.
(1) If the logic of the middleware is relatively simple, you can use it directly without creating a class
IApplicationBuilder.Use(
           Func<RequestDelegate,RequestDelegate> middleware)
For example:
app.Use(next =>
            {
                return context =>
                {
                    return Task.CompletedTask;
                };
            });
(2) Endpoint Middleware - Run method
The last Middleware in the whole middleware pipeline uses iaapplicationbuilder Run registration.
app.Run(context =>
            {
                return Task.CompletedTask;
            });
(3) Branch Middleware -- Map method
The subsequent execution route is determined according to the decision logic, and cannot be merged after branching
//It is assumed that all requests on the app side have started with the api The following meaning means that if the request starts with api, it will enter MyMiddleware, and the subsequent middleware will not execute Map method takes path as decision
  app.Map("/api", builder => {
                builder.UseMiddleware<MyMiddleware>();
             });
Test. Adding / api after the default address will call MyMiddleware middleware to display test.

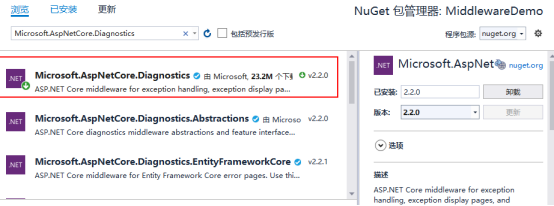
In fact, our ASP Net core project itself already contains many middleware.
If you want to add and use more middleware, install microsoft.com through the NuGet package manager reference AspNetCore. Diagnostics
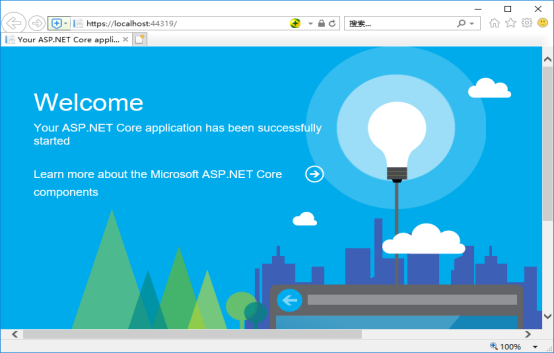
Modify the Configure() method in the Startup class and add a middleware app UseWelcomePage
public void Configure(IApplicationBuilder app, IHostingEnvironment env)
        {
            if (env.IsDevelopment())
            {
                app.UseDeveloperExceptionPage();
            }
            else
            {
                //The above code is in the non development environment, UseExceptionHandler is the first middleware to be added to the pipeline, because it will catch any exceptions that appear in the call and then jump to the abnormal page /home/Error.
                app.UseExceptionHandler("/Home/Error");
                // The default HSTS value is 30 days. You may want to change this for production scenarios, see https://aka.ms/aspnetcore-hsts.
                app.UseHsts();
            }
            app.UseHttpsRedirection();
            app.UseStaticFiles();

            app.UseWelcomePage();
            app.UseCookiePolicy();

            app.UseMvc(routes =>
            {
                routes.MapRoute(
                    name: "default",
                    template: "{controller=Home}/{action=Index}/{id?}");
            });
         }