Getting started with SpringBoot plug-ins
brief introduction
- Spring boot is used by the company, and swagger UI is used by the API framework, which is really good. However, a problem is found in the use process. When the current end is formally called, if there are more parameters, it is more difficult to simulate the request, or swagger UI cannot simulate the complete request parameters of the front end. For example, if the parameters are put in the header, an idea arises, can you write one yourself? A plug-in similar to swagger UI can capture the access request, save its header and param, and request again through the same header and param next time there is a problem.
Thinking process
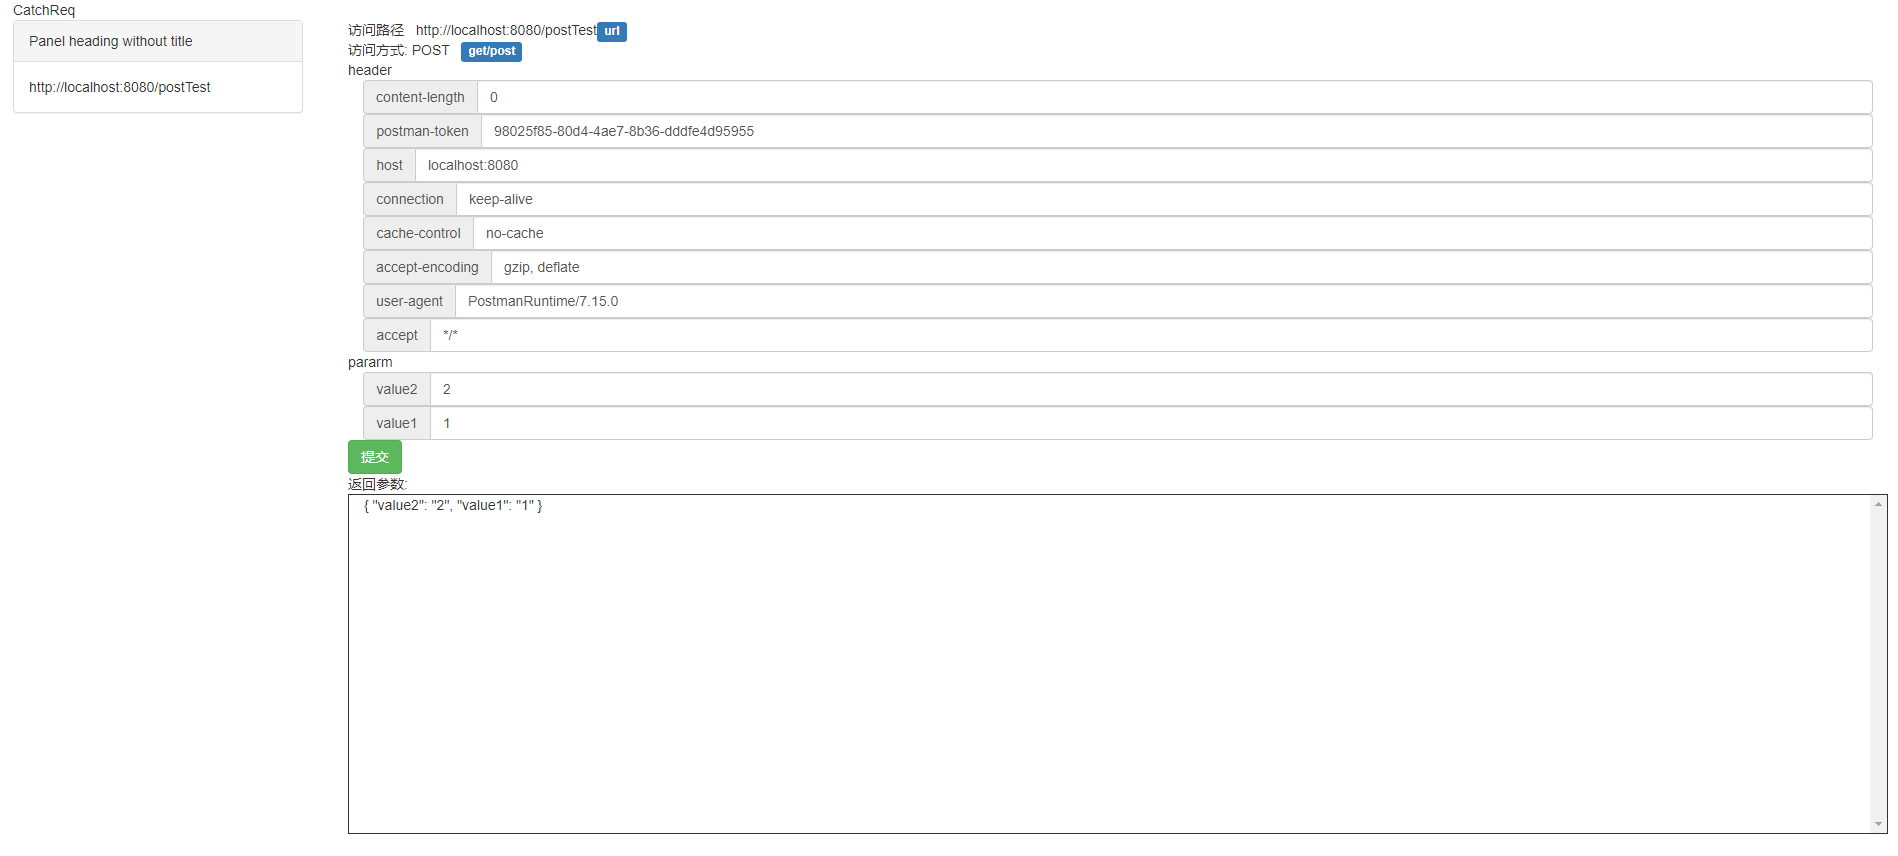
That is, to capture the request in the specified path through the filter, and then store its params and headers in a map. For the time being, the database has not been saved, with a maximum capacity of 100. A simple front-end page is provided to page the content. On the page, you can choose to initiate the request directly with the same parameters, and at the same time, you can change the parameters to initiate the request. The request is through the front-end page. Direct initiation.
This logic is quite simple, and the difficulty lies in how to make a springboot jar package for other projects to reference, how to integrate the page into springboot, whether other configurations are needed, and how to introduce the beans in other packages into the main project.
Finally, I'll refer to the source code of swagger UI. Swagger UI source code
development process
- First, write basic code, i.e. Filter, data saving class, and corresponding foreground UI. When writing UI, one difficulty is how to get the address of the current project. Finally, use the following code to solve the problem:
   var urlMatches = /(.*)\/reqCatch.html.*/.exec(window.location.href);
   this.baseUrl = urlMatches[1] + '/';
- After you write the basic code, you need to consider how to make it jar package and call it directly to other projects. Because spring boot is used, you need to change the packaged plug-in to maven's packaged plug-in, as follows. Then run the maven install command to make it a jar that can be introduced by other projects.
    <plugins>
            <plugin>
                <groupId>org.apache.maven.plugins</groupId>
                <artifactId>maven-compiler-plugin</artifactId>
                <configuration>
                    <source>1.8</source>
                    <target>1.8</target>
                </configuration>
            </plugin>
        </plugins>
After the jar is printed, first you need to check whether the front-end page can be accessed. The static resource html can be sent to the static. After the jar is printed, it can be accessed directly through the original web address without conflict. In this step, you can introduce the jar to access the front-end page. You only need to add its Bean to the main project, and then write the specified configuration class.
- How to introduce bean s into the Spring environment of the main project? This is to learn from the usage of swagger UI. First, write an annotation, and use Import to introduce a configuration class. Then on the configuration class, write the annotation directly in the configuration file of the main class through @ ComponentScan((basePackages= {"com.xx","com.xx"})), and then it can be introduced into the corresponding Spring environment.
        // Annotation
        @Retention(RetentionPolicy.RUNTIME)
        @Target({java.lang.annotation.ElementType.TYPE})
        @Documented
        @Import({CatchReqConfiguration.class})   // Give this class to Spring management
        public @interface CatchReq {

        }

        // Configuration class
        @Configuration
        @ComponentScan(basePackages= {"com.req.controller","com.req.filter"})  // Scanning package
        public class CatchReqConfiguration {
        }
In this way, you can give the Bean with the specified path in the jar package to Spring management.
- The next step is to write configuration files for plug-ins. The popular point is to register a Filter, put the following configuration methods into the main project, that is, you can start plug-in effect. Here, a very simple Spring Boot plug-in is developed.
    @Configuration
    @CatchReq
    public class CatchFilterDemo {
        @Bean
        @SuppressWarnings({ "rawtypes", "unchecked" })
        public FilterRegistrationBean timerFilter() {
            FilterRegistrationBean filterRegistrationBean = new FilterRegistrationBean();
            filterRegistrationBean.setFilter(new CatrhReqFilter());
            filterRegistrationBean.addUrlPatterns("/*");
            return filterRegistrationBean;
        }
    }
Publish the jar to a private library
- Configure publishing information in a profile
    <distributionManagement>
        <!--Official version -->
        <repository>
            <!-- nexus User name in server: in settings.xml in<server>Of id -->
            <id>nexus-releases</id>
            <!-- This name is defined by itself -->
            <name>Release repository</name>
            <url>http://192.168.1.241:8088/repository/maven-releases/</url>
        </repository>
        <!--snapshot -->
        <snapshotRepository>
            <id>nexus-snapshots</id>
            <name>Snapshots repository</name>
            <url>http://192.168.1.241:8088/repository/maven-snapshots/</url>
        </snapshotRepository>
</distributionManagement>- Then run clean deploy