In Spring Boot project, normally there is no XML configuration, because Spring Boot does not recommend using XML. Note that Spring Boot does not support it. Spring Boot recommends that developers use Java configuration to build frameworks. In Spring Boot, a large number of automation configuration is achieved through Java configuration. This set of implementation schemes can also be done by ourselves, that is, ourselves. You can use pure Java to build an SSM environment where no XML configuration, including web.xml, exists in the project.
Environmental requirements:
Using pure Java to build SSM environments requires Tomcat versions to be more than 7.
Quick experience
1 Create a Project
Create a normal Maven project (note that you don't need to create a Web project here) and add Spring MVC dependencies. At the same time, the environment needs to be built using Servlets, so we also need to introduce Servlet dependencies (we must not use lower versions of Servlets). The final pom.xml file is as follows:
<dependency><groupId>org.springframework</groupId><artifactId>spring-webmvc</artifactId><version>5.1.6.RELEASE</version></dependency><dependency><groupId>javax.servlet</groupId><artifactId>javax.servlet-api</artifactId><version>4.0.1</version><scope>provided</scope></dependency>
2 Add Spring configuration
After the project is successfully created, add Spring's configuration file as follows:
@Configuration@ComponentScan(basePackages = "org.javaboy", useDefaultFilters = true, excludeFilters = {@ComponentScan.Filter(type = FilterType.ANNOTATION, classes = Controller.class)})public class SpringConfig {}
With regard to this configuration, I would like to make the following points:
The @Configuration annotation indicates that this is a configuration class. In our case, the function of this configuration is similar to that of the application Context. xml ComponentScan annotation for configuration package scanning. The attributes inside and the attributes in the xml configuration are one-to-one, and the useDefaultFilters for default filters are used, and then the Controller annotation is removed, that is, in the Spring container. Scan all beans except Controller.
3 Add Spring MVC configuration
Next, create the configuration file for spring mvc: _____________.
@Configuration@ComponentScan(basePackages = "org.javaboy",useDefaultFilters = false,includeFilters = {@ComponentScan.Filter(type = FilterType.ANNOTATION,classes = Controller.class)})public class SpringMVCConfig {}
Note that if you don't need to add additional configurations to Spring MVC, that's fine. That is, view parser, JSON parsing, file upload, and so on. If you don't need to configure them, that's all.
4 Configure web.xml
At this time, we don't have web.xml file. At this time, we can use Java code instead of web.xml file. Here we will use Web Application Initializer, which is defined as follows:
public class WebInit implements WebApplicationInitializer {public void onStartup(ServletContext servletContext) throws ServletException {//First, load the configuration file for Spring MVCAnnotationConfigWebApplicationContext ctx = new AnnotationConfigWebApplicationContext();ctx.register(SpringMVCConfig.class);// Add Dispatcher ServletServletRegistration.Dynamic springmvc = servletContext.addServlet("springmvc", new DispatcherServlet(ctx));// Add path mapping to Dispatcher Servletspringmvc.addMapping("/");// Add startup time to Dispatcher Servletspringmvc.setLoadOnStartup(1);}}
The function of WebInit is similar to web.xml. This class needs to implement the Web Application Initializer interface and implement the methods in the interface. When the project starts, the onStartup method will be executed automatically. We can do some project initialization operations in this method, such as loading Spring MVC container, adding filters, adding Listener, adding Servlet, etc.
Be careful:
Since we only added Spring MVC configuration in WebInit, the project will only load the Spring MVC container at startup, not the Spring container.
If you have to load Spring containers, you need to modify the configuration of Spring MVC.
The @Configuration annotation is also scanned in the package scan of the Spring MVC configuration to load the Spring container.
Another solution to this problem is to abandon the Spring configuration directly in the project and put all the configuration in the Spring MVC configuration directly. This is no problem in the integration of SSM.
In practical development, the second scheme is mostly adopted. The configuration of Spring MVC is as follows:
@Configuration@ComponentScan(basePackages = "org.javaboy")public class SpringMVCConfig {}
In this scenario, all annotations are scanned in Spring MVC, and with this scenario, Spring configuration files can be deleted.
5 test
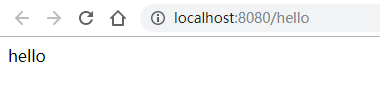
Finally, add a Hello Controller and start the project for testing.
@RestControllerpublic class HelloController {@GetMapping("/hello")public String hello() {return "hello";}}
Start the project and access the interface. The results are as follows:
6 Other configurations
6.1 Static Resource Filtering
The configuration of static resource filtering in Spring MVC's XML is as follows:
<mvc:resources mapping="/**" location="/"/>
In a Java-configured SSM environment, if static resource filtering is to be configured, Spring MVC configuration needs to inherit WebMvc Configuration Support and rewrite the methods in WebMvc Configuration Support as follows:
@Configuration@ComponentScan(basePackages = "org.javaboy")public class SpringMVCConfig extends WebMvcConfigurationSupport {@Overrideprotected void addResourceHandlers(ResourceHandlerRegistry registry) {registry.addResourceHandler("/js/**").addResourceLocations("classpath:/");}}
Rewrite the addResourceHandlers method, which configures static resource filtering, where I put static resources in the resources directory, so the resource location is classpath:/, of course, resources can also be placed in the webapp directory, at this time only need to modify the resource location in the configuration. If you use Java to configure the SSM environment, generally speaking, you don't need to use the webapp directory, unless you use JSP as a page template, you can ignore the webapp directory.
6.2 View Parser
In an XML file, the view parser is configured as follows:
<bean class="org.springframework.web.servlet.view.InternalResourceViewResolver"><property name="prefix" value="/WEB-INF/jsp/"/><property name="suffix" value=".jsp"/></bean>
Similar functionality can also be achieved through Java classes.
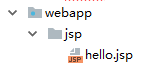
First, we add a webapp directory to our project, a jsp directory to the webapp directory, and a jsp file to the jsp directory:
Then introduce JSP dependencies:)
<dependency><groupId>javax.servlet.jsp</groupId><artifactId>javax.servlet.jsp-api</artifactId><version>2.3.1</version></dependency>
Then, in the configuration class, continue rewriting the method:
@Configuration@ComponentScan(basePackages = "org.javaboy")public class SpringMVCConfig extends WebMvcConfigurationSupport {@Overrideprotected void configureViewResolvers(ViewResolverRegistry registry) {registry.jsp("/jsp/", ".jsp");}}
Next, add a controller to the Controller to access the JSP page:
@Controllerpublic class HelloController2 {@GetMapping("/hello2")public String hello() {return "hello";}}
6.3 Path Mapping
Sometimes, the function of our controller is just a jump, just like the controller in the above section. There is no business logic in it. In this case, we can access the page directly through path mapping without defining a method. If you configure path mapping in XML, as follows:
<mvc:view-controller path="/hello" view-name="hello" status-code="200"/>
This line of configuration indicates that if the user accesses the / hello path, the view named hello is returned directly to the user and the response code is 200, which can replace the method in Controller.
The same requirement, if in Java code, is written as follows:
@Configuration@ComponentScan(basePackages = "org.javaboy")public class SpringMVCConfig extends WebMvcConfigurationSupport {@Overrideprotected void addViewControllers(ViewControllerRegistry registry) {registry.addViewController("/hello3").setViewName("hello");}}
At this point, the user accesses the / Hello 3 interface and sees a view file called hello.
6.4 JSON Configuration
Spring MVC can accept or return JSON parameters, depending on HttpMessageConverter.
HttpMessageConverter can convert a JSON string to an object or an object to a JSON string. In fact, its underlying structure depends on the specific JSON library.
To automatically return or receive JSON in Spring MVC, all JSON libraries must provide their own HttpMessageConverter.
In Spring MVC, Jackson and gson's HTTP Message Converter are provided by default: Mapping Jackson 2Http Message Converter and GsonHttp Message Converter.
Because of this, if we want to use JSON in Spring MVC, we only need to add dependencies for jackson and gson, and we can use them directly after adding dependencies. The specific configuration is completed in the AllEncompassingFormHttpMessageConverter class.
If developers use fastjson, Spring MVC does not provide fastjson's HuttpMessageConverter by default. This needs to be provided by ourselves. If it is in XML configuration, fastjson not only adds dependencies, but also explicitly configures HttpMessageConverter, as follows:
<mvc:annotation-driven><mvc:message-converters><bean class="com.alibaba.fastjson.support.spring.FastJsonHttpMessageConverter"></bean></mvc:message-converters></mvc:annotation-driven>
In the SSM of Java configuration, we can also add such configuration:
@Configuration@ComponentScan(basePackages = "org.javaboy")public class SpringMVCConfig extends WebMvcConfigurationSupport {@Overrideprotected void configureMessageConverters(List<HttpMessageConverter<?>> converters) {FastJsonHttpMessageConverter converter = new FastJsonHttpMessageConverter();converter.setDefaultCharset(Charset.forName("UTF-8"));FastJsonConfig fastJsonConfig = new FastJsonConfig();fastJsonConfig.setCharset(Charset.forName("UTF-8"));converter.setFastJsonConfig(fastJsonConfig);converters.add(converter);}}
Then, you can return JSON directly in the interface, where the JSON data will be generated through fastjson.
summary
Well, this article shows you how to configure Spring + Spring MVC environment with Java through a simple example. In fact, as long as these two configurations are OK, it is very easy to add MyBatis.
Regarding this article, if you have any questions, please leave a message for discussion.