Three.js to achieve parabolic dynamic flow effect
Old rules, let's first look at the final effect.
This effect may be used in the demonstration from the beginning to the end of the aircraft route, the demonstration of missile launch trajectory effect and other scenes. After mastering the idea, the effect is very simple. There are actually two main points to sum up: 1 Draw parabola; 2. Realize the dynamic effect of flow direction. Let's take a look at the specific implementation process.
Create 3D scene
First of all, we need to create a 3D scene. It is very simple to create a scene, which can be realized in just one sentence of code.
const scene = new THREE.Scene();
After creating the scene, we can't display anything yet because we still need a renderer and camera.
// Create camera
const camera = new THREE.PerspectiveCamera(
  75,
  window.innerWidth / window.innerHeight,
  0.1,
  1000
);
camera.position.z = 50; // Set camera position
three. There are many kinds of cameras in JS. The perspective camera is used here. This type is perspective camera, which can be used to simulate the scene seen by human eyes, so it is used in most 3D scene rendering. Click to view Document details.
// Create renderer
const renderer = new THREE.WebGLRenderer();
renderer.setSize(window.innerWidth, window.innerHeight);
document.body.appendChild(renderer.domElement);
renderer.render(scene, camera);
After creating the renderer, set the output canvas size. Specific properties and methods can be clicked View document.
Then you need to add a method and call it every once in a while to render the scene.
function animate() {
  renderer.render(scene, camera);
  requestAnimationFrame(animate);
}
// Must be called once
animate();
A global method requestAnimationFrame will be used in this method. If you are not familiar with it, please click View document.
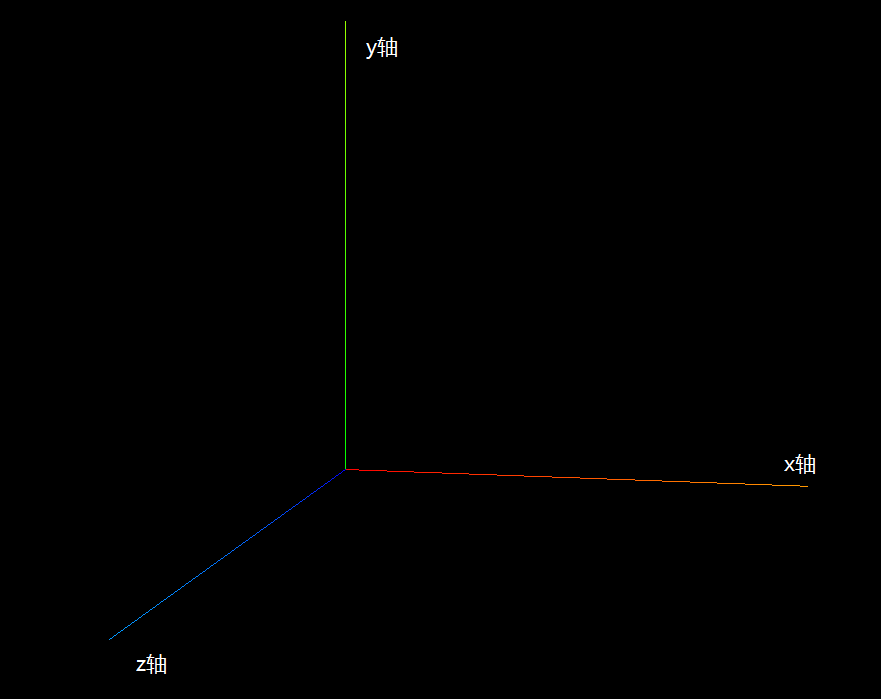
// Add axis AIDS
const axesHelper = new THREE.AxesHelper(100);
scene.add(axesHelper);
In order to feel the sense of three-dimensional space more intuitively, we can also add a coordinate axis auxiliary tool to the scene. Red, green and blue represent the x-axis, y-axis and z-axis respectively. As shown in the figure below.
So far, we can see the coordinate axis in the scene, but we found that we can't move and rotate the scene by dragging the mouse, because we haven't added a controller. The controller module needs to be introduced separately, which can be used in three.js code warehouse Relevant codes found in.
// Create controller
const controls = new OrbitControls(camera, renderer.domElement);
controls.enableDamping = true; // Enable damping (inertia), which will give the controller a sense of weight. If this value is enabled, it must be called in the animation loop update()
controls.dampingFactor = 0.05; // Damping inertia
Note: when controls When enabledamping is true, controls must be called in the animation loop Update() method.
function animate() {
  // controls. When enabledamping is set to true (damping is enabled), it must be called in the animation loop update()
  controls.update();

  renderer.render(scene, camera);
  requestAnimationFrame(animate);
}
Generate parabola
Generating a parabola requires three JS. This class can create a smooth 3D quadratic Bezier curve based on three point coordinates (start point, end point and one control point). click View document.
const point1 = [50, 0, 0]; // Point 1 coordinates
const point2 = [-50, 0, 0]; // Point 2 coordinates
const controlPoint = [0, 50, 0]; // Control point coordinates

// Create a 3D quadratic Bezier curve
const curve = new THREE.QuadraticBezierCurve3(
  new THREE.Vector3(point1[0], point1[1], point1[2]),
  new THREE.Vector3(controlPoint[0], controlPoint[1], controlPoint[2]),
  new THREE.Vector3(point2[0], point2[1], point2[2])
);
After getting the parabola, we can't directly use the generated curve, because we also need to realize the flow effect. The principle of this effect is to divide the curve into many small segments, one of which is in high bright color and the other is in dark color. The color of the previous segment of the highlighted segment is changed to high bright color every certain time, The original highlighted line segment is changed to dark color. In this way, by setting a reasonable interval, the changes of highlighted line segments will be connected, which seems to be the effect of flow.
Class quadricabeziercurve3 inherits from the Curve class and has a getPoints() method on it. This method receives a parameter of type number, which is used to divide the Curve into a specified number and return an array containing all the split points. The length of the array is the size of the passed in parameter plus 1. For example, if the parameter passed in is 10, which means that the Curve is divided into 10 segments, then the number of segmentation points returned is 11 (1 starting point, 9 segmentation points in the middle and 1 ending point). For details, click to view the of Curve class Document details.
const divisions = 30; // Number of segments of the curve
const points = curve.getPoints(divisions); // Return the number of segments + 1 point, such as points The length is 31
Now we have 31 point coordinates and use these points as vertices to create Geometry.
// Create Geometry
const geometry = new THREE.Geometry();
geometry.vertices = points; // Assign the point list obtained in the previous step to the vertices attribute of geometry
After creating geometry, we also assign it a vertex color array, because the material of geometry needs to be set as vertex shading. Later, when we need to change the color of line segments, we only need to change the vertex color array.
// Set the vertex colors array to be consistent with the number and order of vertices.
geometry.colors = new Array(points.length).fill(
  new THREE.Color('#333300')
);
Note: the number and order of colors correspond to vertices one by one. The first one in colors is the color corresponding to the first vertex in vertices.
We need materials to create meshes. It should be noted that we need to set the material as vertex shading.
// Generate material
const material = new THREE.LineBasicMaterial({
  vertexColors: THREE.VertexColors, // Vertex Shader
  transparent: true, // Defines whether this material is transparent
  side: THREE.DoubleSide,
});
const mesh = new THREE.Line(geometry, material);
Now that we have created the parabola, we must not forget to add it to the scene so that it can be rendered!
scene.add(mesh);
Achieve dynamic flow effect
As mentioned above, to achieve dynamic flow direction effect, we only need to update the vertex color array every other period of time. So we need to add the code to update the vertex color in the animate method.
let colorIndex = 0; // Index value of highlight color flow
let timestamp = 0; // time stamp

function animate() {
  controls.update();
  // time interval
  let now = new Date().getTime();
  if (now - timestamp > 30) {
    geometry.colors = new Array(divisions + 1)
      .fill(new THREE.Color('#333300'))
      .map((color, index) => {
        if (index === colorIndex) {
          return new THREE.Color('#ffff00');
        }
        return color;
      });
    // If geometry If the colors data changes, the colorsNeedUpdate value needs to be set to true
    geometry.colorsNeedUpdate = true;
    timestamp = now;
    colorIndex++;
    if (colorIndex > divisions) {
      colorIndex = 0;
    }
  }
  renderer.render(scene, camera);
  requestAnimationFrame(animate);
}
Note: after changing the vertex color array, be sure to set geometry Set the colorsneedupdate property to true so that three JS to know that the vertex color array has changed, which is very important!!!
Now, we have completed all the code and realized the parabola dynamic flow effect.
Click to view Online example.
Click to view the complete Sample code.
If this article is helpful to you, please don't be stingy with your encouragement. Like, comment, share, collect and reward are all your encouragement and support to me.
If you have a GitHub account, you can Pay attention to me~
Finally, thank you for your reading. If there are any mistakes, please criticize and correct them.