Preface
In the previous blog, we mainly talked about how to deploy hexo to the cloud server locally, but we don't want to write an md file locally and then deploy the server once. How to deploy it automatically?
The answer is Travis CI
thinking
1. Create a new public warehouse in our github warehouse
2. Whenever there is a file change in github, let Travis CI execute our command
3. Let Travis CI go to the cloud server and pull the files in the github warehouse once, and then execute hex deploy once
4. This enables automatic deployment
1, Configure multiple SSH
- Create a new user
#New user
useradd travis
passwd ***** //Set your own password
#Add add permission for user
vim /etc/sudoers
Find the comment "Allow root to run any commands anywhere" and add a new line below:
travis ALL=(ALL) ALL
- Generate ssh key on server
Be sure to switch to travis user. Since ssh key has been generated before, it can't be overwritten now. Just pay attention to it when executing the generate command.
su travis  #Switch to travis user
cd ~    #Get into/home/travis Catalog
ssh-keygen -t rsa -C "github mailbox"
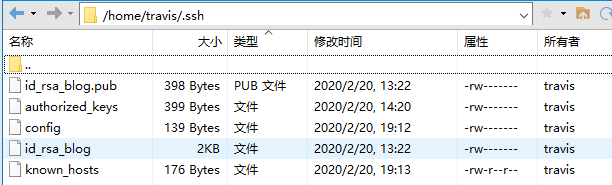
When enter file in which to save the key (/ C /. SSH / ID ﹣ RSA): appears, enter ID ﹣ RSA ﹣ blog, and then enter all the way, which will be generated under * * / home/travis/.ssh * *
Due to the control rules of Linux permissions, the file permissions are not as large as possible. All the permissions need to be set appropriately. Here, you need to set the * *. ssh directory to 700 permissions and the files under the. ssh = directory to 600 permissions.
#Set up.ssh Directory is700
[travis@VM_156_69_centos ~]$ chmod 700 ~/.ssh/
#Set up.ssh The files in the directory are600
[travis@VM_156_69_centos ~]$ chmod 600 ~/.ssh/*
#You can see that all the directories and files below are used by travis
[travis@VM_156_69_centos ~]$ ls -al
total 28
drwx------  3 travis travis 4096 Mar  6 20:12 .
drwxr-xr-x. 5 root   root   4096 Mar  6 20:03 ..
drwx------  2 travis travis 4096 Mar  6 20:12 .ssh
[travis@VM_156_69_centos ~]$ ls ~/.ssh/ -al
total 16
drwx------ 2 travis travis 4096 Mar  6 20:12 .
drwx------ 3 travis travis 4096 Mar  6 20:12 ..
-rw------- 1 travis travis 1675 Mar  6 20:12 id_rsa
-rw------- 1 travis travis  405 Mar  6 20:12 id_rsa.pub
- Add the generated public key as the trusted list
[travis@VM_156_69_centos ~]$ cd .ssh/
#Output the public key content to authorized_keys
[travis@VM_156_69_centos .ssh]$ cat id_rsa.pub >> authorized_keys
[travis@VM_156_69_centos .ssh]$ cat authorized_keys
# The contents of the authorized keys file are similar to this
ssh-rsa  *************centos
- Modify config configuration
#stay.ssh Add profile in directory config,Modified esc :wq Preservation
[travis@VM_156_69_centos .ssh]$ touch config
[travis@VM_156_69_centos .ssh]$ vim config
config :
Host test
HostName Your server ip
#Login user name
User travis
IdentitiesOnly yes
#Key used for login
IdentityFile ~/.ssh/id_rsa_blog
Test ssh connection
#Test connection
[travis@VM_156_69_centos .ssh]$ ssh test
Bad owner or permissions on /home/travis/.ssh/config
#Note that the test fails at this time, because authorized_keys and config are the files we added later, and the file permissions are not600
#Modify file permissions
[travis@VM_156_69_centos .ssh]$ chmod 600 config
[travis@VM_156_69_centos .ssh]$ chmod 600 authorized_keys
#Retest
[travis@VM_156_69_centos .ssh]$ ssh test
The authenticity of host '139.199.90.74 (139.199.90.74)' can't be established.
ECDSA key fingerprint is 41:39:50:e1:e7:c2:f5:19:86:dc:70:e5:91:42:bb:56.
Are you sure you want to continue connecting (yes/no)? yes
Warning: Permanently added '139.199.90.74' (ECDSA) to the list of known hosts.
Last login: Tue Mar  6 20:43:32 2018 from 139.199.90.74
#The test is successful. A known hosts file is generated. When you log in later, you don't need to enter yes for confirmation. You can do the test again
There is an additional known hosts file under. ssh
2, Add ssh to github
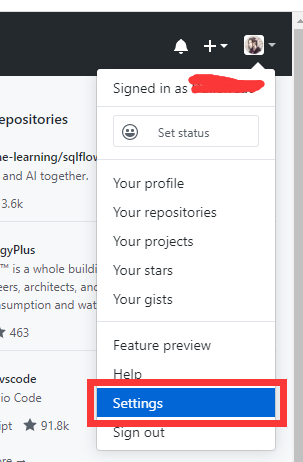
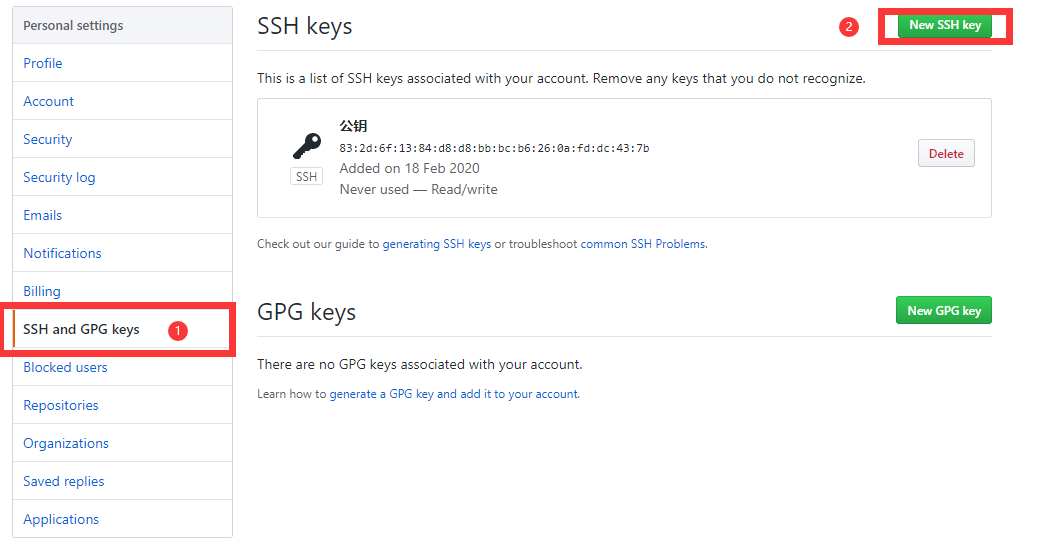
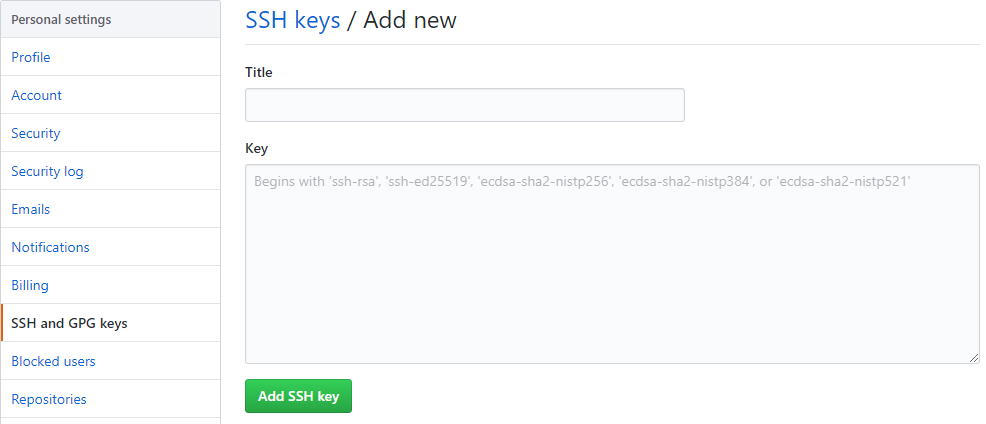
- Log in to github, place the mouse on the top right corner of the avatar, click setting, click SSH and GPG keys, click New SSH key, copy the content in the generated key ID ﹣ RSA ﹣ blog.pub to the key text box, and finally click Add SSH key
- Build a new public warehouse of hexoblog Auto in the warehouse, because travis-ci.org is free for open source library, and private library needs to be charged
- Create a new file. travis.yml in the local pull hexoblog auto warehouse, and then submit it.
.travis.yml:
language: node_js
node_js:
- stable
branchs:
  only:
  - master
addons:
  ssh_known_hosts:
  - 134.175.240.20
3, Configure Travis
- open Travis-CI Official website, log in your github account
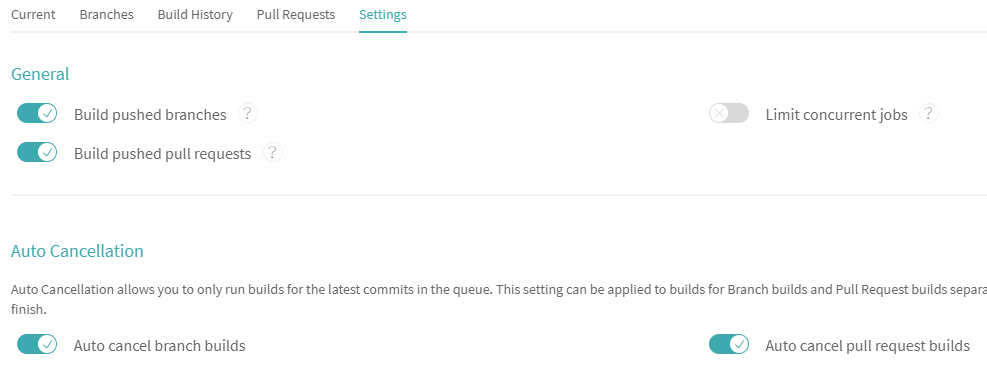
- Find hexoblog auto, tick it, click Settings, and tick it as follows

4, Install Travis client tool on ECS
-
The Travis client needs to be installed with gem, which is the management tool of ruby. So you need to install Ruby first. Here, use the ruby version management tool rvm (similar to the relationship between nodejs and npm)
-
Install rvm
[travis@VM_156_69_centos ~]$ curl -sSL https://get.rvm.io | bash -s stable
#Test whether the installation is successful after the installation
[root@VM_156_69_centos ~]$ rvm version
rvm 1.29.3 (master) by Michal Papis, Piotr Kuczynski, Wayne E. Seguin [https://rvm.io]
- Install ruby
#When I use travis user to install, it seems that there is a network error, so I use root user to install
[travis@VM_156_69_centos root] su #
[root@VM_156_69_centos ~]# rvm install ruby
#Test ruby installation
[root@VM_156_69_centos ~]$ su travis
[travis@VM_156_69_centos root]$ ruby --version
ruby 2.4.1p111 (2017-03-22 revision 58053) [x86_64-linux]
- Modify image source
After ruby is installed, you can use the gem package management tool, but the official image source is blocked, so you need to replace the image source of gem
[travis@VM_156_69_centos ~]$ gem sources -l
*** CURRENT SOURCES ***

https://rubygems.org/
[travis@VM_156_69_centos ~]$ gem -v
2.6.14
#Replace image source
[travis@VM_156_69_centos ~]$ $ gem sources --add https://gems.ruby-china.com/ --remove https://rubygems.org/
https://gems.ruby-china.org/ added to sources
https://rubygems.org/ removed from sources
[travis@VM_156_69_centos ~]$ gem sources -l
*** CURRENT SOURCES ***

https://gems.ruby-china.com/
- Install travis command line tools
#The prompt below travis indicates that there is no permission. I switch to the root user to install
[travis@VM_156_69_centos ~]$ gem install travis
Fetching: multipart-post-2.0.0.gem (100%)
ERROR:  While executing gem ... (Gem::FilePermissionError)
    You dont have write permissions for the /usr/local/rvm/gems/ruby-2.4.1 directory.
#Install travis
[root@VM_156_69_centos ~]# gem install travis
Successfully installed travis-1.8.8
Parsing documentation for travis-1.8.8
Done installing documentation for travis after 1 seconds
1 gem installed
#Switch back to travis user. The following output shows that the installation is successful after executing travis command
[travis@VM_156_69_centos root]$ travis
Shell completion not installed. Would you like to install it now? |y| y
Usage: travis COMMAND ...
5, Encrypt ssh private key to. travis.yml
- Code warehouse from github drop-down
[travis@VM_156_69_centos ~]$ git clone git@github.com:Your github Name/hexoBlog-auto.git
- Create a new. travis folder under hexoblog auto, and copy the ssh private key to the. travis folder
[travis@VM_156_69_centos hexoBlog-auto]$ mkdir .travis
[travis@VM_156_69_centos hexoBlog-auto]$ cp ~/.ssh/id_rsa_blog .travis/
- ssh profile
This ssh configuration file is used for travis CI deployment, not the local ssh configuration file. Later, travis configuration file will use
[travis@VM_156_69_centos ~]$ touch .travis/ssh_config
[travis@VM_156_69_centos ~]$ vim .travis/ssh_config

Host test
HostName 134.175.240.20
#Login user name
User travis
IdentitiesOnly yes
#Key used for login
IdentityFile ~/.travis/id_rsa_blog

esc :wq Preservation
- Login travis
**
[travis@VM_156_69_centos ~]$ cd hexoBlog-auto
[travis@VM_156_69_centos hexoBlog-auto]$ travis login
We need your GitHub login to identify you.
This information will not be sent to Travis CI, only to api.github.com.
The password will not be displayed.

Try running with --github-token or --auto if you dont want to enter your password anyway.

Username: Your github Account number
Password for github Account number: ******
Successfully logged in as github Account number!

[travis@VM_156_69_centos hexoBlog-auto]$ travis encrypt-file .travis/id_rsa_blog --add
In the hexoblog auto directory, the ID ﹣ RSA ﹣ blog.enc file will be generated. Move * * id ﹣ RSA ﹣ blog.enc * * to the. travis folder, and delete the ID ﹣ RSA ﹣ blog key file (ID ﹣ RSA ﹣ blog.enc is the encrypted key file that we use for travis server resolution)
At the same time, your. travis.yml file will display the following code:
before_install:
- openssl aes-256-cbc -K $encrypted_f61dd4bb83d2_key -iv $encrypted_f61dd4bb83d2_iv
  -in .travis/id_rsa_blog.enc -out ~/.ssh/id_rsa -d
Indicates that we have successfully added
6, Edit the configuration file.travis.yml
- .travis.yml:
language: node_js
node_js:
- stable
branchs:
  only:
  - master
install:
- npm install
- npm install --save hexo-deployer-git #hexo submit dependency
- npm install --save hexo-generator-json-content  #yilia theme dependency, no need to download
addons:
  ssh_known_hosts:
  - 99.99.99.99 #Your server ip
before_install:
- openssl aes-256-cbc -K $encrypted_f61dd4bb83d2_key -iv $encrypted_f61dd4bb83d2_iv
  -in .travis/id_rsa_blog.enc -out ~/.ssh/id_rsa -d
- chmod 600 ~/.ssh/id_rsa
- eval $(ssh-agent)
- ssh-add ~/.ssh/id_rsa
- cp .travis/ssh_config ~/.ssh/config
- git config --global user.name "xxxxx" #Set github user name
- git config --global user.email xxxxx@xxx.com #Set up github user mailbox
# Commands executed
after_success:
- ssh travis@99.99.99.99 -o StrictHostKeyChecking=no 'cd ~/hexoBlog-auto  && git pull && npm run deploy'

script:
- npm run deploy
- Edit hexoBlog-auto package.json
"scripts": {
        "build": "hexo generate",
        "clean": "hexo clean",
        "server": "hexo server",
        "deploy": "hexo clean && hexo g -d"
},
- Save and submit new and modified documents
[travis@VM_156_69_centos hexoBlog-auto]$ git add .travis package.json .travis.yml
[travis@VM_156_69_centos hexoBlog-auto]$ git commit -m 'update'
[travis@VM_156_69_centos hexoBlog-auto]$ git push
7, View deployment status in travis official website
Pit you may encounter:
- No such file or directory:bss_file.c:398:fopen('.ssh/id_rsa','w')
This is a problem with key resolution. Go back to step 5
In the normal step, you will be prompted that you do not have permission, because in the previous article, we published it to the git user of the server, and travis user does not have permission to operate the file under / home/git
Modify / home/git file owner
[travis@VM_156_69_centos hexoBlog-auto]$ su git             //Switch to git
[git@VM_156_69_centos hexoBlog-auto]$ cd ~
[git@VM_156_69_centos ~]$ cd ..
[git@VM_156_69_centos home]$ chown -R travis git/              //-R recursively modifies all files under git
[git@VM_156_69_centos home]$ su #                        //Switch to root
[root@VM_156_69_centos home]$ chown -R travis hexoBlog/     //-R recursively modifies all files under hexoBlog
Then restart once


