Project introduction
The project is completed by using the object-oriented idea in ts language.
preface
After learning the TS project, it is a good choice to practice with this project. Here is a process of js - > ts. js is a process oriented language and TS is an object-oriented language. This is the biggest difference between the two languages.
1, Several objects in greedy snake
Before formally doing this project, we should make it clear that the greedy Snake game can be divided into several modules. Here, we can imagine that the greedy snake can be divided into three objects: food, scoreboard and snake. Next, explain how each object should be completed one by one in this order.
1. Food
For an object, it just contains two points: methods and attributes. Analyze the attributes of food: coordinate position (X,Y). The method to be included in the food object is to change the coordinate position, because after the snake eats the food, the food will change accordingly change(): that is, a random number generates a position.
Code for this class:
class Food{
    elements: HT0MLElement;
    constructor(){
        //If you write directly, you may report an error because you can't get this div,
        //So there will be an error, but we can certainly get it, so we use an exclamation mark to indicate that we can get it.
        //This is a kind of assertion
        this.elements=document.getElementById('food')!;
    }
    //Get food X axis
    get X(){
        return this.elements.offsetLeft;
    }
    get Y(){
        return this.elements.offsetTop;
    }
    change(){
        //The minimum food position is 0 and the maximum is 290. Because the snake moves 10px each time, the food should be divided by 10
        //Generate random position round up and round floor down
        let top=Math.round(Math.random()*29)*10
        let left=Math.round(Math.random()*29)*10
        this.elements.style.top=top+'px'
        this.elements.style.left=left+'px'
    }
 }
 export default Food;
Several ts knowledge points are involved here:
1. Type assertion: when our compiler cannot determine that a variable is a type, but we are sure that it is a type, we can assert this variable. The syntax is as follows:
XX as String
<String>XX
2. When creating each object, it will correspond to an HTMLElement element. See the first line of the code for details, which actually explains object - > instance
3. get X() {} in ts is the attribute of an object. You can set this attribute by directly return ing the attribute value you want to express in this function, which is similar to a getter in vue. It is convenient for us to perform some operations on the attribute before obtaining the attribute.
2. Scoreboard ScorePannel class
For this class, it should contain two attributes: score and grade.

The idea of realizing this class here is: when a snake eats a food, its score is + 1, and when added to a certain value, its level is + 1. Therefore, this class should contain two methods, addScore() and addLevel(). The specific implementation code is as follows:
class ScorePannel{
    // Record scores and grades
    score=0;
    level=1;
    //dom element corresponding to score level
    scoreEle:HTMLElement;
    levelEle:HTMLElement;
    // Set the variable limit level to increase scalability. If the value is transferred, it will not be transferred to 10
    maxLevel:number;
    // Set the variable to indicate how many decimals are raised one level
    upScore:number;
    constructor(maxLevel:number=10,upScore:number=10){
        this.scoreEle=document.getElementById('score')!;
        this.levelEle=document.getElementById('level')!;
        this.maxLevel=maxLevel;
        this.upScore=upScore
    }
    // Bonus method: the score increases automatically
    addScore(){
        this.score++
        this.scoreEle.innerHTML=this.score+'';
        // Judge the score to determine whether to upgrade
        if(this.score%this.upScore===0){
            this.addLevel()
        }
    }
    // Level increase: assign a value after self increase to set a level judgment
    addLevel(){
        if(this.level<this.maxLevel)
        {
            this.levelEle.innerHTML=++this.level+'';
        }

    }
}
// Test code
// const scorePannel=new ScorePannel(100,2)
// for(let i=0;i<200;i++)
// {
//     scorePannel.addScore()
// }
export default ScorePannel
Here, in order to increase the extensibility of the upgrade rule, the relevant variables are defined in the form of constructor parameters, which can also be absorbed in future development. In order to improve the extensibility, the variables to be extended can be used as parameters.
3. Snake
Since the snake has only one head at first, the html structure of the snake here is as follows:
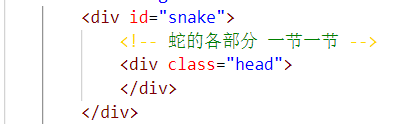
When writing snake, you can split the snake into two parts: head + body, that is, it contains two attributes: head and bodies. However, it should be noted that head also belongs to the body. After eating food, you need to add div to make the snake longer. Therefore, you also need to obtain the div with id snake as an attribute to facilitate the subsequent addition of body; Let's analyze the methods that the snake should have. First, the method to control the movement of the snake. moveBody is essential. Then, there should be an addBody because the length of the snake should be increased. In addition, we also need to consider the case that the snake bumps into itself when its body becomes very long, so we need to add an additional method of checkHeadBody.
addBody: a relatively simple method is to directly add a new dom element to the div with id snake based on the html structure.
moveBody: call this method when set ting the Head coordinates of the snake. In this method, traverse the body dom nodes except the snake Head, so that the positions of these nodes are equal to the position of the previous node, so as to realize the movement of the body. For example, the coordinates of body[3] are equal to the coordinates of body[2] when moving.
The checkHeadBody method is to traverse whether the body nodes other than the head are equal to the head nodes. When they are equal, they hit themselves.
In addition to these methods, we also need to explain what needs to be done inside the set X and set Y functions. Since only one value of X or y of the snake will change at a certain time, you can judge whether it has changed before setting the coordinates of the snake Head. If there is no change, you can directly return, After judgment, it is also necessary to check whether the current value exceeds the boundary range of the snake panel. If it exceeds the boundary range, it means that it has hit the wall. Another point is that whether it moves horizontally or vertically, the snake cannot turn around vertically. Here, it is also necessary to judge whether the coordinate position of the snake's Head in the next second overlaps with the position of the first body, Then call the moveBody and checkHeadBody methods inside the set.
The specific implementation details are as follows:
because
class Snake{
    // The snake head element is the first child element in the div
    head:HTMLElement;
    // Including snake head, the whole snake HTMLCollection will be updated in real time
    bodys:HTMLCollection;
    element:HTMLElement;

    constructor(){
        this.element=document.getElementById('snake')!;
        // The assertion data type gets the first div child element of the snake
        this.head=document.querySelector('#snake > div') as HTMLElement;
        //head is part of the body
        this.bodys=document.getElementById('snake')!.getElementsByTagName('div');
    }
    // Obtain snakehead coordinates:
    get X(){
        return this.head.offsetLeft;
    }
    get Y(){
        return this.head.offsetTop;
    }
    // Set snakehead coordinates
    set X(value:number){

        if(this.X===value)
        {
            return
        }


    if(value<0||value>290)
    {
        throw new Error('The snake hit the wall x')
    }

        // If you turn around and the snake continues
        if(this.bodys[1]&&(this.bodys[1] as HTMLElement).offsetLeft===value){
            if(value>this.X){
                value=this.X-10
            }else{
                value=this.X+10
            }
        }
        this.moveBody()
        this.head.style.left=value+'px'
        this.checkHeadBody()
    }
    set Y(value:number){
        if(this.Y===value)
        {
            return
        }
        // The snake throws an exception when it hits the wall
        if(value<0||value>290)
        {
            throw new Error('The snake hit the wall y')
        }

        // When modifying X, the horizontal coordinates are modified. When the snake moves left and right, it cannot turn right directly
        if(this.bodys[1]&&(this.bodys[1] as HTMLElement).offsetTop===value){
            if(value>this.Y){
                value=this.Y-10
            }else{
                value=this.Y+10
            }
        }
        this.moveBody()
        this.head.style.top=value+'px'
        this.checkHeadBody()
    }
    // Method for increasing body length of snake after eating food
    addBody(){

        // Add div to element
        let newBody=document.createElement('div')
        this.element.appendChild(newBody)

    }
    // This method is called when the head is moved
    moveBody(){
        // Set the fourth knot to the third knot position - > three equals two - > two equals one
        // Traverse all bodies
       console.log(this.bodys.length)
        for(let i=this.bodys.length-1;i>0;i--)
        {
            // Gets the front body position type assertion
            let X=(this.bodys[i-1] as HTMLElement).offsetLeft;
            let Y=(this.bodys[i-1] as HTMLElement).offsetTop;
            // The body has changed
            (this.bodys[i] as HTMLElement).style.left=X+'PX';
            (this.bodys[i] as HTMLElement).style.top=Y+'PX';
        }
    }
      checkHeadBody(){
        //   Get whether all physical examinations overlap with snake head coordinates
        for(let i=1;i<this.bodys.length;i++){
            let bd=this.bodys[i] as HTMLElement
            if(this.X===bd.offsetLeft&&this.Y===bd.offsetTop){
                 throw new Error('Hit yourself')
            }
        }
      }
}
export default Snake;
PS: all the error reports here are realized by throwing exceptions, because next, we need to implement a GameControl class to control the movement of snakes. In this class, we can catch exceptions.
4. Game control GameControl class
This class mainly controls the above three classes to realize the operation of the game. Therefore, in addition to calling the above three classes, it also needs to add attributes such as direction (judge the moving direction of the snake) and ISLIVE (judge whether the snake is alive, that is, whether the game is to be terminated). For methods, the methods that this class should implement include init() to start the game, keydownHandler() to check the key, run() to move the snake, and checkEat() to check the food.
init(): listen for mouse buttons and call run().
keydownHandler() listens for pressing the key and sets the direction value of the attribute to facilitate the implementation of the run method.
run() determines the coordinate changes of X and Y according to the keys. If Y-10 is the upper, then Y+10, left X-10, right X+10, then checkEat is used to determine whether to eat the food. Finally, try modifies the X Y coordinates of the Snake. The reason for using the X here is to capture the anomalies in the class, and then adjust the number of points to the exception when the exception occurs. Finally, the most important thing is to call the run method regularly. The shorter the time, the faster the speed. The call time can be evaluated according to the level, so as to realize the change of speed.
checkEat() directly determines the location of the snake head and the location of the food, then calls the change() of the Food class and addScore() of the scorePannel class, and finally calls the addBody() method of the snake class.
The detailed code is as follows:
import Snake from "./Snake";
import Food from "./Food";
import ScorePannel from "./ScorePannel";
//A unified class that controls all classes
class GameControl {
    // snake
    snake: Snake;
    // food
    food: Food;
    //Scoreboard
    scorePannel: ScorePannel;
    //    Create an attribute to store the moving direction of the snake (key direction)
    direction: string = ''
    // Create an attribute to record whether the snake is alive
    isLive=true;
    constructor() {
        // Declare three new classes
        this.snake = new Snake();
        this.food = new Food();
        this.scorePannel = new ScorePannel(10,1);
        this.init()
    }
    //    Start the game
    init() {
        //    Bind the event of keyboard key pressing. Note that this point needs to be bound to the gamecontrol object with bind, otherwise it points to document
        document.addEventListener('keydown', this.keydownHandler.bind(this))
        // Call the run method to move the snake
        this.run()

    }
    //   The response function of pressing the keyboard returns a string
    // Chrome:  ArrowUp    IE:   up
    //          ArrowDown        down
    //          ArrowRight       right
    //          ArrowLeft        left
    keydownHandler(event: KeyboardEvent) {
        console.log(event.key)
        //    Check whether the user has pressed the direction key
        //    Modify direction
        this.direction = event.key
    }
    // Snake Movement
    run() {
        //   top up decrease
        //   top down increase
        //   Right left increase
        //   left decrease
        let X = this.snake.X
        let Y = this.snake.Y
        // Modify the X and Y values according to the key direction
        switch (this.direction) {
            case "ArrowUp":
            case "Up":
                Y-=10;
                break;
            case "ArrowDown":
            case "Down":
                Y+=10;
                break;
            case "ArrowLeft":
            case "Left":
                X-=10;
                break;
            case "ArrowRight":
            case "Right":
                X+=10;
                break;
        }
    // Detect whether you eat food
    this.checkEat(X,Y)


    //    Modify the X and y of the snake
    try{
        this.snake.X=X;
        this.snake.Y=Y;
    }catch(e){
      alert((e as Error).message)
      this.isLive=false
    }

    // The time when the timed call run is started is the speed
    this.isLive&&setTimeout(this.run.bind(this),300-(this.scorePannel.level-1)*30)
    }
    // Define a method to detect whether snakes eat food
    checkEat(X:number,Y:number){
        if (X===this.food.X&&Y===this.food.Y){
        this.food.change()
        this.scorePannel.addScore()
        this.snake.addBody()}

    }
}
let test=new Food()
console.log(test.X,test.Y)
export default GameControl
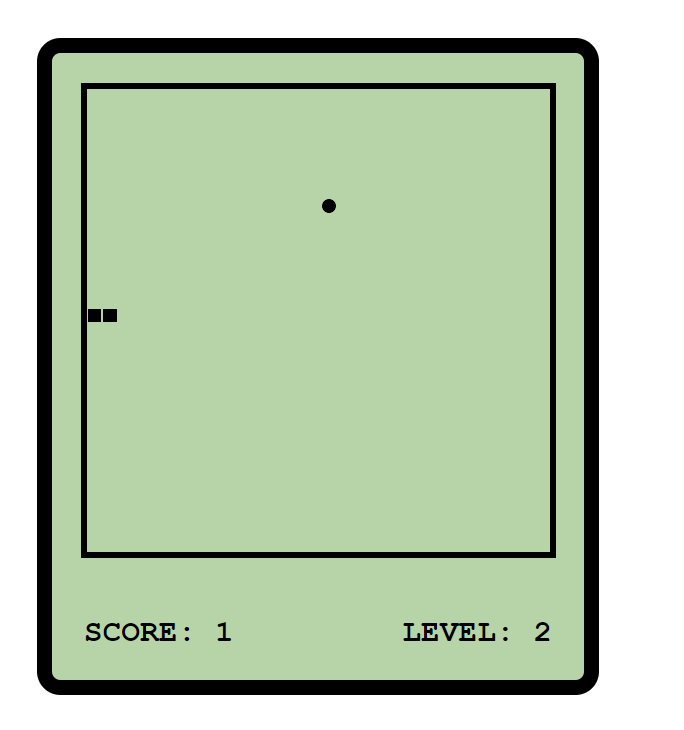
2, Run
Export the gameControl class to the webpack packaged entry file and create a new object to run the game. The running interface is as follows:
3, Summary
The biggest difference between ts and js is that TS is an object-oriented development process, while js is a process oriented development process. The development of TS should be more abstract, but its logic can be seen from the above development.