in Spring + spring MVC environment, generally speaking, we have two schemes to implement Scheduled tasks. One is to use the @ Scheduled annotation of spring's own Scheduled task processor, and the other is to use the third-party framework Quartz. Spring Boot is derived from spring + spring MVC, so it naturally has the implementation strategies of Scheduled tasks in these two springs, Of course, Quartz is also supported. In this article, let's take a look at the implementation of two timing tasks in Spring Boot.
I@ Scheduled
it's very easy to use @ Scheduled. Directly create a Spring Boot project and add the web dependency Spring Boot starter web. After the project is created successfully, add the @ enableshcheduling annotation to start the Scheduled task:
@SpringBootApplication
@EnableScheduling
public class ScheduledApplication {

    public static void main(String[] args) {
        SpringApplication.run(ScheduledApplication.class, args);
    }
}
Next, configure scheduled tasks:
@Scheduled(fixedRate = 2000)
    public void fixedRate() {
        System.out.println("fixedRate>>>"+new Date());
    }
    @Scheduled(fixedDelay = 2000)
    public void fixedDelay() {
        System.out.println("fixedDelay>>>"+new Date());
    }
    @Scheduled(initialDelay = 2000,fixedDelay = 2000)
    public void initialDelay() {
        System.out.println("initialDelay>>>"+new Date());
    }
1. First use the @ Scheduled annotation to start a Scheduled task.
2.fixedRate refers to the time interval between task execution, specifically refers to the start time interval of two tasks, that is, when the second task starts, the first task may not end.
3.fixedDelay refers to the time interval between task execution, specifically the time interval between the end of this task and the beginning of the next task.
4.initialDelay indicates the delay time of the first task start.
5. All time is in milliseconds.
the above is a basic usage. In addition to these basic attributes, @ Scheduled annotation also supports cron expression. Using cron expression can very richly describe the time of Scheduled tasks. The cron expression format is as follows:
[seconds] [minutes] [hours] [days] [months] [weeks] [years]
The specific values are as follows:

It should be noted that the date and week in the month may conflict. Therefore, when configuring, one of the two must be?
Wildcard meaning:
1.?
: indicates that you do not specify a value, that is, you do not care about the value of a field. It should be noted that the date and week in the month may conflict, so when configuring, one of the two must be?
2.*
: indicates all values. For example, setting * in the field of seconds means that it will be triggered every second
3.,
: used to separate multiple values. For example, setting "MON,WED,FRI" in the week field indicates that Monday, Wednesday and Friday are triggered
4.-
: indicates the interval. For example, setting "10-12" on seconds means that it will be triggered in 10, 11 and 12 seconds
5.
/: used for incremental triggering. If "5 / 15" is set above the second, it means to trigger every 15 seconds (5,20,35,50) from 5 seconds
6.
#: serial number (indicating the week number of each month). For example, setting "6#3" in the week field indicates the third Saturday of each month (it is perfect for mother's day and father's day)
7.
The setting of the week field is case insensitive if English letters are used, that is, mon is the same as mon
8.
50: Express the last meaning. In the day field setting, it represents the last day of the current month (according to the current month, if it is February, it will automatically judge whether it is a wet year). In the week field, it represents Saturday, which is equivalent to "7" or "SAT" (note that Sunday is the first day). If a number is added before "L", it indicates the last of the data. For example, if the format of "6L" is set in the week field, it means "the last Friday of this month"
9.
W: Indicates the nearest working day (Monday to Friday) from the specified date. For example, setting "15W" in the day field indicates that it is triggered on the nearest working day from the 15th of each month. If the 15th happens to be a Saturday, it will be triggered by the nearest Friday (14th). If the 15th is a weekend, it will be triggered by the nearest next Monday (16th). If the 15th happens to be a working day (Monday to Friday), it will be triggered on that day. If the specified format is "1W", it indicates that it is triggered on the latest working day after the 1st of each month. If the 1st is Saturday, it will be triggered on the 3rd next Monday. (Note: only specific numbers can be set before "W", and no interval is allowed. ")
10.
L and W can be used in combination. If "LW" is set in the day field, it means that it will be triggered on the last working day of the current month (generally refers to salary)
For example, a simple cron expression in the @ Scheduled annotation is triggered every 5 seconds, as follows:
@Scheduled(cron = "0/5 * * * * *")
public void cron() {
    System.out.println(new Date());
}
The above describes how to use @ Scheduled annotation to implement Scheduled tasks. Next, let's take a look at how to use Quartz to implement Scheduled tasks.
II Quartz
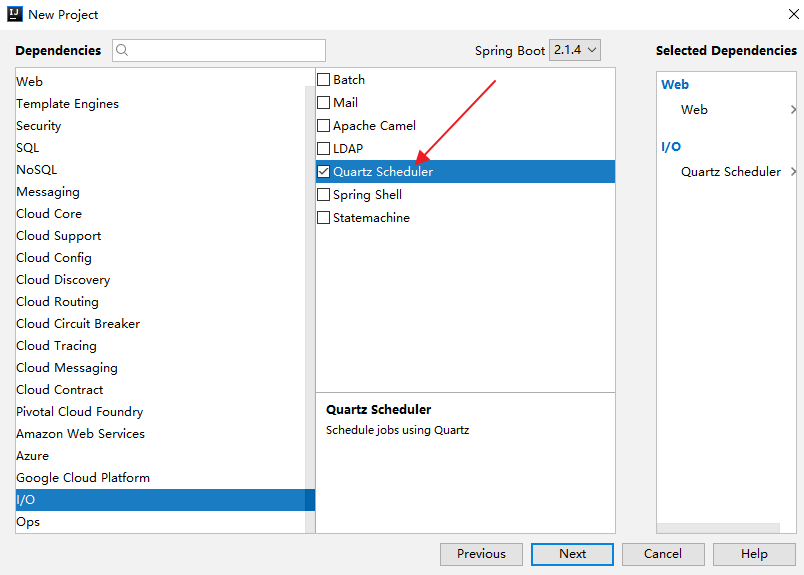
in general, in projects, unless the business involved in Scheduled tasks is too simple and the @ Scheduled annotation is used to solve Scheduled tasks, Quartz may be used for Scheduled tasks in most cases. To use Quartz in Spring Boot, you only need to add Quartz dependency when creating the project:
After the project is created, you also need to add a note to start the scheduled task:
@SpringBootApplication
@EnableScheduling
public class QuartzApplication {
    public static void main(String[] args) {
        SpringApplication.run(QuartzApplication.class, args);
    }
}
In the process of using Quartz, there are two key concepts: JobDetail (what to do) and trigger (when to do). To define JobDetail, you need to define job first. Job can be defined in two ways:
The first method is to directly define a Bean:
@Component
public class MyJob1 {
    public void sayHello() {
        System.out.println("MyJob1>>>"+new Date());
    }
}
There are two points about this definition:
1. First register the Job in the Spring container.
2. One defect of this definition method is that it cannot transfer parameters.
The second definition method is to inherit QuartzJobBean and implement the default method:
public class MyJob2 extends QuartzJobBean {
    HelloService helloService;
    public HelloService getHelloService() {
        return helloService;
    }
    public void setHelloService(HelloService helloService) {
        this.helloService = helloService;
    }
    @Override
    protected void executeInternal(JobExecutionContext jobExecutionContext) throws JobExecutionException {
        helloService.sayHello();
    }
}
public class HelloService {
    public void sayHello() {
        System.out.println("hello service >>>"+new Date());
    }
}
Compared with the first method, this method supports parameter transmission. When the task is started, the executeInternal method will be executed.
After the Job is created, create a class and configure JobDetail and Trigger triggers as follows:
@Configuration
public class QuartzConfig {
    @Bean
    MethodInvokingJobDetailFactoryBean methodInvokingJobDetailFactoryBean() {
        MethodInvokingJobDetailFactoryBean bean = new MethodInvokingJobDetailFactoryBean();
        bean.setTargetBeanName("myJob1");
        bean.setTargetMethod("sayHello");
        return bean;
    }
    @Bean
    JobDetailFactoryBean jobDetailFactoryBean() {
        JobDetailFactoryBean bean = new JobDetailFactoryBean();
        bean.setJobClass(MyJob2.class);
        JobDataMap map = new JobDataMap();
        map.put("helloService", helloService());
        bean.setJobDataMap(map);
        return bean;
    }
    @Bean
    SimpleTriggerFactoryBean simpleTriggerFactoryBean() {
        SimpleTriggerFactoryBean bean = new SimpleTriggerFactoryBean();
        bean.setStartTime(new Date());
        bean.setRepeatCount(5);
        bean.setJobDetail(methodInvokingJobDetailFactoryBean().getObject());
        bean.setRepeatInterval(3000);
        return bean;
    }
    @Bean
    CronTriggerFactoryBean cronTrigger() {
        CronTriggerFactoryBean bean = new CronTriggerFactoryBean();
        bean.setCronExpression("0/10 * * * * ?");
        bean.setJobDetail(jobDetailFactoryBean().getObject());
        return bean;
    }
    @Bean
    SchedulerFactoryBean schedulerFactoryBean() {
        SchedulerFactoryBean bean = new SchedulerFactoryBean();
        bean.setTriggers(cronTrigger().getObject(), simpleTriggerFactoryBean().getObject());
        return bean;
    }
    @Bean
    HelloService helloService() {
        return new HelloService();
    }
}
The configuration is as follows:
1. There are two ways to configure JobDetail: MethodInvokingJobDetailFactoryBean and JobDetailFactoryBean.
2. Use MethodInvokingJobDetailFactoryBean to configure the name of the target Bean and the name of the target method. This method does not support parameter passing.
3. JobDetail can be configured by using JobDetailFactoryBean. The task class inherits from QuartzJobBean. This method supports parameter transmission and encapsulates the parameters in JobDataMap for transmission.
4.Trigger refers to trigger. Multiple triggers are defined in Quartz. Here we show you the usage of two of them, SimpleTrigger and CronTrigger.
5.SimpleTrigger is a bit similar to the basic usage of @ Scheduled mentioned earlier.
6.CronTrigger is a bit similar to the usage of cron expression in @ Scheduled.
After all definitions are completed, start the Spring Boot project to see the execution of scheduled tasks.