Recently, when using NVIDIA TX2, I spent a lot of time repeatedly in environmental configuration, stepped on some pits and made a record to prevent reinstallation of the system in the future
prepare
- Data cable, keyboard, mouse and monitor are indispensable (the monitor should support HDMI interface. I think the Internet says that HDMI to VGA will have a black screen, so I haven't tried it)
- There is a virtual machine of Ubuntu 16 or Ubuntu 18, or a computer as the host (Ubuntu 20.04 can't be used, because my computer is installed for the first time and can't be used)
- There is a network environment, and the network speed must be better. In my laboratory, the network speed is average, and I often fail to download
Brush with SDKmanager
- Open the prepared Ubuntu system as the host
Note that if you use a virtual machine, you need to allocate a large hard disk space, at least 40GB, preferably 100G, otherwise you will fail due to insufficient space - Register NVIDIA developer account https://developer.nvidia.com/
- Download NVIDIA's SDK Manager (Baidu address), install, open and log in
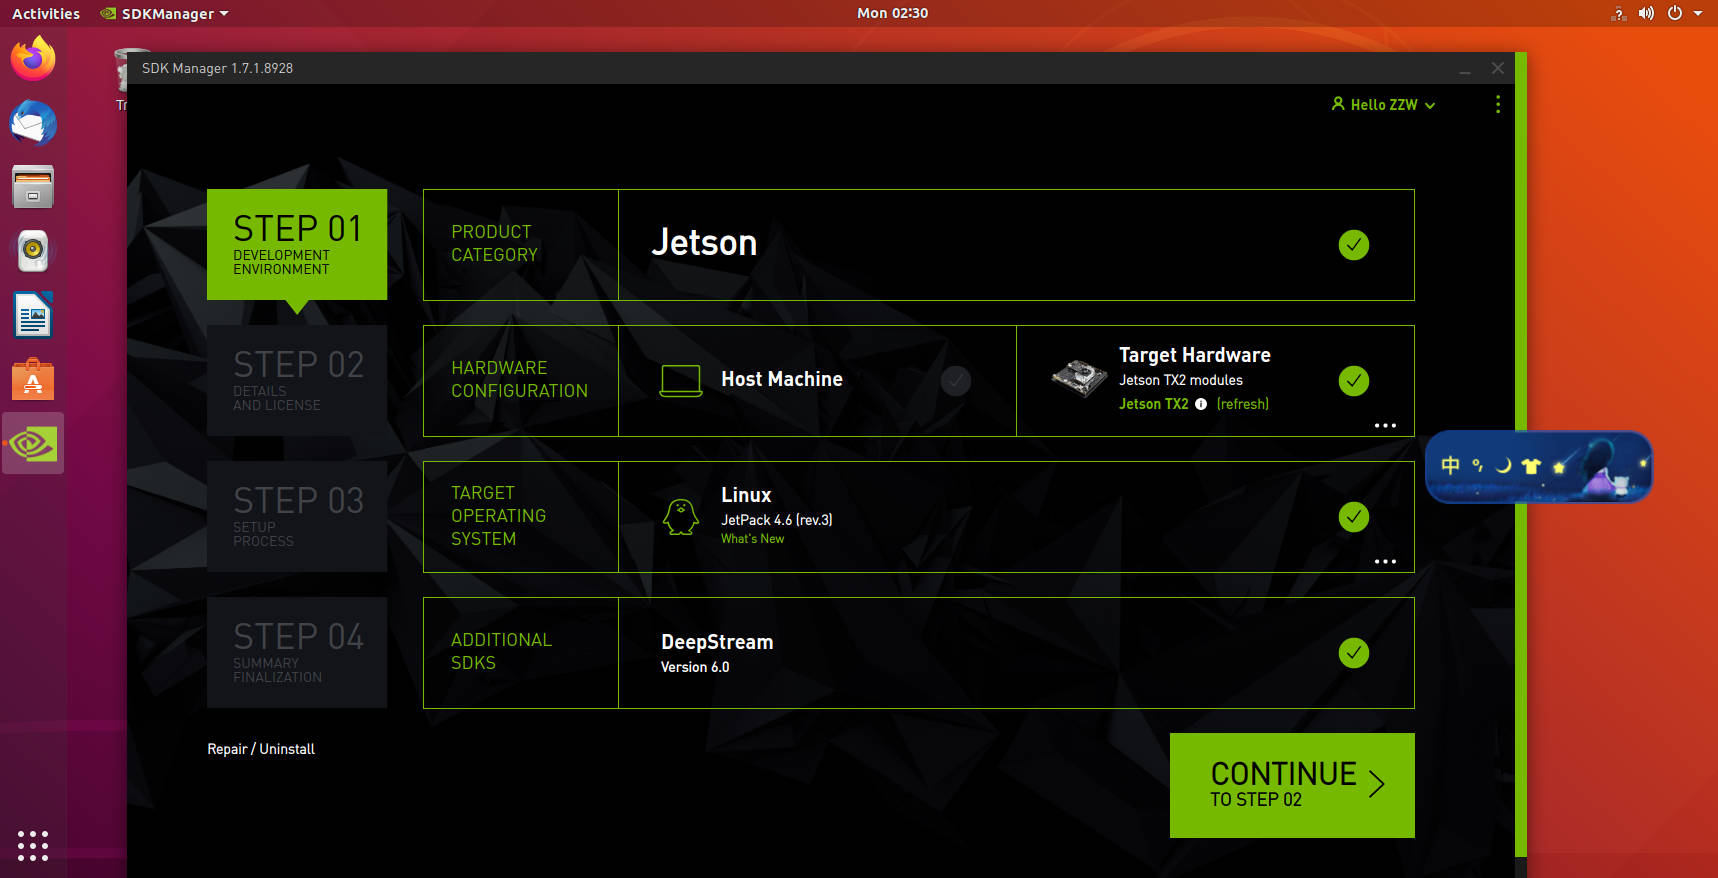
- The third pin of TX2 board is connected to GND (enter recovery mode), powered on and connected to the host
- Some blogs of the Host Machine also click on it. In fact, you don't need it. This is to install cuda for your computer host. If you don't need it, you don't have to tick it
You can input lsusb to see if there are NVIDIA devices and ensure that the board is connected
 7. The first I accept... At the bottom should be checked. The second Downloader now and install later is also recommended to be checked for the first time, which means downloading first and not installing. After downloading, you can install it together. If it is installed while downloading, the network speed is not good, and it is easy to have problems
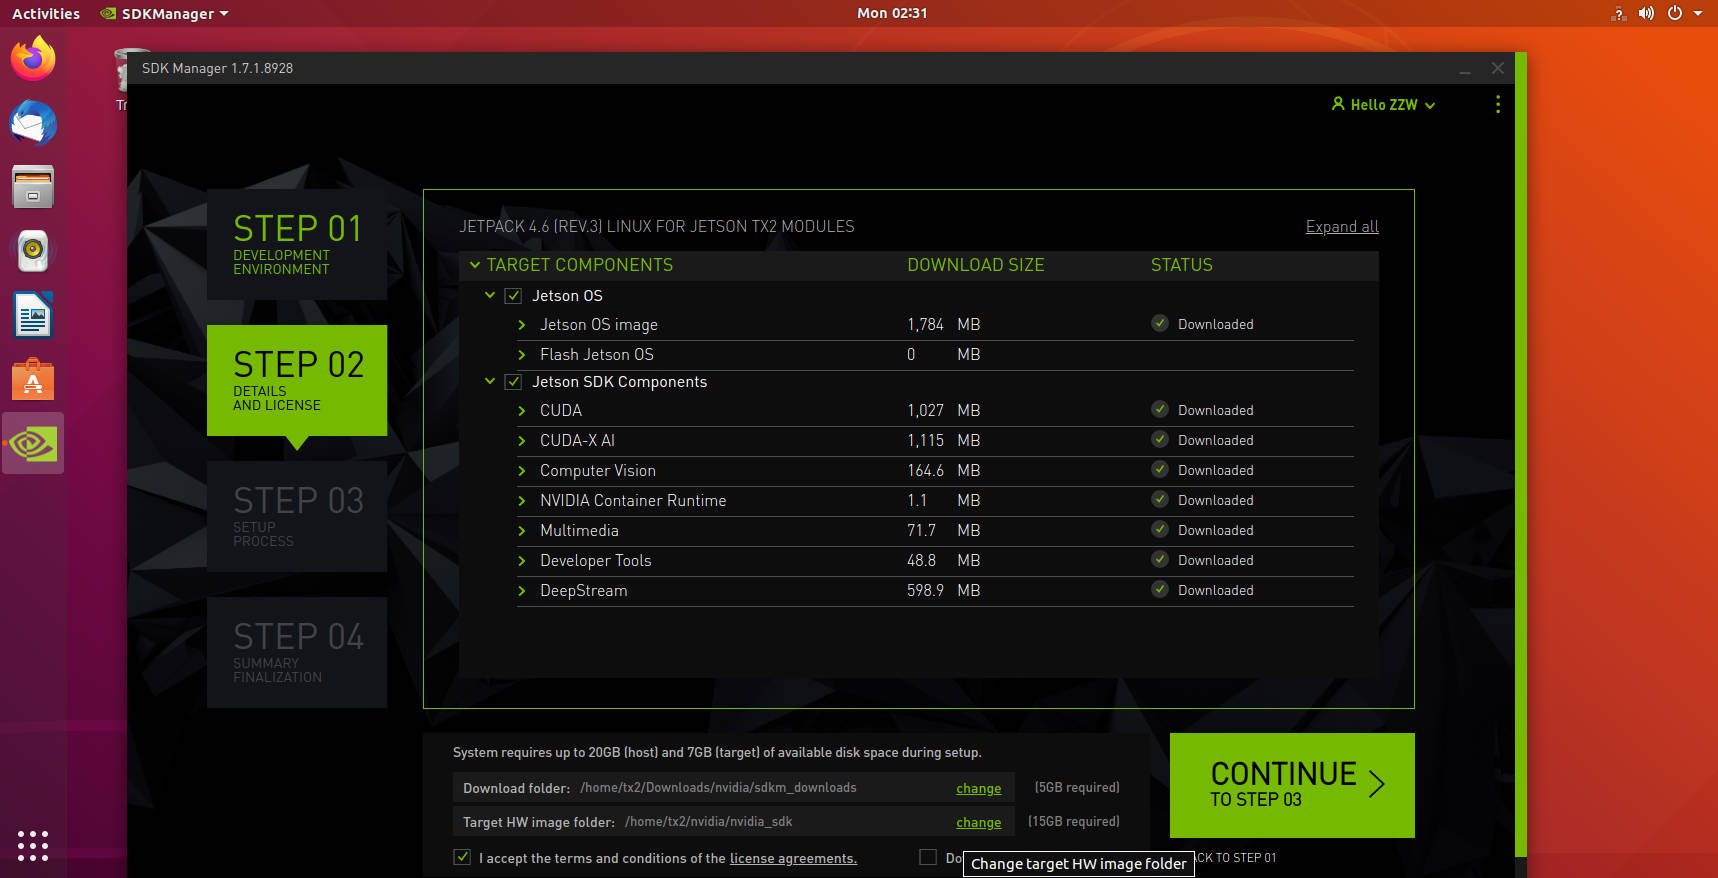
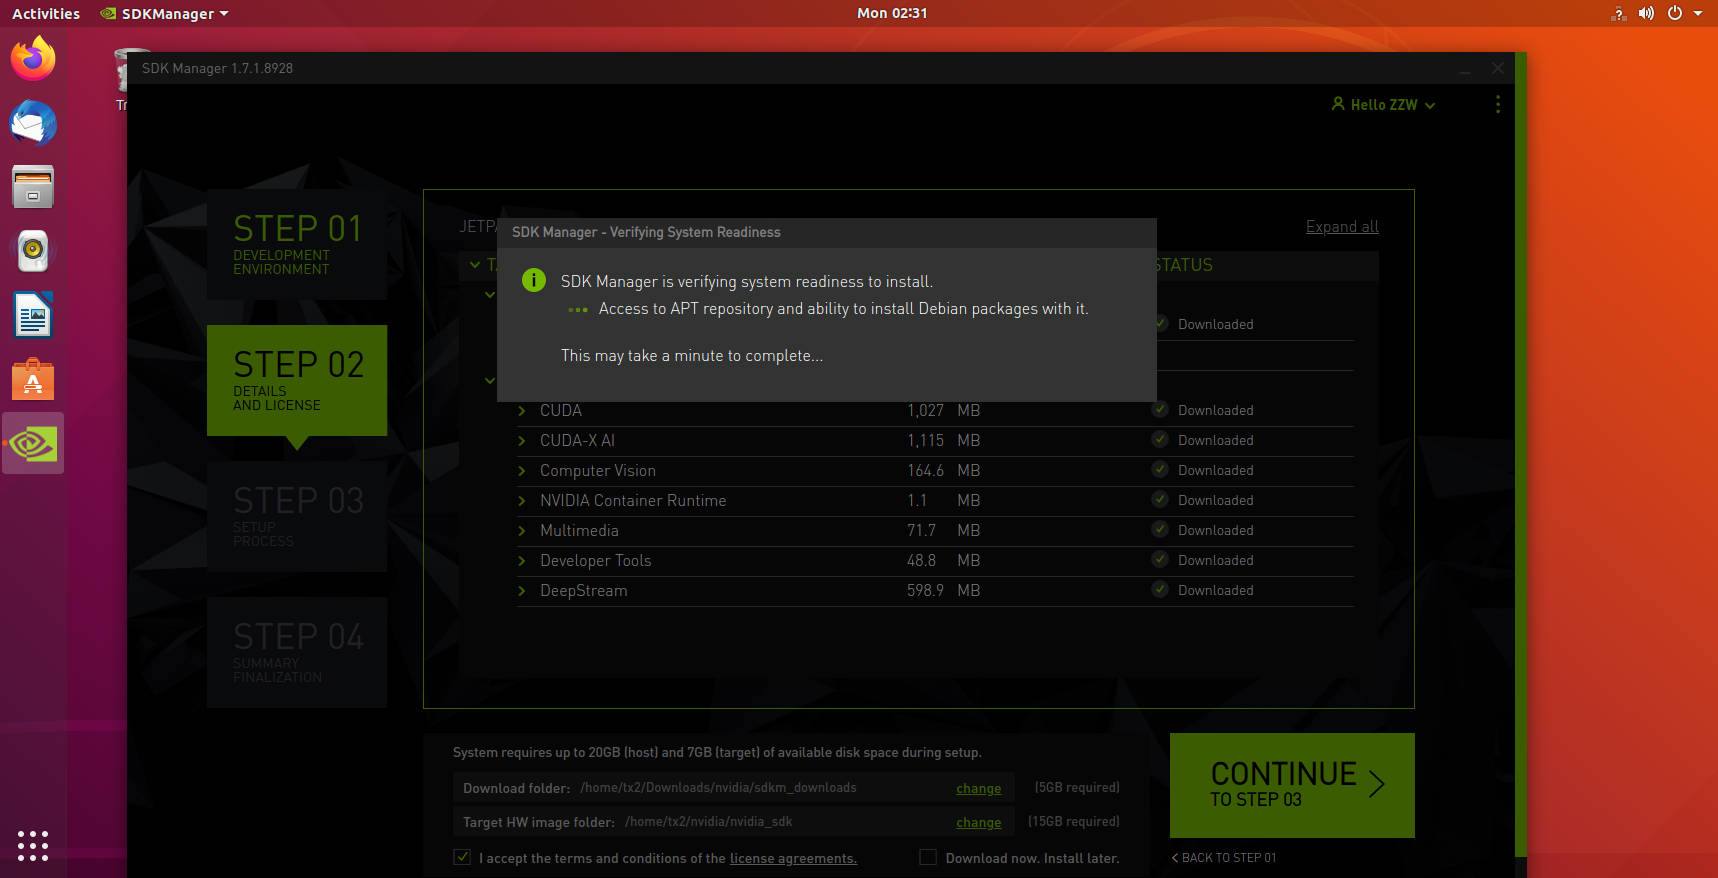
- First, I will burn the Jetson OS (that is, the magic modified Ubuntu 18). When the burning is about to end, the display will light up by itself, and such a prompt will appear after a period of time
Don't panic. This is the image. It has been burned and can enter the system. The part of installing SDK software is behind it. We first log in to the system and set the user and password
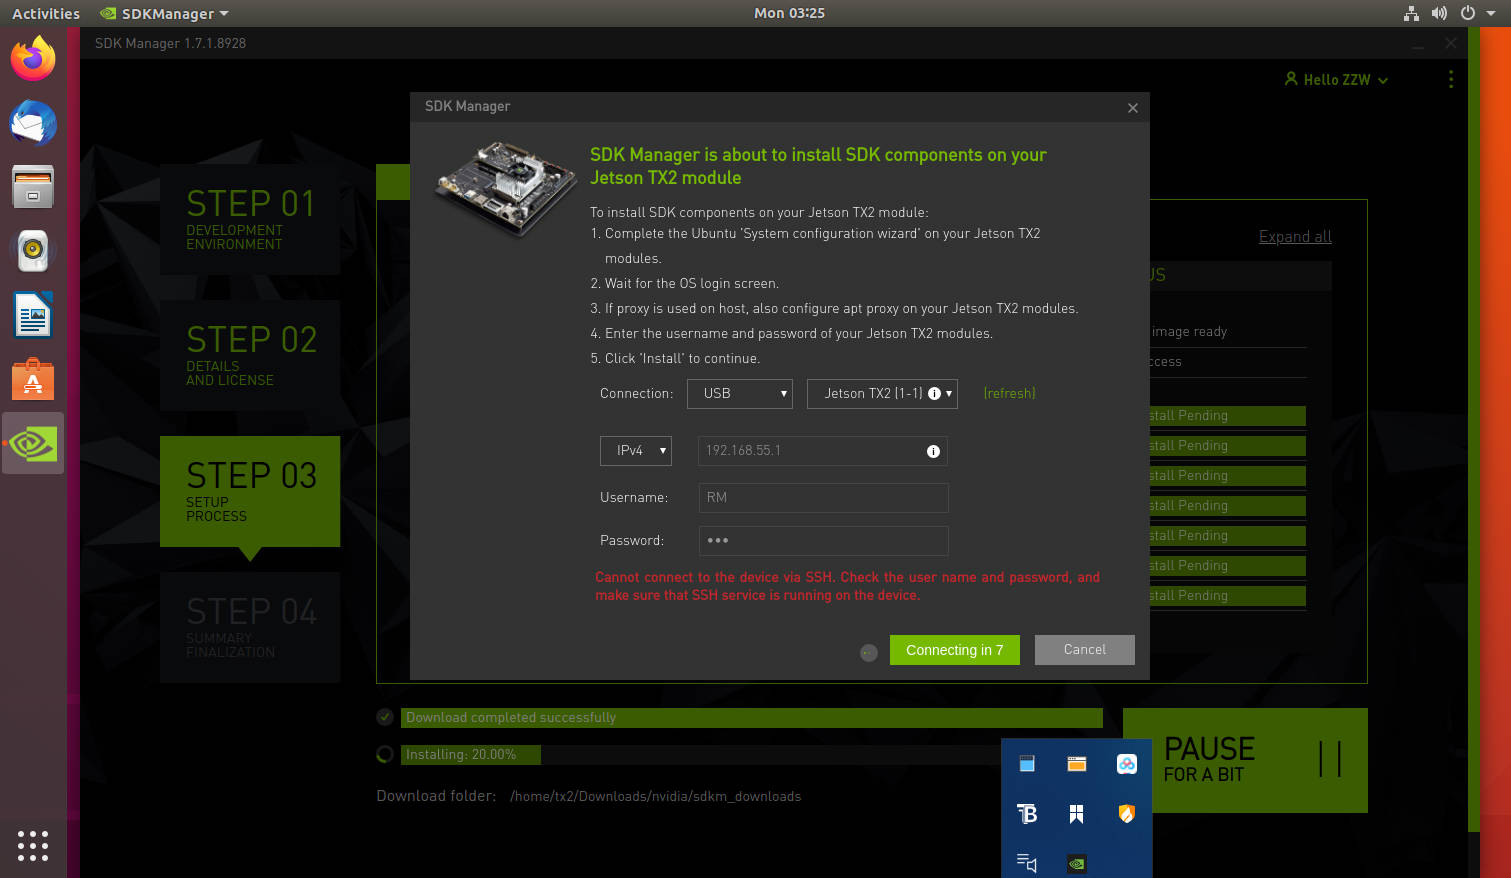
After that, set and enable SSH service on TX2
ps -e | grep ssh  # Check whether there is SSH service
sudo apt-get install openssh-server
sudo apt-get install openssh-client
service ssh start # Open service
If there is sshd in ps -e | grep ssh, it means normal
You can view the ip address through ifconfig or ip addr
Generally, you can connect by entering the account and password on the host
Ensure that the host and TX2 are under the same local area network
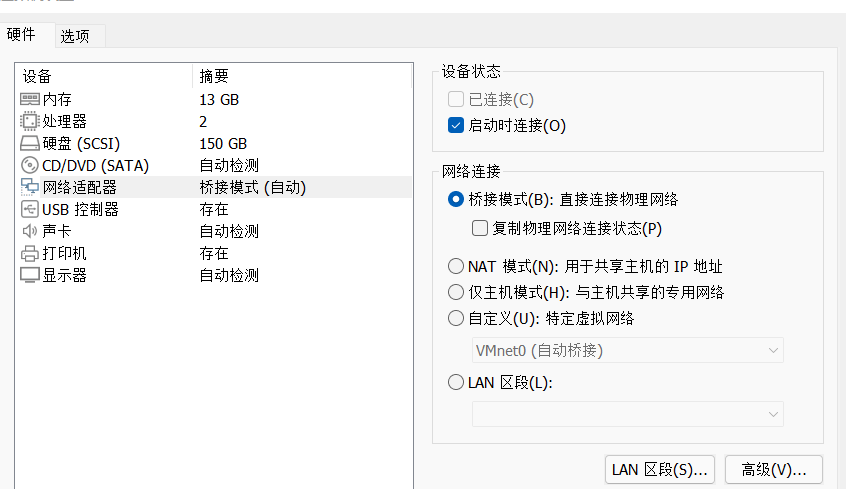
My virtual machine configuration is as follows. It is recommended to use bridge mode instead of NAT mode
7. Wait patiently for him to install it. It may not succeed. Try several more times
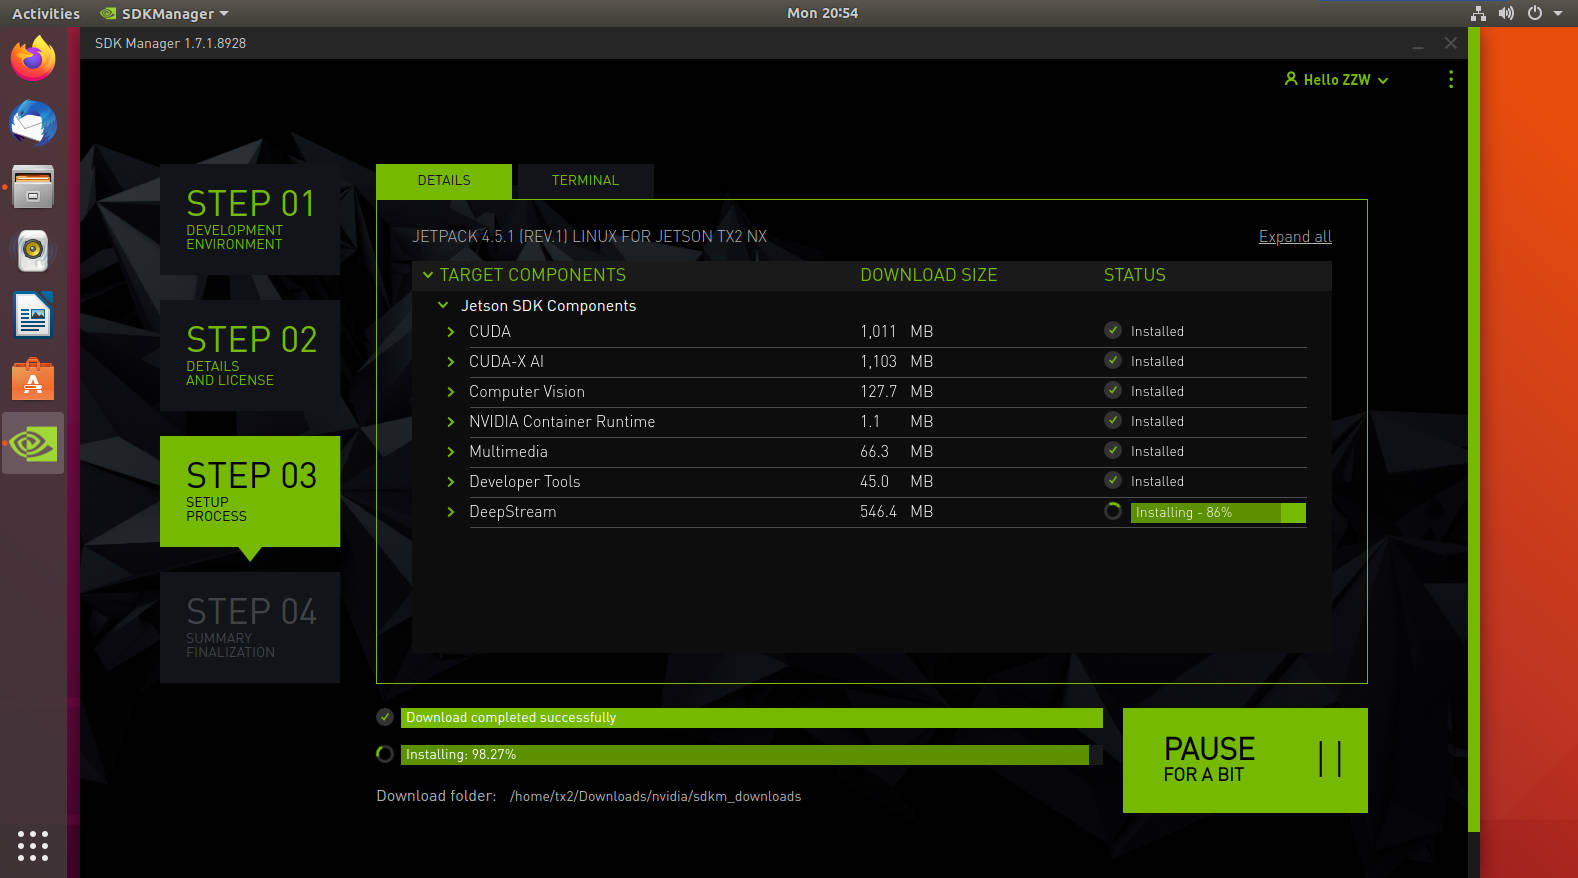
I made an error in Deepstream in the last step. I checked the log and thought it was due to insufficient memory. This SDK is not very important for the time being. I will install it myself later
If you have problems using SDKmanager, please refer to the official instructions
Install SDK manually
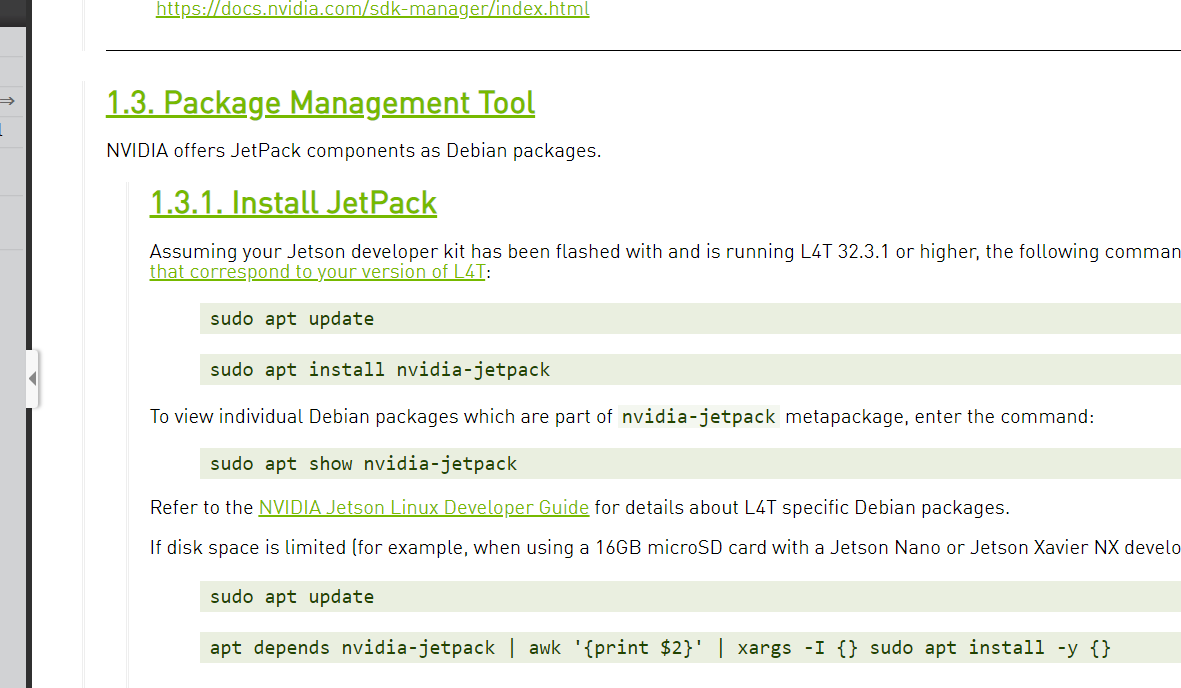
Although the tools provided by NVIDIA are easy to use (and not easy to use), they will inevitably encounter problems that can not be brushed normally. NVIDIA provides other installation methods https://docs.nvidia.com/jetson/jetpack/install-jetpack/index.html
If the brush is a bare system, the board can be installed online (I haven't tried)
I didn't install it successfully for the first time. I manually installed cuda, cudnn, pytorch, tersonRT, etc. Some installation methods may be introduced later.
SSD boot
A 128GB SSD is installed on the board of our TX2, which is very practical. The following describes how to set SSD as the first boot item
1. Format the installed SSD
Open DISK
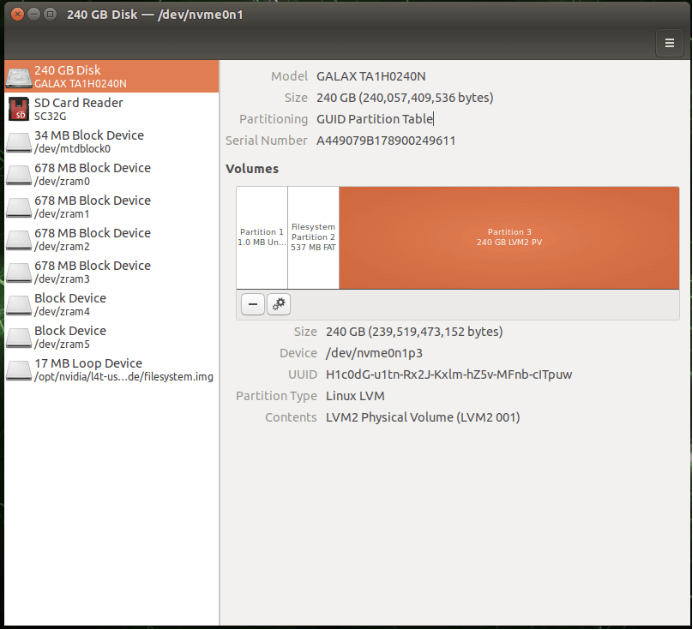
Click the three horizontal buttons in the upper right corner
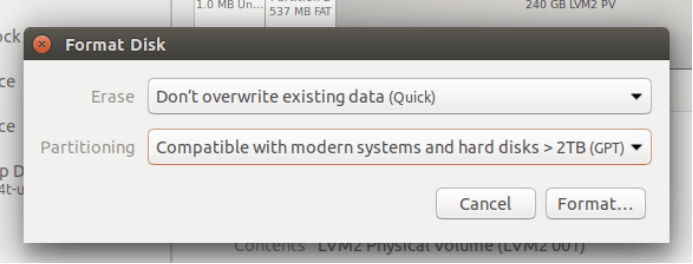
Then Fromat
Click the plus sign at the bottom
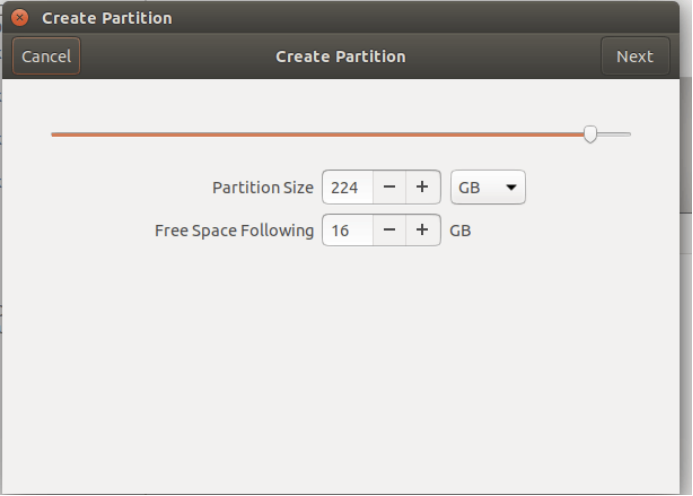
Leave 16GB of switching space
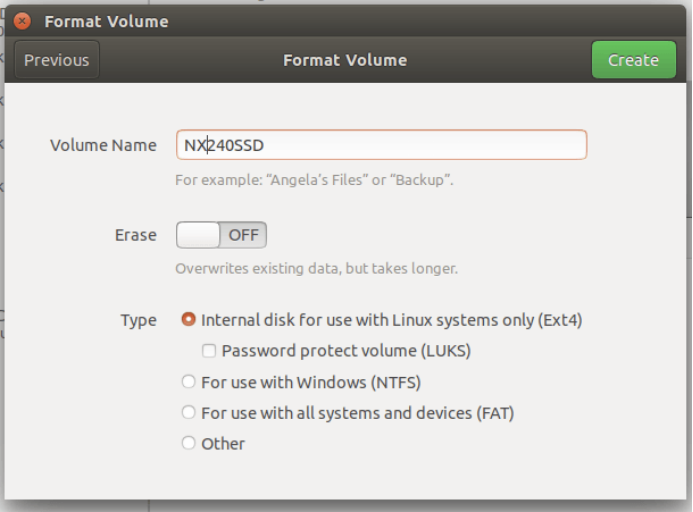
After create, the volume is successfully created
2. Copy from SD card to SSD
git clone https://github.com/jetsonhacks/rootOnNVMe.git
cd rootOnNVMe
./copy-rootfs-ssd.sh
3. Enable boot from SSD
./setup-service.sh
After restarting, you can see that there are more than 100 G of memory in TX2
Source change
The software source of TX2 is a foreign server, and the network speed will be very slow. You need to change the domestic ARM source (remember it's ARM)
1. Backup
sudo cp /etc/apt/sources.list /etc/apt/sources.list.bak    #First back up the original file sources list
sudo vim /etc/apt/sources.list  #sudo opens sources list
2. Delete or comment sources List, copy the following contents
Tsinghua source
deb http://mirrors.tuna.tsinghua.edu.cn/ubuntu-ports/ xenial-updates main restricted universe multiverse
deb-src http://mirrors.tuna.tsinghua.edu.cn/ubuntu-ports/ xenial-updates main restricted universe multiverse
deb http://mirrors.tuna.tsinghua.edu.cn/ubuntu-ports/ xenial-security main restricted universe multiverse
deb-src http://mirrors.tuna.tsinghua.edu.cn/ubuntu-ports/ xenial-security main restricted universe multiverse
deb http://mirrors.tuna.tsinghua.edu.cn/ubuntu-ports/ xenial-backports main restricted universe multiverse
deb-src http://mirrors.tuna.tsinghua.edu.cn/ubuntu-ports/ xenial-backports main restricted universe multiverse
deb http://mirrors.tuna.tsinghua.edu.cn/ubuntu-ports/ xenial main universe restricted
deb-src http://mirrors.tuna.tsinghua.edu.cn/ubuntu-ports/ xenial main universe restricted
Kedayuan:
deb http://mirrors.ustc.edu.cn/ubuntu-ports/ xenial-updates main restricted universe multiverse
deb-src http://mirrors.ustc.edu.cn/ubuntu-ports/ xenial-updates main restricted universe multiverse
deb http://mirrors.ustc.edu.cn/ubuntu-ports/ xenial-security main restricted universe multiverse
deb-src http://mirrors.ustc.edu.cn/ubuntu-ports/ xenial-security main restricted universe multiverse
deb http://mirrors.ustc.edu.cn/ubuntu-ports/ xenial-backports main restricted universe multiverse
deb-src http://mirrors.ustc.edu.cn/ubuntu-ports/ xenial-backports main restricted universe multiverse
deb htp://mirrors.ustc.edu.cn/ubuntu-ports/ xenial main universe restricted
deb-src http://mirrors.ustc.edu.cn/ubuntu-ports/ xenial main universe restricted
3. Save
sudo apt-get update
sudo apt-get upgrade
View some software versions
1. View cuda
nvcc -V # Or nvcc --version
2. View cudnn
Those on the Internet generally do not respond to input. After careful consideration, I think this is the right way
cat /usr/include/cudnn_version.h | grep CUDNN_MAJOR -A 2
3. Check the version of opencv
pkg-config --modversion opencv
We couldn't check the opencv version at first because we didn't find OpenCV PC, and jetpack4 The OPENCV of 4 + brush machine is opencv4
Install opencv4.0 in / usr / lib / aarch64 Linux GNU / pkgconfig PC, copy it to / usr/lib/pkgconfig and rename it OpenCV Just a PC.
cd  /usr/lib/aarch64-linux-gnu/pkgconfig
sudo cp opencv4.pc /usr/lib/pkgconfig/opencv.pc
The default is 4.1 one
4. Check the version of TensorRT
dpkg -l | grep TensorRT
5. View system version
cat /etc/lsb-release
6. View running processes
top
Installation of some software
1. Install todesk remote software
sudo dpkg -i todesk_x.x.x_aarch64.deb
2. Install jtop query system tools
sudo -H python3 -m pip install jetson-stats
Modify the default python and pip versions
1. Modify python version
By default, the board comes with Python 2.7 and python 3 6.9 parser (you can find it by using python3 -V), but the default is python2 7. If you need Python 3 6.9, you need to use the following command to call Python 3 Version 6
sudo update-alternatives --install /usr/bin/python python /usr/bin/python2 100
sudo update-alternatives --install /usr/bin/python python /usr/bin/python3 150
sudo update-alternatives --config python
2. Modify pip version
sudo apt-get install python3-pip