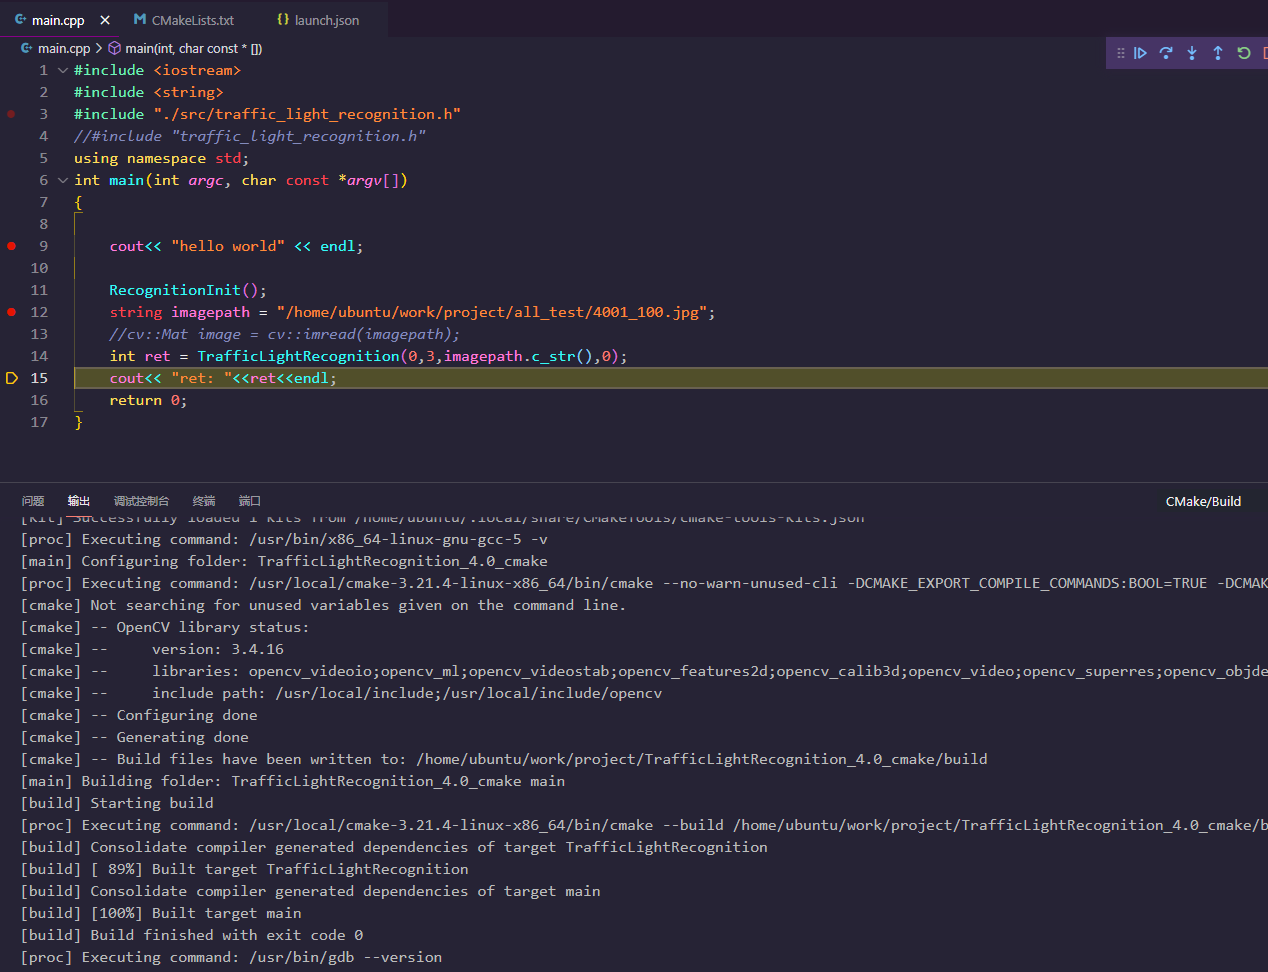
previous Configure c + + for vscode under linux to debug it like visual studio 2019 Similar to this article, the article configures vscode to debug and compile with vs2019, but the previous article is not very practical. It is configured in the form of command line. This method is good for small projects. If it is a very complex project, is there a better method? The answer is yes. You can refer to the official website here article , the example on the official website is very simple. I'm here for more complex projects, and I'll also explain the problems encountered in the configuration process.
1. cmake version problem under Ubuntu
The reason for this problem is that when we configure it later, we will find that sometimes we cannot debug the source files of multi-layer folders, and the error reported is that the lower version is not supported The wrong explanation is here , cmake will not be supported until its version is greater than 3.7.2. Therefore, you need to determine your own version here.
ubuntu@ubuntu-PowerEdge-R730:~$ cmake --version
cmake version 3.21.4
If there is no version greater than 3.7, you need to uninstall cmake and install a later version, Click here to download cmake , after downloading, install it under ubuntu:
Download the installation package, decompress it directly, and then create a soft connection


Reopen a terminal to view the cmake version: cmake --version
Now you can configure vscode
2.VScode configuration
two point one cmake configuration of vscode
By default, there are c + + related plug-ins and cmake tools and other plug-ins with vscode installed. First configure cmake configuration, open the file -- > preferences -- > settings -- > user -- > extension -- > cmake tools -- > cmake: cmake path, and add the location of cmake reinstalled in linux, such as:
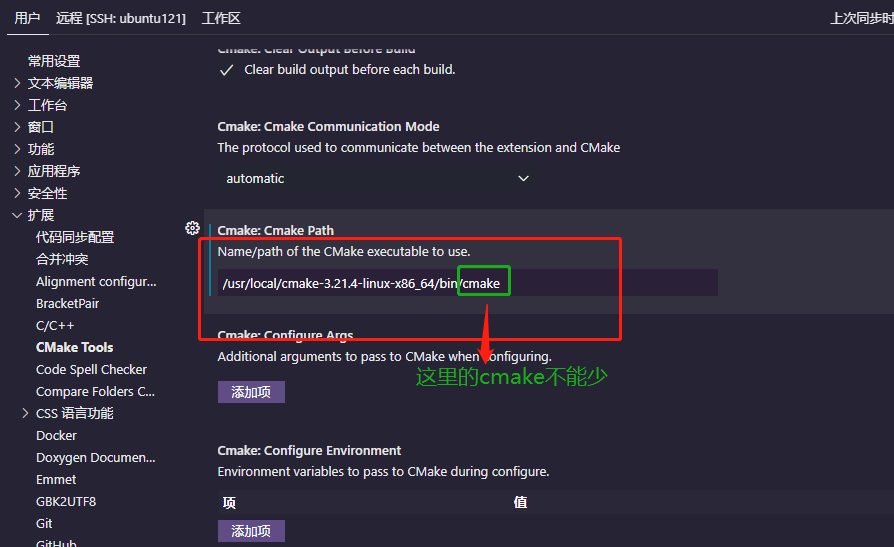
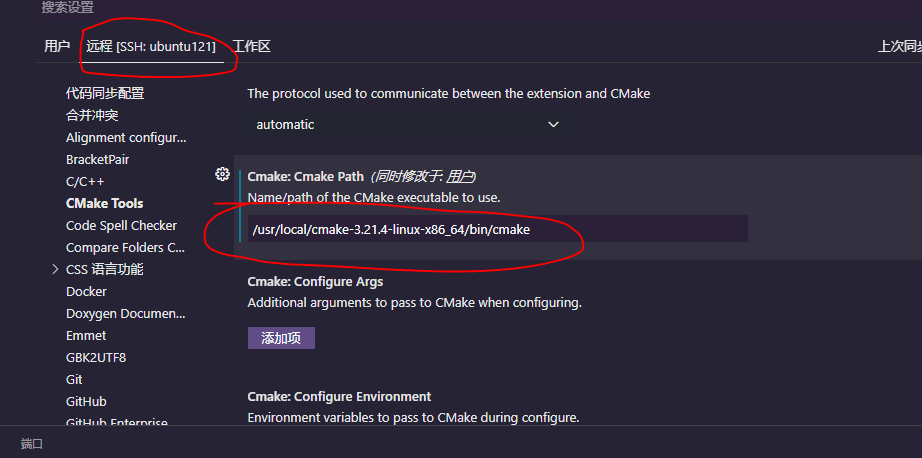
Similarly, you need to modify the remote:
2.2 C + + environment configuration
After completing the above basic configuration, you can configure the c + + environment. You can directly follow the official tutorial:
Create a CMake project #
If your existing CMake project CMakeLists.txt already has a file in the root directory, you can skip to Select Kit To configure an existing project.
Otherwise, create a folder for the new project. In the terminal window, create an empty folder named cmakeQuickStart, navigate to it, and then open VS Code in the folder by entering the following command:
mkdir cmakeQuickStart
cd cmakeQuickStart
code .
The code. Command will open VS Code in the current working folder, which will become your "workspace".
Create a CMake hello world Project #
The CMake tool extension can create files for basic CMake projects for you. Open the command panel( Ctrl+Shift+P ) And run the CMake: quick start command:

Enter the project name. This will be written to CMakeLists.txt and some initial source files.
Next, select Executable as the project type to create the main.cpp basic source file containing the basic main() function( ) .

Note: if you want to create a basic source file and header file, you should select Library. However, for this tutorial, Executable is OK. If you are prompted to configure IntelliSense for the folder, select allow.
This will create a hello world CMake project, main.cpp, CMakeLists.txt, which contains, (tell the CMake tool how to build your project) and a folder named after your build file:

Select Kit #
Before you can use the CMake tool extension to build a project, you need to configure it to understand the compiler on the system. Do this by scanning the "suite". A toolkit represents a tool chain, which is the compiler, linker and other tools used to build a project. Scanning Kit:
-
Open the command panel( Ctrl+Shift+P ) And run CMake: Select a Kit. The extension will automatically scan the toolkit on your computer and create a list of compilers found on your system.
-
Select the compiler to use. For example, depending on the compiler you installed, you might see the following:

Configure Hello World #
You must do two things to configure your CMake project: select a toolkit (you just completed) and select a variant.
The kit you previously selected appears in the status bar. For example:

To change the suite, you can click suite in the status bar, or run CMake: select the suite command from the command panel again. If you do not see the compiler you are looking for, you can cmake-tools-kits.json edit the file in your project. To edit the file, open the command panel( Ctrl+Shift+P ) And run the CMake: edit user local CMake kits command.
Select a variant #
Variations contain instructions on how to build a project. By default, CMake's tool extension provides four variations, each corresponding to the default build type: Debug, Release, MinRelSize, and relewithdebinfo. These options do the following:
Debug: disable optimization and include debugging information. Release: includes optimization but no debugging information. MinRelSize: optimized size. No debugging information. RelWithDebInfo: optimizes speed and contains debugging information.
To select a variant, open the command panel( Ctrl+Shift+P ) Run the CMake: Select Variant command.

Select debug to include debugging information in your build.

The selected variant appears in the status bar next to the active suite.
CMake: Configuration #
Now that you have selected a suite and a variant, open the command panel( Ctrl+Shift+P ) And run the CMake:Configure command to configure your project. This will generate a build file in the project's build folder using the toolkit and variants you select.
Build helloword #
After configuring the project, you can start building. Open the command panel( Ctrl+Shift+P ) And run the CMake: Build command, or select the Build button from the status bar.

You can select the targets to build by selecting CMake: Set Build Target from the command panel. By default, the CMake tool builds all targets. The selected targets appear in the status bar next to the build button.
Debug helloword #
To run and debug your project, open main.cpp and place a breakpoint on the std::cout line. Then open the command panel (Ctrl+Shift+P) and run CMake: Debug. The debugger will stop on this std::cout line:
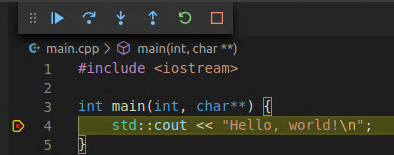
Continue and press F5 to continue.
2.3 multi folder and multi project environment configuration
Let's take a look at my file structure
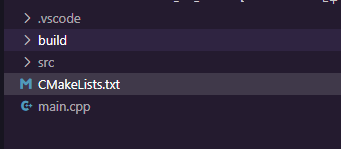
build is automatically created, and CMakeLists.txt is also automatically created. There are a large number of source files, namely. cpp files, in src. What we need to do is to modify CMakeLists.txt in the root directory and create CMakeLists.txt in src directory. In fact, these operations are the same as those in the previous cmake series. For a brief description, please see mine cmake tutorial series , first look at CMakeLists.txt in the root directory
cmake_minimum_required(VERSION 3.7.2)
project(main VERSION 0.1.0)

include(CTest)
enable_testing()

# Find the path of opencv
find_package(OpenCV REQUIRED)
# Print information about opencv
message(STATUS "OpenCV library status:")
message(STATUS "    version: ${OpenCV_VERSION}")
message(STATUS "    libraries: ${OpenCV_LIBS}")
message(STATUS "    include path: ${OpenCV_INCLUDE_DIRS}")

# Add a subdirectory, which is the library directory. The cmake file of the subdirectory will be called to build the library
add_subdirectory(src)


add_executable(main main.cpp)

# Add link library
target_link_libraries(main TrafficLightRecognition ${OpenCV_LIBS})

set(CPACK_PROJECT_NAME ${PROJECT_NAME})
set(CPACK_PROJECT_VERSION ${PROJECT_VERSION})
include(CPack)
The annotated ones are added by me, while the uncommented ones are automatically added. The added commands are mainly used to build src library files, and then link them. src is the same as the previous tutorial. I won't repeat it here. So far, the vscode configuration ends:
# Get the list of all files in this directory
aux_source_directory(. DIR_LIB_SRCS)
# Set c++11 to compile. If the pre research feature of c++11 is used, this command must be written, otherwise an error will be reported
SET( CMAKE_CXX_FLAGS "-std=c++11 -O3")
# Obtain the relevant information of opencv through the following commands. This method is not used here. The method of adding a directory is used to increase the diversity of methods
find_package(OpenCV REQUIRED)
# message(STATUS "OpenCV library status:")
# message(STATUS "    version: ${OpenCV_VERSION}")
# message(STATUS "    libraries: ${OpenCV_LIBS}")
# message(STATUS "    include path: ${OpenCV_INCLUDE_DIRS}")
# include_directories(${OpenCV_INCLUDE_DIRS})
link_libraries(${OpenCV_LIBS})

# When installing opencv, we can know the installation location of OpenCV, such as: / usr/local/include
# The source file here also depends on the runtime of matlab, so the header file is also loaded in
include_directories(/usr/local/MATLAB/MATLAB_Runtime/v96/extern/include /usr/local/include)
# Add the corresponding library file directory. The purpose of adding the Library Directory here is to generate the static library needs
link_directories(/usr/local/lib /usr/local/MATLAB/MATLAB_Runtime/v96/extern/bin/glnxa64  /usr/local/MATLAB/MATLAB_Runtime/v96/extern/lib/glnxa64)


# Specify the output location of the compilation library, which can or can not be set
set(LIBRARY_OUTPUT_PATH lib)
# Generate dynamic library
add_library(TrafficLightRecognition SHARED ${DIR_LIB_SRCS})

# Generate static library
add_library(TrafficLightRecognition_static STATIC  ${DIR_LIB_SRCS})

# To generate a library file with the same name as the dynamic library and the static library, you need a set instruction_ target_ properties
# Here, we just rename them so that they have the same name. They should not be the same during construction
set_target_properties(TrafficLightRecognition_static PROPERTIES OUTPUT_NAME "TrafficLightRecognition")

# The installation command is also written here for completeness, which does not apply to him
# Install shared libraries and header files
# Install dynamic and static libraries to < prefix > / lib
install(TARGETS TrafficLightRecognition TrafficLightRecognition_static LIBRARY DESTINATION lib ARCHIVE DESTINATION lib)
# Install header file
install(FILES traffic_light_recognition.h DESTINATION include)
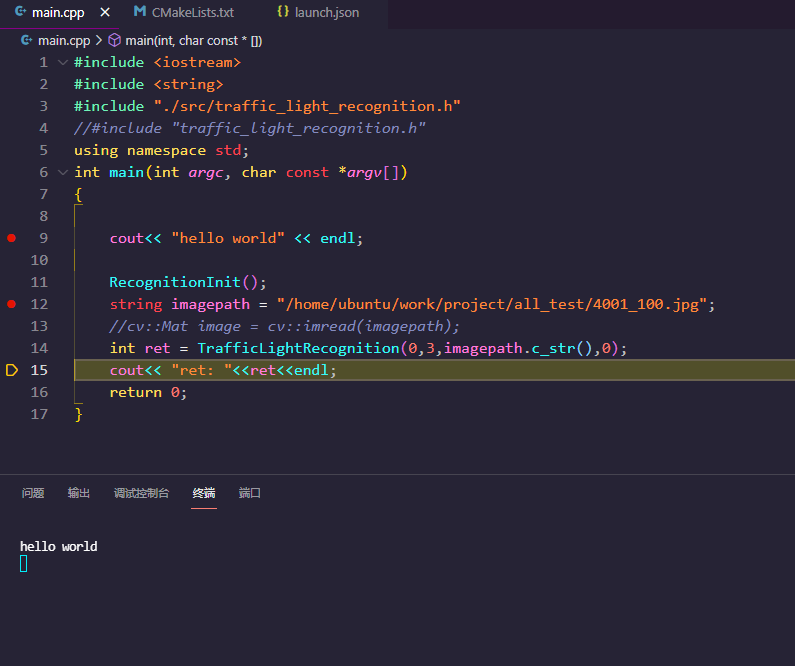
Let's take a look at the debugging process:
ctrl+shift+p: enter cmake: debug
