First release the result picture... Because the online and offline models are pieced together, the eyelids, cheeks and lips look like cracks. The solution is to add surface subdivision and displacement map to make a certain bulge. However, the blogger tried the surface subdivision of fragment shader. Although the subdivision is successful, the shading effect becomes very strange. There is no need for surface subdivision here, If you have a good way to use surface subdivision on fragment shader, please let me know if you can
Parameter setting 1
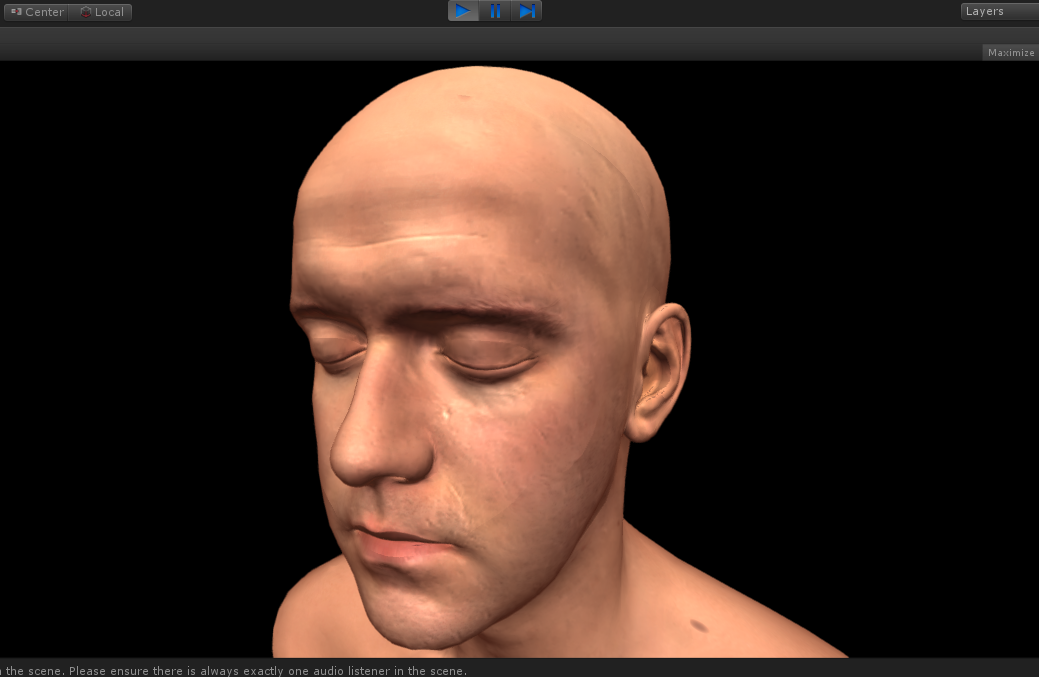
Parameter setting 2
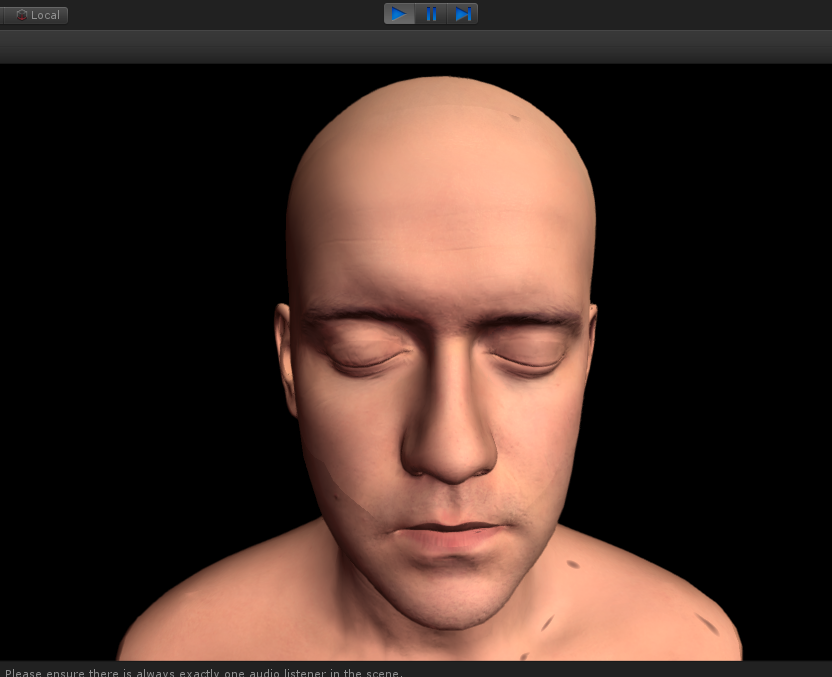
Fine to pore highlights
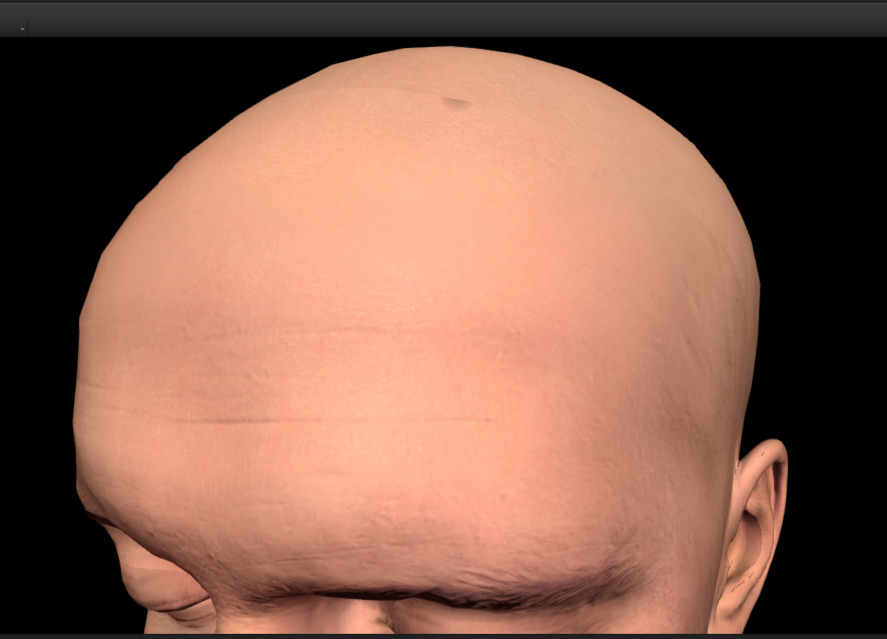
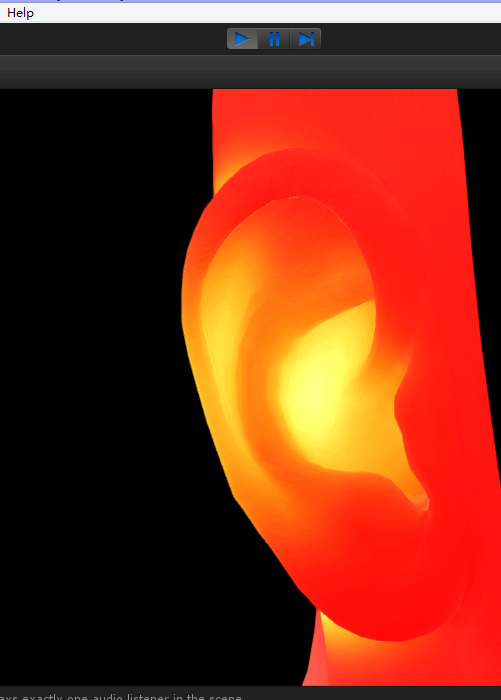
Subsurface scattering ear
Human skin rendering has been a topic for more than ten years. People have tried every means to make it real and credible. Recently, large-scale 3A era games have become more and more real, such as the son of Rome. Their skin claims to have exceeded the example of NVIDIA
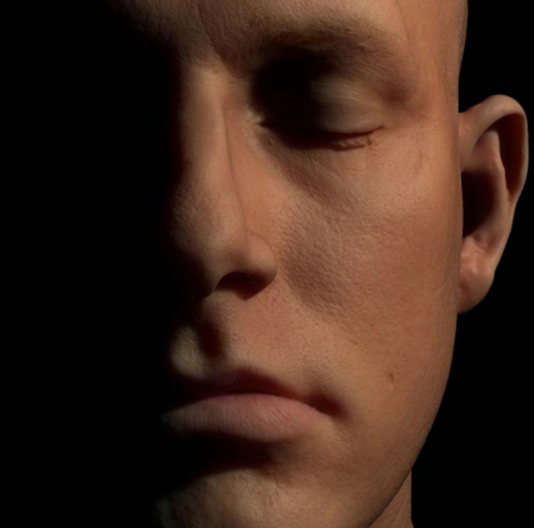
This is the multi-layer skin rendering of SIGGRAPH in 2005. Their parameters are accurately measured in medicine, and the rendering takes 5 minutes...
After studying this, I found a lot of materials, and combined with the previous knowledge, I made a human skin that looks pretty good This example achieves the following points 1. Subsurface scattering
2. Physics based rendering
Including special and brdf, etc. I used a map to adjust the curvature instead of brdf. Special has been explained in detail in the previous article Link here
3. Normal blur
Wait, wait...
Why is skin rendering so difficult? 1. Most diffuse light comes from subsurface scattering 2. Skin color mainly comes from the upper epidermis 3. Pink or red is mainly the blood in the dermis This picture is a simulation of the composition of human skin. People have many layers of epidermis, which shows that it is more difficult to achieve reality by refracting and reflecting several times in the real situation
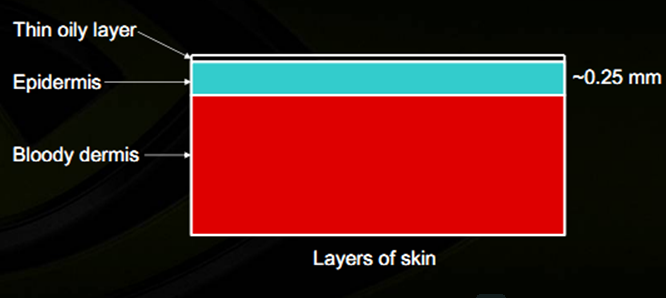
Refraction and reflection of light
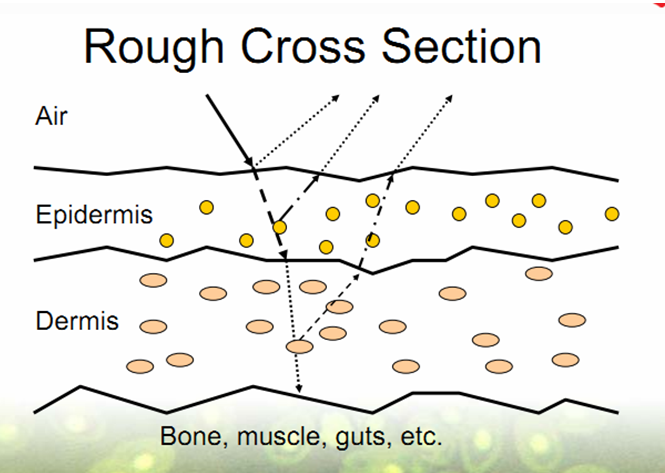
The picture above shows how the light is "affected" When light touches the skin, about 96% is scattered by all layers of the skin, and only about 4% is reflected
Besides special, people's skin will produce oil, so there will be reflection, but people's skin can't reflect like a mirror, because people's skin is rough. In this case, it's best to use the physical based method. If you haven't learned about the physical based method, you can learn about this article first Same as above

The method with the best effect was used, that is, the method used in call of Duty 2. At the same time, beckmann's method was tried, but the effect was not good, and phong and other methods were not tried Here, our implementation method is as follows
<span style="font-size:14px;">            /*
            *this part is compute Physically-Based Rendering
            *the method is in the ppt about "ops2"
            */

            float _SP = pow(8192, _GL);
            float d = (_SP + 2) / (8 * PIE) * pow(dot(n2, H), _SP);
            float f = _SC + (1 - _SC)*pow(2, -10 * dot(H, lightDir));
            float k = min(1, _GL + 0.545);
            float v = 1 / (k* dot(viewDir, H)*dot(viewDir, H) + (1 - k));

            float all = d*f*v;
            float3 refDir = reflect(-viewDir, n2);
            float3 ref = texCUBElod(_Cubemap, float4(refDir, _nMips - _GL*_nMips)).rgb;</span>
Then we found that although gloss was adjusted to the maximum, it did not achieve the effect we expected, Another "intelligent light filling" That is, the conventional method of seeking highlights. We have added a highlight map here to prevent highlights from being generated in places that should not be highlighted (such as eyebrows)
			float specBase = max(0, dot(n2, H));
			float spec = pow(specBase, 10) *(_GL + 0.2);
			spec = lerp(0, 1.2, spec);
			float3 spec3 = spec * (tex2D(_SpecularTex, i.uv_MainTex) - 0.1);
			spec3 *= Luminance(diff);
			spec3 = saturate(spec3);
			spec3 *= _SpecularPower;
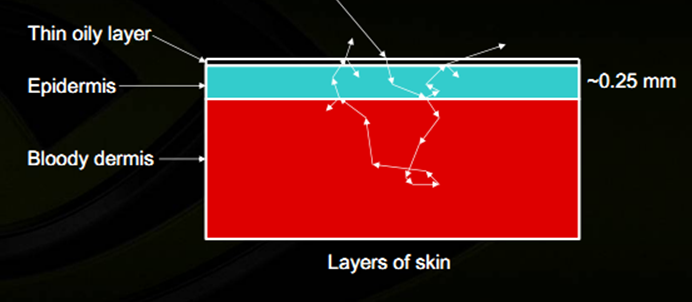
Where the light passes, it takes part of the color there. It can be found that the position and direction of the light change from incident to exit
The number of light paths is infinite, the light reflected back is diffuse, and the transparency of the oil surface is also different, This produces subsurface scattering NVIDIA mentioned in the speech of GDC 2007 that the soft subsurface scattering effect can be achieved by six times of image blur Each blur is performed in different color channels in different ranges and degrees Because our map is such a "high configuration"
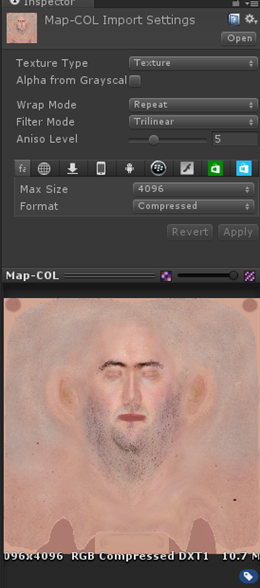
In this example, some details of the original map will be lost, but there is a certain sub surface scattering effect. You should choose by yourself, and don't just do Gaussian blur. In this way, more details will be lost, and there is no feeling of sub surface scattering
In order to save expenses, the rendering blur in ppt is omitted. Six Gaussian blur maps are directly made on ps, put into material and mixed linearly
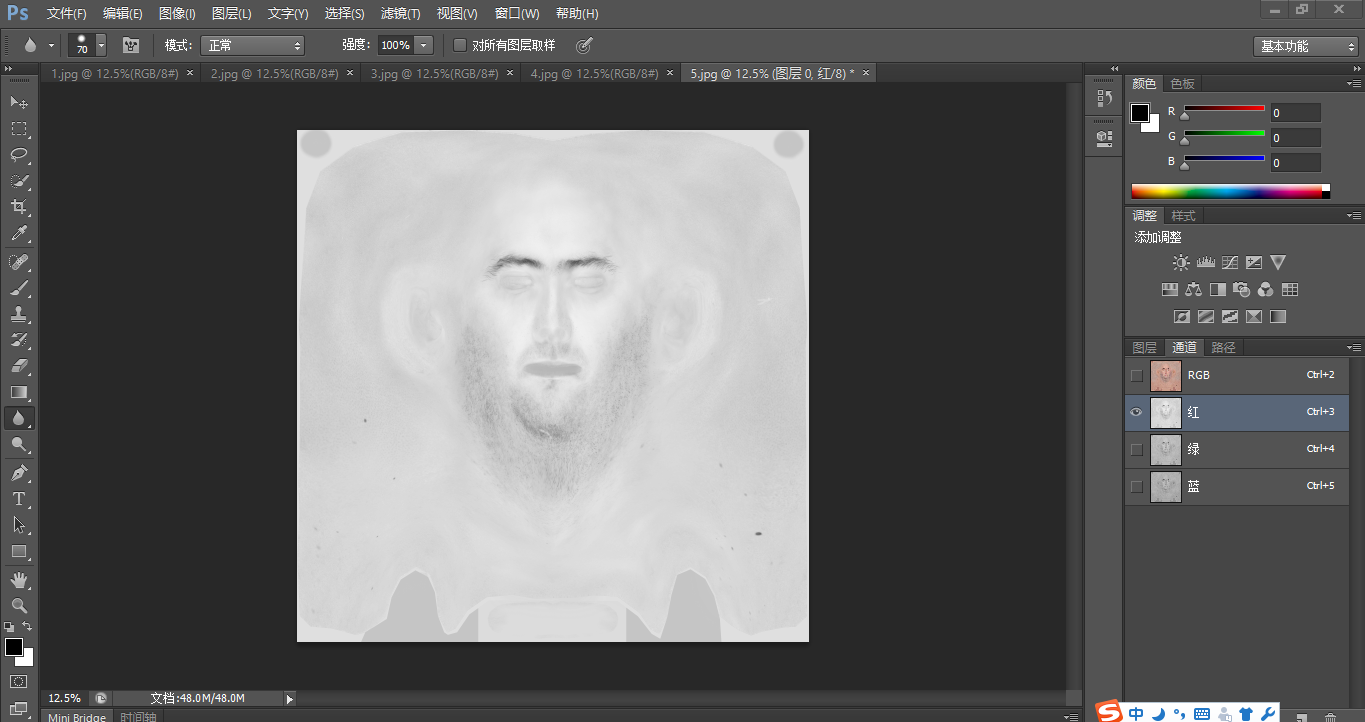
			float3 c = tex2D(_MainTex, i.uv_MainTex) * 128;
			c += tex2D(_BlurTex1, i.uv_MainTex) * 64;
			c += tex2D(_BlurTex2, i.uv_MainTex) * 32;
			c += tex2D(_BlurTex3, i.uv_MainTex) * 16;
			c += tex2D(_BlurTex4, i.uv_MainTex) * 8;
			c += tex2D(_BlurTex5, i.uv_MainTex) * 4;
			c += tex2D(_BlurTex6, i.uv_MainTex) * 2;
			c /= 256;
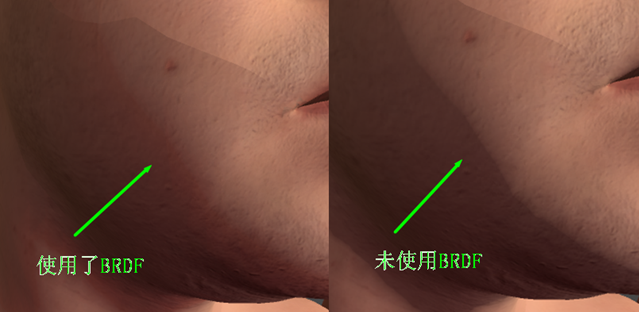
We also play an important role in rim and brdf, The most obvious advantage of using BRDF is that the BRDF map indirectly controls the color of the light dark boundary. Through curvature control, it simulates the reflection and refraction of light on the skin at the junction of light and shadow. If it is all black, it means that the light is just ordinary diffuse reflection.
Moreover, human skin has the texture of sub surface scattering
			/*
			*this part is to add the sss
			*used front rim,back rim and BRDF
			*/

			float3 rim = (1 - dot(viewDir, n2))*_RimPower * _RimColor *tex2D(_RimTex, i.uv_MainTex);
			float3 frontrim = (dot(viewDir, n2))*_FrontRimPower * _FrontRimColor *tex2D(_FrontRimTex, i.uv_MainTex);

			float3 sss = (1 - dot(viewDir, n2)) / 50 * _SSSPower;
			sss = lerp(tex2D(_SSSFrontTex, i.uv_MainTex), tex2D(_SSSBackTex, i.uv_MainTex), sss * 20)*sss;

			fixed atten = LIGHT_ATTENUATION(i);
			float curvature = length(fwidth(mul(_Object2World, float4(normalize(i.normal), 0)))) /
				length(fwidth(i.worldpos)) * _CurveScale;

			float3 brdf = tex2D(_BRDFTex, float2((dot(normalize(i.normal), lightDir) * 0.5 + 0.5)* atten, curvature)).rgb;
For rim, forward rim and backward rim are essentially rim. Backward rim uses white pictures to produce a feeling of jade (well, it's actually more like sheep soup). Forward rim uses red pictures, which is equivalent to adding the scattering of light in the blood layer, so that people's faces have real blood color
This is the result of subsurface scattering:
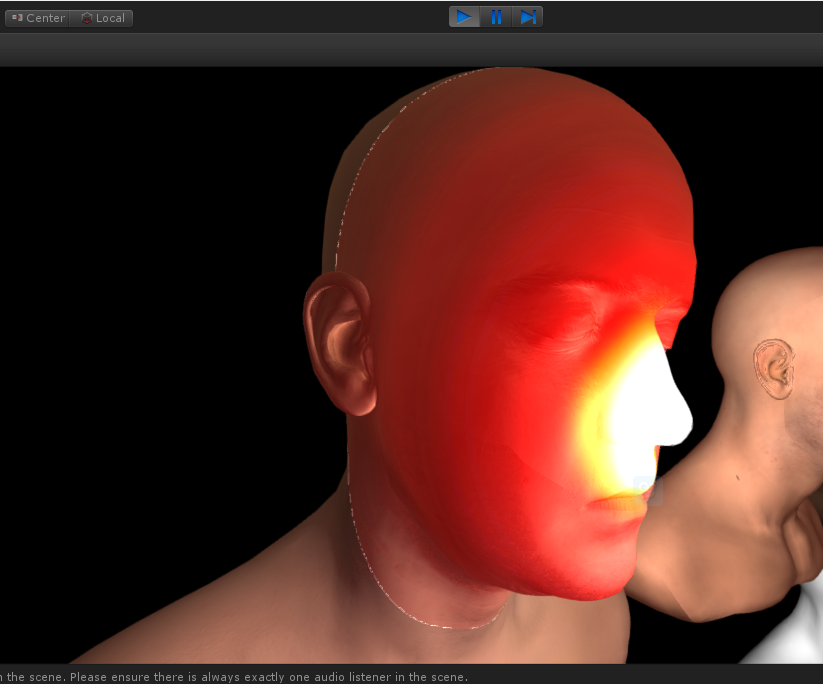
The light source is in your mouth
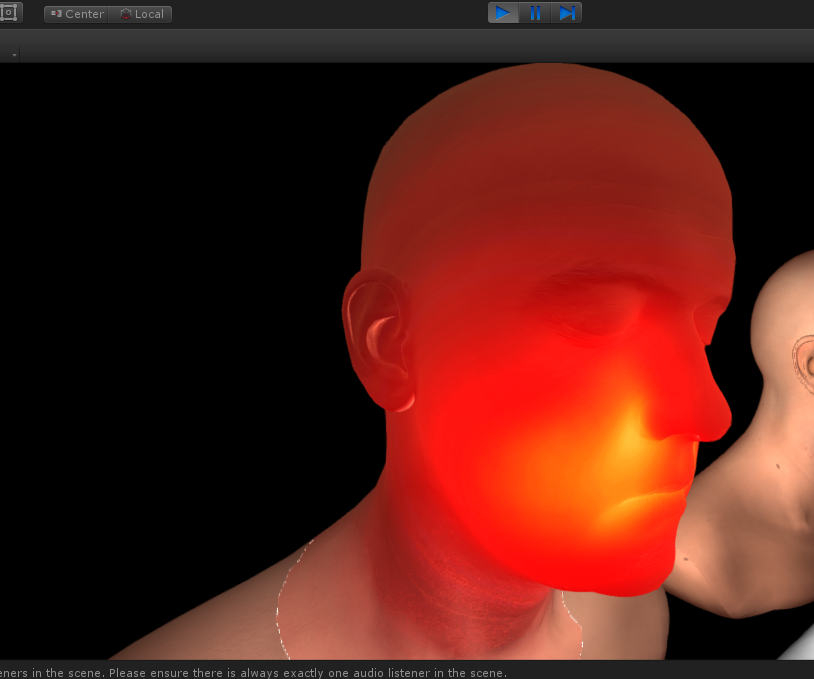
Like putting your fingers or ears in front of a flashlight? That's subsurface scattering You need an intensity strips map to mix the original colors. The method is to find the distance between the current point and the point light in the case of a point light source. The closer the distance, the brighter
About normals, A new blending method is used to preserve more normal details, Here's a brief explanation of normal blending,
float3 n1 = tex2D(texBase,   uv).xyz*2 - 1;
float3 n2 = tex2D(texDetail, uv).xyz*2 - 1;
float3 r  = normalize(n1 + n2);
return r*0.5 + 0.5;
You may have used this method to mix two normal maps. This linear method compromises the two maps. The detail weight is average, and the effect is not good. This is the result
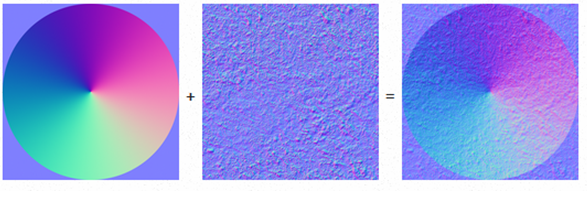
Improved to cover blending
float3 n1 = tex2D(texBase,   uv).xyz;
float3 n2 = tex2D(texDetail, uv).xyz;
float3 r  = n1 < 0.5 ? 2*n1*n2 : 1 - 2*(1 - n1)*(1 - n2);
r = normalize(r*2 - 1);
return r*0.5 + 0.5;
Where the normal of normal 1 is deep, more weight will be given, and where it is shallow, it will be properly covered by normal 2, but this effect is not real enough
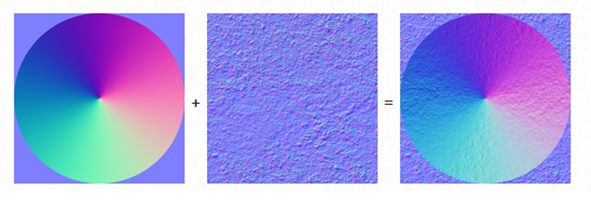
In Mastering DX11 with unity of GDC2012, an official method is described as follows:
float3x3 nBasis = float3x3(
    float3(n1.z, n1.y, -n1.x), //Rotate + 90 degrees around the y-axis
float3(n1.x, n1.z, -n1.y),// Rotate - 90 degrees about the x-axis
float3 (n1.x, n1.y, n1.z ));

 n = normalize (n2.x*nBasis[0] + n2.y*nBasis[1] + n2.z*nBasis[2]);
The result is like this. Is it much better?
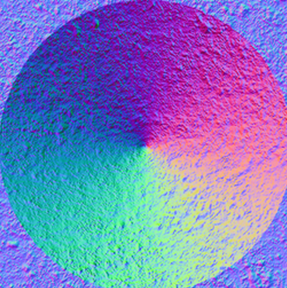
The level of detail on both sides has improved a lot,
They used a basis to transform the second normal. See this article for details - link
Use autolight A function light defined in cginc_ Attenuationcalculate the attenuation atten of the light. Atten is fixed to 1 in the directional light, and the attenuation effect is only available in the point light source, because there is no difference in the position of the directional light in the unit, and it is the same everywhere.
fixed atten = LIGHT_ATTENUATION(i);
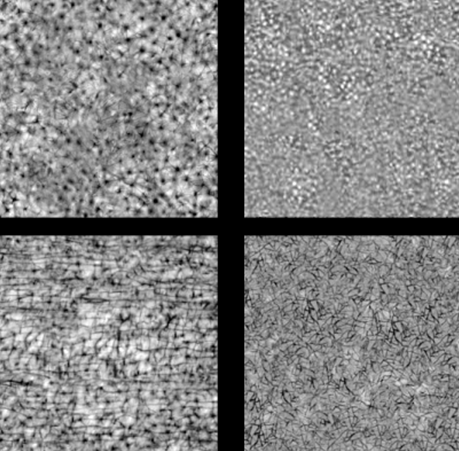
For details, such as pores, the mapping and normal mapping in this example are very detailed, including pores and skin lines. If you want high details with low mapping accuracy, you can paste details again
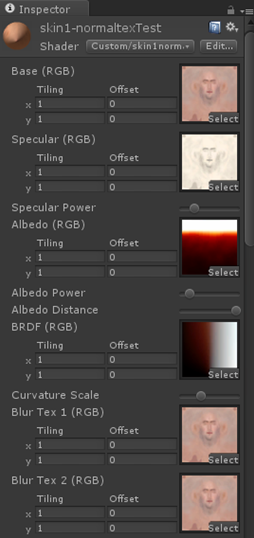
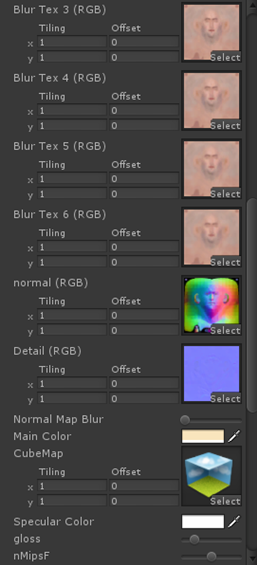
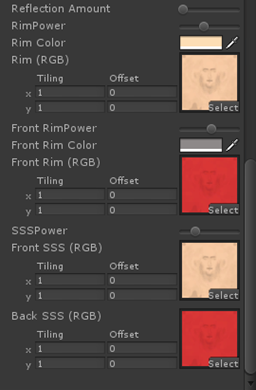
All settable variables:
All codes have been shared to GitHub link ---- by wolf96