1. Preface
A single machine or a few machines can be installed one by one through u disk. However, when hundreds or even more machines in the LAN need to install the operating system, it is obviously not advisable to install one by one. At this time, the time-saving and labor-saving automatic PXE method comes in handy.
2. PXE introduction
PXE is the Preboot Execution Environment, which translates into "pre boot execution environment". It is developed by inter company. Based on C / S mode, it provides a mechanism to start the computer using Network Interface. This mechanism allows the computer to start without relying on local data storage devices (such as hard disks) or locally installed operating systems.
The PXE server needs a DHCP server, a TFTP server and a file server. The file server can be ftp, http, nfs and other file servers.
Server
DHCP ------ used to allocate IP addresses and locate bootstrappers
TFTP ------- provides bootstrap download
NFS ------- file share in network
client
The network card supports PXE protocol
The motherboard supports network startup
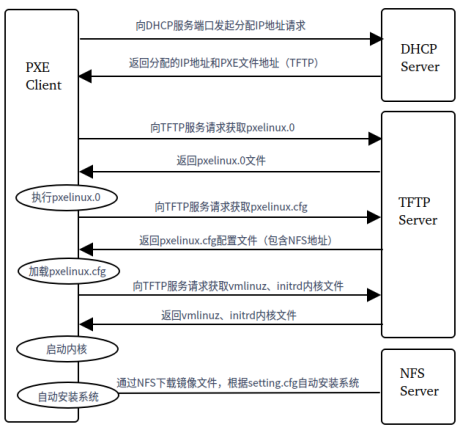
PXE deployment system automated installation process:
1) Set the startup item of the client host with PXE function as network startup;
2) After the client starts up, it enters the network startup. At this time, the client has no IP address and needs to send a broadcast message (the built-in DHCP client program in the PXE network card). The DHCP server requests the corresponding client and assigns the corresponding IP address, mask and other information to the client;
3) After getting the IP address, the client communicates with TFTP and downloads pxelinux 0, default, vmlinuz,initrd file. Start the system kernel according to the vmlinuz,initrd specified by default, and download the specified system installation package.
4) According to setting Cfg file go to the file sharing server (http/ftp/nfs) to download the system installation package and start the system installation.
3. Environmental preparation
The entire environment of this article will be verified on vmware virtual machines.
Two virtual machines: UOS01 and UOS02
To simplify the operation, DHCP, TFTP and NFS are installed in the same virtual machine
UOS01: set up installation environment (DHCP, TFTP and NFS)
ip address: 192.168.114.128 (network card name: ens33)
The system installation files have been placed in the / home/uos/iosdir directory
UOS02: verify PXE unattended system installation
4. Build installation environment
4.1. Set up DHCP
1) Install dhcp
1 uos@uos-PC:~$ sudo apt install isc-dhcp-Server
2) Configure dhcp
 1 uos@uos-PC:~$ sudo vi /etc/dhcp/dhcpd.conf
 2
 3 subnet 192.168.114.0 netmask 255.255.255.0 {  #dhcpserver distribution ip Subnet 192.168.114 Network segment, and PXE server One network card of the same network segment
 4
 5         range 192.168.114.130 192.168.114.200;     #Assign to client ip Range
 6
 7         option subnet-mask 255.255.255.0;
 8
 9         option routers  192.168.114.2;
10
11         default-lease-time 600;
12
13         max-lease-time 7200;
14
15         next-server 192.168.114.128;    #appoint tftp server of ip
16
17         }
18
19         filename "pxelinux.0";
20
21 uos@uos-PC:~$ sudo vi /etc/default/isc-dhcp-server
22
23 INTERFACESv4="ens33"
3) Start dhcp
1 uos@uos-PC:~$ sudo systemctl start nfs-kernel-server
2
3 uos@uos-PC:~$ sudo systemctl enable nfs-kernel-server
4.2. Set up TFTP
1) Install TFTP
1 uos@uos-PC:~$ sudo apt install tftpd-hpa
2) Configure TFTP
uos@uos-PC:~$ cat /etc/default/tftpd-hpa ##Use the default configuration.

# /etc/default/tftpd-hpa

TFTP_USERNAME="tftp"

TFTP_DIRECTORY="/srv/tftp"

TFTP_ADDRESS="0.0.0.0:69"

TFTP_OPTIONS="--secure"
3) Installing PXELINUX
1 uos@uos-PC:~$ sudo apt install pxelinux
4) configure PXE boot file
uos@uos-PC:~$ sudo mkdir -p /srv/tftp/pxelinux.cfg

uos@uos-PC:~$ sudo cp -r /home/uos/isodir/isolinux/ /srv/tftp

uos@uos-PC:~$ sudo cp /home/uos/isodir/live/vmlinuz /srv/tftp

uos@uos-PC:~$ sudo cp /home/uos/isodir/live/initrd.lz /srv/tftp

uos@uos-PC:~$ sudo cp /usr/lib/PXELINUX/pxelinux.0 /srv/tftp

uos@uos-PC:~$ sudo vi /srv/tftp/pxelinux.cfg/default

default vesamenu.c32

    timeout 5

    menu autoboot Starting Linux install in # second{,s}. Press any key to interrupt.

    menu clear

    menu title UOS20

    label UOS

      menu label Start UOS20

      kernel vmlinuz

      append initrd=initrd.lz boot=live livecd-installer netboot=nfs nfsroot=192.168.114.128:/home/uos/isodir  locale=zh_CN.UTF-8
5) Start TFTP
1 uos@uos-PC:~$ sudo systemctl start tftpd-hpa
2
3 uos@uos-PC:~$ sudo systemctl enable tftpd-hpa
4.3. Build NFS
1) Mount NFS
1 uos@uos-PC:~$ sudo apt install nfs-kernel-server
2) Configure NFS
1 uos@uos-PC:/srv/tftp$ sudo vi /etc/exports
2
3 /home/uos/isodir *(ro)
3) Start NFS
1 uos@uos-PC:~$ sudo systemctl start nfs-kernel-server
2
3 uos@uos-PC:~$ sudo systemctl enable nfs-kernel-server
4.4. Configure unattended
 1 uos@uos-PC:/srv/tftp$ vi  /home/uos/isodir/oem/settings.ini
 2
 3 [General]
 4
 5 # deb repository entry to be added in the sources.list file.
 6
 7 apt_source_deb="deb-src https://professional-packages.chinauos.com/desktop-professional eagle main contrib non-free"
 8
 9 skip_select_language_page = true
10
11 skip_select_language_page_on_first_boot = true
12
13 skip_select_component_page = true
14
15 skip_system_info_page = true
16
17 skip_partition_page = true
18
19 skip_network_page=true
20
21 skip_timezone_page=true
22
23 skip_repair_system_page=true
24
25 skip_virtual_machine_page=true
26
27 partition_do_auto_part = true
28
29 timezone_default = true
30
31 timezone_default=Asia/Shanghai
32
33 select_language_default_locale = zh_CN
34
35 system_info_default_keyboard_layout = us
36
37 system_info_setup_after_reboot = true
38
39 system_info_default_username="didtx"
40
41 system_info_default_hostname="didtx-PC"
42
43 system_info_hostname_auto_suffix=-PC
44
45 system_info_hostname_reserved=localhost
46
47 system_info_default_password="zh**420427"
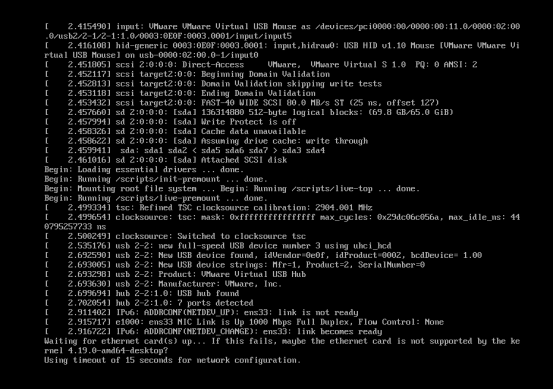
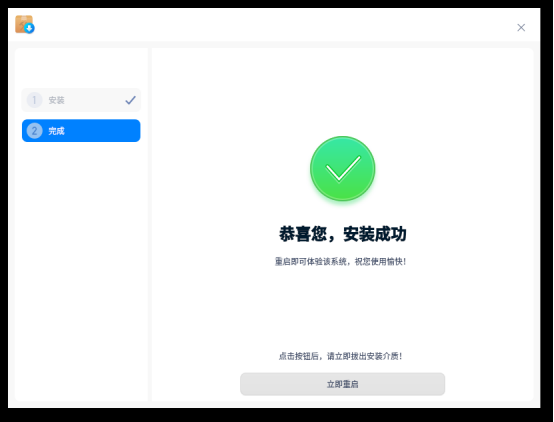
5. Unattended verification
Enter the BIOS page of UOS2 and select network startup:


6. Appendix
6.1. setting.cfg file description
  1 #Skip language selection interface
  2
  3 skip_select_language_page = true
  4
  5
  6 #Skip the post configuration language selection interface
  7
  8 skip_select_language_page_on_first_boot = true
  9
 10
 11 #Skip component selection interface
 12
 13 skip_select_component_page = true
 14
 15
 16 #Do not skip the create account interface
 17
 18 skip_system_info_page = false
 19
 20
 21 #Skip partition interface
 22
 23 skip_partition_page = true
 24
 25
 26 #Skip network setting interface
 27
 28 skip_network_page=true
 29
 30
 31 #Skip time zone setting interface
 32
 33 skip_timezone_page=true
 34
 35
 36 #Skip system repair interface
 37
 38 skip_repair_system_page=true
 39
 40
 41 #Skip keyboard layout selection interface
 42
 43 skip_system_keyboard_page = true
 44
 45
 46 #Do not skip the virtual machine environment prompt interface
 47
 48 skip_virtual_machine_page=false
 49
 50
 51 #Perform automatic partition operation
 52
 53 partition_do_auto_part = true
 54
 55
 56 #Set the default time zone to Asia/Shanghai
 57
 58 timezone_default=Asia/Shanghai
 59
 60
 61 #Set the default language to Chinese
 62
 63 select_language_default_locale = zh_CN
 64
 65
 66 #Set the default installation component set type to Server-Environment-with-GUI,The current component set types are: Basic-Server-Environment,Cloud-and-Virtualzalition,Big-Data,Server-Environment-with-GUI,Custom-Installation You can select one of them as needed
 67
 68
 69 #For the detailed contents of the component set, see packages_default.json and packages_choice.json,If you get the service version of the operating system iso Mirror files, you can live Directory found packages_default.json and packages_choice.json,Desktop version iso This field does not need to be configured
 70
 71
 72 selected_component_install_type = Server-Environment-with-GUI
 73
 74
 75 #If selected_component_install_type If the field is not specified, use the component set type specified in the field, desktop version iso This field does not need to be configured
 76
 77 select_component_default_install_type = Server-Environment-with-GUI
 78
 79
 80 #Set the default keyboard layout to us
 81
 82 system_info_default_keyboard_layout = us
 83
 84
 85 #Set not to use post configuration
 86
 87 system_info_setup_after_reboot = false
 88
 89
 90 #Set whether to set the user password to root password
 91
 92 set_root_password_from_user = false
 93
 94
 95 #Set user information and specify user name as“ uos"
 96
 97 system_info_default_username="uos"
 98
 99
100 #Set the user information and specify the host name as“ uos-PC"
101
102 system_info_default_hostname="uos-PC"
103
104
105 #Set user information and specify that the host name is automatically suffixed with“-PC"
106
107 system_info_hostname_auto_suffix=-PC
108
109
110 system_info_hostname_reserved=localhost
111
112
113 #Set user information and specify user password as“ uos123"
114
115 system_info_default_password="uos123"
116
117
118 DI_FULLDISK_MULTIDISK_DEVICE="/dev/sda;/dev/sdb"(Note: after the equal sign "/dev/sda;/dev/sdb"To be enclosed in double quotation marks) where/dev/sda Is the system disk,/dev/sdb It is a data disk. At present, both system disk and data disk are required to be at least 64 Gib
119
120 stay oem This field may be configured in the customization project, but the data disk is still not data Partitions are not automatically mounted for two reasons: 1.inspect full_disk_policy.json Is it deleted in data Partition settings, 2.Is the space of the data disk greater than or equal to 64 Gib.