preface
By learning opencv image library programming, learn how to complete a comprehensive program design with the help of third-party library functions.
1, Know OpenCV
Open source computer vision (OpenCV) is a programming function library mainly for real-time computer vision.
The application fields of OpenCV include:
- 2D and 3D feature kits
- motion estimation
- Face recognition system
- gesture recognition
- human-computer interaction
- mobile robot
- Action understanding
- Object recognition
- Segmentation and recognition
- Solid image stereo vision: depth perception from two cameras
- Structure in motion (SFM)
- Motion tracking
- Augmented reality
In order to support some of the above areas, OpenCV includes a statistical machine learning library, which contains:
- Lifting
- Decision tree learning
- Gradient lifting tree
- Expectation maximization algorithm
- k nearest neighbor algorithm
- Naive Bayes classifier
- artificial neural network
- Random forest
- Support vector machine (SVM)
- Deep neural network (DNN)
Installation: [embedded] opencv tutorial for windows10 & ubantu16.04 & Raspberry pie 3B + installation
Take a preventive injection in advance. The installation process will be cumbersome. If you encounter problems, search more and always find solutions!
2, Usage example – pictures
2.1 create code
- First, create the code folder and enter.
mkdir code
cd code

- Create a test1.cpp file.
gedit test1.cpp
test1.cpp
#include <opencv2/highgui.hpp>
#include <opencv2/opencv.hpp>
using namespace cv;
using namespace std;
int main(int argc, char** argv)
{
	CvPoint center;
    double scale = -3;

	IplImage* image = cvLoadImage("pic.jpg");
	argc == 2? cvLoadImage(argv[1]) : 0;

	cvShowImage("Image", image);


	if (!image) return -1; 	center = cvPoint(image->width / 2, image->height / 2);
	for (int i = 0;i<image->height;i++)
		for (int j = 0;j<image->width;j++) {
			double dx = (double)(j - center.x) / center.x;
			double dy = (double)(i - center.y) / center.y;
			double weight = exp((dx*dx + dy*dy)*scale);
			uchar* ptr = &CV_IMAGE_ELEM(image, uchar, i, j * 3);
			ptr[0] = cvRound(ptr[0] * weight);
			ptr[1] = cvRound(ptr[1] * weight);
			ptr[2] = cvRound(ptr[2] * weight);
		}

	Mat src;Mat dst;
	src = cvarrToMat(image);
	cv::imwrite("test.png", src);

    cvNamedWindow("test",1);  	imshow("test", src);
	 cvWaitKey();
	 return 0;
}
2.2 compiled files
- The compilation command is as follows:
g++ test1.cpp -o test1 `pkg-config --cflags --libs opencv`
gcc compiler: gcc + file name + - o + output file stream name + ` support package
Note that here is the. cpp file. Change gcc to g++

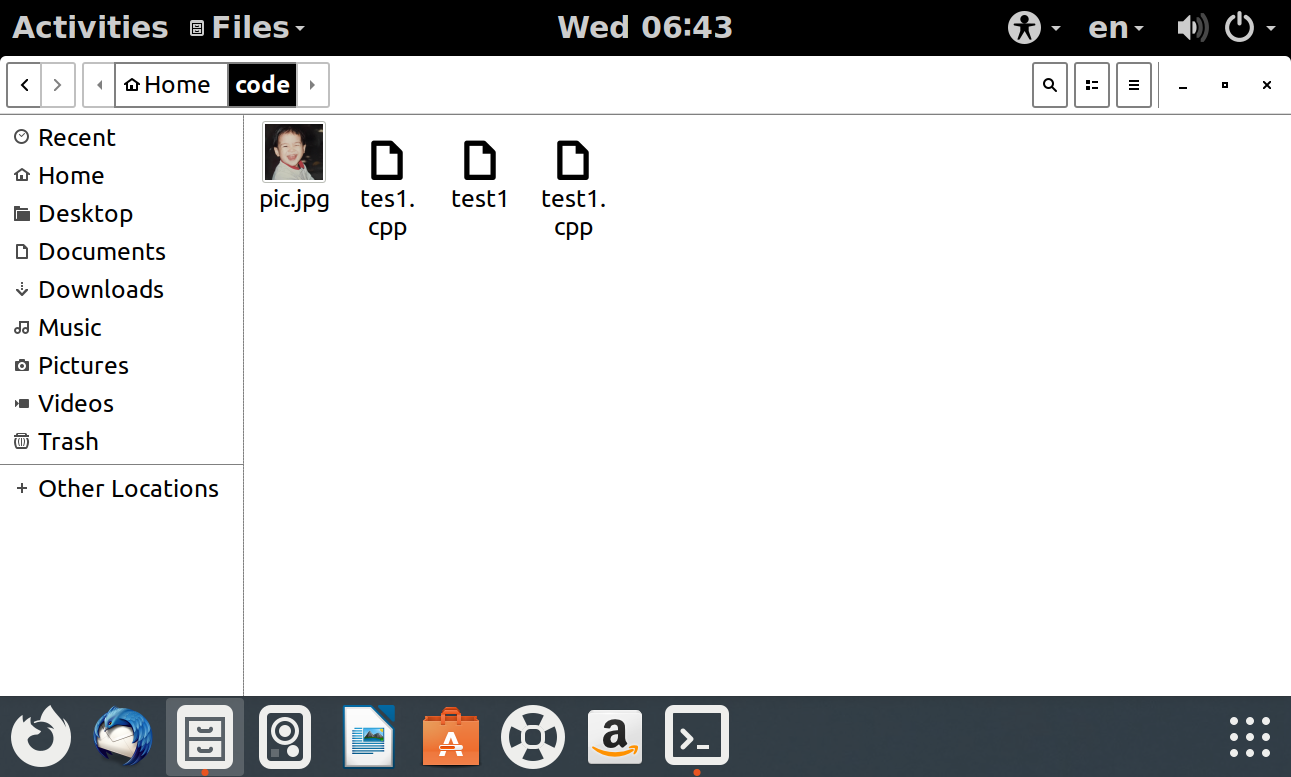
- Prepare a picture in the same folder and name the file pic.jpg
2.3 output results
./test1

After compilation, the picture will jump out directly, and can also be viewed in the folder

You can see that a test.png is generated by pic.jpg, and the rendering effect is different.
3, Usage example – video
3.1 virtual machine obtaining camera permission
-
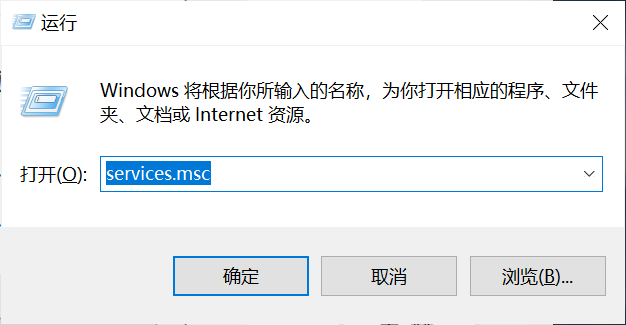
Use the shortcut key Win + R, enter services.msc, and click OK.
-
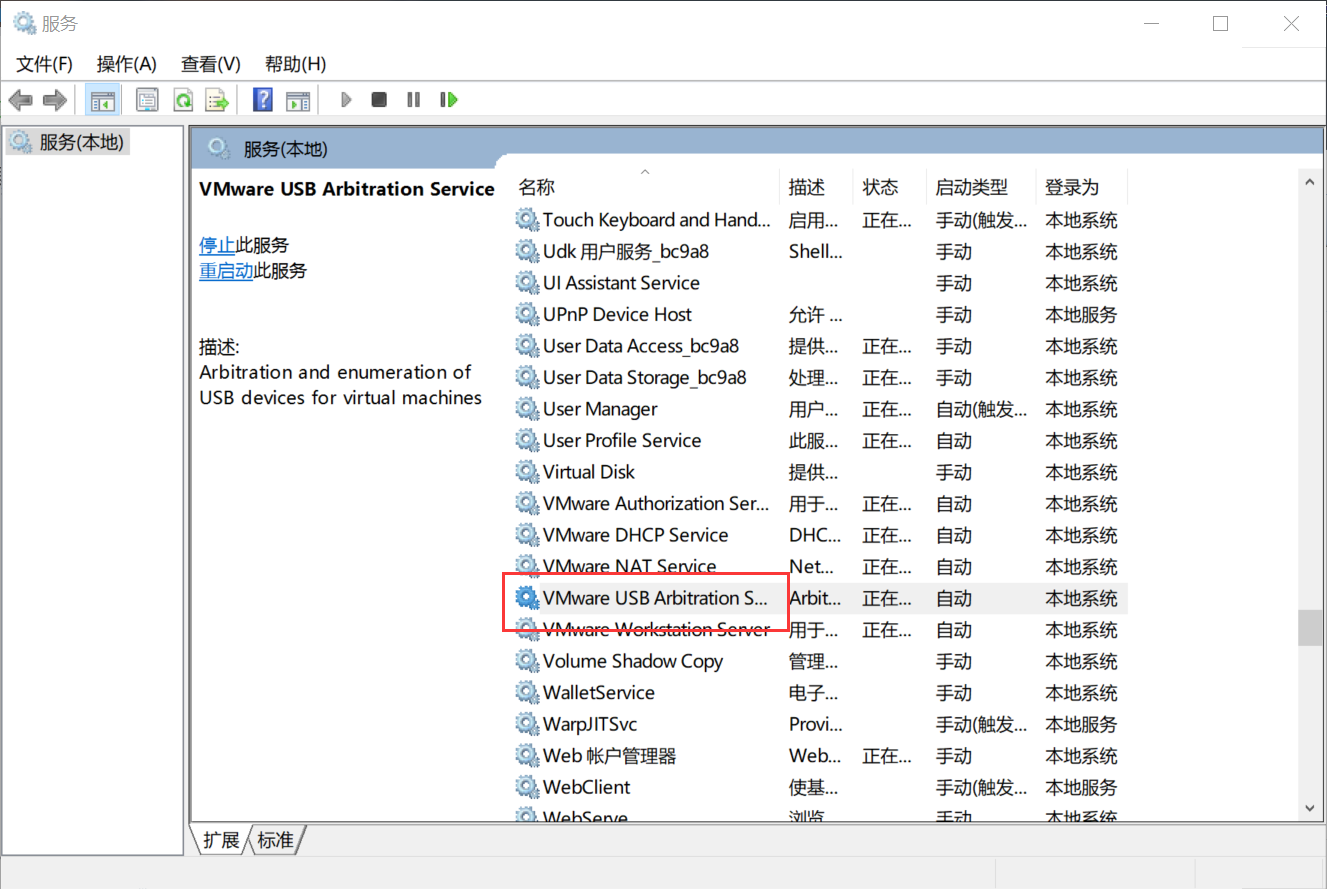
Locate the VMware USB Arbitration Service service and ensure that it is started.
-
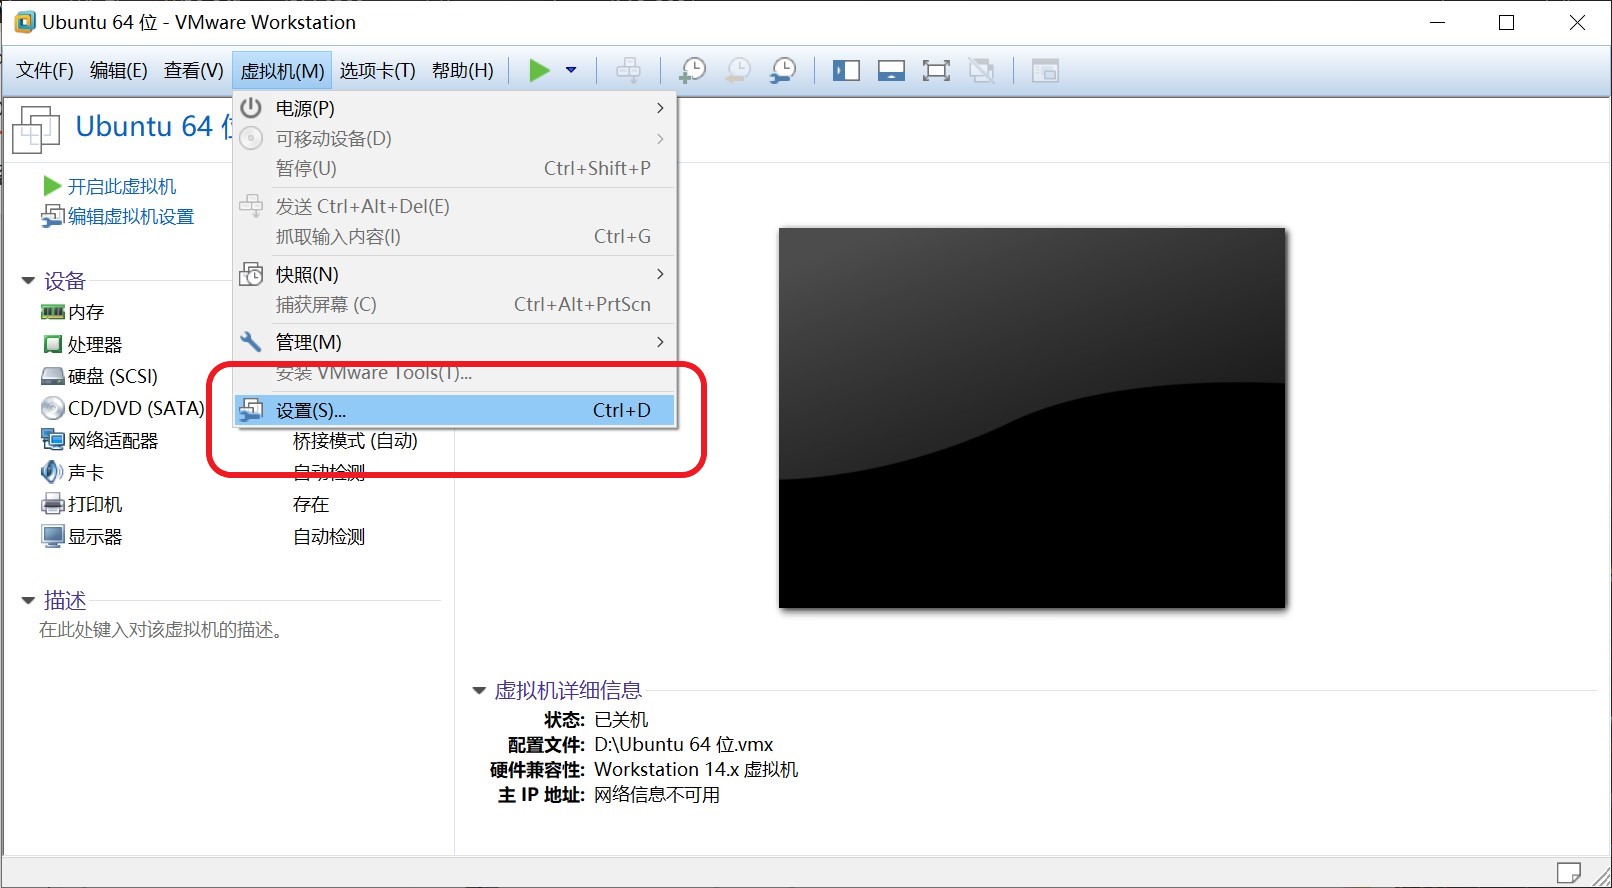
Click virtual machine, and then click settings.
-
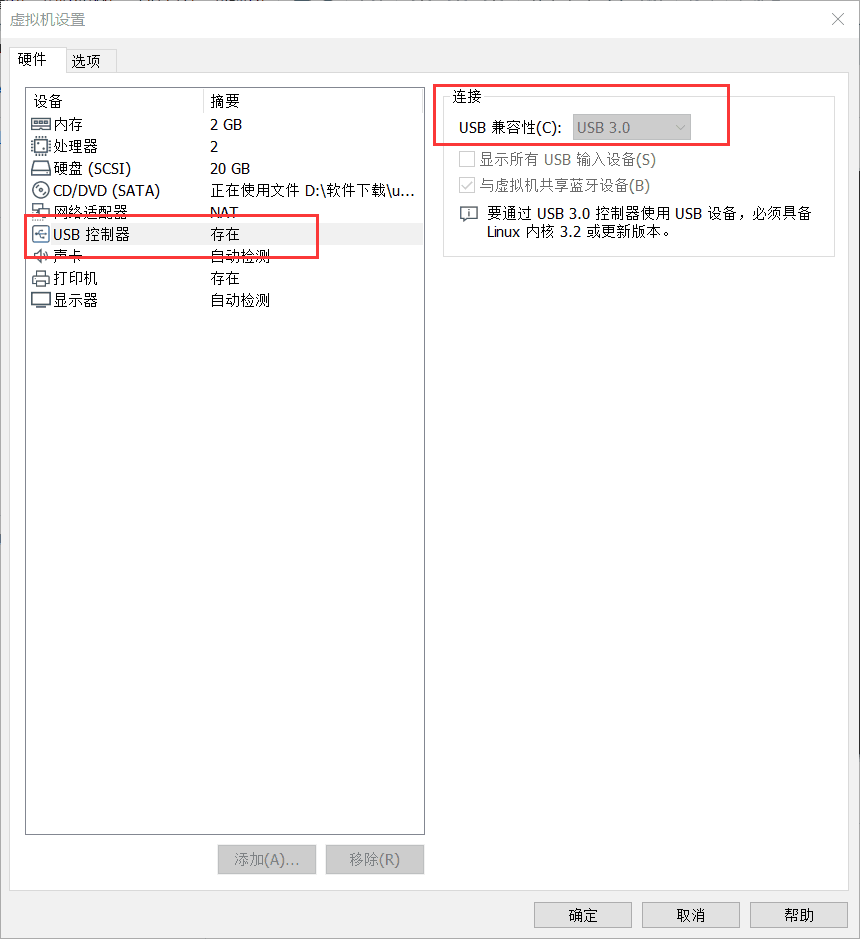
Select "USB controller", set "USB compatibility" to "USB 3.0", and click OK.
-
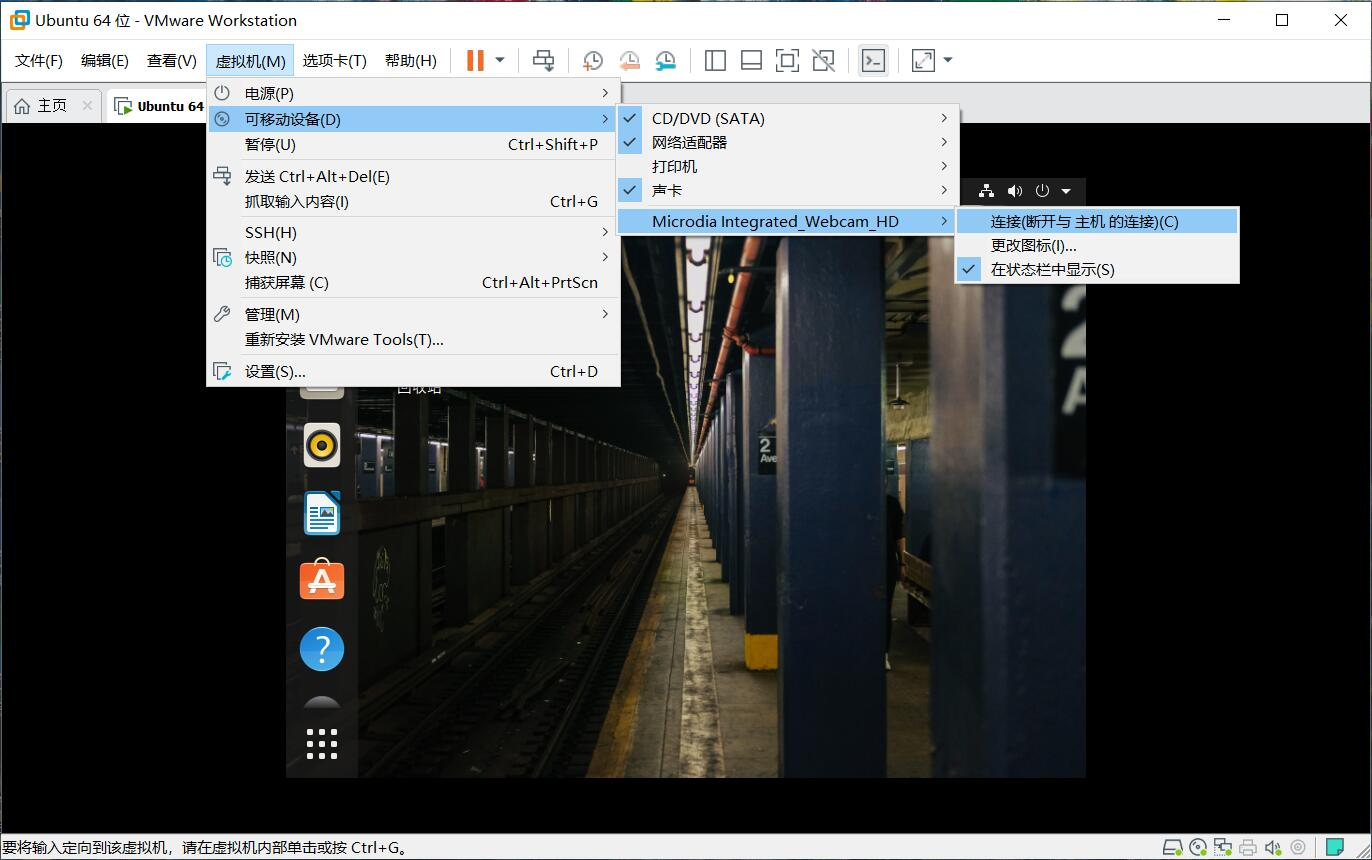
Select "removable device" in "virtual machine", then select "Microdia Integrated_Webcam_HD" (everyone's device may be different), and finally click "connect (disconnect from the host)".
-
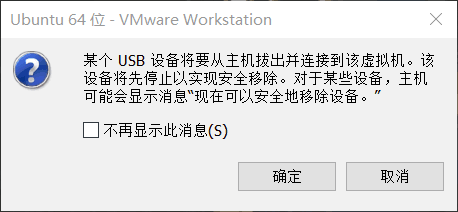
Pop up the prompt window and click OK.
-
If there is a small green dot on the camera icon in the lower right corner of the virtual machine, the connection is successful.

3.2 playing video
1. Create a test2.cpp file.
gedit test2.cpp
test2.cpp:
#include <opencv2/opencv.hpp>
using namespace cv;
int main()
{
	//Read video from camera
	VideoCapture capture("man.mp4");
	//Cycle through each frame
	while(1){
		Mat frame;//Define a Mat variable to store the image of each frame
		capture >> frame;//Read current frame
		if(frame.empty())//Play finished, exit
			break;
		imshow("Read video frame",frame);//Displays the current frame
		waitKey(30);//Cover up 30ms
	}
	system("pause");
	return 0;
}
a) . if the statement: videocapture (0), and the subsequent parameter is set to 0, the video is read from the camera and each frame is displayed circularly; If it is set to the file name of a video, such as mona.mp4, the video will be read and displayed circularly every frame.
b) The Mat data structure in the while loop is actually a dot matrix, corresponding to each point on the image, and the set of points forms a frame image. In essence, it is a class composed of two data parts: (including the size of the matrix, the method for storage, the address for matrix storage, etc.) and a pointer to the matrix containing pixel values (data can be stored in any dimension according to the method selected for storage).
c) . statement: the parameter unit in waitKey(30) is MS, that is, the interval of each frame is 30 ms. this statement cannot be deleted, otherwise an error will be executed and the video cannot be played or recorded.
The waitKey() function is to wait for the user to press the key to trigger within a given time (unit: ms); If the user does not press the key, the return value is - 1 and the currently displayed window is closed;
If the user presses the key, the ASCII code value for the key is returned and the currently displayed window is closed;

2. Prepare a video. Note that the video name should be consistent with that in the code.

3. Compile the test2.cpp file.
g++ test2.cpp -o test2 `pkg-config --cflags --libs opencv`
Output results
./test2

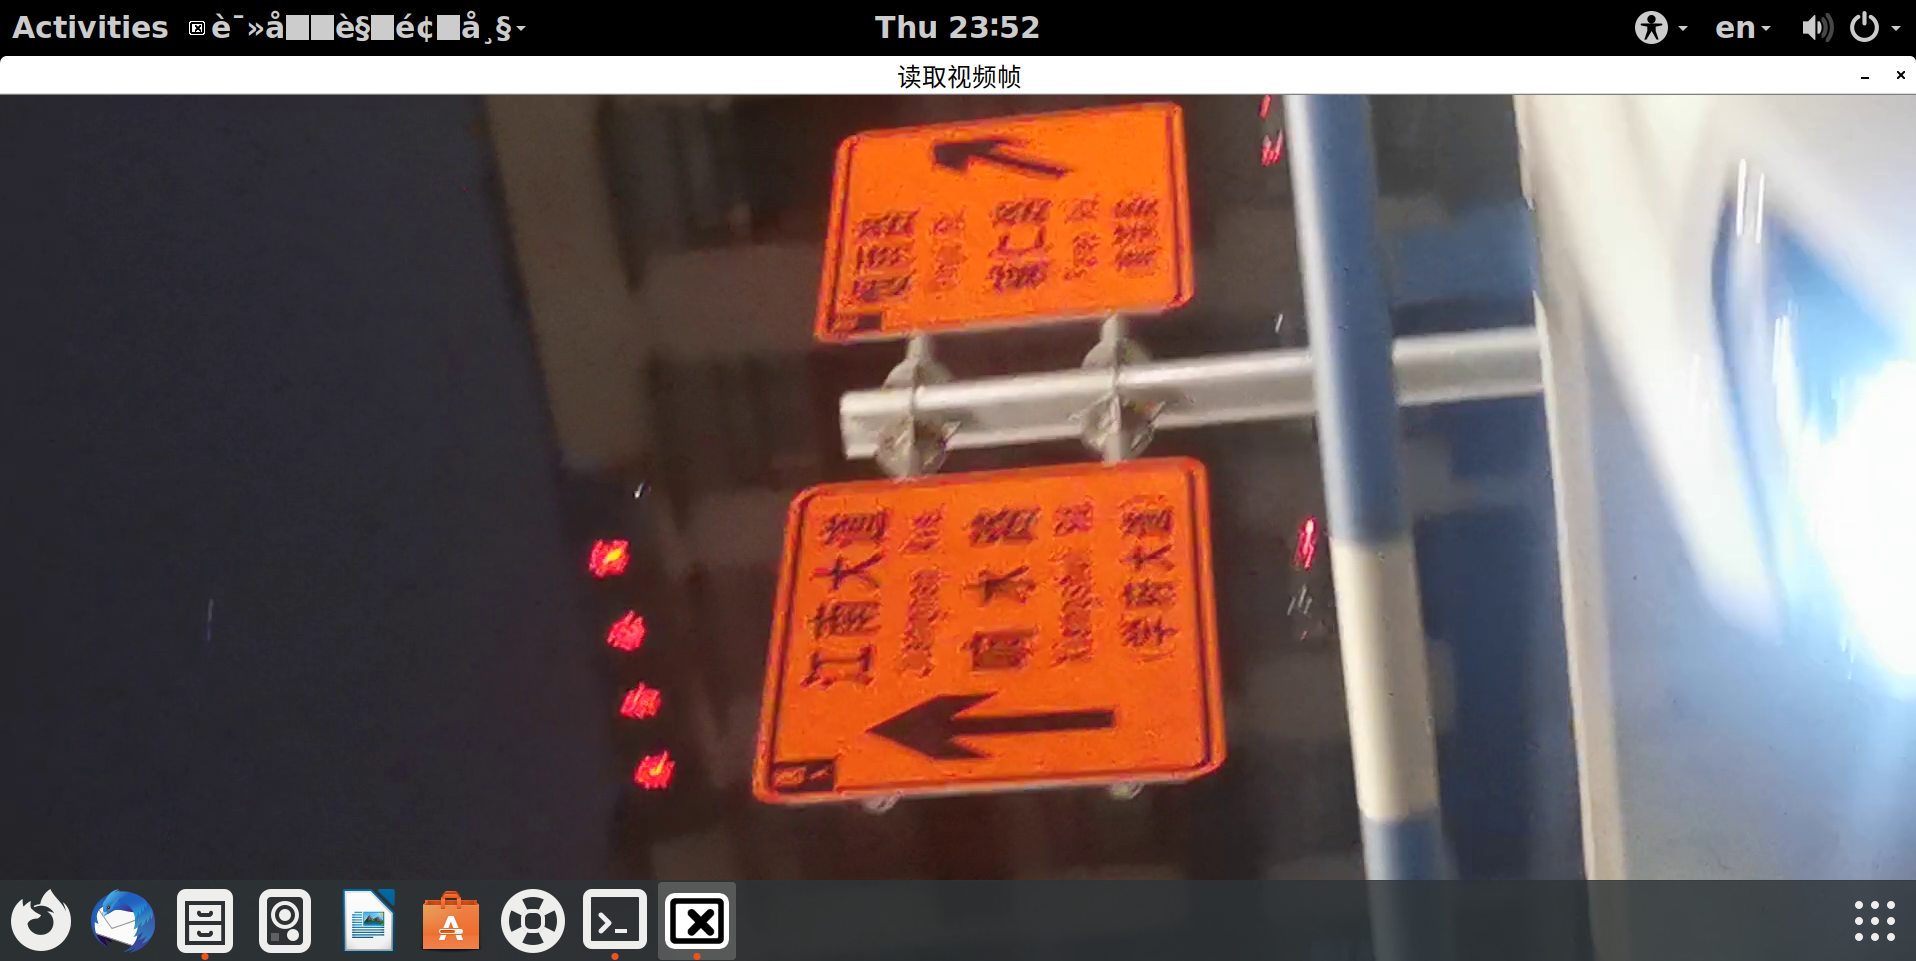
4. Jump out of the video as follows:
3.3 recording video
1. Create a test3.cpp.
gedit test3.cpp
test3.cpp:
/*********************************************************************
Turn on the computer camera, control the video recording with a blank space, and ESC exits and saves the video RecordVideo.avi
*********************************************************************/
#include<iostream>
#include <opencv2/opencv.hpp>
#include<opencv2/core/core.hpp>
#include<opencv2/highgui/highgui.hpp>
using namespace cv;
using namespace std;

int main()
{
	//Turn on the computer camera
	VideoCapture cap(0);
	if (!cap.isOpened())
	{
		cout << "error" << endl;
		waitKey(0);
		return 0;
	}

	//Get the resolution of cap
	int w = static_cast<int>(cap.get(CV_CAP_PROP_FRAME_WIDTH));
	int h = static_cast<int>(cap.get(CV_CAP_PROP_FRAME_HEIGHT));
	Size videoSize(w, h);
	VideoWriter writer("RecordVideo.avi", CV_FOURCC('M', 'J', 'P', 'G'), 25, videoSize);

	Mat frame;
	int key;//Record keyboard keys
	char startOrStop = 1;//0 starts recording video; 1 end recording video
	char flag = 0;//Recording flag 0 - not recording; 1 - recording

	while (1)
	{
		cap >> frame;
		key = waitKey(100);
		if (key == 32)//Press the space to start recording and pause recording to switch back and forth
		{
			startOrStop = 1 - startOrStop;
			if (startOrStop == 0)
			{
				flag = 1;
			}
		}
		if (key == 27)//Press ESC to exit the whole program and save the video file to disk
		{
			break;
		}

		if (startOrStop == 0 && flag==1)
		{
			writer << frame;
			cout << "recording" << endl;
		}
		else if (startOrStop == 1)
		{
			flag = 0;
			cout << "end recording" << endl;

		}
		imshow("picture", frame);
	}
	cap.release();
	writer.release();
	destroyAllWindows();
	return 0;
}
2. Compile the test3.cpp file.
g++ test3.cpp -o test3 `pkg-config --cflags --libs opencv`
Output results
./test3

3. Generate an. avi file and generate frames continuously.

4, Summary
In the process of installing and using OpenCV, I encountered many problems, but I can find solutions through Forum Search. I also refer to many relevant blogs and find that there are different explanations for the code and debugging process, which is worth learning from!
5, References
1.[embedded] opencv tutorial for windows10 & ubantu16.04 & Raspberry pie 3B + installation
2. Installation and use example of OpenCV3.4.11 under Ubuntu 18.04