Usage of Alert Dialog, a common instance of Android
AlertDialog is widely used in applications where you want users to make "yes" or "no" or a wide variety of other choices, in order to keep the same Activity and not change the user's screen, you can use AlertDialog.
Code Address
https://github.com/JueYingCoder/AndroidUsefulExample_AlertDialog
This article is mainly about how to implement various AlertDialogs. It is a long article. If you read it carefully, you should be able to understand the various uses of AlertDialog. Here is the final result we will achieve today:
At first glance, we've seen a lot of strange dialogs in our applications, but after careful analysis, they still have rules to follow, not least a few. We need to learn to start with simplicity and pull out cocoons to master a seemingly complex function.As long as we have cleared up the basic logic, other foundations need to be adapted to suit our needs.
The basic structure of AlertDialog is as follows: 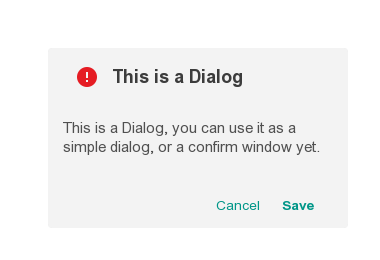
The dialog box can be divided into three main parts: the top area is the title bar and icon, the middle area is the content area, and the bottom button area; other dialog boxes of different forms are also based on this variation!
So what do we need to do to create a dialog?
1, you first need to create an AlertDialog.Builder object, basic syntax:
AlertDialog.Builder alertDialogBuilder=new AlertDialog.Builder(this);- 1
- 1
2. After creating the alertDialogBuilder object, a dialog box can be constructed by calling the create() method
AlertDialog alertDialog = alertDialogBuilder.create();
alertDialog.show();//Show dialog- 1
- 2
- 1
- 2
3, but we still have a question about how to set the other properties of Dialog, that is, how to control the title, chart area, content area and button area, we naturally think of a series of setup methods; in fact, this is done by calling the setXX method of the alertDialogBuilder object:
alertDialogBuilder.setTitle();//Set Title
    alertDialogBuilder.setIcon();//Set up charts

    /*Set the bottom button*/
    alertDialogBuilder.setPositiveButton();
    alertDialogBuilder.setNegativeButton();
    alertDialogBuilder.setNeutralButton();

    /*There are several ways to set the content area of a dialog box*/
    setMessage();//Set Display Text
    setItems();//Set dialog content to simple list item
    setSingleChoiceItems();//Set dialog contents as radio list items
    setMultiChoiceItems();//Set dialog contents to multiple-select list items
    setAdapter();//Set dialog contents to custom list items
    setView();//Set Dialog Content to Custom View

    //Set whether the dialog can be canceled
    setCancelable(booleab cancelable);
setCancelListener(onCancelListener);- 1
- 2
- 3
- 4
- 5
- 6
- 7
- 8
- 9
- 10
- 11
- 12
- 13
- 14
- 15
- 16
- 17
- 18
- 19
- 1
- 2
- 3
- 4
- 5
- 6
- 7
- 8
- 9
- 10
- 11
- 12
- 13
- 14
- 15
- 16
- 17
- 18
- 19
To sum up: AlertDialog is mainly about how to set the content area.
Here we implement several common dialog boxes by using different content area settings.
The basic idea is to add a few Button s to MainActivity and click them to pop up the corresponding AlertDialog
Steps:
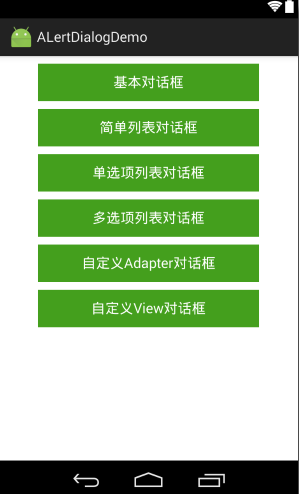
- 1. Create Android Project->"AlertDialogDemo"
- 2. Write activity_main.xml layout file
- 3. Write required strings.xml
- 4. Write methods in MainActivity
Limited to the length of the issue, only the key parts of the code are posted, the rest are for the reader to achieve their own;
activity_main.xml
<LinearLayout xmlns:android="http://schemas.android.com/apk/res/android"
    xmlns:tools="http://schemas.android.com/tools"
    android:orientation="vertical"
    android:layout_width="match_parent"
    android:layout_height="match_parent" >

    <Button
        android:id="@+id/btn_simple_dialog"
        android:text="@string/simple_dialog"
        android:textColor="#ffffff"
        android:textSize="18sp"
        android:background="#449F1D"
        android:layout_marginTop="10dp"
        android:layout_marginLeft="50dp"
        android:layout_marginRight="50dp"
        android:layout_width="match_parent"
        android:layout_height="wrap_content" />
    <Button
        android:id="@+id/btn_simple_list_dialog"
        android:text="@string/simple_list_dialog"
        android:textColor="#ffffff"
        android:textSize="18sp"
        android:background="#449F1D"
        android:layout_marginTop="10dp"
        android:layout_marginLeft="50dp"
        android:layout_marginRight="50dp"
        android:layout_width="match_parent"
        android:layout_height="wrap_content" />
    <Button
        android:id="@+id/btn_single_choice_dialog"
        android:text="@string/single_choice_dialog"
        android:textColor="#ffffff"
        android:textSize="18sp"
        android:background="#449F1D"
        android:layout_marginTop="10dp"
        android:layout_marginLeft="50dp"
        android:layout_marginRight="50dp"
        android:layout_width="match_parent"
        android:layout_height="wrap_content" />
    <Button
        android:id="@+id/btn_multi_choice_dialog"
        android:text="@string/multi_choice_dialog"
        android:textColor="#ffffff"
        android:textSize="18sp"
        android:background="#449F1D"
        android:layout_marginTop="10dp"
        android:layout_marginLeft="50dp"
        android:layout_marginRight="50dp"
        android:layout_width="match_parent"
        android:layout_height="wrap_content" />
    <Button
        android:id="@+id/btn_custom_adapter_dialog"
        android:text="@string/custom_adapter_dialog"
        android:textColor="#ffffff"
        android:textSize="18sp"
        android:background="#449F1D"
        android:layout_marginTop="10dp"
        android:layout_marginLeft="50dp"
        android:layout_marginRight="50dp"
        android:layout_width="match_parent"
        android:layout_height="wrap_content" />
    <Button
        android:id="@+id/btn_custom_view_dialog"
        android:text="@string/custom_view_dialog"
        android:textColor="#ffffff"
        android:textSize="18sp"
        android:background="#449F1D"
        android:layout_marginTop="10dp"
        android:layout_marginLeft="50dp"
        android:layout_marginRight="50dp"
        android:layout_width="match_parent"
        android:layout_height="wrap_content" />
</LinearLayout>- 1
- 2
- 3
- 4
- 5
- 6
- 7
- 8
- 9
- 10
- 11
- 12
- 13
- 14
- 15
- 16
- 17
- 18
- 19
- 20
- 21
- 22
- 23
- 24
- 25
- 26
- 27
- 28
- 29
- 30
- 31
- 32
- 33
- 34
- 35
- 36
- 37
- 38
- 39
- 40
- 41
- 42
- 43
- 44
- 45
- 46
- 47
- 48
- 49
- 50
- 51
- 52
- 53
- 54
- 55
- 56
- 57
- 58
- 59
- 60
- 61
- 62
- 63
- 64
- 65
- 66
- 67
- 68
- 69
- 70
- 71
- 72
- 73
- 1
- 2
- 3
- 4
- 5
- 6
- 7
- 8
- 9
- 10
- 11
- 12
- 13
- 14
- 15
- 16
- 17
- 18
- 19
- 20
- 21
- 22
- 23
- 24
- 25
- 26
- 27
- 28
- 29
- 30
- 31
- 32
- 33
- 34
- 35
- 36
- 37
- 38
- 39
- 40
- 41
- 42
- 43
- 44
- 45
- 46
- 47
- 48
- 49
- 50
- 51
- 52
- 53
- 54
- 55
- 56
- 57
- 58
- 59
- 60
- 61
- 62
- 63
- 64
- 65
- 66
- 67
- 68
- 69
- 70
- 71
- 72
- 73
Layout effect:
strings.xml
<resources>
    <string name="app_name">ALertDialogDemo</string>

    <!--String resources needed for the main interface layout-->
    <string name="action_settings">Settings</string>
    <string name="simple_dialog">Basic dialog </string>
    <string name="simple_list_dialog">simple list dialog </string>
    <string name="single_choice_dialog">single-choice list dialog </string>
    <string name="multi_choice_dialog">Multi-choice list dialog </string>
    <string name="custom_adapter_dialog">Custom Adapter dialog </string>
    <string name="custom_view_dialog">Custom View dialog </string>

    <!--String resources needed for dialogs-->
    <string name="dialog_message">Here is the content area </string>
    <string name="postive_button">OK</string>
    <string name="negative_button">Cancel</string>

    <!--Dialog Prompt string resource-->
    <string name="toast_postive">You clicked the OK button </string>
    <string name="toast_negative">You clicked the Cancel button </string>

    <string name="text">Content of custom Adapter</string>
</resources>- 1
- 2
- 3
- 4
- 5
- 6
- 7
- 8
- 9
- 10
- 11
- 12
- 13
- 14
- 15
- 16
- 17
- 18
- 19
- 20
- 21
- 22
- 23
- 1
- 2
- 3
- 4
- 5
- 6
- 7
- 8
- 9
- 10
- 11
- 12
- 13
- 14
- 15
- 16
- 17
- 18
- 19
- 20
- 21
- 22
- 23
MainActivity.Java
public class MainActivity extends ActionBarActivity implements View.OnClickListener{

    //Correspond to each button
    private Button simpleDiaog;
    private Button simpleListDiaog;
    private Button singleChoiceDiaog;
    private Button multiChoiceDiaog;
    private Button customAdateprDiaog;
    private Button customViewDiaog;
    //Declare an AlertDialog constructor
    private AlertDialog.Builder builder;

    @Override
    protected void onCreate(Bundle savedInstanceState) {
        super.onCreate(savedInstanceState);
        setContentView(R.layout.activity_main);

        //Instantiate Control
        simpleDiaog= (Button) findViewById(R.id.btn_simple_dialog);
        simpleListDiaog= (Button) findViewById(R.id.btn_simple_list_dialog);
        singleChoiceDiaog= (Button) findViewById(R.id.btn_single_choice_dialog);
        multiChoiceDiaog= (Button) findViewById(R.id.btn_multi_choice_dialog);
        customAdateprDiaog= (Button) findViewById(R.id.btn_custom_adapter_dialog);
        customViewDiaog= (Button) findViewById(R.id.btn_custom_view_dialog);


        //Listen for click events
        simpleDiaog.setOnClickListener(this);
        simpleListDiaog.setOnClickListener(this);
        singleChoiceDiaog.setOnClickListener(this);
        multiChoiceDiaog.setOnClickListener(this);
        customAdateprDiaog.setOnClickListener(this);
        customViewDiaog.setOnClickListener(this);
    }

    /**
     *
     * For convenience, write a showXXDialog() method
     */
    @Override
    public void onClick(View view) {
        switch (view.getId()){
            case R.id.btn_simple_dialog:
                showSimpleDialog(view);
                break;
            case R.id.btn_simple_list_dialog:
                showSimpleListDialog(view);
                break;
            case R.id.btn_single_choice_dialog:
                showSingleChoiceDialog(view);
                break;
            case R.id.btn_multi_choice_dialog:
                showMultiChoiceDialog(view);
                break;
            case R.id.btn_custom_adapter_dialog:
                showCustomAdapterDialog(view);
                break;
            case R.id.btn_custom_view_dialog:
                showCustomViewDialog(view);
                break;
        }

    }

    @Override
    public boolean onCreateOptionsMenu(Menu menu) {
        getMenuInflater().inflate(R.menu.menu_main, menu);
        return true;
    }
}- 1
- 2
- 3
- 4
- 5
- 6
- 7
- 8
- 9
- 10
- 11
- 12
- 13
- 14
- 15
- 16
- 17
- 18
- 19
- 20
- 21
- 22
- 23
- 24
- 25
- 26
- 27
- 28
- 29
- 30
- 31
- 32
- 33
- 34
- 35
- 36
- 37
- 38
- 39
- 40
- 41
- 42
- 43
- 44
- 45
- 46
- 47
- 48
- 49
- 50
- 51
- 52
- 53
- 54
- 55
- 56
- 57
- 58
- 59
- 60
- 61
- 62
- 63
- 64
- 65
- 66
- 67
- 68
- 69
- 70
- 1
- 2
- 3
- 4
- 5
- 6
- 7
- 8
- 9
- 10
- 11
- 12
- 13
- 14
- 15
- 16
- 17
- 18
- 19
- 20
- 21
- 22
- 23
- 24
- 25
- 26
- 27
- 28
- 29
- 30
- 31
- 32
- 33
- 34
- 35
- 36
- 37
- 38
- 39
- 40
- 41
- 42
- 43
- 44
- 45
- 46
- 47
- 48
- 49
- 50
- 51
- 52
- 53
- 54
- 55
- 56
- 57
- 58
- 59
- 60
- 61
- 62
- 63
- 64
- 65
- 66
- 67
- 68
- 69
- 70
The above code is simple, and now what we really care about is how to implement showXXDialog.
1.showSimpleDialog(): Based on the basic grammar we wrote earlier, we can write the following code quickly. The only thing we need to pay attention to is listening for two button s. Since this is the most basic and core AlertDialog, it is relatively simple to master this other alertDialog.
//Show Basic Dialog
    private void showSimpleDialog(View view) {
        builder=new AlertDialog.Builder(this);
        builder.setIcon(R.mipmap.ic_launcher);
        builder.setTitle(R.string.simple_dialog);
        builder.setMessage(R.string.dialog_message);

        //Listen for button clicks below
        builder.setPositiveButton(R.string.postive_button, new DialogInterface.OnClickListener() {
            @Override
            public void onClick(DialogInterface dialogInterface, int i) {
                Toast.makeText(getApplicationContext(),R.string.toast_postive,Toast.LENGTH_SHORT).show();
            }
        });
        builder.setNegativeButton(R.string.negative_button, new DialogInterface.OnClickListener() {
            @Override
            public void onClick(DialogInterface dialogInterface, int i) {
                Toast.makeText(getApplicationContext(), R.string.toast_negative, Toast.LENGTH_SHORT).show();
            }
        });

        //Settings dialog is cancellable
        builder.setCancelable(true);
        AlertDialog dialog=builder.create();
        dialog.show();
}- 1
- 2
- 3
- 4
- 5
- 6
- 7
- 8
- 9
- 10
- 11
- 12
- 13
- 14
- 15
- 16
- 17
- 18
- 19
- 20
- 21
- 22
- 23
- 24
- 25
- 26
- 1
- 2
- 3
- 4
- 5
- 6
- 7
- 8
- 9
- 10
- 11
- 12
- 13
- 14
- 15
- 16
- 17
- 18
- 19
- 20
- 21
- 22
- 23
- 24
- 25
- 26
Achieving results:

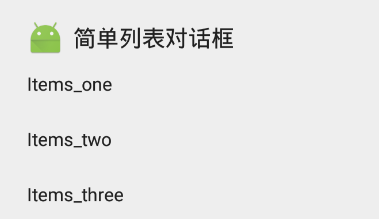
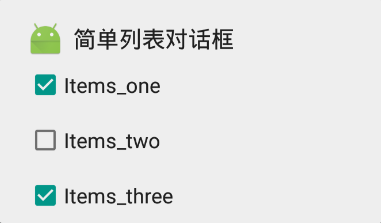
2, showSimpleListDialog(): The previous code is very similar, the only thing you need to change is to change the content area to a list item:
private void showSimpleListDialog(View view) {
        builder=new AlertDialog.Builder(this);
        builder.setIcon(R.mipmap.ic_launcher);
        builder.setTitle(R.string.simple_list_dialog);

        /**
         * Set content area to simple list item
         */
        final String[] Items={"Items_one","Items_two","Items_three"};
        builder.setItems(Items, new DialogInterface.OnClickListener() {
            @Override
            public void onClick(DialogInterface dialogInterface, int i) {
                Toast.makeText(getApplicationContext(), "You clicked "+Items[i], Toast.LENGTH_SHORT).show();
            }
        });
        builder.setCancelable(true);
        AlertDialog dialog=builder.create();
        dialog.show();
    }
- 1
- 2
- 3
- 4
- 5
- 6
- 7
- 8
- 9
- 10
- 11
- 12
- 13
- 14
- 15
- 16
- 17
- 18
- 19
- 20
- 1
- 2
- 3
- 4
- 5
- 6
- 7
- 8
- 9
- 10
- 11
- 12
- 13
- 14
- 15
- 16
- 17
- 18
- 19
- 20
Achieving results:
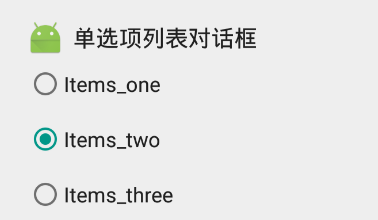
3, showSingleChoiceDialog(): Note the meaning of the internal parameters of setSingleChoiceItems()
    private void showSingleChoiceDialog(View view) {
        builder=new AlertDialog.Builder(this);
        builder.setIcon(R.mipmap.ic_launcher);
        builder.setTitle(R.string.single_choice_dialog);

        /**
         * Set the content area as a radio list item
         */
        final String[] items={"Items_one","Items_two","Items_three"};
        builder.setSingleChoiceItems(items, 1, new DialogInterface.OnClickListener() {
            @Override
            public void onClick(DialogInterface dialogInterface, int i) {
                Toast.makeText(getApplicationContext(), "You clicked "+items[i], Toast.LENGTH_SHORT).show();
            }
        });

        builder.setCancelable(true);
        AlertDialog dialog=builder.create();
        dialog.show();
}- 1
- 2
- 3
- 4
- 5
- 6
- 7
- 8
- 9
- 10
- 11
- 12
- 13
- 14
- 15
- 16
- 17
- 18
- 19
- 20
- 1
- 2
- 3
- 4
- 5
- 6
- 7
- 8
- 9
- 10
- 11
- 12
- 13
- 14
- 15
- 16
- 17
- 18
- 19
- 20
Achieving results:
4,showMultiCHoiceDialog():
private void showMultiChoiceDialog(View view) {
        builder=new AlertDialog.Builder(this);
        builder.setIcon(R.mipmap.ic_launcher);
        builder.setTitle(R.string.simple_list_dialog);

        /**
         * Set Content Area to Multiple Selected List Items
         */
        final String[] items={"Items_one","Items_two","Items_three"};
        builder.setMultiChoiceItems(items, new boolean[]{true, false, true}, new DialogInterface.OnMultiChoiceClickListener() {
            @Override
            public void onClick(DialogInterface dialogInterface, int i, boolean b) {
                Toast.makeText(getApplicationContext(),"You clicked "+items[i]+" "+b,Toast.LENGTH_SHORT).show();
            }
        });


        builder.setCancelable(true);
        AlertDialog dialog=builder.create();
        dialog.show();

}- 1
- 2
- 3
- 4
- 5
- 6
- 7
- 8
- 9
- 10
- 11
- 12
- 13
- 14
- 15
- 16
- 17
- 18
- 19
- 20
- 21
- 22
- 1
- 2
- 3
- 4
- 5
- 6
- 7
- 8
- 9
- 10
- 11
- 12
- 13
- 14
- 15
- 16
- 17
- 18
- 19
- 20
- 21
- 22
Achieving results:
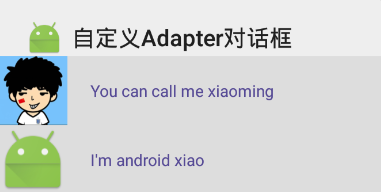
5,showCustomAdapterDialog():
This section involves customizing the Adapter, and don't be discouraged if you don't know much about it. I'll cover it separately in a later article.Here we just need to understand that the custom adapter needs to inherit from the BaseAdapter and then override four of these methods, where the getView() method is responsible for display, so we also need to create a layout file for it:
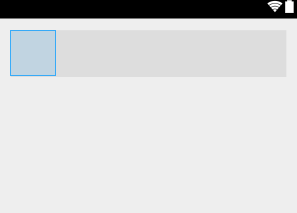
layout->custom_adapter.xml
<?xml version="1.0" encoding="utf-8"?>
    <LinearLayout xmlns:android="http://schemas.android.com/apk/res/android"
    android:orientation="horizontal"
    android:background="#dddddd"
    android:layout_marginLeft="15dp"
    android:layout_marginTop="15dp"
    android:layout_marginBottom="10dp"
    android:layout_marginRight="15dp"
    android:layout_width="match_parent"
    android:layout_height="wrap_content">
    <ImageView
        android:id="@+id/id_image"
        android:layout_width="60dp"
        android:layout_height="60dp" />
    <TextView
        android:textColor="#554995"
        android:id="@+id/id_text"
        android:layout_marginLeft="20dp"
        android:layout_gravity="center"
        android:layout_width="wrap_content"
        android:layout_height="wrap_content" />
</LinearLayout>- 1
- 2
- 3
- 4
- 5
- 6
- 7
- 8
- 9
- 10
- 11
- 12
- 13
- 14
- 15
- 16
- 17
- 18
- 19
- 20
- 21
- 22
- 1
- 2
- 3
- 4
- 5
- 6
- 7
- 8
- 9
- 10
- 11
- 12
- 13
- 14
- 15
- 16
- 17
- 18
- 19
- 20
- 21
- 22
Layout effect:
Then we need to implement our custom Adapter class in MainActivity.java:
private class CustomAdapter extends BaseAdapter {

        private List<ItemBean> items;
        private LayoutInflater inflater;
        private ImageView image;
        private TextView text;

        public CustomAdapter(List<ItemBean> items, Context context) {
            this.items = items;
            this.inflater = LayoutInflater.from(context);
        }


        @Override
        public int getCount() {
            return items.size();
        }

        @Override
        public Object getItem(int i) {
            return items.get(i);
        }

        @Override
        public long getItemId(int i) {
            return i;
        }

        @Override
        public View getView(int i, View view, ViewGroup viewGroup) {
            if(view==null){
                view=inflater.inflate(R.layout.custom_adapter,null);
                image= (ImageView) view.findViewById(R.id.id_image);
                text= (TextView) view.findViewById(R.id.id_text);
            }
            image.setImageResource(items.get(i).getImageId());
            text.setText(items.get(i).getMessage());
            return view;
        }
}- 1
- 2
- 3
- 4
- 5
- 6
- 7
- 8
- 9
- 10
- 11
- 12
- 13
- 14
- 15
- 16
- 17
- 18
- 19
- 20
- 21
- 22
- 23
- 24
- 25
- 26
- 27
- 28
- 29
- 30
- 31
- 32
- 33
- 34
- 35
- 36
- 37
- 38
- 39
- 40
- 41
- 1
- 2
- 3
- 4
- 5
- 6
- 7
- 8
- 9
- 10
- 11
- 12
- 13
- 14
- 15
- 16
- 17
- 18
- 19
- 20
- 21
- 22
- 23
- 24
- 25
- 26
- 27
- 28
- 29
- 30
- 31
- 32
- 33
- 34
- 35
- 36
- 37
- 38
- 39
- 40
- 41
We use List items here; because the Adapter needs a picture and String to fill in the layout we just defined; so we also need to create a data class in the MainActivity: ItemBean:
private class ItemBean{
        private int imageId;
        private String message;

        public ItemBean(int imageId, String message) {
            this.imageId = imageId;
            this.message = message;
        }

        public String getMessage() {
            return message;
        }

        public int getImageId() {
            return imageId;
        }

        public void setImageId(int imageId) {
            this.imageId = imageId;
        }

        public void setMessage(String message) {
            this.message = message;
        }
    }


        private void showCustomAdapterDialog(View view){

        builder=new AlertDialog.Builder(this);
        builder.setIcon(R.mipmap.ic_launcher);
        builder.setTitle(R.string.custom_adapter_dialog);

        /**
         * Set content area to custom adapter
         */
        List<ItemBean> items=new ArrayList<>();
        items.add(new ItemBean(R.mipmap.icon,"You can call me xiaoming"));
        items.add(new ItemBean(R.mipmap.ic_launcher, "I'm android xiao"));
        CustomAdapter adapter=new CustomAdapter(items,getApplicationContext());
        builder.setAdapter(adapter, new DialogInterface.OnClickListener() {
            @Override
            public void onClick(DialogInterface dialogInterface, int i) {
                Toast.makeText(getApplicationContext(),"You clicked"+i,Toast.LENGTH_SHORT).show();
            }
        });

        builder.setCancelable(true);
        AlertDialog dialog=builder.create();
        dialog.show();

}- 1
- 2
- 3
- 4
- 5
- 6
- 7
- 8
- 9
- 10
- 11
- 12
- 13
- 14
- 15
- 16
- 17
- 18
- 19
- 20
- 21
- 22
- 23
- 24
- 25
- 26
- 27
- 28
- 29
- 30
- 31
- 32
- 33
- 34
- 35
- 36
- 37
- 38
- 39
- 40
- 41
- 42
- 43
- 44
- 45
- 46
- 47
- 48
- 49
- 50
- 51
- 52
- 1
- 2
- 3
- 4
- 5
- 6
- 7
- 8
- 9
- 10
- 11
- 12
- 13
- 14
- 15
- 16
- 17
- 18
- 19
- 20
- 21
- 22
- 23
- 24
- 25
- 26
- 27
- 28
- 29
- 30
- 31
- 32
- 33
- 34
- 35
- 36
- 37
- 38
- 39
- 40
- 41
- 42
- 43
- 44
- 45
- 46
- 47
- 48
- 49
- 50
- 51
- 52
Achieving results:
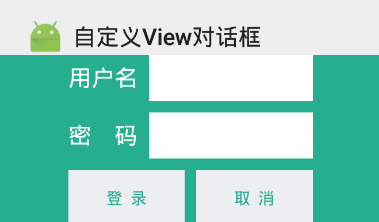
6,showCustomViewDialog()
To implement a custom View's content area, we first need to create a layout file:
layout->custom_view.xml
<?xml version="1.0" encoding="utf-8"?>
    <LinearLayout xmlns:android="http://schemas.android.com/apk/res/android"
    android:layout_width="match_parent"
    android:layout_height="match_parent"
    android:orientation="vertical"
    android:gravity="center"
    android:background="#25AE90">
    <LinearLayout
        android:orientation="horizontal"
        android:layout_width="match_parent"
        android:layout_height="wrap_content"
        android:layout_marginRight="60dp"
        android:layout_marginLeft="60dp">
        <TextView
            android:text="User name"
            android:layout_marginRight="10dp"
            android:textSize="20sp"
            android:textColor="#ffffff"
            android:layout_width="wrap_content"
            android:layout_height="wrap_content" />
        <EditText
            android:layout_width="0dp"
            android:layout_weight="1"
            android:layout_height="40dp"
            android:background="#ffffff"/>
    </LinearLayout>
    <LinearLayout
        android:orientation="horizontal"
        android:layout_width="match_parent"
        android:layout_height="wrap_content"
        android:layout_marginTop="10dp"
        android:layout_marginRight="60dp"
        android:layout_marginLeft="60dp">
        <TextView
            android:text="dense    code"
            android:layout_marginRight="10dp"
            android:textSize="20sp"
            android:textColor="#ffffff"
            android:layout_width="wrap_content"
            android:layout_height="wrap_content" />
        <EditText
            android:layout_width="0dp"
            android:layout_weight="1"
            android:layout_height="40dp"
            android:background="#ffffff"/>
    </LinearLayout>
    <LinearLayout
        android:orientation="horizontal"
        android:layout_width="match_parent"
        android:layout_height="wrap_content"
        android:layout_marginTop="10dp"
        android:layout_marginRight="60dp"
        android:layout_marginLeft="60dp">
        <Button
            android:text="Sign in"
            android:textColor="#25AE90"
            android:background="#ECEEF1"
            android:layout_width="0dp"
            android:layout_marginRight="10dp"
            android:layout_weight="1"
            android:layout_height="wrap_content" />
        <Button
            android:text="Cancel"
            android:textColor="#25AE90"
            android:background="#ECEEF1"
            android:layout_width="0dp"
            android:layout_weight="1"
            android:layout_height="wrap_content" />
    </LinearLayout>
</LinearLayout>- 1
- 2
- 3
- 4
- 5
- 6
- 7
- 8
- 9
- 10
- 11
- 12
- 13
- 14
- 15
- 16
- 17
- 18
- 19
- 20
- 21
- 22
- 23
- 24
- 25
- 26
- 27
- 28
- 29
- 30
- 31
- 32
- 33
- 34
- 35
- 36
- 37
- 38
- 39
- 40
- 41
- 42
- 43
- 44
- 45
- 46
- 47
- 48
- 49
- 50
- 51
- 52
- 53
- 54
- 55
- 56
- 57
- 58
- 59
- 60
- 61
- 62
- 63
- 64
- 65
- 66
- 67
- 68
- 69
- 70
- 1
- 2
- 3
- 4
- 5
- 6
- 7
- 8
- 9
- 10
- 11
- 12
- 13
- 14
- 15
- 16
- 17
- 18
- 19
- 20
- 21
- 22
- 23
- 24
- 25
- 26
- 27
- 28
- 29
- 30
- 31
- 32
- 33
- 34
- 35
- 36
- 37
- 38
- 39
- 40
- 41
- 42
- 43
- 44
- 45
- 46
- 47
- 48
- 49
- 50
- 51
- 52
- 53
- 54
- 55
- 56
- 57
- 58
- 59
- 60
- 61
- 62
- 63
- 64
- 65
- 66
- 67
- 68
- 69
- 70
Layout effect:
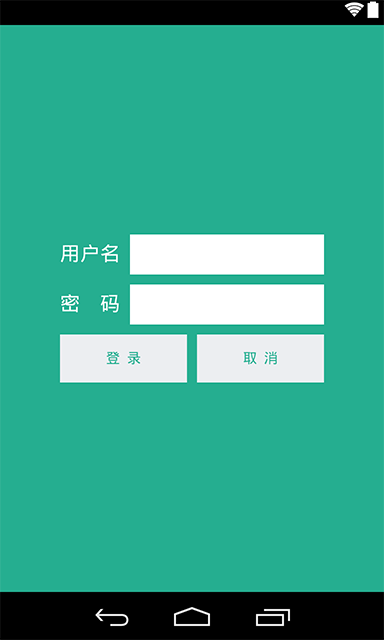
Implement showCustomViewDialog()
private void showCustomViewDialog(View view){
        builder=new AlertDialog.Builder(this);
        builder.setIcon(R.mipmap.ic_launcher);
        builder.setTitle(R.string.custom_view_dialog);

        /**
         * Set Content Area to Custom View
         */
        LinearLayout loginDialog= (LinearLayout) getLayoutInflater().inflate(R.layout.custom_view,null);
        builder.setView(loginDialog);

        builder.setCancelable(true);
        AlertDialog dialog=builder.create();
        dialog.show();
}- 1
- 2
- 3
- 4
- 5
- 6
- 7
- 8
- 9
- 10
- 11
- 12
- 13
- 14
- 15
- 1
- 2
- 3
- 4
- 5
- 6
- 7
- 8
- 9
- 10
- 11
- 12
- 13
- 14
- 15
Achieving results:
Summary:
- Basic usage of AlertDialog: You need to master the process of creating AlertDialog and understand the Builder mode;
- Content area: The difficulty with AlertDialog is to design the appropriate content area;
- Custom Layout: Many times we need to customize the display of AlertDialog content area according to our own wishes, which requires us to master the use of Custom Adapter and Custom View, which are also a difficult part and another topic to talk about.
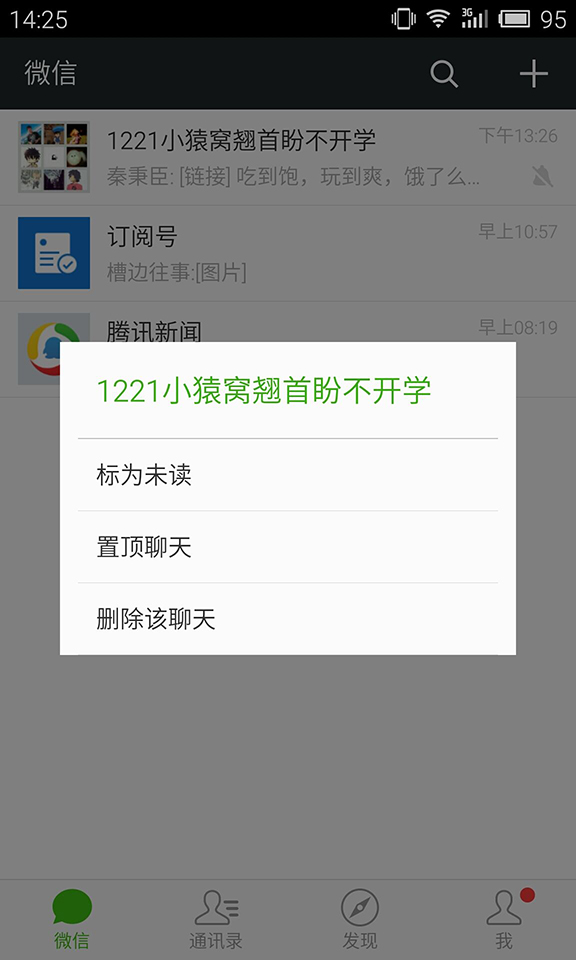
As the end of the article; to verify that we have mastered the various uses of AlertDialog, we can try to implement the following WeChat AlertDialog in; if you already have a custom adapter and a custom ListView, try removing and setting the top ListItem.
Tips: Write a custom ListView, monitor AlertDialog pops up when the director presses ListItem, and click Delete ensures that the Item in ListView is deleted, as well as top-set functionality
- Weibo: @JueYingCoder,
- Personal home page: Coder: Programmer & Daily for Engineering Males,